Skid Pro LXG210S-SKD Manual

SETUP INSTRUCTIONS
Rev Dec-2023 Part number: Z97920-SI
LXG210S-SKD
LXG210SB-SKD

2
LXG210S-SKD / LXG210SB-SKD
Log Grapple
Setup Instructions
Skid Pro
Safety
WARNING!
Do not assemble the machine before you read
the assembly instructions in this manual. Make
sure that you understand the safety information
and each step of the procedure before you
assemble the machine.
Keep this manual with you and available
for frequent reference as you assemble the
machine.
WARNING!
Use a hoist when to lift machine components
that weigh 50 lb (23 kg) or more. Do not lift
machine components that weigh more than you
can lift without strain or injury.
WARNING!
Use lift equipment with a lift capacity that
is more than the weight of the machine
component. Put jack stands or wood blocks
under the machine to make it safe while you
assemble the machine.
WARNING!
Use the correct tools and equipment to
assemble the machine. The use of incorrect
tools can create safety hazards. A tool that
breaks or slips during assembly risks personal
injury. Repair or replace equipment or tools that
are broken or defective.
WARNING!
All lifting equipment (for example, straps,
slings, chains, or ratchet blocks) must comply
with the applicable local laws, standards, and
regulations. Skid Pro Attachments does not
accept responsibility for the use of unsafe
equipment and work practices.
WARNING!
Know the location of and keep away from
overhead power lines and obstructions when
you lift the machine. Contact with power lines
can cause electrocution. Contact with overhead
obstructions can damage the machine or
components.
WARNING!
Do not start or operate the machine before you
read the Operator's Manual. Make sure that
you fully understand all safety, operation, and
maintenance information before you operate
the machine.
Keep the Operator's Manual with the machine at
all times and available for frequent reference.
WARNING!
Make sure that all the fasteners are installed
and torqued to the correct specications. For
more information, see Specications on page
9.
CAUTION!
Keep the assembly area clean and free of debris
to prevent slips, trips, or falls.
IMPORTANT! Inspect the machine for damage from
shipping. Contact the shipping company immediately if you
find any damage to the machine.
Some components are attached to the skid with
screws. Make sure that you only discard the
shipping brackets.
Put the crate in a large, open area so that you can
access the machine components from all sides
during assembly.
Learn what the safety labels mean and know the safety
hazards.
3
LXG210S-SKD / LXG210SB-SKD
Log Grapple
Setup Instructions
Skid Pro
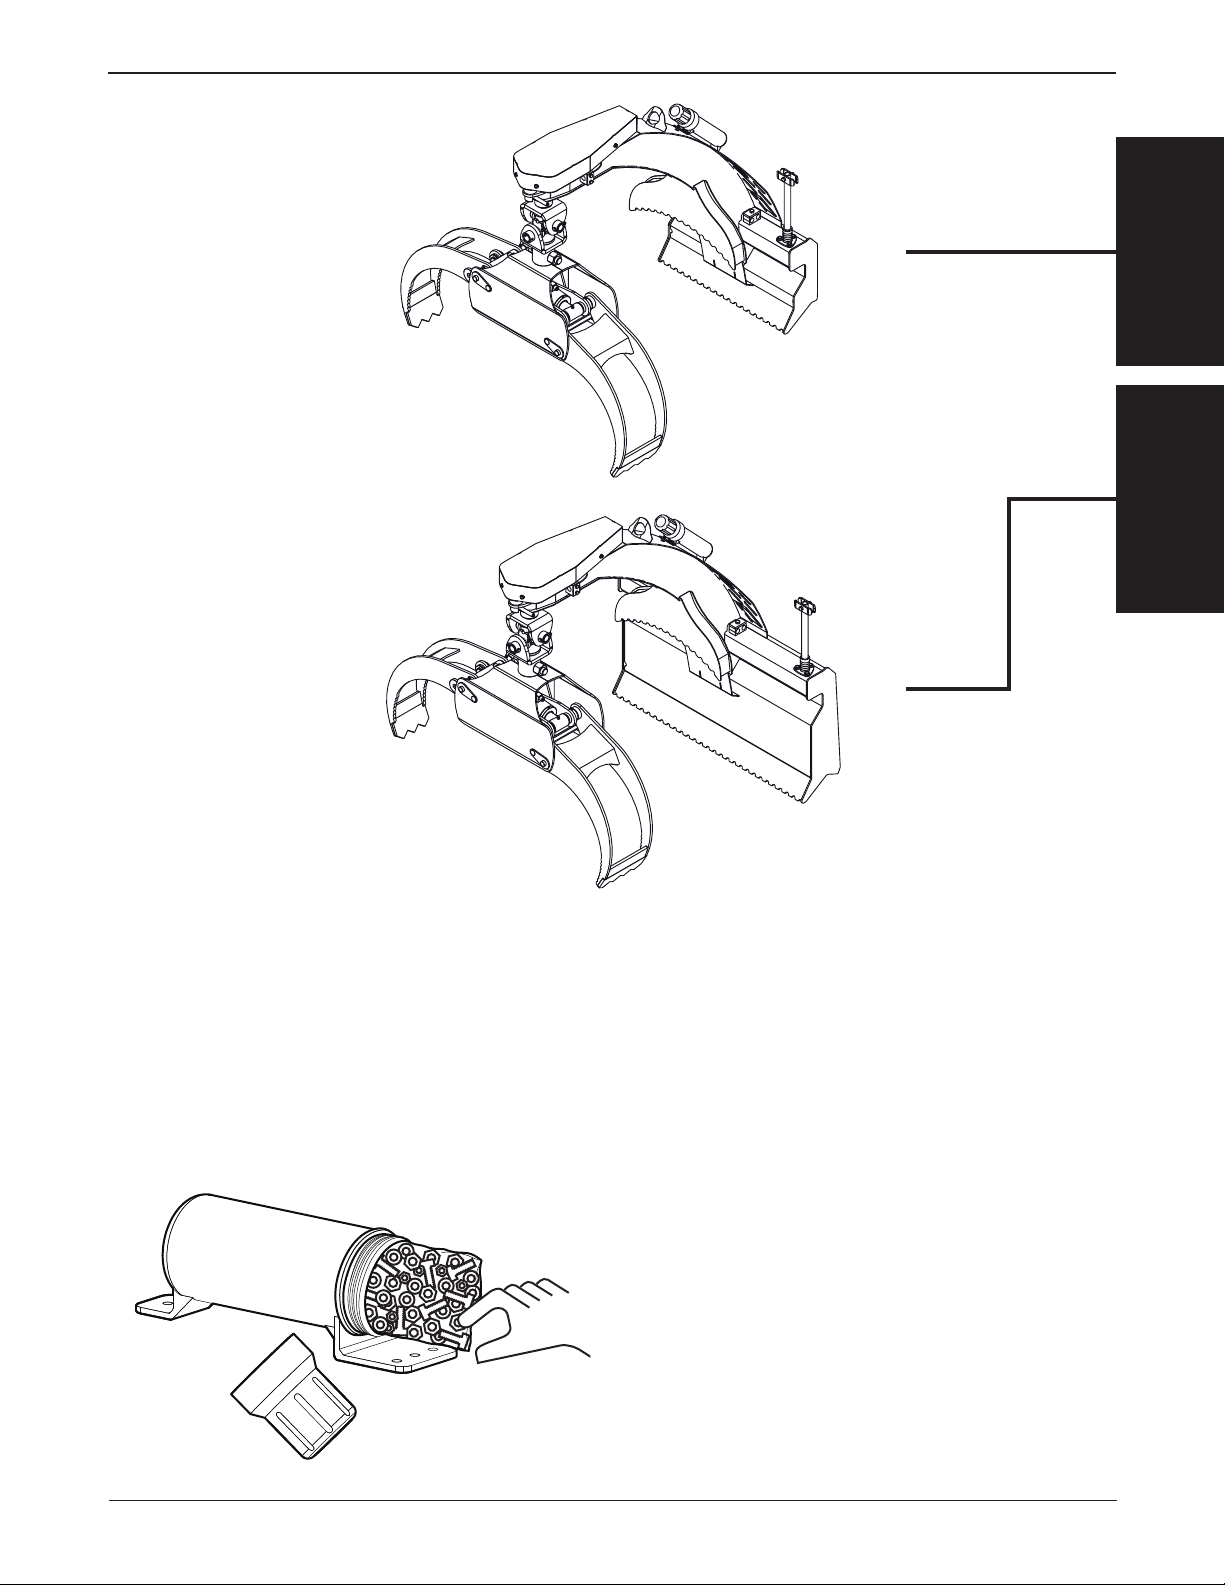
LXG210S-SKDLXG210SB-SKD
LXG210S-SKD
LXG210SB-SKD
The assembly hardware is inside the Operator's Manual
storage tube.

4
LXG210S-SKD / LXG210SB-SKD
Log Grapple
Setup Instructions
Skid Pro
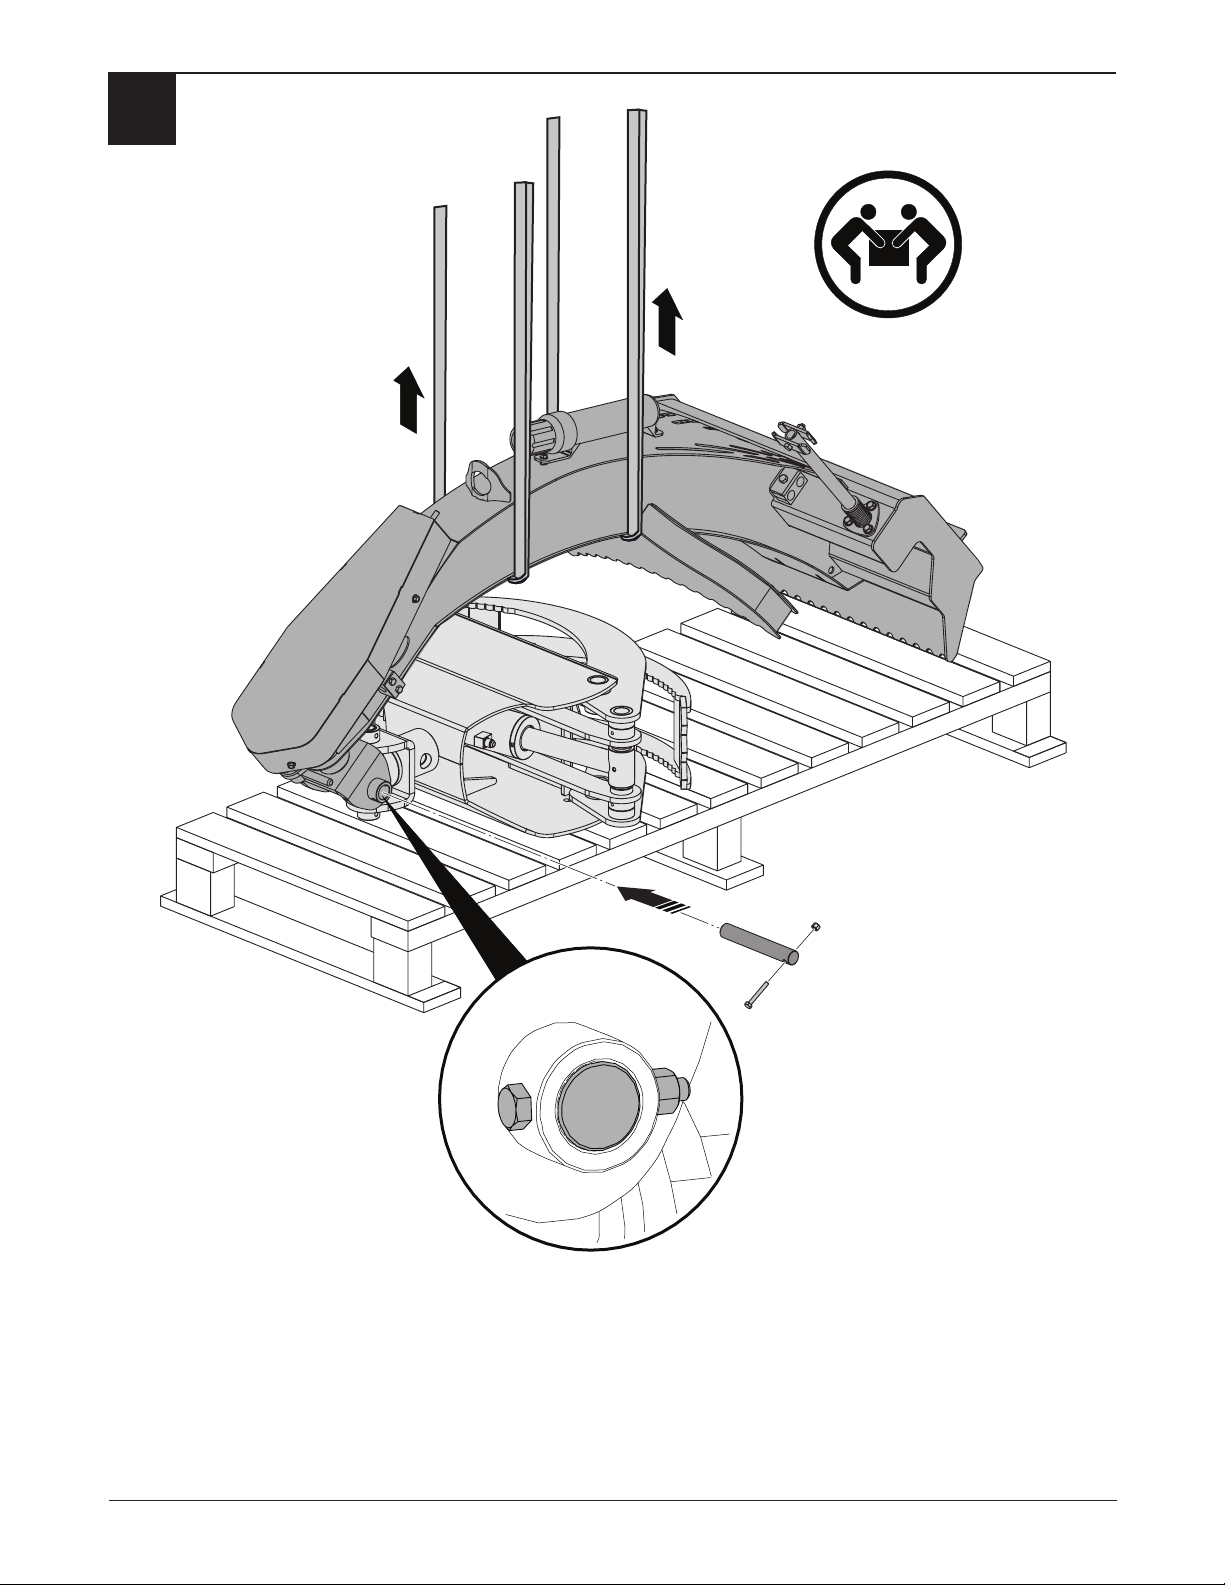
1
2

5
LXG210S-SKD / LXG210SB-SKD
Log Grapple
Setup Instructions
Skid Pro
3
6
LXG210S-SKD / LXG210SB-SKD
Log Grapple
Setup Instructions
Skid Pro
4

7
LXG210S-SKD / LXG210SB-SKD
Log Grapple
Setup Instructions
Skid Pro
5

8
LXG210S-SKD / LXG210SB-SKD
Log Grapple
Setup Instructions
Skid Pro
Pre-delivery Inspection Checklist
Do the following pre-delivery inspections (PDI).
Pivot assembly moves freely.
Rotator functions correctly.
Grapple functions correctly.
Hydraulic system functions correctly.
Hydraulic connections are tight, and hoses and fittings are
in good condition.
There are no hydraulic fluid leaks.
All fasteners are torqued to the correct specifications.
All grease locations are lubricated.
Operator's Manual is in the storage tube.
Safety Checks
All safety labels are applied and legible.
All guards and shields are installed.
Operating and safety instructions were reviewed.

9
LXG210S-SKD / LXG210SB-SKD
Log Grapple
Setup Instructions
Skid Pro
Specications
Bolt Torque
IMPORTANT! If you replace hardware, use fasteners
of the same grade.
IMPORTANT! The torque specifications in these
tables are for non-greased or non-oiled threads. Do
not grease or oil fastener threads unless otherwise
indicated. When using a thread lock, increase the
specified torque 5%.
Bolt grades are identified by the marks on top
of the bolt head.
These bolt torque specification tables give the correct
torque settings for common bolts and capscrews. Tighten
all bolts to the torque that is specified in the table, unless
otherwise indicated. Check the bolt tightness periodically.
Imperial Bolt Torque Specifications
Bolt
Diameter
Torque
SAE Gr. 2 SAE Gr. 5 SAE Gr. 8
lbf•ft N•m lbf•ft N•m lbf•ft N•m
1/4 inch 6 8 9 12 12 17
5/16 inch 10 13 19 25 27 36
3/8 inch 20 27 33 45 45 63
7/16 inch 30 41 53 72 75 100
1/2 inch 45 61 80 110 115 155
9/16 inch 60 95 115 155 165 220
5/8 inch 95 128 160 215 220 305
3/4 inch 165 225 290 390 400 540
7/8 inch 170 230 420 570 650 880
Metric Bolt Torque Specifications
Bolt
Diameter
Torque
Gr. 8.8 Gr. 10.9
lbf•ft N•m lbf•ft N•m
M3 0.4 0.5 1.3 1.8
M4 2.2 3 3.3 4.5
M6 7 10 11 15
M8 18 25 26 35
M10 37 50 52 70
M12 66 90 92 125
M14 83 112 116 158
M16 166 225 229 310
M20 321 435 450 610
M30 1,103 1,495 1,550 2,100

10
LXG210S-SKD / LXG210SB-SKD
Log Grapple
Setup Instructions
Skid Pro
Hydraulic Fitting Torque
Tighten flare-type tube fittings:
1. Check the flare and flare seat for defects that might
cause leaks.
2. Align the tube with the fitting before tightening.
3. Hand-tighten the swivel nut until it is snug.
4. To prevent the tube from twisting, use two
wrenches. Place one wrench on the connector body
and tighten the swivel nut with the second wrench.
Torque the fitting to the correct specification.
If a torque wrench is not available, use the flats from
finger tight (FFFT) method.
Hydraulic Fitting Torque Specifications
Tube size
OD
Hex size
across
flats Torque
Flats from finger
tight
Inches Inches lbf•ft N•m Flats Turns
3/16 7/16 6 8 2 1/6
1/4 9/16 11–12 15–17 2 1/6
5/16 5/8 14–16 19–22 2 1/6
3/8 11/16 20–22 27–30 1-1/4 1/6
1/2 7/8 44–48 59–65 1 1/6
5/8 1 50–58 68–79 1 1/6
3/4 1-1/4 79–88 107–119 1 1/8
1 1-5/8 117–125 158–170 1 1/8
Specifications are for non-lubricated connections.

11
LXG210S-SKD / LXG210SB-SKD
Log Grapple
Setup Instructions
Skid Pro

This manual suits for next models
1
Table of contents


