Skil BB9504-00 User manual

WARNING: To reduce the risk of injury, the user must read and understand the
Owner’s Manual before using this product. Save these instructions for future reference.
AVERTISSEMENT : Afin de réduire les risques de blessure, l’utilisateur doit lire et
comprendre le guide d’utilisation avant d’utiliser cet article. Conservez le présent guide
afin de pouvoir le consulter ultérieurement.
ADVERTENCIA : Para reducir el riesgo de lesiones, el usuario debe leer y comprender
el Manual del operador antes de utilizar este producto. Guarde estas instrucciones para
consultarlas en caso sea necesario.
Owner’s Manual
Guide d’utilisation
Manual del propietario
For Customer Service
Pour le service à la clientèle
Servicio al cliente
Belt/Disc Sander
Ponceuse à bande/disque
Lijadora de correa/disco
Model/ Modelo/ Modèle: BB9504-00
1-877-SKIL-999 OR www.skil.com

2
TABLE OF CONTENTS
General Power Tool Safety Warnings . ............................3-4
Additional Safety Rules ........................................4-7
Symbols ....................................................9-12
Unpacking and Checking Contents................................13
Get to Know Your Belt/Disc Sander.............................14-15
Specications .................................................15
Assembly and Adjustments ...................................16-21
Operations .................................................22-25
Maintenance...................................................26
Troubleshooting ...............................................27
Limited Warranty of SKIL Consumer Benchtop Power Tools ...........28
WARNING
• Some dust created by power sanding, sawing, grinding, drilling and other construction
activities contains chemicals known to the State of California to cause cancer, birth defects
or other reproductive harm. Some examples of these chemicals are:
– Lead from lead-based paints.
– Crystalline silica from bricks, cement, and other masonry products.
– Arsenic and chromium from chemically-treated lumber.
• Your risk from these exposures varies, depending upon how often you do this type of work.
To reduce your exposure to these chemicals:
– Work in a well-ventilated area.
– Work with approved safety equipment, such as dust masks that are specially designed to
lter out microscopic particles.
– Avoid prolonged contact with dust from power sanding, sawing, grinding, drilling, and
other construction activities. Wear protective clothing and wash exposed areas with soap
and water. Allowing dust to get into your mouth or eyes or to lie on the skin may promote
absorption of harmful chemicals.

3
GENERAL POWER TOOL SAFETY WARNINGS
WARNING READ ALL INSTRUCTIONS. Failure to follow the safety rules listed
below and other basic safety precautions may result in serious
personal injury.
SAVE ALL WARNINGS AND INSTRUCTIONS FOR FUTURE
REFERENCE.
The term “power tool” in the warnings refers to your mains-operated (corded) power tool or
battery-operated (cordless) power tool.
Work area safety
KEEP CHILDREN AWAY
Do not let visitors contact tool or extension cord. All visitors should be kept safe distance from
work area.
KEEP WORK AREAS CLEAN
Cluttered areas and benches invite accidents.
MAKE WORKSHOP CHILD-PROOF
With padlocks, master switches, or by removing starter keys.
AVOID DANGEROUS ENVIRONMENTS
Don’t use power tools in damp or wet locations. Keep work area well lit. Do not expose power
tools to rain. Do not use the tool in the presence of ammable liquids or gases.
Personal Safety
KNOW YOUR POWER TOOL
Read and understand the owner’s manual and labels afxed to the tool. Learn its application
and limitations as well as the specic potential hazards peculiar to this tool.
DON’T OVERREACH
Keep proper footing and balance at all times.
STAY ALERT
Watch what you are doing. Use common sense. Do not operate tool when you are tired. Do
not operate while under inuence of drugs, alcohol, or medication.
WEAR PROPER APPAREL
Do not wear lose clothing, gloves, neckties, rings, bracelets, or other jewelry which may get
caught in moving parts. Nonslip footwear is recommended. Wear protective hair covering to
contain long hair.
ALWAYS USE SAFETY GLASSES
Also use face or dust mask if cutting operation is dusty, and ear plugs during extended periods
of operation. Everyday eyeglasses have only impact resistant lenses, they are NOT safety
glasses.
GUARD AGAINST ELECTRIC SHOCK
Prevent body contact with grounded surfaces. For example: pipes, radiators, ranges,
refrigerator enclosures.
DISCONNECT TOOLS FROM POWER SOURCE
When not in use, before servicing, when changing blades, bits, cutters, etc.
KEEP GUARDS IN PLACE
In working order, and in proper adjustment and alignment.
REMOVE ADJUSTING KEYS AND WRENCHES

4
When not in use, before servicing, when changing blades, bits, cutters, etc.
REDUCE THE RISK OF UNINTENTIONAL STARTING
Make sure the switch is in the “OFF” position before plugging in tool.
GROUND ALL TOOLS
This tool is equipped with an approved 3-conductor cord and a 3-prong grounding type plug
to t the proper grounding type receptacle. The green conductor in the cord is the grounding
wire. Never connect the green wire to a live terminal.
NEVER STAND ON TOOL OR ITS STAND
Serious injury could occur if the tool is tipped or if the cutting tool is accidentally contacted. Do
not store materials on or near the tool such that it is necessary to stand on the tool or its stand
to reach them.
CHECK DAMAGED PARTS
Before further use of the tool, a guard or other part that is damaged should be carefully
checked to ensure that it will operate properly and perform its intended function. Check for
alignment of moving parts, mounting, and any other conditions that may affect its operation. A
guard or other part that is damaged should be properly replaced.
WARNING All repairs, electrical or mechanical, should be attempted only by trained
repairmen. Contact the nearest SKIL Factory Service Center, Authorized
Service Stat ion or other competent repair service.
WARNING Use only SKIL replacement parts; any others may create a hazard.
WARNING Do not use any attachments or accessories not recommended by the
manufacturer of this tool. The use of attachments or accessories not
recommended can result in serious personal injury.

5
ADDITIONAL SAFETY RULES
Tool Use
DON’T FORCE TOOL
It will do the job better and safer at the rate for which it was designed.
USE THE RIGHT TOOL
Don’t force a small tool or attachment to do the job of a heavy-duty tool. Don’t use tool for
purpose not intended — for example, don’t use a circular saw for cutting tree limbs or logs.
SECURE WORK
Use clamps or a vise to hold work. It’s safer than using your hand and it frees both hands to
operate the tool.
NEVER LEAVE TOOL RUNNING UNATTENDED
Turn power off. Don’t leave tool until it comes to a complete stop.
Tool Care
DO NOT ALTER OR MISUSE TOOL
These tools are precision built. Any alteration or modication not specied is misuse and may
result in dangerous conditions.
AVOID GASEOUS AREAS
Do not operate electric tools in a gaseous or explosive atmosphere. Motors in these tools
normally spark, and may result in a dangerous condition.
MAINTAIN TOOLS WITH CARE
Keep tools sharp and clean for best and safest performance. Follow instructions for lubricating
and changing accessories. Inspect tool cords periodically and if damaged, have repaired by
authorized service facility. Inspect extension cords periodically and replace if damaged. Keep
handles dry, clean and free from oil and grease.
WARNING Before connecting the tool to a power source (receptacle, outlet, etc.), be
sure voltage supplied is the same as that specied on the nameplate of the
tool. A power source with a voltage greater than that specied for the tool can result in serious
injury to the user, as well as damage to the tool. If in doubt, DO NOT PLUG IN THE TOOL.
Using a power source with a voltage less than the nameplate rating is harmful to the motor
WARNING For your own safety, do not operate your sander until it is completely
assembled and installed according to the instructions and until you have
read and understood this owner’s manual.
STABILITY OF THE BELT/DISC SANDER
If there is any tendency of the belt/disc sander to tilt or move during any use, bolt it to the
bench top or to a piece of 3/4" (19 mm) exterior plywood large enough to stabilize the sander.
Bolt the plywood to the underside of the base so it extends beyond the sides of the base. DO
NOT USE PRESSED WOOD PANELS. They can break unexpectedly. If the workpiece is too
large to easily support with one hand, provide an auxiliary support.
LOCATION
Use the sander in a well-lit area and on a level surface, clean and smooth enough to reduce
the risk of trips and falls. Use it where neither the operator nor the casual observer is forced to
stand in line with a potential kickback.
PROTECTION: Eyes, hands, ears and body.

6
WARNING TO AVOID BEING PULLED INTO THE SPINNING TOOL—
DO NOT WEAR:
Loose tting gloves
Necktie
Loose clothing
Jewelry
DO:
TIE BACK LONG HAIR
ROLL LONG SLEEVES ABOVE ELBOWS
a. If any part of your belt/disc sander is missing, malfunctioning, has been damaged or
broken (such as the motor switch, or other operating control, a safety device or the power
cord), cease operating immediately until the particular part is properly repaired or replaced.
b. Never place your ngers in a position where they could contact the sand paper or other
cutting tool if the workpiece should unexpectedly shift or your hand should slip.
c. To prevent the workpiece from being torn from your hands, spinning on the table,
shattering the tool, or being thrown, always support your work so it won’t shift or bind on
the tool.
d. Never move the table support while the tool is running.
e. Before starting the operation, jog the motor switch to make sure the sanding belt or other
cutting tool does not wobble or cause vibration.
f. If a workpiece overhangs the table such that it will fall or tip if not held, provide auxiliary
support.
g. Use xtures for unusual operations to adequately hold, guide and position the workpiece.
h. Turn the motor switch “OFF” and unplug from power source when not in operation.
i. Always support workpiece with the miter guide, work support or worktable.
j. Keep ngers away from pinch points between the belt/disc and the housing.
k. Maintain 1/16” (1.6 mm) maximum clearance between table/stops and sanding belt or
disc.
l. Maintain proper adjustment of sanding belt tension and alignment.
m. Avoid kickback (workpiece thrown at you) - Do not use right half of disc or work on left side
of workpiece stop when belt-sanding.
n. To avoid injury from thrown workpiece or tool contact, DO NOT perform layout, assembly,
or setup work on the table while the tool is rotating.
o. Do not expose to rain or use in damp locations.
p. Unplug the sander before making belt/wheel changes, adjustments or repairs.
DIRECTION OF FEED FOR DRUM SANDING
WARNING Feed workpiece into a sanding drum or other approved accessory, against
the direction of rotation.
THINK SAFETY
SAFETY IS A COMBINATION OF OPERATOR COMMON SENSE AND ALERTNESS AT ALL
TIMES WHEN THE SANDER IS BEING USED.
WARNING Do not allow familiarity (gained from frequent use of your sander) to
become commonplace. Always remember that a careless fraction of a
second is sufcient to inict severe injury.
7
Electrical Requirements
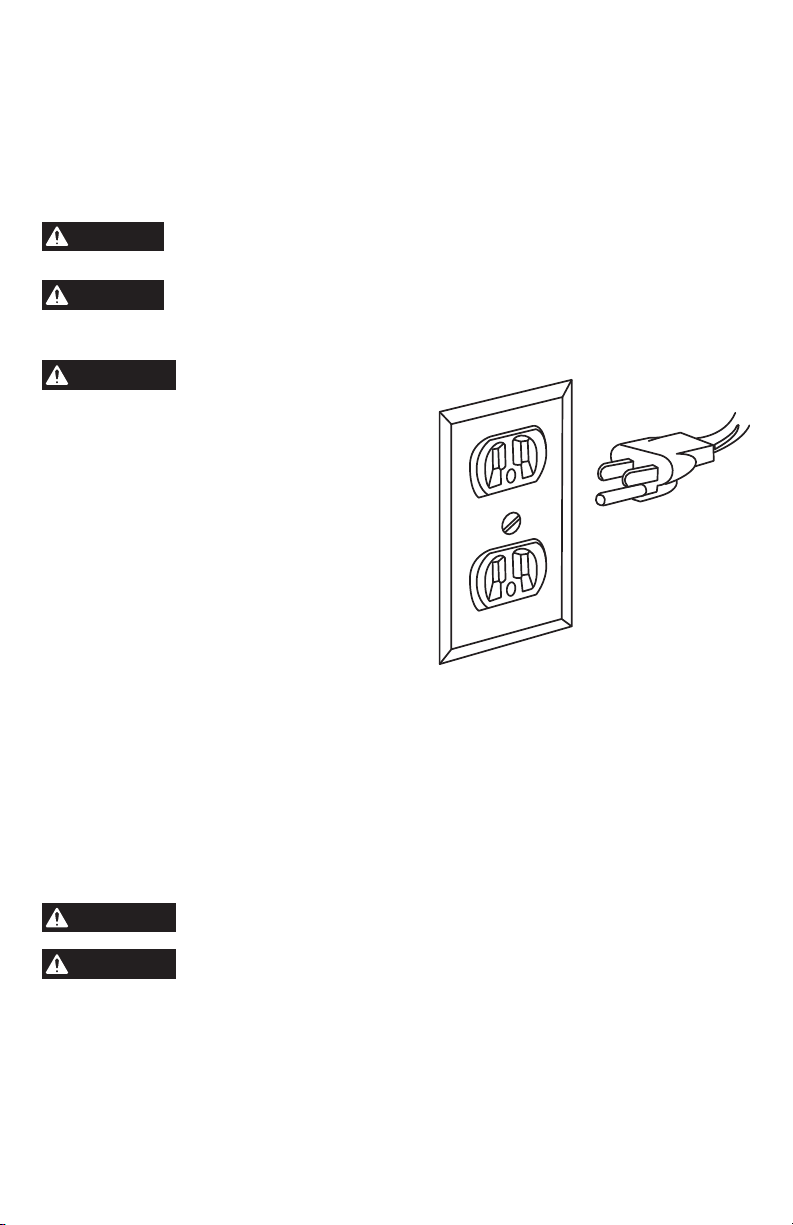
Connection to A Power Source
This machine must be grounded while in use to protect the operator from electric shock.
Plug power cord into a 110-120V properly grounded type outlet protected by a 15-amp dual
element time delay fuse or circuit breaker.
Not all outlets are properly grounded. If you are not sure that your outlet, as pictured in Figure 1,
is properly grounded; have it checked by a qualied electrician.
DANGER To avoid electric shock, do not touch the metal prongs on the plug when
installing or removing the plug to or from the outlet.
DANGER Failure to properly ground this power tool can cause electrocution or serious
shock, particularly when used near metal plumbing or other metal objects. If shocked, your
reaction could cause your hands to hit the tool.
WARNING If power cord is worn, cut or
damaged in any way, have
it replaced immediately to avoid shock or re
hazard.
Your unit is for use on 120 volts. It has a plug
that looks like the one in the gure on the right:
This power tool is equipped with a 3-conductor
cord and grounding type plug, approved by
Underwriters Laboratories and the Canadian
Standards Association. The ground conductor
has a green jacket and is attached to the tool
housing at one end and to the ground prong in
the attachment plug at the other end.
If the outlet you are planning to use for this
power tool is of the two-prong type, DO
NOT REMOVE OR ALTER THE GROUNDING PRONG IN ANY MANNER. Have a qualied
electrician replace the TWO-prong outlet with a properly grounded THREE-prong outlet.
Improper connection of the equipment-grounding conductor can result in a risk of electric
shock. The conductor with insulation having an outer surface that is green with or without
yellow stripes is the equipment-conductor. If repair or replacement of the electric cord or plug
is necessary, do not connect the equipment-grounding conductor to a live terminal.
Check with a qualied electrician or service personnel if the grounding instructions are not
completely understood, or if in doubt as to whether the tool is properly grounded.
Extension Cords
WARNING Replace damaged cords immediately. Use of damaged cords can shock,
burn or electrocute.
WARNING If an extension cord is necessary, a cord with adequate size conductors
should be used to prevent excessive voltage drop, loss of power or
overheating. The table shows the correct size to use, depending on cord length and nameplate
amperage rating of the tool. If in doubt, use the next heavier gauge. Always use U.L. and CSA
listed extension cords.

8
RECOMMENDED SIZES OF EXTENSION CORDS 120 VOLT
ALTERNATING CURRENT TOOLS
Tool's
Ampere
Rating
Cord Size in A.W.G. Wire Sizes in mm2
Cord Length in Feet Cord Length in Meters
25 50 100 150 15 30 60 120
3-6 18 16 16 14 0.75 0.75 1.5 2.5
6-8 18 16 14 12 0.75 1.0 2.5 4.0
8-10 18 16 14 12 0.75 1.0 2.5 4.0
10-12 16 16 14 12 1.0 2.5 4.0 —
12-16 14 12 — — — — — —
NOTICE: The smaller the gauge number, the heavier the cord.
SAVE THESE INSTRUCTIONS

9
SYMBOLS
Safety Symbols
The purpose of safety symbols is to attract your attention to possible dangers. The safety
symbols and explanations with them deserve your careful attention and understanding. The
symbol warnings do not, by themselves, eliminate any danger. The instructions and warnings
they give are no substitutes for proper accident prevention measures.
WARNING Be sure to read and understand all safety instructions in this Owner's
Manual, including all safety alert symbols such as “DANGER,”
“WARNING,” and “CAUTION” before using this tool. Failure to following all instructions listed
below may result in electric shock, re, and/or serious personal injury.
The denitions below describe the level of severity for each signal word. Please read the
manual and pay attention to these symbols.
This is the safety alert symbol. It is used to alert you to potential
personal injury hazards. Obey all safety messages that follow this
symbol to avoid possible injury or death.
DANGER DANGER indicates a hazardous situation which, if not avoided, will
result in death or serious injury.
WARNING WARNING indicates a hazardous situation which, if not avoided,
could result in death or serious injury.
CAUTION CAUTION, used with the safety alert symbol, indicates a hazardous
situation which, if not avoided, will result in minor or moderate
injury.
Damage Prevention and Information Messages
These inform the user of important information and/or instructions that could lead to equipment
or other property damage if they are not followed. Each message is preceded by the word
“NOTICE”, as in the example below:
NOTICE: Equipment and/or property damage may result if these instructions are not followed.
WARNING The operation of any power tools can result in foreign
objects being thrown into your eyes, which can result
in severe eye damage. Before beginning power tool operation, always
wear safety goggles or safety glasses with side shields and a full face
shield when needed. We recommend a Wide Vision Safety Mask for use
over eyeglasses or standard safety glasses with side shields. Always use
eye protection which is marked to comply with ANSI Z87.1.

10
SYMBOLS (CONTINUED)
IMPORTANT: Some of the following symbols may be used on your tool. Please study them
and learn their meaning. Proper interpretation of these symbols will allow you to operate the
tool better and safer.
Symbol Name Designation/Explanation
V Volts Voltage (potential)
AAmperes Current
Hz Hertz Frequency (cycles per second)
WWatt Power
kg Kilograms Weight
min Minutes Time
s Seconds Time
Wh Watt-hours Battery capacity
Ah Ampere-hours Battery capacity
ØDiameter Size of drill bits, grinding wheels, etc.
n0No-load speed Rotational speed, at no load
nRated speed Maximum attainable speed
…/min Revolutions or
reciprocations per minute Revolutions, strokes, surface speed,
orbits, etc. per minute
ft/min Feet per minute (fpm) Surface speed
0 Off position Zero speed, zero torque...
1,2,3,…
I,II,III, Selector settings Speed, torque or position settings. Higher
number means greater speed
Innitely variable selector
with off Speed is increasing from 0 setting
Arrow Action in the direction of arrow
Alternating current (AC) Type or a characteristic of current
Direct current (DC) Type or a characteristic of current
Alternating or direct current
(AC/DC) Type or a characteristic of current
Class II construction Designates Double Insulated Construction
tools.
Protective earth Grounding terminal
Li-ion RBRC seal Designates Li-ion battery recycling
program
Table of contents
Languages:
Other Skil Sander manuals


