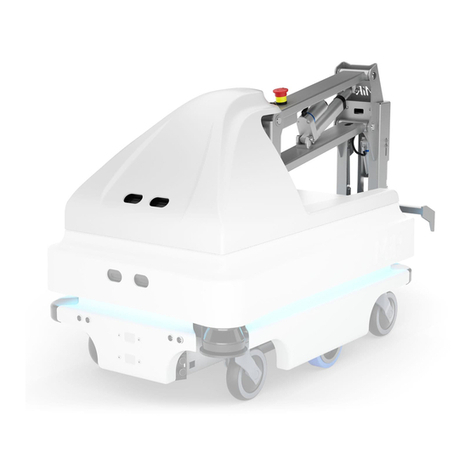
SKY-HERO SIGYN Mk I User manual

QUICK START GUIDE | SIGYN MkI
SYSTEM COMPONENTS
QUICK START GUIDE | SIGYN Tactical Ground Robot
An operator friendly robot that provides teams
with superior scouting through two ultra-sensitive
Day-Night cameras. While 150-degree views allow
for an impressive scope, dimmable IR LEDs on the
front, back, and top of the vehicle provide video
clarity and NVG lighting.
A small remote ground controller with highly
intuitive cybersecure interface that simultaneously
handles the control and monitoring of multiple
unmanned vehicles, including the operation of
their sensors and plug-in payloads* (*in option).
1
2
3
4
5
7
8
6
1
2
3
4
5
6
7
8
FRONT MASK
UPPER FRAME LOWER FRAME
1
2 3
4 5
6
7 8
910 11 12 13
14
9
10
11
12
13
14
LOWER PORTS
UPPER BUTTONS
FRONT MASK
This Quick Start Guide is not
a substitute for reading the
operator’s manual. To reduce the
risk of injury or device misuse,
user must read and understand
operator’s manual before using
these products.
WARNING
Camera
Front IR LEDs
Upper IR (L/R) and status LEDs
Binding button
Payload connector
Lower IR LEDs
ON/OFF Button
Battery cover
1
2
3
4
5
6
7
8
ON/OFF Button
Left Joystick/J1
Right Joystick/J2
Device buttons
Action buttons
Display Screen
Action button Left
Action button Right
Push-to-Talk Port
Headphone Port
Audio/Video ouptut Port
Micro SD Card Slot
USB-C Port
LED Charging indicator
Sigyn MkI related elements
GCS MkII related elements
MkI
with rubber cap
with rubber cap

STA R T
CONTROL
QUICK START GUIDE | SIGYN MkI
Fully charge the GCS MkII using USB-C cable in dedicated port
with packaged charger plug until charge LED indicator is green
Insert charged batteries in the Sigyn MkI :
1. Unscrew the battery cover on the lower frame
2. Insert the batteries starting with the positive terminal and
then push in the negative terminal (label)
You own a Sigyn MkI Core Tactical System :
In the Sigyn MkI Core Tactical System, the GCS MkII is already bound
with the Sigyn MkI. You can go directly to the CONNECT section
How to navigate in GCS MkII Menu
1. Turn On the GCS MkII by pressing ON/OFF button
2. On GCS start-up prompt, dene your «Region of use (CE/
FCC)» to automatically congure the frequency and power
limits of UAV/ UGV control and video signal in compliance with
the regulations of the country of operation
3. Enter the menu (press Button D), navigate and select the
«GCS Settings Menu»
4. In this menu, select rst «Joystick Calibration» and follow the
instructions
5. Exit the menu (press Button D)
Press button D: Access or Exit the menu
Right Joystick/J2 to the Right : Go a level down and/or conrm
Right Joystick/J2 to the Left : Go back
Right Joystick/J2 Up and Down : Scroll the menu
14
8
Fig. 2
A
B
OPTION A
1
5
5
3
5
3
3
Fig. 3
FIG. 3
1
5
3
4
FIG. 2
INSERT
FIRST
FIG. 1
Fig. 1
13
13
14
+
3. Screw back the battery cover
8

CONNECT
QUICK START GUIDE | SIGYN MkI
FIG. 5
4
FIG. 6
FIG. 4
3
PULL
OUT
7
PUSH
4
Turn On the Sigyn MkI by pressing the central button on the lower frame
The LED on upper frame will show a green light
On the GCS MkII, push the button on the left associated to the Sigyn MkI
tactical ground robot
You will then see on the GCS MkII the A/V stream transmitted by the Sigyn
MkI. You can start operating the ground robot
Turn On the GCS MkII by pressing ON/OFF button 1
7
3
4
A
B
C
D
Fig. 3
SHORT
PRESS
FIG. 6
You are in possession of a Sigyn MkI Extension Set :
1. Turn on the GCS MkII by pressing ON/OFF button
2. Enter the menu (press Button D), navigate and select «Version »
3. Check if your remote rmware is 3.0.0 :
4. Then, bind the GCS MkII together with the Sigyn MkI :
Turn On the Sigyn MkI by pressing central button on the lower
frame. The status LED on upper frame becomes green
You have 40 sec. to press the binding button on the device. If this
time limit is passed, turn off the Sigyn MkI and restart step 4
Turn the Sigyn MkI back on the upper frame and remove the small
protective rubber cap next to the upper LEDs
You will see the small LED binding button with a steady red light
Use the binding key to gently press it once. The LED button is
ashing green light. Now, bind the device with the remote
On the GCS MkII, enter the menu (press Button D), navigate to
«Advanced Settings Menu» and select it.
In this menu, select«Device Binding»,navigate to the desired left
button to allocate to your device, select it; then select«Loki2,
Sigyn»on the following screen. A pop-up message appears on the
GCS MkII screen showing «Connecting» - along with incrementing
dots - to indicate the binding operation is progressing.
Once the binding is complete, the GCS MkII displays the Sigyn MkI
A/V stream. On the Sigyn MkI, the binding LED button turns steady
green.
Put the rubber cap back on the binding button on the Sigyn MkI
If Yes, proceed to step 4 to bind the Sigyn MkI and GCS MkII
If No, proceed rst with the rmware upgrade of GCS MkII and Loki MkII
OPTION B
1
5
7
Fig. 5
Fig. 6
5
4
Fig. 4
3
3
4

OPERATE
QUICK START GUIDE | SIGYN MkI
Missing parts/accessories or need assistance with this unit ?
Contact your local distributor: sky-hero.com/distributors
To drive Forward : orient the Right Joystick upward
To drive Backward : orient the Right Joystick downward
To turn Left : orient the Right Joystick to the left
To turn Right : orient the Right Joystick to the right
Basics
Advanced Drive
To operate an automatic clock-wise rotation of 90°, push the Left
Joystick/J1 to the right
To operate an automatic counterclock-wise rotation of 90°, push the
Left Joystick/J1 to the left
Preset features
The Motor Shutdown function of the Sigyn MkI is already attributed to
the button on the GCS Mk2
Other specic features of the Sigyn MkI can be attributed to GCS MkII right
and top buttons . It concerns : Toggle Upper/Bottom LED, Toggle push-
to-talk, Switch Camera and Toggle device sleep
To congure it, enter the menu, navigate and select the «Device Settings»
menu; then opt for «Sigyn» sub-section and select «Button allocation» entry
Sigyn MkI is operated using the GCS MkII joysticks, top and right buttons
Fig. 7
Fig. 8
B
C
A
Note that the forward/backward speed is progressive. The more you move the
joystick forward/backward, the faster the Sigyn will move, until Max Speed is
reached
Max speed is set by default (100%) but can be ne tuned. To do so, enter the
GCS MkII menu , navigate and select the «Device Settings» menu. Then, opt
for «Sigyn» sub-section and select «Max Speed»
To operate an automatic rotation of 180°, push the Left Joystick/J1
downward
Turn speed is set by default (100%) but can be ne tuned. To do so, enter the
GCS MkII menu, navigate and select the «Device Settings» menu. Then opt
for «Sigyn» sub-section and select «Turn Speed»
2
3
3
3
3
2
2
5
7 8
5
FIG. 7
FIG. 8
© 2022 SKY-HERO sa


