Sky Tango A028 User manual
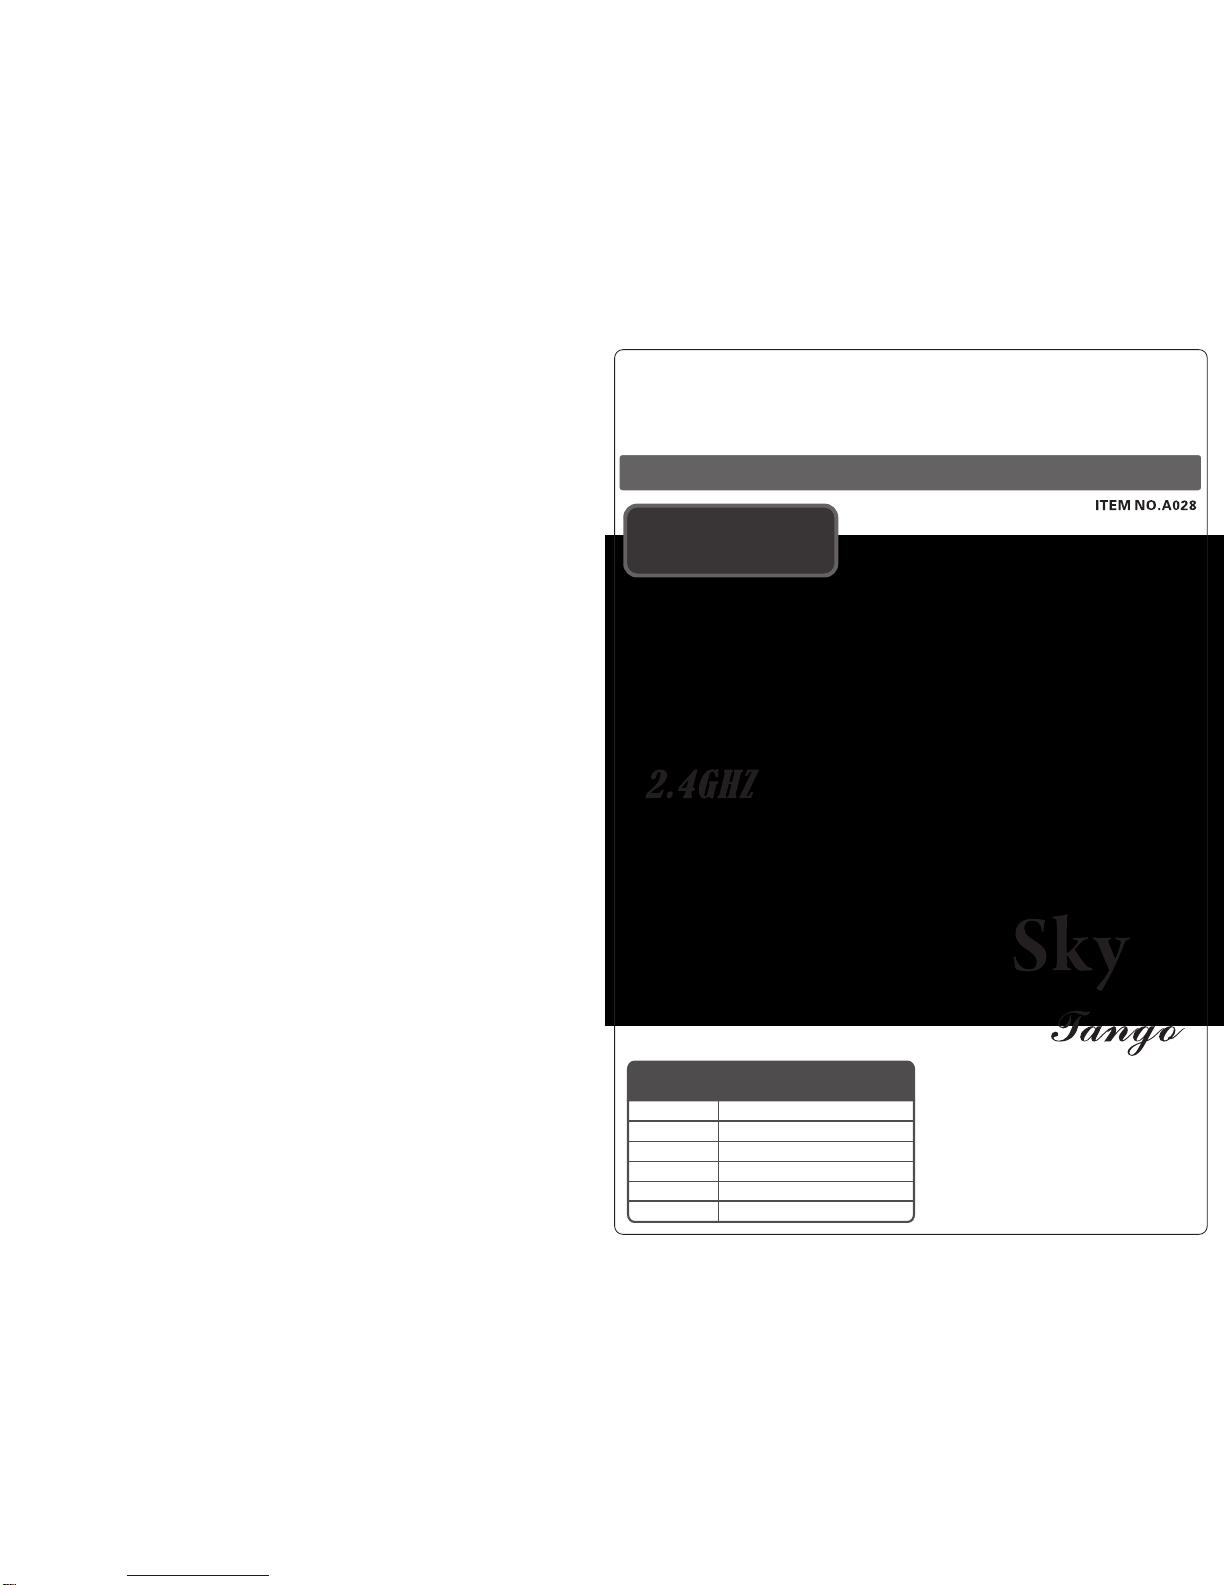
“Sky Tango”
Radio Control Helicopter
RTF Instruction Manual Suitable age :For 14 years and above
Right-Hand
Mode
Length: 7.9 in (200mm)
Height: 4.7 in (120mm)
Main Rotor Diameter: 7.5 in (190mm)
Weight : 0.95 oz (26.5 g)
Motor :
Battery : 130mAh 3.7V Li-Po battery
DC coreless motor
Specifications
Note: Attempting to fly the helicopter without completely reading the
manual may cause injury to yourself and people in the vicinity, as well
as damage to the helicopter.

Specifications.................................. 1
Introduction........................................................................................3
Warnings............................................................................................3
Note on Li-Po Batteries........................................................................3
Parts List ...........................................................................................4
Functions Of Transmitter......................................................................5
How To Operate.............................................................................5/6/7
Flying Instruction.................................................................................8
For Professionals................................................................................9
Troubleshooting Guide.......................................................................10
Other notice and precautions..............................................................10
...................................................
Contents FCC Caution: Any changes or modifications not expressly approved by the party
responsible for compliance could void the user's authority to operate this
equipment.
This device complies with Part 15 of the FCC Rules. Operation is subject to the
following two conditions: (1) This device may not cause harmful interference, and
(2) this device must accept any interference received, including interference that
may cause undesired operation.

★
※Match Frequency
□
⑽
02
05
01
03
04
“Tango” 2.4Ghz Remote Control Helicopter has superb flying performance. Both professional
and new beginners can grasp the basic flying technique very well in a short time and do some
little nice stunts.
The compact size enables “Tango” tp fly in any interior space like office, bedroom ,living roometc.
The application of 2.4Ghz Technology provides flyers with extra superior stability and operational
ability than other products of the same kind in the market .
“Tango” comes from the factory completely assembled and flight tested and adjusted with
everything you need to get flying . No need to re-assemble and set up , all you have to do is charge
the battery and out it into the helicopter and fly !
This is not a toy! Misuse may cause bodily harm and damage to property .
Suitable ages for 14 years and over,Kids should have adult supervision when fly it.
Users shall strictly follow the instructions when performing .
Only can fly outdoors when little wind.
prohibit any part of the body to touch the propeller while rotating.
Prohibit flying near the head in order to avoid danger
Charge and preserve in strict accordance with the lithium battery usage standard.
Introduction
Precautions and war nings
Please perform this model by following the warnings very closely
Note on Lithium Polymer This is the safty precautions and must be strictly followed.
Lithium Polymer batteries are significantly more volatile than alkaline or Ni-Cd/Ni-MH
batteries generally used in RC applications, which may have better advantages in
weight and capacity but not stable enough. All manufacturer's instructions and
warnings must be followed closely. By handling, charging or using the included
Li-Po battery, you assumeall risks associated with lithium batteries. If you do not
agree with theseconditions, return the complete package of model in unused condition
to the place of purchase immediately.
Do not charge package- attached battery with mismatched transmitter or charger !
Do not charge other batteries with package-attached transmitter or charger
Never charge near or in the area of any flammable or combustible materials
When charging the battery you should always remain in constant observation to monitor the
charging process and react to potential problems that may occur.
If at any time during the charge or discharge process the battery begins to balloon or swell,
discontinue charging or discharging immediately. Quickly and safely disconnect the battery, then
place it in a safe, open area away from flammable materials to observe it for at least 15 minutes.
Do not continue charging a battery that has begun to balloon or swell .Handle the lithium battery safely.
After flight, the Li-Po batteries must be cooled to the ambient temperature before charging.
Do not over-discharge the Li-Po flight battery. Discharging the battery too
low can cause damage to the battery resulting in reduced power, duration
or failure of the battery entirely
Please store the battery in cool ,dry places under 25 degrees Celsius when you are not using it .
Troubleshooting Guide
Please refer to below list to resolve the possible problems during flying .
Other notice and precautions
1.When the battery is running low(the red LED on the circuit board starts blinking )please stop
flying immediately .
2.Pull out the lithium battery after each flight is finished .
3.When the helicopter is going down by crash ,please push down the throttle immediately in
case of any damage occur
4.After charging many times , the controller battery is running lower and lower , the charging
time will last longer .
5.If controller power indicator is blinking and beeping continuously, showing that the 4 AA battery
inside the controller is running out ,please replace all with new batteries immediately .
6.When unused in long-term , please charger the lithium battery to 50% before storing .All batteries
inside the controller also should be taken out .
7.If related parts of the helicopter is damaged , please contact the dealer by referring to the
“Parts list ” and replace with new parts .
Collision Protection
This model is designed with collision protection function on the balance bar set . If the helicopter
is crashed , the balance bar set will fall off the plane . To repair , all you need to do is assemble
the balance bar set into the blade head and get linked .
1.Plug the lithium battery into the helicopter (the LCD on the circuit board is blinking rapidly)
2.Push any button on the controller and power on .Release the button ,the circuit board
LCD is blinking slowly and the controller power indicator is blinking as well.
3.Push the left hand throttle stick from the top all the way to the bottom, the controller beeps
two times(power indicator stops blinking). The circuit board red LED stops blinking , showing
frequency match is done .
4.If transmitter keeps beeping , showing the frequency match is failed .Please rematch the
frequency from the top .
Problem Possible cause Solution
Helicopter is out of control
Lithium battery is low
Protection system is not closed
Frequency is skipping
Fully charge the battery
Close the protection system
Reset the frequency
The fly can not last long
enough
Fully charge the lithium battery
Replace the controller battery
Replace lithium battery
The lithium battery is low
The controller battery is charged many times
The lithium battery is damaged
Left and right hand stick function
can not switch Mode switch is not on the right position Push the mode switch to “1” position
Can not fly after crash Balance weight is lost Replace balance bar set
Can not keep stable by adjusting
after crash Related parts were damaged or displaced Contact dealer and buy new parts

001
002
003
006
007
026
027
032
033
034
035
008
012
013
004
014
015
017
018
019
028
029
024
021
022
023
005
031
030
005
009
016
020
020
005
025
011
010
011
序号 零件名称 数量
⑼
Checklist Please contact the dealer timely when you found any parts missing .
Articles Quantity
Tango Helicopter(complete).........................................................................................1
2.4Ghz Remote Controller ..........................................................................................1
3.7V 130mAh Lithium battery.......................................................................................1
AA Battery..................................................................................................................4
Screw driver................................................................................................................1
Optional Par ts Please contact the dealer when you are in need
Charger(an adaptor included): AC/DC , chargeable to 4 Lithium battery at once
Par ts list Please buy related parts according to this chart
001 Balance hammer 2
002 Balance bar 1
003 Balance amount 1
004 Rotor head linkage 1
005 Screw PA1.2X5 6
006 Top blade head 1
007 Top blade 2
008 Inner shaft 1
009 Bearing seat 1
010 bottom blade 2
011 Screw PA1.2X3 3
012 bottom blade head 1
013 Outer shaft 1
014 Rotor bottom linkage 1
015 Top swashplate 1
016 Bearing MR106 1
017 Bottom swashplate 1
018 Fixing holder 1
019 Fixing slot 1
020 Bearing M R63 2
021 Adjustable ball Joint 2
022 Servo Linkage 2
023 Insulation ring 2
024 Screw PM 1.2X2.5 2
025 Receiver 1
026 Motor 2
027 Frame 1
028 Top blade gear 1
029 Bottom blade gear 1
030 Canopy 1
031 Battery holder 1
032 Lithium battery 1
033 Landing gear 1
034 Tail Boom 1
035 Tail fin 1
Hover
When the helicopter is flying to a certain high level, you can try to hover. Push the right hand stick
up and down slightly to make the helicopter go up and down slowly .Please refer to the adjusting methods
in the first part”Take off” to do some slight adjustments to the helicopter. When finished above adjusting ,
the helicopter should keep at a certain high level almost without any throttle input.
Practice more and make yourself to be able to freely control the helicopter
going up and down
Landing
Pull the right hand stick downward slowly to land the helicopter steadily on a plain ground.
Area Flying
When you can successfully fly the helicopter in hover , you can start to learn to
control the helicopter to fly in a certain area.
When the helicopter is lifted to a certain high level, practice controlling the helicopter by joysticks to
go forward, backward, turn left and right .At the early stage of practice, control 2 directions each time ,
you can do multiple directions control when you are experienced .
For professionals Please move on to this level after mastering the basic flying skills
Side fly to left and right in hover
When the helicopter is lifted in a certain high level , move the helicopter to side fly to left and right .
When you go side fly , the throttle will move along. So when doing side fly(or after),
the helicopter might go up and down rapidly .Please do some adjustments immediately
by pushing the throttle to the opposite direction .
Advanced fly mode
When the advanced mode is open, the flying sensitivity will be increased and
the operation will be harder as well . Please do not open the advanced fly mode
before you master the basic flying skills.
After turning on the controller power switch and closing the
protection system, push both buttons at once on the
controller as shown by the right chart. The power indicator
light is blinking ,showing the advanced fly mode is open
(close the mode by pushing again both same buttons at once)
Push at once
Import ant
Import ant N oti ce
Notice
01
02
03
04
05
09
06
08
07 10
11
12
序号 名称 说明
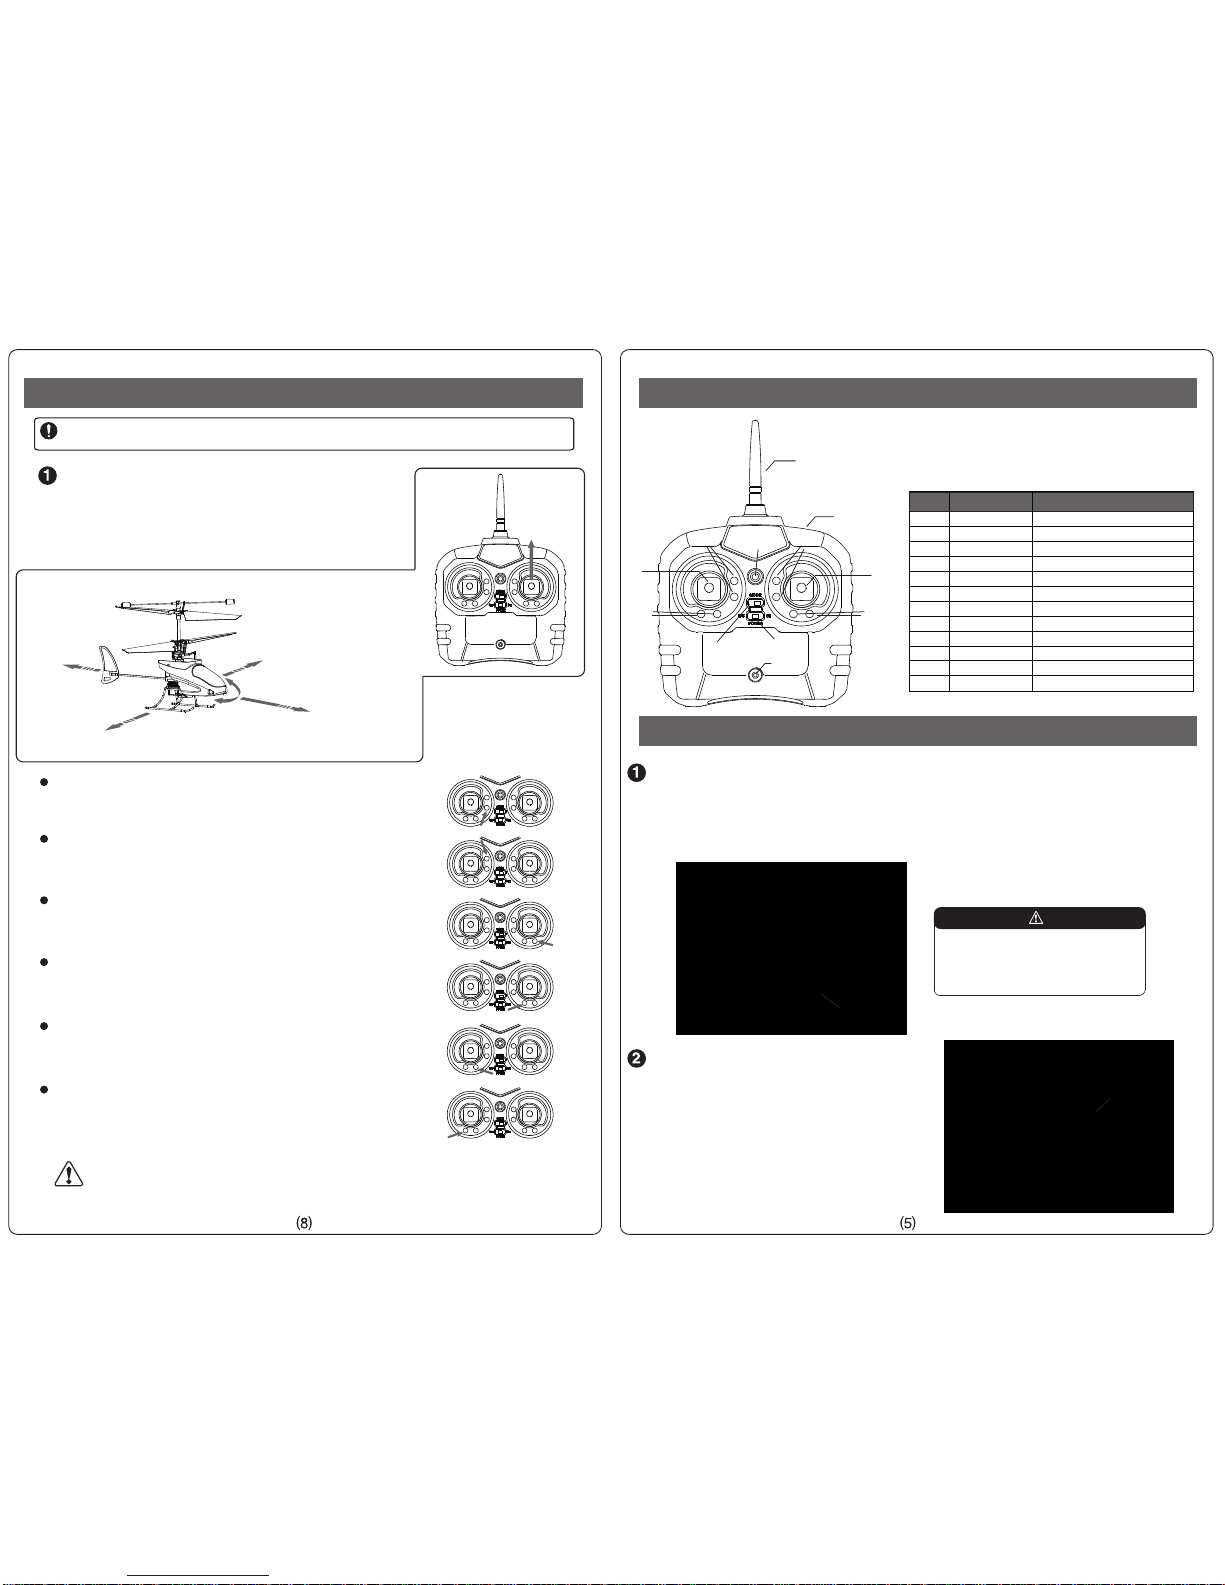
Functions of Transmitterplease read following instructions very carefully and keep them in mind
01
02 Controler body
03 Power indicator
04 Power switch
05 charging indicator
06 Left hand joystick Forward , backward, left and right
07 Elevator Trim button trim for forward ,backforward
08 Rudder trim button trim for left and right
09 Right hand joystick Up,down, yaw left, yaw right
10 Throttle trim button trim for throttle position
11 Aileron trim button trim for sliding left and right
12 Mode switch not available for switching mode
How to operate Please perform by following the usage guidelines very closely
Installing the Transmitter Batteries
1. Install four AA batteries in the transmitter, make sure the polarities are correct.
2. Test transmitter: turn the power on , The LED light at the top of the transmitter should begin
to glow solid red.
3.put on the hatch of the battery compartment.
Warning Danger
Incorrect installment can result
in short circuit , may also cause
fire ,explosion . Must install by
strictly following the instructions .
Charging lithium battery
1. Put the package attached lithium battery(pay attention
to the direction, the end with metal is facing downward)
into the charging slot on the back of the transmitter.
2. turn the transmitter around , if the charging indicator
is glowing solid red ,it means its charging .
3. After the indicator light is off(around 30 minutes) the
battery is fully charged, pull it out from the charging
port .
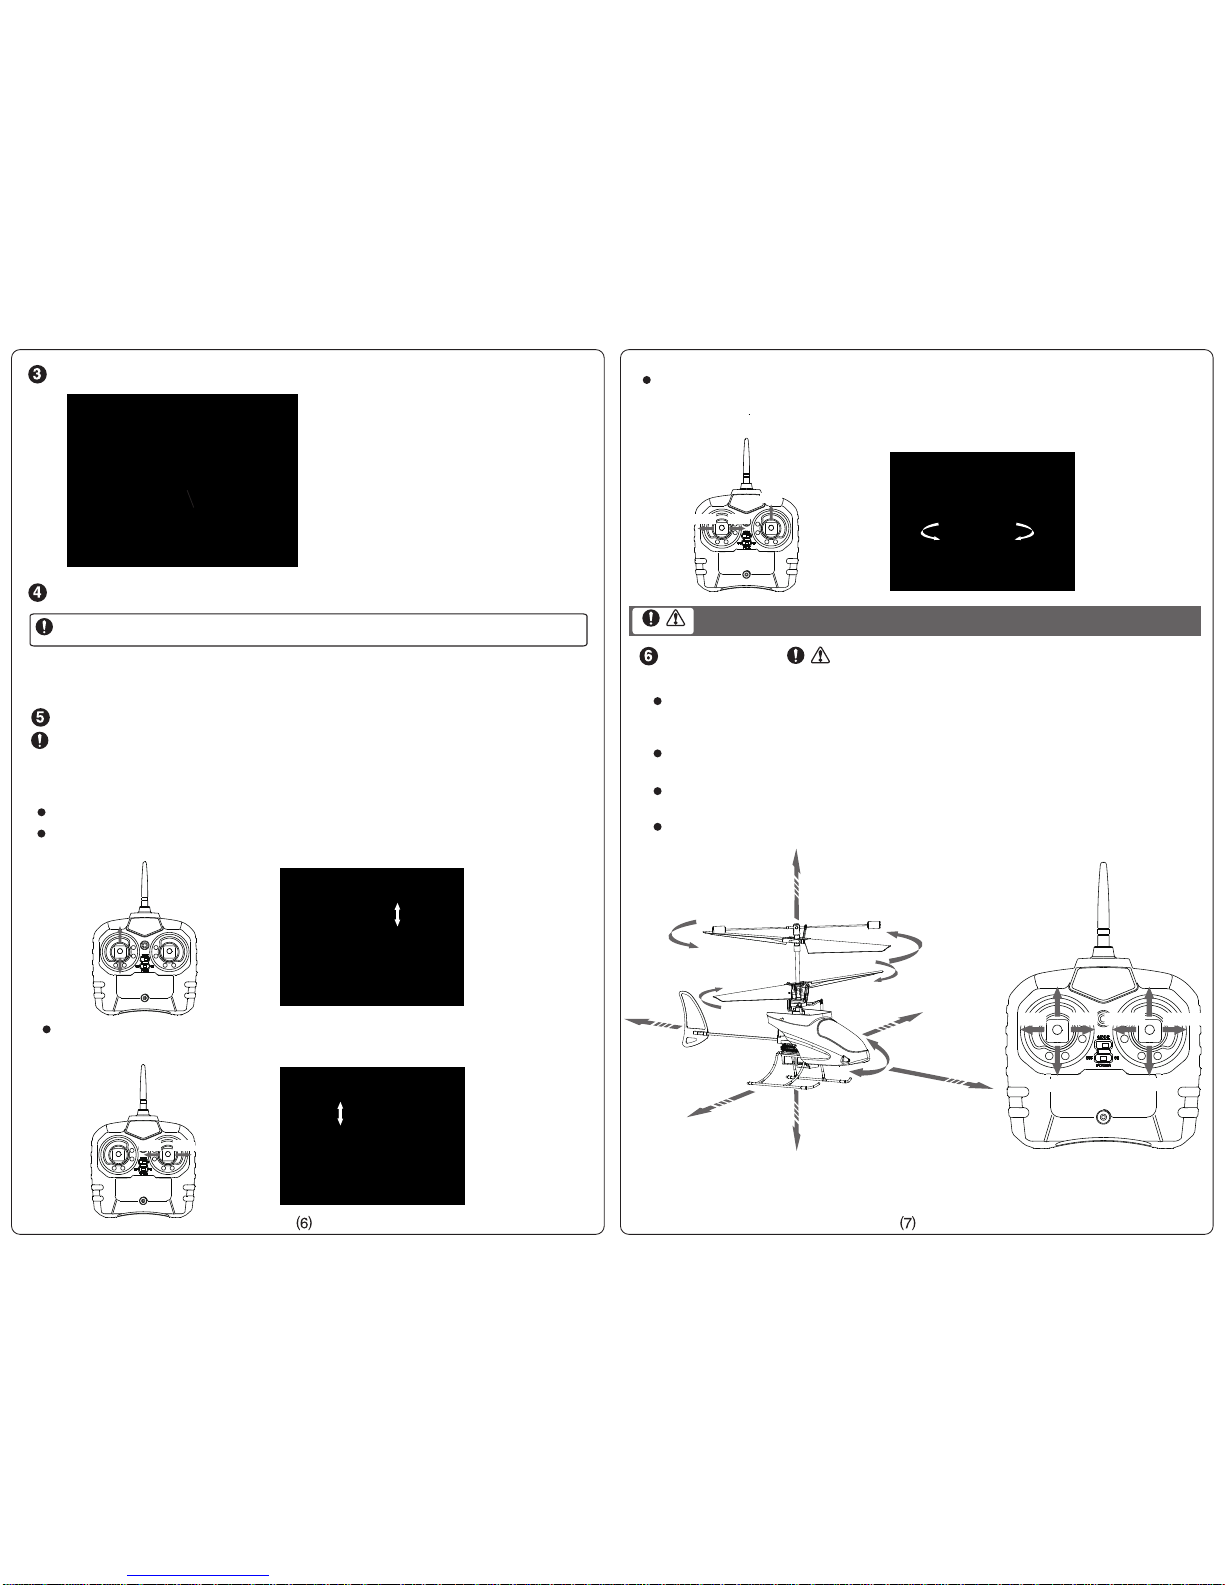
Flying instructions Please read the instructions before your first fly.
You may not completely know the functions of this model before your first fly ,please perform byfollowing
below steps and do related adjustments.This will ensure the model to be mostly protected.
take off
Push the right hand stick slowly till the propller moving fast enough to
lift the helicopter from the ground .Observe the flying status, please
adjust the plane by following below steps if the helicopter can not climb
up vertically .
Status 1: Move forward
Adjust by pushing elevator trim down button .Push once each time till
the problem is resolved.
Status 2: Move backward
Adjust by pushing elevator trim top buttom.Push once each time till the
problems is resolved.
Adjust by pushing rudder trim left button. Push once each time till the
problems is resolved.
Status 3: Slide left
Adjust by pushing aileron trim left button. Push once each time till the
problems is resolved.
Status 4: Slide right
Adjust by pushing aileron trim right button. Push once each time till the
problems is resolved.
Status 5:Nose yaw left
Adjust by pushing rudder trim right button. Push once each time till the
problems is resolved.
Status 6: Nose yaw right
Through above adjustments, the helicopter is supposed to fly very well.
Some necessary accurate trim adjustments will be needed to perfect the
flying performance after the plane is taking off .
Status 1: Move forward
Status 2:
Move backward Status 3: Slide left
Status 4: Slide right
Status 5:Nose yaw left
Status 6: Nose yaw right
Import ant
Notice
push up
AA Battery
Lithium battery
Installing the flight battery
Install the fully charged battery
in the helicopter by sliding it into
the battery mounting slot with
the exposed metal polarity facing
downward just below the main
gear (the LED on the circuit board
of the helicopter blinks fast)
Close the safety protection system
The model has system protection in order to avoid incidental operation. Before its
closed , this model can not receive any other operation instructions.
1.Power on the controller(the power indicator begins blinking)
2.Push the right hand stick from the top to the bottom,controller beeps(power indicator stops blinking)
the LCD on circuit board stops blinking ,this means the safety protection system is closed.
Control test
Although each Blade mSR model is test flown at the factory, it is a good idea to test the
controls prior to the first flight to ensure none of the servos, linkages or parts were
damaged during shipping and handling .This process could prevent crash caused by
mechanical failure to happen and ensures fly safety.
Close the safety protection system.
With the left hand stick pushed up, the right side servo should push the swashplate downward.
With the left hand stick pushed down ,the right side servo should push the swashplate upward.
With the right hand stick pushed to left horizentally, the left side servo should push the swashplate
downward.
With the right hand stick pushed to right , the left side servo should push the swashplate upward.
With the right hand stick pushed up slowly, the propeller starts rotating(but the helicopter remains
on the table), meanwhile push the left hand stick to left, the helicopter will turn to left on the table .
Push the left hand stick to right horizentally, the helicotper will turn to right on the table .
Please make sure everthing is ok before flying the helicopter!
Please contact the manufacturer when any incidents occur.
How to fly Please push the throttle to the bottom immediately when
any incidents occur.
Vertical up and down: push the right hand stick up and down to control the helicopter. The higher
position you set the throttle , the faster the propeller is spinning so the helicopter is climbing up
more qickly.
Forward and backward: Push the left hand stick up and down to control the plane. By pushing up ,
the plane will move forward ,pushing down, move backward.
Side flying to left and right: Control the helicopter by pushing the right hand stick to left and right.
Pushing to left ,the plane side fly to left ,pushing to right ,side fly to right .
Turning to left and right : control the plane by pushing the left hand stick to left and right. Pushing
the stick to left ,the plane turn to left and pushing to right ,turn to right.
Notice
Import ant
Import ant
Import ant
Push up
Push down
Push up
Push down
Push up
Push down
Push left Push right
Push up
Push left Push right
Notice
Import ant
turn left turn right
Descend
Backward
Forward
Turn left Turn right
Climb
Left side f ly Right sid e fl y
Lithium battery
Table of contents


