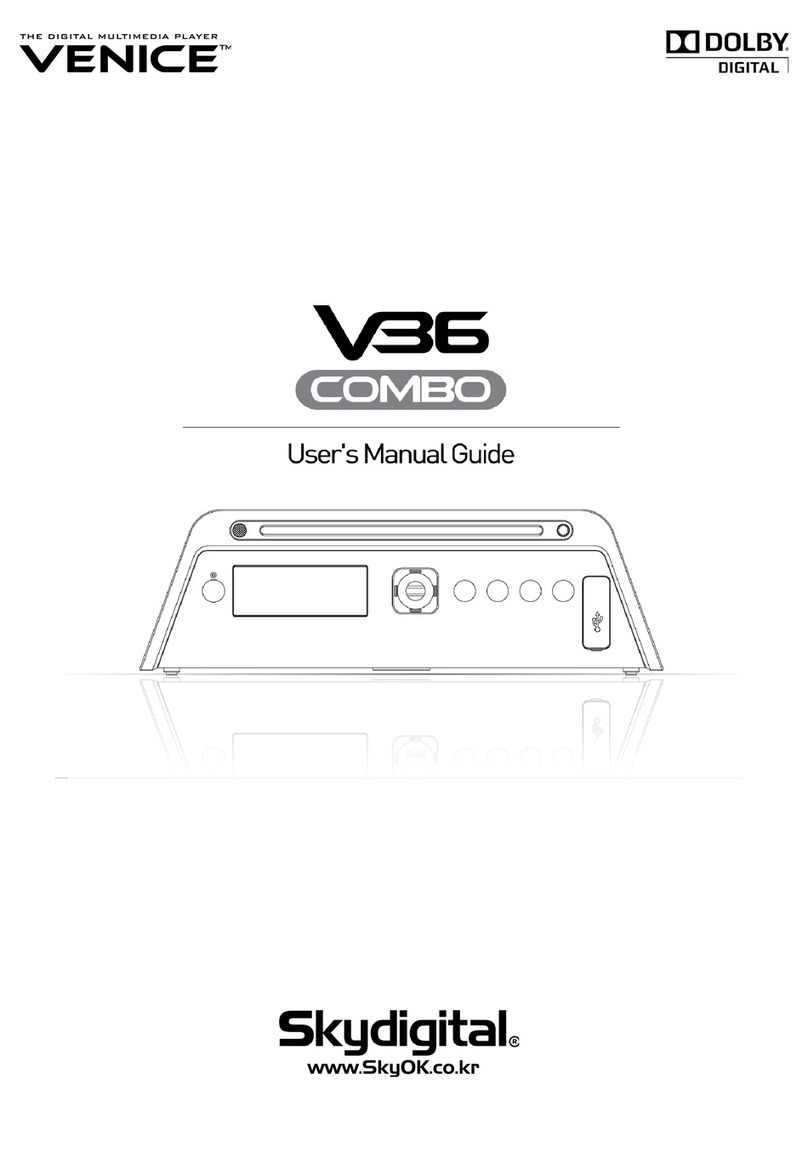
Skydigital Venice V38 User manual

It's an operating manual for both Venice V38 HD Combo and Venice
V38 HD SATA users. In case of DVD related features they're only for
Venice V38 HD Combo.
Please note that Venice V38 HD SATA doesn't include DVD rom
inside and doesn't support any DVD related features
Dolby Digital:
"Dolby" and the double
-
D symbol are trademarks of Dolby Laboratories. Manufactured
under license from Dolby Laboratories.

Important Safety Instructions
Please read all of the safety and operating instructions before using the product.
Precautions on Power
- Do not plug too many devices into a socket. It may cause an overload and result in a electric
shock or fire.
- Do not touch the plug with wet hands. It may cause an electric shock or fire.
- Do not place heavy objects on the power cable or bend it severely. It may cause a fire.
Installation Precautions
- Do not install around any heat sources such as radiators, heat registers, or cooking appliances.
Keep the product out of direct sunlight and locate well ventilated place.
- Keep the product away from moisture and dust as they may cause an electric shock and fire.
- Do not place any magnetic objects around the product. It may damage the data in your DD.
We will not be liable in any way for damages as a consequence of loss or recovery of
information in the DD.
- Do not drop the product cause it to be subject to severe impact on it. It can cause the product
to malfunction.
- After making sure the product and TV are powered off, connect the power and A/V cables.
Usage Precautions
- We are not be liable for any personal or confidential information stored in the DD if it is
damaged by strong impact or abuse. Customers should back up their data before returning the
unit for repair.
- Do not cause any strong impact to the product. The DD or the product itself can be damage
and malfunction.
- Do not connect the cables when the product is on.
Precautions on HDD
- Customers need to format the DD and create partition when you use a new DD for the first
time. No DD jumper setting is required.
- When detaching a DD which has recently been used, please wait for the unit to cool. The heat
of the DD can result in burn.

- Customers need to format the DD and create a partition when they use a new DD for the
first time. There are two kinds of file systems(FAT32 and NTFS) and customers must choose one
of them before formatting.
- If FAT is selected, please maximize the size of the cluster.
If you want to manage (copy & record) an file whose size is more than 4GB, please use the NTFS file
system because FAT32 is limited to a 4GB file size.
Precaution on Disassembling
- Please disassemble the product after turning if off. Do not disassemble the product while the
power is on, it can cause an electric shock or burn.
- Please read this manual before disassembling.
- Do not alter the product. It can cause a fire and will void the warrantee.
- When detaching the DD, please wait until the unit cools. A hot DD can cause a serious burn.
Remote Control Precautions
- Please point the remote controller towards the infrared receiver on the product, otherwise it may
not work properly.
- Please store the remote control properly. If it is lost, please contact our customer service
department for a replacement. Most of the product's function S/W are only accessible via the
remote control.
Maintaining the Product
- Never clean the product with furniture wax, benzene or other volatile liquids since they may
corrode the cabinet.
- Please clean the product with dry & soft cloth after unplugging the power cord.
- Do not turn off the product while upgrading firmware(F/W). It may cause any malfunction.
- User can adjust the speed of cooling fan(low, normal, Turn off). You can set the fan speed low or
turn it off when the noise of fan is annoying. But it can heat up the player and may cause
malfunction. We highly recommend setting the fan speed as normal always especially in
summer or in a car.

Before you start
The product does not include a HDD. the HDD must be purchased and installed separately. The
Product was registered and passed the electromagnetic wave test for home use
Product A/V Cable
User Manual USB Cable
Remote Controller (and battery)
Power Adapter Power Cord

The product was registered and passed the electromagnetic wave test for home use.

Table of Contents
1. Introduction
1.1 Venice V38 HD Digital Multimedia Player) 7
1.2 Specification 8
1.3 Name of Each Part 10
1.4 Part Names Remote Control) 11
2. Installation and Connection
2.1 HDD Installation 14
2.2 PC Connection 15
2.3 Partition and Format in Windows 2000/XP 16
2.4 Linux OS 20
2.5 Mac OS 20
2.6 DATA transfer with PC via USB 21
2.7 Disconnecting to a PC 22
2.8 TV Connection
Composite Cable Connection 24
S-VHS Cable Connection 24
Component Cable Connection 25
HDMI Cable Connection 25
2.9 Audio Cable Connection 27
2.10 Ext. IR Cable connection 28
2.11 Network Connection 29
3. Venice V38 – Menu & Setup Manual
3.1 V38 Main Menu 32
3.2 V38 Setup Menu setting 34
3.3 SETUP Menu MAP 38
3.4 Audio & Video Menu 40
3.5 Network Menu 43
3.6 Playback Option 46
3.7 System Option 48

4. Setup Menu Setting
4.1 Active usage of media data in HDD
Video File playback 50
Audio File playback 56
Photo Slide Show 58
4.2 Active Usage of DVD drive
DVD Title playback 60
Video CD playback 61
Audio CD playback 61
4.3 DVD File Ripping 61
4.4 Playlist 63
4.5 Usage of a USB Host 64
4.6 DVD Backup 64
4.7 Audio CD-Rip 65
4.8 Line-in Recording 66
4.9 Torrent 67
. NETWORK Connection & Setup
5.1 Wire Network Connection H/W Connection) 68
5.2 Wireless Network Connection H/W Connection) 70
5.3 Network Client Setup S/W setup) 71
5.4 SAMBA Network share
SAMBA Network Share under Windows XP 71
SAMBA Network Share under Windows VISTA / 7 76
5.5 Network Server setting
SAMBA server Setting 86
FTP Server setting 90
6. Q&A
92

1. Introduction
1.1 Venice V38 HD (Digital Multimedia Player)
- V38 HD is a state-of-the-art digital multimedia player which plays not only HD (1920 1080P) movies,
pictures, music, but also DVD titles and Audio CDs.
- V38 HD supports convenient and various media contents download via Torrent which is a strong
and powerful P2P engine.
- V38 HD supports various Network server SAMBA, FTP).
- Sigma design 8634/5 chipset solution. Venice V38 HD supports the latest codecs including MPEG4
3.11, 4.0, 5.0, 6.0, 7.0 and plays back AVI, Xvid, MPG, WMV9, TP files as well as MKV, MPEG-4,
AVC-HD(H.264) and VC-1(MP@HL, AP@L3)
- V38 HD supports playback of digital audio files not only lossless audio format such as WEPACK,
FLAC, APE, but also MP3, OGG, WMA, WAV, AAC AC3 and M4A.
- V38 HD supports high definition 240 million pi el) JPEG photo files and slide show function.
- Venice V38 HD plays back the media files from the PC which is connected by (wire/wireless) network.
You can play the file via network without any special and additional program.
- Venice V38 HD plays back the media files in e tension HDD, memory card reader, digital camera,
USB memory.
- Venice V38 HD plays back DVD, VCD, Audio-CD and CD via the installed DVD ROM.
- Supports DTS/Dolby Digital down mi ing function and plays back DTS/Dolby Digital sound into two
channels.
- Venice V38 HD supports HDMI 1.1 format for high definition Audio/Video. HDMI deliver
uncompressed digital video up to 1080p as well as multi-channel digital audio.
- Supports file copy and delete via LAN and USB by remote control.
- Supports the backup and playback of authentic DVD titles.
- Supports MP3 ripping of authentic Audio CDs.
- Supports Line-IN real-time recording (Analogue into MP3)
- Shows information via the front LCD display and the background color can be changed in the setup.
- Supports the size/location/color change of subtitle.
- Supports various subtitle files like smi, id /sub, sub, m2ts(Blu-ray)internal subtitle, lrc, t t, srt, ass, ssa.
- Supports the rapid reaction of remote control and prompt folder switchover.
- Supports DVD juke bo via ISO, IFO file.
- Supports network playback (10/100 LAN)
- Supports continuous F/W upgrades for the stable and convenient usage.

1.2 Specification
LCD Display Playback mode, playback time, video out, audio format, playback title.
Video
format avi, mkv, wmv, mpg, iso, vob, ifo, mp4, asf, tp, trp, ts, m2ts,
mov(H.264), mod, tod, flash
codec MPEG 1/2/4, WMV9(MP@HL), H.264(BP@L3, MP@4.0), VC-1
(MP@HL, AP@L3), DivX, Xvid, FLV(H.264)
resolution
Max 1920
ⅹ
1080P
Audio
codec WAVEPACK, FLAC, APE MP3, WMA, AAC, Ogg, PCM, AC3,
M4A, FLA, WAV
lyric lrc(lyric file)
DTS 2-channel Down mixing , Digital Pass through
Photo JPEG (ISO Standard, Max 240,000,000 Pixels)
Connection
Expansion
USB USB 2.0 Host (3EA)
USB USB 2.0 Slaver (1EA)
LAN Ethernet 10/100Mbps (1EA)
LAN WiFi (USB) dongle. Supports Ralink chipset (optional)
Audio Input Stereo Stereo in (Analogue – Line in recording)
Video Out HDMI (1080p) Component (1080i), Composite, S-Video
Audio Out
Digital Coaxial, Optical, HDMI
Analog 2-channel Stereo, HDMI
ODD DVD, SVCD, VCD, Audio CD, Data CD
Support
subtitle Smi, idx/sub, sub, m2ts(Blu-ray)internal subtitle, lrc, txt, srt, ass, ssa,
Network
Protocol
Client : SAMBA, NFS, UPNP
Server : SAMBA, FTP
Cooling Fan Speed control and off function
power 12/5V DC adapter
Size(Weight) 78mm(H) x 231mm(W) x 174mm(D) (930g)

1.3 Name of ach Part
① Power connect to power adapter)
② HDMI Output ⑧ Extension IR Receiver option)
③ Composite Output ⑨ USB-S Slave)
④ Audio Output stereo) ⑩ S/PDIF Coaxial)
⑤ S-VIDEO Output ⑪ Component Output YPbPr)
⑥ USB-M Host) ⑫ S/PDIF Optical)
⑦ Cooling fan ⑬ LAN wireless LAN is option)

1.4 Part Names (Remote Control)
Before using the Remote Control
- Open the battery cover.
- Insert two AAA batteries into the battery compartment following the indications +,-) inside the
compartment. Close the battery cover.
Button Names
1. Power button : Turn on/off Venice V38 HD
2. Mute button : Mute on/off in media playback.
3. TV button : Start HDTV Option)
4. Setup button : move to setup menu
5. TV-out button : Change the Video Out mode NTSC Video –
PAL Video - NTSC Component - PAL
Component - NTSC HDMI - PAL HDMI)
6. Eject button : Eject DVD/CD
7. Numeric Buttons : English/Number input function in folder
creation.
No '1' button works as open and close of
DVD title menu in DVD.
8. - button : In Photo playback, start/stop photo slideshow. In Audio playback Play - File Repeat -
Folder Repeat - Shuffle)
9. Back button : Delete the previous letter in folder name creation.

10. Bookmark button : Bookmark in media file playback. Start
from the bookmark position.
11. Subtitle button : Start/Stop the subtitle function during
movie file/DVD) playback. Or change
subtitles if the file supports multiple
subtitles.
12. Subaudio button : Start/Stop Audio functions during
movie playback or change sound if the
file supports multiple sounds.
13. Sleep button : Set up the sleep time 120-90-60-30-Off)
14. SKIP -/+ button : Skip the frame in certain interval during playback.
15. CH ▲/▼ button : Move Up/Down in List and Menu Control the playback speed of movie +/-
10% playback speed control from standard 100%)
16. ◀/▶ button : Move Left/Right in List and Menu
17. OK button : File Play/Pause/Select function
18. MENU button : Go to Main Menu
19. STOP button : Stop playback/Go back to the Initial stage in current Menu
20. I◀◀ button : Play previous file or play the previous chapter in DVD
21. ▶▶I button : Play next file and or play the previous chapter in DVD
22. ◀◀ / ▶▶ button : Rewind or forward the media file

23. Ratio button : Change the ration of media file
24. Screen button : Setup Screen Brightness, Darkness and Color
Depth
25. Angle button : Rotate photo 90 degrees clockwise and angle
change in DVD playback
26. Zoom button : Go to Zoom mode. Press 'Stop' and go back
the standard screen. Change the zoom size via
CH ▲/▼ or VOL ◀/▶ buttons)
27. Goto button : Start playback from the position you want
28. Interval button : Change SKIP interval
29. Caption button : Adjust and select location/size/color of
subtitle
30. Scroll button : Scroll Re-position) function on or off
31. REC / Schedule / EPG button : In case HDTV module installed Option) Record/Scheduled
Record/Program Guide)
32. INFO button : Show various information of the media file which being displayed
33. New Folder button : Make New Folder by using English/Number combination of numeric
buttons. Change the mode a capital letter ENG), a small letter ENG),
Number) by pressing <Sleep> button.
34. Copy button : Copy the selected file
35. Paste button : Paste the copied file in current folder
36. DEL button : Delete folder or file
37. Playlist button : Switch Playlist mode and Normal mode
38. Add button : Add new file in Playlist
39. DEL button : Delete the selected file in Playlist
40. Move button : Move the file location in Playlist

2. Installation and Connection of V38
2.1 HDD Installation
The product does not include a HDD.
1. Unscrew the 2 bolts from the bottom of the product.
2. Open the HDD cover.
3. Gently take out the data SATA) & power connector and connect them with the HDD. After they
are connected, slide the HDD into the center of the bracket.
4. Close the HDD cover and screw it tightly
use the shock resistant stickers twofold) if a slim size HDD is used)
5. Format the HDD after connecting the unit to a PC.

2.2 PC Connection
2.2.1 Connecting to PC (Windows XP)
The user needs to format and create a partition when you use a new HDD for the first time.
Please make partition and format of HDD installed in V38 HD) through PC. Below is the
procedure of PC connection to V38 HD with USB cable.
The following steps are for PCs with Windows XP
1. Connect PC and V38 HD with USB cable, and turn on V38 HD by remote or front power button
of it.
When you connect V38 HD with PC, please connect to the rear USB port of it. In case of front USB
port, its internal USB is rather thin and unstable to recognize HDD device.
2. 'USB ON' message on front LCD of V38 HD is coming and "New device detected" will appear
on windows bar.
3. HDD installed in V38 is detected. If HDD in V38 isn't formatted, it can't be detected via my
computer because there's no partition and format.
If it's non and the local disk drive:) window will follow.
This product recognizes and supports FAT32, NTFS and EXT2 file systems.
Caution
V38 HD recognizes and supports FAT, NTFS, EXT2, EXT3, HFS, HFS+.
Please refer to Table 2.3 for more information on HDD partitioning and formatting. (You can also get
more information from the product homepage) A PC with Windows Me or higher OS does not
require a driver.
For Windows 98/ME, you must download the latest driver from our website and install it.
1. Please use the USB cable included with the product. The USB cable has a different shape on both
ends. One side is USB 2.0 "A" plug type and the other is "B" plug(male) type.2. To use Venice V38
HD as portable storage, the power should be connected prior to use.

2.3 Partition and Format in Windows 2000 / XP
1. Connect V38 HD to PC using the included USB cable. V38 HD is recognized as a portable
storage device.
2. Under Windows 2000, you can make a partition and format the HDD through the disk manager
utility
3. Right click on 'My Computer' -> Click 'Manager' -> the 'Computer Management' window will
appear. -> Click 'Disk Management'
4. When the New partition Wizard appears, click 'Next'.

5. Venice V38 HD can recognize the divided partitions 9EA) as well as the Folder Directory).
6. Choose the partition type and format the HDD. If you want to make several partitions, select
'Extended partition'.
7. Select the partition size. If FAT 32 is used, the partition size is limited to 32GB or less.
The HDD capacity will show a lower figure than the original capacity due to the display by binary
and decimal number.


8. Assign the drive letter, and then click "Next"
9. Select the partition format NTFS or FAT) If you select 'Perform a quick format', after making a
partition, the quick format will begin automatically.

10. When finished, the following message appears. Click "OK" to finish.
Venice V38 HD supports both the NTFS and the FAT32 file system. The two systems are almost
identical, but we recommend the NTFS file system because NTFS supports files which are larger
than 4GB and is more stable. In your PC has its operating system in a FAT32 HDD, it will not
support the NTFS file system.
For an older HDD or a HDD used in other OS such as Linux, Venice V38 HD may not recognize
them. In this case, the user needs to delete and rearrange the partition, then reformat.
Table of contents
Other Skydigital Media Player manuals
Popular Media Player manuals by other brands

Atoll Electronique
Atoll Electronique ST300 SIGNATURE owner's manual

Streaming Network
Streaming Network iRecord user manual
iPazzPort
iPazzPort The Pearl SY-20-19VC manual
Cayin
Cayin SMP-2200 quick start guide
ViewSonic
ViewSonic VMP52 user guide

Sony
Sony NW-HD5 Operating Instructions (English) operating instructions
