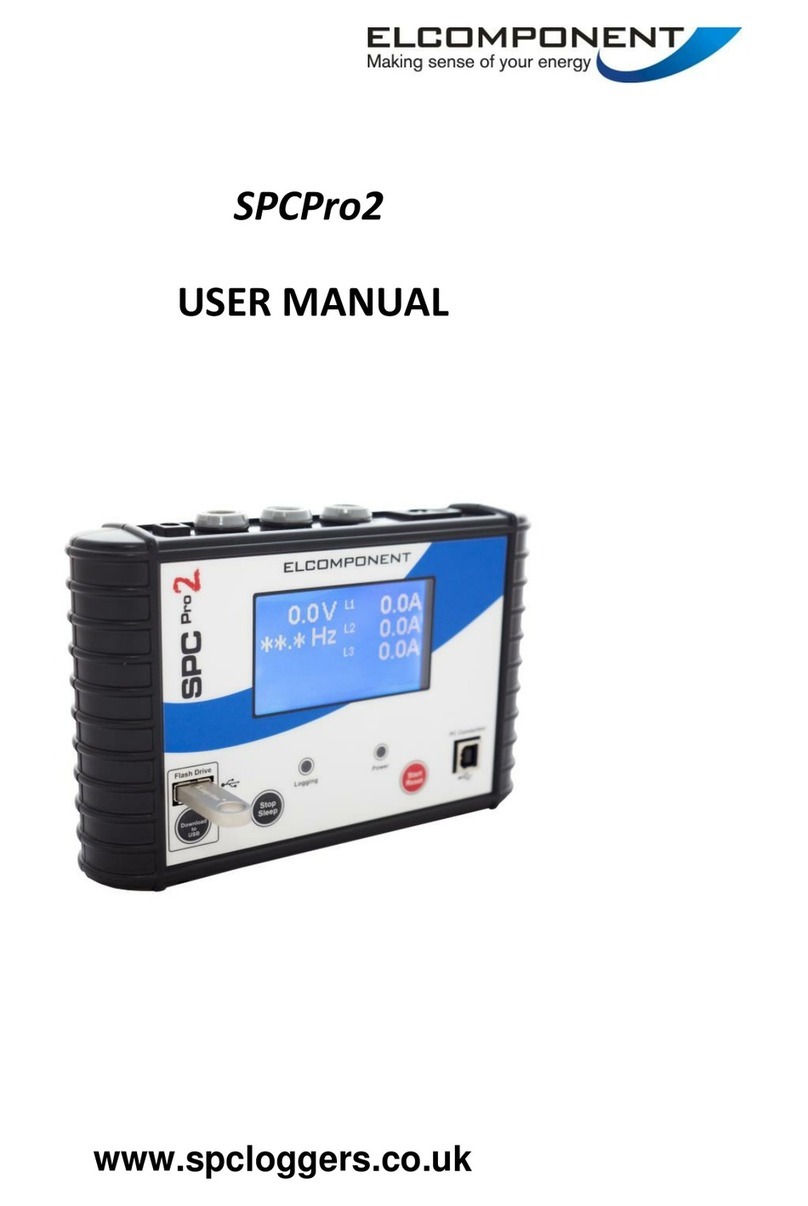
Skyla HB1 User manual

skyla
TM
Clinical Chemistry Analyzer
HB1
Operator’s Manual
For In-Vitro Diagnostic Use Only
Technical support and customer service information:
Tel: +886-3-611-8511
Fax: +886-3-579-5393
E-mail: support@skyla.com
Website: www.skyla.com
Manual Text, Rev. 1B
PN: 7B25000005HB
LITE-ON
Technology
Corp. H.S.P.B.
No. 8, Dusing Road, Hsinchu Science Park
Hsinchu, Taiwan, R.O.C.
MT Promedt Consulting
GmbH
Altenhofstr. 80
D-66386 St. Ingbert
Germany

i
Table of Content
SECTION 1: GENERAL INFORMATION .......................................... 1-1
1.1 Overview ..................................................................................... 1-1
1.2 Universal Precautions .................................................................. 1-1
1.3 Introduction ................................................................................. 1-2
1.4 Technical Support ....................................................................... 1-3
1.5 Consumables and Supplies .......................................................... 1-3
1.6 Understand the Symbols.............................................................. 1-3
SECTION 2: SETUP AND QUICK START ......................................... 2-1
2.1 Pre-installation Check ................................................................. 2-1
2.2 Specifications and Installation Characteristics ............................ 2-3
2.3 Installation and Setup .................................................................. 2-4
2.4 Touchscreen Interface ................................................................. 2-6
2.5 Power-On and Initialization ........................................................ 2-8
2.6 Maintenance and cleaning ......................................................... 2-11
SECTION 3: SAMPLE ANALYSIS ....................................................... 3-1
3.1 Functions of Reagent Disc .......................................................... 3-1
3.2 Sample Preparation ..................................................................... 3-2
3.3 Preparation Before Testing.......................................................... 3-4
3.4 Dispensing the Sample ................................................................ 3-6
3.5 Performing a Test ........................................................................ 3-8
3.6 Test Results ............................................................................... 3-10
3.7 Reviewing the Test Results ....................................................... 3-11
3.7.1 Symbols Used in Test Reports .................................. 3-12
3.7.2 Symbols Used in internal QC Reports ...................... 3-15
3.8 Custom Reports ......................................................................... 3-17
3.9 Performing Quality Control ...................................................... 3-18

ii
3.9.1 Selecting an External Control ................................... 3-19
3.9.2 Using a skylaTM Reagent Disc for the Quality
Control Test ............................................................. 3-19
3.9.3 Performing a Quality Control Test............................ 3-19
3.9.4 Quality Control Test Results .................................... 3-20
SECTION 4: REVIEW OF HISTORICAL DATA & OPERATION
INFORMATION ............................................................... 4-1
4.1 Review of Historical Data (Recall) ............................................. 4-1
4.1.1 Searching for Test Records (Search) ...........................4-1
4.1.2 Browsing Test Results (Browse) ................................4-4
4.1.3 Searching for System Quality Control Test Records
(Controls) ..................................................................4-5
4.2 Help Information ......................................................................... 4-6
SECTION 5: SYSTEM SETTINGS ....................................................... 5-1
5.1 System Settings ........................................................................... 5-1
5.1.1 System Version ..........................................................5-1
5.1.2 Printer Selection ........................................................5-1
5.1.3 Screen Brightness Adjustment ....................................5-2
5.1.4 eGFR value ................................................................5-2
5.1.5 Control (Performing Quality Control) ........................5-3
5.1.6 Custom Report ...........................................................5-3
5.2 Administrator Settings: ............................................................... 5-4
5.2.1 Screen Calibration .....................................................5-6
5.2.2 Date & Time ..............................................................5-7
5.2.3 Reference Range ........................................................5-7
5.2.4 Marker Unit ...............................................................5-9
5.2.5 Backup Records ....................................................... 5-10
5.2.6 System Upgrade ....................................................... 5-10

iii
5.2.7 Password Change ..................................................... 5-11
5.2.8 System Default ........................................................ 5-12
5.2.9 Operator Control ...................................................... 5-12
5.2.10 Operator List............................................................ 5-13
5.2.11 Operator Creation .................................................... 5-13
5.2.12 RS232 Baud Rate Setting ......................................... 5-14
5.2.13 Demo Mode ............................................................. 5-14
5.2.14 QC Report ............................................................... 5-15
5.2.15 Buzzer ..................................................................... 5-15
5.2.16 Hospital Name ......................................................... 5-16
5.2.17 Patient Name ........................................................... 5-16
5.2.18 Language ................................................................. 5-17
5.2.19 Automatic Printing ................................................... 5-17
5.2.20 Save Log to USB ..................................................... 5-17
5.2.21 & 22 Export Databse & Import Databse ................... 5-18
5.2.23 Error Log ................................................................. 5-18
SECTION 6: TROUBLESHOOTING & ERROR HANDLING......... 6-1
6.1 Troubleshooting .......................................................................... 6-1
6.2 Error Messages & Handling ........................................................ 6-3
APPENDIX I: RS232 COMMUNICATION PROTOCOL
SPECIFICATIONS ....................................................... A-1
APPENDIX II: BACKUP RECORDS DATA EXPORT
SPECIFICATIONS ....................................................... B-1

1-1
skylaTM
Clinical Chemistry Analyzer
skylaTM Reagent Discs
(Reagent discs must be stored at
temperatures between 2 to 8°C)
Section 1: General Information
1.1 Overview
The skylaTM Clinical Chemistry Analyzer, together
with
its exclusive H
B1 reagent disc series, offers a quick,
easy and accurate method
to measure various
biochemical markers in whole blood, plasma, or serum.
CAUTION :
1. If the skylaTM Clinical Chemistry Analyzer
is
operated in any manner different
from those
described in this manual, the analyzer may
produce no or inaccurate results.
If used outside
safe design limits, the skylaTM
Clinical
Chemistry Analyzer
may not function as
intended and may be hazardous.
2. The skylaTM Clinical Chemistry Analyzer
should
only be used with skylaTM HB1 series of
reagent
discs.
1.2 Universal Precautions
As the use of this device involves clinical blood
samples
, health and safety regulations require that
Universal Precautions be observed at all times when
handling the samples
. Handling of used reagent discs
and the parts of the analyzer that may have
come into
contact with samples must be treated in accordance w
ith
relevant legal regulations in the locality or
standard
operation procedures of affiliated units.

1-2
1.3 Introduction
The skylaTM Clinical Chemistry Analyzer
provides
clinical testing laboratories of medical facilities
and
clinics with an in-vitro clinical chemistry diagnostic
tool
that is compact, portable, and reports
rapid results. The
portable design of the clinical chemistry analyzer
utilizes
precision photometric
measurement technology,
combined with the use of specific reagent discs. The
reagent disc contains a set of dry assay reagents
that are
used in the quantitative testing of various biomarkers in
the blood sample.
Features of the clinical chemistry analyzer include:
Compatibility with lithium-
heparinized whole blood
samples without the need for sample dilution.
Operation by a colored touchscreen panel.
Fully automated system for simple operation.
Rapid analysis, reporting
test results in approximately
15 minutes.
Testing a maximum of 15 blood
clinical chemistry
markers in a single analysis.
Power-on self-test capability, ensuring
instrument
stability.
Internal quality control functionality, ensur
ing
reliable test results.
Built-in thermal printer for immediate printing of
the
test results.
A USB interface for connecting to an external printer
,
or exporting the test results.
A RS232 interface for connecting with
external
instruments or computers.
A USB interface supporting an
externally connected
barcode scanner for patient record numbers.
A RJ45 LAN port for communication with
external
PC networks.
The reagent disc is a round plastic disc that contains dry
assay
reagents. The automated operation protocol of the

1-3
analyzer includes blood separation, sample
dilution, and
reagent reaction in the reagent disc. Optical
signals are
then analyzed by the analyzer to obtain the test results
.
Use of the skyla
TM
Clinical Chemistry Analyzer
does
not require complex operational training.
Note: The clinical chemistry analyzer
screen
captures
displayed in this manual are for
illustration only, and may differ from system
displays during actual operations.
Warning:
Please do not attempt to
disassemble or repair the
skyla
TM
Clinical Chemistry
Analyzer by yourself. This will
void the warranty.
Technical Support &
Customer Service
Contact Tel:
Tel: +886- 3- 6118511
Fax: +886- 3- 5795393
E-mail: support@skyla.com
1.4 Technical Support
skyla
TM
technical support personnel of skyla
TM
(or
authorized agents) are available to assist users
regarding the operation of the skyla
TM
Clinical
Chemistry Analyzer.
1.5 Consumables and Supplies
To order consumable supplies or additional accessories,
please contact the customer service representatives
or
authorized distributors.
1.6 Understand the Symbols
The definitions of symbols found on the skyla
TM
Clinical Chemistry Analyzer and
its peripherals are as
follows:
In Vitro Diagnostic Medical Equipment
Caution
Biohazard. Please strictly
adhere to laboratory practices
when handling blood and body fluid samples;
consider
all samples
to be potentially infectious and handle them

1-4
with caution. Please refer to the biological medical
waste disposal regulations of the locality.
Do not reuse
EC authorized representative
Date of manufacture
Manufacturer
Temperature limits (2-8°C)
Use by date
Serial number
Lot number
Consult instructions for use
Direct current
RJ45 LAN network connection
IOIOI
RS232 serial port
USB port
Power button

2-1
Package Checklist
Clinical chemistry analyzer
Power adapter & power
supply cord
One roll of thermal printer
paper
200 μL micropipette
One box of pipette tips
(96 tips)
Operator’s manual
Quick guide of operation
Quick guide of error code
Warranty card
External barcode scanner
and stand (optional)
USB-to-RS232 connection
cord (optional)
Section 2: Setup and Quick Start
2.1 Pre-installation Check
1.
Remove the skyla
TM
Clinical Chemistry Analyzer
from the shipping box
. Place the analyzer on a clean
surface off the floor. Do not expose the analyzer to
direct sunlight or any heat source.
2.
Please refer to the checklist on the
left and check that
the components and other peripherals received with
the analyzer are present.
Checklist
No.
Item Picture of Item
1
Clinical Chemistry analyzer
2
Power adapter & power
supply cord
3
Roll of thermal printer paper
4
200 μL micropipette
5
One box of pipette tips (96
tips)
6
Operator’s manual
7
Quick guide of operation
8
Quick guide of error code
9
Warranty card

2-2
10
External barcode scanner
and stand (optional)
11
USB-to-RS232 connection
cord (optional)
3. After the successful setup, fill in
the warranty card
and mail it to LITE-ON Technology Corp. H.S.P.B
.
or email to support@skyla.com for
receiving
periodic mail or email regarding software upgrades
and skylaTM Clinical Chemistry Analyzer
product
information.

2-3
2.2 Specifications and Installation Characteristics
Dimensions: Height:
Width:
Depth:
300 mm
223 mm
285mm
Weight: Analyzer:
5.5 kg (12.1 pounds)
Ambient Operating Temperature:
Operating Humidity:
Device Storage/Transportation
Temperature:
Device Storage/Transportation
Humidity:
Reaction Temperature:
Thermal Protection Rating:
Waterproof Class:
Altitude:
Power Requirements:
Main Supply Voltage:
Transient Over voltages:
Pollution:
Consumables:
Quality Control:
Samples:
Sample Volume:
Warm-up Time:
Test Time:
Touch Panel:
Printer:
Communication:
Memory Capacity:
Indoor 10 - 32C (50 - 89.6F)
<95% relative humidity (non-condensing)
<65C(149 F)
<90% relative humidity (non-condensing)
37C (98.6 F)
100C (212 F)
Ordinary equipment (IPX0)
2,000 m (6,562 ft)
100-240 volts AC; 50-60 Hz; Output 12 Volts DC; 5.0 A
Fluctuations must not exceed ± 10% of the nominal voltage
Installation Category II in accordance with EN610101-1
Degree 2 in accordance with IEC 664
Reagent disc/pipette tip
Self-calibration function/internal quality control function for each reagent disc
Serum and lithium-heparinized whole blood or plasma
200 µL ±10 μL
Less than 15 minutes (may exceed this time limit in unique environments)
15 minutes
5” TFT color LCD touchscreen
Built-in thermal printer; can be connected to compatible external printers
USB port: 1x ; RS232 port: 1x ; RJ45 network port: 1x
Capacity for up to 50,000 test results

2-4
2.3 Installation and Setup
This section provides important information for the
installation and setup of the skyla
TM
Clinical Chemistry
Analyzer.
Exterior function diagram
Installation Location
Place the skyla
TM
Clinical Chemistry Analyzer
on a
level surface off
the ground and be sure that the surface
is:
Free from vibration.
Clean and free of contaminants.
Indoors at a room temperature of 10–32 °C
(50 - 89.6 °F).
Away from direct sunlight and other heat sources.
At least 10cm from any
wall to ensure proper
ventilation around the analyzer and access to
the
Power button
Disc drawer
Touchscreen LCD
Built-
in thermal printer
RJ45 network port
USB port
Power socket
RS232 port

2-5
Note:
The clinical chemistry
analyzer should not share the
same circuit with other
high-current devices. A surge
protector is recommended to
protect the clinical chemistry
analyzer.
Note:
The clinical chemistry
analyzer supports few USB
interfaced external printer
models. Please contact your
skyla
TM
authorized technical
support personnel for the
latest information on external
printer models.
power connector, RS232 and USB ports at the back
of the analyzer. At t
he same time, there must be at
least 15 cm of space to the front of the analyzer
to
ensure normal operation of the disc drawer.
Power Supply
In addition to the clinical chemistry analyzer and power
supply cord, the analyzer
comes with a power adapter.
Connect the power adapter into
the clinical chemistry
analyzer on one end and
plug the power supply cord into
a grounded electrical outlet.
Printer Paper
Open the top cover of the built-in thermal
printer and
place the printe
r paper into the paper slot. Confirm that
the heat-
sensitive side is facing the correct direction (the
arrow sticker on the roll should point downwards).
Connecting an External Printer
If you choose to use an externally connected printer
instead of the built-
in thermal printer, please plug the
external printer into the skyla
TM
Clinical
Chemistry
Analyzer’s USB port and switch the system settings to
an external printer. Refer to section 5.1.2 for details.

2-6
Connecting an External Barcode Scanner
If you purchase an external b
arcode scanner (CIPHER
1500H) for p
atient ID scanning, please connect it to the
USB port on the clinical chemistry analyzer
’s rear panel.
The clinical chemistry analyzer
’s operating system will
automatically detect and launch the scanner
when it’s
connected.
Connecting Other External USB Devices
Using a USB
flash drive, you can export test results or
historical data to the USB drive for data backup.
Connecting an External Device via the RS232 Serial
Port
The clinical chemistry analyzer
can be connected to
external equipment or personal computers via the RS232
serial port. The administrator can set different transfer
baud rates for the RS232 serial port according to needs.
Connecting to a personal computer
via USB is possible
by using a RS232-to-USB
connection cord (optional
purchase).
Connect to LAN Network (RJ45)
If you need to link the clinical chemical analyzer
to the
laboratory’s LAN via RJ45, please contact
the
authorized technical support personnel.
Icons for touchscreen
interface:
Page Up, Increase
Page Down, Decrease
Page Back/Next
2.4 Touchscreen Interface
The clinical chemistry analyzer
is equipped with a
touchscreen which is easy to operate and facilitates
rapid
interaction between the user and the
system software
interface during function selection and test execution.
The user can utilize the touchscreen for procedural
instructions on completing a test. The interface provides
information about function
, test progress, system
settings, and other messages.

2-7
Backspace
Back
Confirm (Next step)
Home (Home menu)
Print
Export to RS232
Dump to USB
Show all test results
(regular reports)
Show custom report
option activated
option not
activated
Analyte selected
Selection is being
updated
Show numerical
keypad
On-Line help
explanation
Input the password or patient ID using the keypad
on
touchscreen (up to 12 digits).
To change typed
information, please use the
backspace or delete key on the touch screen
to
move the cursor on screen backwards
in order to
delete a typed character.
Use the up and down
arrow keys on the
touchscreen to browse the displayed list of items or
to increase or decrease a displayed value.
Use the page back and page next
keys on
touchscreen to navigate between pages.
All clinical chemistry analyzer functions are
operated
via various icons on touchscreen, as well as specific
keys that appear on screen.
Press the back
key on touchscreen to cancel a
choice and return to the previous step, or to move
backward through a series of screens/items.
Press OK to confirm the step.
Press HOME to return to the top layer (Home).
Press Printer to prin
t the test results shown on
screen. To print results with the built-
in thermal
printer or external printer, select this option under the
system settings menu.
Press Export to RS232
to export the test data
shown on screen to an external information device via
the RS232 interface.
Press Dump to USB
to export all of the
historical test data in the system via USB.
Press Show all test results
to display results for
all test items on the reagent disc (regular report).
Press Show custom report
to display the custom
report on screen.
means an option has been activated.
means an option has not been activated.
means an analyte
has been selected for display
in the Custom Report function.

2-8
English keyboard
Space
Uppercase /Lowercase
/ Number
Warning:
Please do not touch or scratch
the touchscreen with sharp,
hard objects to avoid
damaging the screen.
yellow frame means that the selected
value is currently being updated.
means to show the numerical keypad for
manual key-
in when using an external barcode
scanner.
Provides an on-line help explanation.
English keyboard. Press one time to show the
left character; press twice to show the right character.
Enter space.
Switch the keyboard among uppercase,
lowercase and number.
Power-On:
Press the Power button to turn
on the analyzer. Warm-up
requires up to 15 minutes
(this time may be exceeded in
unique environments)
Built-in Self-test:
System self-test and precision
calibration.
2.5 Power-On and Initialization
Power-On and Built-in Self-tests
Turn the clinical chemistry analyzer
on and off by
pressing
the power button on the front panel. The system
automatically launches the warming procedure
and
completes system self-test after power on.
It may take up
to 15 minutes for the system to be ready
(depending
upon room temperature).
Warm boot screen after start up
Low temperature warm boot screen after start up

2-9
Initialization:
The first time the clinical
chemistry analyzer is turned
on, you will be prompted to
set the “Language”,
“Password” , “Date & Time”,
and “Analytes Unit” on
screen.
Initialization
The first time the clinical chemistry analyzer is turned
on, once the warm up and system self-
test are complete,
the language menu in the operator interface will appear
on screen. The manager should tick and click “OK”.
After the language is set, the screen to set the password
will appear. Please input a numerical password and then
enter the same password again for confirmation. Then
press “OK.”
If the administrator presses “OK”
button without
entering any numbers in both “New P
assword” &
“Confirmation”
boxes, the password will no longer be
required by the system.
Once the system password setting is complete, the
“Date
& Time” setup screen will appear. Please select
the date
edit box and use the up and down
arrow keys
to adjust to the correct date. Press the “OK”
icon to save
the changes on the system.
After confirming the time is
correct, select the “Format”
square and choose the usual
date format. Finally, press “OK” to save information
in
the system.

2-10
Home Menu:
When the “START” icon
appears on screen, sample
analysis may begin.
After completing the date and time setting, the
all
analytes units setting menu will appear
on screen. Select
and press “OK”
to complete setting. The system
processing
will take about 10 seconds, and it will
automatic be directed to the system homepage.
Home Menu
After completing the warm-up and system self-
tests, the
“START”
icon will appear on screen for sample analysis
to be commenced.
The screen displayed at this time is referred to as the
Home (top level
) menu. You can return to the home
menu from any stage by simply pressing the icon.
Press the “START
” icon on screen and the reagent disc
drawer at
the front of the analyzer will automatically
open up. Place the prepared reagent disc inside to start
the analysis.

2-11
Power-Off:
Press the power icon on
screen and press “YES” to
confirm power-off.
Prior to inserting a reagent disc into
the clinical
chemistry analyzer
, check that the expected reference
ranges and specified units have been set up properly.
Also check if there is thermal paper in the built-
in
thermal printer, or, if it applies, whether setup of
the
external printer and other connected devices are
complete.
Power-Off
Please turn off the clinical chemistry analyzer
if it will
not be used for a prolonged period. Press the power icon
on screen, and press “YES” to confirm power-off.
2.6 Maintenance and cleaning
LITE-ON suggests the skyla
TM
Clinical
Chemistry Analyzer
should be cleaned routinely
at least once per week.
Use a clean cloth dampened with cleaning
solution (ex. 10% commercial bleach solution) to
wipe the
exterior surface of the analyzer. When
using the cleaning solution for the first time
gently wipe a small area of the analyzer surface
to ensure no obvious damage occurs before
cleaning the entire surface.
If the exterior surface of analyzer is stained wit
h
blood then clean immediately using a cloth
dampened with 10% commercial bleach solution.
When necessary, clean the interior area of disc
drawer using the following steps:
1.
Press the “START” icon on screen to open the
disc drawer.
2. Use a cotton swab d
ampened with 10% commercial
bleach solution to wipe the drawer area.

2-12
3. Use a dry cotton swab to wipe the same area.
4. Close the disc drawer.
The disc drawer will automatically
close in 15
seconds. If the cleaning procedure is not yet
finished, please press the “START” icon
again to
open the drawer.
Table of contents

