09
RSTW
08 RSTW
CALIBRATION & FACTORY RESET
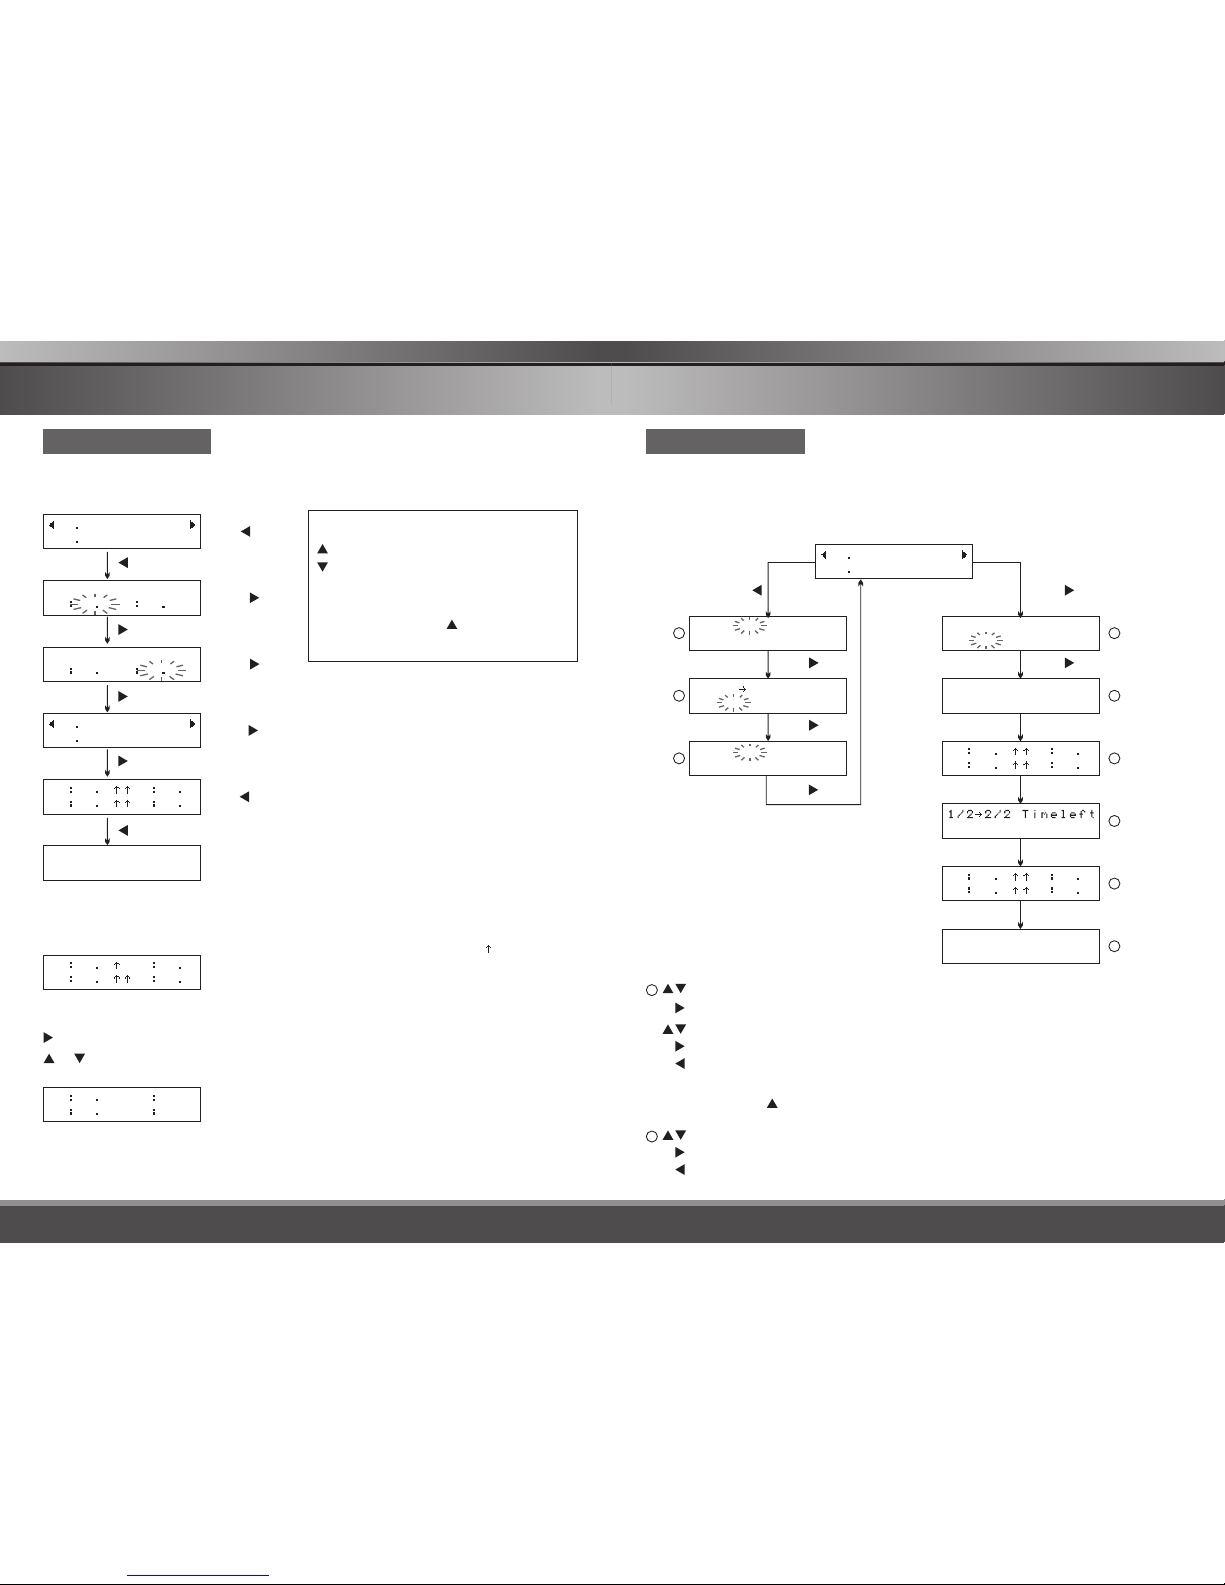
CALIBRATION
You can calibrate your tire warmers with you thermometer.
Calibration is required when the temperature of tire warmers are changed.
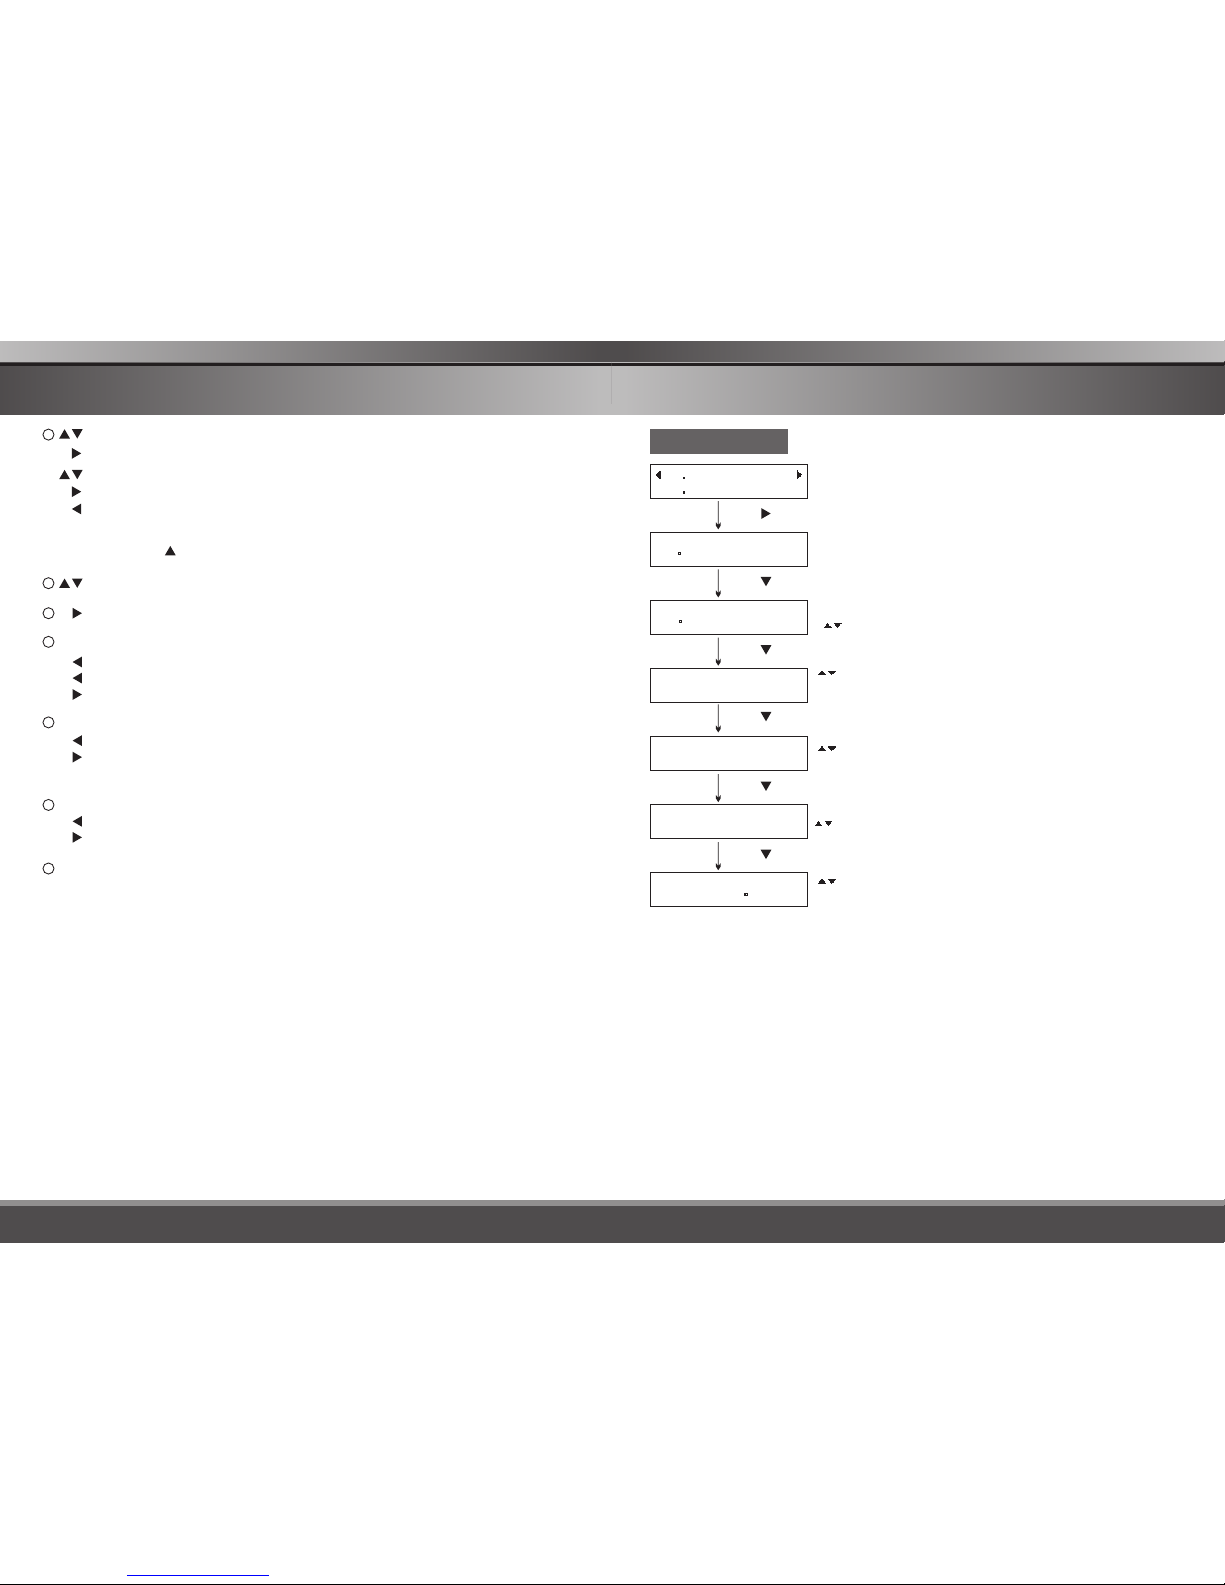
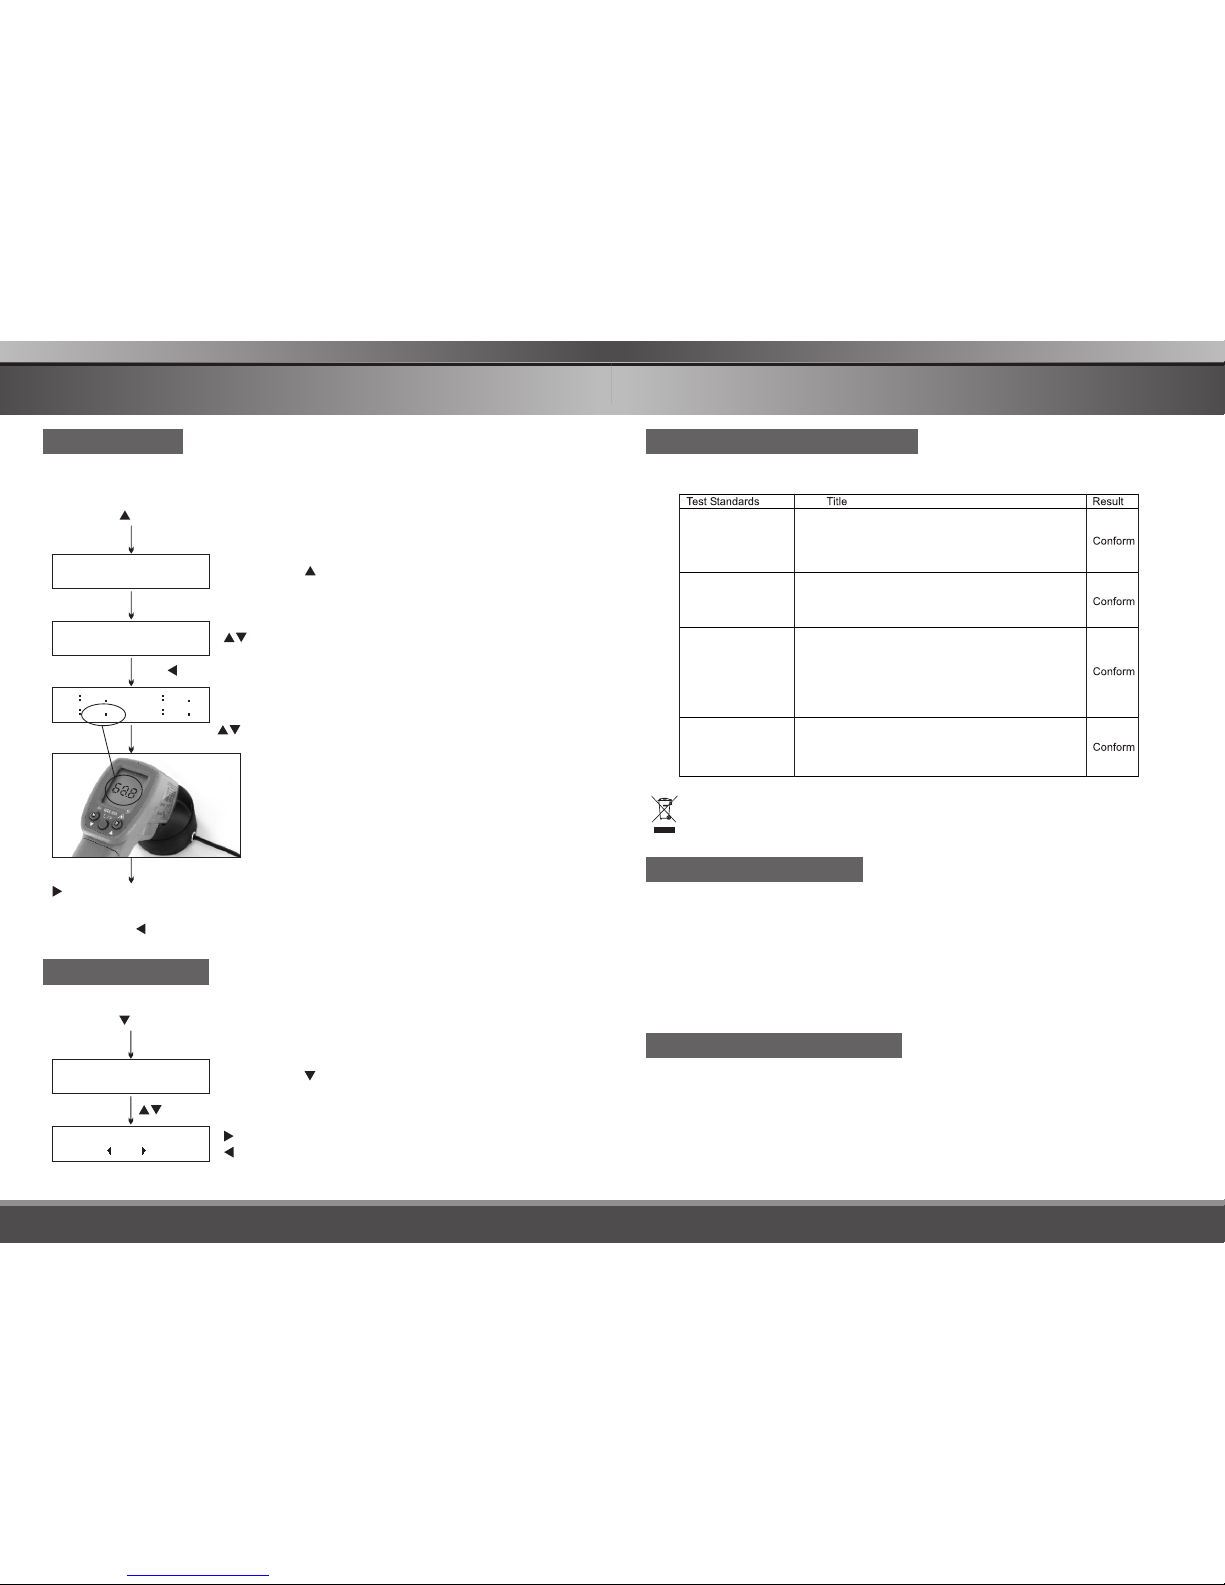
With push key and hold, input DC power.
h a n d o f f p l e a s e
T E M P a d j u s t m o d e Stop pushing button.
Determine target temperature for calibration.
* T a r g e t T E M P *
OFF
F R 6 9 2 R R 6 5 6
F L 6 8 8 R L 7 1 0
FL will blink first.
Check the temperature of FL
with you're thermometer
Match the temperature to the value of thermometer
Move cursor to next step.
Calibrate FR-RL-RR warmers as same way.
If you push key on FL, step-W will save all calibration data and will restart itself.
LEFT
You can reset the setting when you want to return all values to the original values.
With push key and hold, input DC power.
h a n d o f f p l e a s e
Factory reset Stop pushing button.
Factory reset then goes to Main menu.
Exit and goes to Main menu.
FACTORY RESET
Will ask you if factory reset.
N O Y E S
Factory reset
LIABILITY EXCLUSION & WARRANTY
We guarantee this product to be free of manufacturing and assembly defects for a period of one year from the
time of purchase. The warranty only applies to material or operational defects, which are present at the time of
purchase. During that period, we will repair or replace free of service charge for products deemed defective due to
those causes.
For any repair or replace service, please contact your dealer in the first instance, who is responsible for
processing guarantee claims. This warranty is not valid for any damage or subsequent damage arising as a result
of misuse, modification or as a result of failure to observe the procedures outlined in this manual.
This tire warmer is designed and approved exclusively for use with for 1/10 size touring car’s rubber tires stated in
Instruction Manual. SKYRC accepts no liablility of any kind if the tire warmer is used for any purpose other than
that stated. We are unable to ensure that you follow the instructions supplied with the tire warmer, and we have no
control over the methods you employ for using, operating and maintaining the device. For this reason we are
obliged to deny all liability for loss, damage or costs which are incurred due to the incompetent or incorrect use
and operation of our products, or which are connected with such operation in any way. Unless otherwise
prescribed by law, our obligation to pay compensation, regardless of the legal argument employed, is limited to
the invoice value of those SKYRC products which were immediately and directly involved in the event in which the
damage occurred.
WARRANTY AND SERVICE
LIABILITY EXCLUSION
This symbol means that you must dispose of electrical from the General household waste when
it reaches the end of its useful life. Take your device to your local waste collection point or recycling
centre. This applies to all countries of the European Union, and to other European countries with a
separate waste collection system.
devices
CONFORMITY DECLARATION
SKYRC satisfies all relevant and mandatory CE directives and FCC Part 15 Subpart B: 2008.
The product has been tested to meet the following technical standards:
RSTW Tire Warmer
EN 61000-6-3: 2007
+A1:2011
Electromagnetic compatibility (EMC)—Part 6-3:Generic
Standards
-Emission standard for residential, commercial and light-
industrial environments
Electromagnetic compatibility(EMC)- Part 3-2:Limits-Limits
for harmonic current
emissions(equipment input current≤16A per phase)
Electromagnetic compatibility (EMC)- Part 3-3:Limits-
Limitation of voltage
changes, Voltage fluctuations and flicker in public low-
voltage supply systems. For equipment with rated current
≤16A per phase and not subject to conditional connection
Electromagnetic compatibility (EMC)—Part 6-1:Generic
Standards
—Immunity standard for residential, commercial and light-
industrial environments
EN 61000-3-2: 2006
+A1:2009+A2:2009
EN 61000-3-3: 2008
EN 61000-6-1: 2007