Sly Electronics SL012G User manual
0

1
Please read this user manual very carefully before proceeding.
Please use the player properly to prevent any damage
1 Do not leave the player in a place subject to moisture or temperature higher than 35℃ or lower
than 5℃.
2 Do not repair the player by yourself.
3 Do not get the player wet or drop in water.
4 Please bac up important data onto your personal computer, as repair or other causes may
result in data loss.
5 Tampering with the product will void warranty.
When using the player, please pay attention to your health and safety.
1 Do not use the earphones while driving or riding a bicycle.
2 It may cause traffic accident if you turn up the volume of the player while wal ing down the
street.
3 Do not turn up the volume too high; doctors warn against prolonged exposure to high volume.
4 Stop using the device or turn down the volume if ringing occurs in your ears.
5 Always use the accessories provided by or approved by our company; do not spray water on
the player.
**Warranty is void when you open the player**
Contents
Understand Your Product
Product Features ...............................................................................
Pac age Contents .............................................................................
Button Function and LCD Display ......................................................
3
4
5

2
Charge Your Player ...........................................................................
6
Getting Started
Connect to Computer ……………………………...…………………..…
Disconnect from Computer ………...…………………..……………….
Power On / Power Off …....................................................................
Menu Selection ..................................................................................
Music …………...................................................................................
Record ……….....................................................................................
Voice ..................................................................................................
System Setup .....................................................................................
Tele Boo ...........................................................................................
EBoo .................................................................................................
8
8
10
10
11
15
16
16
17
19
roubleshooting…………………………………………………………..…… 19
A
APPENDIX:
::
:User’s Guide of AM ……………………………………………..…… 21
Product Features
Clip on design for easy carry and use
Supports MP3, WMA & WAV audio/music file formats
Built-in flash memory allows you to store extra data via PC.
USB 2.0 high speed
3
Record outside voice in WAV format
7 EQ mode (Natural, Roc , Pop, Classic, Soft, Jazz and DBB)
Multi play mode, Normal, Repeat One, Folder, Repeat Folder, Repeat All,
Random and Intro (introduction of each music)
Power off automatically after a preset time, you may setup sleep and power save
model for power manager and better using time.
Users can save different files in different folders (Folders should be set up in
computer first so one can play and manage files easily.). This player supports
nine one-grade submenus’ distinguishing.
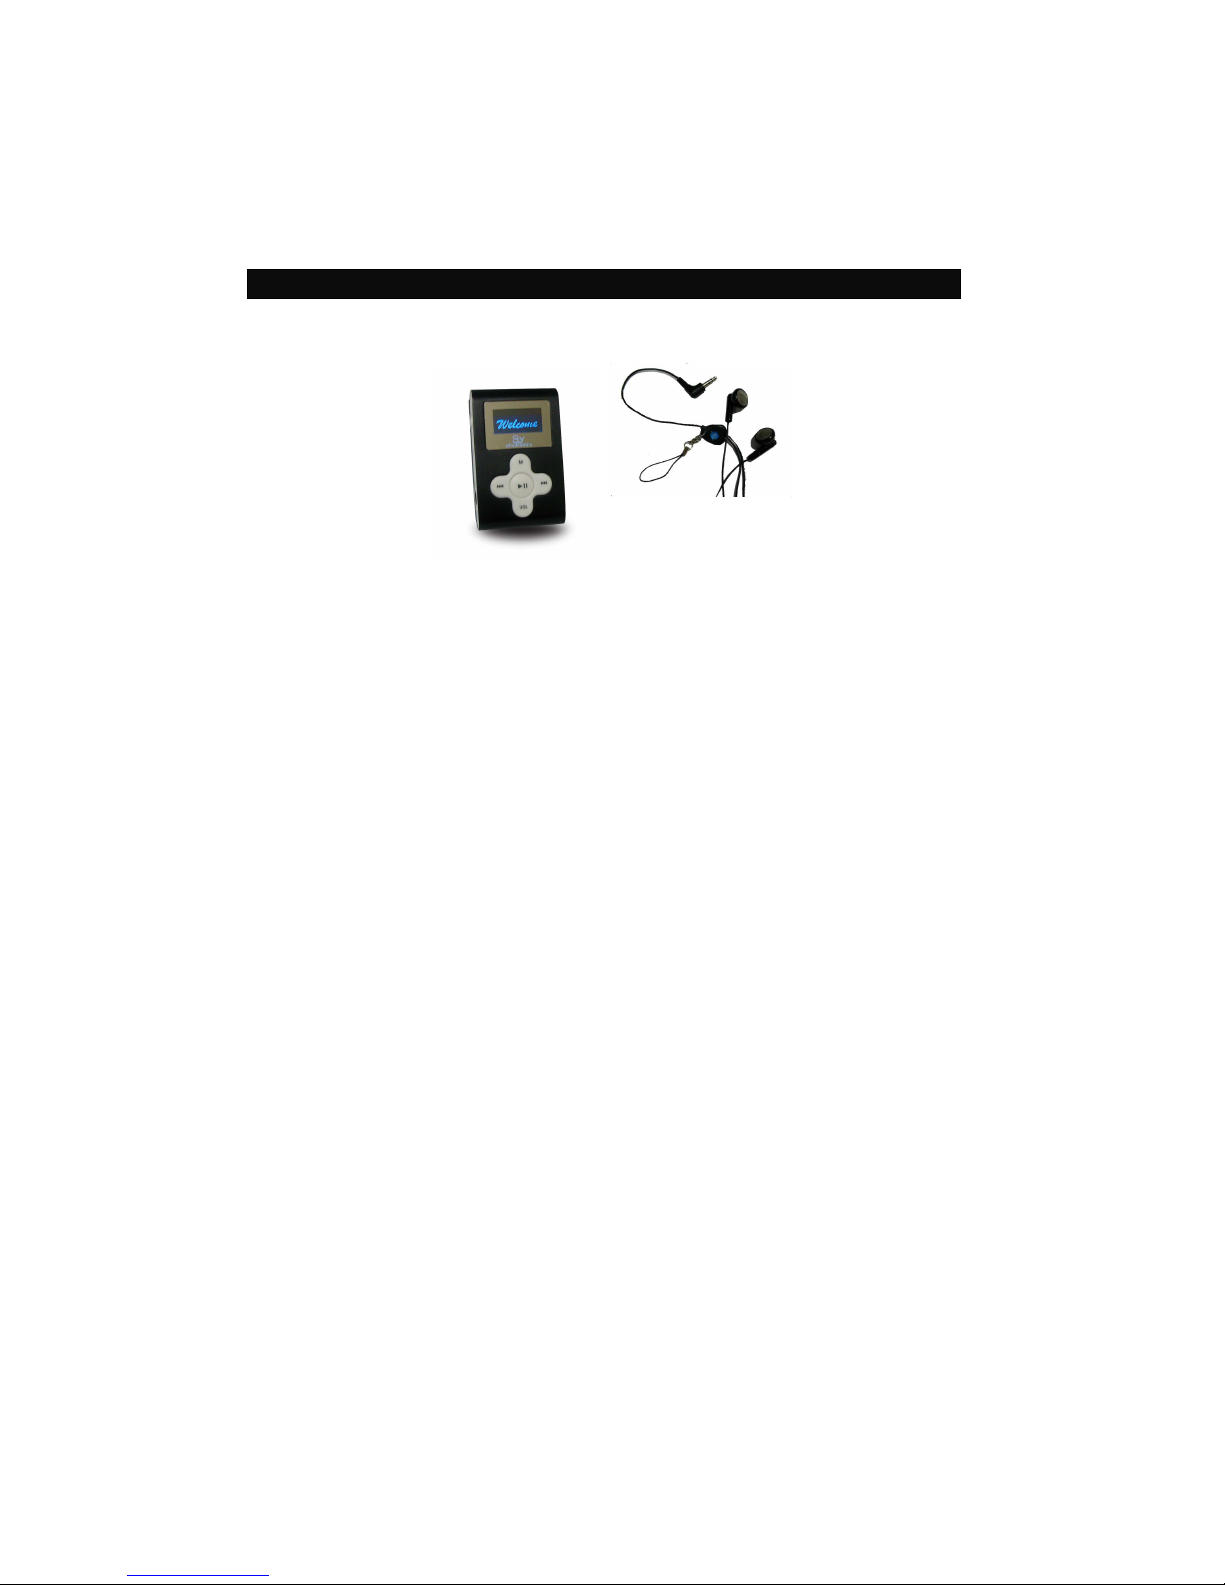
Package Contents
SL018G Clip On MP3 Player Earphone

4
USB cable User manual
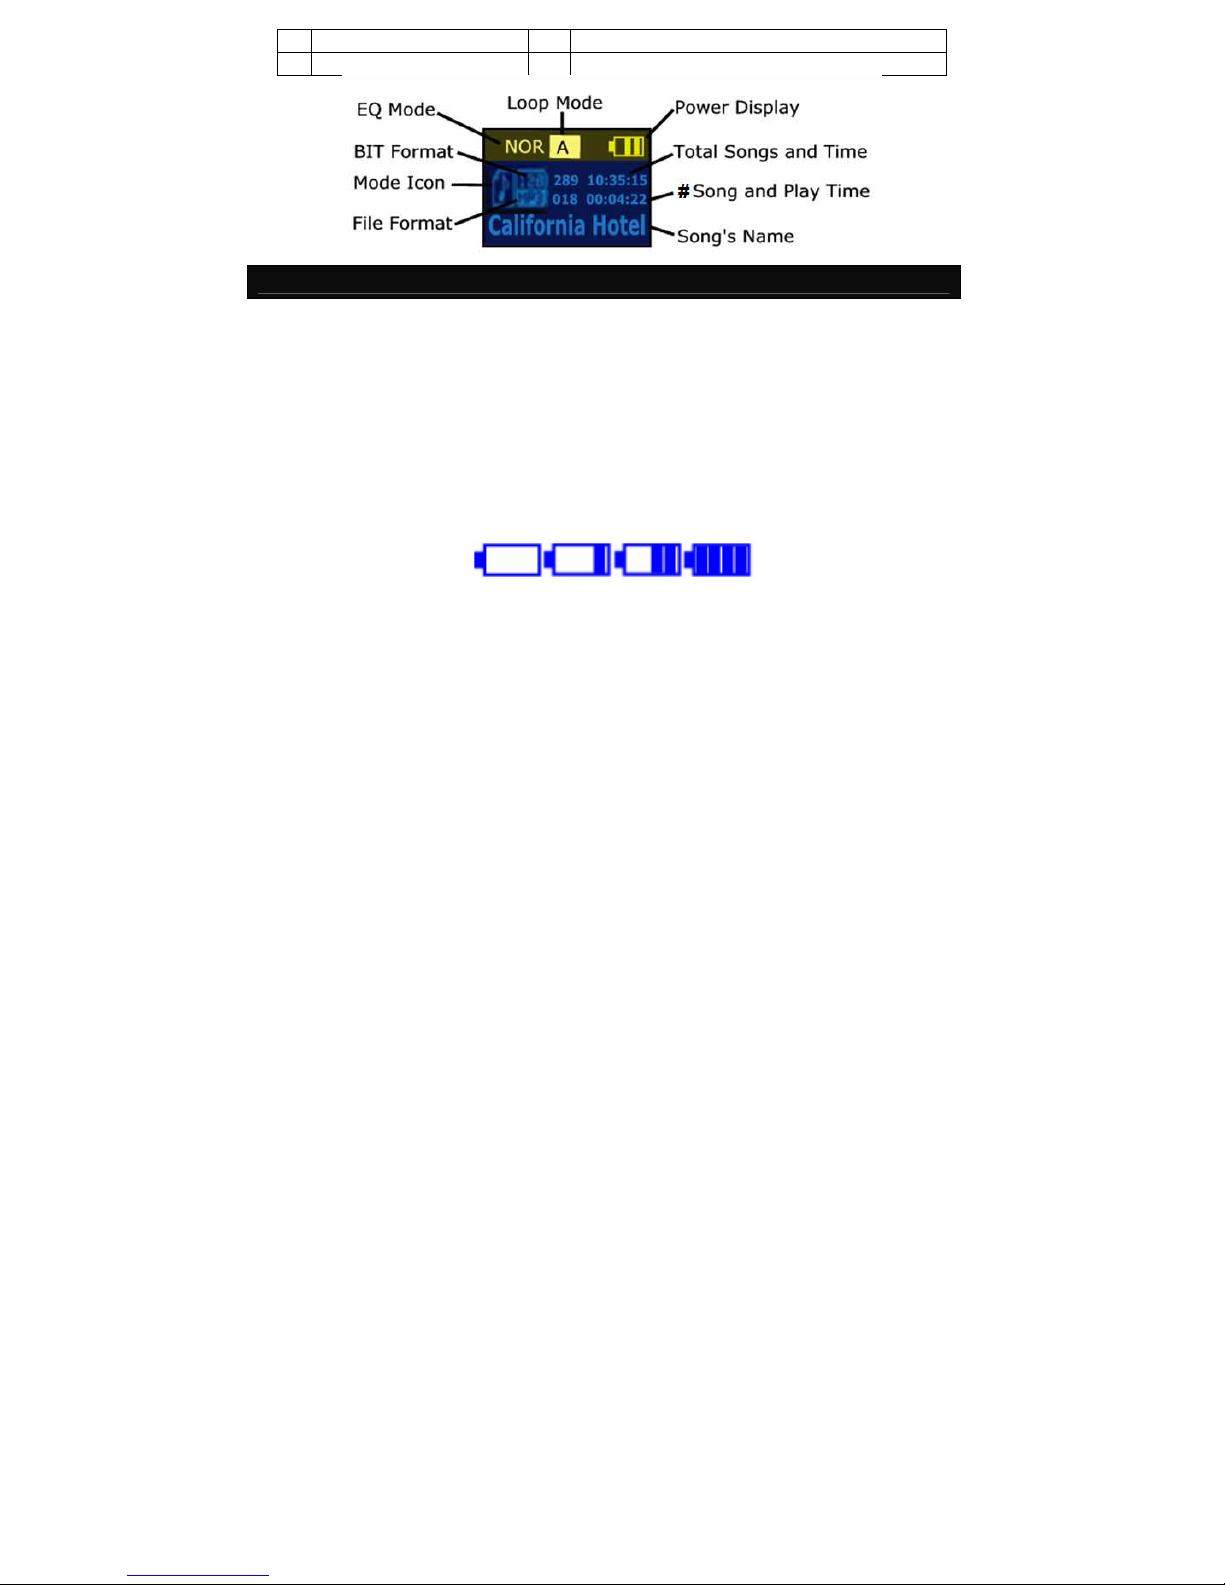
Button Function and LCD Display
1 Power On / Off 6 Play / Pause
2 Stereo Earphone Jac 7 Fast Forward / Next / Volume Up
3 Microphone 8 USB Port
5
4 2 Colors LCD Display 9 Fast Bac ward / Previous / Volume Down
5 Menu 10 Volume
Charge Your Player
Notes:
Please turn Power ON/OFF switch to OFF position and fully charge the player
before 1
st
use. (Approximately 6 hours first time you charge it).
Always charge battery fully before initial use. (normally ta e 2~3 hours to fully
charger the player after the first time)
If the battery level is low, please charge it immediately. Otherwise, the player
will shut down automatically or will be unable to power on.
To charge the player, connect one end of the USB to the player and the other
end to the computer.
Charging process begins automatically when fully charged.

6
When it is fully charged, the battery indicator turns green and charging stops
automatically. Before disconnecting, please “Safely Remove” it.
The battery life (play time) varies depending on the music volume level and
power save settings.
Please use ONLY the original USB cable supplied. DO NOT use any third-party
cable as it might cause severe damage to the player.
If the player is being used during charging, it will ta e longer to charge.
Do not tamper with the battery.
Do not disassemble, crush, short-circuit or incinerate your battery as it may
cause fire, injuries, burns, or other hazards.
Adding Songs to the Player
Connect your player using the USB cable to your computer.
Once your player has been detected, a window may pop-up (Autoplay) →
please select “Open Folder” and “Run start.exe (AMT)
If a window does not pop-up then simply go to My Computer and Select the
Removable Dis that correlates to your player.
In a new window, go to the folder where you eep your music on your computer

7
(usually “My Music” in My Documents) and then copy the audio file(s) you
want.
Go bac to the Removable Dis and right clic “Paste”
Your songs are now on the player; simply safely remove the player and enjoy
your music
You can also use Windows Media Player to sync your music but ma e sure it
is in .mp3 format or else it will not sync (if it is in .wma simply follow the above
steps)
OR Follow the Step Below to add music to your MP3 player
To Transfer music
Windows XP
1) Connect your MP3 player to your computer
2) Wait for your computer to recognize the MP3 player as flash drive and let the
AMT program run, you should see something li e this on your computer
monitor ta e note of the icon near the cloc area, you should see the red note
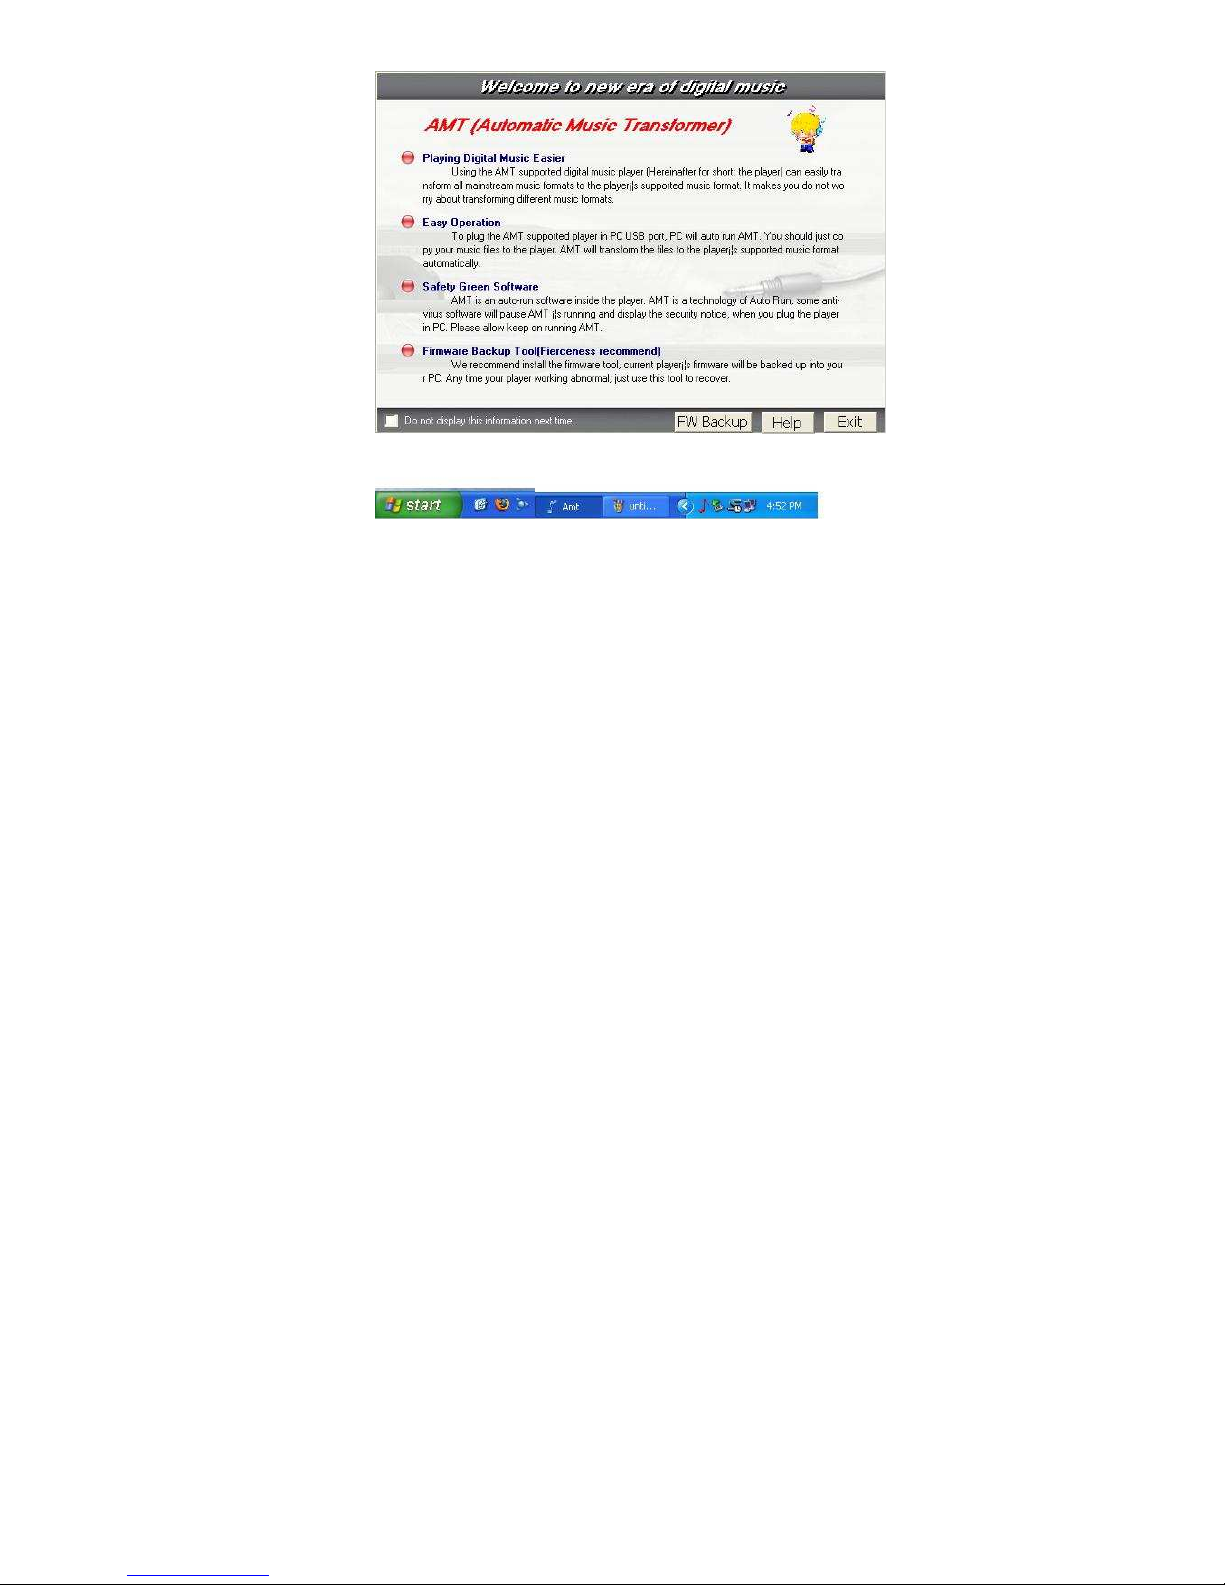
8
icon and the flash icon, see Figure 1
Figure 1

9
3) Once your computer recognize the MP3 player as flash drive you can now
start copying music.
4) Go My Computer, loo for the removable dis ( Your MP3 player ) you can
see something li e this, see Figure 2
Figure 2
10
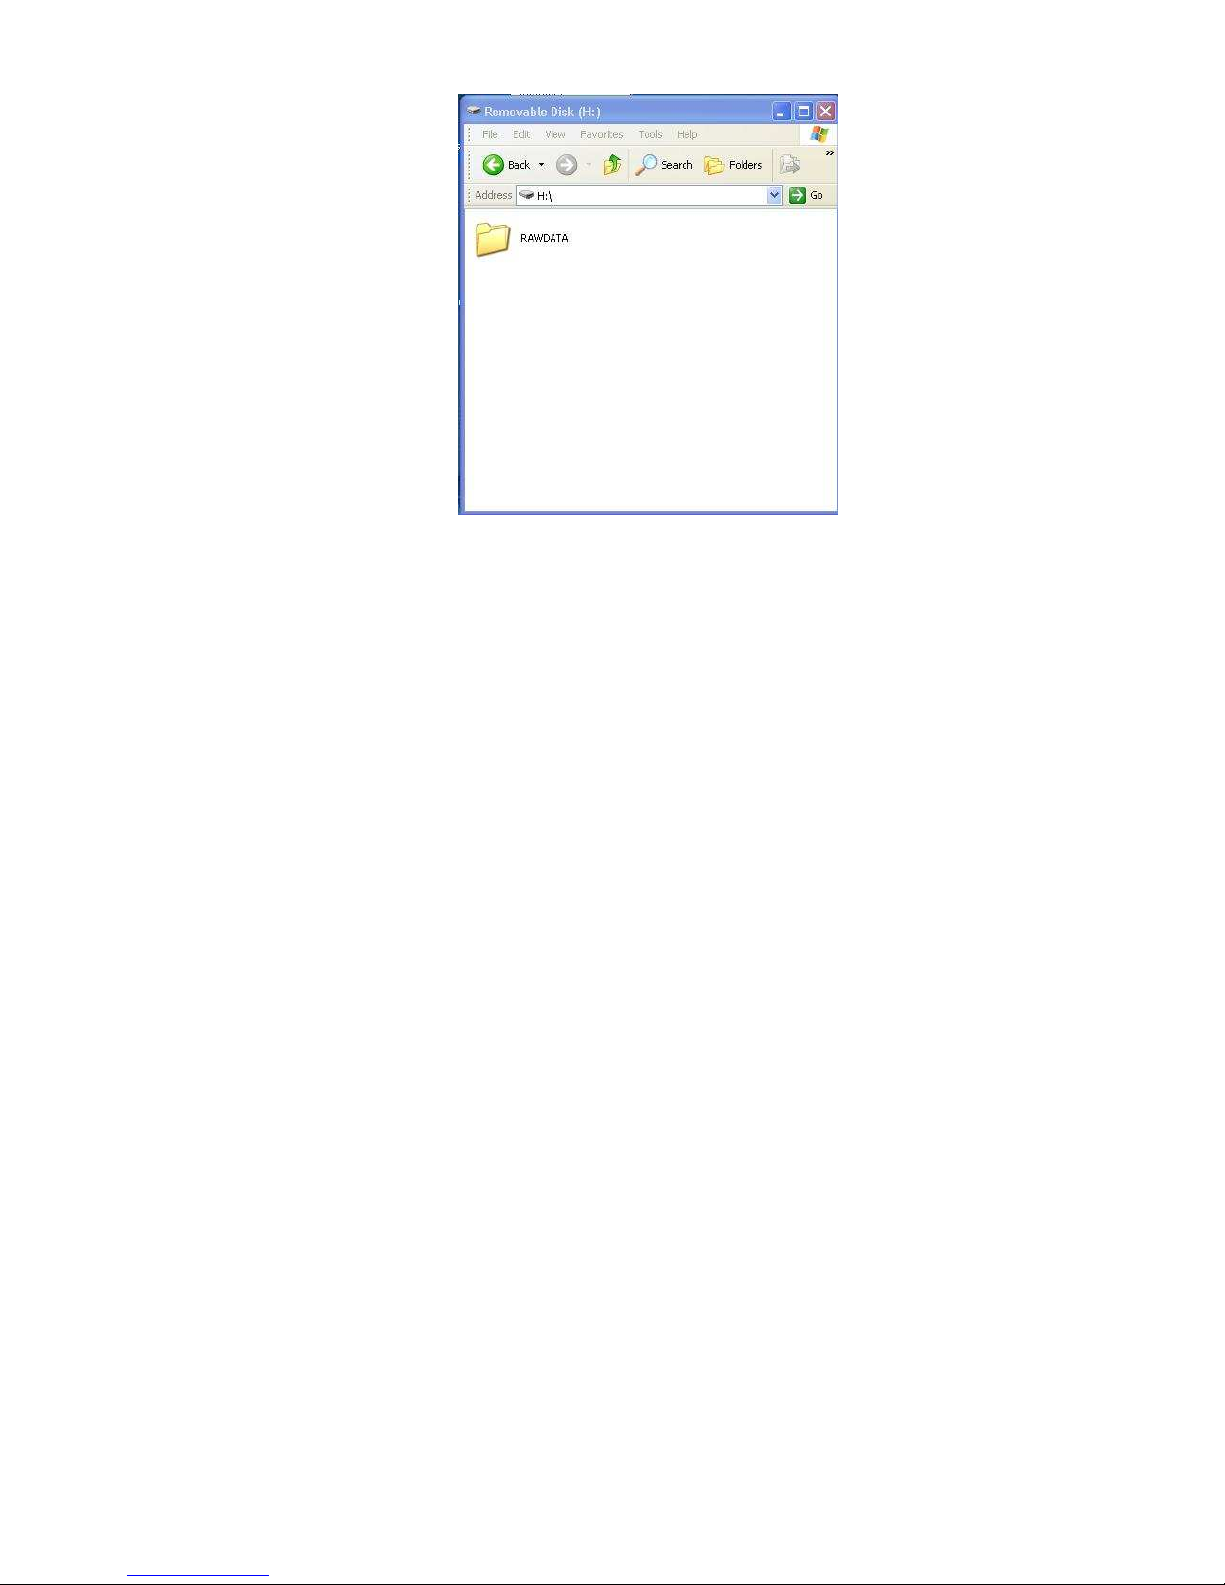
5) Now double left clic on the Removable dis to open it, then you should
something li e this, see Figure 3
Figure 3

11
6) Just leave it open, that is where we transfer music from your computer to the
MP3 player, now go to where you save you music from your computer, once
you locate where you save your music, usually by default all your music are
save in My Documents then My Music, now open each folder that you have in
that My Music folder, in this example I open the abba folder, then you should
see something li e this, see Figure 4
Figure 4
12
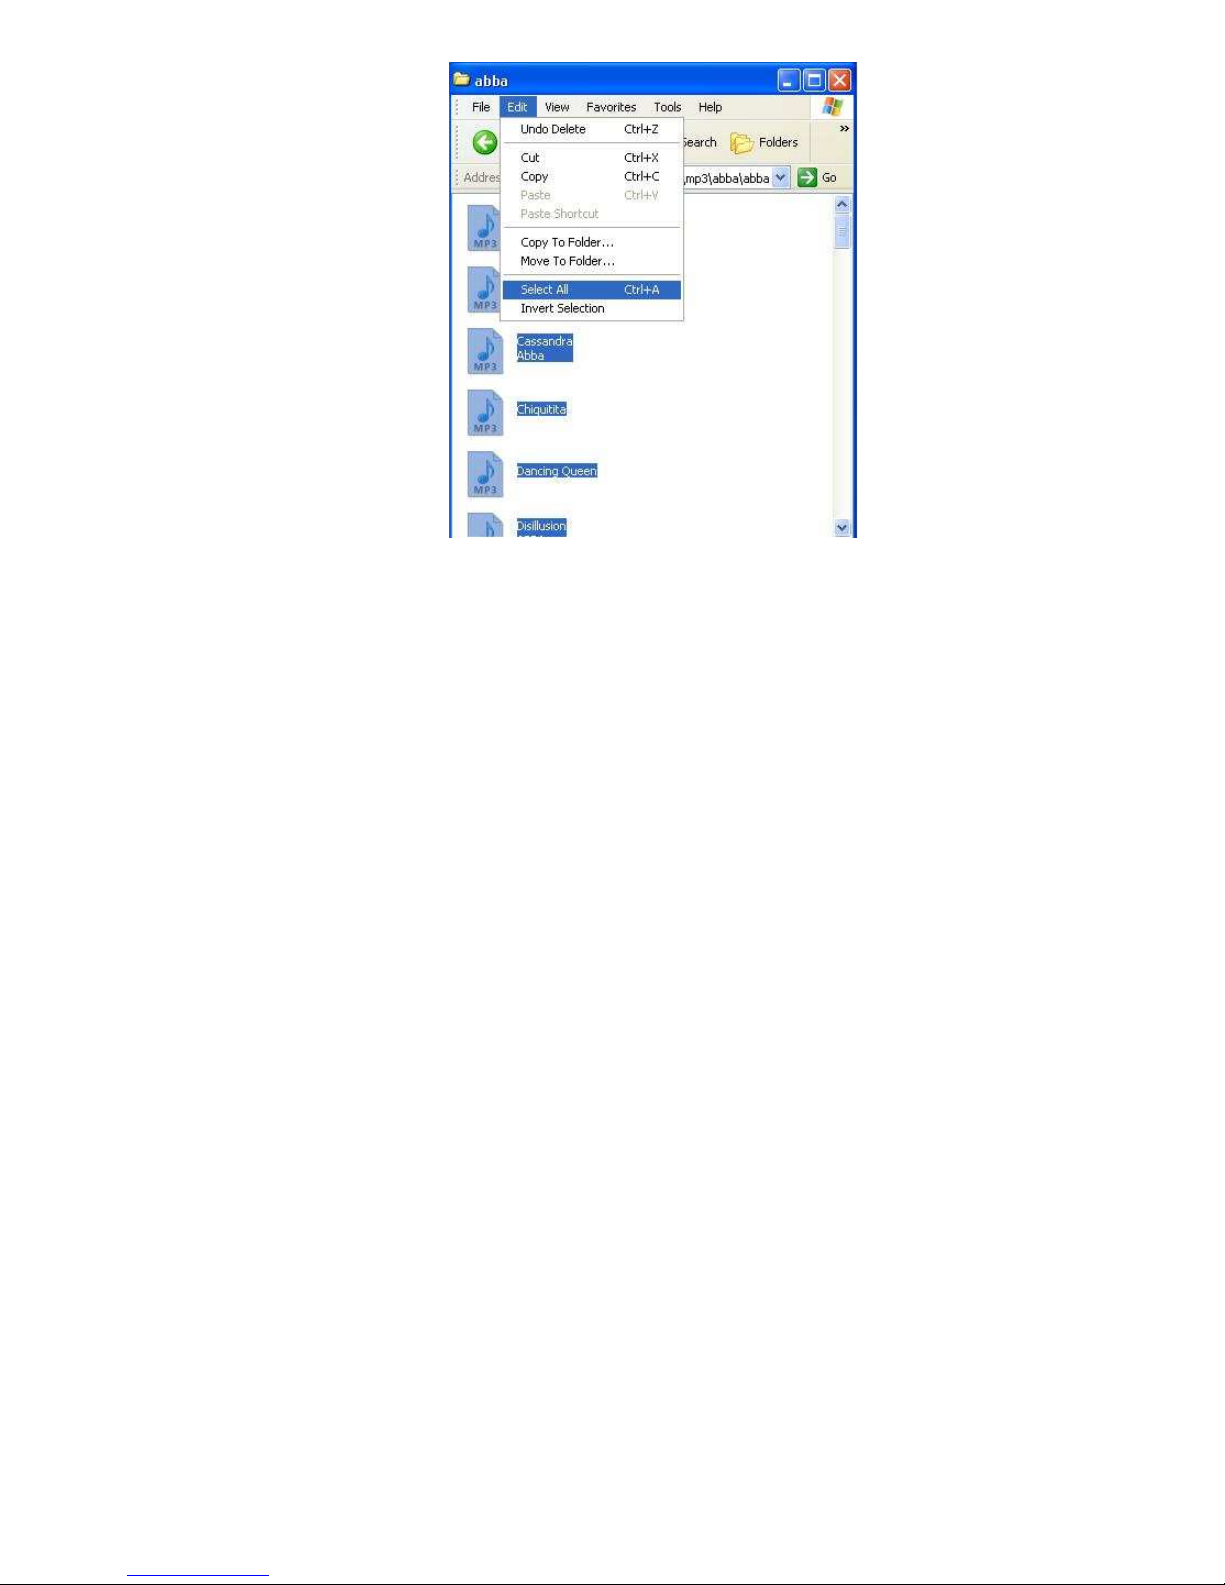
7) Now Clic on Edit then clic Select All, see Figure 5
Figure 5
13
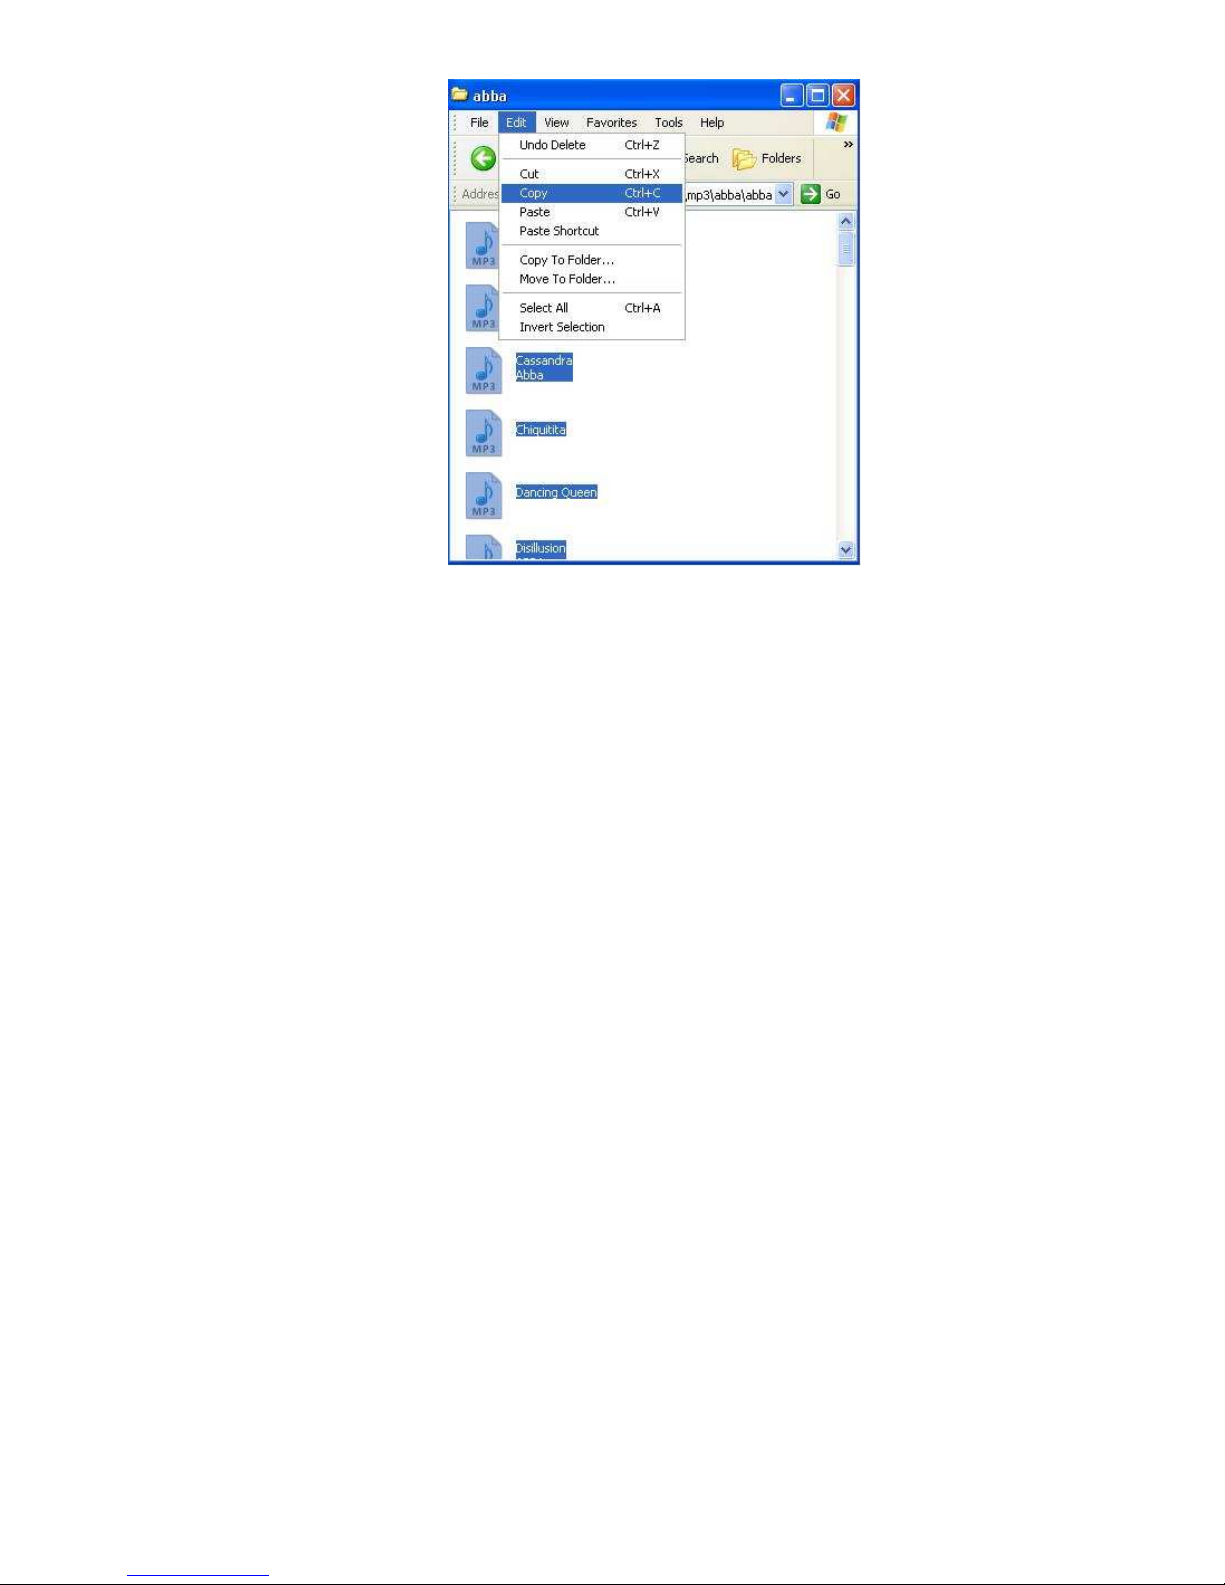
8) Now clic copy, see Figure 6
Figure 6

14
9) Now go to the removable dis then go to Edit then clic paste, see Figure 7

15
Figure 7
10) After you clic paste it will start transferring music, see Figure 8
Figure 8
11) Just wait until it finish copying you music, the after copying close all the windows,
then safely remove the MP3 player from your computer, just li e what you do on a
regular flash drive.

16
Disconnect from Computer
For Windows 2000 or above, please follow “Safely Remove Hardware” procedure on
computer.
- A “Safely Remove Hardware” icon will be displayed on computer system’s tray as
below diagram.
- Move the mouse over the icon, “Safely Remove Hardware” prompt appears.
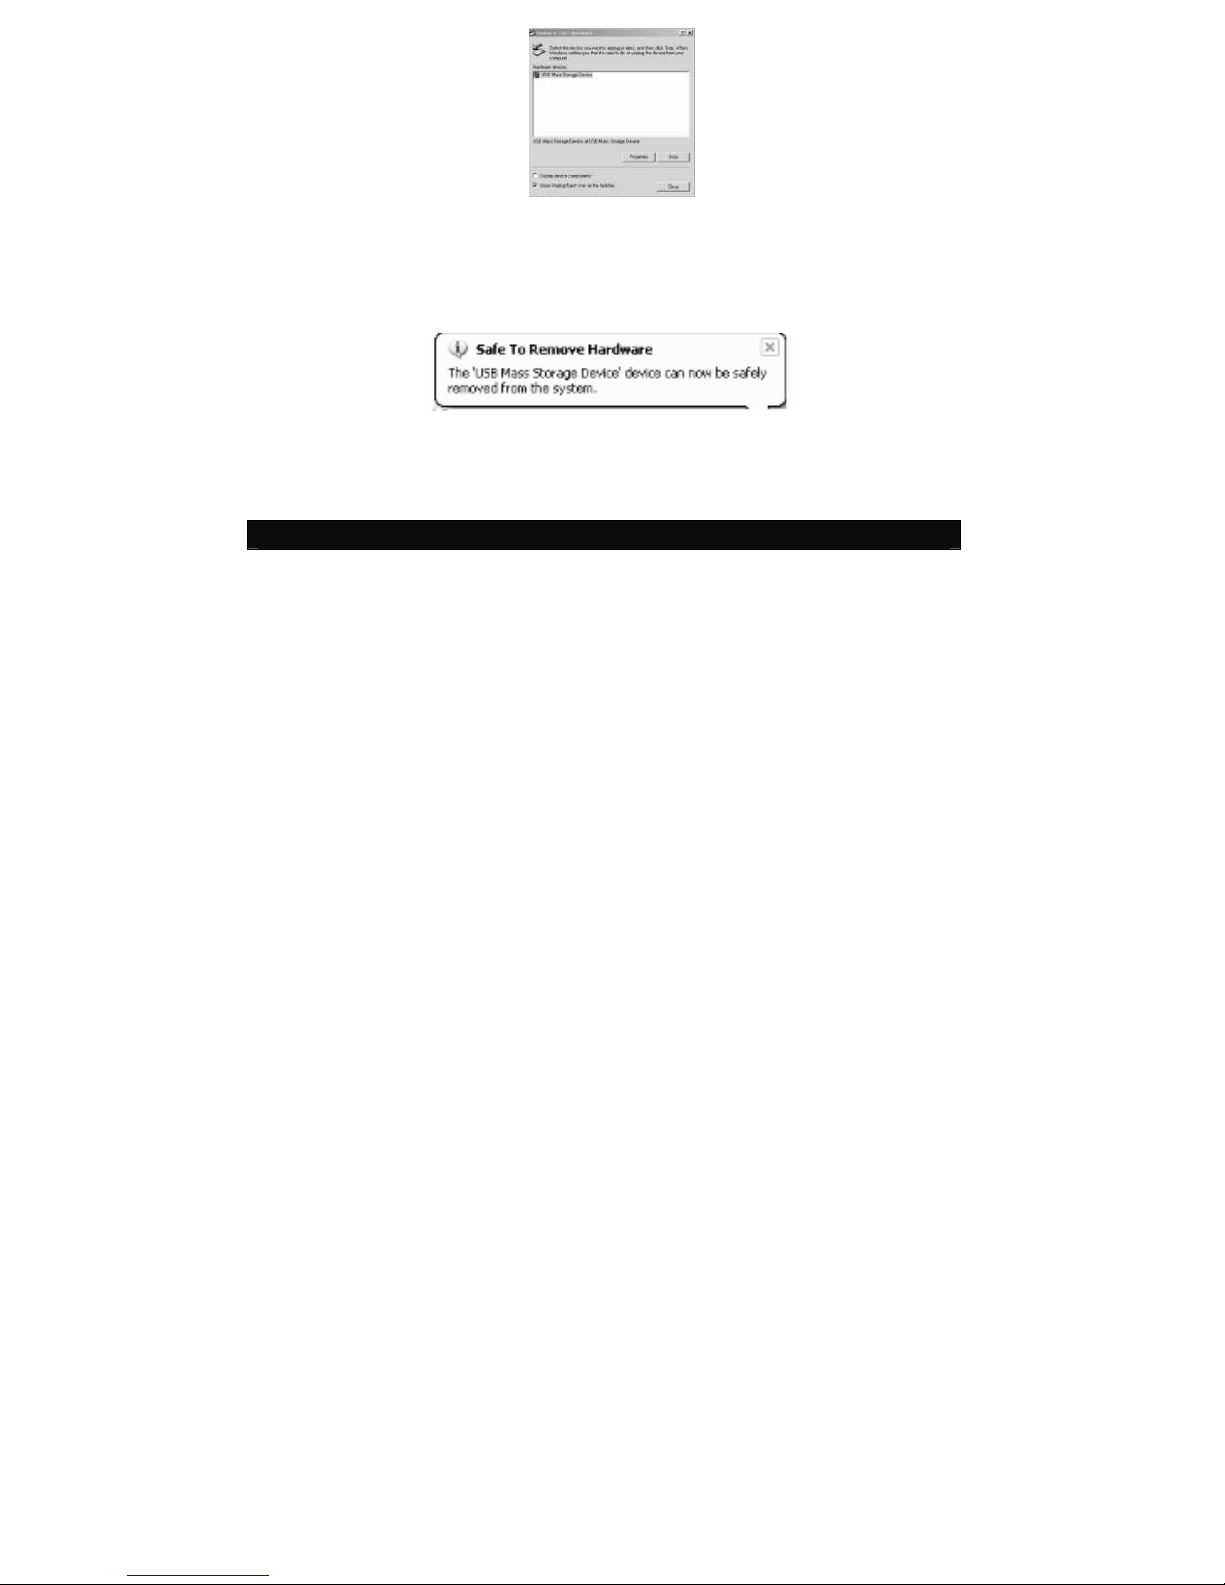
- Double clic on “Safely Remove Hardware” icon then “Safely Remove Hardware”
windows will be displayed. Select the device to be disconnected and clic on “Stop”
button to end the connection between the computer and the device.
17
- Next, “The USB Mass Storage Device can now be safely removed from the system”
will be displayed.
- Finally, disconnect and safely unplug the device from the USB port on your
computer.
Power On / Power Off
- Turn Power ON/OFF switch to ON position, long press “►II” to power ON.
18
- In any mode, long press “►II” to power OFF.
- Press “►II” to start or pause playbac .
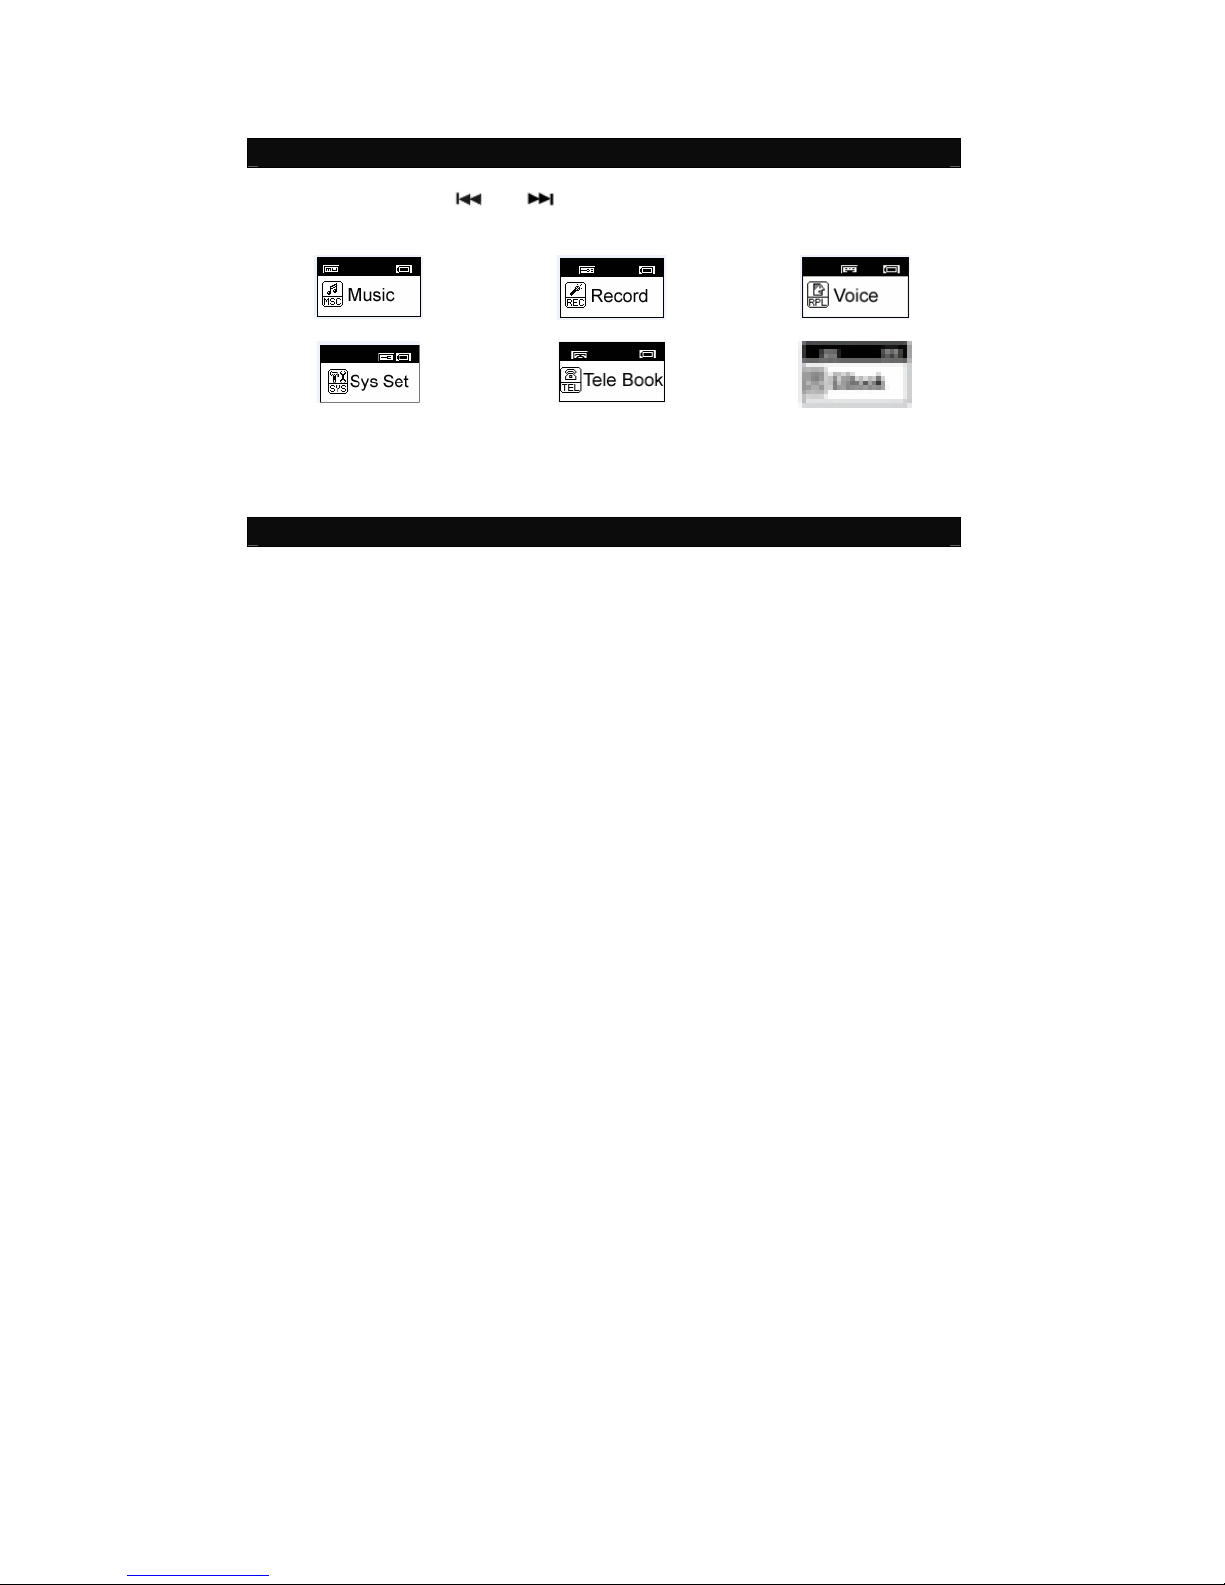
Menu Selection
- In Main menu, press “ ” or “ ” to select a mode.
- There are 6 modes available in the main menu
Music Record Voice
System Setup Tele Boo EBoo
- Press “M” to enter.
Music
Music Playback

19
- In Main menu, select Music menu and press “M” ey to enter Music mode.
- Press “ ” or “ ” ey to select a Music file.
- Music playbac begins by pressing “►II”.
- During Music playbac , press “►II” to pause.
- While in Pause mode, press “►II” again to resume playbac .
Note: During Music playbac , press “ ” or “ ” to s ip to the previous or next
music file. Press & hold “ ” or “ ” to rewind or fast forward within the trac .
Adjusting Volume
- During Music playbac , press “VOL” and then press “ ” or “ ” to adjust volume
level.
Skipping to Previous / Next Music File
- During Music playbac , press “ ” or “ ” to s ip to Previous or Next music file.
Synchronizing Song Lyrics Display
When a music file in the player has a song lyrics file with same file name, song lyrics
will be displayed automatically during Music playbac .
Note: The player supports song lyrics file in .LRC format.
Both the Music file (MP3 or WMA) name and song Lyrics file (LRC) name must both
be identical. (Example: LoveSong.MP3 + LoveSong.LRC).
o Return to Main Menu
- During Music playbac , press “M” to enter submenu.
This manual suits for next models
3
Table of contents
Other Sly Electronics MP3 Player manuals

Sly Electronics
Sly Electronics SLV252 User manual

Sly Electronics
Sly Electronics SLV152G User manual

Sly Electronics
Sly Electronics SL414CM User manual

Sly Electronics
Sly Electronics SLV202G User manual

Sly Electronics
Sly Electronics MP3 Player User manual

Sly Electronics
Sly Electronics SLV324 User manual


