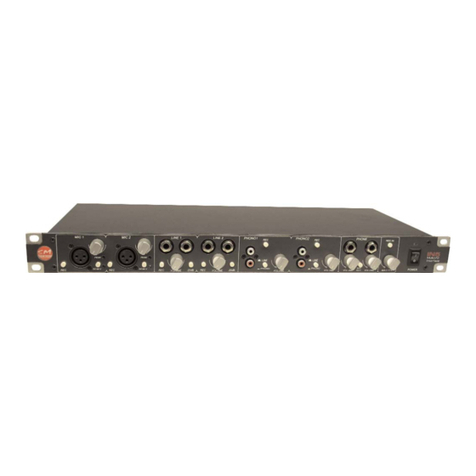
SM Pro Audio IN5E User manual


2Safety
SAFETY INSTRUCTIONS
CAUTION: To reduce the risk of electrical shock, do not remove the cover or rear panel of this unit. No user
serviceable parts inside. Please refer servicing to qualified personnel only.
WARNING: To reduce the risk of fire or electrical shock do not expose this appliance to rain or moisture.
DETAILED SAFETY INSTRUCTIONS:
All safety and operation instructions of this manual should be read and adhered to before operation.
Retain instructions:
Please retain all safety and operating instructions for future reference.
Follow instructions:
All operation and user instructions should be followed.
Water, liquid and moisture:
The appliance should not be used near water, rain or other liquids. Make sure that no liquid can leak, spill
or otherwise seep into the appliance.
Ventilation:
Please place the appliance so no obstacles interfere or impede the flow of air through the ventilation
openings.
Heat:
The appliance should be situated away from other heat sources such as heaters, radiators, ovens, or other
appliances that produce heat.
Power source:
Make sure your appliance is set to the correct voltage for the country in which it will be used.
Grounding and polarization:
Precautions should be taken so that the grounding or polarization means of an appliance is not defeated.
Power-Cord protection:
Power supply cords should be routed so that they are not likely to be walked on, pinched, damaged, worn,
or rubbed by any other device or obstacle.
Cleaning:
The appliance should be cleaned only with a light soft cloth. Do not use any damaging or corrosive prod-
ucts on the unit.
Periods of inactivity:
The power cord of the appliance should be unplugged from the outlet when left unused for a long peri-
od of time.
Damage requiring service:
The appliance should be serviced by qualified service personnel when:
- The power supply cord or the plug has been damaged; or
- Objects have fallen, or liquid has been spilled into the appliance; or
- The appliance has been exposed to rain; or
- The appliance does not appear to operate normally or exhibits a marked change in performance; or
- The appliance has been dropped, or the enclosure damaged.
Servicing:
The user should not attempt to service the appliance beyond that is described in the Operating
Instructions.
All other servicing should be referred to qualified service personnel.

3Main Features – Foreword
IN5E Main Features:
The new IN5E from SM Pro Audio covers a huge range of applications for use in the home/project studio.
It is suitable for mixing various analog audio signals to a high quality recording output channel in either
high quality low noise analog or pristine 24-bit 96 kHz digital format via USB. This makes the IN5E to a tru-
ely high quality audio interface which can be directly connected to a computer. In addition to this, the
unit will operate as a versatile monitor mixer providing facilities for up to 12 channels of monitored sig-
nal!
- 3 x Mic pre amps
- 3 x Insert points
- 3 x Phantom power
- 2 x XLR Bal I/O
- 6 x Mono, 3 x Stereo line inputs
- 1 x Turntable or CD inputs with switchable RIAAEQ and level controls
-2xHeadphone monitoring amplifiers
- USB port
- CAT5 connector for connecting 3 balanced inputs with just one single CAT5 cable!
FOREWORD
Dear Customer,
Thank you very much for expressing your confidence in SM ProAudio products by purchasing this unit.
The SM IN5E has been designed to be used as a standard tool for home/pro studios. With much experi-
ence in the audio industry over a long period of time, and along with valuable suggestions from our cus-
tomers, our engineers have developed a product we know you will be satisfied with. We guarantee you
uncompromising quality (manufactured under ISO9000 certified management system) as well as excel-
lent technical and audio properties at an extremely affordable price.
Regards,
SM Pro Audio
* It should be pointed out, that extreme output volumes may damage your ears and/or your headphone units.
Turn down the LEVEL controls before you switch on the unit.

4Ta b l e o f C o n t e n t s
Table of Contents
Safety Instructions 2
Main Features and Foreword 3
1. Introduction 5
2. The Design Concept 5
2.1 High quality components and design
2.2 Inputs and outputs
3. Overview 5
4. Installation 6
4.1 What’s included in the box
4.2 Rack mounting
4.3 Mains voltage
5. Rear Panel Connections 6
5.1 GND - Ground pin connector
5.2 Ground Lift Switch
5.3 L&R Stereo Unbalanced & Balanced Audio Outputs
5.4 L&R Stereo RCARecord Input and outputs
6. Front Panel Connections and Control Knobs/Switches 7
6.1 XLR Mic Input controls
6.2 Stereo line Input controls
6.3 Phono Input controls
6.4 Stereo headphone amplifiers
6.5 Master volume section
6.6 Power switch ~ Power on/off switch
7. Application Guide 8
7.1 The Purpose of the SM IN5E
7.2 The SM IN5E as a recording interface unit
7.3 The SM IN5E as a standard mixer
8. Specifications 10
9. Warranty 11

5 Introduction – Design Concept – Overview
1. Introduction
Functionality - Versatility - Mix - Record - Monitor - Convert - Inject and Digitize!!!
The new IN5E from SM Pro Audio covers a huge range of applications for use in the home/project stu-
dio. It is suitable for mixing various analog audio signals to a high quality recording output channel in
either high quality low noise analog or pristine digital format via USB.
Many users will be glad to see the options provided for connectivity. 3 x Bal mic inputs with switch-
able phantom power, peak lights, and gain control can be found on the front of th unit (3 x inserts
available on these channels). An additional 6 x mono (3 x stereo) line level inputs, 1 x stereo turntable,
CD or Phono inputs with RIAAEQ and level controls are also present. This is great news for DJ's home
audiophile users wanting to digitize their vinyl and transfer to the PC!
And we have one truely innovative feature packed at the backside of the IN5E: With the TST3 connec-
tor you have the possibility to connect up to 3(!) analog audio channels with just one standard CAT5
cable. All you need is a compatible Audio-to-CAT5 converter box like the Violet Audio TST3 (please
check www.violetaudio.com for more details)!
2. The Design Concept
2.1 High quality components and design
The philosophy behind SM ProAudio products guarantees a no-compromise circuit design and
employs the best choice of components.
2.2 Inputs and outputs
All inputs and outputs are secured firmly to the exterior chassis housing. This ensures robust
quality and confidence in performance under all conditions.
3. Overview
Connect up to 3 microphones Connect up to 4 mono line
signals or 2 stereo line sig-
nals (e.g. MP3 players or CD
players)
Connect 1 stereo
line signal (e.g.
MP3 players or
CD players) or 1
stereo phono sig-
nal (turntable)
Connect 2
headphones
Connect the REC
inputs and out-
puts to your
recording device
of choice
Connect to your monitor-
ing system, e.g. a mixer or
your monitoring speakers
Connect a Violet Audio
TST3 device for tranfering 3
channels with one single
CAT5 cable. Connect noise
gates or effect units to the
3 insert jacks
Connect to
a USB port
at the
computer

6 Installation – Rear Panels Controls
4. Installation
Your SM ProAudio IN5E was carefully packed in the factory and the packaging was designed to protect
the unit from rough handling. Nevertheless, we recommend that you carefully examine the packaging
and its contents for any signs of physical damage, which may have occurred in transit.
*
If the unit is damaged, please do not return it to us, but notify your dealer and the shipping company imme-
diately, otherwise claims for damage or replacement may not be granted. Shipping claims must be made by
the consignee.
4.1 What’s included in the box
- the IN5E (hopefully)
- a power cord and/or a suitable power supply
- this beautiful designed manual
4.2 Rack mounting
The SM ProAudio IN5E fits into one standard 19" rack unit of space (1 3/4"). Be sure that there is enough
air space around the unit for cooling. As to avoid overheating, please do not place the IN5E on high tem-
perature devices such as power amplifiers.
4.3 Mains voltage
The SM IN5 has a professional internal power supply thus eliminating the use of external power adaptors.
Before you connect your IN5E to the mains, please make sure that your local voltage matches the voltage
required by the unit!
5. Rear Panel Connections
5.1 GND – Ground pin connector
The ground pin connector allows for connection of your turntable grounding wire. Please refer
to your turntable manual for information regarding ground connections.
5.2 Ground lift switch
In certain situations where you have audible humm or buzz in your system, you can use the Ground Lift
Switch to eliminate this problem. Place the switch in the “Lift” position to lift the ground.
5.3 USB connector
This port is used for the direct connection between the IN5E and the computer.
5.4 Stereo RCA record input and outputs
Use standard stereo RCAcables to connect the REC inputs and outputs to your recording
device of choice. This could be a DAT, MD recorder, Sound card, etc. The REC outputs (L&R) con-
nect to the inputs of your chosen recording device, while the REC inputs are used for the return
signal from your recording devices outputs.
5.5 Stereo Unbalanced & Balanced Audio Outputs
The IN5E provides two types of analog output connections to connect to your
monitoring device, unbalanced & balanced. These are to connect to your active
monitor speakers, amplifier, or additional mixer device for you to listen to the out-
put from the IN5E. This output signal carries the source signal from any/all of the inputs on the front of the
IN5E, or a mixed signal including the inputs on the front and a source from the the REC inputs on the rear.

7Rear Panels Controls – Front Panel Controls
5.6 Ethernet input and microphone insert point
The IN5E supports you with a new breed of analog audio distribution features.
With just one standard CAT5 cable it is now possible to transmit up to three
channels of audio. Perfect, if you are going to use the IN5E as recording inter-
face in a studio. No more cable hassles and fear of broken audio cables during a recording session. This
new connection is truely passive without any influences on th sound! Just check your local dealer and
www.violetaudio.com for compatible products.
The three TRS inserts are for connecting any dynamics of effects between the connected microphones
at the front panel. So if you like to spice up your vocals directly while recording, these are the right
connections.
6. Front Panel Connections and Control Knobs/Switches
6.1 XLR Mic Input controls
Independent (3 x) rotary gain controls, switchable Phantom power,
peak lights, and a record/monitor enable switch.
This is where you can connect up to three microphones, control their
input gain, and choose either to monitor the signal directly to your main outputs for monitoring, or to
send the source to the REC outputs and subsequently to your recording device. Connect a microphone
using a standard XLR type microphone cable and turn up the volume knob to an acceptable level. If your
microphone is a condenser microphone that requires phantom power, depress the 48V switch to enable
power to your mic. The REC switch directs the microphone source signal to the REC output on the rear
panel when in the drepessed position. When in the non-depressed position the signal is routed directly
to the main outputs on the rear panel. The peak light illuminates to indicate when the mic pre-amp is
overdriven with excessive input signal. If illuminated, reduce the volume to avoid distortion of your micro-
phone signal.
6.2 Stereo line Input controls
Independent (2 x) rotary volume controls, -20dB pad, and a record/monitor
enable switch.
This is where you can connect up to two stereo (L&R) line level devices (keyboards,
modules etc), control their input gain, and choose either to monitor the signal directly to your main out-
puts for monitoring, or to send the source to the REC outputs and subsequently to your recording device.
Connect your stereo (L&R) line level device with a standard 1/4” audio cables and turn up the volume
knob to an acceptable level. A -20dB PAD switch is provided to reduce the input gain on very high input
signals. If your signal is distorting, depress the -20dB switch to adjust to a more suitable level. The REC
switch directs the line level source signal to the REC output on the rear panel when in the drepessed posi-
tion. When in the non-depressed position the signal is routed directly to the main outputs on the rear
panel.
6.3 Phono Input controls
Independent rotary volume control, line/phono switch, and a record/monitor enable switch.
This is where you can connect one stereo phono/line level device, control their input gain,
and choose either to monitor the signal directly to your main outputs for monitoring, or to
send the source to the REC outputs and subsequently to your recording device.
Connect your stereo (L&R) phone/line level device with a standard RCA audio cable and turn up the vol-
ume knob to an acceptable level. A line/phono switch is provided for the stereo pair of the input which
toggles the use of the input as either a fully operational RIAA phono pre-amp or as standard RCA line level
input. The REC switch directs the phono/line level source signal to the REC output on the rear panel when
in the drepessed position. When in the non-depressed position the signal is routed directly to the main
outputs on the rear panel.

8 Front Panel Controls – Application Guide
6.4 Stereo headphone amplifiers
Independent (2 x) rotary monitor volume controls, and MIX/REC switch.
This is where you can connect up to two stereo headphones, control their volume, and
choose either to monitor the full mix of your signals from both the front panel inputs and the
REC inputs together, or just the REC input signal from the rear panel. The MIX/REC switch toggles the mon-
itor mode of the headphone amplifiers.
6.5 Master volume section
The master volume controls the main output level to the Main outputs on the rear panel.
* Note: This does not effect the REC output volume.
The REC IN switch enables a mixed signal of both the input signals on the front panel with the REC
IN input on the rear panel.
6.6 Power switch
Power on/off switch. This is where you enable the unit for use.
7. Application Guide
7.1 The Purpose of the IN5E
Nowadays, the computer is the hub of the home recording studio. There are many reasons for this includ-
ing ease of editing, clarity, digital transfer to CD etc. Traditionally, most computer audio interface units
(standard sound card) been limited to only 2 channel inputs that do not offer professional connectivity
for microphones, turntables and the like. Some type of mixer device is required to provide these features.
In the case of the turntables, a seperate phono pre-amp is also required to record your analog vinyl
records to your PC for CD transfer. The IN5E has been designed for many of these needs.
The IN5E provides a solution for users needing to connect a multitude of different devices including con-
denser microphones which require phantom power, turntables, keyboards, modules, and even 2 sets of
headphones for monitoring to any 2 channel recording device. This includes the computer, MP3 players,
DAT recorders, MD recorders, etc.
7.2 The IN5E as a recording interface unit
In this example we will record an input from a microphone to a recording device, e.g. a Multitrack
recorder.
Step 1 Ensure you have the REC inputs & outputs connected correctly to your recording device as out-
lined in section 5.4 of this manual.
Step 2 Connect your microphone to one of the microphone connections on the front of the IN5E and
increase the gain control to an acceptable level.
Step 3 Depress the REC switch on the front panel of the IN5E for the microphone channel you are using
to direct the signal to your REC outputs. This will send the signal from the microphone directly to your
recording device. Adjust the gain control on the microphone to the correct level desired. You should take
note of the level meter indicators on your recording device while setting the gain.
Step 4 Engage recording on your recoring device, and capture the signal from your microphone.
* Note: For monitoring your signal, simply listen to your monitor speakers (ensure they are connected correctly
as described in section 5.5) or headphones connected to the front panel of the IN5E (as described in section 6.4).
7.3 The IN5E as a standard mixer
The IN5E is extremely simple to operate as a standard mixer.
Step 1 Simply connect all your input devices to the appropriate connections on the front panel.
Step 2 Adjust the gain controls on the desired input signals to your desired level.

Step 3 Monitor the results from your speakers or headphones.
7.4 The IN5E as a computer interface
The IN5E can act as a pretty nifty Interface for your computer. As all major operating systems come with
plug and play it’s just about connecting the IN5E via USB cable. As no drivers are needed the IN5E works
with low latency drivers (Core Audio) within your Mac OS X System. Under Windows we recommend that
you install the Freeware ASIO4all (www.asio4all.com) to have decent ASIO drivers within your DAW.
Step 1 Connect the IN5E with a compatible USB cable to your computer.
Step 2 Connect your microphone to one of the microphone connections on the front of the IN5E and
increase the gain control to an acceptable level. Do the same with all other sources you want to record.
Step 3 Start your Sequencer. There you need to choose a audio channel and press the “Monitoring” but-
ton.
* Note: The function “Monitoring” may differ, depending which sequencer you use.
Now you should see the signal what’s coming from the IN5E into your DAW. If not, please consider the
manual of your sequencer. Adjust the gain control on the microphone to the correct level desired. You
should take note of the level meter indicators on your recording software while setting the gain.
Step 4 Hit the “Record” button in your Sequencer, and capture the signal from your microphone.
* Note: If you have heavy latencies within your system, please check the ASIO4all software panel and adjust the
buffer size as desired. Also check the “Audio Preferences” pane within your sequencer. The lateny depends on
many factors, e.g. how fast your computer is and what kind of drivers you have choosen.
This is the ASIO4all Software Panel, where
you can configure the soundcard’s latency.
9Application Guide

8. Specifications
Audio Inputs
Connectors 1/4" jack TRS Balanced, XLR Balanced
RCA Unbalaced
Impedance 47k Ohms / 600Ohm
Min Sensitivity -20dB
Peak input level +16dB
Mic Inputs
Connector XLR
Type Balanced
Impedance 47k Ohms
Min sensitivity -60 dB
Peak input level +9.5 dB
Phantom Power +48V, switchable
Headphone Outputs
Connectors 1/4" jack
Type Stereo, 1V RMS @ 32 Ohm
Stero Line Mixer Outputs
Connectors 1/4” Jack Unbalanced
Impedance 47K / -10dB
Max. output level +2dB (peak level +18.5 dB)
XLR Balanced Outputs
Connectors XLR
Type balanced
Min. output impedance 600Ohms
Max. output level 0dB (peak level +18.5dB)
Dist, Freq, S/N Ratio & Crosstalk
Frequency response 20Hz~20kHz, 0dB~-2B
Distortion 0.008%
S/N Ratio better than 74dB
Crosstalk rejection >80dB@1kHz;-20dB input
Function Controls
Volume per channel variable
Volume per channel variable
Power Supply
Mains voltages USA/Canada ~ 120 V AC, 60 Hz
U.K./Australia ~ 240 V AC, 50 Hz
Europe ~ 230 V AC, 50 Hz
General export model ~ 100-120 V AC, ~ 200-240 V AC,
50-60 Hz
Power consumption 11.5VA
Fuse 100-120 V AC: 630 mA(slow-blow)
200-220 V AC: 315 mA(slow-blow)
Mains connection Standard IEC receptacle
Physical
Dimension 1 3/4" (44.5 mm) * 19" (482.6 mm) * 8 1/2" (217 mm)
Net weight approx. 3.25 kg
SM ProAudio is constantly striving to maintain the highest professional standards. As a result of these efforts,
modifications may be made from time to time to existing products without prior notice. Specifications and
appearance may differ from those listed or shown.
10 Specifications

11 Warranty
9. WARRANTY
9.1 WARRANTY CARD &/OR WEBSITE REGISTRATION
To be protected by this warranty the purchaser of the product must complete an SM Pro Audio product
registration procedure.
Product registration is available via two methods:
- Complete and return the enclosed warranty card within 14 days of the date of purchase to SM Pro Audio
(see address below).
- Complete an online product registration form at the SM Pro Audio website. www.smproaudio.com
9.2 WARRANTY
- SM Pro Audio warrants the mechanical and electronic components of this product to be free of defects in
material and workmanship for a period of one (1) year from the original date of purchase.
SM Pro Audio will at its sole discretion either repair or replace the product if any defects occur that are not
caused by normal wear or inappropriate use within the warranty period.
- This warranty does not apply if the product has been damaged by negligence, non-authorized modifica-
tions, accident, abuse, misuse, misapplication, or as a result of unauthorized service other than performed
by that of SM Pro Audio’s service department.
- All freight charges incurred for transport of justified warranty claims are at the buyer's expense.
All other warranty claims other than those indicated above are excluded.
9.3 HOW TO REQUEST A RETURN AUTHORIZATION NUMBER
To obtain warranty service, the purchaser must call SM Pro Audio during normal business hours before
returning the product (Tel.: +61 3 9555 8081). An SM Pro Audio representative will discuss any issues
with you over the telephone and then issue a return authorization number if deemed appropriate.
Please ship original shipping cartons along with your return authorization number to the following
address:
SM Pro Audio
Service Department
Warehouse 25
Roberna Business Park
26-28 Roberna St
Moorabbin 3189
Melbourne, Victoria
Australia
Europe:
SM Pro Audio Europe / ttaudio GmbH
Alfred-Krupp-Str. 5
48291 Telgte
Germany

9.4 WARRANTY REGULATIONS
- Warranty can only be serviced when accompanying proof of purchase is provided. Dealers invoice and
date stamp required.
- SM Pro Audio will endeavor to repair or replace any product under the terms of this warranty within 30
days of receipt of the product at SM Pro Audio.
- Modifications performed in order to comply with any applicable technical or safety standards in any coun-
try which is not the country for which the product was originally developed and manufactured shall not be
considered a defect in materials or workmanship. SM Pro Audio shall not be held responsible for any costs
incurred or resulting from any such modification whether performed correctly or not.
- This warranty does not cover defects of parts caused by normal operational wear. These parts are typical-
ly switches, knobs, and other similar components.
Product damage caused by the following conditions are not covered by this warranty:
- Operation of the unit in a way that does not comply with the safety regulations applicable in the country
where the product is used.
- Damages or defects caused by conditions beyond the control of SM Pro Audio.
9.5 WARRANTY TRANSFERABILITY
This warranty is non transferable and available exclusively to the original purchaser.
9.6 DAMAGE CLAIMS
Failure of SM Pro Audio to provide proper warranty service does not entitle the purchaser to claim fur-
ther damages. SM Pro Audio’s liability shall in no way exceed the invoiced value of the product.
9.7 OTHER WARRANTY RIGHTS
This warranty does not exclude or limit any statutory rights provided by national law.
12 Warranty

The information contained in this manual is subject to change without notice.
ALL RIGHTS RESERVED © 2008 SM Pro Audio
SM Pro Audio
Service Department
Warehouse 25
Roberna Business Park
26-28 Roberna St
Moorabbin 3189
Melbourne, Victoria
Australia
Phone: +61 3 9555 8081
Fax: +61 3 9555 8083
Mail: info@smproaudio.com
Internet: www.smproaudio.com
13
EG-Konformitätserklärung
Hiermit wird bestätigt, dass das Produkt
SM Pro Audio IN5E
den Anforderungen entspricht, die in der Richtlinie des Rates zur Angleichung der Rechtsvorschriften der
Mitgliedstaaten über die elektromagnetische Verträglichkeit (89/336/EWG) sowie in der Richtlinie des
Rates betreffend elektrische Betriebsmittel zur Verwendung innerhalb bestimmter Spannungsgrenzen
(73/23/EWG) festgelegt sind. Dies gilt für alle Exemplare, die nach gleichen Fertigungszeichnungen vom
Hersteller und Entwickler
SM Pro Audio, W25 Roberna Business Park, 26-28 Roberna St, Moorabbin, Melbourne, Victoria 3189, Australien
gefertigt werden. Zur Beurteilung des Produkts hinsichtlich elektromagnetischer Verträglichkeit wurden
folgende Normen herangezogen:
EN 60065; EN 55020; EN 55013; EN 61000-3-2; EN 61000-3-3
Diese Erklärung wird für den Anbieter
tt audio GmbH, Alfred-Krupp-Str. 5, D-48291 Telgte, Deutschland
abgegeben durch
Tamer Terzi - Geschäftsführer
Telgte 01.07.2008
______________ ___________ ________________________
Ort Datum Unterschrift
Konformitätserklärung – Legal Notice
Table of contents
Other SM Pro Audio Recording Equipment manuals
Popular Recording Equipment manuals by other brands
LEGRAND
LEGRAND 036 02 manual
Bastl Instruments
Bastl Instruments Noise Square manual

Synthstrom Audible
Synthstrom Audible Deluge Guide book
Advancing Alternatives
Advancing Alternatives 42-CIB2-24MO Installation and user guide

Kenwood
Kenwood Nexedge KTI-3 instruction manual
Studio Technologies
Studio Technologies 5204 user guide
