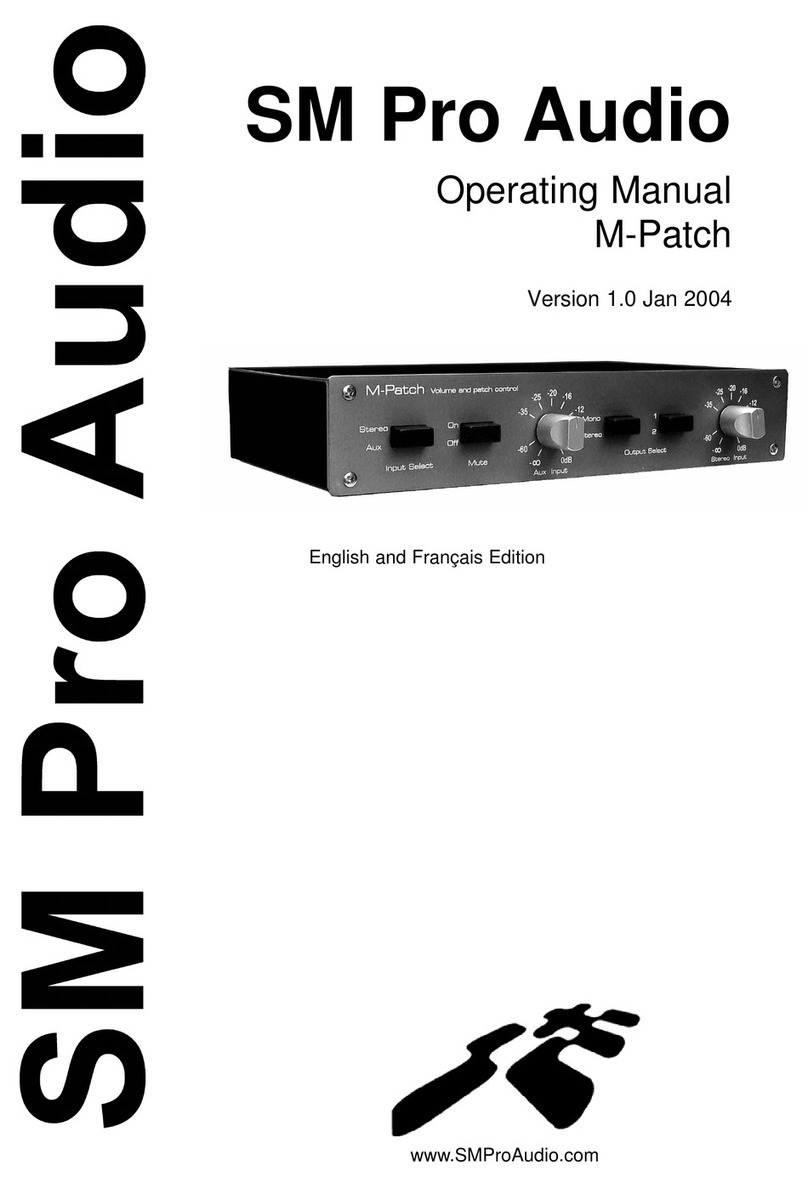
SM Pro Audio SM IN5 User manual

SM Pro Audio
SM Pro Audio
Operating Manual - SM IN5
Version 1.0 Nov 2002
www.SMProAudio.com

2Safety
SAFETY INSTRUCTIONS
CAUTION: To reduce the risk of electrical shock, do not remove the cover or rear panel of this
unit. No user serviceable parts inside. Please refer servicing to qualified personnel only.
WARNING: To reduce the risk of fire or electrical shock do not expose this appliance to rain or
moisture.
DETAILED SAFETY INSTRUCTIONS:
All safety and operation instructions of this manual should be read and adhered to before
operation.
Retain Instructions:
Please retain all safety and operating instructions for future reference.
Follow instructions:
All operation and user instructions should be followed.
Water, liquid and Moisture:
The appliance should not be used near water, rain or other liquids. Make sure that no liquid can
leak, spill or otherwise seep into the appliance.
Ventilation:
Please place the appliance so no obstacles interfere or impede the flow of air through the
ventilation openings.
Heat:
The appliance should be situated away from other heat sources such as heaters, radiators,
ovens, or other appliances that produce heat.
Power Source:
Make sure your appliance is set to the correct voltage for the country in which it will be used.
Grounding and Polarization:
Precautions should be taken so that the grounding or polarization means of an appliance is not
defeated.
Power-Cord Protection:
Power supply cords should be routed so that they are not likely to be walked on, pinched, dam-
aged, worn, or rubbed by any other device or obstacle.
Cleaning:
The appliance should be cleaned only with a light soft cloth. Do not use any damaging or
corrosive products on the unit.
Periods of inactivity:
The power cord of the appliance should be unplugged from the outlet when left unused for a long
period of time.
Damage Requiring Service:
The appliance should be serviced by qualified service personnel when:
- The power supply cord or the plug has been damaged; or
- Objects have fallen, or liquid has been spilled into the appliance; or
- The appliance has been exposed to rain; or
- The appliance does not appear to operate normally or exhibits a marked change in
performance; or
- The appliance has been dropped, or the enclosure damaged.
Servicing:
The user should not attempt to service the appliance beyond that is described in the Operating
Instructions.
All other servicing should be referred to qualified service personnel.

3Features - Foreward
SM IN5 Main Features
The new IN5 from SM Pro Audio covers a huge range of applications for use in the home/project
studio.
It is suitable for mixing various analog audio signals to a high quality recording output channel in
either high quality low noise analog or pristine 24-bit 96 kHz S/PDIF Digital format (with optional
USBMOD Digital board). In addition to this, the unit will operate as an quality ADDA format con-
verter with the optional digital board, and a versatile monitor mixer providing facilities for up to 12
channels of monitored signal!
- 2 x Mic Pre amp (JRC4558D)
- 2 x Insert points
- 2 x Phantom power
- 2 x XLR Bal I/O
- 4 x Mono, 2 x Stereo line inputs
- 2 x Turn-Table, CD or Phono inputs with switchable RIAA EQ and level controls
- 2 x Headphone monitoring amplifiers
- 24-bit 44.1kHz-96kHz S/PDIF I/O (USBMOD optional)
FOREWORD
Dear Customer,
Thank you very much for expressing your confidence in SM ProAudio products by purchasing
this unit. The SM IN5 has been designed to be used as a standard tool for home/pro studios.
With much experience in the audio industry over a long period of time, and along with valuable
suggestions from our customers, our engineers have developed a product we know you will be
satisfied with. We guarantee you uncompromising quality (manufactured under ISO9000 certified
management system) as well as excellent technical and audio properties at an extremely afford-
able price.
Regards,
SM ProAudio

4Table of Contents
TABLE OF CONTENTS
1. INTRODUCTION
2. THE DESIGN CONCEPT
2.1 High quality components and design
2.2 Inputs and outputs
3. INSTALLATION
3.1 Rack mounting
3.2 Mains voltage
4. REAR PANEL CONNECTIONS
4.1 GND - Ground pin connector
4.2 Ground Lift Switch
4.3 L&R Stereo Unbalanced & Balanced Audio Outputs
4.4 L&R Stereo RCA Record Input and outputs
5. FRONT PANEL CONNECTIONS & CONTROL KNOBS/SWITCHES
5.1 XLR Mic Input controls ~ Independent (2 x) rotary gain controls, switchable Phantom power,
peak lights, and a record/monitor enable switch
5.2 Stereo line Input controls ~ Independent (2 x) rotary volume controls, -20dB pad, and a
record/monitor enable switch
5.3 Phono Input controls ~ Independent (2 x) rotary volume controls, line/phono switch, and a
record/monitor enable switch
5.4 Stereo headphone amplifiers ~ Independent (2 x) rotary monitor volume controls
5.5 Master volume section
5.6 Power switch ~ Power on/off switch
6. APPLICATION GUIDE
6.1 The Purpose of the SM IN5
6.2 The SM IN5 as a recording interface unit
6.3 The SM IN5 as a standard mixer
6.4 The SM IN5 as a converter for digital recorders (with optional USBMOD digital module)
7. FUTURE POSSIBLE OPTIONS
7.1 Information about the USBMOD S/PDIF Option board
8. SPECIFICATIONS
9. WARRANTY

5Introduction - Design Concept
1. INTRODUCTION
Functionality - Versatility - Mix - Record - Monitor - Convert - Inject and Digitize!!!
The new IN5 from SM Pro Audio covers a huge range of applications for use in the home/project
studio.
It is suitable for mixing various analog audio signals to a high quality recording output channel in
either high quality low noise analog or pristine 24-bit 96 kHz S/PDIF Digital format (optional USB-
MOD S/PDIF module). In addition to this, with the USBMOD digital module, the unit will operate
as an quality ADDA format converter, and versatile monitor mixer providing facilities for up to 12
channels of monitored signal! (1 x stereo digital).
Many users will be glad to see the options provided for connectivity. 2 x Bal mic inputs with
switchable phantom power, peak lights, and gain control can be found on the front of th unit (2 x
inserts available on these channels). An additional 4 x mono (2 x stereo) line level inputs, 2 x
stereo Turn-table , CD or Phono inputs with RIAA EQ and level controls are also present. This is
great news for DJ's home audiophile users wanting to digitize their vinyl and transfer to the PC!
2. THE DESIGN CONCEPT
2.1 High quality components and design
The philosophy behind SM ProAudio products guarantees a no-compromise circuit design and
employs the best choice of components.
2.2 Inputs and outputs
All inputs and outputs are secured firmly to the exterior chassis housing. This ensures robust
quality and confidence in performance under all conditions.

6Installation & Rear Panel Connections
3. INSTALLATION
Your SM ProAudio SM IN5 was carefully packed in the factory and the packaging was designed
to protect the unit from rough handling. Nevertheless, we recommend that you carefully examine
the packaging and its contents for any signs of physical damage, which may have occurred in
transit.
+ If the unit is damaged, please do not return it to us, but notify your dealer and the shipping
company immediately, otherwise claims for damage or replacement may not be granted.
Shipping claims must be made by the consignee.
3.1 Rack Mounting
The SM ProAudio SM IN5 fits into one standard 19" rack unit of space (1 3/4"). Be sure that there
is enough air space around the unit for cooling. As to avoid overheating, please do not place the
SM IN5 on high temperature devices such as power amplifiers.
3.2 Mains voltage
The SM IN5 has a professional internal power supply thus eliminating the use of external power
adaptors. Before you connect your SM IN5 to the mains, please make sure that your local volt-
age matches the voltage required by the unit!
4. REAR PANEL CONNECTIONS
Please note the following connections and their functions
4.1 GND Ground Pin Connector
The ground pin connector allows for connection of your turntable grounding wire.
Please refer to your turntable manual for information regarding ground connections.
4.2 Ground Lift Switch
In certain situations where you have audible humm or buzz in your system, you can use the
Ground Lift Switch to eliminate this problem. Place the switch in the “Lift” position to lift the
ground.

7Rear Panel Connections
4.3 L & R Stereo Unbalanced & Balanced Audio Outputs
The IN5 provides two types of analog output connections for you to connect to your monitoring
device, unbalanced & balanced.
These are to connect to your active monitor speakers, amplifier, or additional mixer device for
you to listen to the output from the IN5.
This output signal carries the source signal from any/all of the inputs on the front of the IN5, or a
mixed signal including the inputs on the front of the IN5 and a source from the the REC inputs on
the rear panel.
4.4 L & R Stereo RCA Record Input and outputs
Use standard stereo RCA cables to connect the REC inputs and outputs to your recording device
of choice.
This could be a DAT, MD recorder, Sound card, etc. The REC outputs (L&R) connect to the
inputs of your chosen recording device, while the REC inputs are used for the return signal from
your recording devices outputs.

8Front Panel Connections & Control Knobs/Switches
5. FRONT PANEL CONNECTIONS & CONTROL KNOBS/SWITCHES
SM IN5 front panel
The SM IN5 has a multitude of audio connections and controls on the front panel. Please read
the following information to understand these connections.
5.1 XLR Mic Input controls (2 x)
Independent (2 x) rotary gain controls, switchable Phantom power, peak lights, and a
record/monitor enable switch.
This is where you can connect up to two microphones, control their input gain, and choose either
to monitor the signal directly to your main outputs for monitoring, or to send the source to the
REC outputs and subsequently to your recording device.
Connect a microphone using a standard XLR type microphone cable and turn up the volume
knob to an acceptable level. If your microphone is a condenser microphone that requires phan-
tom power, depress the CD48V switch to enable power to your mic.
The REC switch directs the microphone source signal to the REC output on the rear panel when
in the drepessed position. When in the non-depressed position the signal is routed directly to the
main outputs on the rear panel.
The peak light illuminates to indicate when the mic pre-amp is over-driven with excessive input
signal. If illuminated, reduce the volume to avoid distortion of your microphone signal.
5.2 Stereo line Input controls (2 x)
Independent (2 x) rotary volume controls, -20dB pad, and a record/monitor enable switch.
This is where you can connect up to two stereo (L&R) line level devices (keyboards, modules
etc), control their input gain, and choose either to monitor the signal directly to your main outputs
for monitoring, or to send the source to the REC outputs and subsequently to your recording
device.
Connect your stereo (L&R) line level device with a standard 1/4” audio cables and turn up the
volume knob to an acceptable level.
A -20dB PAD switch is provided to reduce the input gain on very high input signals. If your signal
is distorting, depress the -20dB switch to adjust to a more suitable level.
The REC switch directs the line level source signal to the REC output on the rear panel when in
the drepessed position. When in the non-depressed position the signal is routed directly to the
main outputs on the rear panel.

9Front Panel Connections & Control Knobs/Switches
5.3 Phono Input controls
Independent (2 x) rotary volume controls, line/phono switch, and a record/monitor enable switch
This is where you can connect up to two stereo phono/line level devices, control their input gain,
and choose either to monitor the signal directly to your main outputs for monitoring, or to send
the source to the REC outputs and subsequently to your recording device.
Connect your stereo (L&R) phone/line level device with a standard RCA audio cables and turn up
the volume knob to an acceptable level.
A line/phono switch is provided for each stereo pair of inputs which toggles the use of the inputs
as either a fully operational RIAA phono pre-amp or as standard RCA line level inputs.
The REC switch directs the phono/line level source signal to the REC output on the rear panel
when in the drepessed position. When in the non-depressed position the signal is routed directly
to the main outputs on the rear panel.
5.4 Stereo headphone amplifiers (2 x)
Independent (2 x) rotary monitor volume controls, and MIX/REC switch.
This is where you can connect up to two stereo headphones, control their volume, and choose
either to monitor the full mix of your signals from both the front panel inputs and the REC inputs
together, or just the REC input signal from the rear panel.
The MIX/REC switch toggles the monitor mode of the headphone amplifiers.
5.5 Master Volume
The master volume controls the main output level to the Main outputs on the rear panel. (It does
not effect the REC output volume).
The REC IN switch enables a mixed signal of both the input signals on the front panel with the
REC IN input on the rear panel.
5.6 Power switch
Power on/off switch. This is where you enable the unit for use.

10 Application Guide
6. APPLICATION GUIDE
6.1 The Purpose of the SM IN5
Nowadays, the computer is the hub of the home recording studio. There are many reasons for
this including ease of editing, clarity, digital transfer to CD etc. Traditionally, most computer audio
interface units (standard sound card) been limited to only 2ch inputs that do not offer professional
connectivity for microphones, turn-tables and the like. Some type of mixer device is required to
provide these features. In the case of the turn-tables, a seperate phono pre-amp is also required
to record your analog vinyl records to your PC for CD transfer. The SM IN5 has been designed to
cator for many of these needs.
The SM IN5 provides a solution for users needing to connect a multitude of different devices
including condenser microphones which require phantom power, turn-tables, keyboards, mod-
ules, and even 2 sets of headphones for monitoring to any 2ch recording device. This includes
the computer, DAT recorders, MD recorders, etc.
6.2 The SM IN5 as a recording interface unit
In this example we will record an input from a microphone to the computer.
Step1
Ensure you have the REC inputs & outputs connected correctly to your recording device (com-
puter audiocard, DAT, minidisc, etc) as outlined in section 4.4 of this manual.
Step 2
Connect your microphone to one of the microphone connections on the front of the IN5 and
increase the gain control to an acceptable level. See section 5.1 of this manual.
Step 3
Depress the REC switch on the front panel of the IN5 for the microphone channel you are using
to direct the signal to your REC outputs. This will send the signal from the microphone directly to
your recording device.
Adjust the gain control on the microphone to the correct level desired. You should take note of
the level meter indicators on your recording device while setting the gain. For example, if you are
recording to your computer, check the input level meters of your recording software are register-
ing an acceptable value.
Step 4
Engage recording on your recoring device, and capture the signal from your microphone.
NOTE: For monitoring your signal, simply listen to your monitor speakers (ensure they are con-
nected correctly as described in section 4.3) or headphones connected to the front panel of the
IN5 (as described in section 5.4).

11 Application Guide & Digital option information
6.3 The SM IN5 as a standard mixer
The IN5 is extremely simple to operate as a standard mixer.
Step 1
Simply connect all your input devices to the appropriate connections on the front panel.
Step 2
Adjust the gain controls on the desired input signals to your desired level.
Step 3
Monitor the results from your speakers or headphones
7. FUTURE POSSIBLE OPTIONS (Under Development Feasability)
We are investigating the possible development of a range of accessories, and options for the
IN5.
7.1 USBMOD S/PDIF DIGITAL OPTION MODULE
Information about the USBMOD S/PDIF Option board
The USBMOD is a 24-bit 96kHz digital option board for the SM IN5. It enables the IN5 to act as a
high quality analog to digital and digital to analog converter unit. This is an extremely valuable
tool for many applications in today’s studio.
This option board will offer excellent full duplex AD/DA conversion. In the world of digital record-
ings, it is extremely useful to have a level of connectivity that allows for high quality digital trans-
fer of audio signals between devices.
With the USBMOD option board, users can obtain full functionality of the IN5 with the added
bonus of full digital connectivity. A great example of the benefits of the USBMOD is when con-
necting directly to your computer sound cards digital I/O. This is far more desirable than using the
AD/DA converters within your computers case. You can eliminate many of problems of electrical
noise by removing the analog to digital conversion process from the intense environment of your
PC case.
Of course there are many other benefits of having a stand alone digital converter at hand. Need
to sample your voice directly to your sampler? Simply connect the digital out to your samplers
digital in! Quick, easy, and pristine 24bit quality. The options are endless.
We hope to have news of our development progess listed on our website.
Please check www.smproaudio.com for details.

12 Specifications
8. SPECIFICATIONS
AUDIO INPUTS
Connectors 1/4" jack TRS Balanced, XLR Balanced
RCA Unbalaced
Impedance 47k Ohms / 600Ohm
Min Sensitivity -20dB
Peak input level +16dB
HEADPHONE OUTPUTS
Connectors 1/4" jack
Type Stereo, 1V RMS @ 32 Ohm
STEREO LINE MIXER OUTPUTS
Connectors 1/4” Jack Unbalanced
Impedance 47K / -10dB
Max. output level +2dB (peak level +18.5 dB)
XLR BALANCED OUTPUTS
Connectors XLR
Type balanced
Min. output impedance 600Ohms
Max. output level 0dB (peak level +18.5dB)
DIST, FREQ, S/N RATIO & CROSSTALK
Frequency response 20Hz~20kHz, 0dB~-2B
Distortion 0.008%
S/N Ratio better than 74dB
Crosstalk rejection >80dB@1kHz;-20dB input
FUNCTION CONTROLS
Volume per channel variable
Volume per channel variable
POWER SUPPLY
Mains voltages USA/Canada ~ 120 V AC, 60 Hz
U.K./Australia ~ 240 V AC, 50 Hz
Europe ~ 230 V AC, 50 Hz
General export model ~ 100-120 V AC, ~ 200-240 V AC, 50-60 Hz
Power consumption 11.5VA
Fuse 100-120 V AC: 630 mA (slow-blow)
200-220 V AC: 315 mA (slow-blow)
Mains connection Standard IEC receptacle
PHYSICAL
Dimension 1 3/4" (44.5 mm) * 19" (482.6 mm) * 8 1/2" (217 mm)
Net weight approx. 3.25 kg
SM ProAudio is constantly striving to maintain the highest professional standards. As a result of
these efforts, modifications may be made from time to time to existing products without prior
notice. Specifications and appearance may differ from those listed or shown.

13 Warranty
9. WARRANTY
1 WARRANTY CARD
To be protected by this warranty, the buyer must complete and return the enclosed warranty card
(signed/stamped by retail dealer) within 14 days of the date of purchase to SM ProAudio (see
address below 3). Failure to return the card in due time (date as per postmark) will void any
extended warranty claims.
2 WARRANTY
1. SM ProAudio warrants the mechanical and electronic components of this product to be free of
defects in material and workmanship for a period of one (1) year from the original date of
purchase, in accordance with the warranty regulations described below. If any defects occur
within the specified warranty period that are not caused by normal wear or inappropriate use, SM
ProAudio shall, at its sole discretion, either repair or replace the product.
2. If the warranty claim proves to be justified, the product will be returned freight prepaid by SM
ProAudio within Australia. Outside of Australia, the product will be returned at the buyer's
expense.
3. Warranty claims other than those indicated above are expressly excluded.
3 RETURN AUTHORIZATION NUMBER
1. To obtain warranty service, the buyer must call SM ProAudio during normal business hours
BEFORE returning the product (Tel.: +61 3 9555 8081). All inquiries must be accompanied by a
description of the problem. SM ProAudio will then issue a return authorization number.
2. The product must be returned in its original shipping carton, together with the return
authorization number, to the following address:
SM Pro Audio
Service Department
W25, 26-28 Roberna St
Moorabbin
Melbourne, Victoria
Australia 3189

4 WARRANTY REGULATIONS
1. Warranty services will be furnished only if the product is accompanied by an original retail
dealer's invoice. Any product deemed eligible for repair or replacement by SM ProAudio under
the terms of this warranty will be repaired or replaced within 30 days of receipt of the product at
SM ProAudio.
2. If the product needs to be modified or adapted in order to comply with applicable technical or
safety standards on a national or local level, in any country which is not the country for which the
product was originally developed and manufactured, this modification/adaptation shall not be
considered a defect in materials or workmanship.
The warranty does not cover any such modification/adaptation, irrespective of whether it was
carried out properly or not. Under the terms of this warranty, SM ProAudio shall not be held
responsible for any cost resulting from such a modification/adaptation.
3. Free inspections, maintenance/repair work and replacement of parts are expressly excluded
from this warranty, in particular if caused by inappropriate use. Likewise, the warranty does not
cover defects of expendable parts caused by normal wear of the product. Expendable parts are
typically pots, potentiometers, switches and similar components.
4. Damages/defects caused by the following conditions are not covered by this warranty:
- Misuse, neglect or failure to operate the unit in compliance with the instructions given in the
user or service manuals.
- Connection or operation of the unit in any way that does not comply with the technical or safety
regulations applicable in the country where the product is used.
- Damages/defects that are caused by any other condition beyond the control of SM ProAudio.
5. Any repair carried out by unauthorized personnel will void the warranty.
6. Products which do not meet the terms of this warranty will be repaired exclusively at the
buyer's expense. SM ProAudio will inform the buyer of any such circumstance. If the buyer fails
to submit a written repair order within 4 weeks after notification, SM ProAudio will return the unit
C.O.D. with a separate invoice for freight and packing. Such cost will also be invoiced separately
when the buyer has sent in a written repair order.
14 Warranty

5 WARRANTY TRANSFERABILITY
This warranty is extended exclusively to the original buyer (customer of retail dealer) and is not
transferable to anyone who may subsequently purchase this product. No other person (retail
dealer, etc.) shall be entitled to give any warranty promise on behalf of SM ProAudio.
6 CLAIM FOR DAMAGES
Failure of SM ProAudio to provide proper warranty service shall not entitle the buyer to claim
(consequential) damages. In no event shall the liability of SM ProAudio exceed the invoiced
value of the product.
7 OTHER WARRANTY RIGHTS
This warranty does not exclude or limit the buyer's statutory rights provided by national law, in
particular, any such rights against the seller that arise from a legally effective purchase contract.
The information contained in this manual is subject to change without notice. No part of this
manual may be reproduced or transmitted in any form or by any means, electronic or mechani-
cal, including photocopying and recording of any kind, for any purpose, without the express writ-
ten permission of SM ProAudio.
ALL RIGHTS RESERVED © 2002 SM ProAudio
SM Pro Audio
Service Department
W25, 26-28 Roberna St
Moorabbin
Melbourne, Victoria
Australia 3189
PH: +61 3 9555 8081
FAX: +61 3 9555 8083
15 Warranty
Table of contents
Other SM Pro Audio Recording Equipment manuals
