PRODUCT PRESENTATION
Diffuser
Charging Dock
Light bulb(
bulblite3)
Retractable handle
PRECAUTIONS
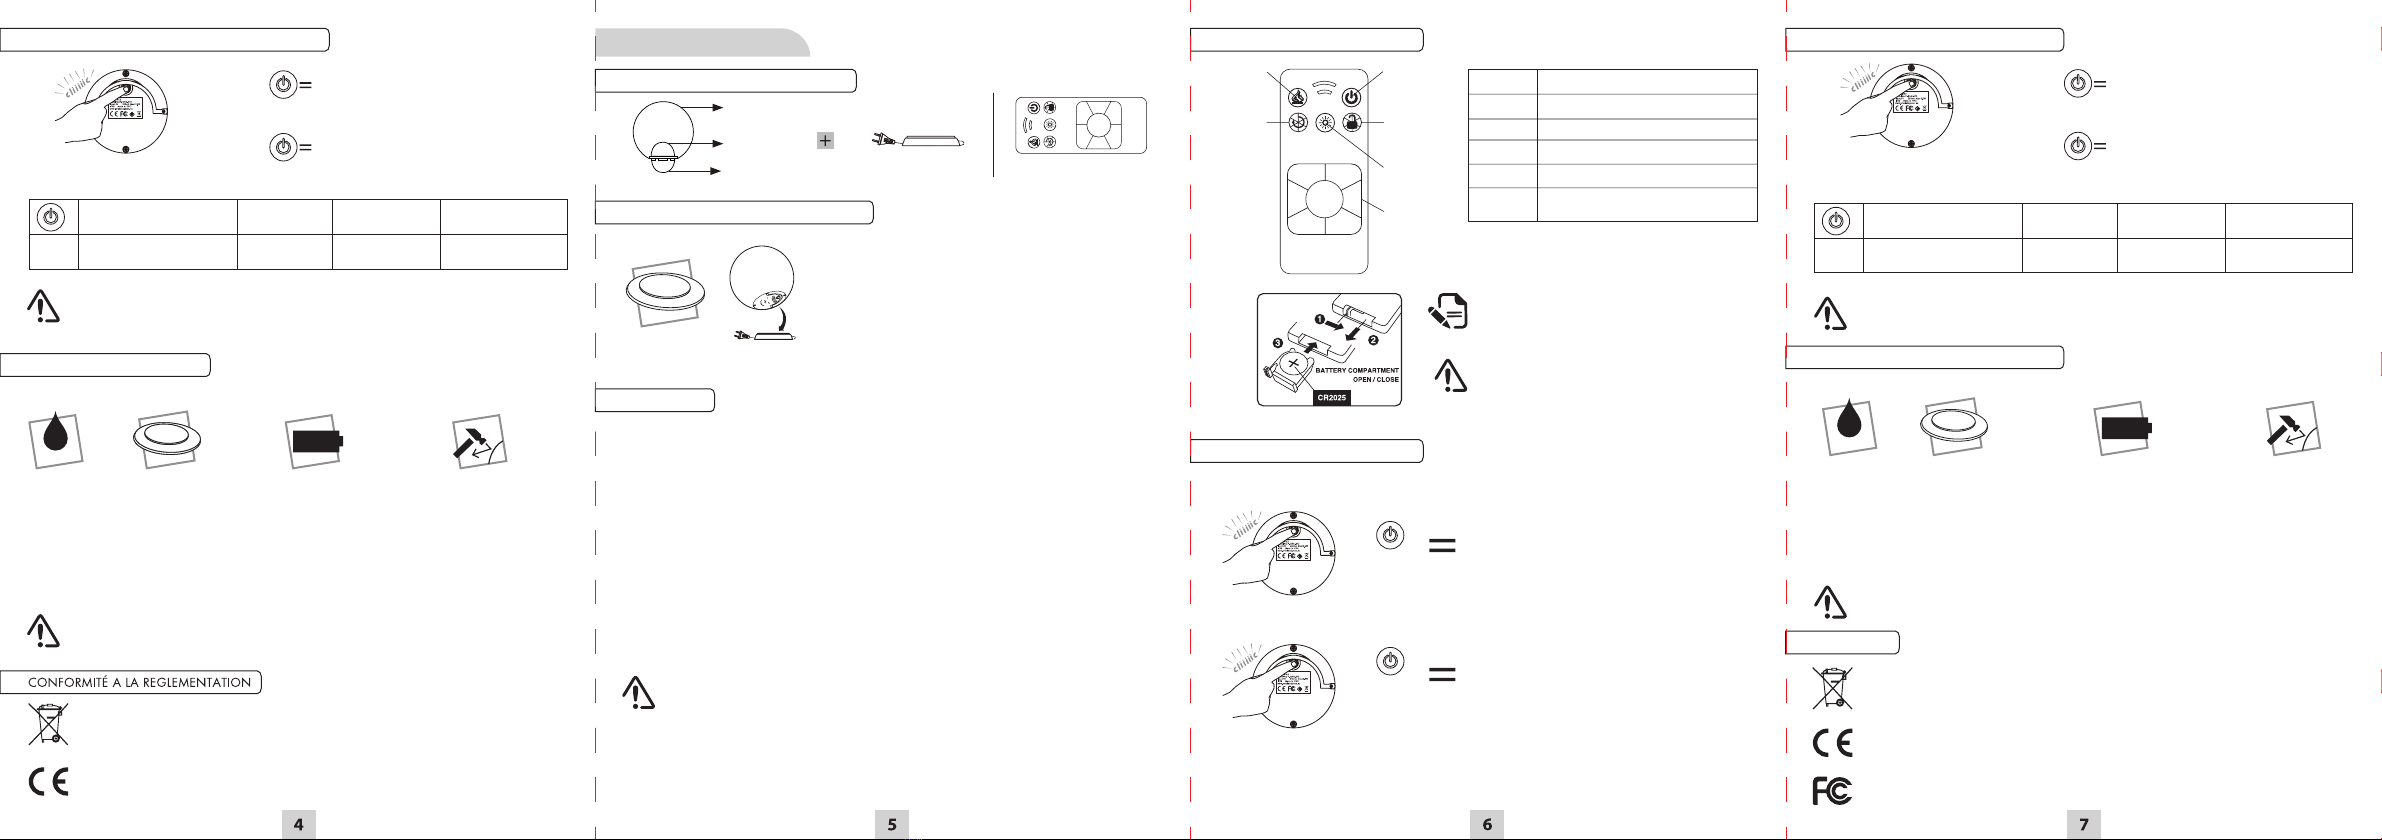
SWITCHING ON/OFF
BULB CHARGING DOCK AND CHARGING
OPERATING MODES
Model:BulbLite2
Input:5VDC
200mA
Max:0.5W
IP68
Madein PRC
• The bulb must be charged before it is used for the rst time and
regularly after that (to prevent damage to the battery).
• Plug in the charging base.
• Place the light on the charging base.
• The bulb gently glows red to indicate that it is charging.
When the indicator turn green, the battery is fully charged.
Allow approximately ten hours to fully charge an empty battery.
Carefully read and save these instructions before using the product. Use it according to the instructions
given in this user manual. Failure to do so will invalidate your guarantee.
• Do not use near a heat source. Keep away from re.
• Keep out of reach of children.
• Do not touch the base of the charging dock being
powered.
• Do not try to dismantle or open the charging dock;
your guarantee will automatically be invalidated.
• Unplug the charging dock after the lamp has
charged.
• Do not use outdoors. Store in a dry place.
Control
buttion
• Do not expose to re or other sources of intense
heat.
• Do not try to dismantle or open the light; your
guarantee will automatically be invalidated.
• Do not connect the light to another device.
• Charge the light regularly: the battery deteriora-
tes after a few months without charging.
• Do not attempt to charge the light using a
charging dock other than the one provided.
• Take care of your light, the diuser can scu.
Charging dock
> For any questions relating to the proper functioning of this product, please contact your point
of sale.
Light
1S
Push on this button for 1second to switch o the
light.
Briey press this button to switch on the light.
TECHNICAL INFORMATION
• Unlimited light colors, 7 LEDs (1 white, 6 RGB)
• LED power consumption: 0.4 W
• Lithium-ion battery: 3,7V 850mAh
• Hours of lighting: approx. 8 hours depending on use
• Battery life in O mode: several months*
• Charging dock power supply: 100-240Vac 50-60Hz
• Bulb power supply: 5.35V 1A
• Bulb charge time: 7h
• Radio range: 5m maximum (direct range)
• Plastic diuser (PE) - Silicon access door (optional)
• Shock and UV resistant
• Waterproof: IPx8 to depth of 1 metre
• Recommended operating temperature: 0 to 40°C
• Product guarantee: 1 year
In the European Union (in accordance with Directive DEEE 2002/96/EC), and also in other regions, you must return this
product to a recycling collection point at the end of its life. As this product is not ordinary household waste, managing
its end of life helps us protect our environment and limit the use of our natural resources. For further information,
please contact Smart & Green.
IPW Europe declares that this product complies with the following European directives: R&TTE (1999/5/EC), LVD (2006/
95/EC), RoHS (2011/65/EU), EMC (2004/108/EC) and Battery (2006/66/EC). The corresponding Declaration of Conformity
can be viewed on our website (www.smartandgreen.eu).
This device complies with Part 15 of the FCC Rules. Operation is subject to the following two conditions: (1) this device
may not cause harmful interference, and (2) this device must accept any interference received, including interference
that may cause undesired operation.
SELECTING A COLOR MODE (AMBIENCE)
MODE
X1 - X7 X8 X9 X10
TECHNICAL CHARACTERISTICS
COMPLIANCE
In order to change to the next color mode (white) when in the RAINBOW mode, you need to
turn the light o and then on again.
WATERPROOF SANS FIL ET RECHARGEABLE HOURS OF OPERATION: APPROX. 8 HOURS SHOCK AND UV RESISTANT
8h
English
Remote control
INFORMATIONS TECHNIQUES
• Une innité de couleurs possibles, 7 LEDs (1 blanches, 6 RVB)
• Puissance consommée par les LEDs : 0.4 W
• Batterie Lithium-ion : 3,7V 850mAh
• Autonomie lumière : 8h environ selon l’utilisation
• Autonomie en mode Arrêt : plusieurs mois *
• Alimentation de la station de recharge : 100-240Vac 50-60Hz
• Alimentation de l’ampoule : 5.35V 1A
• Recharge de l’ampoule : 7h
• Portée radio : 5m maximum (en portée directe)
• Diuseur en plastique (PE) - Trappe (option) en silicone
• Résistance aux chocs et UV
• Etanchéité à l’eau : IPX8 à 1m de profondeur
• Température d’utilisation conseillée : 0 à 40°C
• Garantie du produit : 1an
* Si vous devez ne pas utiliser votre luminaire plus d’un mois, passez de préférence en mode Arrêt,
sinon rechargez régulièrement l’ampoule, an de préserver la batterie.
Dans l’union Européenne (conformément à la directive DEEE 2002/96/CE), voire aussi d’autres régions, vous avez
l’obligation, en n de vie, de retourner ce produit à un point de collecte pour recyclage. En eet, ce produit n’est pas
un déchet ménager ordinaire, gérer ainsi sa n de vie nous permet de préserver notre environnement et limiter
l’utilisation de nos ressources naturelles. Pour toute information complémentaire, contactez Smart & Green.
IPW Europe déclare le présent produit conforme aux directives européennes suivantes : RTTE (1999/5/CE),LVD (2006/
95/CE), ROHS (2011/65/EU), EMC (2004/108/CE) and Battery (2006/66/EC).
La déclaration de conformité correspondante est disponible sur notre site internet (www.smartandgreen.eu).
CHOISIR UNE COULEUR ET UN MODE (AMBIANCE)
CARACTÉRISTIQUES TECHNIQUES
ÉTANCHE SANS FIL ET RECHARGEABLE AUTONOMIE : ENV.8 HEURES RÉSISTANT AUX CHOCS ET AUX UV
8h
REMOTE CONTROL DESCRIPTION
When the unit does not respond to the signal from the
remote control, replace the original battery with a new
Lithium battery 3V CR2025.
Note: The remote control is an alternative way, the
remote control according to the customer's own needs.
Candle
Auto Lock
Colour Buttons
Intensity
O O Turn o the light.
Colour
Buttons Select the desired colour
Auto Change LED colours gradually
Intensity White light in 3 brightnesses
Lock Stop changing colour temporarily
Candle Candle eect mode
RAINBOW*
A short click on this button sets the chosen
color. A second click restartsthe color rotation,...
Briely press this button to turn the light on in
white light, or changes the light color or mode.
Color cycle Stop in the
current color
Continue to
change color
A partir du mode RAINBOW, pour passer à la couleur suivante (blanc) vous devez éteindre
puis rallumer votre luminaire.
RAINBOW*
Un appui cout sur ce bouton dans ce mode xe
la couleur choisie, un second appui relance le
délement du mode, ....
Un appui court sur ce bouton allume le lumina-
ire en blanc ou change la couleur ou le mode.
* If you are not going to use your light for over a month, you should put the product in O mode, if
not recharge regularly the bulb (to prevent damage to the battery).
White / Red/Green / Blue / Yellow
Purple/Cyan
MODE
X1 - X7 X8 X9 X10
Cycle couleur Arrêt dans la
couleur selectionnée
Changement
de couleur
Blanc / Red / Vert / Bleu / Jaune
Pourpre / Cyan
Control
buttion
5S
Deactivation: Push on this button for 5 seconds to turn
o the the remote control function. The light ashes white
to show that the function is turned o.
Reactivation: Briey press this button to restart the
function and turn the light on.


