Smart-M SignWare2 User manual

User’s Guide
SignWare2
www.smartavi.com

TableofContents
Introduction.........................................................................................................................................3
DisclaimerNotice.................................................................................................................................4
What’sintheBox?...............................................................................................................................5
LimitedWarrantyStatement...............................................................................................................6
Section1‐SettinguptheSignWare2ServerSoftware
1.GettingStarted.....................................................................................................................7
2.InstallingSignWare2Server.................................................................................................8
3.SettinguptheSignWare2Client..........................................................................................9
4.NavigatingtheSignWare2Client.......................................................................................10
5.UpdatingtheSignWare2Client.........................................................................................12
Section2‐UsingtheSignWare2ServerSoftware
6.RunningSignWare2ServerSoftwareforthefirsttime.....................................................13
6.1Firewall............................................................................................................................14
6.2UserManager..................................................................................................................15
7.TaskManager.....................................................................................................................17
8.Creatingandworkingwithschedules….............................................................................20
8.1SuperSchedules...............................................................................................................23
9.TemplateCreator...............................................................................................................24
10.CreepingLineEditor........................................................................................................31
11.RegistrationandActivation.............................................................................................38
Specifications.....................................................................................................................................39
ServerRequirements.........................................................................................................................39
AlphabeticalIndex.............................................................................................................................40
2

Introduction
CongratulationsonyourpurchaseoftheSignWare2DigitalSignageSolution.Pleasereadthe
instructionscarefullybeforeusing.
SignWare2isadigitalsignagesolutionthatcreatesnewmarketingandinformationsharingportals
toreachtargetaudienceswithrealtimeinformation.SignWare2attractsaudiencesbydisplaying
yourmessageusingvivid,high‐qualityvideoandanimationreplacingtraditionalsignsandposters.
SignWare2usesyourIPnetworktoremotelymanage,control,andbroadcastyourinformation
totargetaudiencesinspecificlocationsacrosstheglobe.Becauseitusesaclosednetwork,your
informationissafeandsecure.
SignWare2iscapableofplayingbackallindustrystandardsofVideo(avi,mp4,mov,
wmv,etc.)andImaging(bmp,gif,jpeg,png,tif).
SignWare2istheultimatesolutionthatprovidesbothhardwareandsoftwareforthedisplayand
managementofyourdigitalcontent.Itishighlycosteffectiveandeasytouse.Itistheperfect
solutionforbothsmall‐scaleandlarge‐scaleprojects.
3

DisclaimerNotice
Theinformationcontainedinthisdocumentissubjecttochangewithoutnotice.SmartAVI
makesnowarrantyofanykindwithregardtothismaterial,includingbutnotlimitedto,implied
warrantiesofmerchantabilityandfitnessforparticularpurpose.
SmartAVIwillnotbeliableforerrorscontainedhereinorforincidentalorconsequential
damagesinconnectionwiththefurnishing,performanceoruseofthismaterial.
Nopartofthisdocumentmaybephotocopied,reproduced,ortranslatedintoanotherlanguage
withoutpriorwrittenconsentfromSmartAVI,Inc.
4

What’sintheBox?
PART NO. QTY DESCRIPTION
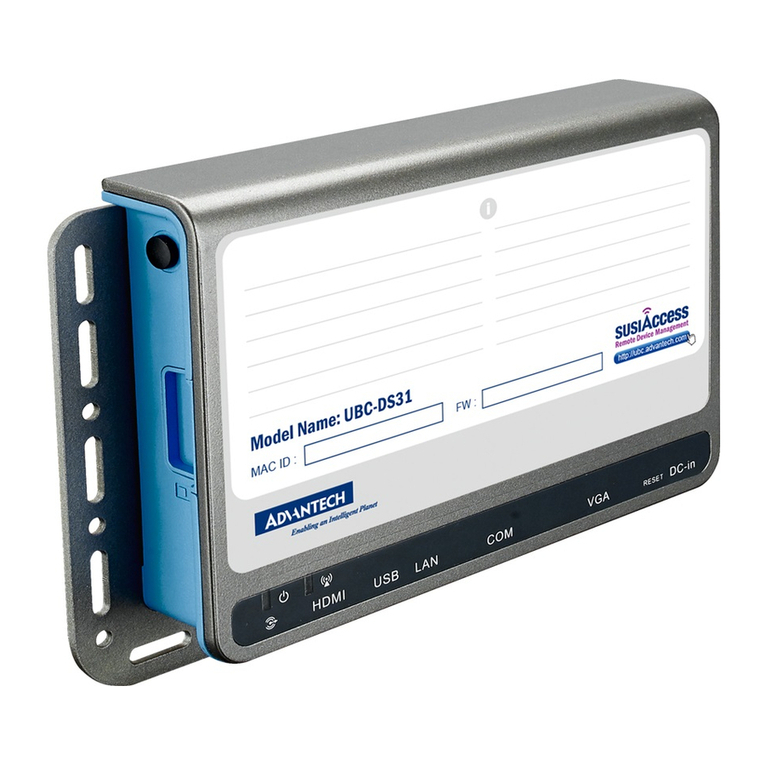
AP-SNW2-4G* 1 SignWare2 Client* - Figure A
AP-SNW-SW 1 SignWare2 Software -Figure B
PS12VDC2A* 1 12-Volt 5-Amp Power Supply* - Figure
C
RMT-SW 1 Remote Control -Figure D
CCPWR06 1 6-Foot Power Cable - Figure E
SM4GBSD 1
4GB SD Flash Card Memory – Figure F
*Actualpartno/productmayvary
5

LimitedWarrantyStatement
A.ExtentofLimitedWarranty
1.SmartAVI,Inc.warrantstotheend‐usercustomersthattheSmartAVIproductspecifiedabove
willbefreefromdefectsinmaterialsandworkmanshipforthedurationof1year,whichduration
beginsonthedateofpurchasebythecustomer.Customerisresponsibleformaintainingproofof
dateofpurchase.
2.SmartAVI’slimitedwarrantycoversonlythosedefectswhichariseasaresultofnormaluseofthe
product,anddonotapplytoany:
a.Improperorinadequatemaintenanceormodifications.
b.Operationsoutsideproductspecifications.
c.Mechanicalabuseandexposuretosevereconditions.
3.IfSmartAVIreceives,duringApplicablewarrantyperiod,anoticeofdefect,SmartAVI,Inc.will,at
itsdiscretion,replaceorrepairthedefectiveproduct.IfSmartAVIisunabletoreplaceorrepairthe
defectiveproductcoveredbytheSmartAVIwarrantywithinareasonableperiodoftime,SmartAVI
shallrefundthecostoftheproduct.
4.SmartAVIshallhavenoobligationtorepair,replaceorrefundunituntilcustomerreturns
defectiveproducttoSmartAVI.
5.Anyreplacementproductcouldbeneworlikenew,providedthatithasfunctionalityatleast
equaltothatoftheproductbeingreplaced.
6.SmartAVIlimitedwarrantyisvalidinanycountrywherethecoveredproductisdistributedby
SmartAVI.
6

Section1SettinguptheSignWareServerSoftware
1.GettingStarted
ThisquicksetupguidewillinstructyouonhowtoinstallandsetuptheSignWaresoftwareonto
yourServer(HostPC)andhowtosetuptheSignWareclient.
Toensureproperinstallationoftheserversoftware;
•PleasemakesureyouarerunningWindowsXPProfessionalwithServicePack2or3,
Windows2003orWindowsVista.
•Makesurethatyouareloggedinasthesystemadministrator.
•TurnofftheWindowsfirewall.(seeFigure1.1forWindowsXP)Youcanalternatelyselect
SignWareundertheexceptionstab.(Figure1.2)
•Ifyoudonotwishtoturnoffyourfirewall,pleaserefertoPart7.1ofthemanual.
Figure1.1Figure1.2
7

2.InstallingSignWare2Server
SignWareServerrequiresauniqueserialnumbertobeinstalled.Youwillfindyourkeyonbackof
theSignWareServerCDsleeve.Inaddition,youmustcompletetheonlineregistrationforyourcopy
ofSignWareServer.Ifyoudonotregisterwithinthethirty‐daywindow,yourSignWareServer
softwarewillbecomedisabled.Aregistrationwindowwillopenautomatically.Ifyouwishto
registeratalaterdate,simplyselectHelp/Registration.Formorehelponregistration,refertoPart
13ofthemanual.
1. DoubleclickontheSignWareServerSetupexecutable.ReadtheLicenseAgreementthen
click‘IAgree’
2. Enterinyournameandorganizationandentertheuniqueserialnumber(INALLCAPS)
providedtoyou.Important:Whenenteringtheserialnumber,pleasemakesureitistyped
withALLCAPS,orregistrationwillnotgiveyoua30daygraceperiod.(Figure2.1)
3. Thenextwindowwillbetochoosecomponents,makesure“SignWareServer”ischecked.
(Figure2.2)
4. ChoosetheinstallationlocationyouwouldliketoinstalltheSignWareServer.Click‘Next’.
5. Beforetheinstallationcompletes,youwillbeaskedtocreateapasswordforthe
Administratoraccount.YoumustsigninastheAdministratorforthefirsttimeyouloadthe
SignWareManager.FormoreinformationontheUserManager,gotoSection2ofthe
manual.
Figure2.1 Figure2.2
8

3.SettinguptheSignWare2Client
1. SettinguptheSignWareClient
a. ConnectthepowersupplycabletotheSignWareclientandplugthecableintoa
groundedpoweroutlet.(Figure3.1)
b. AttachtheHDMIfromthemonitorordisplaytotheHDMIportonbackoftheclient.
c. ConnecttheSignWareclienttoarouterusingCAT5cable.
Turnonthedisplayconnectedtotheclient.
ThemonitorshoulddisplaytheSignWaresplashscreen.
Oncethekernelhasbooted,youwillbebroughttoablackscreenwithabluestatusbaratthe
bottom.
Figure3.1
9

4.Na
v
v
igating
t
t
heSign
W
W
are2Cl
i
i
ent
1.
O
S
2.
N
3.
R
4.
S
O
nceyou’ve
S
ignWareC
o
N
etworkSet
t
i. DHC
P
•
C
f
•I
f
G
R
esolutionS
e
•
U
a
t
S
ignWareSe
i. Serv
e
•I
f
loggedin,
u
o
nfiguration
t
ings
P
C
heckthisb
o
romyourn
e
f
youneedt
G
ateway,an
d
e
ttings(
Fig
u
U
sethe‘Tab
’
a
rrowkeyst
o
heresolutio
n
rverSetting
s
e
r
f
yourSign
W
u
sethekey
s
Panel(Figu
r
o
xifyouw
o
e
twork.
osetaStati
d
DNS.
u
re4.4)
’
key(
Figure
o
scrollthrou
g
n
.
s
W
areClienti
s
10
s
described
i
r
e4.3).
i
nFigure4.
1
1
andFigur
e
e
4.2tonav
i
i
gatethe
Figure4.1
Figure4.2
Figure4.3
o
uldlikeyou
cIP,unche
c
4.2)totabt
o
g
hthediffer
e
s
unabletof
rSignWare
c
kthisboxt
o
o
theResolu
t
e
ntselectio
n
indyourSe
r
Clienttore
c
c
eivedanIPAddress
o
manually
s
s
etyourIP,
N
N
etmask,
t
iondropdo
w
n
s.Pressthe
w
nboxand
u
‘OK’button
t
u
sethe
t
oselect
r
veronthe
n
n
etwork,manually

k
ii. User
k
eyintheIPAddressof
y
y
ourServer.
•
T
s
iii. Pass
w
T
hisisthed
e
ettingasis.
e
faultusern
a
a
methatisl
i
i
nkedtoyou
u
rServer.Pl
e
e
aseleavet
h
h
is
•
T
a
w
ord
T
hisisthed
e
a
sis.
e
faultpassw
o
o
rdthatisli
n
n
kedtotheUser.Pleas
e
e
leavethis
s
s
etting
11
Figure4.4

5.UpdatingtheSignWare2Client
Inanefforttoproducethebestdigitalsignagesystemonthemarket,wewillcontinuetomake
upgradestoourproducts.
ToupdatetothenewestversionoftheSignWareclient,youwillneedtodothefollowing;
1. UnpacktheSignWareupdatefileontoyourserver.
2. InTaskmanagercreate“Update”taskandpointtoupdate.imgasthetaskdata.(Figure6.1)
Important:update.infshouldbeplacedinthesamedirectoryasupdate.imgortheupdate
willnotwork.
3. InTaskmanager,createanewscheduleandaddtheupdatetaskyoucreatedinStep2.
(Figure6.2)
4. Right‐Clickthescheduleandselect‘Start’toruntheupdate.
5. Afterupdating,theSignWareclientwillrebootautomatically.
6. Youmayneedtoreconfigureclientsettingsagain.
IMPORTANT:DONOTTURNOFFORUNPLUGTHECLIENTduringthisoperation.Ifyoudoso,the
SignWareclientwillnolongeroperateandyouwillneedcontactcustomersupportforanewsystem
file.
Figure6.1Figure6.2
12

Section2UsingtheSignWareServerSoftware
6.RunningSignWareServerSoftwareforthefirsttime
1. DoubleclickontheSignWareServerStationManagericoneitheronyourdesktoporstart
menu.
2. Youwillfirstbepromptedwitha‘ServerLogonsettings’dialogbox.ThedefaultIPaddressis
127.0.0.1.IntheusernameandpasswordfieldsusethenewAdministratoruserand
passwordyoucreatedintheinstallationprocessandclick‘OK’.(Figure6.1)
3. OncetheSignWareServerStationManagerisloaded.Youwillseethefollowing;
a. ConnectedSignWareclients
b. LoopbackIP.(127.0.0.1)
c. Yourusernameandpassword.ClickSavePasswordtostayloggedin.(Figure6.2)
Figure6.1 Figure6.2
13

6.1Firewall
SignWareusestheTCP/IPsuitetocommunicatebetweentheserverandclient,propersettings
ofyourfirewallandrouterswillbeneeded.
AftertheinstallationofSignWareManager,andtheinitialstartofthesoftware,youwillbeaskedto
bythewindowsfirewalltounblock,orkeepblockingSignWareManager.Youwanttomakesure
youunblockit.
Theportusedforcommunicationis‘13325’UDPandTCP.Thiswillbeusedwhenforwarding
portsinyourrouter,whenusingSignWareviaWAN.
14

6.2UserManager
OurusermanagernowallowsSignWareuserstomanageandcontroltheirownuserdatabase.
Windowsloginsarenolongerrequired.Eachusercreatedisallowedasetofpermissions.
Theuserrightsaredescribedasfollowed:
•Administrator:Fullaccesstoeverything,onlyuserthatisabletocreateandmanageusers.
•TaskManager:Allowedtoaccessandcontrolthetaskmanagerandselectableclients
assignedbytheadministrator.
•StationManager:allowedtoaccessandcontrolthestationmanager.
•Client:usedfortheSignWareclientstoconnecttothesignageserveronly.
Duringtheinstallation,youwillbeaskedtocreatetheadministratorpassword.Ifyouclick‘Cancel’,
youwillbeassigneddefaultusernamesandpasswords.(Figure6.2.1)
Tohavedifferentuserslogin,alwaysclickon‘Configuration’then‘Loginserver.’Click‘Save
Password’whileloggedin.Tologout,uncheck‘SavePassword’.(Figure6.2.2)
Figure6.2.1 Figure6.2.2
15

AfteryoulogintotheSignWaremanager,youcancreatenewusersbyclicking‘Run,’thenclicking
on‘UserManager’(Figure6.2.3)
Tocreateanewuser,rightclickorclickon‘User’then‘NewUser.’Theuserpropertieswindowwill
open.Hereiswhereyouenterinyournewuserinformation(Figure6.2.4):
•Username:Thenameofthenewuser.
•Fullname:Therealnameoftheuser.
•Description:Thedescriptionoftheuser.
•Password:Thepasswordforthatuser.
•Userrights:Selecttherightsyouwantthisusertohave.
Figure6.2.3 Figure6.2.4
Click‘Save’.Youwillthenseethenewuserinthelist.(Figure6.2.3)
16

7.TaskManager
ThemainfeatureofSignWareistheTaskManager.Thisiswhereyousetupandmanageallofyour
presentations.
ToopentheTaskManager:
•SelectRunthenclickontheTaskManager.(Figure7.1)
Figure7.1
OnceyouareintheTaskManageryoucanbeginsettingupyourpresentations.
Tasks:areindividualfilessuchasVideos,Images,andRS232commands.InordertorunaTask,it
mustbeplacedintoaschedule.
Schedules:areusedtoscheduleaTaskoraseriesofTaskstoruntogetherataspecifictimeand
day.
17

SettingupTasks:IntheTaskmenuoption,youcancreate,delete,andviewthepropertiesofallthe
filesyouwishtorunonSignWare.
Figure7.2
Tocreateanewtask:
1. SelectTaskandselect‘NewTask’.(Figure7.2)
2. Selectthetypeoffileyouaregoingtouse.(Figure7.3)
3. Selectthefilelocatedonyourharddrive.Oncethetaskhasbeenadded,youcanconfigure
thefollowingproperties;
a. Thedurationofthetask(settingthedurationto0:0:0willcausetheprogramtorun
indefinitely.
b. OperationonEndofTask,
i. HereyoucansetwhatwillhappenuponcompletionoftheTaskifitisincludedina
schedule.
ii. RunNextTaskwillopenupthenexttaskinthescheduleuponcompletion.
iii. RestartCurrentTaskwillcausethetasktorepeatitself.
Note:Youcanoverridetheseconfigurationsinthe‘ScheduleProperties’menu.(Part8)
18

Figure7.3
CreatingSchedules
Ascheduleiswhereyoucombineallofthedifferenttasksthatyou’vecreatedinstep8andput
themintooneplace.Fromhereyoucreatetheprogrammingschedule.Youcanselectavarietyof
tasktorunatspecifictimes,runonce,orloopcontinuously.Ifyouusethetemplatefeature
(describedinstep10)youwillselectwhichtaskswillruninwhichwindow.
Schedulescanbeascomplexorassimpleasyoulike.Youcancontrolhundredsoftaskstorun
atspecifictimesorsimplyhaveoneortwotaskssettoloopcontinuously.
19

8.Creatingandworkingwithschedules
1. IntheTaskManagerselect‘Schedule’andclick‘NewSchedule’.TheScheduleProperties
Dialogwillappear.(Figure8.1)
2. Inthe‘General’tabgiveyourscheduleaname.(optional)
3. Beginpopulatingtheschedulewithvarioustasks.Thesetaskscanbevideos,images,and
RS232data.
a. Todothisyoumustuseyourmousetohighlightoneofthetasksyoucreatedinthe
previousstep.(Figure8.2)
b. Withthetaskhighlightedclickthearrowjusttomovethetaskintoyourschedule.
(Figure8.2)
c. Thetaskwithintheschedulewillruninorderstartingfromthetaskatthetopofthelist.
Youcanarrangetasksbyselectingthemandusingtheupanddownbuttons.
d. Youalsohavetheoptionofdeletingthetaskfromthescheduleorclearingtheschedule
entirely.
Figure8.1Figure8.2
Onceyouhaveaddedyourtaskstotheschedule,youarereadytomodifythetasksproperties
20
Table of contents
