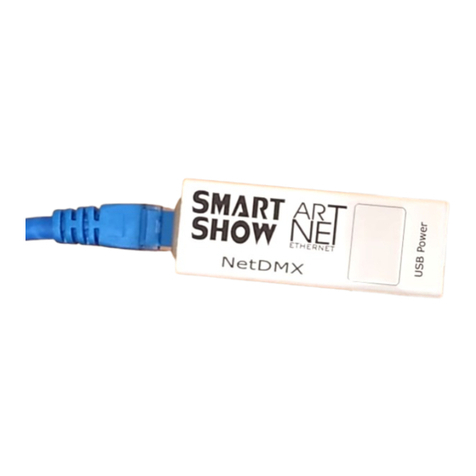
SMART SHOW NetWS-340 Quick start guide

NetWS-340 Installation & Use
Introduction
NetWS-340 will drive up to two Art-Net/sACN Pixel Universes (340 WS2811/WS2812/WS2813/Neopixel Pixel- EDs)
over a wired Ethernet network. DMX Protocol Selection, Device IP, Art-Net/sACN Settings and ED configuration is
adjustable directly from your Browser interface, a simple pixel test is included. Two 3-pin JST connections are provided
for outputting the pixel data to the Pixel ED strips/matrix. Operational Mode is indicated by a simple 7 segment
display. Product Firmware updates can be sent over USB, and a serial diagnostics interface has also been included.
Specifications
IEEE 802.3 compatible Ethernet Controller, Integrated MAC and 10BASE-T PHY
Browser Configuration Server and UDP Client modes
Isolated RJ45 Ethernet Connection
Dual Universe Art-Net II & III and sACN (E1.31) decoding pixel data at 25fps typical
Power Input : 5V USB Powered, or MAX 5V external power applied to RED wire of 'Brown' 3-Pin JST Connector
Parts Supplied
NetWS-340 Interface, 2 x 3-Pin JST Plug/Cable, 1 x USB-MiniUSB cable (power, configuration & firmware upload)
Product & Pixel LED Connection
Connect a strip of WS2811 or WS2812 EDs to the 3-pin JST connector. Most Pixel- ED strips come with this
connector already supplied, if not then a female 3-pin JST connector is supplied with the kit. Use a 5V external power
supply capable of powering your EDs. To calculate the power supply required, multiply the number of EDs by 0.25
(each Pixel- ED draws 0.25W). For example 340 Pixel- EDs will require 340x0.25W = 85W, therefore a 100W/5V
power supply should be perfectly adequate.
Powering Options
The NetWS-340 can be powered either from a USB power source, such as a quality mains-plug-in source (500mA
min) or alternatively 5V power can be taken from the Pixel Strip supply, as long as 5V only is used. The Brown output
JST connector has an additional Red wire available for this purpose. Applying more than 5V to the product in this way
may cause damage internally.
LAN Ethernet Connection
The NetWS-340 can be configured for almost any IP setting, although a default IP of 192.168.1.200 is supplied with
the unit. In general this will be a similar IP to your home router/hub, therefore the NetWS-340 can be connected
directly to one of your router AN Ports. Once connected it can be accessed from a PC that is also connected to that
same Network.
Device Configuration
It is possible to configure your device in one of two ways, either directly from your PC Browser (if you are on a
192.168.1.x network) or via a Serial Configuration using the USB connection, this is useful for directly setting to an
alternative network.
Lighting Innovations Software Design - www.smartshow.lighting – Page 1

NetWS-340 Installation & Use
Browser Configuration Mode
To access the browser configuration, the NetWS-340 must be put in Configuration mode. Configuration mode is
available for the first 8 seconds after power up, during this time the devices IP address will be shown in the display. To
activate Configuration mode you should open your PC browser (most browsers are supported) and type into the UR
bar 192.168.1.200 and press return, hitting the return within the 8 second window will activate Configuration mode
and will show a 'C' on the display (If you allow 8 seconds to elapse without any browser intervention then the NetWS-
340 will go directly into Art-Net mode 'A', or sACN mode 'S'). As long as the PC and the NetWS-340 are connected to
the same network at 192.168.1.200 the configuration interface should appear as follows:
Ethernet Settings & IP Configuration
Device IP: It is possible to set the IP Address of the NetWS-340 to almost any value, (Many Art-Net devices
will use standard IP addresses of 10.x.x.x or 2.x.x.x) only values of 0-254 can used, 255 is not allowed.
SubNet Mask: Normally this should be left at 255.255.255.0, which will cover most applications.
MAC Address: This is not adjustable and is a unique number created in conjunction with the serial number of
the supplied unit
[SAVE] New IP configuration will not take place until NetWS-340 has its power cycled (or by pressing
REBOOT). Saving the configuration will write the Device IP and SubNetMask values to the NetWS-340 internal
memory, so on the next power-up the new settings will be used.
DMX Protocol
Select either Art-Net or sACN (E1.31) to match the DMX Data Protocol coming from the host application
[SAVE] New DMX Protocol settings will take immediate effect after they are saved to the NetWS-340.
Art-Net/sACN Settings
These values can be configured to match the requirements of your system. There are a total of 256 Universe
values for Art-Net II and 32,768 for Art-Net III, and 63,999 for sACN
Net: any value in the range 0-127
SubNet: any value in the range 0-15
Universe: Art-Net : any value in the range 0-15 – sACN : any value in the range 1-15
Art-Net Node Name (Art-net only): each NetWS-340 can be numbered (0-255) so it can be identified easily
on a network with ArtPoll
[SAVE]: New Art-Net/sACN settings will take immediate effect after they are saved.
Pixel LED Test
Buttons have been provided for testing connected Pixel EDs, both output connections are tested at the same
time. Pressing RGB-[1],[2] or [3] will test individual RGB channels. Pressing RGBW-[1],[2],[3] or [4] will
test individual RGBW channels. Pressing [OFF] will clear all colour channels.
Pixel Colour Order
In general the default is GRB(W) which covers GRB & GRBW Pixels. If your application sends data out in RGB
order, then select RGB for 3 colour Pixels, or RGBW for 4 colour pixels.
REBOOT DEVICE
Pressing [REBOOT DEVICE] will restart the NetWS-340 interface (a bit like cycling the power) and display the
devices IP Address before entering Art-Net/sACN streaming mode, indicated by 'A' or 'S'. All newly saved
settings (including IP values) will be used after reboot.
Private Wired Network Connection
It is highly recommended that you move the NetWS-340 away from your home network and onto a private wired
network connected directly between your PC and the NetWS-340 device. Generally your home network (192.168.1.x)
could have lots of traffic that could affect the consistency of Art-Net/sACN data, and may cause visual disturbances.
To move NetWS-340 to a direct-wired network follow these instructions (MS Windows):
Go to Control Panel, select Network and Internet, then select Network and Sharing Centre
In the left hand column, click on 'Change Adapter Settings'
' ocal Area Connection' should be shown, double click on it
Under the 'Networking' tab, select the line that says 'Internet Protocol Version 4 (TCP/IPv4)'
Then click 'Properties'
Click the radio button beside 'Use the following IP address'
Enter your required IP address & Subnet mask (eg 255.255.255.0) in the fields provided
NOTE : The IP Address entered here MUST match the NetWS-340 IP SUBNET for communications to work
eave the DNS Settings blank, click OK then click Close
Plug in the NetWS-340 (if you haven't already done so)
Serial Configuration Mode - Set-Up
Firstly, you will need to install the correct CH340 serial driver for the NetXX devices these can be found at :
Windows 7 - http://www.arduined.eu/tag/windows-7/
Windows 8 - http://www.arduined.eu/ch340-windows-8-driver-download/
Once installed, connect the NetWS-340 via the USB connection and allow the driver install to complete.
Make a note of the serial port number for the device (see Device manager/Com Ports/CH340 device)
If you havent already got a Serial Communications application, we recommend HTComm for simplicity.
You can find HTComm at http://www.hobbytronics.co.uk/ht-comm
Set the PORT number to the ComPort that the NetWS-340 is connected to
The serial communications use serial settings of 9600 N/8/1, so set Baud to 9600
Ensure that the checkbox for [CR] is set, to allow a carriage return to be sent after any communications
Lighting Innovations Software Design - www.smartshow.lighting – Page 2

NetWS-340 Installation & Use
Serial Configuration Mode - Use
To access the Serial Configurator, the NetWS-340 must be put into Configuration mode. Configuration mode is
available for the first 8 seconds after power up, this is shown as the devices IP address on the ED display. To activate
Configuration mode you should type '?' in the HTComm chat window and press return, hitting the return within the 8
second window will activate Configuration mode and will show a 'C' on the display (If you allow 8 seconds to elapse
without any user intervention then the NetWS-340 will go directly into Art-Net mode 'A' or sACN mode 'S'). In
response to sending a '?' the device will respond with its Device Settings, and a Function Guide:
*********** DEVICE SETTINGS **********
MAC Address CA:EF:FF:1E:02:34
Device IP 192.16 .1.200
SubNetMask 255.255.255.0
Starting Uni (Net)0 (Subnet)0 (Uni)0
DMX Protocol Art-Net
Pixel Order GRB(W)
*********** FUNCTION GUIDE ***********
'i192.16 .1.200<CR>' Change local IP
's255.255.255.0<CR>' Change SubNetMask
'u0<CR>' Change Start Uni
'a<CR>' Change to Art-Net Mode
'e<CR>' Change to sACN(E1.31) Mode
'r<CR>' Reboot device
'?<CR>' Display settings & help
'$RESET<CR>' Reset Defaults & Reboot
***(ensure <CR> is enabled on send)***
For example, pressing 'i2.0.0.1' and pressing return will change the device IP to 2.0.0.1
Changes can be made to IP, SubNetMask, Starting Universe, DMX protocol and ED Configuration.
For more information see 'Browser Configuration'
Lets Animate !
Open your ED animation application, we suggest Jinx as a good starting point, this can be downloaded free of
charge from http://www.live-leds.de/
1. Configure Jinx to use your NetWS-340 device, by selecting it as an 'Art-Net or sACN' device type from the
'SetUp>OutputDevices' menu
2. Ensure the Broadcast check box is not checked
3. Enter the IP number of your NetWS-340 interface (as you have set in NetWS-340 config)
4. Select 512 channels, and set Net, SubNet and First Output Universe (as you have set in NetWS-340 config)
5. Click OK to save changes
6. For the Second Output Universe, add another device (as above) but with the NEXT Universe value. (the
second Universe assumes it is one after the first Universe) – Note : sACN starts at universe ONE
7. Design your matrix size and shape within 'SetUp>MatrixOptions'
8. Patch your matrix to the NetWS-340 universe(s) within 'SetUp>OutputPatch'. Be careful to select the correct
colour order for your EDs, WS2812 are GRB, and NOT RGB, starting at channel zero.
9. Ensure BOTH universes are patched to different parts of the Matrix
10. 'SetUp>StartOutput' to start the show.
11. Ensure NetWS-340 is in Art-Net/sACN mode this should be identified by an 'A' or 'S' on the ED display.
12. Ensure your WS2812 ED strip/matrix is connected to the JST outputs, following the correct connections of
GREEN=DataOut, WHITE=GROUND/0V. The Red Connection is not used.
13. Once Art-Net/sACN data is being received the 'A' or 'S' ED Display will flash. It will flash twice a second for
TWO universes received, and Once a second for ONE universe received
14. Select the effect you want to see from the Channel Effects and have fun !
Multiple Universe Connections
If you have more than one universe of 170 RGB Pixels, the second universe will always be the Configured Universe
P US ONE, the BROWN output will be the FIRST Universe and the RED output will be SECOND Universe. Make sure you
patch different device outputs to different areas of the overall matrix design. As an example, you could create a 26
wide by 13 high matrix, patch Universe0 to the left 13*13 array, and Universe1 to the right 13*13 array.
Multiple Device Connections
If required you can add several NetWS-340 to your network and have them controlled from the same application.
Each NetWS-340 would need to have a different IP address (x.x.x.1, x.x.x.2, x.x.x.3 etc) and be added to your
application as a new device and patched accordingly into its own area of the matrix. Your Ethernet connection can be
split into several outputs using a simple and inexpensive Ethernet 4 or 8 way switch.
Lighting Innovations Software Design - www.smartshow.lighting – Page 3

NetWS-340 Installation & Use
Using RGBW (4-colour) LEDs
The NetWS-340 is able to output data to either RGB or RGBW eds (depending on your host application). RGB EDs
use 3 channels per pixel and RGBW EDs use 4 channels per pixel. Since RGBW uses 4 channels and there is a
maximum of 512 channels per universe on Art-Net/sACN/DMX, the maximum number of Pixel- EDs that can be
connected to one universe is 128. Ensure you select the correct Pixel Colour Order from within the browser
Configuration.
Art-Net/sACN Unicast, Multicast & Broadcast mode
It is recommended that Unicast mode is used when sending Art-Net/sACN data to the NetWS-340.
Art-Net Broadcasts are also accepted, but not recommended
Art-Net Device Discovery & DHCP
There is the ability to discover IP addressing and device Information using ArtNetPoll, IP Scan is available on most
software, if unavailable, addressing can be done manually as described above. There is no DHCP function as IP
addressing is Static, utilising client port 6454.
Pixel-LEDs that can be driven from the NetWS-340
WS2811, WS2812, WS2813, UCS1903, UCS2903, TM1804, SK6812
Dimensions
ength : 68mm (plus JST cables) – Width 24mm – Height 24mm
Software Compatibility
NetWS-340 works with all free and commercial Art-Net/sACN compatible software. For free software, Jinx is highly
recommended, visit http://www.live-leds.de/ for more information.
Firmware Upgrades
From time to time we may issue revised firmware for our products. The latest firmware can be uploaded to any of
our products using the Xloader tool plus the latest HEX file for the product. Please ensure that the firmware file
matches the product you are downloading to.
Xloader can be provided on request or downloaded from our website www.smartshow.lighting
Unpack the zip file and run the Xloader executable
Select the '…' browse button and navigate to the hex file, and select it
Select the device as 'NetWS/SPI/DMX Art-Net Interface'
Select the COM port which the NetWS-340 is connected to (see Device manager/Com Ports/CH340 device)
eave the BaudRate as 57600 and press UP OAD
Once the upload is complete, there will be a notification
Additional Software
On request we can supply an alternative version of NetWS-340 software that will output both universes into ONE
output, thus enabling 340 Pixel- EDs to be connected in one long string. This version of software does not have the
Browser Configuration Interface, but just uses a simple Serial Configuration Interface.
Power Supply
It is recommended that you use a quality USB power source with this product, a mains plug-in variety is best, and
it is good to avoid using a phone charger type as these generally have weak current supply
Technical Support
email : [email protected]ghting
Art-Net™ Desi ned by and Copyri ht Artistic Licence Holdin s Ltd
Lighting Innovations Software Design - www.smartshow.lighting – Page 4
Table of contents
Other SMART SHOW Recording Equipment manuals
