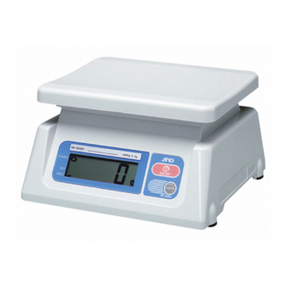
SMART HAX Series User manual

SMART
HAX - SERIES
Hanging Weighing Scale
www.weighing.in
Hax Series Hanging Scale
2
About the HAX Series Hanging Scale
We would like to thank you for choosing SMART as your preferred
choice for your weighing requirements.
The HAX SERIES HANGING weighing scale is an accurate, fast and
versatile series of balance loaded with time saving features and
ease of customer use. It is perhaps the most economical
commercial grade scale available in the market.
The scale has two 0.56” LED displays to show weight, one for the
user and the other for the customer on the back side
The soft touch keypad buttons are ideally sized, color coded, and
bear symbolic tags for easy recalling scale functions. The displays
are large easy to read LED type displays for easy view in different
lighting conditions.
The scale is loaded with features like, automatic zero tracking,
overload alarm, low battery protection, Weight Hold,
Accumulation, Pre Tare, Sleep Mode, Check Weighing, Brightness
Increasing, Dummy Zero.

Hax Series Hanging Scale
3
1TECHNICAL DATA
High Precision Bal
ances
HANGING
Balances
Measurement
Data HAX-HG-10K5
HAX-HG-200K50
Capacity 10kg 200kg
Readout / Interval 5g 50g
Tare range
subtractive 10kg 200kg
Repeatability ±1d ±1d
Display
Resolution 1:30000 1:60000
Other Parameters
Application
Modes Weighing & Weight Accumulation
Product Features Auto Sleep, 100% Tare Range, Weight Hold, dummy
zero
Keyboard 4 membrane keys
Weighing Units Kilograms
Calibration Digital with external weight.
Weight 1.5kg Approx
Front Display
Type 0.56” Bright red LED display
Remote Display Optional, Available with 0.56” LED Display
Communication NONE
Stabilization 2 seconds
Power 6V AC Adaptor / built in battery for backup to 30hrs.
Operating Temp. 50° to 98° F / 10° to 35° C
** Specific to country restrictions.
Hax Series Hanging Scale
4
2INSTALLATION
2.1 Unpacking
Unpack and verifythat the following components have been included:
a) Hax Series Hanging Scale
b) Instruction Manual
c) AC Adapter
Save the packaging material. This packaging ensures the best possible
protection for the storage or transport of the product.
2.2 Hanging your scale
Before you install the scale, identify the best location for the equipment.
The proper environment enhances its operation and longevity. Keep in
mind the following factors, which might have a negative influence on the
scale's operation:
a) Vibration: Vibration diminishes the scale’s ability to measure accurately.
Electrical machinery such as conveyors and drill presses can cause
inaccurate and non-repeatable readings. The scale may also read
inaccurately if it is not leveled properly. The scale incorporates a SMART
weighing mode where the scale can reject readings with vibration up
to some extent.
b) Drafts / Air currents: Moving air can cause the scale to read wind
movement as an additional force and cause inconsistency in the
weighing results.
c) External Rubbing / Friction: Ascale cannot measure accurately if an
object is rubbing or pressing against the scale hook.
2.3 Power Source
The unit works through 6VAC Adaptor. The scale is fitted with a built in 6V
4Ah battery which provides backup of more than 30 ~45 hours depending
on glow setting and sleep mode setting.

Hax Series Hanging Scale
5
2.4 Calibration Check
Hang a known weight on the machine and make sure that the scale reads the
correct weight on the display. In case of a variationin the display reading, it is
recommended to calibrate the scale again with the procedure explained in section
7.1 later in the manual.
3CONTROLS & FUNCTIONS
SYMBOL
NAME
FUNCTION
Located on
back side of
scale Power Switch To power on and off the machine
HOLD
Right shift the selected digit during cal or
other setup modes
Holds the weight on the display
M+
Manual Accumulation, Add weight to
memory
Long press clears the Accumulated memory
Recall Accumulated weight
Increment digit by 1 of selected digit. Ex
change 0 to 1 to 2 to 3….9
MODE
Changes to different options available in the
setting mode
Press and switch on the scale, displays the
internal counts
TARE/ZERO
Tare / Zero the weight hanging on the hook
Zero the weight hanging on the hook.
Enter Key – Accept the selected setting and
exit from setting mode.
External Calibration of Scale
Hax Series Hanging Scale
6
4USER OPERATION
4.1 SWITCHING SCALE - ON / OFF The scale is switched ON / OFF by using the
Power switch located on the back side of the scale.
Note: Make sure there is no weight hangedbefore turning on the scale.
4.2 TARE / ZERO : The machine has a common Tare/Zero button. TARE /
ZERO BUTTON: This button is used for taring a weight to display 0.00. Hang a
Bowl on the hook (say 200g), then press the TARE button. The weight is zeroed
and the machinewill display zero.
4.3 ACCUMULATION: Hang a weight on the Hook (ex 200g). The display will show
the weight. Now press M+. The display will show “n ...” total no. of items weighed
and then the total weight. Now hang another weight (ex 300g), the display will
show its weight, now press the M+ button, the display will show the no. of items
and the total weight. To recall the accumulated weight press the M+ button.
4.4 HOLD FUNCTION: This function enables you to hold a particular weight that is
being displayed on the display of the scale so that the user can see the accurate
stable weight until the hanged weight is lifted back from the hook. To hold the
weight just hang some weight to the scale and press the “ M+ ” button and you
will notice the displayed weight has been hold with the hold led blinking, now
remove the hanged weight and the scale will automatically return to the
weighing mode.
4.5 MODE This button is used to select the different values available in the scale
settings mode. This button is also used to display the internal counts. Press and
hold the button and switch on the scale until display shows the internal counts.

Hax Series Hanging Scale
7
5SCALE SETTINGS
5.1 PRE – TARE: With an empty hook Press the
Hold & M+ button together - “P-tArE” will
flash on the display. Now press the
Tare/Zero button once and all the zeros will
be displayed. Enter a value (ex.-1.200g),
using M+ & Hold keys. Exit the setup menu
by pressing the Zero/Enter key until the
scale comes in weighing mode. The Pre-set
Tare will be displayed as a negative value
(no weight on the hook).
Note: To clear the Pre-set Tare value, press
TARE with the hook empty it will remove it temporarily and to remove the Pre Tare
value permanentaly from the memory you have to again go in the settings and
make the display “000.00” using” M+” & “hold” keys.
5.2 LED GLOW: The display GLOW strength can be increased or decreased
depending upon the user requirement. Increasing the GLOW of the display will
effect the Battery back up time, and the battery life. If the user wants to increase
the GLOW of the display, it can be done as follows. When the indicator is in the
weighing mode, While pressing the Hold button, press the M+ button. The display
will show “P-TARE” Now press the Tare/Zero
button two times so that the display shows
“GLOW 0”. 0 means the GLOW mode is
currently set to Low. Now press the MODE
button, and you will notice the GLOW of the
display is increased. If the user wants to keep
this setting, simply press the Tare/Zero
button, until the display comes back to the
weighing mode.
Hax Series Hanging Scale
8
5.3 SERIAL:When the scale is in the weighing
mode, while pressing the “HOLD” button,
press the “M+” button. The display will
show “P-TARE” Now press the Tare/Zero
button three times so that the display
shows “SERIAL” Now press the Tare/Zero
button again and display will show “CMD”
which means command mode you can
select it to the continuos mode by pressing
“M’ button display will show “CONTS” and
then press the Tare/Zero button, until the
display comes back to the weighing mode.
5.4 DATA:When the scale is in the weighing
mode, while pressing the “HOLD” button,
press the “M+” button. The display will show
“P-TARE”. Now press the Tare/Zero button
five times so that the display shows ‘data’
Now press the Tare/Zero button again and
the display will show “FWD’ which means the
data is being send in the forward mode, you
can select it to the reverse mode by pressing “MODE” button display will show
“REV’ and then press the Tare/Zero button, until the display comes back to the
weighing mode.
5.5 SLEEP MODE: The scale has a power saving mode called the SLEEP MODE.
Whenever the scale is switched on, the SLEEP MODE is by default set to ON
condition. In this mode, if the scale is idle for two minutes, that is there is no
weighing being done, the display will simply show the decimal point of the right
most digit on the display. Whenever any weight is hanged, the scale will
automatically come out of the SLEEP MODE and start displaying the weight. It is

Hax Series Hanging Scale
9
important to know that SLEEP mode increases the battery back-up time by double.
The Normal backup time when the sleep mode is switched off is 25 Hours, and
with the SLEEP mode switched on, the
battery back-up time increases to more
than 40 Hrs. If the USER wants to switch
off the SLEEP MODE for some special
usage or function it can be done as
follows: When the scale is in the weighing
mode, while Pressing the “HOLD” button
press the “M+” button. The display will
show “P-TARE” Now press the Tare/Zero button seven times so that the display
shows “SLEEP1”. 1 means the sleep mode is currently switched On. If the user
wants to switch the sleep mode Off, press the MODE button once. The display will
now show “SLEEP0”. Press the Tare/Zero button till scale comes to the weighing
mode. Now the Sleep mode has been switched off.
5.6 DUMMY ZERO: This feature enables you to get an extra zero on the rightmost
digit of the display that is the dummy zero actually which is only displayed and
does not work. If the user want to add a dummy zero for some special usage or
function it can be done as follows: When the
scale is in then weighing mode, While
pressing the “Hold” button press the “M+”
button and the display will show “P-Tare”
now press the Tare/Zero button eight times
so that the display shows “dummy” now
press the Tare/Zero button once again and
the display will show ”no” now the user can
select the “yes” option for getting the dummy
zero by pressing the Mode button once after
selecting the desired value press the
Tare/Zero button, until the display comes
back to the weighing mode.
Hax Series Hanging Scale
10
5.7 CHECK WEIGHING: This function
SET LOW:When scale is in the weighing mode with no weight on the hook, while
pressing the “Hold” button press the “M+” button. The display will show “P-TARE” Now
press Tare/Zero button ten times so that the display shows “SET LO” Now press the
Tare/Zero button again and the display will show
“0000.00”, with the rightmost digit blinking, now
you can enter the value which you want to set as
low value using “HOLD” key to change the value &
“M+” key to shift the digit to right. Now after
entering the value, press the Tare/Zero button till
scale comes to the weighing mode. A low value has
been set.
SET HIGH:- When scale is in the weighing mode with no weight on the hook, while
pressing the “HOLD” button, press the “M+” button. The display will show “P-TARE” Now
press the Tare/Zero button twelve times so that the display shows “SET HI” Now press the
Tare/Zero button once again and the display will
show “0000.00”, with the rightmost digit blinking,
now you can enter the value which you want to
set as high value using “HOLD” to change the
value and “M+” key to shift the digit to right. Now
after entering the value, press the Tare/Zero
button till scale comes to the weighing mode. A
high value has been set.

Hax Series Hanging Scale
11
6CALIBRATION
All SMART weighing scales come pre-calibrated from the factory. However the scale may
require re-calibration. Temperature changes, geographic gravity variations, altitude
changes and abuse are few reasons why a scale may need recalibration. The scales can be
calibrated using a known external weight.
6.1 INTERNAL SERVICE CALIBRATION
STEP PROCEDURE DISPLAY
1
Switch off the scale. Press
& hold the
“M+, Hold & Tare/Zero (all three together)
buttons and switch on the scale.
You will see
“d 01” on the display. Now you can select the
“d” value of the scale by pressing the “M+”
button to 01, 02, or 05 and press the tare/zero
button.
2
You will now see
“0 0.” on the scale. Now
you can set the decimal point according to
your scale capacity by pressing the Hold
button to shift the decimal to right and press
the Tare/Zero button once after setting the
decimal point.
3
You will now see “CAP” on the scale. Press
Tare/Zero button and
the display will show
the pre entered capacity value of the scale, you
can change it by using “M+” & “Hold” keys after
setting the new capacity or on the previous
capacity only press the Tare/Zero button once.
4
You will now see some “noload”
on the display
momentarily and then the display will show
some internal
counts.
Hax Series Hanging Scale
12
5 Press Tare/Zero button and you will see
“LOAD” on the display momentarily and then
the display will show some internal counts
6 Now hang a known weight to the hook of the
scale. For eg.:10kg and press the Tare/Zero
button once and all the zeros will bedisplayed
with the rightmost zero digit blinking
7 Now enter the value of hanged weightusing
“M+” key to up/change the value and “Hold”
key to shift the digit to right. For eg. You have
to enter 10kg then press the “M+” key once, 1
will be displayed now press the “Hold” key till
the display reads ten kg “10.00”
8
Press the Tare/Zero key once and the display
will show “END” now press the Tare/Zero
button once more and the display wil
l show
the weight hanged. Check the calibration

Hax Series Hanging Scale
13
6.2 EXTERNAL USER CALIBRATION (Refer Service Manual)
1
Pr
ess and hold the T
are
/Zero
button while
switching on the scale. You will see “CAL”
on the display.
2
Press the Tare/Zero
button once, you
will
see “noload” on the display momentarily
and then the display will show some
internal counts.
3
Press the Tare/Zero button on
ce, you will
see”load” on the display momentarily and
then the display will show some internal
counts
4
Now hang a known weight on the hook of
the scale say 10 kg and press the Tare/Zero
button and the display will show all zeros
with the right most zero digit blinking, now
enter the value of the hanged weight using
key “M+” to up/change the value and
“Hold” key to shift the blinking digit to right
5
Pre
ss the Tare/Zero button and the display
will show “END” now press the Tare/Zero
button once more and the display will
show the hanged weight. Check
calibration.
Hax Series Hanging Scale
14
7ERROR CODES
ERROR
–
DISPLAY
Error
Solution
Zero not in range
Removeweight from pan
and restart themachine. If
the problem persists, the
machinemay have been
overloaded.
Weight not enough for
the selected setting Keep weight or Add more
weight on pan for correct
results.
Internal / External
calibration variance
larger than 2%
You are trying to calibrate
the scale with a incorrect
weight.
LOW Battery. Machine
displays message and
turns off
Battery is low. Connect scale
to power so that the battery
can be charged.

Hax Series Hanging Scale
15
8TROUBLESHOOTING
SYMPTOM
POSSIBLE CAUSE
REMEDY
Scale will not
power on
If running on batteries, the battery
may have fully discharged.
AC Power cord not connected.
Connect scale to power
source.
Recharge battery
Battery does not
give enough
backup
The battery is defective. The battery
may have past its useful life.
(Generally 6months – 1 year) Change thebattery.
Weight reading on
scale does not
stabilize
External Rubbing / Friction A
scale cannot measure accurately
if an object is rubbing or
pressing against the scale
platform. Mobile interference,
Vibration or wind could be other
possible reasons
Move the scale away from
mobile signal, breeze or
vibration areas.
Scale does not
show weight
accurately Improper calibration
Calibrate the scale again to
and check for the problem
again.
Hax Series Hanging Scale
16
WARRANTY
Customer Name :_________________________________________________
__________________________________________________________________
__________________________________________________________________
Phone:________________________ Mobile:______________________________
Date of Purchase :__________________Invoice / DC No:__________________
Model :___________________Sl.No.:_____________________________
Dealers / Agent Name :______________________________________________
_______________________________________________
_______________________________________________
SMART warrants all products shipped from New Delhi, India against defects in MATERIAL and
WORKMANSHIP for a period of one (1) year for SMART standard line. All OEM and custom
build orders carry (1) year warranty for MATERIAL and WORKMANSHIP. Warranty will not be
applicable for Battery and adaptors. Normal wear and tear, injury by natural forces, user
neglect and purposeful destruction are NOT covered by this warranty. Technical Service MUST
be performed by SMART staff or factory authorized personnel. SMART's obligation is limited to
replacement of parts that have been so returned and are disclosed to SMART satisfaction to
be defective. The provisions of these warranty clauses are lieu of all other warranties,
expressed or implied, and of all obligations or liability in connection with sale of said articles.
SMART makes no warranty of merchantability or fitness for a particular purpose. By accepting
the goods, the buyer acknowledges that the buyer has determined that the goods are suitable
for the buyer’s purposes. In no event shall SMART be liable for any sub sequential or special
damages. Any misuse, improper installation or tampering shall VOID this warranty.
Product that is malfunctioning within the 1-year warranty period for scale line and 1-year
warranty period for OEM products may be returned to SMART for Warranty Evaluation at the
customers’ expense. SMART reserves the right to repair OR replace the components free of
charge as may qualify under this warranty.
REMINDER!! WARRANTY DOES NOT COVER USER DAMAGE AND ABUSE. In addition to a
listing of the repairs covered under warranty, if any, the customer will be billed accordingly
for all parts and labor associated with any NON-WARRANTY repairs made to the product.
This manual suits for next models
2
Table of contents
Other SMART Scale manuals
Popular Scale manuals by other brands

American Weigh
American Weigh CD-V2-500 user manual
Cardinal
Cardinal Detecto DR150 Operation manual
REMBE
REMBE UNIBAND Translation of the original operating manual

Scarlett
Scarlett SC-KS57P19 instruction manual

Pennsylvania Scale Company
Pennsylvania Scale Company 7700 Calibration manual

Iget
Iget BODY B11 quick start guide
