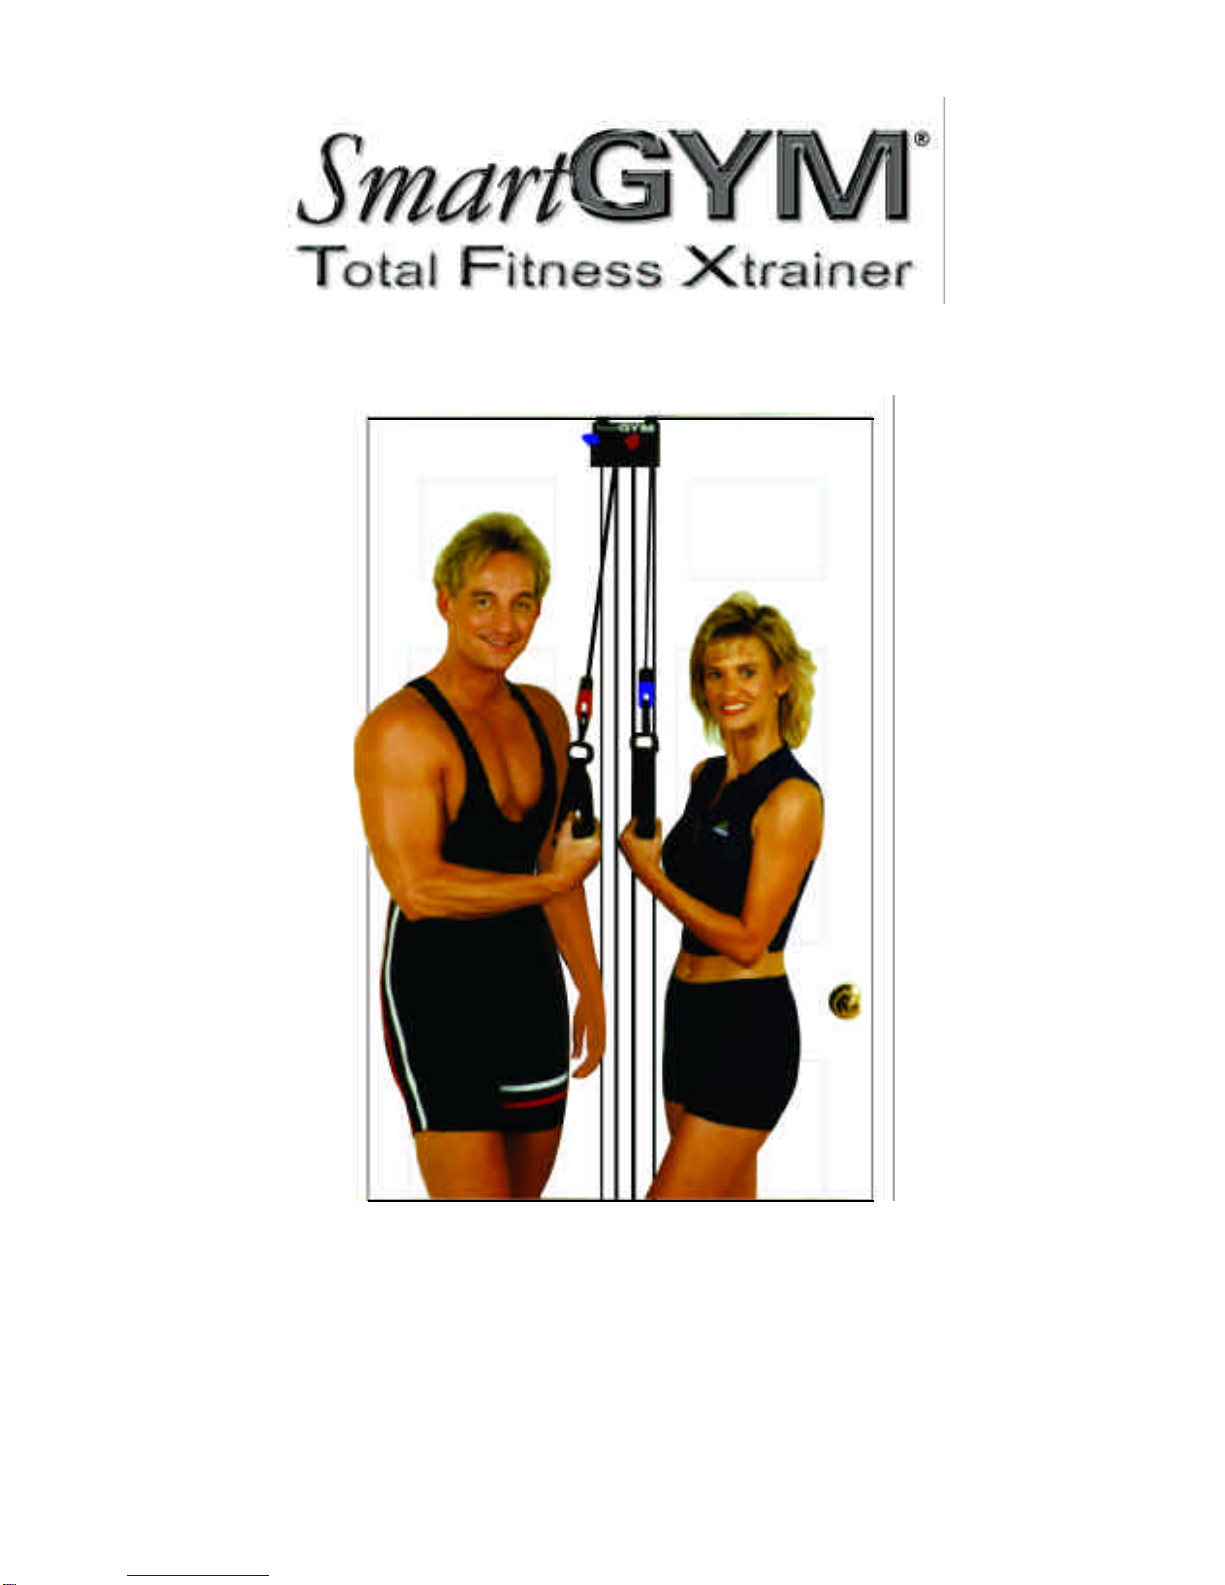
SmartGYM SG-01 User manual

INSTRUCTION BOOK
and
OPERATING MANUAL
www.SmartGYM.com

Safety First 1
Setting Up 2
Packing Up 3
Operation 4
Power Band Resistance System, Changing Resistance 4
Using the Handles, Ankle Straps, and Cardio Belt 5
StrengthTraining 6
Muscle Burns Calories 7
Supersets,Powersets,SplitTraining 7-8
CardioTraining 9
HeartRateandtheTrainingRange,TakingYourPulse 10
Target Training and the Myth of Spot Reducing 11
Exercise Tips 12
SampleWorkoutPrograms 15
Beginner 15
Intermediate 17
Advanced 19
Exercise Index 22
Stretches 24
70 Exercises 26
Abs, Waist & Low Back 26
Legs, Hips & Buns 29
Chest 34
Back 38
Shoulders 40
Arms 43
Cardiovascular 46
Sport Specific 47
Replacement Parts 51
How to Wall Mount SmartGYM 52
How to Use SmartCRUNCH (optional equipment) 53

READALLINSTRUCTIONSCAREFULLYBEFOREUSINGSMARTGYM.
IMPORTANT SAFETY PRECAUTIONS
1. Consult your doctor before beginning any exercise program.
Exercise is not without some risks from sprains, strains, fractures,
dizziness, fainting, elevated blood pressure, and in rare cases, heart
attack, stroke, or even death. The manufacturer, its employees, and
representatives are not responsible or liable for any injuries and/or
illness sustained as a result of using the SmartGYM Fitness System.
So please, protect yourself by checking with your doctor first!
2. Inspect your exercise machine prior to each use to ensure that the
Power Bands are in good condition, free of nicks or cuts, and
unfrayed. Also check that all stitching of webbing components and
Velcro is intact and all plastic parts are free from visible cracks.
3. FOR ADULT USE ONLY. Not intended for use by children.
Keep others, especially children, at a safe distance while exercising.
4. Do NOT at any time release your grip on the handles while the
Power Bands are under tension (pulled away from the door).
5. ALWAYS CLOSE AND LOCK DOOR BEFORE USING!
WARNING: Consult your physician before beginning any exer-
cise program. If at any time during exercise you feel faint,
dizzy, or experience pain, stop and consult your physician. In
the event that any of the warnings above are breached by the
consumer, the manufacturer may use same as a defense to any
claim for injuries, damage, or loss. These warnings are not
intended to limit or modify the consumer's remedies for
breach of warranties pursuant to applicable Federal and State
Laws or Regulations, but are being supplied solely to ensure
the safety of the individuals using this product.
1

Check the
front of
door to make
sure both brack-
ets are level and
even with the top
andbottomofthe
door, respective-
ly. If necessary,
adjust the webbing straps to make
them even by tightening each of the
rear cinching straps as needed.
Close and
LOCK the
DOOR.
Remove
the three
band clips from
the top, middle,
and bottom of the
Power Bands.
Attach handles,
ankle straps, or
cardio belt and go
forit!
Remove
SmartGYM
from the carry
bag, unroll it, and
hold it by the top
bracket (with the
SmartGYM
label). The web-
bing straps and
Power Bands are held in place with 3
band clips. Slide the webbing straps
out of the band clips but leave the
Power Bands clipped together.
Slip web-
bing straps
over top of door
(Bands face exer-
cise room, straps
on opposite side).
Slip the webbing
straps underneath
bottom of door in
thesamemanner.Slidebothbrackets
to center of door. Make sure bottom
bracket rests on the floor and straps
arenottwisted.
Behind
door, grasp
webbing straps
and pull down-
ward as far as pos-
sible. This action
slides the top
bracket up until it
stops at top of
door. Press strap ends down onto the
exposed Velcro to secure them in
place. The Power Bands should now
be stretched tautly between the
brackets.
2

With one
hand hold-
ing the top
bracket at shoul-
der height, use
the other hand to
grasp the Power
Bands in the cen-
ter and fold over
the top bracket so it hangs just
above the bottom bracket.
Continue
to double
the bands over
one more time,
then wrap the
rubber band
around the end of
the quadrupled
Power Bands to
secure the unit for transport.
Slide the
unit in the
carrybag.Stuffthe
handles, ankle
straps, and cardio
belt alongside and
pullthedrawstring
tight to close.
Throw over your
shoulder and go!
Before
packing up,
immobilize the
Power Bands by
attaching the 3
band clips (at the
top, middle, and
bottom of the
Power Bands).
This keeps the Power Bands from
getting tangled once they are no
longer stretched on the door.
Behind the
door, pull
the ends of the
webbing straps
up to release
them from the
Velcro and allow
them to gently
slide upward to
the top of door.
Slip the top
webbing
straps off the top
of the door and,
while holding at
shoulder height,
pull the bottom
webbing straps
from underneath
door.
3

SmartGYM is a deceptively powerful machine that allows you to exercise
without using weights. Instead, using its unique Power Band resistance
system, you can choose variable levels of resistance for a customized total
body workout that rivals a health club…free weights and all.
Most exercise machines are big, heavy, and expensive, but SmartGYM is
just the opposite—small, lightweight, totally portable, and totally afford-
able. What gives? The answer is patented genius. Most of the expense of
other machines resides in the mammoth steel frame needed to support
the resistance system (usually weights). SmartGYM ’s unique omnidirec-
tional pulley system fitted with four Power Bands is designed to use any
conventional door as the frame. So you don’t have to carry the frame
around with you, which makes it extremely light (3.5 pounds) and totally
portable. And since almost anywhere you go there’s a door available, we
don’t need to sell you the frame, which drops the price dramatically.
Power Band Resistance System—DVR Technology
SmartGYM’s resistance (weight) consists of four Power Bands, two for
each hand, each varying in resistance (from left to right: blue, red, red,
blue). Made from woven strands of natural Latex encased in a durable
nylon jacket, the Power Bands are designed to provide years of safe, effec-
tive service. The pulley system connecting the Power Bands offers both
high and low pulley positions which enables you to push and pull the
Power Bands in almost any conceivable manner or direction, facilitating
over 70 muscle building and aerobic exercises. Each exercise is designed
to work a specific muscle group, and since muscles vary in strength, it’s
important to choose an appropriate resistance level for each exercise to
be the most effective.
Changing Resistance
To change resistance, simply hook the handles, ankle straps, or cardio belt
to one or more Power Bands in different combinations. Eight different
combinations, or levels of resistance, are possible, depending on which
Power Band or combination of Power Bands you choose.
4

5
The red (heavy) Power Band is more powerful than the blue (light) Power
Band, However, two blue Power Bands are stronger than one red Power Band.
The 8 possible combinations, or levels of resistance, from low to high are:
The Power Bands work on the principle of Dynamic Variable
Resistance—the more they’re stretched, the more resistance they provide
This makes fine tuning overall resistance extremely quick and easy.
Simply step further away from the door to increase resistance or move
closer to the door to decrease resistance.
Connecting the Cardio Belt
Loop the cardio belt around your waist/hips and thread the free end
through the loop buckle. Pull back to adjust length and press the end onto
the exposed Velcro to secure. The belt should be loose around your hips.
Clip one or more Power Bands onto the snaphook and begin exercising.
Connecting the Handles
Clip the snaphook onto one or more Power Bands and begin.
Connecting the Ankle Straps
Loop the ankle strap around your
ankle. Thread the free end through the
snaphook’s D-ring and tighten to com-
fort. Press the end onto the exposed Velcro to secure. It’s easier if you first
pull the Power Band to your ankle before attaching the snaphook.

6
Traditional strength training consists of performing one to three sets of
exercises on a specific, isolated muscle group. One rep, or repetition,
equals one complete movement of the exercise from start to finish. For
example, for a bicep curl you might begin with your arm extended down
by your side holding the weight, say a dumbell, curl the weight upward to
your shoulder by bending your elbow, and then lower the weight back to
the starting position. That’s one rep. Do that 8-12 times and you’ve com-
pleted one set of bicep curls. Rest for 30 to 60 seconds to allow your
muscle to recuperate and you’re ready for the next set.
Successive sets should be progressive, meaning that each one should be
performed using “progressive” or increased resistance. In the case of the
aforementioned bicep curl, you might do the first set using one blue
Power Band for resistance, rest for 30 seconds, then increase the resist-
ance for the second set by using one red Power Band, rest for 30 seconds,
then finish up with a third set, again increasing the resistance by using a
combination of one red and one blue Power Band. Congratulations!
You’ve just worked out your biceps in the same way bodybuilders train
their biceps in the gym. And you’ll get the same great results, too, with-
out having to lug around big, bulky weights and without having to strain
your neck, back, joints, and spine while lugging around big, bulky
weights!
Smart Tip: Choose a starting resistance for the first set that’s chal-
lenging, but not so hard that you can’t complete a whole set nor so
easy that you’re just going through the motions. Each set should
push the muscle to near muscle fatigue. The harder you work, the
faster and more dynamic the results.
Now, if you were to do just those three sets of biceps curls two times a
week, in only a few weeks time you’d start to feel your biceps muscles
getting firmer, tighter, and stronger. You’d also begin to see changes in the
shape of the muscles as well, to a more dynamic, contoured, athletic
look. That’s new muscle growing on your body right before your eyes.

Muscle Burns Calories
Every pound of new muscle requires your body to burn about 50 calories
more per day just to keep that muscle alive and functioning, even while
you’re sleeping. So as you continue to build more muscle, your metabolism
continues to increase, which allows you to shed unwanted pounds and inches
while at the same time shaping and building more muscle, which increases
metabolism even more, which allows you to shed more pounds and inches,
which…well, I think you get the picture.
Training all the other muscle groups in your body—chest, abs, shoulders,
back, triceps, thighs, buns, calves, and hamstrings— involves the same basic
principles. One to three progressive sets of 8-12 reps for each muscle group
twice a week. If you’re a beginner, however, it’s highly recommended that
you start with only one set for each muscle group during the first two weeks,
then add a second set during weeks three and four, and, if you feel up to it,
do three sets thereafter. Gradually increasing the work load on your body will
help prevent undue soreness and make your workouts much more enjoyable.
Smart Tip: Never work the same muscle group on successive days. Always
allow a minimum of 48 hours rest, but no more than 96 hours, between
sessions that work the same muscle group. For example, if you work your
legs on Monday, you wouldn’t want to work legs again until Wednesday
or Thursday in the same week.
Strength training involves working your muscles beyond their normal limits
by lifting progressively heavier weights. This overloading of the muscles causes
micro-tears in the muscle tissue. Resting 48-96 hours between sessions allows
your body the time it needs to effectively repair the micro-tears and make the
muscle stronger. Remember, it’s just as vital not to over train a muscle as it is
to train it in the first place.
Supersets
One way to get more out of each set is to combine two or more different
exercises for the same muscle into one continuous set, or Superset. For
example, try doing a set of bicep curls, then without resting do a set of
7

concentration curls followed by a set of cable curls. Now, you can rest!
This superset replaces one regular set. The next set would consist of the
same three exercises with increased resistance. Working the muscle from
three different angles at three different stress levels without letting it rest
is a good way to get more results fast.
Smart Tip: This is an advanced workout feature. Beginners should
start more slowly, doing one regular set for each muscle group during
the first few weeks and build up gradually to three regular sets and
later to three supersets.
Powersets
Powersets are giant Supersets that encompass all the muscles worked on in
one day’s session one after the other without resting, in a circuit training
fashion. After resting a couple of minutes, increase resistance and perform
the second and third round of Powersets. Supersets and Powersets can pump
up your intensity level while shaving precious time off your workouts.
SplitTraining
Working out your entire body in one session can take a significant amount
of time and energy, especially if you’re doing lots of sets at a high intensi-
ty level. One way to cut your workout down to size is to split train.
Split Training is a method whereby you split up your total body workout
over two or more sessions, choosing to work only a few muscle groups
each day. For example, you could train your upper body on Monday and
work your lower body on Tuesday, a two-day split routine that works your
entire body every two days. Or you could do the push/pull split where
you “push” (train chest, shoulders, and triceps) on Monday and “pull”
(train legs, back, and biceps) on Tuesday. Again, it’s a two-day split, and
even though it’s not strictly all push/pull (some of the leg muscles are
really “push” muscles) it serves to shorten each day’s workout, making it
easier to keep up your intensity and find the time to exercise regularly.
Once you get to the point of doing three sets of two or three exercises
for each muscle group, you’ll most likely choose to split train.
8

9
There’s one more muscle we haven’t discussed yet, and it’s perhaps the
most important one of all—your heart. Cardiovascular training, or aero-
bics, requires a different approach, however, than other body parts. At the
“heart” of cardiovascular training is one basic premise: if you elevate your
heart rate to 65-80 percent of your maximum and keep it there for a
period of at least 12 minutes it will stimulate the production of fat-burn-
ing enzymes. It will also strengthen your heart and increase the capacity
of your lungs to re-oxygenate your blood more efficiently. The idea here
is not to work yourself to a frenzy and go beyond your target heart rate,
but to stay within that magic training range of 65-80 percent of maxi-
mum for a minimum of 12 minutes and, optimally, for 20 to 30 minutes.
Smart Tip: Training for longer periods will certainly hasten your
improvement, but not on a 1-to-1, linear basis. Research has shown
that the first 12 minutes of aerobic exercise produce a more lasting
training effect than the second 12 minutes. So unless you’re already
in pretty good condition, it’s probably better to do your 12 minutes
more frequently (say 4-6 times per week) than it is to train for
longer periods of 30 minutes or more but less frequently.
Many people believe that the primary purpose of aerobic exercise is to
burn off excess calories while they’re doing the exercise. However, that is
not exactly true. Think about it, most aerobic activity can only burn off
several hundred calories even if you exercised for an entire hour. Eat a
hamburger with fries and you're already playing catch up. And you’ve just
had lunch! The real purpose of aerobics is to stimulate the growth of the
body’s natural fat-burning enzymes long term so you burn more and
more calories all the time, not just when you’re exercising. Increase the
size of the fireplace and you can burn more logs in it. The same principle
applies to the calorie burning potential of your body.
Okay, so the key is to elevate your heart rate. But how do you do it?
Walking, jogging, running, cycling, rowing, jumping rope, running in place,
and aerobic dancing are all fine. As long as your heart rate is elevated into

10
your training range and remains there for 12 minutes minimum, any of
these activities will do a pretty good job. However, SmartGYM's cardio
program has an edge. Not only can you walk, jog, or run against
SmartGYM’s formidable Power Band resistance system, but you can also
perform upper body strength training exercises at the same time. And
since you’re able to engage more muscle groups simultaneously, you get
results faster.
Heart Rate and the Training Range
To determine your training range, simply calculate the lower limit at 65%
of your Age-Predicted Maximum Heart Rate and the upper limit at 80%
of your Age-Predicted Maximum Heart Rate. Age-Predicted Maximum
Heart Rate = 220 minus your age. If you’re 45 years old, for example,
your lower limit is 220 - 45 x 0.65 = 114. Similarly, your upper limit is
220 - 45 x 0.80 = 140. If you elevate your heart rate to between 114 and
140 beats per minute continuously for at least 12 minutes, you’ll get the
desired training effect on your heart.
Smart Tip: It takes a few minutes of exercise to elevate your heart
rate into your training range. This time does not count toward your
12 minutes.
TakingYourPulse
Check your pulse by resting your index and middle fingers lightly against the
carotid artery on either side of your neck underneath the curve of the jaw-
bone. Count the beats for 6 seconds and multiply by 10 to calculate your
heart beats per minute. Or, for a rough estimate, you can use the “talk test.”
If you’re gasping and panting so much that you are unable to talk, then
you’re probably exercising too hard and are beyond your training range.
Consistency is the key. If you do your 12 minutes 2-4 times a week, within a
few weeks time you’ll begin to notice that you feel more energetic, you won’t
tire as easily, and your body will start to burn calories more efficiently and
begin to lose some of its fat stores (providing you eat a sensible low fat diet!).

11
Target Training and The Myth of Spot Reducing
There is no such thing as spot reducing. Any fat you lose comes off in the
same proportion it’s stored in your body. For example, if you carry most
of your fat weight in your hips and thighs (like most women), then the fat
inhabiting those area will be the last to go. If you carry your fat weight
around your waist as “love handles” (like most men), then your significant
other will most likely have something to hang on to right up until the
very end of the reduction process. You can target train your abs with
situps and crunches ‘til the cows come home and you can get rock hard
abs, but until you lose the layer of subcutaneous fat covering them they
won’t be visible.
That’s why strength training is so essential. Yes, you can lose weight
through aerobic exercise and dieting, but without strength training you’ll
also lose lean body mass which lowers your metabolism so your body
burns even less calories than when you started the diet in the first place.
And strength training is the only way to reshape your body. The most
effective exercise program is one that incorporates strength training and
cardiovascular training coupled with sensible low-fat eating habits, and
that’s the SmartGYM Total Fitness Xtrainer all the way.

12
The most effective exercise regimen includes both strength training and
cardiovascular (aerobic) training in a consistent, regular program.
A.. 2-4 days of strength training and 2-5 days of aerobic activity; or
B. 3-4 days of circuit training.
Every safe and effective exercise program should consist of three ele-
ments. In order, they are: Warm Up, Work Out, and Cool Down.
Warm Up
Always warm up before exercising. People who do not warm up before
exercising are the ones who usually end up sustaining injuries. Protect
your neck, back, spine, and joints. Get the blood and juices flowing and
wake up your muscles gradually through a series of stretches and prelimi-
nary sets using reduced resistance. This is one time when “going through
the motions” can be extremely beneficial.
StrengthWorkOut
Perform at least one set of 8-12 reps to near fatigue for each muscle
group in the body (chest, back, shoulders, biceps, triceps, abs, thighs,
hamstrings, and calves) a minimum of two times per week. Your goal
should be to work up to doing three sets (increasing the resistance for
each successive set) with 30-60 seconds of rest between each set.
Start out slowly, but remember that SmartGYM allows you to perform a
wide variety of exercises for each muscle group. By doing additional sets
or combinations of sets you can realize even greater strength and body
shaping gains. Following are some basic guidelines useful for all strength
training exercises:
•Perform each exercise smoothly and evenly through the whole range
of motion in a slow, controlled manner. Never jerk or lunge.
•Breathe. Exhale against the resistance; inhale on the return. Do not
hold your breath.

13
•Always resist the Power Bands back to the starting position for each
exercise. This provides a training effect in both directions.
•Increase the resistance for successive sets by 5%-10%. In general,
increase the resistance when 12 repetitions can be completed in
proper form; decrease the resistance when less than 8 reps can be
completed.
•Replace fluids lost while exercising by drinking water at regular
intervals during exercise. Don’t wait until you feel thirsty to drink.
•Rest a minimum of 48 hours and a maximum of 96 hours between
training sessions using the same muscle groups.
AerobicWorkOut
An exercise is classified as aerobic if the oxygen supply is sufficient to
meet the oxygen demand of the working muscles during the exercise.
When this occurs, it’s possible to continue the exercise for prolonged
periods of time (12 minutes or more). Another aspect of aerobic exercise
is that it engages the large muscle groups, principally those of the legs,
continuously over the length of the exercise. Brisk walking, running, jog-
ging, cycling, rowing, jumping rope, etc. are examples of aerobic exer-
cise.
You can achieve an aerobic training effect by performing aerobic exercise
for a minimum of 12 minutes during which your heart rate has been ele-
vated to within your training range. The training range is between 65%
and 80% of your Age-Predicted Maximum Heart Rate (approximately
220 minus your age). Remember: It takes a few minutes of exercise to
elevate your heart rate into the training range and this time does not
count toward the minimum 12 minutes.
CircuitTrainingWorkOut
Circuit training consists of a series of strength training exercises, com-
monly interspersed with short episodes of aerobic exercise, all done one
after the other with as little time between each exercise as possible.

14
The object is to perform strength training exercises on the major muscle
groups while maintaining an effective aerobic training level. Circuit train-
ing takes significantly less time to achieve results comparable to separate
programs of strength training and aerobics.
Since lack of time is the number one reason people give for failing to
start or maintain a regular exercise program, circuit training is a method
that makes sense. And SmartGYM, with its revolutionary new design that
allows simultaneous aerobic and strength training, is the ideal circuit
training machine.
Cool Down
Never quit exercising suddenly. Instead, decrease your intensity gradually
and finish up with some stretching movements to allow your heart rate to
come back down to normal, nice and easy. This can help to reduce muscle
cramping and post exercise muscle pain.

15
This section provides three sample workout programs—Beginner,
Intermediate, and Advanced. Each program is designed to help you get
the most out of your new SmartGYM Total Fitness Xtrainer on your way
to a healthier, stronger, more shapely body. The object is to work each
muscle group in your body at least twice a week and get in some aero-
bics, too, without spending a lot of time doing it. Remember: Always take
a few minutes to stretch and warm up before each session and to cool
down after exercising. If you are unsure of how to perform any of the
exercises, refer to the instruction video or the “Exercises” section of this
booklet.
BEGINNERPROGRAM
This program consists of one set of one or more strength training exercis-
es for each of the major muscle groups, all done in one session two times
a week. In between strength training days are aerobic sessions. The com-
bination of strength training and aerobics will get you started on strength-
ening, toning, and building your muscles while also stimulating the pro-
duction of your body’s natural fat-burning enzymes to help you begin los-
ing excess body fat.
It is important to choose a suitable resistance for each exercise. The goal
is to perform 8-12 reps to near muscle fatigue for each set. If near fatigue
does not occur, increase the resistance. For those exercises utilizing one
leg or one arm at a time, the repetitions listed apply to each arm or leg.
As you will discover, this program is quick and invigorating. The strength
training component takes approximately 11 minutes and the aerobic ses-
sions about 15 minutes each (including the time it takes to get into your
target training range).
It is recommended that beginners stay with this introductory program for
at least two weeks before moving to the Intermediate program.

DAY MUSCLE EXERCISE SETS/REPS
Mon Abs LyingLowerAbCrunch 1/8-12
FrontCrunch 1/8-12
Side Crunch 1/8-12
Chest ChestPress 1/8-12
Fly 1/8-12
Decline Chest Press 1/8-12
Back One-Arm Row 1/8-12
Lat Pull Down 1/8-12
Straight Arm Lat Pull 1/8-12
Shoulders FrontDeltoidRaise 1/8-12
Side Deltoid Raise 1/8-12
Reverse Fly 1/8-12
Biceps Bicep Curl 1/8-12
ConcentrationCurl 1/8-12
CableCurl 1/8-12
Triceps TricepExtension 1/8-12
Close Grip Tricep Press 1/8-12
TricepPress 1/8-12
Legs LegSquat 1/8-12
HackSquat 1/8-12
Lunge 1/8-12
LegCurl 1/8-12
Calf Raise 1/8-12
LegKickback 1/8-12
InnerThighKick 1/8-12
OuterThighKick 1/8-12
Approximate Total Time Monday: 11 Minutes
Tue Abs Same as Monday
Cardio Cardio Level 1 or 2
(12 minutes minimum
at target heart rate)
ApproximateTotalTimeTuesday:15Minutes
Wed RepeatTuesday’sWorkout
Thur RepeatMonday’sWorkout
Fri RepeatTuesday’sWorkout
Sat-Sun Rest 16

17
DAY MUSCLE EXERCISE SETS/REPS
Mon Abs LyingLowerAbCrunch 2/8-12
FrontCrunch 2/8-12
Side Crunch 2/8-12
Chest ChestPress 2/8-12
Fly 2/8-12
Decline Chest Press 2/8-12
Back Front Lat Pull Down 2/8-12
One-Arm Row 2/8-12
SeatedRow 2/8-12
Shoulders FrontDeltoidRaise 2/8-12
Side Deltoid Raise 2/8-12
Reverse Fly 2/8-12
Upright Row 2/8-12
Biceps Bicep Curl 2/8-12
ConcentrationCurl 2/8-12
CableCurl 2/8-12
In the Intermediate program we’re going to increase the number of sets
to two and add a few more exercises. As with the Beginner program, all
exercises are to be done in one session, two times a week, in conjunction
with slightly expanded aerobic training sessions.
Normally, you should rest 30-60 seconds between sets. If you feel up to
it, however, and to save time, try “circuit training” through the entire list
of exercises one after the other, in order, as one giant set or Powerset.
You must still change to the appropriate resistance for each exercise as
you go through the list, but wait until the end before taking your 2 min-
utes of rest. Repeat the procedure for the second Powerset, increasing the
resistance for each exercise accordingly. If this is too much for you, how-
ever, by all means rest for 30-60 seconds between each exercise if neces-
sary. Listen to your body. Never push yourself too hard. On the other
hand, if you’re up to it, go for it!
It is recommended that you stay with the Intermediate program for at
least two weeks before moving to the Advanced program.

18
DAY MUSCLE EXERCISE SETS/REPS
Mon Triceps TricepExtension 2/8-12
cont’d) Close Grip Tricep Press 2/8-12
ReverseTricepPress 2/8-12
TricepPress 2/8-12
Legs LegSquat 2/8-12
HackSquat 2/8-12
Lunge 2/8-12
LegCurl 2/8-12
Calf Raise 2/8-12
LegKickback 2/8-12
InnerThighKick 2/8-12
OuterThighKick 2/8-12
Approximate Total Time Monday: 24 Minutes
Tue Abs Same as Monday
Cardio Cardio Level 2
(12 minutes minimum
at target heart rate)
ApproximateTotalTimeTuesday:15Minutes
Wed RepeatTuesday’sWorkout
Thur RepeatMonday’sWorkout
Fri RepeatTuesday’sWorkout
Sat-Sun Rest
Table of contents
Popular Fitness Equipment manuals by other brands

PURE
PURE VR1 owner's manual

Taurus
Taurus Single Pulley Design Line TF-PULL-SINGLE Assembly and operating instructions

Taurus
Taurus V BENCH LEG CURL IT95 owner's manual

Johnson
Johnson T7000 PRO Service manual

Nautilus
Nautilus F2LROW owner's manual

First Degree Fitness
First Degree Fitness Fluid Rower FDR-02 owner's manual