SmartPlug SP1US User manual
SMART WI-FI PLUG
GUIDE
WHAT’S IN THE BOX
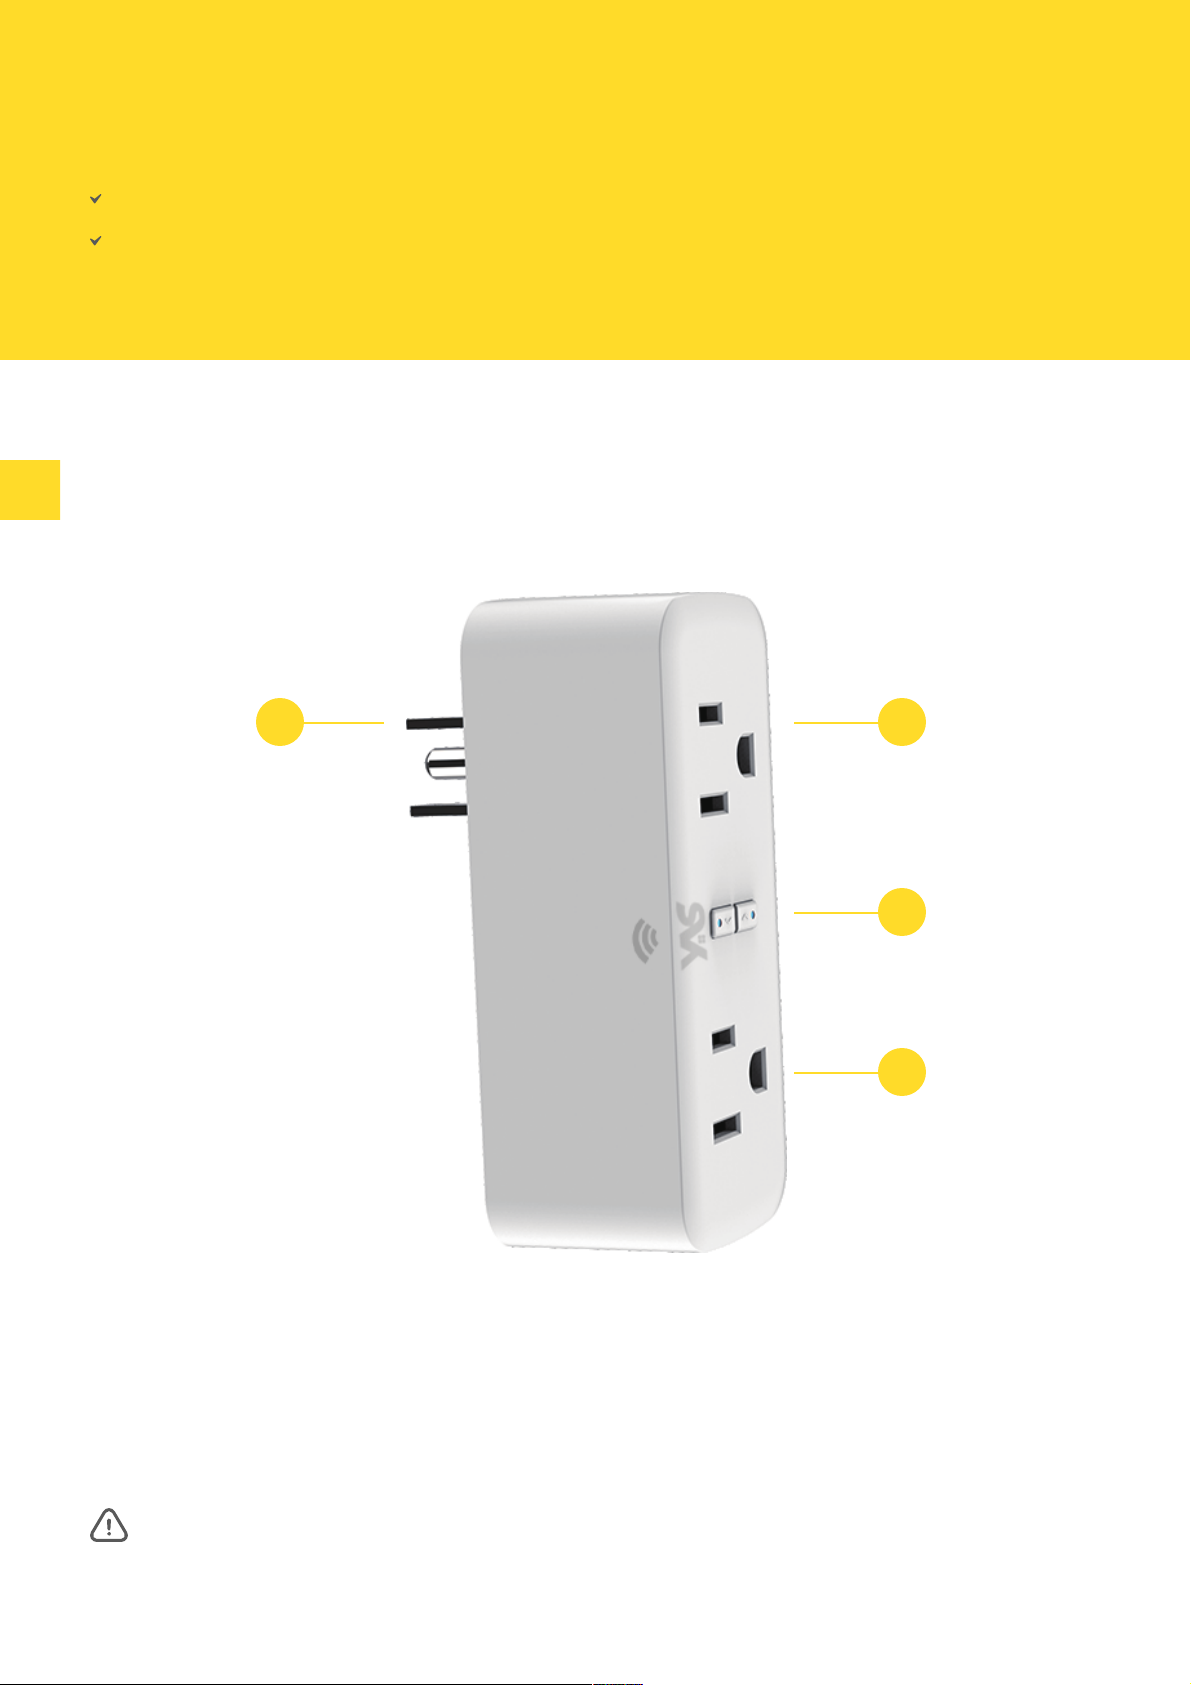
AT A GLANCE
1 2
3
4
Home Control Outlet ×2
User Manual ×1
1. Power Plug
2. Flame Resistant Material
3. ON/OFF Button (The upper button always control the left socket)
4. Socket Panel
Note: ON/OFF button can be used as restore button, long press can change the flashing speed
and will restore your Smart Wi-Fi Plug to factory defaults. Only do this if you are sure you want to
erase all your settings.

PARAMETERS
Model Number:
Rated Voltage:
Rated Current:
AC Frequency:
Working Temp.:
WIFI frequency:
Maximum Total Power Output:
Disconnection means:
Pollution degree:
Rated impulse voltage:
Automatic action:
Altitude:
Rating:
SP1US
110-240V
10A (Max)
50/60Hz
-20 ~ 45°C
2.4GHz
1200W
Type 1B
2
1500V
6000 cycles
Not exceed 2000m
AC120V 50/60Hz 10A 1200W
RISK OF ELECTRIC SHOCK!
DRY LOCATION USE ONLY.
USED INDOOR ONLY.
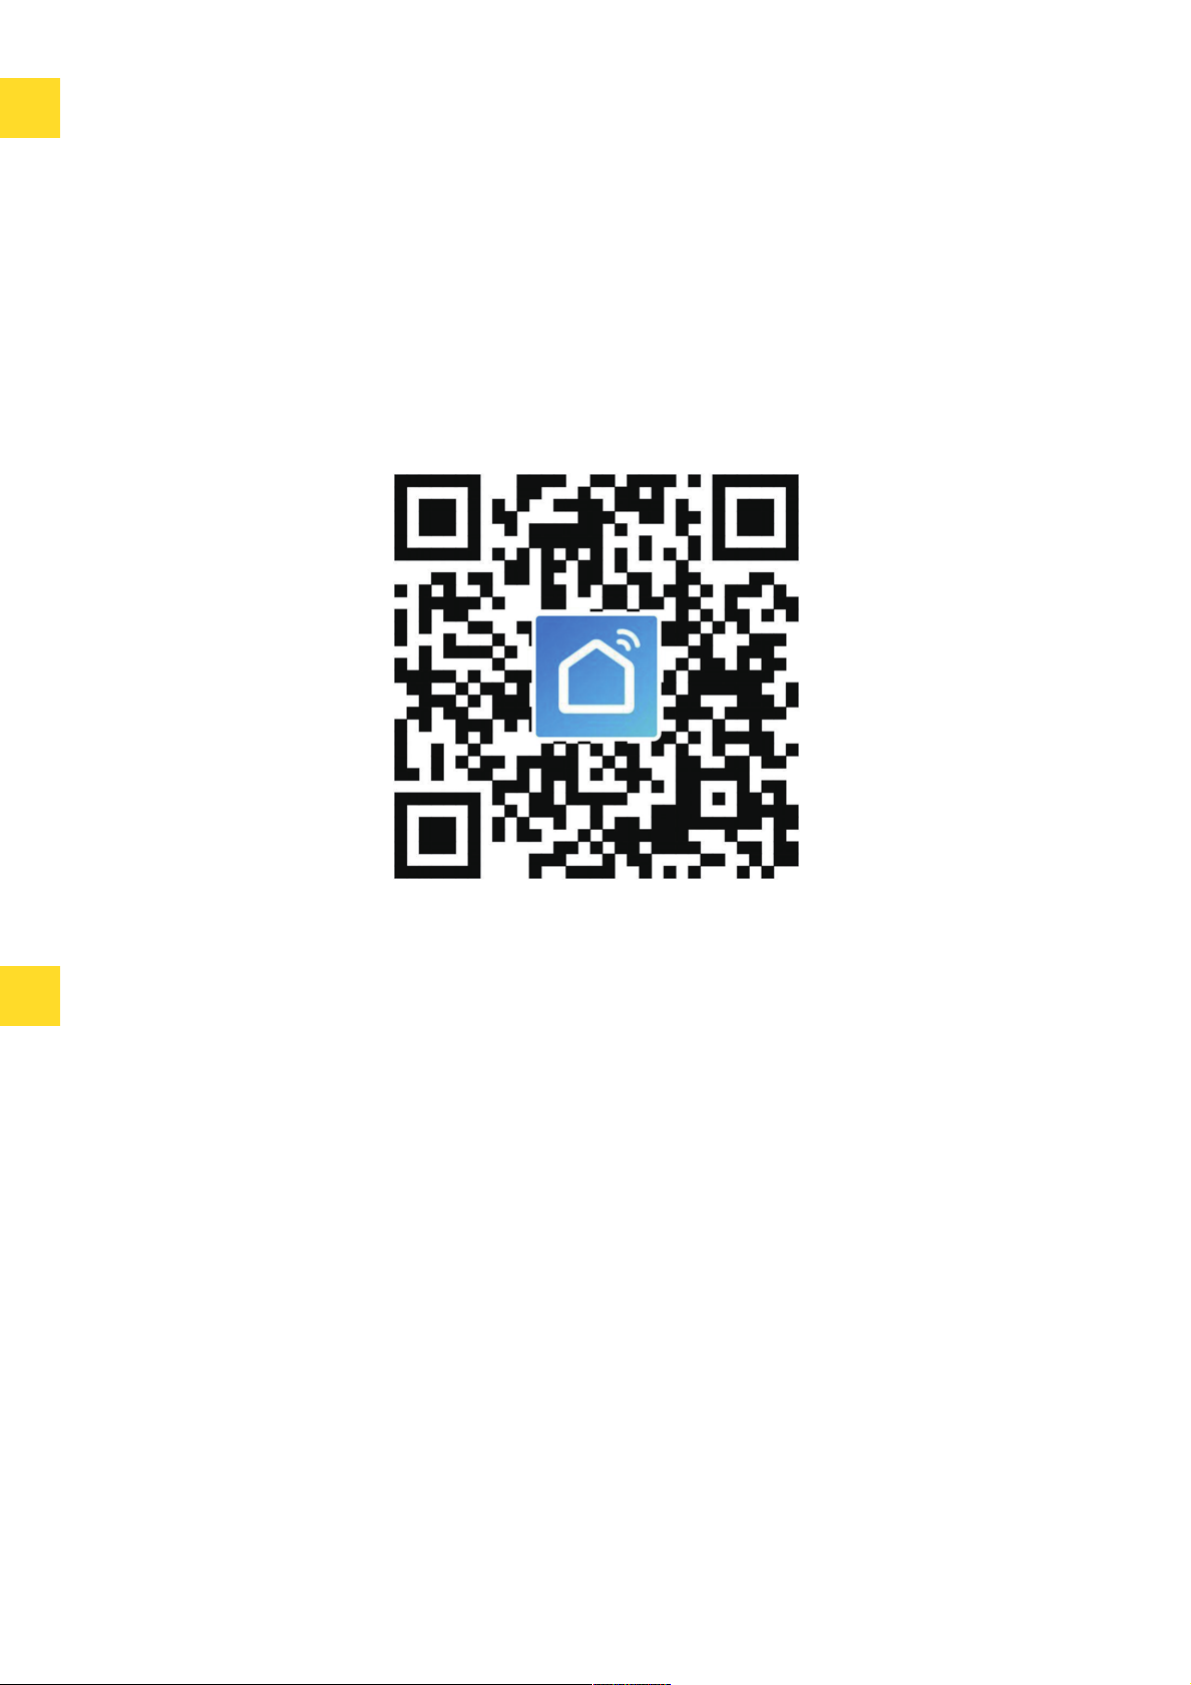
INSTALL THE “SMART LIFE” APP
CONNECTING YOUR SMART WI-FI PLUG
WITH APP
a. Easy Mode (recommended)
You may find the "Smart Life" app on Apple App store, Google Play, or Scan the QR code below and
install it.
Enter the register / log in interface, input the email address for getting the verification code to register
an account.
The free app "Smart Life" is compatible with mobile devices that support iOS 8.0 above, Android 4.4
above.
1. Please make sure the mini socket has connected with electricity at the beginning, then open
the" Smart Life" APP, tap the" ADD DEVICES" or the"+"at the upper right corner of the page
and select "Electrical outlet"
2. Long press ON/OFF button of the device for 5 seconds until indicator light quickly flashed, the
interface page already stepped into" Add Device" Page as the above;
3. Make sure the indicator light is flashing rapidly and confirm it in app;
4. Choose the local WIFI and enter the correct password and confirm;
5. Wait for configuring successfully, then tap "Done".

b. AP Mode
A. Devices
1. Please change to "AP Mode" if connecting failed in "Easy Mode". The AP Mode is at the upper
right corner of the "ADD DEVICE" page.
2. Long press on/offbutton until the indicator light flashes slowly;
3. Make sure the indicator light is flashing slowly and confirm it in App;
4. Choose the local WIFI and enter the correct password and confirm;
5. Tap" Connect Now", choose WIFI hotspot named " SmartLife xxx", then back to" Smart Life"
application;
6. Wait for configuring successfully, then tap "Done".
You can add listed devices by tap the "+" at the top right at this page.
1. Switches
Switches allows you to turn on/offyour device anywhere. As long as you have an internet connection
you can control the device in your home. Tap to the icon at the right of the page, you are able to
modify the device name individually or even create a group (if you have several device), which means
you can turn multiple devices on or offat the same time.
2. Timer
You can set the devices individually on or offafter the specific time as you want with this function.
3. Countdown
With the count down timer feature, you can automatically switches on/offthe running household
appliances.
GETTING TO KNOW “SMART LIFE” APP

B. Scenes
Create a life scene:
1. Tap "+" in the upper right of the page to create a new smart life scene
2. Enter life scene name, add task, tap "Save, as shown in the picture. A smart life scene has
been created.
3. You can also change the scene you have already created, change scene name, change task,
delete smart life scene.

C. Profile
Profile is the entrance for the users to manage personal information, mainly show the following
information:
•switches on/offthe running
•household appliances
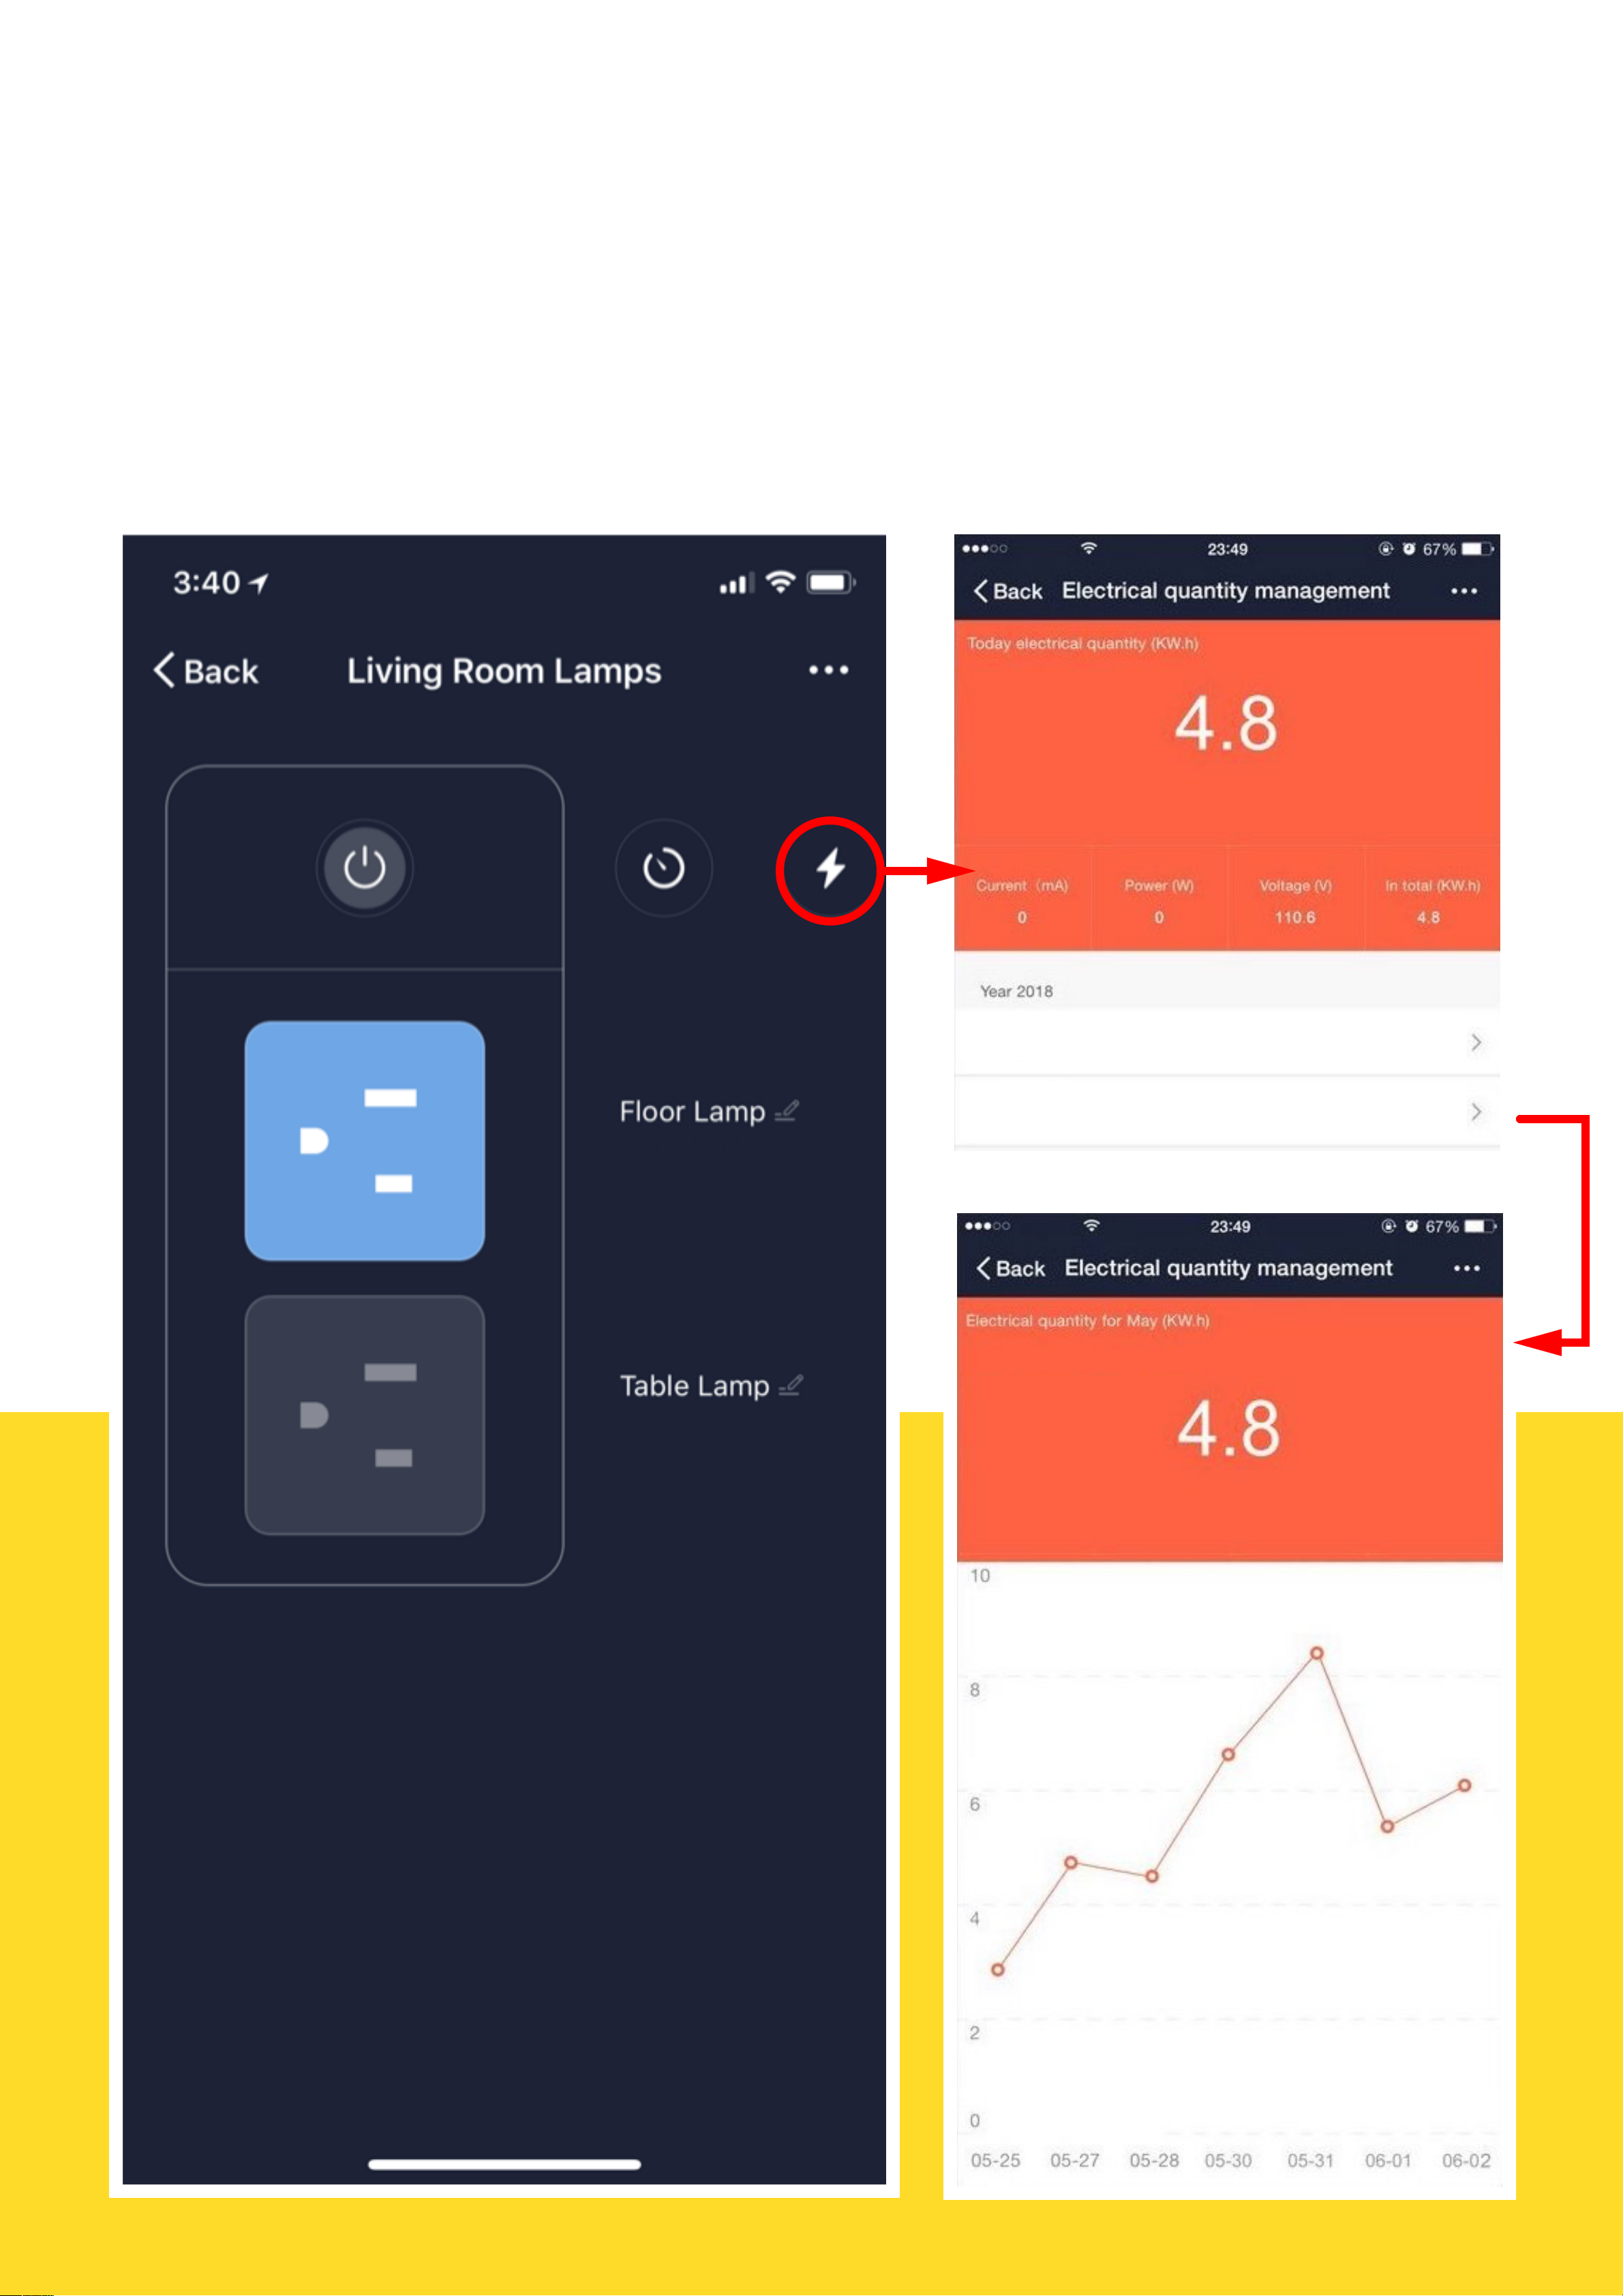
D. Using Energy Monitoring Feature
Monitor energy usage of any device plugged into the this plug right from your phone or tablet. This
Smart Plug provides real-time reports on how much energy your devices are consuming. Use the
Smart Plug to monitor how much a space heater is costing you, or how much energy a particular room
consumes, and create schedules so that you can save money on your next electrical bill.
May 4.8
June 4

SAFETY INFORMATION
The device is recommended for use indoors and in a dry location only, power outlet shall be used
within it's published outlet rating on the instructions.
Please contact seller for replacement if there is any damage caused by transportation.
Please plug in the socket in proper condition and away from children.
Please plug in the socket fully while using for safety concern.
Please do not disassemble or install the socket, otherwise there may cause product damaged or
security risks.

•Amazon Alexa APP & Account Smart Life APP & Account (Users need to register your own
account, select region as "The United States")
•Echo, Echo Dot, Tap or other Amazon voice operated devices
•Smart Wi-Fi Plug
1. Sign in with Alexa account & password (If
not registered, sign up first); After login,
click the menu at the top left, then click
"Settings", and choose "Set up a new
device";
2. Choose a device (for example, Echo).
When the right page appears, long press
the small dot on your Echo device until
the light turns to yellow. Then click
"Continue" on App. (Note: at this time the
mobile phone can not open a variety of
VPN software)
3. Choose users' WIFI and wait for a few
minutes.
4. After an introduction video, click next
step, it will turns to "Home page
automatically. Now the Echo is
connected to Alexa APP through WiFi
successfully.
Tip: Rename the device after configuring successfully, The name of the device is recommended
to use easy pronunciation of the English words. (Amazon Echo only supports English temporarily)
USING AMAZON ECHO QUICK GUIDE
What you'll need
Set your Echo Speaker by Alexa app
Enable Our Skill in Alexa app
Enable Our Skill in Alexa app
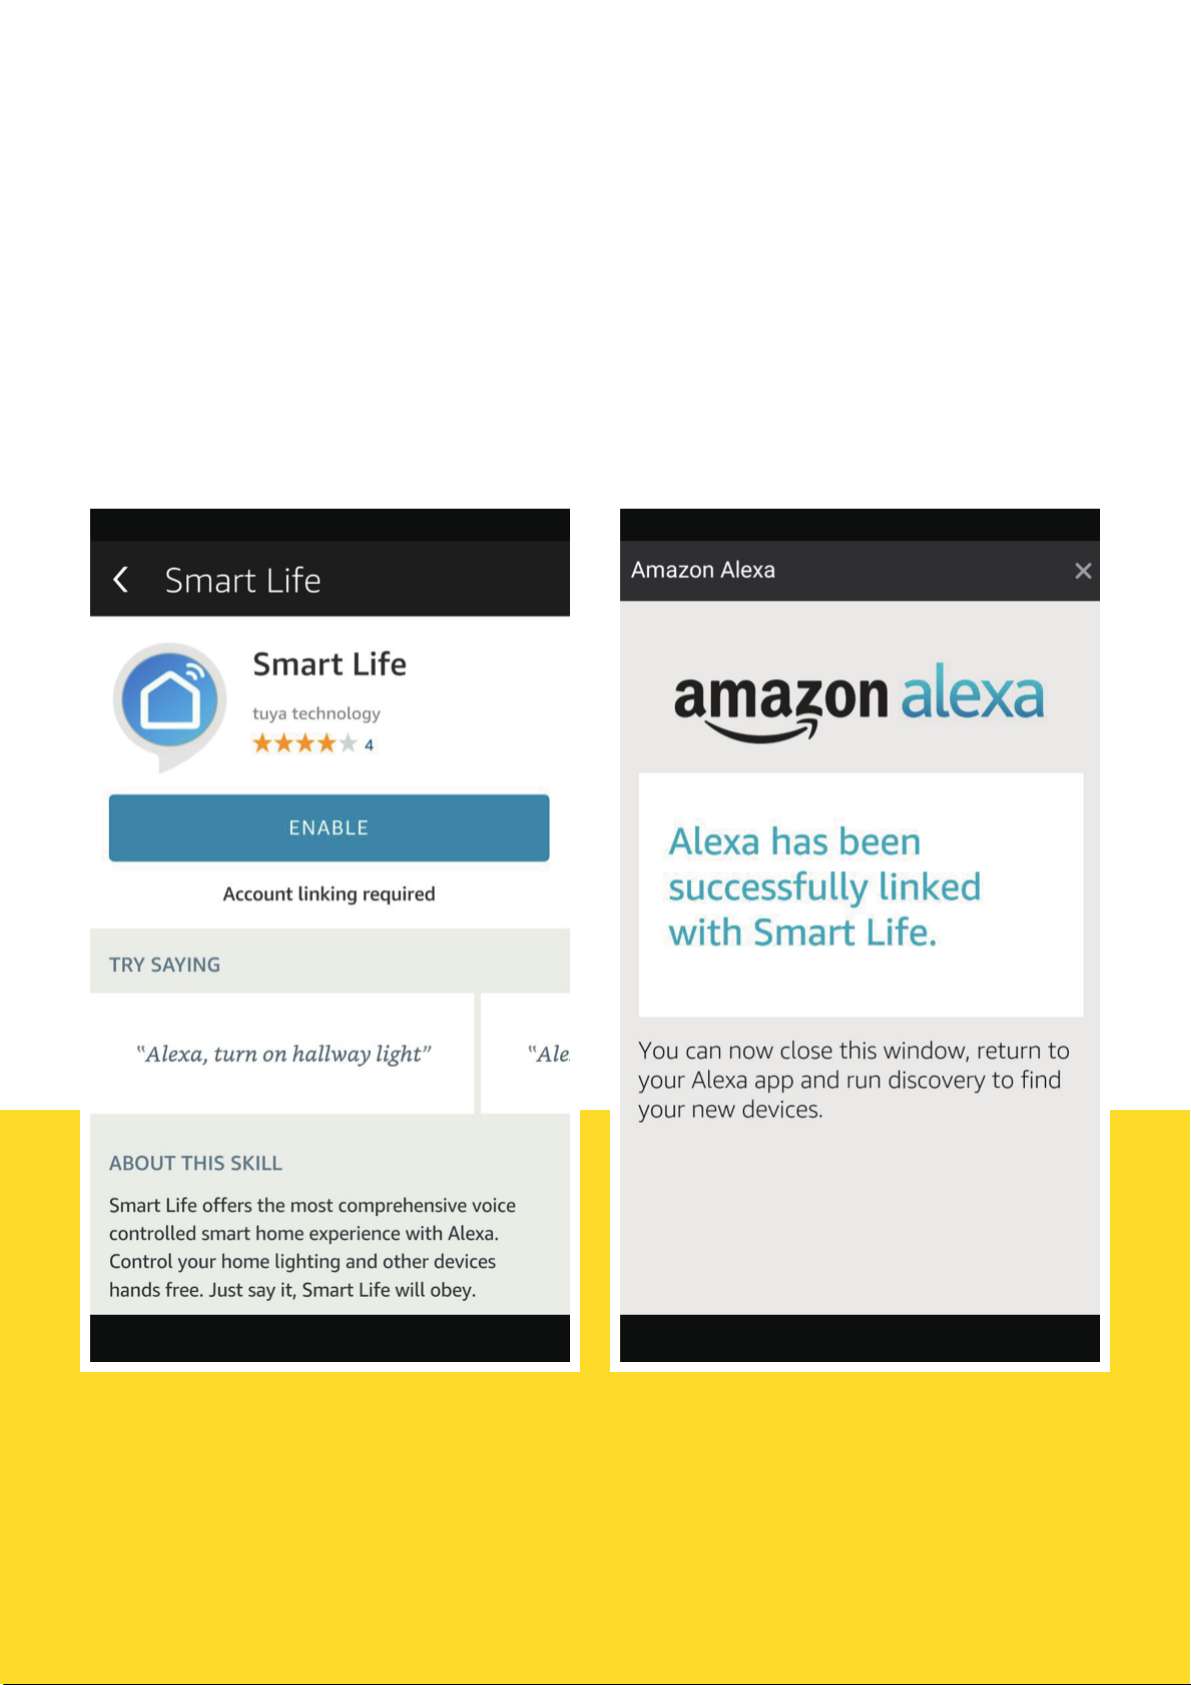
1. Choose "Skills" in the options bar, and then search "Smart Life" in the search bar; Select
"Smart Life" in the search results, and then click "Enable"
2. Input the user name and password that you had previously registered (Only support the
account in the United States); When you see the right page, it means the Alexa account is
linked with Smart Life account.

Control Smart Wi-Fi Plus by Voice
After the previous operation, you can control the socket via Echo.
1. Discovering devices: Firstly, users need to say to Echo: "Echo(or Alexa), Discover my devices."
Echo will start to finding the devices which is added in Smart Life APP, it will take about 20
seconds to show the result. Or you may click "Discover devices" in Alexa APP, it will show the
devices that found successfully. Note: "Echo" is one of the wake-up name, which can be any of
these three names (Settings): Alexa/Echo/Amazon.
2. Support Skill List: User can control devices by instructions like below:
• Alexa, turn on [fridge socket]
• Alexa, turn off[fridge socket]
Attention: The name of the device must be consistent with the addition of Smart Life App.

USING GOOGLE HOME QUICK GUIDE
You can do this by either the two following way.
You can invoke Smart Life by saying "Ok Google, talk to Smart Life" to your Google Home device.
When you hear the respond voice from Google Home, you can check the link request on the
homepage in Google Home app. Tap LINK to direct to the account link page. Be noted that the
country/region, the account, and the password must match with content in Step 2.2. Then select the
country that your Smart Life account belongs to, type in your Smart Life account and password, then
tap LINK NOW.
By saying the invocation name (Smart Life)
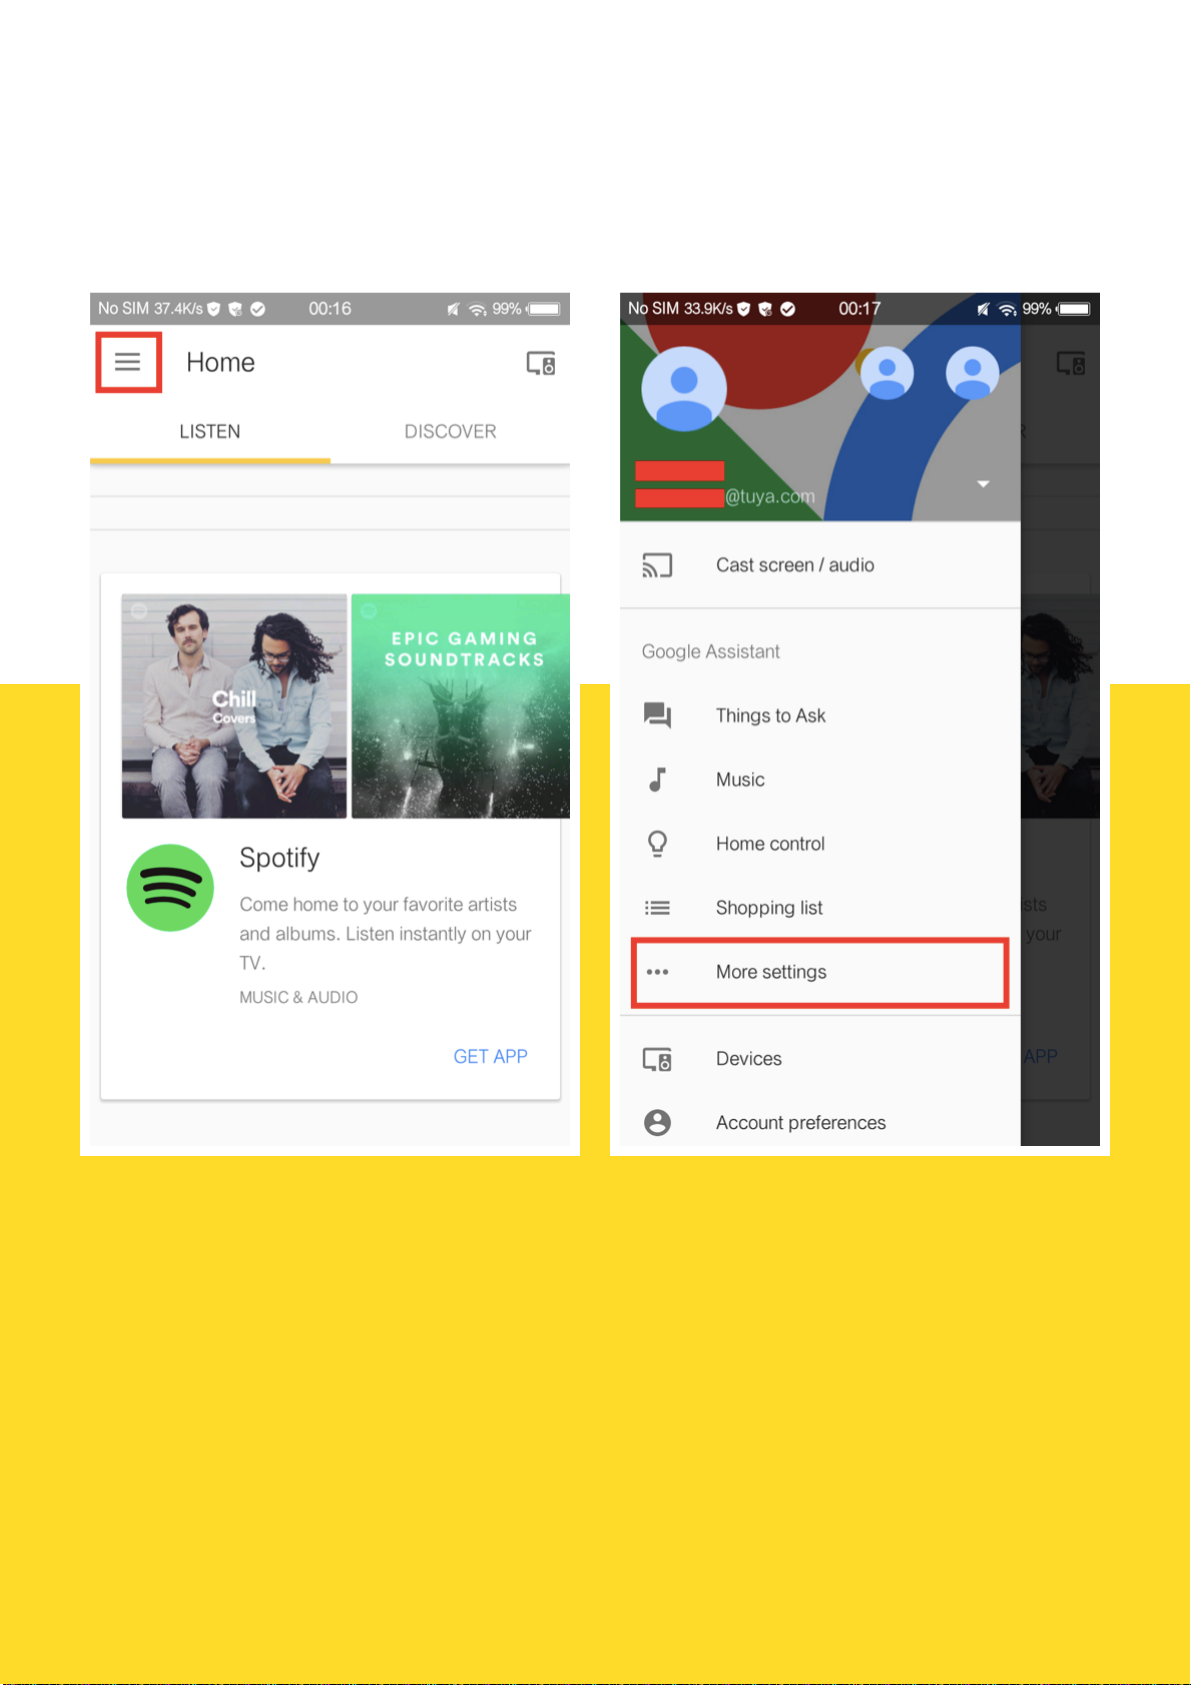
Tap the hamburger menu on the top left conner on Google Home app, then tap More Settings.
By setting up in the Google Home app
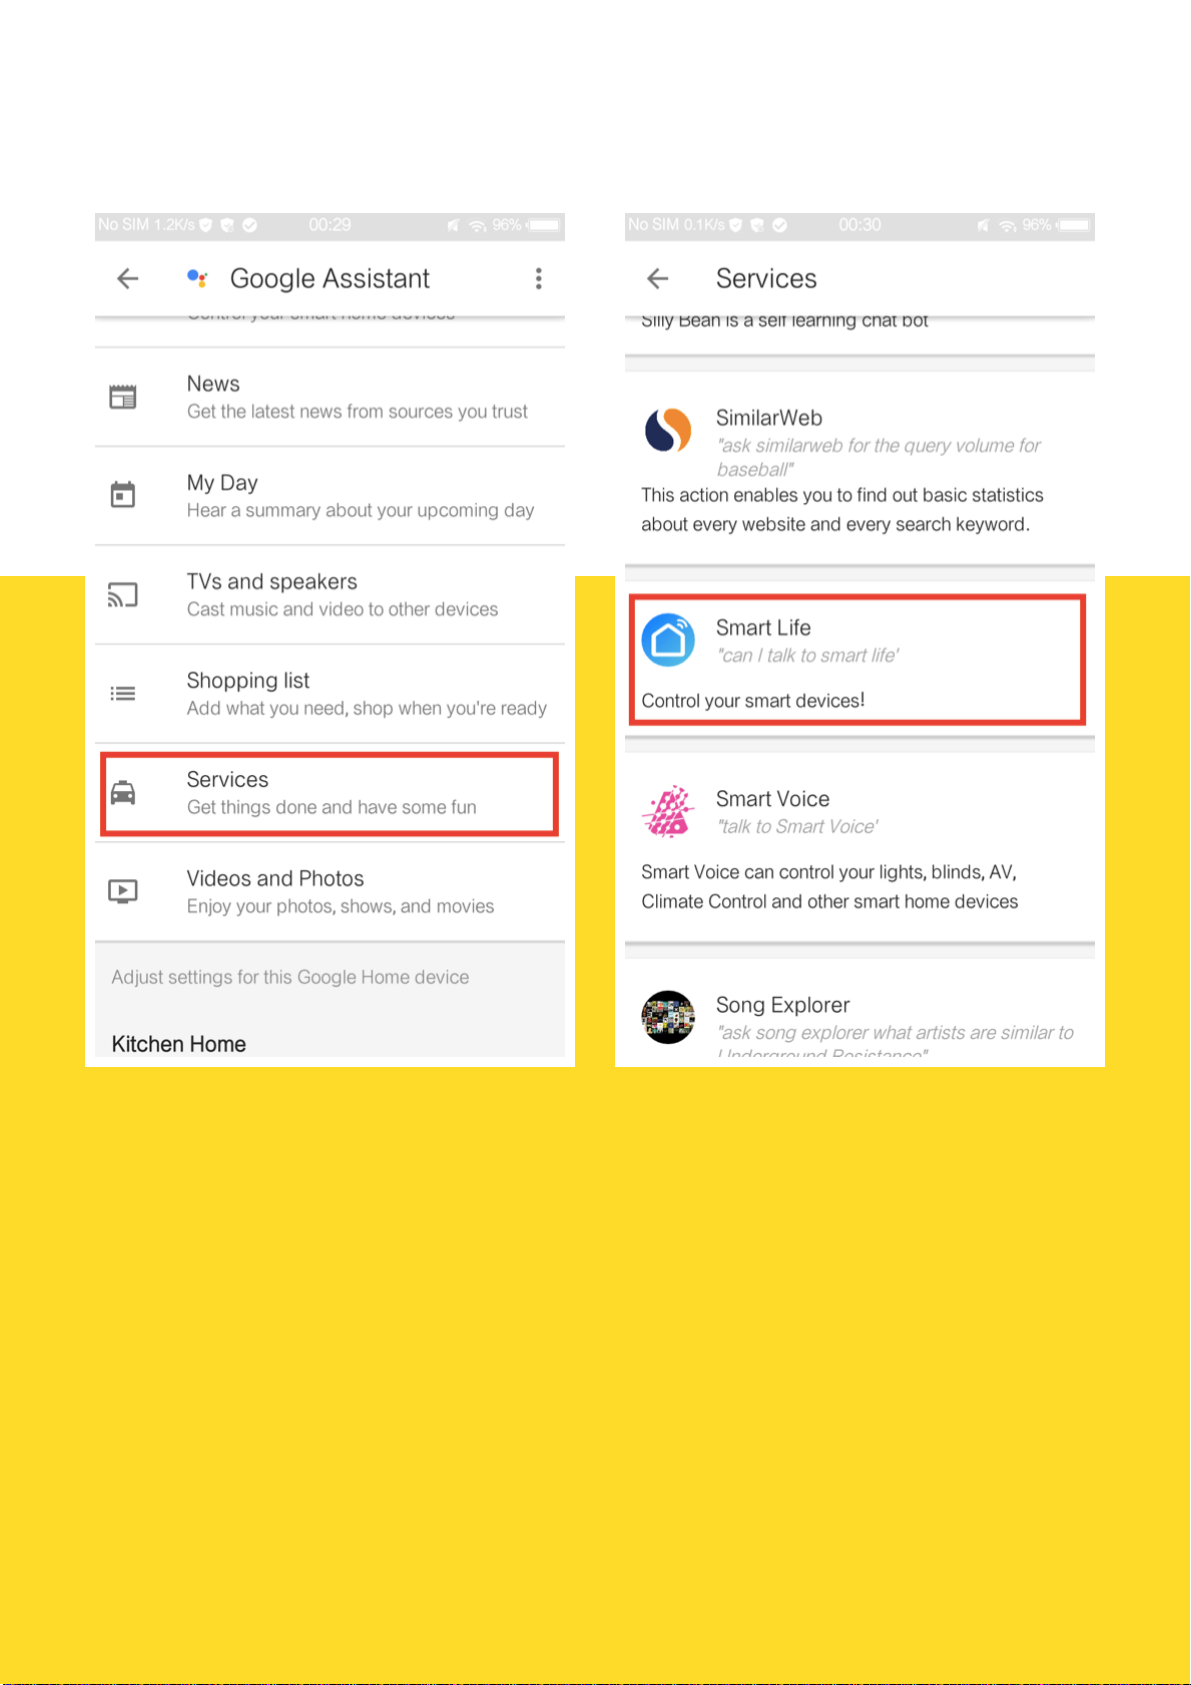
Tap Services, find Smart Life in the list and tap it.
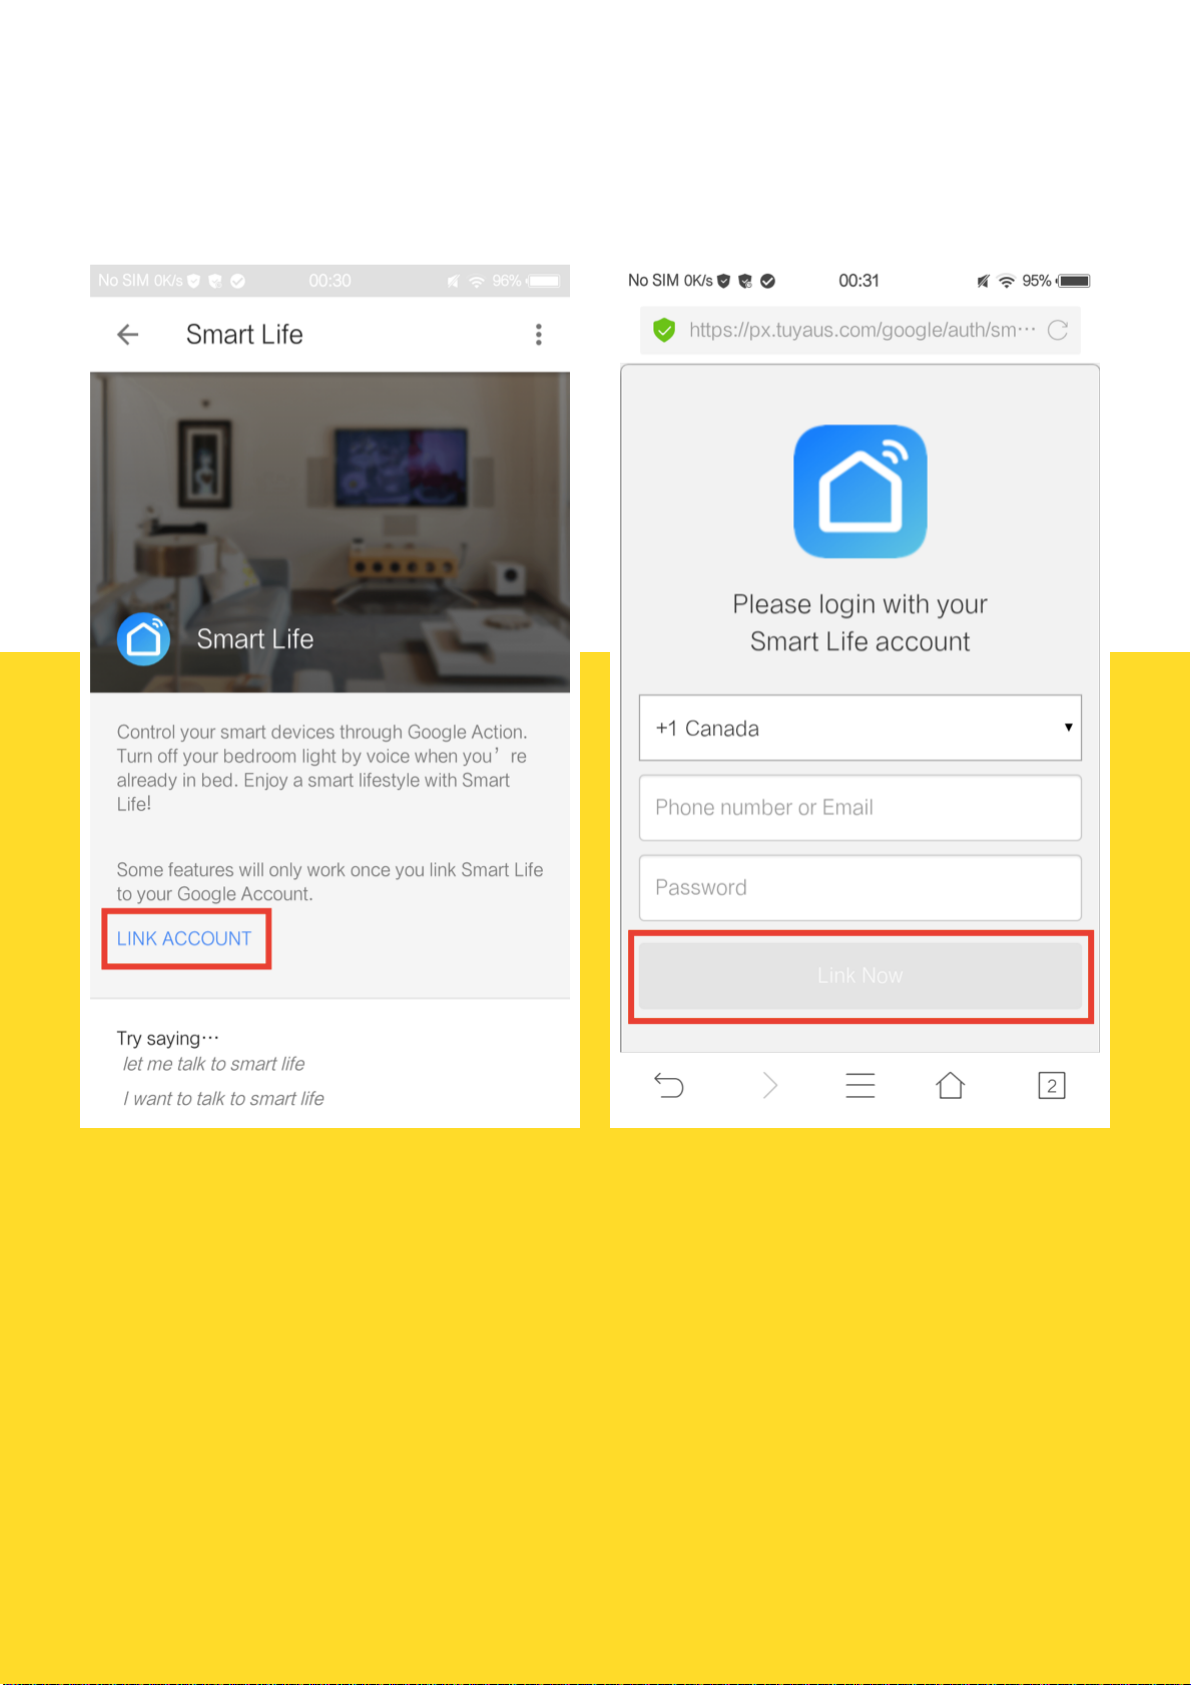
Tap LINK ACCOUNT to redirect to the account link pageselect the country that your Smart Life
account belongs to, type in your Smart Life account and password, then tap LINK NOW. Be noted that
the country/region, the account, and the password must match with content in Step 2.2.

Control your smart devices through Google Home
Now you can control your smart devices through Google Home. Invoke Smart Life by saying "Ok
Google, talk to Smart Life" to Google Home, then you can use the following commands to control your
devices(e.g., bedroom light):
We also support light strips, smart plugs, smart switches, air conditioners, air purifiers, e.t.c.
• Turn on/offbedroom light.
• Set bedroom light to 50 percent.
• Set bedroom light to red. (Only RGBW Light)
• Set bedroom light to party mode. (Depends on product)
Note: After the Smart Life is invoked, it will wait for your command all the time until you say
"Cancel" or "Stop". You can also quit Smart Life by answering "Nothing" when it says "What can
I do for you". Once you quit Smart Life, you need to invoke it again before you control smart
devices through it.
WARRANTY
This Smart Wi-Fi Plug is covered by a limited warranty from YAS Smart Home for the original
purchaser that covers the product from defects in workmanship and materials for 12 months from the
date of purchase (damages through normal wear and tear, alteration, misuse, neglect, accident,
service by anyone other than the authorized service center, or act of God are not included).
During the warranty period and upon verification of defects, this product will be replaced when
returned with proper proof of purchase.
Table of contents
Other SmartPlug Accessories manuals


Popular Accessories manuals by other brands


U-Line
U-Line 3M S-7028 Fittings guide

HAUL MASTER
HAUL MASTER 30329 operating instructions

Tefcold
Tefcold UR90G-Sub-Zero Original instructions

SANKI
SANKI S-CON MINI-Z Series Operating and service manual

Cooper Lighting
Cooper Lighting HALO Home HIWMSB1BLE40AWH installation instructions

Major tech
Major tech PIR33 instructions