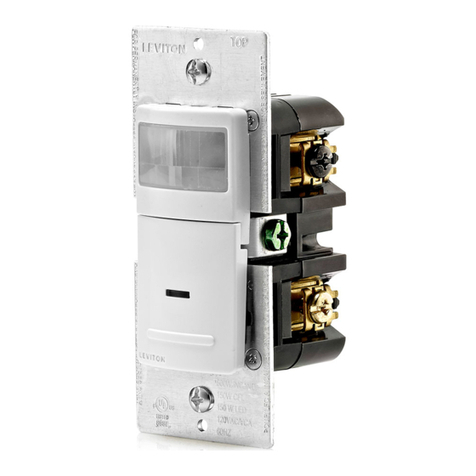
Smartswitch HNS430SW User manual

HNS430SW Electronic ON/ OFF Switch 2-Wire
Note: This manual was correct at the time of manufacture. For the latest version of the manual and any technical or
safety updates refer to the website:- www.sclick.com.au or scan the QR code with a mobile phone.
Scan our QR code
with your phone to go
directly to our website
for technical information
1. FEATURES
• Soft touch push button ON/ OFF switch.
• Blue LED indicates device status.
• Returns to OFF after loss of power.
• Compatible with HPM and Clipsal Style wall plates.
2. OPERATING CONDITIONS
• Operating Voltage: 230 – 240V a.c. 50Hz
• Operating Temperature: 0 to +50 °C
• Compliance Standard: CISPR15, AS/NZS 3100, AS/NZS 60669.2.1
• Maximum Load: 400VA
• Minimum Load: 10VA
• Maximum Current capacity: 1.7A
• Terminals: Screw Terminals suit 0.5mm2 to 1.5mm2stranded (bootlace terminal reccomended)
Note: Operation at temperature, voltage or load outside of the specications may cause permanent damage to the unit.
3. LOAD COMPATIBILITY
LOAD TYPE COMPATIBILITY
LED Lamps (1) 400VA
Incandescent / 240V Halogen / Dichroic Lamps 400VA
Low Voltage Halogen / Dichroic Lighting with Iron-Core Transformers Not Compatible
Low Voltage Halogen / Dichroic Lighting with Electronic Transformers (1)400VA
Dimmable Compact Fluorescent Lamps (1) 400VA
Motors / Fans / Contactors / Relays / Transformers Not Compatible
Fluorescent Tube with Electronic Ballast (1) or Iron Core Ballast Not Compatible
(1) Refer to lamp manufacturer’s guidelines. Lamps must be compatible with electronic switches
HNS430SW
OWNER’S MANUAL
2-WIRE NOT
SUITABLE FOR
FANS, MOTORS
OR IRON CORE
BALLASTS
CP14731 Rev 3, 7TH June 2018

HNS430SW Electronic ON/ OFF Switch 2-Wire
4. WIRING INSTRUCTIONS
WARNING: The HNS430SW is to be installed as part of a xed wire electrical installation. By law such
installations must be made by an electrical contractor or similarly qualied person.
NOTE: A readily available discconect device, such as a type C 16A circuit breaker shall be incorporated external to
the product.
4.1 WIRING
• Disconnect power at the circuit breaker before any electrical work.
• Install the HNS430SW as per the wiring diagram in gure below.
ACTIVE
LOOP
LOAD
A
N
Loop
HNS430SW
Using Optional Mains Rated Momentary Switch
Active
Load
Neutral Load
HNS430SW 240V Momentary
Optional
HNS430SW
for Multi-Way Switching
Active
Figure 1 Figure 2
• Clip the button on to the HNS430SW. Ensure that the button is oriented so that the LED light pipe is aligned with
the hole in the button, before attaching it to the wall plate.
• Afx Instruction Sticker behind wall plate.
• Reconnect power at the circuit breaker and afx Solid State Device Warning Sticker at switchboard.
Note: The HNS430SW is designed for indoor use. It is not rated for outdoor installation. If the unit is loose in the plate, the
wall plate should be replaced. The wire strip length is 6.5mm.
4.2 MULTI-WAY SWITCHING
• The HNS430SW is multi-way switching capable by using mains rated momentary action switches wired across
the Active and Load connections. Suitable switches include the HPM EM870K or Clipsal 681M20P.
• Total length of remote wiring should not exceed 50 metres.
• Holding a remote button for over 0.5 seconds will cause the lights to turn off.
• The lights will ash momentarily when turned off with a remote button.
4.3 DERATING
• In high ambient temperatures, the maximum load rating is reduced according to the table below.
AMBIENT TEMPERATURE MAXIMUM LOAD
25°C 100%
30°C 90%
35°C 80%
40°C 70%
45°C 60%
50°C 50%
CP14731 Rev 3, 7TH June 2018

HNS430SW Electronic ON/ OFF Switch 2-Wire
5. TROUBLESHOOTING
5.1 LOAD FAILS TO TURN ON WHEN THE BUTTON IS PRESSED
•Ensure that the circuit has power by checking the circuit breaker.
•Ensure the load is not damaged or broken.
5.2 LOAD FAILS TO TURN OFF WHEN THE BUTTON IS PRESSED
•If the LED is OFF and if applicable, check that the remote push button is not stuck ON. If not the HNS430SW may
be damaged and should be replaced.
6. IMPORTANT SAFETY WARNINGS
6.1 LOAD REPLACEMENT
• It should be assumed that even when OFF, mains voltage will still be present at the load tting. Mains power
should therefore be disconnected at the circuit breaker before replacing loads.
6.2 INSTALLATION
• The HNS430SW is to be installed as part of a xed wire electrical installation. By law, such installations must
be made by an electrical contractor or similarly qualied person. Avoid excessive force on remote input wire or
terminal block during installation.
6.3 LOW READING DURING INSULATION BREAKDOWN TEST
• The HNS430SW is a solid state device. Therefore a low reading may be observed when conducting insulation
breakdown testing on the circuit.
6.4 CLEANING
• Clean only with a damp cloth. Do not use abrasives or chemicals.
7. WARRANTY AND DISCLAIMER
Legend Corporation Limited warrants the product against manufacturing and material defect from the date of
invoice to the initial purchaser for a period of 12 months. During the warranty period Legend Corporation Limited
will replace products that prove to be defective where the product has been correctly installed and maintained
and operated within the specications dened in the product data sheet and where the product is not subject to
mechanical damage or chemical attack. The warranty is also conditional on the unit being installed by a licensed
electrical contractor. No other warranty is expressed or implied.
Legend Corporation Limited shall not be liable for any direct, indirect, incidental or consequential damages.
Ordering Information: Part No. HNS430SW
Note: This manual was correct at the time of manufacture. For the latest version of the manual and any technical or
safety updates refer to the website:- www.sclick.com.au or scan the QR code with a mobile phone.
CP14731 Rev 3, 7TH June 2018
Other Smartswitch Switch manuals
