manuals.online logo
Brands
  1. Home
  2. •
  3. Brands
  4. •
  5. SMC Networks
  6. •
  7. Network Router
  8. •
  9. SMC Networks 7004FW - annexe 2 User manual

SMC Networks 7004FW - annexe 2 User manual

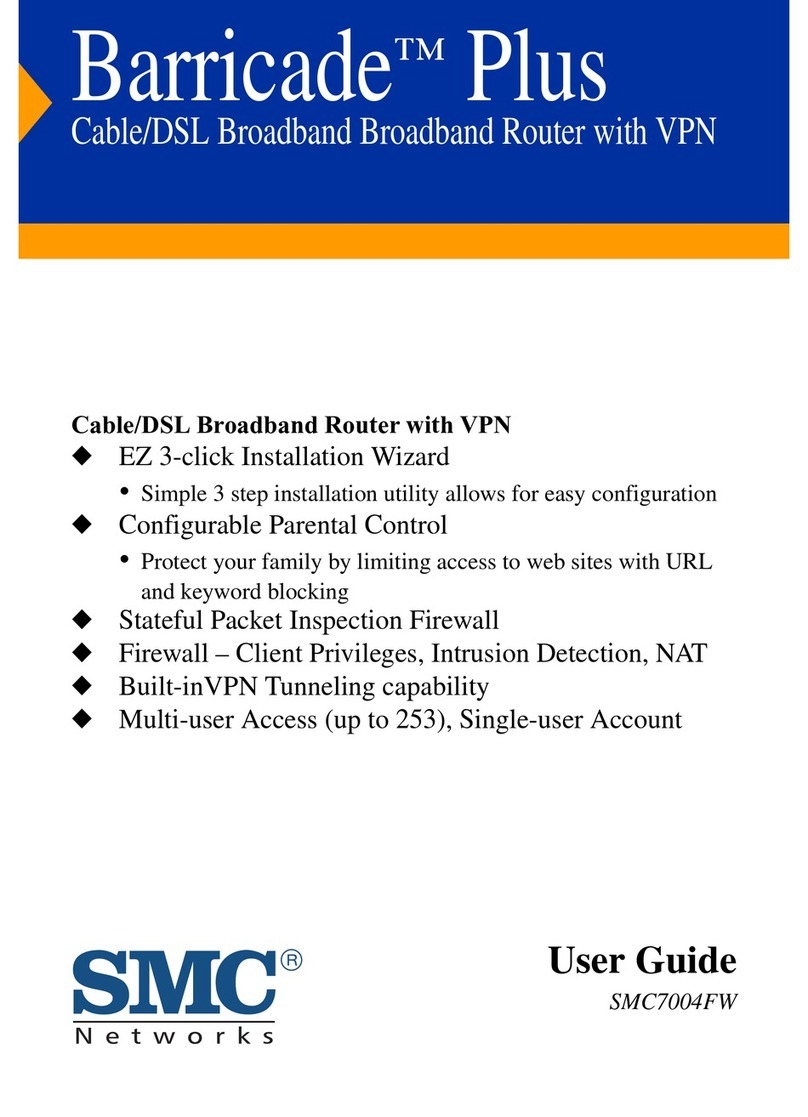
Barricade Plus
Quick Start Guide
SMC7004FW
Table of Contents
Chapter 1 Introduction
Chapter 2 Indicator LEDs
Chapter 3 Configuring your Computer
Chapter 4 Configuring your Barricade
Chapter 5 About SMC
For VPN configuration please refer to the Full Manual found on
CD-rom (included in this package). For additional information
visit www.smc-europe.com.
For Full Manuals in other languages please refer either to the
included CD-rom or to www.smc-europe.com.
Chapter 1. Introduction
The SMC Barricade is a Broadband Router designed to share Internet
Access, provide security, and to network multiple devices for a variety
of users. The Barricade’s simple installation and setup can be carried
out by the least experienced of users, while providing networking
professionals with easy to configure advanced features. Please read
the User Guide for advanced features of this product.
This Package Contains
•One SMC Barricade
•One Power Adapter
•This Quick Installation Guide
•One CD with Complete Documentation
•One Category 5 Fast Ethernet Cable
Confirm That You Meet Installation Requirements
Before proceeding with the installation of your Barricade, please be
sure you have the following:
•A computer with an Ethernet network card installed
•Your Windows CD, if your computer is running Win 95, 98, or ME
•An Internet connection through a cable or xDSL modem
•An additional Ethernet network cable
•A Web browser such as Internet Explorer or Netscape
Chapter 2. Indicator LEDs
Front Panel
Rear Panel
The front panel of the Barricade provides indicator LEDs (Light
Emitting Diodes) for easy monitoring. The following table defines the
function of each LED.
Item Description
Reset Button Use this button to reset the power and restore the
default factory settings.
LEDs Power, WAN and LAN port status indicators.
LAN Ports Fast Ethernet ports (RJ-45). Connect devices on your local
area network to these ports (such as a PC, hub or switch).
WAN Port WAN port (RJ-45). Connect your cable modem, xDSL
modem, or an Ethernet router to this port.
Power Inlet Connect the included power adapter to this inlet.
Warning: Using the wrong type of power adapter may
cause damage.
LED Condition Status
Power (Green) On Barricade Plus is receiving power.
WAN (Green) On The WAN port has established a
valid network connection and
operates at 10 Mbps.
Flashing The WAN port is transmitting or receiving
traffic at 100 Mbps.
Link/Act (Green) On The indicated LAN port has established
a valid network connection.
Flashing The indicated LAN port is transmitting or
receiving traffic.
10/100 (Amber) On The indicated LAN port is operating
at 100 Mbps.
Off The indicated LAN port is operating
at 10 Mbps.
English
English
!
known as a static IP address. How your ISP assigns your IP address
determines how you will configure your computer.
Here is what to do:
1. From the Windows desktop, click the "Start" button. Choose
"Settings," then click "Control Panel."
2. From "Control Panel," double-click the "Network" icon.
English
English
1. Connecting Computers: Connect computers directly to the
Barricade on ports 1- 4 on the rear panel. If you have more than 4
computers to plug in, connect a hub or a switch (using its uplink
port) and connect additional computers to that device.
2. Connecting a Cable Modem or DSL Modem: Connect your Cable or
DSL modem to the WAN port on the rear panel.
3. Power: Plug the power cord into the power jack.
Chapter 3. Configuring Your Computer
This Quick Installation Guide provides configuration instructions for
Windows 95, 98, ME, NT 4.0, 2000 and XP, and for Macintosh OS 7.x
and above. Please be sure that you are following the proper
instruction set for your operating system.
•Configuring Your Computer with Windows 95/98/Me.
•Configuring Your Computer with Windows 2000.
•Configuring Your Computer with Windows XP.
•Configuring Your Computer with Windows NT 4.0.
•Configuring Your Macintosh Computer.
Configuring Your Computer in Windows 95/98/Millennium Edition
You may find that the instructions here do not exactly match your
version of Windows. This is because these steps and screenshots were
created from Windows 98. Windows 95 and Windows Me are very
similar, but not identical, to Windows 98.
Step 1. Configure TCP/IP Settings
After you have completed the hardware setup by connecting your
devices, you need to configure your computer to connect to your
Barricade. You need to determine how your ISP issues your IP
address. Many ISPs issue these numbers automatically using a
networking technology known as Dynamic Host Configuration
Protocol, or DHCP. Other ISPs will specify your IP address and
associated numbers, which you must enter manually. This is also
3. In the "Network" window, under the "Configuration" tab, double-
click the "TCP/IP" entry that is listed with your network card.
4. Select the "IP Address" tab.
If "Obtain an IP address automatically" is already selected, your
computer is already configured for DHCP. Click "Cancel" to close each
window, and skip to Step 2. Disable HTTP Proxy.
5. Locate your IP address and Subnet Mask. Record them in the
spaces provided after step 9 in this section.
6. Click the "Gateway" tab and record the numbers listed under
"Installed gateways."
7. Click the "DNS Configuration" tab. Locate the DNS servers listed
under "DNS Server Search Order." Record the listed addresses.
English
English
8. After writing down your settings, check to make sure you have
recorded them correctly. Click the "IP Address" tab and then
click "Obtain an IP address automatically." Click OK.
9. Windows may need your Windows 95/98/ME CD to copy some files.
After it finishes copying, it will then prompt you to restart your
system. Click "Yes" and your computer will shut down and restart.
TCP/IP Configuration Setting
IP Address ____.____.____.____
Subnet Mask ____.____.____.____
Primary DNS Server ____.____.____.____
Secondary DNS Server ____.____.____.____
Default Gateway ____.____.____.____
Step 2. Disable HTTP Proxy
You will need to verify that the "HTTP Proxy" feature of your Web
browser is disabled. This is so that your Web browser will be able
to view the configuration pages inside your Barricade. The
following steps are for Internet Explorer and for Netscape.
Determine which browser you use and follow the appropriate steps.
Internet Explorer
1. Open Internet Explorer and click the stop button. Click
"Tools," then "Internet Options."
English
English
2. In the "Internet Options" window click the "Connections" tab.
Next, click the "LAN Settings…" button.
3. Clear all the checkboxes.
4. Click "OK," and then click "OK" again to close the "Internet
Options" window.
Netscape
1. Open Netscape and click the stop button. Click "Edit," then
click "Preferences…"
2.In the "Preferences" window, under "Category" double-click
"Advanced," then click "Proxies." Select "Direct connection to
the Internet." Click "OK."
3. Repeat these steps for each Windows 95/98/Me computer
connected to your Barricade.
Step 3. Obtain IP Settings from Your Barricade
Now that you have configured your computer to connect to your
Barricade, it needs to obtain new network settings. By releasing
any old IP settings and renewing them with settings from your
Barricade, you will also verify that you have configured your
computer correctly.
1. Click "Start," then "Run…"
2.Type "WINIPCFG" and click "OK." It may take a minute or two
for the "IP Configuration" window to appear.
3. From the drop-down menu, select your network card. Click
"Release" and then "Renew." Verify that your IP address is now
192.168.2.xxx, your Subnet Mask is 255.255.255.0 and your
Default Gateway is 192.168. 2.1. These values confirm that your
Barricade is functioning. Click "OK" to close the "IP
Configuration" window.
Now that your computer is configured to connect to your
Barricade, please skip to "Configuring Your Barricade".
English
English
Configuring Your Computer with Windows 2000
Step 1. Configure TCP/IP Settings
After you have completed the hardware setup, you need to
configure your computer to connect to your Barricade. You also need
to determine how your ISP issues your IP address. Many ISPs issue
these numbers automatically, using a networking technology known
as Dynamic Host Control Protocol, or DHCP. Other ISPs will specify
your IP address and associated numbers, which you must enter
manually. This is also known as a static IP address. How your ISP
assigns your IP address determines how you will configure your
computer.
Here is what to do:
1. From the Windows desktop, click the "Start" button. Choose
"Settings," then click "Network and Dial-Up Connections" icon.
2. Double-click the icon that corresponds to the connection to
your Barricade.
3. Click "Properties."
4. Double-click "Internet Protocol (TCP/IP).
"
5. All the information that you need to record is on the "Internet
Protocol (TCP/IP) Properties" dialog box. Use the spaces below
to record the information.
If "Obtain an IP address automatically" and "Obtain DNS server
address automatically" are already selected, your computer is
already configured for DHCP. Click "Cancel" to close each window,
and skip to to Step 2. Disable HTTP Proxy.
English
English
6. Select "Obtain an IP address automatically" and then select
"Obtain DNS server address automatically." Click "OK" or "Close"
to close each window
TCP/IP Configuration Setting
IP Address ____.____.____.____
Subnet Mask ____.____.____.____
Primary DNS Server ____.____.____.____
Secondary DNS Server ____.____.____.____
Default Gateway ____.____.____.____
Step 2. Disable HTTP Proxy
You will need to verify that the "HTTP Proxy" feature of your Web
browser is disabled. This is so that your Web browser will be able
to view the configuration pages inside your Barricade. The
following steps are for Internet Explorer and for Netscape.
Determine which browser you use and follow the appropriate steps.
Internet Explorer
1. Open Internet Explorer and click the stop button. Click "Tools,"
then "Internet Options."
2.In the "Internet Options" window click the "Connections" tab.
Next, click the "LAN Settings…" button.
3.Clear all the checkboxes.
English
English
4. Click "OK," and then click "OK" again to close the "Internet
Options" window.
Netscape
1. Open Netscape and click the stop button. Click "Edit," then
click "Preferences…"
2. In the "Preferences" window, under "Category" double-click
"Advanced," then click "Proxies." Select "Direct connection to
the Internet." Click "OK."
Step 3. Obtain IP Settings From Your Barricade
Now that you have configured your computer to connect to your
Barricade, it needs to obtain new network settings. By releasing
any old IP settings and renewing them with settings from your
Barricade, you will also verify that you have configured your
computer correctly.
1. From the Windows desktop, click the "Start" button, then
"Programs," then "Accessories," and then click "Command Prompt."
2. In the "Command Prompt" window, type "IPCONFIG /RELEASE"
and press the <ENTER> key.
English
English
3. Type "IPCONFIG /RENEW" and press the <ENTER> key. Verify that
your IP address is now 192.168.2.xxx (2-254), your Subnet Mask
is 255.255.255.0 and your Default Gateway is 192.168.2.1.
These values confirm that your Barricade is functioning.
4. Type "EXIT" and press <ENTER> to close the "Command Prompt"
window.
Now that your computer is configured to connect to your
Barricade, please skip "Configuring Your Barricade".
Configuring Your Computer with Windows XP
Step 1. Configure TCP/IP Settings
After you have completed the hardware setup, you need to configure
your computer to connect to your Barricade. You also need to
determine how your ISP issues your IP address. Many ISPs issue these
numbers automatically, using a networking technology known as
Dynamic Host Configuration Protocol, or DHCP. Other ISPs will specify
your IP address and associated numbers, which you must enter
manually. This is also known as a static IP address. How your ISP
assigns your IP address determines how you will configure your
computer.
Here is what to do:
1. From the Windows desktop, click the "start" button. Choose
"Control Panel."
2. Select the "Network and Internet Connections" icon ,then
click the "Network Connections" icon ,and and double-click
on the adapter you will use for this connection.
English
English
3. Click "Properties."
4. Double-click "Internet Protocol (TCP/IP)."
5. All the information that you need to record is on the "Internet
Protocol (TCP/IP) Properties" dialog box. Use the spaces
provided after step 7 in this section to record the information.
If "Obtain an IP address automatically" and "Obtain DNS server
address automatically" are already selected, your computer is
already configured for DHCP. Click "Cancel" to close each window,
and skip to Step 2. Disable HTTP Proxy.
6. Select "Obtain an IP address automatically" and then select
"Obtain DNS server address automatically." Click "OK" or "Close"
to close each window.
TCP/IP Configuration Setting
IP Address ____.____.____.____
Subnet Mask ____.____.____.____
Primary DNS Server ____.____.____.____
Secondary DNS Server ____.____.____.____
Default Gateway ____.____.____.____
Step 2. Disable HTTP Proxy
You will need to verify that the "HTTP Proxy" feature of your Web
browser is disabled. This is so that your Web browser will be able to
view the configuration pages inside your Barricade Plus. The
following steps are for Internet Explorer. Determine which browser
you use and follow the appropriate steps.
1. Open Internet Explorer and click the stop button. Click "Tools,"
then "Internet Options."
English
English
2. In the "Internet Options" window click the "Connections" tab.
Next, click the "LAN Settings…" button.
3. Clear all the checkboxes.
4. Click "OK," and then click "OK" again to close the "Internet
Options" window.
Step 3. Obtain IP Settings From Your Barricade
Now that you have configured your computer to connect to your
Barricade, it needs to obtain new network settings. By releasing
any old IP settings and renewing them with settings from your
Barricade, you will also verify that you have configured your
computer correctly.
1. From the Windows desktop, click the "Start" button, then
"Programs," then "Accessories," and then click "Command Prompt."
2. In the "Command Prompt" window, type "IPCONFIG /RELEASE"
and press the <ENTER> key.
3. Type "IPCONFIG /RENEW" and press the <ENTER> key. Verify that
your IP address is now 192.168.2.xxx (2-254), your Subnet Mask
is 255.255.255.0 and your Default Gateway is 192.168.2.1. These
values confirm that your Barricade is functioning.
4. Type "EXIT" and press <ENTER> to close the "Command Prompt"
window.
Now that your computer is configured to connect to your Barricade,
please skip to please skip to "Configuring Your Barricade".
English
English
Configuring Your Computer with Windows NT 4.0
Step 1. Configure TCP/IP Settings
After you have completed the hardware setup, you need to
configure your computer to connect to your Barricade. You need to
determine how your ISP issues your IP address. Many ISPs issue
these numbers automatically using a networking technology known
as Dynamic Host Control Protocol, or DHCP. Other ISPs will specify
your IP address and associated numbers, which you must enter
manually. This is also known as a static IP address. How your ISP
assigns your IP address determines how you will configure your
computer.
Here is what to do:
1. From the Windows desktop click "Start," then "Settings," and
click "Control Panel."
2. Double-click the "Network" icon.
3. Select the "Protocols" tab.
4. Double-click "TCP/IP Protocol."
5. Select the "IP Address" tab.
6. In the "Adapter" drop-down list, be sure your Ethernet adapter
is selected.
If "Obtain an IP address automatically" is already selected, your
computer is already configured for DHCP. Click "Cancel" to close
each window, and skip to Step 2. Disable HTTP Proxy.
English
English
7. In the "TCP/IP Properties" dialog box, click the IP address tab to
locate your IP address, subnet Mask, and Default Gateway. Record
these values in the space provided after step 10 in this section.
8. Click the "DNS" tab to see the primary and secondary DNS
servers. Record these values in the appropriate spaces below.
9. After writing down your IP settings, click the IP address tab.
Select "Obtain IP address automatically" and click OK. Click OK
again to close the "Network" window.
10. Windows may copy some files, and will then prompt you to
restart your system. Click "Yes" and your computer will shut
down and restart.
TCP/IP Configuration Setting
IP Address ____.____.____.____
Subnet Mask ____.____.____.____
Primary DNS Server ____.____.____.____
Secondary DNS Server ____.____.____.____
Default Gateway ____.____.____.____
Step 2. Disable HTTP Proxy
You will need to verify that the "HTTP Proxy" feature of your Web
browser is disabled. This is so that your Web browser will be able
to view the configuration pages inside your Barricade. The
following steps are for Internet Explorer and for Netscape.
Determine which browser you use and follow the appropriate steps.
Internet Explorer
1. Open Internet Explorer and click the stop button. Click "Tools,"
then "Internet Options."
2. In the "Internet Options" window click the "Connections" tab.
Next, click the "LAN Settings…" button.
English
English
3. Clear all the checkboxes.
4. Click "OK," and then click "OK" again to close the "Internet
Options" window.
Netscape
1. Open Netscape and click the stop button. Click "Edit," then
click "Preferences…"
2. In the "Preferences" window, under "Category" double-click
"Advanced," then click "Proxies." Select "Direct connection to
the Internet." Click "OK."
Step 3. Obtain IP Settings From Your Barricade
Now that you have configured your computer to connect to your
Barricade, it needs to obtain new network settings. By releasing
any old IP settings and renewing them with settings from your
Barricade, you will also verify that you have configured your
computer correctly.
1. From the Windows desktop, click the "Start" button, then
"Programs," and then select "Command Prompt."
English
English
2. In the "Command Prompt" window, type "IPCONFIG /RELEASE"
and press the <ENTER> key.
3. Type "IPCONFIG /RENEW" and press the <ENTER> key. Verify that
your IP address is now 192.168.2.xxx, your Subnet Mask is
255.255.255.0 and your Default Gateway is 192.168.2.1. These
values confirm that your Barricade is functioning.
4. Type "EXIT" and press <ENTER> to close the "Command Prompt"
window.
Now that your computer is configured to connect to your Barricade,
please continue to "Configuring Your Barricade".
Configuring Your Macintosh Computer
You may find that the instructions here do not exactly match your
screen. This is because these steps and screenshots were created
using Mac OS 8.5. Mac OS 7.x and above are all very similar, but
may not be identical to Mac OS 8.5.
Step 1. Configure TCP/IP Settings
After you have completed the hardware setup, you need to configure
your computer to connect to your Barricade. You need to determine
how your ISP issues your IP address. Many ISPs issue these numbers
automatically using a networking technology known as Dynamic Host
Control Protocol, or DHCP. Other ISPs will specify your IP address and
associated numbers, which you must enter manually. This is also
known as a static IP address. How your ISP assigns your IP address
determines how you will configure your computer.
Here is what to do:
1. Pull down the Apple Menu. Click "Control Panels" and select
TCP/IP.
English
English
2. In the TCP/IP dialog box, make sure that "Ethernet" is selected
in the "Connect Via:" field.
If "Using DHCP Server" is already selected in the "Configure:" field,
your computer is already configured for DHCP. Close the TCP/IP
dialog box, and skip to Step 2. Disable HTTP Proxy.
3. All the information that you need to record is on the "TCP/IP"
dialog box. Record these values in the space below step 5.
4. After writing down your IP settings, select "Using DHCP Server"
in the "Configure" field and close the window.
5. Another box will appear asking whether you want to save your
TCP/IP settings. Click "Save."
TCP/IP Configuration Setting
IP Address ____.____.____.____
Subnet Mask ____.____.____.____
Primary DNS Server ____.____.____.____
Secondary DNS Server ____.____.____.____
Default Gateway ____.____.____.____
Step 2. Disable HTTP Proxy
You will need to verify that the "HTTP Proxy" feature of your Web
browser is disabled. This is so that your Web browser will be able
to view the configuration pages inside your Barricade. The
following steps are for Internet Explorer and for Netscape.
Determine which browser you use and follow the appropriate steps.
Internet Explorer
1. Open Internet Explorer and click the stop button. Click "Edit"
and select "Preferences."
2. In the Internet Explorer Preferences window, under Network,
select Proxies.
3. Uncheck all checkboxes and click OK.
English
English
Netscape
1. Open Netscape and click the stop button. Click "Edit" and select
"Preferences."
2. In the "Preferences" dialog box, In the left-hand column
labeled "Category," select "Advanced." Under the "Advanced"
category, select "Proxies."
3. Select "Direct Connection to the Internet" and click OK
Step 3. Obtain IP Settings From Your Barricade
Now that you have configured your computer to connect to your
Barricade, it needs to obtain new network settings. By releasing
any old IP settings and renewing them with settings from your
Barricade, you will also verify that you have configured your
computer correctly.
1. Pull down the Apple Menu. Click "Control Panels" and select
TCP/IP.
2. In the TCP/IP window, your new settings will be shown. Verify
that your IP address is now 192.168.2.xxx, your Subnet Mask is
255.255.255.0 and your Default Gateway is 192.168.2.1. These
values confirm that your Barricade is functioning.
3. Close the TCP/IP window.
Now that your computer is configured to connect to your Barricade,
please skip to "Configuring Your Barricade".
English
English
Chapter 4. Configuring Your Barricade
Now that you have successfully configured your computer and
retrieved your new network settings from your Barricade, you are
ready to configure the Barricade’s settings for your LAN.
1. Open your Web browser (i.e., Internet Explorer or Netscape
Navigator) and click the stop button.
2. In the "Address" field type "http://192.168.2.1" and press
<ENTER>.
Note: For some browsers it may be necessary to include ":88" after
the management IP address. For example, http://192.168.2.1:88
3. The Barricade login screen will appear. Leave the Password field
empty and click on "Login." There is no password by default. For
security reasons, you should assign a password as soon as
possible. Note that the login password is case-sensitive.
4. On the home page of the Barricade Web console, click "Setup
Wizard." The automated setup process of the Barricade will take
you through each step for setting up your gateway.
5.Select your time zone from the list.
6. Click on "NEXT," and the "Broadband Type" setup screen will
display.
There are three different general configurations for high-speed
Internet connections. You need to know about your Internet
connection to determine which configuration to use. You found
out most of what you need to know when you recorded your IP
settings in earlier steps. There are some guidelines to determine
which configuration you should use in the following section.
English
English
For PPTP setup refer to the section "Advanced Setup" in the
full manual.
Cable Modem Connection
If you connect to the Internet using a cable modem, your ISP
probably uses DHCP to issue an IP address to you.
1. If you use a cable modem or you know you use a dynamic IP
address, click on the "Cable Modem" radio button to display the
IP address configuration screen.
A Domain Name Server (DNS) is like an index of names and Web
addresses. If you type a Web address into your browser, such as
www.whitehouse.gov, a DNS server will find that name in its index
and find the matching IP address: 198.137.240.92. Most ISPs
provide a DNS server for speed and convenience. Since you are
connecting to the Internet with dynamic IP settings, it is likely
that your DNS servers are also provided dynamically.
2. If you are connecting to the Internet with a dynamic IP
address, you probably do not need to enter anything here.
However, if there is a DNS server that you would rather use,
enter the DNS server addresses in the spaces provided.
3. Click "FINISH" when completed.
Fixed-IP xDSL Connection
1. If you connect to the Internet using a Fixed-IP xDSL, click the
"Fixed-IP xDSL" radio button on the Broadband Type screen.
2. Your ISP probably requires you to manually enter your TCP/IP
settings. If you have an xDSL connection or if you know you use
a static IP address, enter the IP address information in the
spaces provided.
3. Click "FINISH" when completed.
English
English

This manual suits for next models

1

Other SMC Networks Network Router manuals

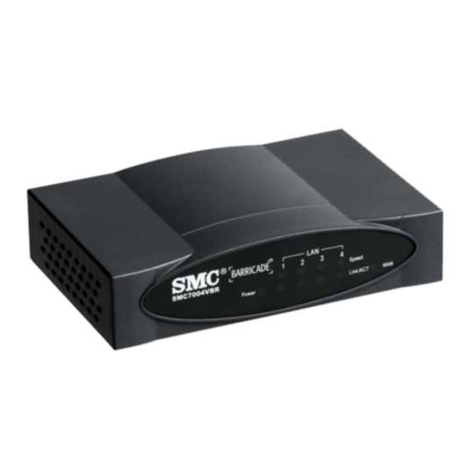
SMC Networks 7004VBR User manual

SMC Networks

SMC Networks 7004VBR User manual

SMC Networks 7908VOWBRA2 User manual

SMC Networks

SMC Networks 7908VOWBRA2 User manual

SMC Networks Edge-corE NETWORKS BARRICADE SMCWGBR14-N2 User manual

SMC Networks

SMC Networks Edge-corE NETWORKS BARRICADE SMCWGBR14-N2 User manual

SMC Networks SMCFS501 User manual

SMC Networks

SMC Networks SMCFS501 User manual

SMC Networks GS1601 User manual

SMC Networks

SMC Networks GS1601 User manual

SMC Networks SMCWEBT-G User manual

SMC Networks

SMC Networks SMCWEBT-G User manual

SMC Networks SMCGS10C-Smart User manual

SMC Networks

SMC Networks SMCGS10C-Smart User manual

SMC Networks Barricade SMC7404WBRA EU User manual

SMC Networks

SMC Networks Barricade SMC7404WBRA EU User manual

SMC Networks GS5 - annexe 1 User manual

SMC Networks

SMC Networks GS5 - annexe 1 User manual

SMC Networks SMC6405TX User manual

SMC Networks

SMC Networks SMC6405TX User manual

SMC Networks EZ Connect SMC2870W User manual

SMC Networks

SMC Networks EZ Connect SMC2870W User manual

SMC Networks Barricade SMC7004BR User manual

SMC Networks

SMC Networks Barricade SMC7004BR User manual

SMC Networks FS26 User manual

SMC Networks

SMC Networks FS26 User manual

SMC Networks 8648T FICHE User manual

SMC Networks

SMC Networks 8648T FICHE User manual

SMC Networks KER25U User manual

SMC Networks

SMC Networks KER25U User manual

SMC Networks Barricade SMC7401BRA User manual

SMC Networks

SMC Networks Barricade SMC7401BRA User manual

SMC Networks SMC6752AL2 User manual

SMC Networks

SMC Networks SMC6752AL2 User manual

SMC Networks 7901BRA2 - annexe 1 User manual

SMC Networks

SMC Networks 7901BRA2 - annexe 1 User manual

SMC Networks ADSL2 Barricade SMC7904BRA3 User manual

SMC Networks

SMC Networks ADSL2 Barricade SMC7904BRA3 User manual

SMC Networks Barricade SMC7404WBRA EU User manual

SMC Networks

SMC Networks Barricade SMC7404WBRA EU User manual

SMC Networks TigerSwitch SMC6709FL2 Programming manual

SMC Networks

SMC Networks TigerSwitch SMC6709FL2 Programming manual

SMC Networks FS8 - FICHE TECHNIQUE Operating and safety instructions

SMC Networks

SMC Networks FS8 - FICHE TECHNIQUE Operating and safety instructions

SMC Networks 7904WBRA-N FICHE Installation guide

SMC Networks

SMC Networks 7904WBRA-N FICHE Installation guide

SMC Networks SMC8612T2 User manual

SMC Networks

SMC Networks SMC8612T2 User manual

Popular Network Router manuals by other brands

Sapido GR-1142 user manual

Sapido

Sapido GR-1142 user manual

Ikegami MA-500 manual

Ikegami

Ikegami MA-500 manual

Cisco ASR 1000 Series Software configuration guide

Cisco

Cisco ASR 1000 Series Software configuration guide

TP-Link SafeStream TL-R605 installation guide

TP-Link

TP-Link SafeStream TL-R605 installation guide

Siemens RUGGEDCOM RS930W installation guide

Siemens

Siemens RUGGEDCOM RS930W installation guide

3Com OfficeConnect Ethernet Hub 16C user guide

3Com

3Com OfficeConnect Ethernet Hub 16C user guide

EtherWAN EX16916 user manual

EtherWAN

EtherWAN EX16916 user manual

PROLiNK Hurricane 9300G user manual

PROLiNK

PROLiNK Hurricane 9300G user manual

weintek MT8053iE Series Installation instruction

weintek

weintek MT8053iE Series Installation instruction

HP J4897A installation guide

HP

HP J4897A installation guide

Phoenix Contact FL MGUARD RS4000 user manual

Phoenix Contact

Phoenix Contact FL MGUARD RS4000 user manual

Alcatel OmniAccess 601 user guide

Alcatel

Alcatel OmniAccess 601 user guide

ProCurve J8458A quick start guide

ProCurve

ProCurve J8458A quick start guide

B&B Electronics Elinx EIRP305-T user manual

B&B Electronics

B&B Electronics Elinx EIRP305-T user manual

Energy Imports VB104W user manual

Energy Imports

Energy Imports VB104W user manual

HPE FlexNetwork HSR6800 series Security command reference

HPE

HPE FlexNetwork HSR6800 series Security command reference

ioSelect EtherWave-WEB user manual

ioSelect

ioSelect EtherWave-WEB user manual

Maipu SM3300-28FX installation manual

Maipu

Maipu SM3300-28FX installation manual

manuals.online logo
manuals.online logoBrands
  • About & Mission
  • Contact us
  • Privacy Policy
  • Terms and Conditions

Copyright 2025 Manuals.Online. All Rights Reserved.