28
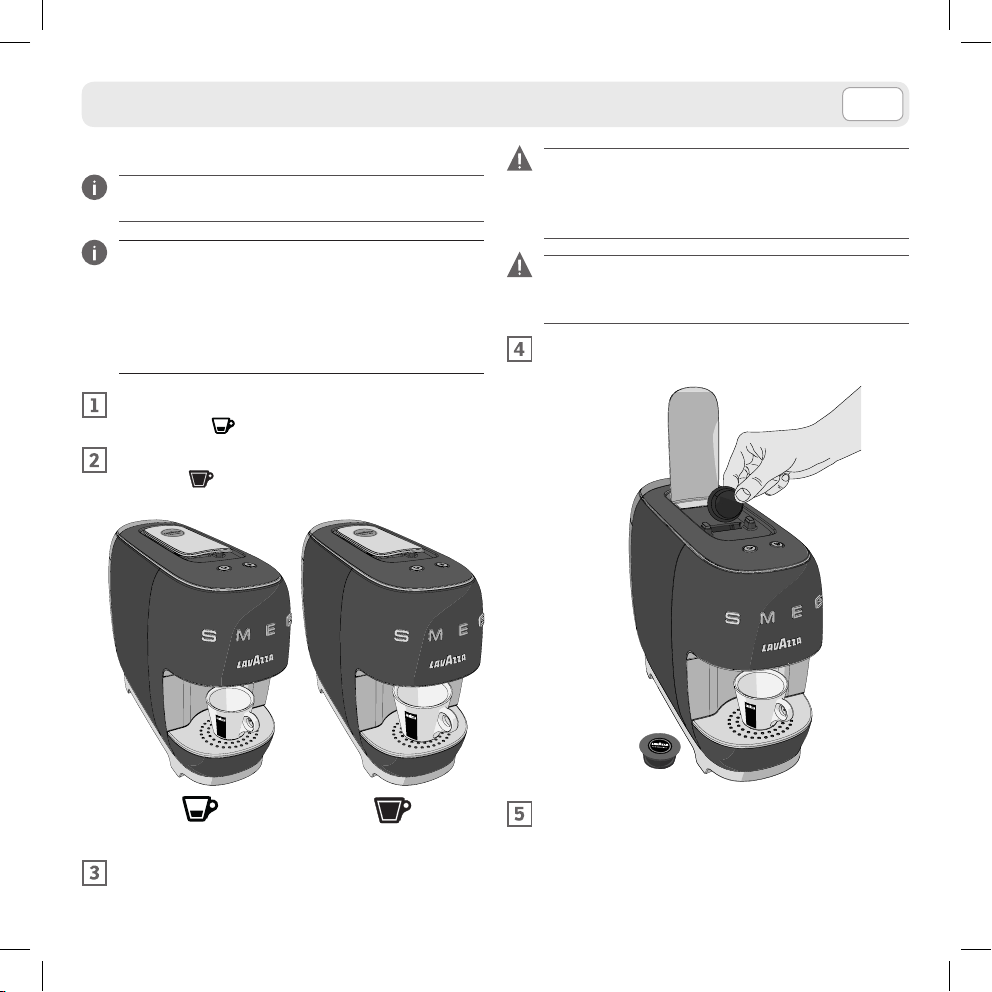
PREPARING THE COFFEE
Press either button to start supplying.
ESPRESSO (1 oz/30 cc)
ESPRESSO LUNGO (2 oz/60 cc)
, the selected button will switch on to a blinking white
light.
If power supply is interrupted during the coffee supply
cycle, restore power supply and restart the coffee sup-
ply procedure.
The machine will stop delivery automatically when the
programmed measure is reached.
To supply the product again, wait for the switch-on/
supply button to light up to a steady white light.
The machine will be set to the low-consumption mode
after it has not been used for 2 minutes. When either
button is pressed to supply again, the machine will per-
form a warming cycle to reach the operating tempera-
ture; then, the supply will be automatically started.
In case water is not found inside the tank during the
supply phase, the machine will make five attempts at
supplying, then it will notify this condition as follows:
steady white light on the selected button
blinking white light on the other button
Proceed as described below:
-fill the water tank up to the indicated MAX. level.
-press the power-on / supply button previously
selected. The button will start blinking and the
coffee supply procedure will be resumed.
After six supply instances, both power-on/supply but-
tons will start blinking quickly to a white
light, to indicate that the pod collecting tray is full.
Empty the capsule collecting tray, then press either
button to reset the machine.