Smeg BCC13 User manual

ITENFRDENLESPTSVRUDAPLFINO
MANUALE D’USO
MACCHINA DA CAFFÈ AUTOMATICA
USER MANUAL
BEAN TO CUP COFFEE MACHINE
MANUEL DE L’UTILISATEUR
MACHINE À CAFÉ AUTOMATIQUE
GEBRAUCHSANLEITUNG
AUTOMATISCHE KAFFEEMASCHINE
GEBRUIKSAANWIJZING
AUTOMATISCH KOFFIEZETAPPARAAT
MANUAL DE USO
MÁQUINA DE CAFÉ AUTOMÁTICA
MANUAL DE USO
MÁQUINA DE CAFÉ AUTOMÁTICA
BRUKSANVISNING
AUTOMATISK KAFFEMASKIN
РУКОВОДСТВО ПО ЭКСПЛУАТАЦИИ
АВТОМАТИЧЕСКАЯ КОФЕМАШИНА
BRUGSANVISNING
AUTOMATISK KAFFEMASKINE
INSTRUKCJA OBSŁUGI
AUTOMATYCZNY EKSPRES DO KAWY
KÄYTTÖOHJE
AUTOMAATTINEN KAHVINKEITIN
BRUKSANVISNING
AUTOMATISK KAFFEMASKIN
AR

Consigliamo di leggere attentamente questo manuale, che riporta tutte le indicazioni per mantenere inalterate le qualità estetiche
e funzionali dell’apparecchio acquistato.
Per ulteriori informazioni sul prodotto: www.smeg.com
We advise you to read this manual carefully, as it contains all the instructions for managing the appliance’s aesthetic and functional
qualities.
For further information on the product: www.smeg.com
Nous conseillons de lire attentivement ce manuel, qui comprend toutes les indications pour maintenir inaltérées les qualités esthétiques
et fonctionnelles de l’appareil acheté.
Pour obtenir des informations supplémentaires sur le produit: www.smeg.com
Wir empfehlen, diese Bedienungsanleitung, die sämtliche Anweisungen enthält, um das Aussehen und die Funktionsfähigkeit des
Geräts zu erhalten, sorgfältig zu lesen.
Für weitere Informationen über das Produkt wird auf www.smeg.com verwiesen
We adviseren om deze handleiding aandachtig door te lezen. Ze bevat aanwijzingen die nodig zijn om de esthetische en functionele
eigenschappen van het gekochte apparaat intact te houden.
Bezoek voor meer informatie over het product: www.smeg.com
Aconsejamos leer atentamente este manual que contienen todas las indicaciones para mantener inalterada la calidad estética y
funcional del aparato adquirido.
Más información sobre el producto en: www.smeg.com
Aconselhamos que leia atentamente este manual, que refere todas as indicações para manter inalteradas as qualidades estéticas
e funcionais do aparelho comprado.
Para mais informações sobre o produto: www.smeg.com
Vi rekommenderar att ni noga läser denna handbok som anger alla de nödvändiga anvisningarna för att bibehålla den inköpta
apparatens utseende och funktioner.
För mer information om produkten: www.smeg.com
Мы рекомендуем вам внимательно прочитать данное руководство, в котором приводятся все указания, необходимые
для поддержания неизменными эстетических и функциональных свойств приобретенного прибора.
Дополнительную информацию об изделии можно получить на сайте: www.smeg.com
Vi anbefaler, at du nøje læser denne vejledning, som indeholder alle anvisninger til at holde det købte apparat i perfekt funktionsmæssig
og æstetisk stand.
For yderligere informationer om produktet: www.smeg.com
Zalecamy uważne przeczytanie niniejszej instrukcji, która zawiera wszystkie wskazania dla utrzymania jakości estetyki i
funkcjonalności zakupionego urządzenia.
Dalsze informacje dotyczące produktu znajdują się na stronie: www.smeg.com
Lue tämä käyttöopas huolellisesti. Ohjeita noudattamalla taataan laitteen oikeaoppinen ylläpito ja sen ominaisuuksien säilyvyys.
Tuotteeseen liittyvät lisätiedot löytyvät osoitteesta www.smeg.com
Vi anbefaler at du leser denne brukerveiledningen grundig, da den inneholder alle indikasjoner for å bevare de estetiske og
funksjonenelle kvalitetene til produktet du har kjent.
For ytterligere informasjon om produktet: www.smeg.com
www.smeg.com

8
2
7
18
5
10
“A”
3
6
22
11
17
4
9
19
15
1213
16
23
21
24
9
41
“B”
37
38
39 40
31
32 36
34
33
30
35
“C”
16
24
15
1
14
20
26
25
27
29
28

A
B6
42 “E”“D”
SMEG
ASSISTANT
4
21
5
19
“F” “G”
“H”
2
3
11
8
19
20
18
17
43
21
“ L”
14
13
123
44
“I”
28
24

Informazioni importanti per l’utente / Important information for the user
Informations importantes pour l’utilisateur / Wichtige Informationen für den Benutzer
Belangrijke informatie voor de gebruiker / Información importante para el usuario
Informações importantes para o utilizador / Viktig information för användaren
Важная информация для пользователя / Vigtig information til brugeren
Ważne informacje dla użytkownika / Tärkeitä tietoja käyttäjälle
Viktig informasjon for brukere /
Avvertenze / Instructions / Avertissements / Hinweise / Waarschuwingen / Advertencias / Advertências /
Varningar / Меры предосторожности / Advarsler / Ostrzeżenia / Varoitukset / Advarsler /
Informazioni generali su questo manuale d’uso, di sicurezza e per lo smaltimento nale / General information on this user manual, on
safety and nal disposal / Informations générales sur ce manuel d’utilisation, sur la sécurité et sur l’élimination dénitive de l’appareil
/ Allgemeine Informationen zu dieser Gebrauchsanleitung, zur Sicherheit und die endgültige Entsorgung / Algemene informatie over
deze handleiding, veiligheidsinstructies en uiteindelijke verwerking / Información general del manual relativa al uso, la seguridad y la
eliminación nal / Informações gerais sobre este manual do utilizador, segurança e para a eliminação nal / Allmän information om
denna bruksanvising, om säkerhet och för slutligt bortskaffande / Общая информация о данном руководстве по эксплуатации,
безопасности и окончательной утилизации / Generelle oplysninger om denne betjenings- og sikkerhedsvejledning samt endelig
bortskaffelse / Ogólne informacje dotyczące użytkowania, bezpieczeństwa i utylizacji / Käyttöohjetta, turvallisuutta ja käytöstä
poistoa koskevat yleistiedot / Generell informasjon om denne brukerveiledningen, sikkerhet og endelig kassering av produktet /
Descrizione / Description / Description / Beschreibung / Beschrijving / Descripción / Descrição / Beskrivning /
Описание / Beskrivelse / Opis / Kuvaus / Beksrivelse /
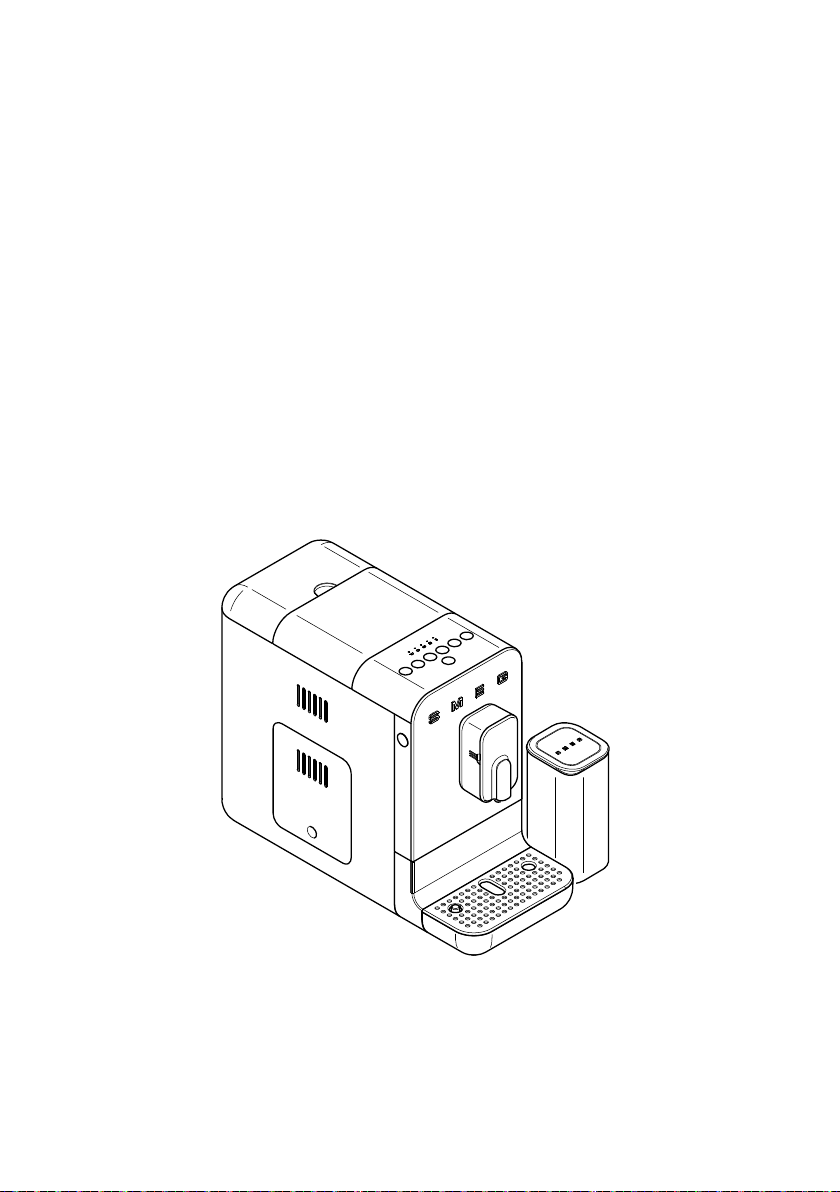
Descrizione dell’apparecchio / Appliance description / Description de l’appareil / Beschreibung des Geräts / Omschrijving van het
apparaat / Descripción del aparato / Descrição do aparelho / Beskrivning av apparaten / Описание прибора / Beskrivelse af
apparatet / Opis urządzenia / Laitteen kuvaus / Beskrivelse av apparatet /
Uso / Use / Utilisation / Gebrauch / Gebruik / Uso / Utilização / Användning / Использование / Anvendelse /
Użytkowanie / Käyttö / Bruk /
Informazioni sull’uso dell’apparecchio / Information on using your appliance / Informations sur l’utilisation de l’appareil / Informationen
zum Gebrauch des Geräts / Informatie over het gebruik van het apparaat / Información sobre el uso del aparato / Informações sobre
a utilização do aparelho / Information om användning av apparaten / Информация об использовании прибора / Oplysninger
om brug af apparatet / Informacje dotyczące użytkowania urządzenia / Laitteistoa koskevat käyttöohjeet / Informasjon om bruken
av apparatet /
Pulizia e manutenzione / Cleaning and care / Nettoyage et entretien / Reinigung und Wartung /
Reiniging en onderhoud / Limpieza y mantenimiento / Limpeza e manutenção / Rengöring och underhåll /
Чистка и техническое обслуживание / Rengøring og vedligeholdelse / Czyszczenie i konserwacja /
Puhdistus ja hoito / Rengjøring og vedlikehold /
Informazioni per la corretta pulizia e manutenzione dell’apparecchio / Information for proper cleaning and maintenance of the
appliance/ Informations pour un nettoyage et un entretien corrects de l’appareil / Informationen zur ordnungsgemäßen Reinigung und
Wartung des Geräts / Informatie voor de juiste wijze van reiniging en onderhoud van het apparaat / Información sobre la limpieza
y el mantenimiento correctos del aparato / Informações para a limpeza e manutenção corretas do aparelho / Information för korrekt
rengöring och underhåll av apparaten / Информация по корректной очистке и техобслуживанию прибора / Oplysninger om
korrekt rengøring og vedligeholdelse af apparatet / Informacje dotyczące prawidłowego czyszczenia i konserwacji urządzenia /
Laitteiston oikeaa puhdistusta ja huoltoa koskevat tiedot / Informasjon for korrekt rengjøring og vedlikehold av apparatet /
Avvertenza di sicurezza / Safety instructions / Consignes de sécurité / Sicherheitshinweise /
Veiligheidswaarschuwingen / Advertencia de seguridad / Advertências de segurança / Säkerhetsvarning /
Предупреждение о безопасности / Sikkerhedsanvisninger / Ostrzeżenie dotyczące bezpieczeństwa /
Turvallisuuteen liittyvät varoitukset / Sikkerhetsadvarsler /
Informazione / Information / Information / Information / Informatie / Información / Informação /
Information / Информация / Information / Informacja / Tietoa / Informasjon /
Suggerimento / Advice / Conseil / Empfehlungen / Aanbeveling / Sugerencia / Sugestões / Råd /
Рекомендация / Forslag / Porada / Neuvo / Forslag /

NOTES
Scansiona il QR code per un accesso rapido alla Guida SMEG “How to”, per
assisterti durante l’uso e installazione del prodotto.
Scan the QR code for an easy access to “How to” SMEG guide to assist you during
product use and installation.
Scannez le code QR pour accéder rapidement au guide SMEG «Comment faire» qui
vous aidera à utiliser et à installer le produit.
Den QR-Code für einen schnellen Zugriff auf den Leitfaden von SMEG „How to“
scannen, um während des Gebrauchs und der Installation behilich zu sein.
Scan de QR-code voor snelle toegang tot de SMEG Gids “How to”, die je zal
bijstaan tijdens het gebruik en de installatie van het product.
Escanear el código QR para acceder rápidamente a la Guía SMEG “How to”, que le
ayudará durante el uso y la instalación del producto.
Digitalize o código QR para obter acesso rápido ao Guia SMEG “How to” da SMEG,
para ajudá-lo durante o uso e a instalação do produto.
SMEG
ASSISTANT
Skanna Qr-koden för en snabb åtkomst till SMEG-guiden “Hur man...”, för att hjälpa dig vid användning och
installation av produkten.
Сканируйте QR-код для быстрого доступа к руководству SMEG How to, которое предоставит вам помощь при использовании и
установке прибора.
Scan QR-koden for at få hurtig adgang til SMEG ”How to”-guiden, der hjælper dig med brug og installation af
produktet.
Zeskanuj kod QR, aby uzyskać szybki dostęp do Przewodnika SMEG „How to”, pomocnego podczas użytkowania i instalacji produktu.
Skannaa QR-koodi, niin pääset nopeasti käsiksi SMEGIN ”How to” -oppaaseen, joka auttaa sinua tuotteen käytön
ja asennuksen aikana.
Skann QR-koden for rask adgang til SMEG-veiledningen “How to”, for hjelp under bruk og installasjon av
produktet.
“SMEG “How to

Il costruttore si riserva di apportare senza preavviso tutte le modifiche che riterrà utili al miglioramento dei propri
prodotti. Le illustrazioni e le descrizioni contenute in questo manuale non sono quindi impegnative ed hanno solo
valore indicativo.
The manufacturer reserves the right to make any changes deemed useful for improvement of its products without prior
notice. The illustrations and descriptions contained in this manual are therefore not binding and are merely indicative.
Le fabricant se réserve la faculté d’apporter, sans préavis, toutes les modifications qu’il jugera utiles pour
l’amélioration de ses produits. Les illustrations et les descriptions figurant dans ce manuel ne sont pas contraignantes et
n’ont qu’une valeur indicative.
Der Hersteller behält sich vor, ohne vorherige Benachrichtigung alle Änderungen vorzunehmen, die er zur
Verbesserung seiner Produkte für nützlich erachtet. Die in diesem Handbuch enthaltenen Illustrationen und
Beschreibungen sind daher unverbindlich und dienen nur zur Veranschaulichung.
De fabrikant behoudt zich het recht voor zonder waarschuwing alle wijzigingen aan te brengen die hij nodig acht om
zijn producten te verbeteren. De afbeeldingen en de beschrijvingen die aanwezig zijn in deze handleiding zijn niet
bindend, en hebben enkel een aanduidende waarde.
El fabricante se reserva el derecho a aportar sin aviso previo todas las modificaciones que considere útiles para la
mejora de sus propios productos. Las ilustraciones y las descripciones contenidas en este manual no comprometen,
por tanto, al fabricante y tienen un valor meramente indicativo.
O fabricante reserva-se o direito de efetuar, sem aviso prévio, qualquer modificação que vise o melhoramento dos
respetivos produtos. As ilustrações e descrições contidas neste manual, não são, por isso, vinculativas e possuem
apenas valor indicativo.
Tillverkaren förbehåller sig rätten att genomföra alla de ändringar som anses nödvändiga för att förbättra de egna
produkterna utan att meddela detta i förväg. De illustrationer och beskrivningar som finns i denna bruksanvisning är
vägledande och därmed inte bindande.
Производитель оставляет за собой право вносить без предупреждения все изменения, которые посчитает
полезными для улучшения собственной продукции. Рисунки и описания, содержащиеся в данном Руководстве
по эксплуатации, не имеют обязательств и имеют ознакомительный характер.
Producenten forbeholder sig retten til at foretage eventuelle ændringer, der anses for at være en forbedring af det
oprindelige produkt, uden forudgående varsel. Illustrationer og beskrivelser i denne betjeningsvejledning er derfor ikke
bindende og kun vejledende.
Producent zastrzega sobie prawo do nanoszenia, bez uprzedniego powiadomienia, wszelkich zmian, które uzna za
przydatne w celu ulepszania swoich produktów. Rysunki i opisy zawarte w niniejszej instrukcji nie są zobowiązujące i
mają charakter poglądowy.
Valmistaja pidättää itsellään oikeuden tehdä ohjeisiin mielestään tarpeellisia muutoksia ilman ennakkoilmoitusta. Tässä
oppaassa olevat kuvat ja piirrokset eivät näin ollen ole sitovia, vaan ne annetaan vain viitteellisessä mielessä.
Produsenten forbeholder seg rett til endringer på sine produkter grunnet tekniske fremskritt, uten forutgående varsel.
Illustrasjonene og beskrivelsene i denne bruksanvisningen er derfor ikke bindende og skal kun betraktes som
retningsgivende.
The manufacturer reserves the right to make any changes deemed useful for the improvement of its products without
priornotice. The illustrations and descriptions contained in this manual are therefore not binding and are merely indicative.

Dear Customer,
Thank you very much for purchasing the Smeg Line coffee machine.
By choosing our product, You have opted for a solution in which aesthetics
and innovative technical design offer unique objects, which become part of
the furnishings.
In fact, a Smeg household appliance always co-ordinates perfectly with other
products in the range and, at the same time, can become a design object
for the kitchen.
We hope You fully appreciate the functionalities of Your appliance.
Best regards.
SMEG S.p.A.
Model BCC13
Bean to cup Coffee machine

EN - 2
SAFETY
Essential safety recommendations.
Keep these instructions carefully.
Whenever the appliance is
transferred to other persons, they
must also be given these user
instructions.
Danger of Electrocution, since the appliance
operates on electric current, it is necessary to
comply with the following safety warnings:
•
Do not touch the plug with wet hands.
•
Make sure that the power outlet used is always
freely accessible, because only in this way can
it be unplugged when necessary.
•
If you want to remove the plug from the socket,
grasp the plug directly. Do not remove the plug
from the socket by pulling on the cable or with
wet hands.
•
If the appliance should break down, do not
attempt to repair it. Switch the appliance off,
remove the plug from the power outlet and
contact the Smeg Technical After-sales centre.
•
If the plug or power supply cable are
damaged, have them replaced exclusively by
the Technical After-sales centre, so as to prevent
all risks.
•
Do not immerse the appliance, the power cord,
the plug in water or any other liquid.
•
Warning: Danger of injury! Improper use of
the appliance can cause injury.
Before cleaning, disconnect the plug.
•
Do not allow the power supply cable to dangle
over the edge of the table or other surface or
to come into contact with hot surfaces.
Choking hazard due to plastic packaging, keep
the packaging material (plastic bags, expanded
polystyrene) out of the reach of children.
•
Do not position the appliance on or in proximity
of electric or gas cookers, or in a heated oven.
•
Do not wash the appliance in the dishwasher.
Connecting the appliance
Warning!
Make sure that the mains voltage and
the frequency correspond with those indicated on
the data plate on the bottom of the appliance.
Only connect the appliance to a current outlet
installed perfectly with minimum capacity of 10A
and with an efcient earth.
If the plug and power outlet are incompatible,
have the power outlet replaced with a suitable
type by qualied staff.
In order to avoid a hazard due to inadvertent
resetting of the thermal cut-out, this appliance must
not be supplied through an external switching
device, such as a timer, or connected to a circuit
that is regularly switched on and off by the utility.
•
Do not use an adapter.
•
Do not use an extension cord.
•
Do not spill liquid on the power plug and on
the power base.
Failure to observe these warnings can result in
death, re or electric shock.
Important Safeguards

EN - 3
EN
•
Keep the appliance out of the reach of children
under the age of 8.
•
Children must not play with the appliance.
•
The use of this appliance is allowed to people
(including children of at least 8 years) with
reduced physical, sensory or mental abilities
only if they are under the control of adults or
have been instructed on the safe use of the
appliance and have understood the dangers
associated with its use.
•
Cleaning or maintenance work can be carried
out by children who are at least 8 years old,
only under the supervision of an adult.
•
Disconnect the appliance from the power outlet
before all assembly, disassembly and cleaning
operations
.
Danger of burns
•
Allow the appliance to cool down before
cleaning.
•
The coffee machine generates heat and
produces hot water and steam during
operation. Avoid contact with boiling steam
or water.
Use compliant with destination
•
Only use the appliance indoors and at a
maximum altitude of 2000 meters.
•
Use the device only to prepare coffee-based
drinks from grinding coffee beans or to
dispense hot water. Other uses are improper
.
•
Only insert water into the appropriate tank.
Use fresh, clean water.
•
Use only original spare parts from the
manufacturer. The use of spare parts not
recommended by the manufacturer could cause
re, electric shock or personal injury.
•
The appliance is intended for household and
similar use, such as:
- in the kitchen area for the staff of shops,
ofces and other work environments;
- in bed and breakfast and agritourism
accommodation;
- by guests at hotels and motels, and in
residential environments.
•
Other uses, in restaurants, bars and cafes for
example, are improper.
Moreover:
•
Do not ll the water container beyond the
maximum limit indicated.
•
Do not use without water in the tank or without
a tank.
•
Use only coffee beans to obtain the powder,
do not put already ground coffee in the coffee
bean hopper.
•
Do not insert the appliance in a closed cabinet
(built-in type).
Attention: For cleaning surfaces that come into
contact with food, observe the special cleaning
indications in the instructions.
Manufacturer’s liability
The manufacturer declines all liability for damage
undergone by persons and objects due to:
•
use of the appliance different from that
envisioned;
•
user manual has not been read;
•
tampering of individual parts of the appliance;
•
use of non-original spare parts;
•
failure to comply with safety recommendations.
Important Safeguards

EN - 4
DISPOSAL
Electrical appliances must not be disposed
of with household waste. The appliances
that have this symbol are subject to
the European Directive 2012/19/EU. All
discarded electric and electronic appliances
must be disposed of separately from household
waste, by taking them to relevant centres
envisioned by the Country. By disposing of
the discarded appliance correctly, damage
to the environment and risks to health will be
avoided. For further information regarding
disposal of the discarded appliance, contact
the Municipal Administration, the Disposal
dept. or the shop where the appliance was
purchased.
DESCRIPTION OF THE APPLIANCE
(Fig. A)
1Machine body.
2Coffee bean container lid.
3Coffee bean container.
4Water tank cover.
5Water tank (1,4 l).
6Grinding selection knob.
7Grinders protection.
8Brewing group access door.
9ON/OFF button.
10 Control panel.
11 Dispenser adjustable in height.
12 Coffee supply nozzle.
13 Milk system with milk supply nozzle.
14 Dispenser cover.
15 Proteciton cap.
16 Milk tube connection.
17 Coffee grounds container.
18 Drip tray.
19 External drip tray.
20 Internal drip tray with level indicator.
21 Mug holder.
22 Infuser group.
23 Milk container with cover.
24 Milk tube.
25 Cleaning brush.
26 Milk tube nozzles cleaning needle.
27 Water hardness test strip.
28 Container for cleaning the milk circuit.
29 Milk tube housing.
DESCRIPTION OF CONTROLS
AND ALARMS (Fig. A-B-C-D)
ON/OFF button (9)
Pressing the button switches the machine on
or off.
Change dispensing program
button (36)
The product has 10 functions, accessible
through two menus, White Menu and Orange
Menu.
By pressing this button it is possible to change
the dispensing menu from “White” and
“Orange” and vice versa.
White Keys LED white
30 Espresso
31 Coffee
32 Hot water
33 Cappuccino
34 Latte macchiato
Description / Assembly / Controls

EN - 5
EN
Orange
Keys LED orange
30 Espresso light
31 Long espresso coffee
32 American
33 Espresso macchiato
34 Milk foam
Easy Cleaning key (35)
The LED of the Easy Cleaning key lights up
ashing when a complete cleaning of the
circuit and of the milk system is advised.
Prolonged press (3 seconds):
the key activates complete cleaning of the
milk circuit.
Press and hold only after having correctly
connected the milk tube (24) to the relevant
connection (16) and after having inserted it
into the Container for cleaning the milk circuit
(28). See the “Cleaning and Maintenance”
section for more details on the topic.
The alarm does not stop the
machine thus allowing the user to
continue drinks dispensing.
Empty water tank alarm (37)
The related LED ashes when the tank (5) is
absent, or when the water inside it is missing
or at an insufcient level. Insert the tank or ll
it with water.
No coffee alarm (38)
The relative LED lights up steadily indicating
that the coffee beans in the container (3) have
reached the minimum level or are absent. Fill the
container with coffee beans.
Coffee grounds container alarm
(39)
Steady lit LED:
Coffee grounds container full (17); empty the
container.
Flashing LED:
Missing or incorrectly mounted coffee grounds
container (17) or drip tray (18); the machine
is blocked until correct mounting of the
components.
Brewing group alarm (40)
Flashing LED:
Door open or brewing group missing or
incorrectly assembled; the machine is blocked
until the brewing group is correct assembled
or door closed.
Stead lit LED:
Indicates that it is advised to clean the area
of the infuser group to remove coffee residues
which may damage machine operation.
Remove the infuser from its seat while the
machine is on and reinsert it after cleaning.
Descaling alarm (41)
Steady lit LED:
Indicates that it is highly recommended to carry
out a descaling cycle;
Flashing LED:
The machine is blocked in all its functions,
a descaling cycle is mandatory to restore
machine operation.
Grinding adjustment knob (6) (Fig. D)
The appliance is equipped with a knob (6) that
allows you to adjust the grinding grain of the
coffee according to its uses:
Turning the knob (6) clockwise “A” increases
the grinding grain; turning the knob (6)
anticlockwise “B” decreases the grinding grain
and the ground coffee will be ner (Fig.D).
Controls

EN - 6
USE (Fig. E-F-G)
• Lift the tank cover (4) and pour fresh water
in the tank (5) being sure not to exceed the
indicated ‘Max’ level. Replace the water
tank cover when full (9).
• Lift the coffee bean container lid (2) and
introduce the coffee beans into the container
(3).
• Check that the drip tray (19) is correctly
positioned. Make sure that the tray which
can be washed in the dishwasher (20) is
correctly inserted inside it and mount the
mug holder (21).
• Press the button (9), the machine starts the
heating phase and the keys light up ashing
in sequence.
At the end of the heating, a self-cleaning
cycle of the internal circuits is carried out
and, once the cycle is nished, the machine
is ready to be used.
• It is possible to adjust the position of the
dispenser (11) according to the cup used.
For very high cups it is possible to remove
the drip tray (19).
At the rst use it is recommended to
make at least one coffee to make a
complete break-in of all the circuits.
It is also recommended to run a
thorough milk circuit cleaning cycle
or to manually clean the milk system
(13) components. Please consult
the “Cleaning and maintenance”
section to this end.
We recommend setting the water
hardness upon first use. Please
see the “Water hardness settings”
paragraph for this reason.
Remember to reassemble the tray
(19) at the end of any dispensing.
Use
Turn the knob (6) and match the indicator (42)
with the desired grinding level.
The grinding grain adjustment must
be carried out when the grinder is
in operation or on rst use when
the bean container is completely
empty; turning the knob (6) with
the grinder stopped and the beans
inside could damage the grinding
unit.
BEFORE FIRST USE
(Fig. A-H)
• Unpack the appliance carefully and remove
all packaging materials.
• Rinse the dismountable components such as:
water tank (5), lids (2,4), door (8), grounds
container (17), drip tray (18), drip trays
(19,20), mug holder (21), infuser group
(22), the milk system (13), the milk bottle
with lid (23) and the milk tube (24).
Before use, check that all
components are intact and do not
show any cracks or breakage.
To clean the milk system (13),
remove the system from the
dispenser and take of the various
components as shown in fig.
H, rinse under running water,
dry thoroughly and re-mount the
machine.
ASSEMBLY OF COMPONENTS
(Fig. E)
• Place the machine on a at surface and x
the drip tray
(19).
• Connect the power supply cable to the
socket on the rear of the machine and the
other end to a power socket
.

EN - 7
EN
Use
After 30 minutes of non-use, the
machine switches off. If it has
produced at least one drink, it
carries out a self-cleaning cycle.
Press the button (9) to switch on
the machine.
Change of dispensing program
The machine has two dispensing menus in its
memory: White and Orange. To switch from
one program to another, press the key (36).
In the White menu all the keys are illuminated
in white, in the Orange
menu, all the keys are
illuminated in orange.
For the specic functions of each menu, refer
to the paragraph “Description of controls and
alarms”
Turning off the machine the setting of
the
White or Orange
dispensing
menu remains in the memory at the
next restart.
Coffee drink supply (Espresso,
Coffee, Americano, Espresso light,
Long espresso coffee) and hot water
• Place a cup or large cup under the
dispenser.
• Press the key for the desired function. For
each selected function, preparation stops
automatically. For specic functions, refer
to the paragraph “Description of controls
and alarms”.
• At the end of dispensing, all the keys light
up xed.
Remember to reassemble the tray
(19) at the end of any dispensing.
It is completely normal that after a
prolonged inactivity of the machine
(breaks longer than 20 min
)
the
rst coffees are not at the right
temperature
.
The tips to obtain a hot
coffee immediately are given in the
section “What to do if
...”
The supply of the coffee drinks and
hot water may be interrupted at any
moment by pressing the dispensing
key.
Dispensing of drinks with milk
(Cappuccino, Latte macchiato,
Espresso macchiato, Milk foam)
Milk foam consistency may vary
depending on the type of used
milk. To obtain a good result, it
is advised to use whole or semi-
skimmed milk at fridge temperature
(approximately 5°C).
It is necessary to proceed as follows to prepare
these drinks:
Connection of the milk tube
(Fig. C)
• Open the safety cap (15).
• Connect the milk tube (24) to the dispenser,
taking care to insert the correct coupling
to the connection (16) envisaged on the
dispenser, as shown in gure C and to
completely immerse the other end.
Make sure the level of milk in the
container used does not exceed the
tube connection height.

EN - 8
Cappuccino, Latte macchiato, Espresso
macchiato
It is enough to press the key of the
desired drink to start dispensing. It
is not necessary to move the glass
or mug.
• Place a small or large cup underneath the
dispenser.
• Press the key of the desired drink. The
machine dispenses milk rst, then coffee,
and stops automatically at the end of the
drink.
• At the end of any dispensing of drinks with
milk, the key (35) lights up indicating that
a complete cleaning of the milk circuit is
advised. It is possible to proceed with the
immediate cleaning (see the section “Milk
system automatic cleaning”). To proceed
with dispensing of further drinks without
carrying out cleaning, press any key.
Milk foam
• Place a mug under the dispenser.
• Enter the orange menu using the button and
press the key (34). The machine dispenses
milk and stops automatically after a few
seconds.
Dispensing of the milk foam drink
can be interrupted at any moment by
pressing the respective dispensing
key again.
Use
After any dispensing of the drinks with
milk, it is essential to proceed with
a complete cleaning of the whole
circuit and respective components.
If it is necessary to prepare various
drinks, proceed with cleaning
after the last dispensing, before
switching off
of the machine. See
the “Cleaning and Maintenance”
paragraph for additional details
regarding manual or automatic
cleaning of the components.
Customization of the quantity
It is possible to customize, for each type of
selected drink, the desired quantity of coffee
or milk.
• Place a small or large cup underneath the
dispenser.
• For the drinks Espresso, Espresso Light,
Coffee, Long espresso coffee, Hot water,
Americano or Milk foam, press one of the
keys of the drink to be supplied for at least 3
seconds. The selected key lights up ashing;
the machine emits a double sound to report
the change of the preset program. Upon
reaching the desired quantity of coffee or
milk, stop dispensing by pressing the key
again; an acoustic signal indicates that the
quantity has been memorized.
• In case of Cappuccino, Latte macchiato
or Espresso macchiato,press the key of the
drink to be supplied for at least 3 seconds.
Upon reaching the desired quantity of milk,
stop the supply by pressing the key again;
an acoustic signal indicates that the quantity
of milk has been memorized. Dispensing
of coffee follows automatically, press the
key again once the desired quanitty has
been reached. A new signal indicates
memorization of the combined drink.

EN - 9
EN
Use
Any customization of the drinks
remains saved for future dispensing.
To restore the manufacturer’s
settings, press the keys
(9)
and
(36) simultaneously for at least 3
seconds.
The machine emits a single sound to
signal the restoration of the factory
settings.
MACHINE SETTINGS
(Fig. B)
Through a programming menu it is possible
to set the water hardness and the acoustic
signals.
Activation / deactivation of acoustic
signals
The acoustic signals can be disabled /
enabled by keeping the keys (31) and (36)
pressed for three seconds; the key (31) ashes
three times indicating the memorization of the
setting.
Setting the water hardness
The machine is factory set to “Hard Water
Level”. The machine can also be set according
to the actual water hardness in the various
regions for less frequent descaling.
If you don’t know the water hardness, use
the supplied test strip (27) and follow the
instructions below.
• Remove the supplied reactive strip from its
packaging.
• Fully submerge the strip in a glass of water
for about one second.
• Remove the strip from the water and slightly
shake it. Read the results after about one minute.
If 5 blue stripes appear on the strip, select
“soft water” settings.
If 1 or 2 pink stripes appear on the strip, select
“average water” settings.
If 3, 4 or 5 pink stripes appear on the strip,
select “hard water” settings.
• To open the water hardness settings,
simultaneously press and hold down keys (30)
and (36) for at least 3 seconds, LEDs (37),
(38), (39) will ash simultaneously.
• Choose the water hardness, referring to the
following table, pressing the key
(30),
the
LED relating to the selected hardness lights
up steadily, the others go off
.
Led Hardness
37
Soft
38 Medium
39 Hard
• To memorize the selected hardness, press
keys
(30)
and
(36)
simultaneously for at least
3 seconds or do not press any key for 15
seconds
.
To prolong the machine operation
and preserve the aroma and taste of
the coffee, it is recommended to use
the Smeg Softener Filter (optional,
not supplied). For installation and
operation, follow the instructions
that accompany the accessory.
Once installed, set the
water hardness level to ‘Soft’
following the instructions in
the previous paragraph.

EN - 10
CLEANING AND MAINTENANCE
(Fig. A-B-C-E-F-G-H-I-L)
Incorrect use Risk of damage to
surfaces.
• Do not use steam jets to clean
the coffee machine.
• Do not use cleaning products
containing chlorine, ammonia
or bleach on parts with metal
surface nishes (e.g. anodised,
nickel- or chrome-plated).
• Do not use abrasive or corrosive
detergents (e.g. powder
products, stain removers and
metallic scourers).
• Do not use rough or abrasive
materials or sharp metal
scrapers.
Automatic rinse
After dispensing of a coffee or milk drink, the
machine will perform an automatic rinsing of
the supply nozzles (12, 13) before switching
off.
To ease cleaning operations, it
is possible to scan the QR code
located inside the service door,
which opens a specific web
section dedicated to Cleaning and
Installation (g. L).
Cleaning of the machine body
For a good preservation of the external
surfaces it is necessary to clean them regularly
at the end of each use, after letting them cool.
Clean with a soft cloth dampened with water.
Never immerse the machine body
(1) in water or other liquids.
Allow the machine to cool down
before cleaning.
Use the supplied brush to clean the
empty coffee bean container (3),
removing any beans or residue.
Always clean when the machine is
off
.
General cleaning
To ensure good operation of the machine,
beyond the optimal quality of the drinks,
some daily operations of simple cleaning are
advised, such as tray (18), drip trays (19, 20)
and grounds container (17) cleaning.
We also recommend you routinely clean
some specic machine components such as
the brewing group (22) or water tank (5).
Please see the specic paragraphs for cleaning
instructions.
Cleaning the drip tray (19, 20)
The drip tray (19) envisages an internal tray
(20) inside it which is equipped with a red
oat (43) which protrudes from the mug holder
(21) as soon as the maximum level of liquid
is exceeded.
• The internal tray (20) can be washed in the
dishwasher.
• Clean the tray (19) and the grid (21) in
running water with neutral dish detergent.
• Dry the components and reassemble them
in the machine.
Do not wash the components in the
dishwasher, except for the internal
tray (20).
We recommend you clean the
external drip tray daily.
Cleaning and maintenance

EN - 11
EN
Coffee grounds container cleaning
(17) and drip tray (18)
Always empty the coffee grounds
container with the appliance
switched on. This is the only way
of resetting the coffee grounds
counter. The counter resets at
least 15 seconds after opening
the various components and LED
(38) ashes.
• Remove the tray (19).
• Remove the grounds container (17) with its
tray (18) by pulling it outwards.
• Empty the coffee grounds from the container
(17).
• Clean the container (17) and the tray (18)
in running water with neutral dish detergent.
• Thoroughly dry components and reassemble
on the machine.
When the grounds container is
emptied, take care to also empty
the drip tray (18) from possible
residues.
It is advised to daily clean the coffee
grounds container (17) adn the drip
tray (18).
It is totally normal to nd water
residues in the tray. Clean and dry.
Cleaning the water tank (5)
• Remove the lid (4) and remove the tank (5)
from the machine using the appropriate
handle.
• Clean the tank (5) in running water with
neutral dish detergent and reassemble it in
the machine.
The presence of lime scale inside
the tank could cause the appliance
to malfunction. Make sure the tank
is always clean and without lime
scale stains.
Milk container cleaning (23)
Clean the supplied milk container in all of its
parts if it has been used for preparation of a
milk drink.
Wash all the components with running water
and neutral detergent or in the dishwasher,
making sure that milk residues do not remain.
Milk system and circuits cleaning
After dispensing of each drink with
milk, the key (35) blinks indicating
that it is necessary to proceed with
a complete cleaning of the milk
circuit.
In the interest of hygiene and to ensure good
operation and good dispensing in the cup,
it is necessary to daily clean the milk system
and circuit if they have been used to prepare
milk-based drinks.
It is possible to proceed with complete
automatic cleaning via the ‘Easy Cleaning’
key or Manual cleaning of the components.
• Manual cleaning of the milk
system components
Manual cleaning of the milk system
(13) and the tube (24) is what
guarantees more thorough cleaning
of the various components.
Wait for the milk system and its
dispenser (13) to cool down before
proceeding with cleaning.
• Remove the milk tube (24).
• Remove the dispenser lid (14), remove the
milk system (13), then dismount the various
parts as shown in Fig. “H”.
Cleaning and maintenance

EN - 12
• Use hot running water to clean all of the
components of the milk system (13) and the
tube (24) and dry them thoroughly.
• Assemble the various parts and reassemble
the milk system (13). Ensure that the milk
system (13) is correctly mounted in all of
its parts. Check the numbering in Fig. “H”.
• Fix the milk system (13) in the dispenser (11),
by pressing it rmly.
• Lastly, reassemble the dispenser lid (14).
Do not wash the milk system in
the dishwasher not to damage it
permanently.
• Automatic cleaning via the ‘Easy
Cleaning’ key
Proceed as follows to start the Easy Cleaning
procedure.
• Fix the cleaning container (28) onto the cup
grid (21)
• Fill the cleaning container (28) with cool
water up to the mark indicated
• Connect the milk tube (24) to the coffee
machine as described in the “Connecting
the milk tube” section and immerse it inside
the tray through the relevant compartment,
as shown in gure I
• Hold the Easy Cleaning key (35) down for
3 seconds to start complete cleaning of the
milk circuit.
• The machine runs a thorough cleaning
cycle of the milk tube (24), milk system, milk
dispensing nozzle (13).
• The cycle stops on completion.
The milk system (13) and all the
components (14, 15, 16, 24)
can be washed using detergent
suitable for cleaning domestic
coffee machines.
If proceeding in this manner,
make sure that all components
have been rinsed well before
re-assembling them (in the case
of manual washing) or repeat an
‘Easy cleaning’ cycle to remove any
residual detergent.
Fast cleaning of the circuits
• It is possible to start a quick rinse cycle at
any moment.
• The key lights up steady at the end of the
washing cycle.
Cleaning the brewing group (22)
We recommend cleaning the
brewing group at least once a
week.
• The coffee machine indicates when brewing
group cleaning is recommended (steady lit
LED 40).
• With the machine on, press the lower part
of the door (8) until it is released and slide
it out from the top.
• Press the two release clips (44) located on
the sides of the infuser (22) and remove it
from the machine
(Fig.L).
• Wash the brewing group (22) with running
water and dry it.
• Thoroughly clean its housing and the duct as
well, using the cleaning brush (25) supplied,
as in Figure “L”.
• Dry thoroughly before re-mounting the
various components.
• Ret the service door (8) making sure it is
correctly positioned.
Cleaning and maintenance

EN - 13
EN
Open the door and clean the
brewing unit while the machine is
on. This is the only way of resetting
the counter.
The counter resets at least 10
seconds after opening the various
components and LED 40 turns off.
We recommend running a manual
circuit cleaning cycle whenever this
operation is performed.
Please see paragraph “Manual
rinse” for this reason.
Do not wash the brewing group
in the dishwasher in order not to
damage it permanently.
Coffee powder residue can be found
in the brewing group compartment.
We recommend thorough cleaning
whenever cleaning the brewing
group. Use the supplied brush
to remove any residue from the
brewing group compartment.
Dry all components and internal
parts using a dry cloth before
closing the side door.
Descaling
Before performing the descaling
cycle, remove possible softener
lters inside the tank.
The coffee machine signals when it is
necessary to carry out a descaling cycle based
on the set water hardness (For the setting of
the water hardness, see the “Setting the water
hardness” paragraph).
If the LED (41) lights up steadily, it means that
a descaling cycle is necessary, so as not to
alter the taste of the coffee and damage the
machine. However, coffee and further drinks
may continue to be dispensed for a limited
number of cycles.
If the LED (41) ashes, it means that a descaling
cycle is mandatory to proceed with further
dispensing of drinks.
To carry out a descaling cycle, proceed as
follows:
•
Position a container with a capacity of at
least 1,4 l under the dispenser (11).
• Make sure that the
White
program with
white illuminated keys is selected.
• Fill the tank (5), up to the “MAX” level, with a
solution of water and descaler in the doses
recommended by the manufacturer
.
• With the machine ready for use, press the
keys (36) and (32) simultaneously for at
least 3 seconds. The key (32) ashes with
an orange light and the LED (41) has a xed
light for the entire duration of the descaling
cycle.
• Stay near the machine for the entire duration
of the descaling cycle since you may be
required, for example, to ll the tank (5). The
entire cycle lasts approximately 30 minutes.
• During the descaling cycle, the machine will
take a few breaks to allow the descaler to
act effectively. Wait for the end of the cycle.
• The descaling cycle ends when the solution
contained in the tank (5) runs out, the key
(32) turns white and the led (41) lights up
steady.
• Pour clean water into the tank (5) up to the
“MAX” level to carry out the rinse cycle,
then press the button (32) to start the rinse
cycle, the button (32) ashes and the LED
(41) lights up steadily for the entire duration
of the washing cycle.
• The rinse cycle ends when the keys light up
white.
Cleaning and maintenance
Table of contents
Other Smeg Coffee Maker manuals

Smeg
Smeg CMSC451B User manual

Smeg
Smeg EGF03PGUS User manual

Smeg
Smeg DCF01 User manual

Smeg
Smeg SCM1 System manual

Smeg
Smeg Lavazza A MODO MIO User manual

Smeg
Smeg DCF02PBUS User manual

Smeg
Smeg ECF02WHEU User manual

Smeg
Smeg Classica CMS4303X User manual

Smeg
Smeg CMSU6451X User manual

Smeg
Smeg CMS4604 User manual