5
The dynamic intake pressure must be between 1 and 6 bar; if it is higher, installation of a pressure reducer is
recommended.
It is essential to fit a main stop tap on the water intake pipeline; the tap must be accessible after installation of
the appliance, so do not install it behind the dishwasher.
The stated cycle duration refers to appliances supplied with hot water at 50°C.
If the appliance is supplied with cold water, the cycle duration might increase depending on the intake water
temperature, since the dishwasher is fitted with the HTR system, which requires set temperature and pressure
for rinsing.
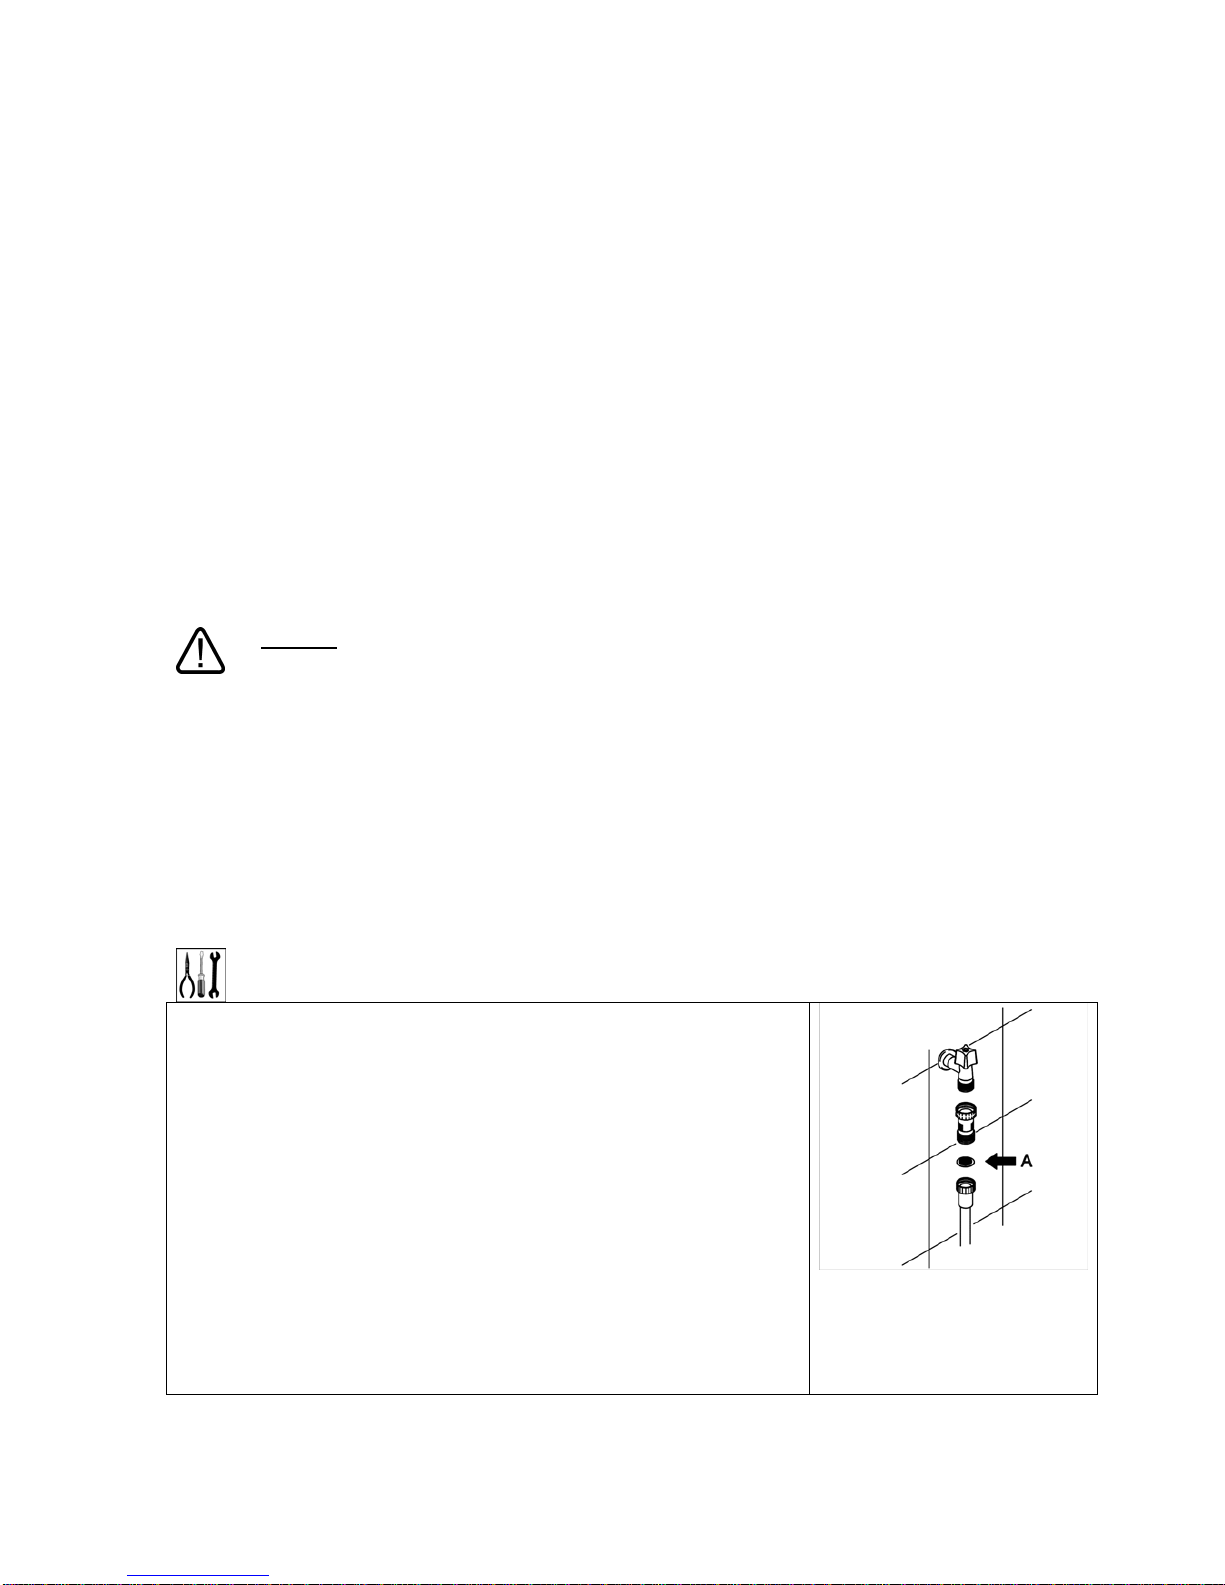
Drainage:
The dishwasher is fitted with a drain pump and can operate with drain
connections on the floor or wall.
Caution: make sure that the intake and drain hoses are not bent,
constricted or crushed after installation.
If the drain connection is to an outlet with valve, the maximum height of the drain is reduced to 600 mm.
In all cases, after installation check that the drain is fully functional by pumping out the tank completely (P0
cycle).
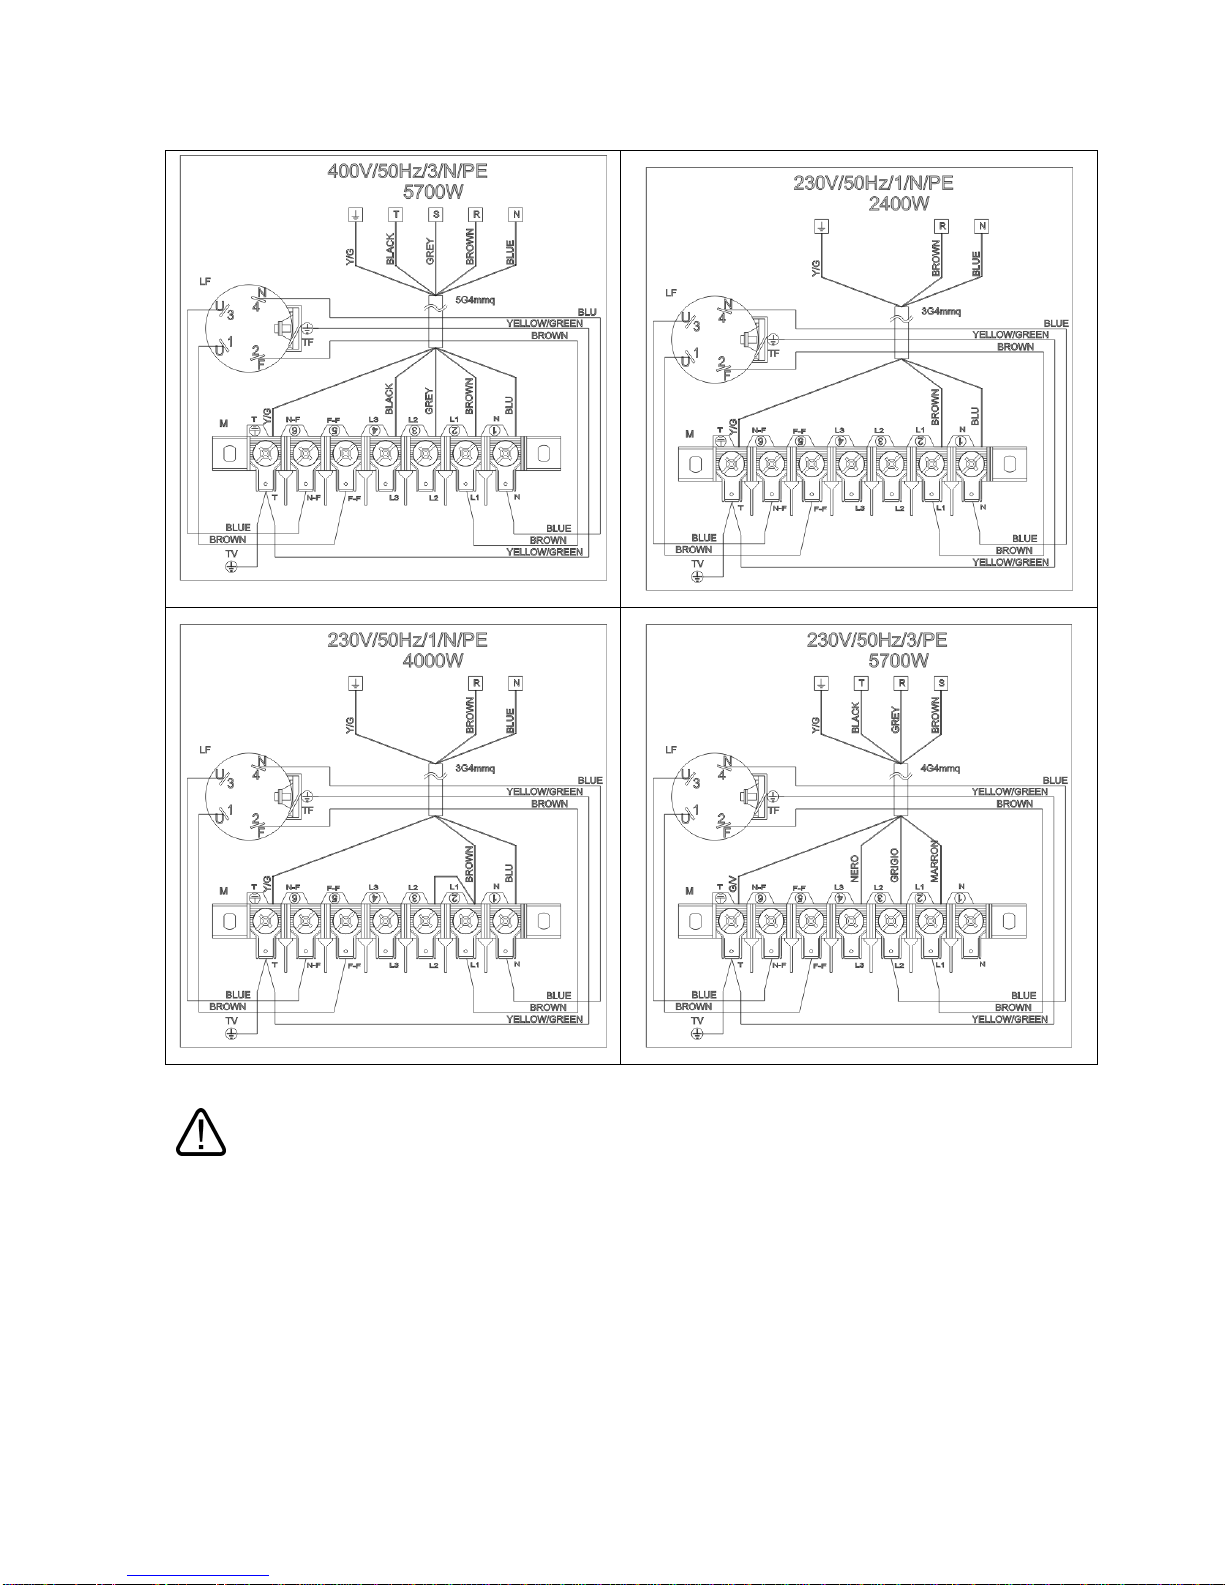
4.1 Electrical connection
The dishwasher and any additional equipment must be connected to the electrical system by
authorised, skilled staff, in accordance with the relevant regulations; also comply with the technical
instructions for the connection.
The total rated power is stated on the appliance’s technical data plate.
The electrical protection devices fitted for the dishwasher must serve this appliance only.
The user must have a master switch and a differential safety breaker, with rating suitable for the
machine’s characteristics, installed on the electricity supply line in accordance with the relevant
regulations.
These switches must be installed close to the dishwasher, be easily accessible after installation, and
provide complete disconnection from the electrical mains in overvoltage class III conditions.
Warning !!!
The dishwasher is always powered up unless the master switch is turned off.
‐Connect the appliance to the user’s earth system. The terminal for the connection is in the bottom
right-hand corner of the appliance.
‐The earth wire (PE) is yellow-green in colour, the neutral wire (N) is blue and the live wires (L1, L2,
L3) are black, grey and brown.
In the event of single-phase connection (230V-1N~) the connection to the electrical mains must be made
using a cable with plug compliant with the relevant regulations..
VOLTAGE FUSE
PROTECTION TANK
HEATING MOTOR BOILER TOTAL CONNECTION
LOAD
400V-50Hz/3/N/PE 13A 0,8kW 0,7kW 5kW 5,7kW
230V-50Hz/1/N/PE 13A 0,8kW 0,7kW 1,7 2,4kW
230V-50Hz/1/N/PE 20A 0,8kW 0,7kW 3,3kW 4,0kW
230V-50Hz/3/PE 20A 0,8kW 0,7kW 5kW 5,7kW