User instructions
4
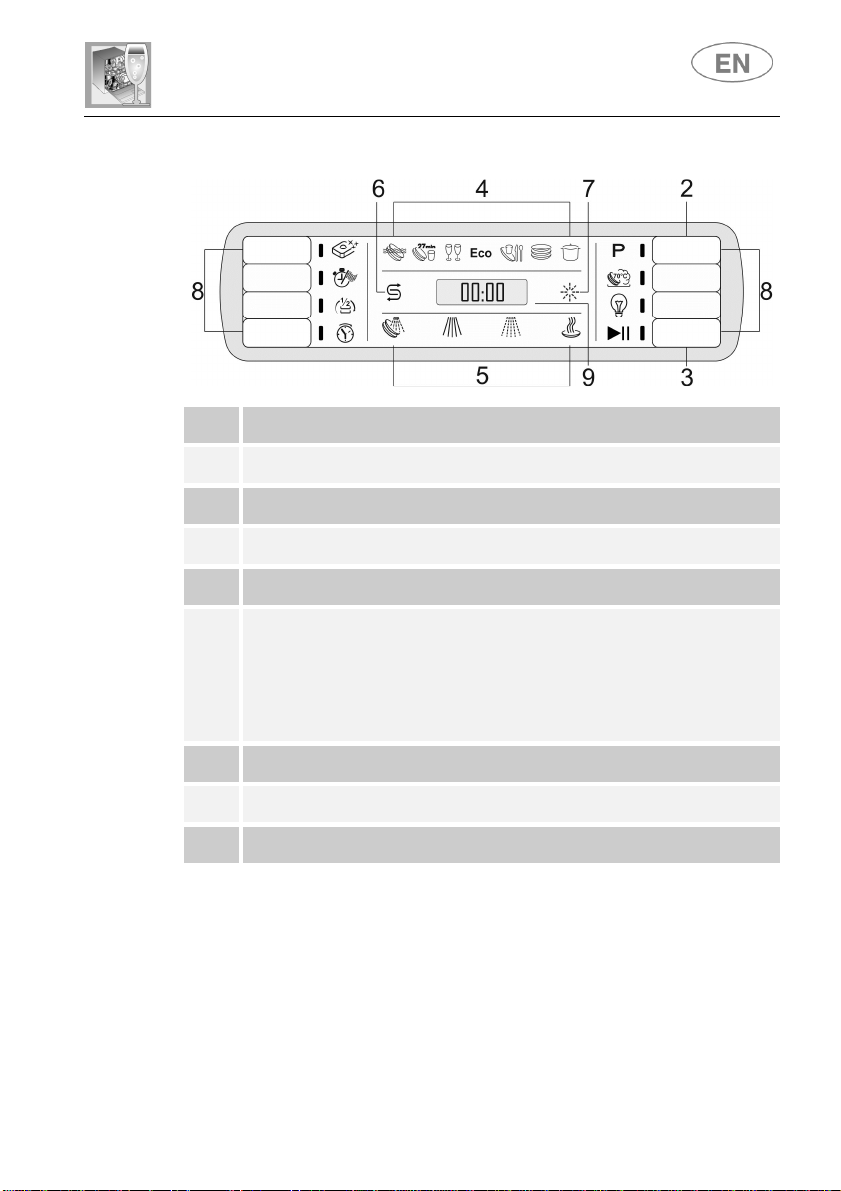
<<OPTIONS (8)>>
Depending on the model, this zone may contain one or more of the
following options, identified by the relative symbols and described in
more detail in the relevant sections of the manual.
It is not possible to select any options when the soak program is being
used. All options except "Flexi Tabs" are disabled at the end of the
wash cycle. To disable the “Flexi Tabs” option, press the relative
button (the light goes out).
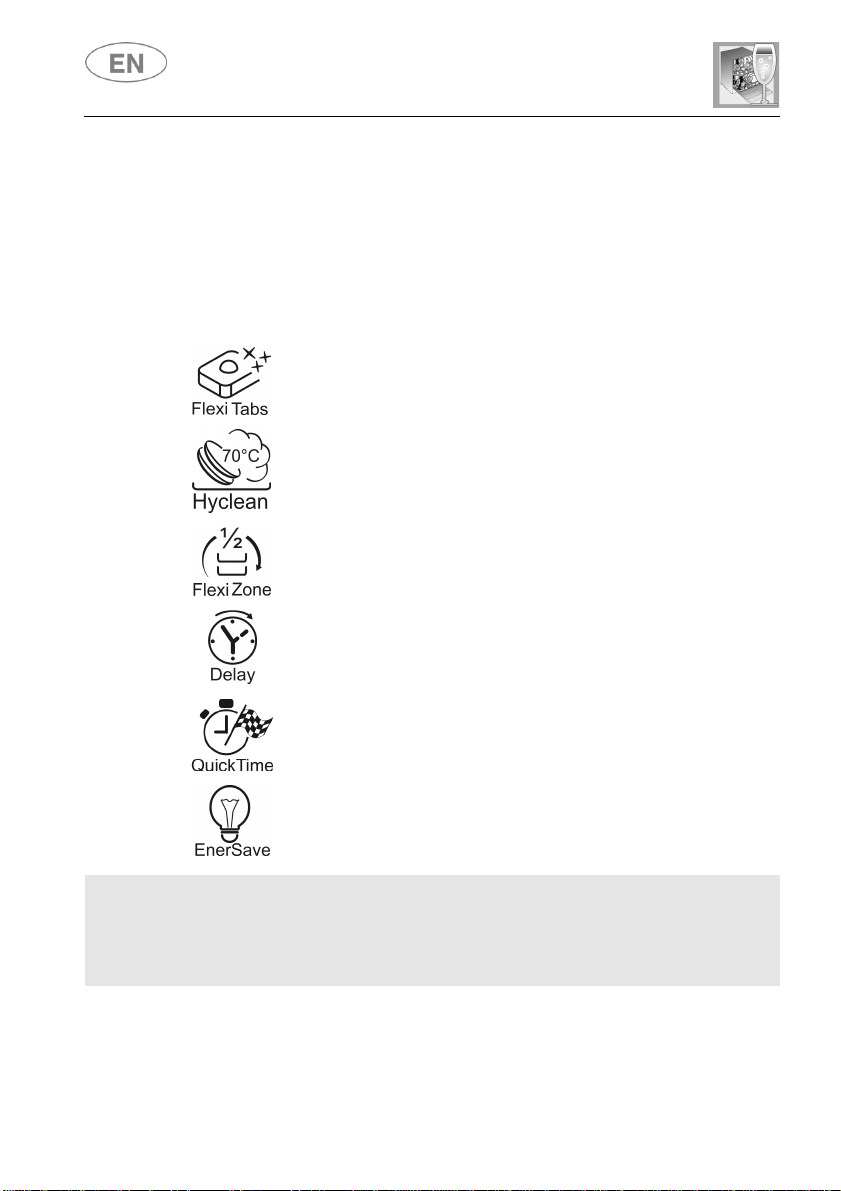
Flexi Tabs
Option recommended for the use of multi-function tablet
detergent.
HYCLEAN
Increases the temperature of the final hot rinse to 70°C to
ensure a further reduction in the bacteria level.
Spread HALF LOAD WASH
Allows washing of just a few dishes placed in both baskets.
PROGRAM DELAY
Allows the program to be set to start with a delay of up to 9, 12
or 24 hours, depending on the model.
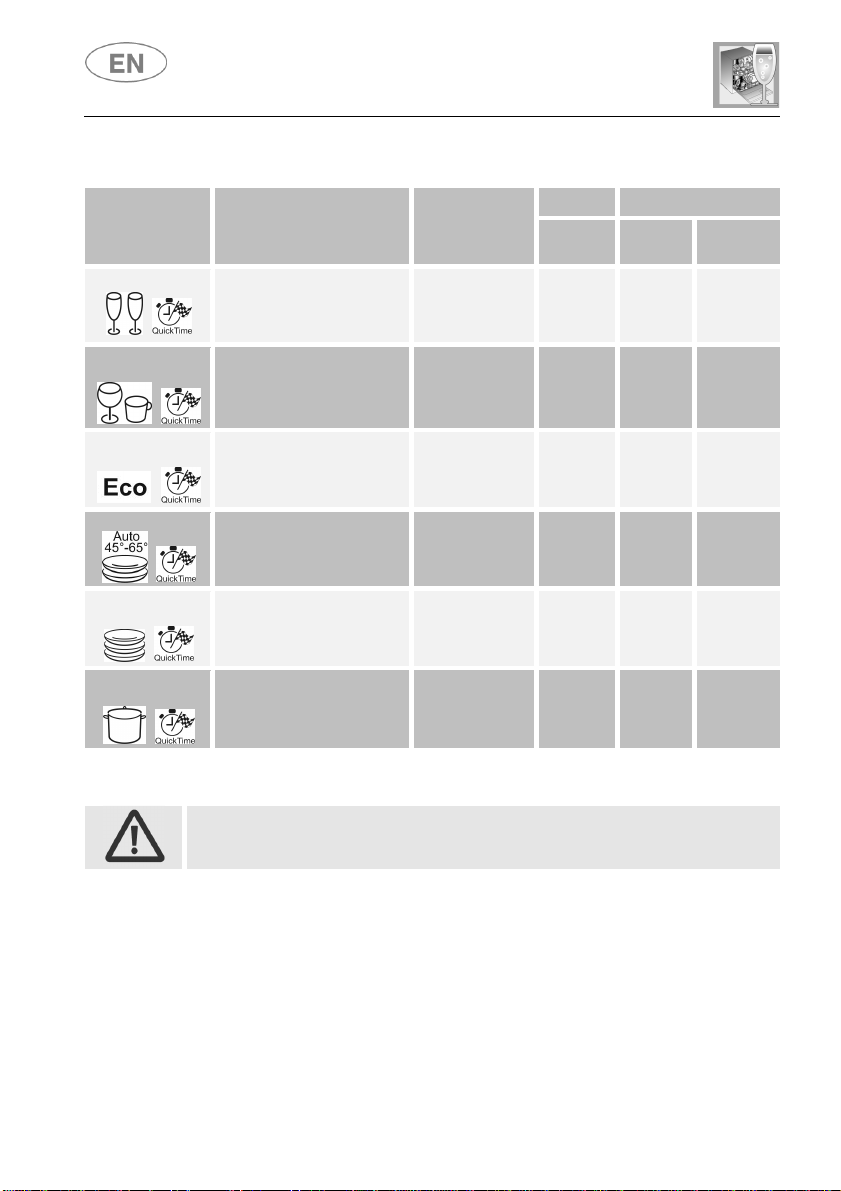
QUICK TIME
Select this option together with any washing program (except
the soak program) to SHORTEN the cycle.
ENERSAVE
Indicated option for save energy.
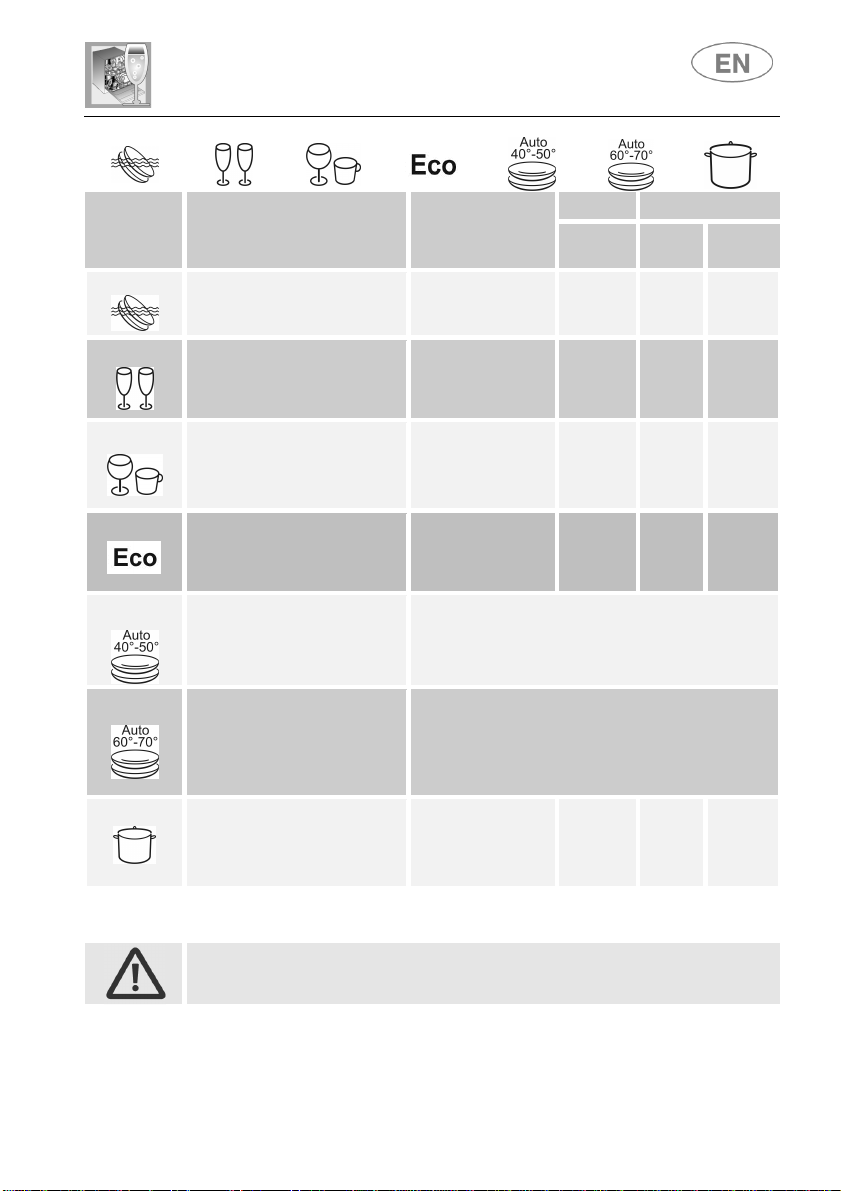
WARNING!
Some models are fitted with a static system to optimise water consumption. When
a programme is started or changed, the dishwasher performs a pump-out followed by
a standby phase (about 10 min.) during which it will make absolutely no noise; the
actual washing process starts after this time.