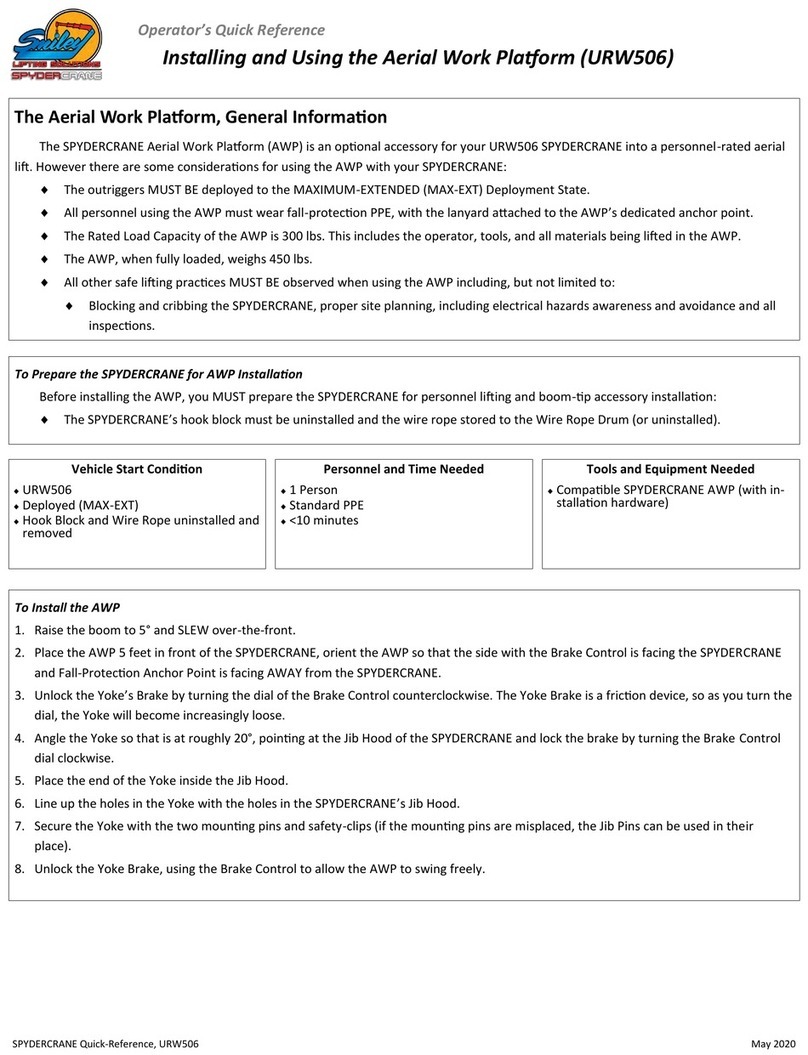
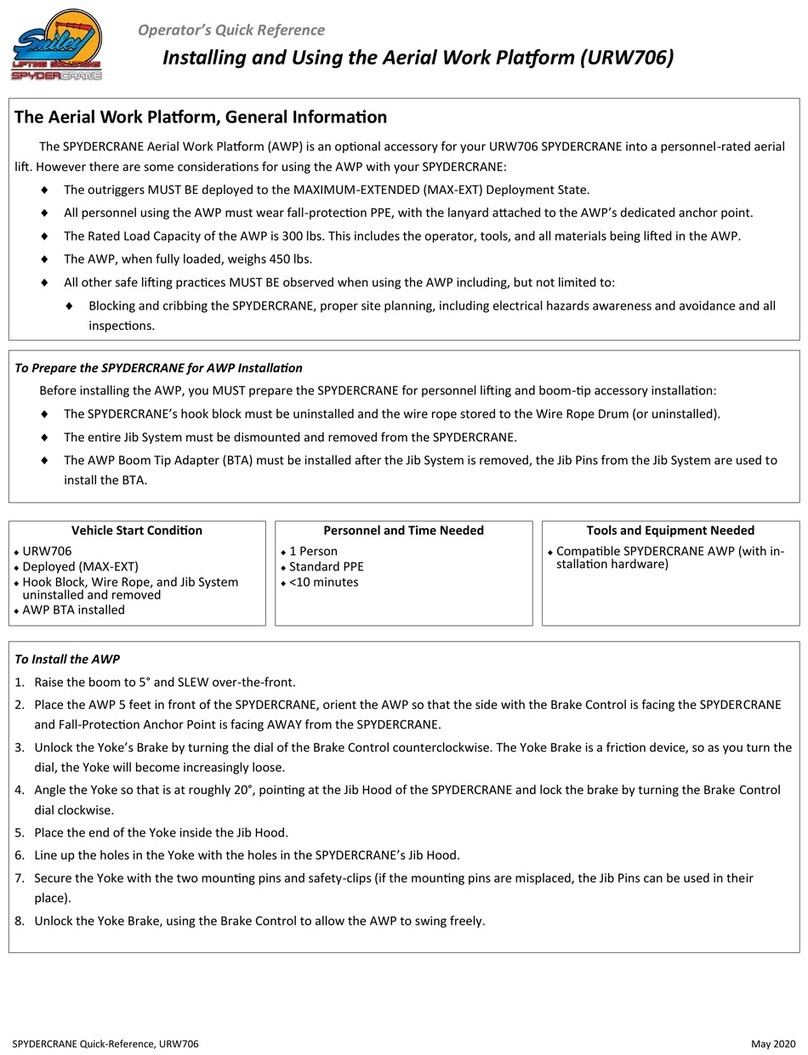
Smiley Lifting Solutions SpyderCrane 300 Series User manual

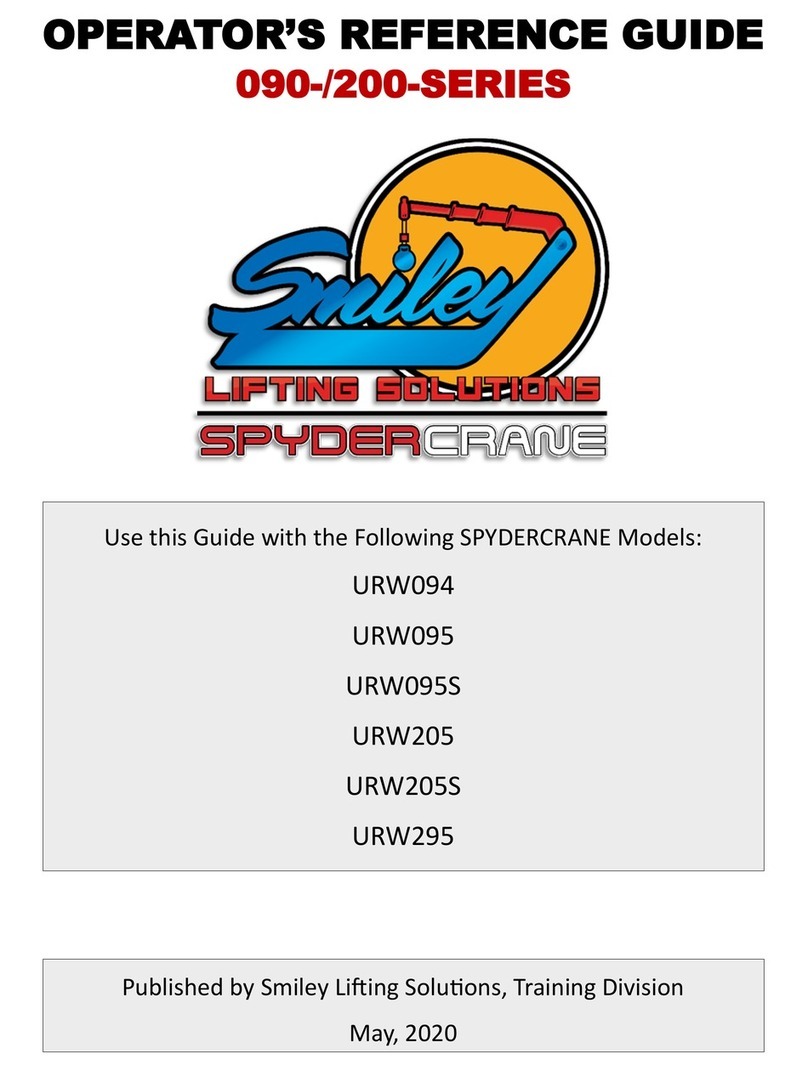
OPERATOR’S REFERENCE GUIDE
300-/500-/700-SERIES
Use this Guide with the Following SPYDERCRANE Models:
URW306
URW306-T
URW376
URW506
URW547
URW706
Published by Smiley Liing Soluons, Training Division
May, 2020

2
Forward
This Operator’s Reference Guide for the 300- , 500-, and 700-Series SPYDERCRANEs is supplementary reference
guide for operang and sustaining your SPYDERCRANE. Smiley Liing Soluons relies on customers like you to com-
ment on errors and provide advice on how to further develop this guide.
If you have quesons, or concerns, contact SLS Training at:
James@smileyliing.com
(602) 513-0204
Basic Informaon About Your SPYDERCRANE
Basic Specicaons 3
Your SPYDERCRANE’s Safees and Operator Aids 8
Your SPYDERCRANE’s Remote Controller 10
The Load Moment Indicator (LMI) System 11
The 110V Baery-Electrical Powerplant QuiQ Charger 18
The 220V Electrical Powerplant Power Distribuon Box 19
Maintaining and Servicing Your SPYDERCRANE
The Daily Inspecon 20
Your SPYDERCRANE’s Service Schedule 21
The Lubricaon Points of Your SPYDERCRANE 22
Check/Drain/Replace Hydraulic Oil 23
Replace Line Filter 24
Check/Add/Drain/Replace Coolant 25
Replace Crawler Track Drive Wheel Oil 26
Check/Replace Motor Oil 27
Clean/Replace Air Filter 28
Inspect, Clean, Replace Fuel Filter and Fuel/Water Separator 29
Operang Procedures
Hook and Boom Deployment/Storage Procedure 31
Hook Block Grounding/Un-Grounding Procedure 32
Install the 1-Part Hook Block (Boom) 35
Install the 2-Part Hook Block 26
Install the 4-Part Hook Block 36
Store the Wire Rope 37
Un-install the Wire Rope 38
Install the Wire Rope 39
Install the Jib (URW547) 40
Install the 1-Part/Searcher Hook (URW547 Jib) 41
Install the Jib (URW706) 42
Operang Procedures
Load Charts: URW306-T/URW306 43
Load Charts: URW376-T/URW376 44
Load Charts: URW506 46
Load Charts: URW547 47
Load Charts: URW706 48
CMU Codes (Common) 49
CMU Codes (System Error) 50

3
Idenfying Your SPYDERCRANE by its Model Number
The rst six digits of your SPYDERCRANE’s model number deter-
mines the overall model. The ve-, six-, or seven-digit sux of the
model number explains the installed powerplants that the SPYDER-
CRANE is equipped with. For example, a URW547 equipped with a Yanmar diesel powerplant is called the URW547C4URS.
Model Number Descripon
URW306
URW376
The URW306 is a xed-cab, telescoping boom mini-crawler crane with six boom secons.
It has a maximum rated load capacity of 5,800 lbs.
The URW376 is otherwise idencal but its rated load capacity is increased to 6,680 lbs.
URW306Cxxx-T
The “Dash-Tee” is a stripped down variant of the URW306
The Dash-Tee loses the crane management unit and load moment indicator of the URW306, but gains the
turnover protecon device like the 095-/200-series.
It has a maximum rated load capacity of 5,800 lbs.
URW547 The URW547 has 59’ and seven secons of boom with a rated load capacity of 8,920 lbs.
URW706 The URW706 is the largest SPYDERCRANE with 63’ of boom and rated load capacity of 13,300 lbs.
xxxxxxC4URS Diesel engine.
This is the standard powerplant for the 300-, 500-, and 700-series.
xxxxxxCMURS Diesel engine plus 220V Electrical.
The CMURS sux indicates the addion of 220V Electrical auxiliary powerplant.
The 220V requires a constant connecon to shore power to work.
xxxxxxCBURS Diesel engine plus 110V Baery-Electrical.
The CBURS sux indicates the addion of 110V Baery-Electrical auxiliary powerplant.
Where to Find More Informaon for Your SPYDERCRANE
This guide is helpful for SPYDERCRANE operators who are already trained and qualied and only need refresher knowledge on using the
SPYDERCRANE. If you require more informaon on operang or sustaining your SPYDERCRANE, there are a number of addional resources:
UNIC Operator’s Manual
This manual is very helpful for technical data on the core SPYDERCRANE vehicle (i.e., not the powerpack), but also contains some
basic operator informaon. Machine translated from Japanese, UNIC -supplied manuals can be challenging to read.
UNIC Parts Catalog
The UNIC Parts Catalog contains line drawings and part idencaon informaon for the core SPYDERCRANE (i.e., not the power-
pack, or Jib System). Like the Operator’s Manual, the Parts Catalog is machine translated from Japanese and can be dicult to use.
Other OEM Manuals
Depending on the SPYDERCRANE’s model and installed accessories, you may have addional manuals for the installed powerplant,
or powerplants, or other systems like the Auxiliary Winch.
How to Find Your SPYDERCRANE’s Model Number and Serial Number
Your SPYDERCRANE’s Model Number and Serial Number are listed on the Vehicle ID Plate that is installed on right side of the turret.

4
URW306/376/306-T
Tracks
Steel-Core Rubber
12 inches x 69 inches (on-ground) x 2
828 square inch contact patch
Dimensions 14.24’ x 4.24’ x 5.91’ (L x W x H)
8,670lbs. (dry)
Weights and
Loadings 5.3 PSI Ground Pressure
Engine Yanmar diesel, 20.4hp at 2500 rpm
Hydraulic
Pump
3,130 PSI (Traveling) 2990 PSI (Liing)
15.9 gal./minute (19.8 gal. tank capacity)
2500 RPM, Variable-Delivery Piston Pump
Performance 3.5 MPH maximum
Your SPYDERCRANE’s Traveling Specicaons and Performance
URW506
Tracks
Steel-Core Rubber
12 inches x 69 inches (on-ground) x 2
828 square inch contact patch
Dimensions 14.24’ x 4.27’ x 5.9’ (L x W x H)
10,935lbs. (dry)
Weights and
Loadings 6.8 PSI Ground Pressure
Engine Yanmar diesel, 20.4hp at 2500 rpm
Hydraulic
Pump
3,130 PSI (Traveling) 2990 PSI (Liing)
15.9 gal./minute (19.8 gal. tank capacity)
2500 RPM, Variable-Delivery Piston Pump
Performance 3.5 MPH maximum
URW547
Tracks
Steel-Core Rubber
12 inches x 69 inches (on-ground) x 2
828 square inch contact patch
Dimensions 16.2’ x 4.5’ x 6.5’ (L x W x H)
11,090 lbs. (dry)
Weights and
Loadings 6.8 PSI Ground Pressure
Engine Yanmar diesel, 20.4hp at 2500 rpm
Hydraulic
Pump
3,130 PSI (Traveling) 2990 PSI (Liing)
15.9 gal./minute (19.8 gal. tank capacity)
2500 RPM, Variable-Delivery Piston Pump
Performance 3.5 MPH maximum
URW706
Tracks
Steel-Core Rubber
16 inches x 88 inches (on-ground) x 2
1408 square inch contact patch
Dimensions 18.4’ x 5.24’ x 7.16’ (L x W x H)
17,590lbs. (dry)
Weights and
Loadings 12.6 PSI Ground Pressure
Engine Yanmar diesel, 31.2hp at 2500 rpm
Hydraulic
Pump
3,553 PSI (Traveling) 2987 PSI (Liing)
21.4 gal./minute (31.7 gal. tank capacity)
2500 RPM, Variable-Delivery Piston Pump
Performance 3.1 MPH maximum
Your SPYDERCRANE is capable of traveling up inclines of up
and down 23-degrees. It can also maintain stability when the lat-
eral (side-side) angle of 20-degrees on prepared surfaces and 10-
degrees on loose earth.
The maximum traveling speed of your SPYDERCRANE depends
on which powerplant you are using. When traveling on either the
110V Baery-Electric or 220V Electrical powerplants, your maxi-
mum travel speed on at ground is 1.2 mph.
When using the diesel powerplant, traveling at idle will allow
the SPYDERCRANE to travel up to 1.4 mph on at ground. Increas-
ing the engine’s RPMs to maximum (wide-open throle) will in-
creases the SPYDERCRANE’s traveling speed to 2.8 mph. Traveling
at wide-open throle and going into high-speed mode will top out
the SPYDERCRANE at 3.5 mph.
There is some variaon between the SPYDERCRANEs when it
comes to travel speed with the lighter URW306/URW376 being
the fastest and the heavyweight URW706 being the slowest.

5
Your SPYDERCRANE’s Liing Specicaons and Performance
URW306/URW306-T
Rated Capacity 5,800 lbs. @ 8 .
Liing Height 48.9 .
Boom Length 11.9 to 47.9 .
Max Working Radius 47.4 .
Max Hoist Speed 55.8 /min (at 4th layer, w/ 4-Part Hook)
Max Boom Extend 36 . in 23 seconds
Max Boom Angle Up 8°/second
Max Slew Speed 2.5 RPM
Slew Range 360° connuous
Contact Patch Foot: 10” x 6.38” (63.8 square inches) x 4
URW376
Rated Capacity 6,680 lbs. @ 8 .
Liing Height 48.9 .
Boom Length 11.9 to 47.9 .
Max Working Radius 47.4 .
Max Hoist Speed 55.8 /min (at 4th layer, w/ 4-Part Hook)
Max Boom Extend 36 . in 23 seconds
Max Boom Angle Up 8°/second
Max Slew Speed 2.5 RPM
Slew Range 360° connuous
Contact Patch Foot: 10” x 6.38” (63.8 square inches) x 4
URW506
Rated Capacity 5,800 lbs. @ 12.1 .
Liing Height 49.9 .
Boom Length 12.9 to 50.5 .
Max Working Radius 49.9 .
Max Hoist Speed 45.9 /min (at 5th layer, w/ 4-Part Hook)
Max Boom Extend 38 . in 35 seconds
Max Boom Angle Up 4.4°/second
Max Slew Speed 2.5 RPM
Slew Range 360° connuous
Contact Patch Foot: 10” x 6.38” (63.8 square inches) x 4
URW547
Rated Capacity 8,920 lbs. @ 8 .
Liing Height 59.7 .
Boom Length 13.1 to 59.1 .
Max Working Radius 58.5 .
Max Hoist Speed 45.9 /min (at 5th layer, w/ 4-Part Hook)
Max Boom Extend 46 . in 35 seconds
Max Boom Angle Up 4.4°/second
Max Slew Speed 2.5 RPM
Slew Range 360° connuous
Contact Patch Foot: 10” x 6.38” (63.8 square inches) x 4
URW706
Rated Capacity 13,220 lbs. @ 9.8 .
Liing Height 64 .
Boom Length 15.7 to 63 .
Max Working Radius 61 .
Max Hoist Speed 36.1 /min (at 4th layer, w/ 4-Part Hook)
Max Boom Extend 47.2 . in 52 seconds
Max Boom Angle Up 5°/second
Max Slew Speed 2.5 RPM
Slew Range 360° connuous
Contact Patch Foot: 14” x 8.2” (114 square inches) x 4

6
Your SPYDERCRANE’s Deployment Footprint Dimensions
URW506 - URW547
URW706
URW306-T - URW306 - URW376

7
Your SPYDERCRANE’s Boom Length Stages
Stage 1: All Secons retracted
Stage 2: Secon Two is extended
Stage 3: Secon Three extended to rst
hash mark
Stage 4: Secons Four, Five, and Six are
extended to Secon Four hash mark
Stage 5: Second Secon Three hash
mark exposed
Stage 6: All Secons extended
Stage 1: All Secons retracted
Stage 2: Secon Two extended to “16”
Stage 3: Secon Three extended to “25”
Stage 4: Secons Four extended to “35”
Stage 5: Secon Four extended to “45”
Stage 6: Secon Four extended to “54”
Stage 7: All Secons extended
Stage 1: All Secons retracted
Stage 2: Secon Two extended
Stage 3: Secons Three, Four, Five, and
Six are extended to Secon Three
hash mark
Stage 4: Secons extended to Secon
Four hash mark
Stage 5: Secons extended to Secon
Four SECOND hash mark
Stage 6: All Secons extended
Stage 1: All Secons retracted
Stage 2: Secon Two is extended
Stage 3: Secons Three, Four, Five, and
Six are extended to Secon Three
hash mark
Stage 4: Secons extended to Secon
Three cross mark
Stage 5: Secons extended to Secon
Three SECOND hash mark
Stage 6: All Secons extended
URW706
URW547
URW506
URW306-T/URW306/URW376

8
Your SPYDERCRANE’s Safees and Operator Aids
Safees
System Descripon
Holding Valves
Each hydraulic cylinder used by the SPYDERCRANE (Extend Cylinders for boom telescoping and outrigger deploy-
ment and the Li Cylinder used to change the angle of the boom) is equipped with a holding valve.
The holding valve prevents the cylinder from collapsing if the engine and/or hydraulic pump are shut down. Essen-
ally, if power or hydraulic pressure is lost, the SPYDERCRANE will “lock up” unl pressure is restored.
Addionally, if the hydraulic oil line to a specic cylinder is cut, or bursts, the associated holding valve will lock up
ONLY the aected cylinder; allowing the others to funcon normally.
Locking Pawl The winch of the SPYDERCRANE is equipped with a locking pawl that lowers and prevents the winch from rotang if
hydraulic pressure is lost.
An-Two Block
Safety
The An-Two Block (A2B) Safety is designed to prevent the hook block from being WINCHED UP (or otherwise
raised) into the boom p. Allowing the hook block to smash into the boom p (“two-blocking”) can result in crical
damage to the wire rope, SPYDERCRANE, or the aached load. The A2B Safety prevents this by commanding a CMU
CODE 15 Funcon Kick-Out (FKO) when it is ACTIVATED.
The A2B Safety is acvated when:
The A2B Switch is OPENED by the hook block being WINCHED UP to the point where it impacts and lis the
A2B Weight, which causes the A2B Switch to spring into the OPEN posion. This can also be caused if the
boom is extended WITHOUT WINCHING DOWN the hook (to prevent the hook from rising).
The A2B Switch, or the electrical connecon to it, is broken.
Minimum Wire
Rope Safety
The Minimum Wire Rope Safety is designed to lockout the WINCH DOWN command when acvated (CMU CODE
96). Its purpose is to prevent the operator from WINCHING DOWN unl all of the wire rope is unspooled o the
Wire Rope Drum.
Boom Stored
Safety
The Boom Stored Safety is a limit switch that locks out the SLEW command when acvated. The Boom Stored Safe-
ty is used when storing the hook and boom. The URW094 IS NOT equipped with the Boom Stored Safety.
Safety Latch Every hook block on the SPYDERCRANE is equipped with a spring-loaded safety latch that acts as a one-way gate.
When a load is properly rigged and aached, the Safety Latch keeps the rigging from slipping o the hook.
Operator Aids
System Descripon
Load Moment Indicator (LMI)
The LMI is bolt-on operator aid composed of a series of sensors connected to a central computer and
an operator interface called the LMI Display.
The LMI provides real-me data on the SPYDERCRANE’s conguraon, including its rated load capaci-
ty and the weight of the aached load.
All SPYDERCRANEs in these series are equipped with LMIs EXCEPT for the URW306-T.
Boom Angle Indicator
A mechanical operator aid, the Boom Angle Indicator indicates the boom angle of the SPYDER-
CRANE’s boom and can be used in conjuncon with visually determining the Boom Stage to calculate
the SPYDERCRANE’s Working Radius.
Load Chart The Load Chart displays the various Rated Load Capacies for the SPYDERCRANE, based on its Boom
Stage, Working Radius, and Deployment State.
Working Range Chart The Working Range Chart indicates the approximate posion and length of the boom based on its
Working Radius, Boom Angle, and Boom Stage.

9
Your SPYDERCRANE’s Safees and Operator Aids
Operator Aids (connued)
System Descripon
Turnover Prevenon Device
(URW306-T ONLY)
The Turnover Prevenon Device (TPD) is a system of load cells and a centralized computer (the TPD
Amplier) that monitors the stability of the SPYDERCRANE and can acvate a CMU CODE 15 FKO
when it detects that it is nearing its stability limits (do to overloading, or boom movement).
Visual Warning Systems
System Descripon
Outrigger Mode Indicator The Outrigger Mode Indicator is the yellow lamp located on the top of the Operator Staon and it lights up
when the SPYDERCRANE is placed into Outrigger Mode.
Remote Control Indicator The Remote Control Indicator is the orange lamp located on the top of the Operator Staon and it lights up
when the SPYDERCRANE is placed into Remote Control.
Run Indicator
The Run Indicator is the green tower lamp that strobes whenever the SPYDERCRANE is running. The Run
Indicator is only installed on 095-/200-Series SPYDERCRANEs equipped with the 110V Baery-Electric
powerpack.
Radio Remote Receiver
Status Panel
Located on outward facing panel of the Radio Remote Receiver (bolted to the rear of the Hydraulic Oil
Tank), the Status Panel is a series of red and green LEDs that can be used to troubleshoot problems with
TPD Amplier Status Pan-
el
Located on the outward facing panel of the TPD Amplier (located inside the Operator Staon and viewa-
ble through a sheet metal cutout), the Status Panel is a series of orange, green and red LEDs that can be
used to troubleshoot problems with the Turnover Protecon Device (TPD). The TPD is only installed on 095
-/200-Series SPYDERCRANEs.
Unlike the audible alarms and warning systems, the visual warning indicators and lamps CANNOT be turned o.
Audible Alarms and Warning Systems
System Descripon
Safety Horn
The Safety Horn is used to warn bystanders and can be acvated from:
The Safety Horn Buon in the Travel Control Group (next to the Ignion Switch).
The Safety Horn Buon in the Outrigger Control Group (next to the Crane/ Outrigger Mode Toggle).
The Remote Safety Horn Buon on the Remote Controller.
Voice Mute Switch
The voice mute switch, when set to the OFF posion turns o the audible signals from the voice warning sys-
tems and audible alerts system.
The voice mute switch does not aect audible signals from the LMI, the TPD, or the outrigger mode alarm.
Outrigger Buzzer
Mute Switch This is a mute switch specically for the outrigger mode alarm.
TPD Alarm Mute The TPD alarm mute is an on/o toggle used to mute the alarms associated with the TPD.
While all of the audible alarms and indicators can be switched o, doing so WILL reduce your situaonal awareness. Audible alarms and
indicators should ONLY be turned o when the SPYDERCRANE is being operated where noise controls are in eect.

10
Your SPYDERCRANE’s Remote Controller
Remote Controller Map
#Switch Funcon
1Remote E-Stop
When ACTIVATED, turns OFF the remote controller.
The remote controller CANNOT be turned ON unl the remote e-stop is deacvated (by ro-
tang the e-stop switch clockwise).
2Power Key/Switch 2-posion switch; turns the Remote Controller ON and OFF.
3Remote Mode Buon
This buon will acvate the secondary command modes for the SPYDERCRANE.
The remote mode buon must be held down when selecng command funcons.
For SPYDERCRANEs running on their ICE, holding the remote mode buon and commanding a
BOOM SLEW CLOCKWISE will turn the engine OFF, holding the remote mode buon and com-
manding a BOOM SLEW COUNTERCLOCKWISE will re-start the engine.
4Speed Control Buon
When pressed, places the SPYDERCRANE into one of three SPEED MODES:
RED (default): Up to 100% engine power can be commanded
Yellow: Up to 50% engine power can be commanded
Green: Up to 10% engine power can be commanded
Only used with SPYDERCRANEs running propane, gasoline, or diesel.
5Remote Store Hook Buon When PRESSED AND HELD; commands a HOOK STORE; Control Trigger must also be squeezed
to actuate the command.
6Remote Safety Horn (Start) Repeatedly PRESS to LINK the Remote Controller with the SPYDERCRANE; also sounds the
SPYDERCRANE’s horn.
7Remote Telescope Control Switch PRESS UP to command BOOM OUT; PRESS DOWN to command BOOM IN.
8Remote Winch Control Switch PRESS UP to command WINCH UP; PRESS DOWN to command WINCH DOWN.
9Remote Slew Control Switch PRESS UP to command SLEW LEFT; PRESS DOWN to command SLEW RIGHT.
10 Remote Boom Angle Control
Switch PRESS UP to command BOOM UP; BOOM DOWN to command BOOM DOWN.
11 Remote Control Trigger Squeeze to apply hydraulic funcon to selected command.

11
The LMI System
If your SPYDERCRANE is equipped with a Load Moment Indicator, or LMI (all models except the 306-T), you will need to understand
how to set it up and use for liing operaons. The LMI is actually composed of four major groups, the LMI Computer, the LMI A2B Cord
Reel and Cord, the various sensors that report to the LMI Computer, and the LMI Display. The LMI Display is the component that you, as
the operator, will work with on a daily basis.
The LMI Display is installed into its own console, which is installed on top of the Forward Console of the Operator’s Staon. When the
boom is stored, it sits to the roadside of the LMI Console. Before going over how to set-up and use the LMI Display, let’s go over the con-
trols and features of the LMI Display.
62
34
5
1
LMI Display Controls
The LMI Display is the operator interface
for the LMI system.
1. The LMI Screen:
This is the color LED screen that you
will use to view your SPYDERCRANE’s
operaonal conguraon and status.
2. The Selecon Dial
The selecon dial is used to scroll
through menus and screens.
3. Set Enter Fixed-Funcon Switch
This FFS is used to enter and save
any conguraon changes you make,
depending on the menu you are in.
4. Back to Ops Screen Fixed-Funcon
Switch
This FFS, when pushed, will exit
whatever menu/screen you are using
and return the display to the Opera-
ons Screen, without saving any
changes you’ve made.
LMI Display Controls (connued)
5. Back-One-Screen Fixed-Fixed Switch
This FFS, when pressed, will back the display up one menu/screen, without making any
conguraon changes.
6. Variable-Funcon Switches
These eight switches, which ank the sides of the LMI Screen, have their funcons
change based on what is displayed on the screen.
The LMI at Start-Up and how it is Connected to the SPYDERCRANE
As soon as you start the SPYDERCRANE, the LMI will begin its own start-up sequence. If uninterrupted, the LMI takes around 45 sec-
onds to go from o to fully started-up and ready for use. Since the LMI is a bolt-on operator aid, it is not aected by the SPYDERCRANE’s
mode of operaon, EXCEPT that if you push down on the Travel Control Interlock (to use the travel controls) power will be disconnected
from the LMI, interrupng its start-up.
During the LMI’s start-up sequence, you will see the LMI Display’s screen ash through mulple screens and menus. During this boot-
up and soware loading process, you should not touch any of the LMI Display controls OR any of the SPYDERCRANE’s crane controls. You
can sll control the outriggers without aecng the LMI.
The LMI is connected to the Crane Management Unit (CMU) of the SPYDERCRANE through a single circuit. When the LMI detects an
internal fault or an alert condion for the SPYDERCRANE (like an A2B condion), it triggers the CMU to generate a CODE 15 Funcon Kick-
Out (FKO). The CMU does not communicate to the LMI. While the SPYDERCRANE can operate WITHOUT the LMI, if the LMI is damaged it
will connue to trigger the CMU to CODE 15; in order to use the SPYDERCRANE with a non-funconal LMI, the LMI will need to be discon-
nected from the SPYDERCRANE.

12
The LMI at Start-Up
Aer you have completed deploying the outriggers and you’ve placed the SPYDERCRANE into Crane Mode, the CMU Code Indicator of
your SPYDERCRANE will be displaying CODE 15 (Funcon Kick-Out). During CODE 15, BOOM OUT, BOOM DOWN, SLEW, and WINCH UP are
all disabled (the funcons have been locked-out). The CODE 15 is being generated for two reasons, the rst is that Boom Stored Safety is
ENGAGED and the LMI is sending an alert to the CMU. In this case, the LMI is alerng the CMU because it has not been properly congured
for crane operaons.
1
2
3
4
5
LMI Operaons Mode Screen
This is screen is displayed aer the LMI has completed its start-up. If there is a red queson-mark superimposed, like it is in this image,
the LMI has no conguraon data saved and it requires conguring. If there is no queson-mark, then there is conguraon data already
saved and you only need to conrm the data (or change it, as required). Expect to see the queson-mark when you use the LMI for the rst
me that day or aer the SPYDERCRANE has been OFF for more than two hours.
On the sides of the LMI Operaons Mode Screen, you can see square icons next to ve of the Variable-Funcon Switches (VFS), this
indicates that a funcon has been assigned to these ve VFS.
1. Go to System Setup VFS
This VFS, when pushed, will take you to the System Setup Screen for the LMI. System Setup is NOT THE SAME as conguraon; system
setup is reserved for higher-level maintenance funcons. You only go to System Setup if you needed to make adjustments on a newly
installed system, or LMI component.
2. Go to System Informaon VFS
This VFS, when pushed, will take you to the System Informaon Screen for the LMI. Like System Setup, this screen is reserved for higher
-level maintenance acons. Typically, maintenance personnel who go through this screen to nd specic diagnoscs data; usually by
being prompng by an LMI Alert.
3. Go to Crane Conguraon VFS
This VFS, when pushed, will take you to the Crane Conguraon Screen. To congure the crane, in this context, is to idenfy several key
characteriscs into the LMI that will allow it monitor the SPYDERCRANE’s safety and stability. The Crane Conguraon Screen is where
you would enter in the conguraon data for the SPYDERCRANE’s Deployment State, whether it is using its main boom or an extension
jib, and whether it has been equipped with an Aerial Wok Plaorm. Every model SPYDERCRANE is dierent, so the LMI will only allow
you to make conguraon changes suitable for your SPYDERCRANE. For instance, the URW547 will NOT have an opon for a jib while
the URW706 has mulple Jib and Main Boom opons. We will cover how to properly congure your SPYDERCRANE later in this guide.
4. Select Part-of-Line VFS
The icon next to this VFS shows a hook graphic with a white text number. Every me you push this VFS, the number value will go up by
one. The valid entries are 1 through 4. For 300-, 500-, and 700-Series, the primary hook block is the 4-Part Hook Block and the 1-Part
Hook Block is an oponal secondary hook block opon. We will cover conguring parts-of-line later in this guide.
5. Alerts Acknowledge VFS
This VFS, when pushed, will take you to the Alerts Acknowledge Screen, which displays any and all alerts being generated by the LMI.

13
Conguring the LMI for First-Time Use
If you are using the SPYDERCRANE for the rst me that day, you will need to
congure the LMI for use.
Aer the LMI has completed its start-up sequence , it will display the Congura-
on Required Screen. The Conguraon Require Screen has faint line drawing of the
deployed SPYDERCRANE in the background and a large red queson mark in the
foreground. Since the LMI has not been congured, the CMU will also be generang
a CODE 15. To begin using the SPYDERCRANE for liing operaons, you will need to congure the LMI.
The rst step is to press the Go To Crane Conguraon VFS...
1
2
3
4
5
The Crane Conguraon Screen VFS’s
The Crane Conguraon Screen contains all of the user-selectable crane conguraon opons for your specic SPYDERCRANE. Depend-
ing on your model SPYDERCRANE, you may see dierent opons than the ones depicted in this graphic, which is from a URW376. At a mini-
mum, you will need to congure the Deployment State and whether an AWP is installed.
1. Congure Deployment State VFS
When you press this VFS, you will be taken to the Congure Deployment State Screen, which idenes the available Deployment States
for your SPYDERCRANE.
2. Congure AWP Status VFS
When you press this VFS, you will be taken to the Congure AWP Status Screen, where you will select whether you have installed an
AWP.
3. Congure Searcher Hook Status VFS
When you press this VFS, you will be taken to the Congure Searcher Hook Status Screen, where you will select whether you have in-
stalled a Searcher Hook.
3. Congure Boom Status VFS
When you press this VFS, you will be taken to the Congure Boom Screen, where you will select a boom and jib conguraon from the
available opons. For every SPYDERCRANE OTHER than the URW706, the Congure Boom Screen will have VFS’s that display the avail-
able boom and jib lt opons.
5. Selecon Dial FFS
For the URW706, there are more than eight dierent boom and jib installaon and lt opons. When conguring the boom of the UR-
W706, you will use the Selecon Dial FFS to scroll through the various opons. The name of the opon will be displayed in the text box
on the top of the screen and the image in the center of the screen will depict the selected opon.

14
Selecng and Saving a Crane Conguraon Opon
When you push one of the go to opon conguraon VFS’s, you will be taken to the appropriate conguraon screen where you need
to select the appropriate conguraon opon AND save it...
Conguring the Deployment State
The Deployment State Conguraon Screen shows a noonal deployed
SPYDERCRANE from an overhead view. Each selectable Deployment State will
have its own icon and VFS on the le side of the LMI Screen. In most cases,
there will be three available Deployment States: NOT-EXT, HALF-EXT, and MAX
-EXT.
When you select the Deployment State Conguraon VFS that matches
your SPYDERCRANE’s actual Deployment State, the icon next to the VFS will
switch to a dark blue background.
Once you have selected the Deployment State that you want, you will
need to push the Set Enter VFS TWICE, once to set the conguraon you have
selected and again to save it to the LMI Computer.
If you have successfully congured the Deployment State, the LMI Screen
will revert to the Crane Conguraon Screen and the Congure Deployment
State VFS will have a dark blue background to its icon. This signals to you that
the Deployment State has been congured and that you can move on to the
next crane conguraon opon.
When selecng a Deployment State conguraon in the LMI, it is im-
portant that you select the Deployment State that the SPYDERCRANE is actual-
ly in. As a safety measure, the LMI system monitors limit switches associated
with the horizontal extension cylinder of the outriggers and it can determine
whether the outriggers have actually been deployed to MAX-EXT, HALF-EXT, or
NOT-EXT. If the LMI detects that the Deployment State of the outriggers IS
NOT the same as the one that you selected in the conguraon screen, it will
index the load chart appropriate for the Deployment State that the LMI has
determined is correct.
Conguring the Searcher Hook and
AWP Status
Seng the Searcher Hook and AWP installaon
status works exactly the same way, so we will describe
them together.
When you select the Congure AWP/Searcher
Hook Status VFS, you will be taken to the appropriate
status conguraon screen. For both the AWP and the
Searcher Hook, the choices are either one is equipped
or one is not equipped.
Select the appropriate VFS, which will turn the
icon next to the VFS dark blue and then push the Set
Enter FFS twice to save the conguraon selecon and
return to the Crane Conguraon Screen.

15
Conguring the Boom and Jib Status
Again focusing on the URW376, when you select the Boom
and Jib Conguraon Screen, you will need to select the boom and
jib conguraon of your SPYDERCRANE. For the URW376, you
have ve opons: main boom (jib stored), jib installed at Tilt Angle
0°, jib installed at Tilt Angle 20°, jib installed at Tilt Angle 40°, or jib
installed at Tilt Angle 60°.
When you select a VFS on this screen, icon next to the VFS will
have a dark blue background, and pressing Set Enter FFS twice will
save the selected conguraon and return you to the Crane Con-
guraon Screen.
If you have congured all of the selectable conguraon op-
ons, the available VFS’s will all have dark blue backgrounds, indi-
cang that the conguraon item has been saved. Pressing the Set
Enter FFS will return you to LMI Operaons Mode Screen.
The Operaons Screen VFS’s
The Operaons Screen is the one you will use the most when operang the SPYDERCRANE for crane operaons. Before going over the
details on the screen itself, we will go over the ve acve VFS’s for the Operaons Screen.
1. Set Crane Limits VFS
This VFS will take you to the Crane Limits Screen where you can set warnings based on boom angle, working radius, and p height.
2. Brightness Control VFS
This VFS will increase the brightness of the LMI screen by 10%. There are six sengs (50%, 60%, 70%, 80%, 90%, and 100%), and when
you reach 100% brightness and press the VFS again, it will restart at 50% brightness.
3. Return to Operaons Screen VFS
This VFS, when pressed, will return you to the Operaons Screen without making conguraon changes or saving changes in progress.
This is a persistent VFS and will appear in mulple screens.
4. Alert Acknowledge VFS
This VFS, when pressed, will take you to the Alerts Screen of the LMI.
5. Mute Alarm VFS
This VFS, when pressed, will mute any alarm the LMI is generang through its internal speaker. If you mute an alarm and subsequently
another alert is generated, a new alarm will sound and must be muted separately.
Compleng the Crane Conguraon
When you return to the LMI Operaons Mode Screen, the su-
perimposed queson-mark will be gone. From this screen, you need
to set the parts-of-line that will correspond the installed Hook Block
(either 1-Part or 4-Part).
Push the Parts-of-Line VFS unl the number matches and then
push the Set Enter FFS twice to go to the Operaons Screen.
1
2
3
4
5

16
The Operaons Screen Data Elements
The data elements on the Operaons Screen are non-interacve data blocks that provide you situaonal awareness informaon on
your SPYDERCRANE’s current conguraon, load capacity, and alert status.
1. Load Bar
The Load Bar is a three-color horizontal bar that provides an at-a-glance status of the SPYDERCRANE’s overall stability as a funcon
of its load fracon. Load fracon is the actual load weight being held by the SPYDERCRANE’s boom divided by its rated load capacity
and is expressed as a percentage.
As the load fracon increases, the Load Bar will begin to “light up” from the le-to-the-right. A load fracon of up to 79-precent
will light up the green secon of the Load Bar. A load fracon from 80-percent to 99-percent will light up the yellow secon of the Load
Bar. A load fracon of more than 99-percent will light up the red secon of the Load Bar. The specic load fracon is displayed in a
small text box in the right secon of the Load Bar.
2. Boom Length Data Block
The Boom Length Data Block indicates the length of the boom in feet and tenths of feet. This boom is sll in its stored condion so
this the minimum boom length.
3. Working Radius Data Block
The Working Radius Data Block indicates the working radius of the SPYDERCRANE in feet and tenths of feet.
Working radius is calculated from the boom length and boom angle of the SPYDERCRANE.
4. Tip Height Data Block
The Tip Height Data Block reports the calculated p height of the SPYDERCRANE in feet and tenths of feet.
5. Installed Hook Block Indicator
This indicator displays the currently installed hook block.
6. Boom Angle Data Block
This data block indicates the boom angle in degrees and tenths of degrees. This boom is sll stored so it is registering as half-a-
degree below the horizontal.
7. Indexed Load Chart Indicator
The indexed load chart indicator displays the le number of the load chart that the LMI is using (indexed), which is based on the
SPYDERCRANE’s deployment state. “1” is the MAX-EXT load chart. “2” is the HALF-EXT load chart. “3” is the NOT-EXT load chart.
8. A2B Acve Alert
During normal operaons, this indicator is faded out. When the LMI detects an An-Two-Block (A2B) condion, the indicator lights
up in bright red.
9. Rated Load Capacity Indicator
The rated load capacity indicator displays the rated load capacity of the SPYDERCRANE based on the deployment state/indexed
load chart, working radius, boom length, and installed hook block (parts-of-line).
10. Actual Weight Indicator
The Actual Weight Indicator displays the approximate weight being held by the SPYDERCRANE’s boom, including the hook block,
rigging, and the part(s) of wire rope between the Sheave Pin and the hook block.
11. Alerts Pop-Up
The Alert Pop-Up appears on the boom right of the screen and can be color-coded and contains a 4- to 6-digit alphanumeric code
that can be diagnosed. Typically, a yellow background pop-up indicates a user-entered condion has been met (like an LMI Limit has
been reached). A red background pop-up indicates an operaons-halng alert, or error, condion exists within the LMI system.
1
3
2
4
5
6
78910 11

17
Using the LMI
The LMI Operaons Mode Screen versus the Operaons Screen
If the LMI starts-up and the LMI Mode Operaons Screen has a red queson-
mark superimposed over the central graphic you MUST make conguraon
changes before you can go to the Operaons Screen.
If the LMI starts-up and the LMI Mode Operaons Screen DOES NOT have a red
queson-mark superimposed over the central graphic you can go directly to the
Operaons Screen by pushing the Set Enter FFS.
Using the Load Bar
The Load Bar tells you the SPYDERCRANE’s load fracon, the closer your SPYDER-
CRANE actual load weight is to its rated load capacity, the greater the fracon.
When the Load Bar is in the red, the load fracon is 100% and the LMI will direct the CMU to execute a CODE 15 FKO; at that point you
can only lower the load to ground or reduce the working radius.
The Load Bar is funconally ed to the Safety Beacon, located on your SPYDERCRANE’s roadside, on the outside of the Operator’s Sta-
on; when you running the SPYDERCRANE in remote control, you can use the Safety Beacon to gain situaonal awareness: when the
Safety Beacon’s yellow lamp is lit, the load fracon is between 80% and 99%, for instance.
Understanding How the LMI Measures the Actual Load Weight
The LMI system includes a pair of transducers in the Li Cylinder: one measures cylinder pressure at the base of the cylinder and the
other measures pin pressure. When a load is aached to the end of the SPYDERCRANE’s boom, that weight is applying pressure on the pin,
forcing it into the cylinder. In response, the SPYDERCRANE’s hydraulic system is applying hydraulic pressure in the cylinder to counteract
the pin pressure. When the LMI is reporng an actual load weight, what it is actually measuring is the hydraulic pressure needed to over-
come the pressure caused by the load weight.
When the load is moving, from either crane movement or from load swing, the extra momentum and kinec energy is going to in-
crease pressure and the actual load weight reading on the LMI will increase, or oscillate up and down. The actual load weight reading is
most accurate when the load is staonary.
Raising the Boom to Maximum and the CODE 15 FKO
When you BOOM UP to maximum, the pin of the Li Cylinder is extended to its physical limit (“boomed out”). When this happens,
the hydraulic system will aempt to compensate by adding more and more pressure to get the pin to move. Since the pin CAN’T move any
further, even when the hydraulic system reaches its maximum safe pressure limit, the LMI will interpret this as an overload situaon. Basi-
cally, the LMI will suddenly think that the load fracon has jumped to over 150% and it will generate an overloading alert. The LMI will send
this alert signal to the CMU and the CMU will generate a CODE 15 FKO.
Recovering the SPYDERCRANE when the Boom is raised to 80°
When the CMU is reporng CODE 15, all of the funcons that would normally INCREASE working radius are disable (“kicked-out”). Un-
fortunately, this includes BOOM DOWN; meaning that you cannot recover the boom when it has been raised to 80°, by normal means. In
this case, the only way you will be able to lower the boom is by temporarily disabling the CMU’s safety funcons.
Push and hold the Safety Bypass Switch to bypass ALL of the SPYDERCRANE’s
safety systems. While holding the Safety Bypass Switch with your le hand, you will
need to use your right hand to command a BOOM DOWN. You only need to lower
the boom three to seven degrees, so apply BOOM DOWN power SLOWLY. If you
watch the LMI Load Bar, you will see it suddenly drop back into the green secon;
when this happens, you can release the Safety Bypass Switch and connue normal
operaons.
The Safety Bypass Switch is located between the Le-Side and Forward Con-
soles, below the CMU Code Indicator; next to your le knee.
Safety Bypass

18
The 110V Baery QuiQ Charger Status Panel
QuiQ Charger Status Panel
The QuiQ Charger and its baery array are
installed to the top of the carrier, underneath
the stored boom. The QuiQ Charger Status Pan-
el can be viewed through a cutout on the baery
array cover.
Depending on the build-date of your
SPYDERCRANE, the status panel can be tucked in
prey far under the cover and you may need to
unlock and move Outriggers #1 and #2 out of the
way.
Regardless of the build date, the QuiQ
Charger Status Panel is always viewable from the
roadside of the SPYDERCRANE.
QuiQ Charger Status Panel
AMMETER LAMPS (Bulk Charge State)
Displays approximate baery charge level during the bulk charging phase (up to
60%).
If FLASHING, the baery array is overheang and NOT CHARGING.
ABSORPTION PHASE INDICATOR
If SOLID YELLOW, baeries are at 80% (Bulk Phase Complete)
If FLASHING YELLOW, baeries are disconnected
CHARGE COMPLETION INDICATOR
If SOLID GREEN, baeries are charged, charger is in Maintenance Phase
If FLASHING GREEN, the absorpon charge phase is ended, and the nishing
phase is in process.
AC INDICATOR
If SOLID AMBER, AC Power input is good
If FLASHING AMBER, AC Power Voltage is LOW, check voltage at power point
and/or extension cord
FAULT INDICATOR
If FLASHING RED, Quiq Charger has an internal error; aempt re-boot.
If ashing returns, check the ash code for maintenance support:
Single ash (ash-o-ash…):
This indicates that there is a problem with the connecon between
the charger and the baery OR the baery array is out of its safe
operang temperature range (14- to 122-degrees, Fahrenheit).
Double ash (ash-ash-o-ash-ash-o…):
This indicates that detected baery voltage is out-of-range (less
than 36V, or more than 55.2V).
Triple ash:
This indicates a charging meout, either because the baery array
is NOT reaching the required voltage OR the baery charger is
overheang. This could be due to a bad connecon to the baery
array.
Four ashes:
This indicates that the baery array cannot be charged to mini-
mum voltage. This is could be due to a damaged baery cell.
Five ashes:
This indicates that charging has stopped due to overheang within
the 110V baery system. This could be due to insucient airow
around the SPYDERCRANE.
Six ashes:
A baery charger internal fault, aempt unplugging for more than
15 seconds and plugging back in.

19
The 220V Electrical Powerplant and Power Distribuon Box
The 220V Electrical Powerplant
If your SPYDERCRANE is equipped with the 220V Electrical Powerplant, you can run all of the SPYDERCRANE’s funcons, including trav-
eling, while plugged in to a compable 220V, 3-phase shore power source. On the back of the SPYDERCRANE Operator’s Staon, the Power
Distribuon Box (PDB).
1
2
3
The PDB
1. Start and Stop Buons
Aer the 220V Electrical Powerplant’s Power Distribuon Box (PDB) has
been plugged into an appropriate shore power source, pushing the green
Start Buon on the PDB will start the 220V Electrical Powerplant. The
red Stop Buon on the Power Distribuon Box (PDB) of the 220V Electrical
Powerplant will stop the electric motor of the powerplant. of the Load Bar.
2. PDB Door
The interior of the PDB can be accessed through this door. To open the
door, insert a at-head screwdriver into the door latch slot and turn counter-
clockwise to unlatch.
3. Power Cord Port
This is the port for inserng the 220V Power Cord.

20
Component Check For: Sat. Unsat. N/A
Carrier Rear
Hydraulic Oil Tank Damage, corrosion, and oil level
Boom Tip A2B Switch, Weight, and Lanyard
Hook Block and Safety Latch Corrosion and damage
Wire Rope Socket and Clip Corrosion and damage
Operator’s Staon
Bubble Level Damage, usability
Alarms ON Outrigger Mode Alarm, Voice Warning System, TPD Alarm
Switches and Buons Damage, corrosion, and mechanical funcon
Track Control Levers Damage, corrosion, and mechanical funcon
LMI Display and Cord Reel Damage and funcon
Decals Readability, presence
CMU Code Indicator Damage and funcon
Carrier Roadside
Diesel Engine Coolant level, oil level
1-Part Hook and Safety Latch Corrosion and damage
Storage Compartment Proper contents
Stored Jib Damage, corrosion, all items accounted for
Outrigger #1 Damage or corrosion to structural members, damage to hydraulics/electronics
Searcher Hook and Safety Latch Corrosion and damage
Boom (Right-Side) Damage, corrosion
Li Cylinder Damage, corrosion, oil leakage
Turret (Winch Gearbox) Damage, corrosion, oil leakage
Roadside Track and Drive Wheel Damage, corrosion, oil leakage
Outrigger #2 Damage or corrosion to structural members, damage to hydraulics/electronics
Carrier Front
Carrier Headlamp Damage, corrosion, and funcon
Emergency Stop Damage and funcon
Carrier Curbside
Outrigger #3 Damage or corrosion to structural members, damage to hydraulics/electronics
Turret and LMI CANBUS Damage or corrosion to structural members, damage to hydraulics/electronics
Li Cylinder Damage, corrosion, oil leakage
Curbside Track and Drive Wheel Damage, corrosion, oil leakage
Outrigger #4 Damage or corrosion to structural members, damage to hydraulics/electronics
Daily Inspecon
This manual suits for next models
8
Table of contents
Other Smiley Lifting Solutions Lifting System manuals
Popular Lifting System manuals by other brands

Bend-Pak
Bend-Pak LR-60P Service manual
Bend-Pak
Bend-Pak PL-6KDT Installation and operation manual
Bend-Pak
Bend-Pak XPR-10A Service manual
PRO LIFTS
PRO LIFTS VMB TE-074 Operating instructions & user manual

Bend-Pak
Bend-Pak XPR-12FDL Installation and operation manual

Bend-Pak
Bend-Pak XPR-9DT Installation and operation manual
