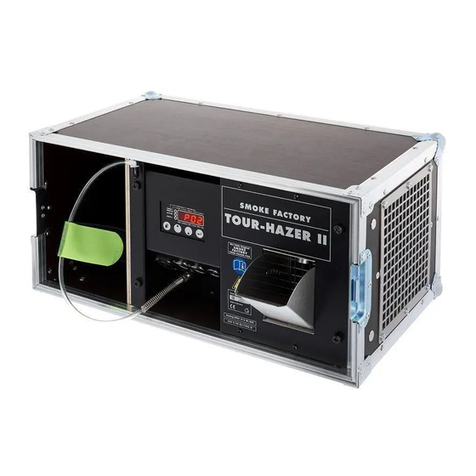
Smoke Factory Carpet Crawler User manual

www.smoke-factory.de

Alle Smoke Factory Nebelmaschinen sind Qualitätspro-
dukte auf dem neuesten Stand der Technik. Unsere lang-
jährige Erfahrung, die kontinuierliche Weiterentwicklung
und Optimierung unserer Produkte insbesondere unter
praxisgerechten Gesichtspunkten haben uns auf dem
Gebiet der Bühnentechnik zu einem der führenden Her-
steller von Nebelmaschinen gemacht. Die sehr enge
Verzahnung von Entwicklungs-, Fertigungs- und Montage-
arbeiten in unserem Werk in Hannover sind der Garant
für das Qualitätssiegel „Made in Germany“.
Herzlichen Glückwunsch zum Erwerb einer Smoke
Factory Nebelmaschine. Wir bedanken uns für Ihr
Vertrauen mit der Gewissheit, dass Sie mit diesem Gerät
zukünftig sicher und komfortabel arbeiten werden.
Wir bieten Ihnen sowohl Komplett- als auch Individual-
lösungen an. Unsere Smoke Factory Mitarbeiter sind
qualifizierte Profis mit jahrelanger Erfahrung, die Ihre
Aufgabenstellung verstehen und mit dem geballten Know-
how des gesamten Smoke Factory Teams in genau
zugeschnittene Lösungen umsetzen.
Stellen Sie uns Ihre Aufgabe! Wir beraten wir Sie gerne
und finden aus unserem Nebelmaschinen-Programm mit
Sicherheit die für Sie optimale Lösung.
Bitte nehmen Sie sich Zeit, diese Betriebsanleitung sorg-
fältig zu lesen, um das Gerät optimal zu bedienen. Bitte
beachten Sie insbesondere die sicherheitsrelevanten
Aspekte und handeln Sie stets verantwortungsbewusst.
Wir wünschen Ihnen viel Spaß mit der Smoke Factory
Nebelmaschine.
All Smoke Factory fog machines are quality products
with state-of-the-art of technology. Many years of
experience, continuous development and optimization of
our products especially under practical considerations
have made us to one of the leading manufacturers of fog
machines in the field of stage equipment. Due to the very
close integration of design, manufacturing and assembly
work in our factory in Hannover we are to stand behind
the quality seal "Made in Germany".
Congratulations on your purchase of a Smoke Factory
fog machine. Thank you for your trust in our equipment
and services. We are convinced that you will be working
safely and comfortably with our products in the future.
We offer both complete and customized solutions. Our
Smoke Factory employees are qualified professionals
with years of experience whose expertise will help to
troubleshoot your problems and react with concentrated
expertise and efficiency by offering you precisely tailored
solutions.
Feel free to contact us with questions! We will be pleased
to advise you and will certainly find out the best solution
for your application with our comprehensive range og fog
machines.
Please take the time to read this operating manual
carefully. It will provide you with valuable information that
will allow you to operate your machine optimally. Please
note in particular the safety aspects and always act
responsibly.
Enjoy the function and versatility of your Smoke Factory
fog machine.
Vorwort
Mario Rincon, Geschäftsführer Mario Rincon, General Manager
Introduction

Inhaltsverzeichnis Index
1 Allgemeines 1
2 Lieferumfang 2
3 Sicherheitshinweise 3
4 Bezeichnung des Gerätes 4
4.1 Pin-Belegung 5
5 Inbetriebnahme 5
5.1 Auswahl des Standortes 6
5.2 Fluid 6
6 Arbeiten mit dem Carpet Crawler 6
6.1 Wechsel der CO -Flasche
27
6.2 Display und Betriebsmodi 7
6.3 Manueller Betrieb 8
6.4 Presets 8
6.5 Betrieb über Analogeingang 10
6.6 Betrieb über DMX-Eingang 11
6.7 Betrieb über Ethernet 12
6.7.1 Betrieb über ARTNET 12
6.7.2 Betrieb über sACN 13
6.7.3 Einstellen der IP-Adresse 14
6.8 Ausschalten des Gerätes 15
7 Einstellungen 15
7.1 Hintergrundbeleuchtung 15
7.2 Bildschirmschoner 16
7.3 Geräteinformationen, Firmware Update 17
7.4 Auf Werkseinstellungen zurücksetzen 17
8 Pflege und Wartung 18
9 Fehlerbehebung 18
10 Technische Daten 19
11 Zubehör 19
12 Garantiebestimmungen 20
13 Kontakt 21
1 General 1
2 Scope of delivery 2
3 Safety instructions 3
4 Description of the device 4
4.1 Pin assignment 5
5 Commissioning 5
5.1 Selecting the location 6
5.2 Fluid 6
6 Working with the Carpet Crawler 6
6.1 Changing of CO bottle
27
6.2 Display and operating modes 7
6.3 Manual operation 8
6.4 Presets 8
6.5 Operation via analog input 10
6.6 Operation via DMX input 11
6.7 Operation via Ethernet 12
6.7.1 Operation via ARTNET 12
6.7.2 Operation via sACN 13
6.7.3 Setting the IP address 14
6.8 Turn off the device 15
7 Settings 15
7.1 Background lighting 15
7.2 Screen saver 16
7.3 Device information, firmware update 17
7.4 Reset to factory settings 17
8 Maintenance and service 18
9 Troubleshooting 18
10 Technical specifications 19
11 Accessories 19
12 Warranty conditions 20
13 Contact 21

1 Allgemeines 1 General
Der Carpet Crawler ist ein hochwertiger CO Kühlvorsatz zum
2
Herunterkühlen von Shownebel um Bodennebel zu erzeugen.
Der Carpet Crawler wird sowohl als CO Kühlvorsatz ohne Nebelma-
2
schine (60 cm breit x 20 cm hoch x 17,6 cm tief) oder komplett im
Case mit Nebelmaschine (65 cm breit x 36 cm hoch x 91,5 cm tief)
angeboten.
Die Case-Version ist mit einem 5 Liter Kanisterfach und Bohrungen für
Captain D. und Data II ausgestattet.
Zur Erzeugung des Bodennebels wird eine Hochdruck CO -Flasche mit
2
Steigrohr benötigt. Diese können bei Kohlensäurewerken oder bei
Getränkezulieferbetrieben gemietet und evtl. auch nachgefüllt werden.
Der mit dem Carpet Crawler gelieferte Schlauch ist für den Anschluss
an ein W 21,8 x 1 1/4" rechts-male-Gewinde vorgesehen. Bei einem
anderen Gewindeanschluss der CO -Flasche ist ein entsprechender
2
Adapter einzusetzen.
Zeichenerklärung
Hinweis, Achtung
Anzeige auf dem Touchdisplay
Bedienfeld auf Touchdisplay betätigen
The Carpet Crawler is a high-class CO cooling device for cooling
2
down of show fog to produce ground fog.
The Carpet Crawler is available both as a CO cooling attachment
2
without fog machine (60 cm wide x 20 cm high x 17.6 cm deep) or as
a complete integrated unit offered with both case and fog machine
(65 cm wide x 36 cm high x 91.5 cm deep).
The cased version is equipped with 2 empty compartments, one to fit a
5 liter bottle and the other Captain D. or Data II fog machine.
To generate the ground fog, a high-pressure CO cylinder with riser is
2
required. These can be rented at any construction, energy, chemical or
beverage supply company and can also possibly be refilled.
The tube delivered with the Carpet crawler is provided for connection
to a W 21.8 x 1 1/4 "right-male-threaded. In case of another thread
connecting the CO bottle an appropriate adapter must be used.
2
Legend to symbols
Note, Warning
Display on the touch panel
Press button on the touch panel
1
!!

1 x Carpet Crawler [1]
1 x Nebelschlauch [2]
1 x PowerCon True1 Kabel [3]
1 x CO Druckschlauch [4]
2
1 x Filter für CO Schlauch [5]
2
1 x Bedienungsanleitung
1 x Carpet Crawler [1]
1 x Fog hose [2]
1 x PowerCon True1 cable [3]
1 x CO pressure hose [4]
2
1 x Filter for CO hose [5]
2
1 x Operating manual
2 Lieferumfang 2 Scope of Delivery
2
[2]
[1]
[3]
[4]
[5]

3 Sicherheitshinweise 3 Safety Instructions
Im Umgang mit flüssigem Kohlenstoffdioxid (CO ) und den
2
dazugehörigen Behältern und Ausrüstung ist geschultes
Fachpersonal unerlässlich.
Achtung Erstickungsgefahr bei zu hoher Konzentration von
Kohlenstoffdioxid (CO ) im Raum! CO ist schwerer als Luft,
2 2
sammelt sich deshalb am Boden. Die max. zulässige Arbeits-
platzkonzentration beträgt 0,5 Vol% (MAKWert 5.000 ppm).
Bitte beachten Sie, dass in verschiedenen Ländern auch andere Vor-
schriften für den Umgang mit Kohlenstoffdioxid (CO ) gelten können.
2
Vorsicht heißer Dampf! Für Personen und wärmeempfind-
liche Gegenstände gilt ein Sicherheitsabstand von mindestens
1,50 m vor der Nebelmaschinenöffnung.
Im laufenden Betrieb ist das Hantieren an der Nebelmaschinen-
öffnung strengstens verboten! Mit brennbaren Materialien ist
ein Mindestabstand von 60 cm einzuhalten.
Im laufenden Betrieb einer Nebelmaschine können vereinzelt heiße
Fluid-Tröpfchen austreten. Lassen Sie diese nicht zu einer Gefahr für
Menschen werden.
Erkrankte Personen oder Personen mit Vorschädigungen der Atem- und
Lungenfunktionswege sowie Neigung zu Allergien sollten den Kontakt
zu Theaternebel meiden!
Für Schäden, die aus nicht bestimmungsgerechter Verwendung oder
Nichtbeachtung der Betriebsanleitung hervorgehen, trägt der Benutzer
die alleinige Verantwortung. Der Hersteller übernimmt keine Haftung.
Veränderungen an den sicherheitsrelevanten Bauteilen des Geräts sind
strengstens verboten!
ACHTUNG!
ŸEingeschaltete Geräte nie unbeaufsichtigt lassen!
ŸNiemals in Zündquellen wie offenes Feuer oder Pyro-Effekte nebeln!
ŸSichtweite nie unter 2 m sinken lassen! Sie tragen die Verantwortung
für das Unfallrisiko von Personen im vernebelten Raum.
ŸNiemals ein an das Stromnetz angeschlossenes Gerät öffnen!
ŸNebelfluide nicht einnehmen oder äußerlich anwenden!
ŸVor Kindern fernhalten!
Bei Augenkontakt die Augen mit reichlich Wasser spülen. Bei einer
versehentlicher Einnahme unverzüglich einen Arzt aufsuchen. Verschüt-
tetes Fluid oder verspritzte Fluid-Tröpfchen können Rutschgefahr verur-
sachen. Nehmen Sie das Fluid auf und entsorgen es vorschriftsmäßig!
Die Smoke Factory Nebelfluide sind vollständig wasserlöslich und
biologisch abbaubar. Die bei Smoke Factory angewandte Methode,
Nebel mit Verdampfer-Nebelmaschinen zu erzeugen, ist die
ungefährlichste. Es ist uns kein Fall bekannt, in dem ein normal
gesunder Mensch durch diesen künstlichen Nebel in irgendeiner Weise
zu Schaden gekommen ist. Voraussetzung ist die Anwendung
professioneller Nebelgeräte mit korrekten Verdampfungstemperaturen
und den darauf abgestimmten Nebelfluiden.
In dealing with liquid carbon dioxide (CO ) and related
2
containers and equipment trained technical personnel is
essential.
Attention choking hazard at a too high concentration of
carbon dioxide (CO ) in the room! CO is heavier than air,
2 2
therefore collects at the bottom. The max. permissible work-
place concentration is 0.5% by volume (MAKWert 5,000 ppm).
Please note that in several countries other rules for dealing with carbon
dioxide (CO ) can apply.
2
Attention hot steam! For individuals and heat-sensitive objects
a minimum safety distance of at least 1.50 m from the aperture
of the fog machine is required.
During operation it is strictly forbidden to handle at the fog
machines aperture! With combustible materials a minimum
distance of 60 cm is required.
During operation of a fog machine sporadically it is possible that hot
fluid droplets can escape. Please take care to not let this become a
danger to humans.
People suffering from a history of respiratory illness and pulmonary
impairmant or with an inclination for allergies should avoid any
contact with artificially-produced fog!
The user is completely responsible for damages resulting from
improper use or non-observance of the operation manual . The
manufacturer assumes no liability.
Changes to the safety-relevant components of the device are strictly
forbidden!
ATTENTION!
ŸNever leave a switched on device unattended!
ŸNever generate fog into open flames or pyrotechnic effects!
ŸNever operate with visibility less than 2 m! You are responsible for
the risk of accidents by people in that location.
ŸNever open the device while connected to the electricity!
ŸNever ingest fogfluids or apply externally!
ŸKeep away from children!
Rinse immediately with plenty of water in the event of eye contact. See
a doctor immediately in an accidental ingestion. Spilled fluid or
splashed fluid droplets can cause slip hazard. Collect the fluid and
dispose according to regulations!
Smoke Factory fog fluid is completely water soluble and
biodegradable. Smoke Factory uses a practically non-hazardous
method to produce fog with vaporizing fog machines. We are unaware
of any case in which a normal healthy person was hurt by this artificial
fog. The prerequisite are the use of professional fog devices with
correct vaporization temperatures and the approved fog fluids.
3
!!
!!
!!
!!
!!
4 Bezeichnung des Gerätes 4 Description of the device
Vorderansicht:
[1] Bedienfeld mit Touchdisplay
[2] Analogeingang XLR-3pol.
[3] DMX-Eingang XLR-5pol.
[4] Ethernet Anschluss RJ45
[5] Nebelauslass, Mischkammer und Schlauchanschluss für einen
200 mm Schlauch
Rückansicht:
[6] CO -Anschluss
2
[7] Power Ein- und Ausgang PowerCon
[8] DMX-Ausgang XLR-5pol.
[9] Analogausgang XLR-3pol.
Front view:
[1] Control panel with touchpanel
[2] Analog input XLR-3pol.
[3] DMX input XLR-5pol.
[4] Ethernet connection RJ45
[5] Fog exhaust, mixing chamber and hose mounting for 200 mm
hose
Rear view:
[6] CO connection
2
[7] Power input and output PowerCon
[8] DMX output XLR-5pol.
[9] Analog output XLR-3pol.
Serial No.:
Made in Germany
www.smoke-factory.de
90 - 240 V AC, PowerCon True1 / 50 Hz - 60 Hz / 70 W
Close CO 2 bottle and exhaust the
CO2 hose before disconnecting.
For High Pressure Liquid CO2 with siphon tube.
Read manual before use!
Only use original Smoke Factory Fluid. Never
use cleaner or fragrances with this machine!
Carpet
Crawler
Analog DMX 512 in | out Ethernet
[2]
[3]
[3]
[4]
[5]
[1]
[7]
[7]
[8]
[9]
[6]
4

4.1 Pin-Belegung 4.1 Pin assignment
5 Pol.XLR (DMX):
Pin 1 = Ground (Masse)
Pin 2 = DMX-
Pin 3 = DMX+
3 Pol.-XLR (analog):
Pin 1= Ground (Masse)
Pin 2 = 0-10 V+ DC in
Pin 3 = 12 V+ DC out
5 Pol.XLR (DMX):
Pin 1 = Ground
Pin 2 = DMX-
Pin 3 = DMX+
3 Pol.-XLR (analog):
Pin 1= Ground
Pin 2 = 0-10 V+ DC in
Pin 3 = 12 V+ DC out
5
5 Inbetriebnahme 5 Commissioning
Nebelmaschine hinter dem Carpet Crawler aufstellen.
Falls vorhanden kann der PowerCon-Stecker der Nebelmaschine an
den Powerausgang [7] des Carpet Crawlers angeschlossen werden (bis
max. 3 kW/1,8 kW für USA).
DMX-Eingang/Analogeingang der Nebelmaschine mittels eines
5pol. XLR-Kabels/3pol. XLR-Kabels mit dem DMX-Ausgang [8]/Analog-
ausgang [9] des Carpet Crawlers verbinden.
CO -Flasche mit dem mitgelieferten Sicherheitsschlauch mit dem
2
Carpet Crawler verbinden.
ACHTUNG!
Besonders auf saubere Gewinde und Verschraubungen achten!
Diese sind mit einem geeigneten Werkzeug fest anzuziehen, so dass
kein CO unkontrolliert entweichen kann. Den Schlauch gegebenenfalls
2
mit CO reinigen!
2
Ventil der CO -Flasche vollständig öffnen.
2
Nun das mitgelieferte Netzkabel an den dafür vorgesehenen
Stecker [7] anschließen. Nach dem Einstecken den PowerCon-Stecker
drehen bis er einrastet.
Netzstecker in eine Schutzkontaktdose stecken.
Der Carpet Crawler ist nun betriebsbereit.
Für den Betrieb der an den Carpet Crawler angeschlossenen Nebel-
maschine ist die entsprechende Bedienungsanleitung zu beachten.
Nebelmaschinen benötigen eine gewisse Zeit zum Aufheizen - siehe
Bedienungsanleitung der Nebelmaschine. Warten Sie diese Zeit ab.
Bei Anschluss einer Nebelmaschine an den rückseitigen DMX-Ausgang
des Carpet Crawlers muss sichergestellt sein, dass an der Nebelma-
schine die DMX-Startadresse "001" eingestellt ist.
Place the fog machine behind the Carpet Crawler.
If available the PowerCon connector of the fog machine can be
connected to the power output [7] of the Carpet Crawler (max. 3 kW /
1.8 kW for USA).
Connect DMX input/analog input of the fog machine by means of
a 5-pin. XLR cable/3pin. XLR cable to the DMX output [8]/analog
output [9] of the Carpet Crawler.
Connect CO bottle with the supplied safety hose to the Carpet
2
Crawler.
ATTENTION!
Pay particular attention to clean threads and fittings!
These threads and fittings must be tightened with a suitable tool, so
that no CO can escape uncontrollably. Clean the hose if necessary
2
with CO !
2
Open the valve of the CO bottle completely.
2
Now connect the supplied power cord to the appropriate
connector [7]. After plugging the PowerCon connector rotate until it
snaps.
Insert the plug into a grounded socket.
Carpet Crawler is now ready to use.
For the operation of the fog machines connected to the Carpet
Crawler the relevant instructions must be observed.
Fog machines require a certain time to heat - see operation manual of
the fog machine. Wait for this time.
When connecting a fog machine to the DMX output on the rear side of
the Carpet Crawler, make sure that the DMX start address of the fog
machine is set to "001".
1 1
2 2
3 3
4 4
5 5
6 6
7 7
! !

6
Der Standort des Carpet Crawlers ist wie folgt zu wählen:
1. unbedingt trocken
2. staub- und schmutzfreie Luft
3. vibrations- und erschütterungsfrei
4. nicht entflammbare Stellfläche
5. Belüftung mit frischer und nebelfreier Luft
6. Umgebungstemperatur zwischen 5° C und 45° C
7. relative Luftfeuchte von unter 80 %
Terms to select a location of the Carpet Crawler:
1. absolutely dry
2. dust and dirt-free air
3. vibration- and shock free
4. non-flammable place
5. ventilation with fresh and fog-free air
6. ambient temperature between 5° C and 45° C
7. relative humidity of less than 80 %
5.1 Auswahl des Standortes 5.1 Selecting the location
Fluide zum Erzeugen von Bodennebel
Verwenden Sie zum Erzeugen von Bodennebel kein extrem langanhal-
tendes Fluid, da dieses warm werden und aufsteigen könnte noch bevor
es sich aufgelöst hat. Wir raten Ihnen zu:
ŸCarpet Crawler Fluid
ŸFast-Fog
ŸSuper-Fog
Verwendung als Nebelmaschine, ohne Zusatz von CO2
Sollte die Nebelmaschine ohne den Kühlvorsatz eingesetzt werden, so
ist das für die Nebelmaschine passende Fluid zu verwenden.
Bei Verwendung von Fluids fremder Anbietern erlischt die Garantie auf
alle mit dem Fluid in Berührung kommenden Teile.
BITTE BEACHTEN!
Der Verdampfer unserer Geräte muß NICHT gereinigt werden! Frei
käufliche Reinigungsflüssigkeiten, sogenannte Cleaner, können dem
Verdampfer schaden! Die Garantie des Carpet Crawlers erlischt durch
den Einsatz von Cleanern.
Fluids for generating ground fog
Do not use extremely long lasting fluids for producing ground fog, as
this will warm up the fog and it could rise even before it has dissolved.
We advise you to use:
ŸCarpet Crawler Fluid
ŸFast-Fog
ŸSuper-Fog
Use as a fog machine, without the addition of CO2
In case that the fog machine is used without the cooling attachment
the fluid suitable for the fog machine has to be used.
Using fluids from foreign vendors will void the warranty on all parts
that are in direct contact with the fluid.
PLEASE NOTE!
The vaporizer of our machines does not have to be cleaned! Free
purchasable cleaning fluids, so-called cleaner can damage the
vaporizer! The guarantee of the Carpet Crawler is void by the use of
cleaners.
5.2 Fluid 5.2 Fluid
! !
6. Arbeiten mit dem Carpet Crawler 6. Working with the Carpet Crawler
Die eingesetzte Nebelmaschine kann auch nach dem Einbau in das
Case noch als „normale“ Nebelmaschine genutzt werden. Hierzu ein-
fach die vorhandene Ansteuerung des Carpet Crawlers nutzen ohne
die Kanäle der Kühleinheit anzusteuern.
Die Aufheizzeit der Nebelmaschine ist der Bedienungsanleitung der
eingesetzten Maschine zu entnehmen. Eine Smoke Factory Captain
D. oder Data II Nebelmaschine ist nach ca. 7 Minuten betriebsbereit,
was durch Blinken der grünen „ready LED“ angezeigt wird. Dauerhaft
grünes leuchten der LED zeigt die optimale Betriebstemperatur an.
The fog machine used can also be used as a "normal" fog machine
even after installation in the case. Therefore just use the control unit of
the Carpet Crawler but do not control the channels of the cooling unit
anymore.
For the heating time of the fog machine please refer to the users
manual of the used fog machine. A Smoke Factory Captain D. or
Data II fog machine is ready for operation after about 7 minutes,
which is indicated by a flashing green "ready LED". Permanently green
LED lights indicates the optimal operating temperature.

7
6.1 Wechsel der CO -Flasche
26.1 Changing of CO bottle
2
6.2 Display und Betriebsmodi 6.2 Display and operating modes
Carpet Crawler wie unter Ausschalten (s. 6.8) beschrieben aus-
schalten.
CO -Flasche wechseln.
2
Gerät nun wieder wie unter Inbetriebnahme (s. 5) beschrieben
hochfahren.
Turn off the Carpet Crawler as described in “Off the device“ (see
item 6.8).
Change CO bottle
2
Now restart the device as described in “Commissioning“ (see
item 5).
1 1
2 2
3 3
Der Carpet Crawler kann in unterschiedlichen Modi betrieben werden.
Grundsätzlich gilt folgende Hierarchie:
6.3 Manueller Betrieb (wird von allen Modi überschrieben)
6.5 Betrieb über Analogeingang
6.6 Betrieb über DMX-Eingang
6.7 Betrieb über Ethernet (überschreibt alle Modi)
Nach dem Start des Carpet Crawlers wird das Smoke Factory Logo
und anschließend das Hauptmenü angezeigt - s. Abbildung 1.
Die Bedienelemente des Hauptmenüs:
Analog: Ausgewählter Modus und aktuelle Spannung des
Gerätes - s. Kapitel 6.5
DMX: DMX aktiv und ausgewählte Adresse - s. Kapitel 6.6.
ETH: Ansteuerung des Carpet Crawler über Ethernet, eingestelltes
Protokoll - s. Kapitel 6.7.
USED CO2: Verbrauchtes CO - Achtung, dies ist ein ungefährer
2
Wert.
RESET: Wert auf 0 zurücksetzen, nachdem eine neue CO -Flasche
2
angeschlossen wurde.
FOG, AIR, CO2: Aktuelle Ausgangswerte für Nebel, Luftzufuhr
und CO .
2
MODIFY: Werte ändern.
PRESET: S. Kapitel 6.3 manueller Betrieb.
SETTINGS: Gehe ins Einstellungsmenü.
START: Manueller Start des Nebelvorgangs.
The Carpet Crawler can be operated in different modes. The following
settings hierarchy is observed:
6.3 Manual mode (will be overwritten of all other modes)
6.5 Operation via analog input
6.6 Operation via DMX input
6.7 Operation via Ethernet (overwrites all other modes)
After starting the Carpet Crawler first the Smoke Factory logo and
after a while the main menu is displayed - see Figure 1.
Operating elements of the main menu:
Analog: Selected mode and current voltage of the device - see
item 6.5
DMX: DMX enabled and selected address - see item 6.6.
ETH: Control the Carpet Crawler via Ethernet, selected protocol -
see item 6.7.
USED CO2: Consumed CO - Attention, this is just an
2
approximate value.
RESET: Value reset to 0, after a new CO bottle was attached.
2
FOG, AIR, CO2: Current output values for fog, air supply and
CO .
2
MODIFY: Change values.
PRESET: See item 6.3 manual mode.
SETTINGS: Go to settings menu.
START: Manual start of the fog process.
Abbildung 1 Figure 1
Abbildung 2 Figure 2
Abbildung 3 Figure 3

8
6.3 Manueller Betrieb 6.3 Manual operation
Abbildung 4
MODIFY
Bildschirm MANUAL MODE
START FOG -/+: Wert für Nebel ändern und einzeln starten.
> STOP FOG: Nebel stoppen.
START AIR -/+: Wert für Luftzufuhr ändern und einzeln starten.
> STOP AIR: Luftzufuhr stoppen.
START CO2 -/+: Wert für CO ändern und einzeln starten.
2
> STOP CO2: CO stoppen.
2
START ALL: Mit allen voreingestellten Werten starten.
> STOP ALL: Nebelvorgang stoppen.
BACK: Zurück zum Hauptmenü.
Im eingeschalteten Zustand ändern sich die Farbe des jeweiligen
Wertes für Nebel, Luftzufuhr bzw. CO .
2
Figure 4
MODIFY
Display MANUAL MODE
START FOG -/+: Change value for fog and start individually.
> STOP FOG: Stop fog.
START AIR -/+: Change value for air supply and start individ.
> STOP AIR: Stop air supply.
START CO2 -/+: Change value for CO and start individually.
2
> STOP CO2: Stop CO .
2
START ALL: Start with all preset values.
> STOP ALL: Stop fog process.
BACK: Back to main menu.
When switched on, the color of the respective value for fog, air
supply or CO changes.
2
6.4 Presets 6.4 Presets
Ein Preset ist eine voreingestellte Kombination von Nebel, Luftzufuhr
und CO . Der Carpet Crawler kann bis zu sechs verschiedene Presets
2
speichern - drei vorgegebene und drei benutzerdefinierbare.
In den voreingestellten Presets sind folgende Werte hinterlegt:
(1)* Fog: 35, Air: 20, CO2: 1 -> ~150 m² 10 cm hoch in 1 min.
(2)* Fog: 45, Air: 30, CO2: 2 -> ~150 m² 15 cm hoch in 1 min.
(3)* Fog: 50, Air: 30, CO2: 3 -> ~150 m² 20 cm hoch in 30 sek.
*ungefähre Werte, die stark vom Einsatzort abhängen
A Preset is a preset combination of fog, air supply and CO . The
2
Carpet Crawler can store up to six different presets - three predeter-
mined and three user-definable.
In the default presets the following values are stored:
(1)* Fog: 35, Air: 20, CO2: 1 -> ~150 m² 10 cm high in 1 min.
(2)* Fog: 45, Air: 30, CO2: 2 -> ~150 m² 15 cm high in 1 min.
(3)* Fog: 50, Air: 30, CO2: 3 -> ~150 m² 20 cm high in 30 sek.
*approximate values, which strongly depend on the location

9
6.4 Presets 6.4 Presets
1. Presets starten:
PRESET -/+: Über „-“ bzw. „+“ gewünschtes Preset 1, 2 oder 3
auswählen.
START: Manueller Start des Nebelvorgangs.
STOP: Nebelvorgang stoppen.
Beim Starten des Nebelvorgangs wechselt die Anzeige zum Manual
Mode. Hier können auch während des Betriebs die Werte beliebig
geändert werden.
Abbildung 5
2. Eigene Presets speichern:
Die zu speichernden Werte wie unter Punkt 6.3 beschrieben
einstellen.
BACK: Zurück zum Hauptmenü
SETTINGS
Bildschirm SAVE MANUAL SETTING
SAVE AS PRESET: Preset 4, 5, oder 6 auswählen.
SAVE: Preset speichern.
BACK: Zurück zum Hauptmenü.
1. Start Presets:
PRESET -/+: Press „-“ or „+“ to select the preferred Preset 1, 2
or 3.
START: Manual start of the fog process.
STOP: Stop fog process.
When the fog process has been started the display changes to
manual mode. In manual mode the values can be changed anytime
during operation
Figure 5
2. Save your own Presets:
Save the values as described in item 6.3.
BACK: Back to main menu
SETTINGS
Display SAVE MANUAL SETTING
SAVE AS PRESET: Select Preset 4, 5, or 6.
SAVE: Save Preset.
BACK: Back to main menu.

10
6.5 Betrieb über Analogeingang 6.5 Operation via analog input
Abbildung 6
Liegt am 0-10 V-Eingang des Carpet Crawlers eine Spannung von
mehr als1 V an wird das Gerät über den Analogeingang gesteuert -
vorausgesetzt es ist weder DMX noch Ethernet aktiv.
Im Hauptmenü wird unter ANALOG die Spannung und der gewählte
Modus angezeigt. Der aktuelle Zustand wird durch eine Farbverände-
rung des Wertes angezeigt.
Analogeingang einstellen:
ANALOG oder SETTINGS > ANALOG
Bildschirm SELECT ANALOG MODE
Modus DIRECT oder LATCHED auswählen:
DIRECT für XLR-Remote, LATCHED für Ein- und Ausschalten durch
kurzzeitigen Spannungsimpuls für beispielsweise Taster oder
Funkfernbedienung.
1. DIRECT:
DIRECT
1-5V PRESET
-/+: Preset wählen
5-9V PRESET
-/+: Preset wählen
ANALOG SAVE: Speichern und zurück
BACK: Ohne speichern zurück
1-5 V entspricht etwa der unteren Hälfte des Drehknopfes auf der
XLR-Remote, 5-9 V der oberen Hälfte.
Figure 6
If a voltage of more than 1 V is applied to the 0-10 V input of the
Carpet Crawler, the device is controlled via the analog input -
assuming it is neither DMX nor Ethernet active.
In the main menu the voltage and the selected mode is displayed at
ANALOG. The current state is indicated on the display by a different
color in the value.
Adjust analog input:
ANALOG or SETTINGS > ANALOG
Display SELECT ANALOG MODE
Select mode DIRECT or LATCHED:
DIRECT for XLR-Remote, LATCHED for switching on and off by brief
voltage pulse for example for push switch or remote control.
1. DIRECT:
DIRECT
1-5V PRESET
-/+: Select Preset
5-9V PRESET
-/+: Select Preset
ANALOG SAVE: Save and return
BACK: Return without saving
1-5 V corresponds to approximately the lower half of the rotary knob
on the XLR-Remote, 5-9 V to the upper half.

2. LATCHED:
LATCHED
-/+: Wert einstellen
ANALOG SAVE: Speichern und zurück
BACK: Ohne speichern zurück
ACHTUNG!
Wird der Carpet Crawler im Latched-Modus aktiviert, muss er
auch im Latched-Modus wieder deaktiviert werden. Das
Umschalten auf einen anderen Modus ist nicht möglich.
2. LATCHED:
LATCHED
-/+: Setting value
ANALOG SAVE: Save and return
BACK: Return without saving
ATTENTION!
If the Carpet Crawler is activated in Latched mode, it must be
deactivated in Latched mode again. Switching to another mode is
not possible.
! !
6.5 Betrieb über Analogeingang 6.5 Operation via analog input
6.6 Betrieb über DMX-Eingang 6.6 Operation via DMX input
Abbildung 7
Ausgangspunkt Hauptmenü
DMX oder SETTINGS > DMX
Bildschirm DMX-Adresse
DMX Adresse über Tastenfeld eingeben
DMX ADDRESS SAVE: Speichern und zurück
BACK: Ohne speichern zurück
Der Carpet Crawler stellt vier Kanäle zur Verfügung:
1. Fog: Weitergabe an die angeschlossene Nebelmaschine.
2. Air: Steuert die Luftzufuhr.
3. CO2: Steuert den CO -Ausstoß in 4 Bereichen:
2
4. Fan: Weitergabe an die angeschlossene Nebelmaschine.
Figure 7
Starting point main menu
DMX or SETTINGS > DMX
Display DMX Address
Enter DMX address via key panel
DMX ADDRESS SAVE: Save and return
BACK: Return without saving
The Carpet Crawler provides four channels:
1. Fog: Transfer to the connected fog machine.
2. Air: Controls air supply.
3. CO2: Controls the CO emissions in 4 sectors:
2
4. Fan: Transfer to the connected fog machine.
Bereich
Stufe
Verbrauch
DMX-Wert
(A)
0
0, kein CO2
0-64
(B)
1
1 kg/min
65-129
(C)
2
2 kg/min
130-194
(D)
3
3 kg/min
195-255
Sector
Level
Consumption
DMX value
(A)
0
0, no CO2
0-64
(B)
1
1 kg/min
65-129
(C)
2
2 kg/min
130-194
(D)
3
3 kg/min
195-255
11

12
6.6 Betrieb über DMX-Eingang 6.6 Operation via DMX input
6.7 Betrieb über Ethernet 6.7 Operation via Ethernet
Nach Anschluss des Carpet Crawlers an das DMX-Netzwerk kann
das Gerät über die Fader des DMX-Pults entsprechend geregelt
werden.
Direkt an der Nebelmaschine muss weiterhin der DMX-Kanal
001 eingestellt bleiben.
After connecting the Carpet Crawler to the DMX network the device
can be controlled via the fader of the DMX console.
At the fog machine the DMX channel must necessarily remain
at 001.
Der Carpet Crawler kann über Ethernet mit den Protokollen ARTNET
oder sACN angesteuert werden.
The Carpet Crawler can be controlled via Ethernet with the protocols
ARTNET or sACN.
! !
6.7.1 Betrieb über ARTNET 6.7.1 Operation via ARTNET
Abbildung 8 Abbildung 9
Im Folgenden wird die Bedienung des Carpet Crawlers unter ARTNET
erklärt.
Ausgangspunkt Hauptmenü
ETH oder SETTINGS > PROTOCOL
Bildschirm PROTOCOL SELECT
ARTNET
MODIFY
Bildschirm ARTNET CONFIG
NET, SUBNET, UNIVERSE: Auswählen
CE: Alten Wert löschen und über Tastenfeld neu einstellen
ARTNET CONFIG SAVE: Speichern und zurück
PROTOCOL SAVE: Speichern und zurück
BACK: Ohne speichern zurück
Figure 8 Figure 9
The operation of the Carpet Crawler by using ARTNET is described in
the following.
Starting point main menu
ETH or SETTINGS > PROTOCOL
Display PROTOCOL SELECT
ARTNET
MODIFY
Display ARTNET CONFIG
NET, SUBNET, UNIVERSE: Select
CE: Delete old value and adjust new value via key panel
ARTNET CONFIG SAVE: Save and return
PROTOCOL SAVE: Save and return
BACK: Return without saving

6.7.2 Betrieb über sACN 6.7.2 Operation via sACN
Abbildung 10 Abbildung 11
Im Folgenden wird die Bedienung des Carpet Crawlers unter sACN
erklärt.
Ausgangspunkt Hauptmenü
ETH oder SETTINGS > PROTOCOL
Bildschirm PROTOCOL SELECT
sACN
MODIFY
Bildschirm sACN UNIVERSE
CE: Alten Wert löschen und über Tastenfeld neu einstellen
sACN UNIVERSE SAVE: Speichern und zurück
PROTOCOL SAVE: Speichern und zurück
BACK: Ohne speichern zurück
Gemäß den Standards für DMX und sACN besteht ein Universum aus
512 Kanälen. sACN umfasst Universen zwischen 1 und 63999.
Im Carpet Crawler muss eine gültige Netzwerkadresse und Subnetz-
maske eingestellt sein - s. auch 6.7.3 Einstellen der IP-Adresse.
Figure 10 Figure 11
The operation of the Carpet Crawler by using sACN is described in the
following.
Starting point main menu
ETH or SETTINGS > PROTOCOL
Display PROTOCOL SELECT
sACN
MODIFY
Display sACN UNIVERSE
CE: Delete old value and adjust new value via key panel
sACN UNIVERSE SAVE: Save and return
PROTOCOL SAVE: ave and return
BACK: Return without saving
According to the standards for DMX and sACN a universe contains
512 channels. sACN includes universes between1 and 63999.
A valid network address and subnet mask must be set in the Carpet
Crawler - see item 6.7.3 setting the IP address.
6.7.1 Betrieb über ARTNET 6.7.1 Operation via ARTNET
Gemäß den Standards für DMX und ARTNET besteht ein Universum
aus 512 DMX-Kanälen, ein Subnetz umfasst 16 Universes, ein Netz
beinhaltet 16 Subnetze und es gibt 128 Netze.
Im Carpet Crawler muss eine gültige Netzwerkadresse und Subnetz-
maske eingestellt sein - s. auch 6.7.3 Einstellen der IP-Adresse.
According to the standards of DMX and ARTNET contains a universe
512 DMX channels, a subnet contains16 universes, a network contains
16 subnets and there ist a total of 128 networks.
A valid network address and subnet mask must be set in the Carpet
Crawler - see item 6.7.3 setting the IP address.
13

Abbildung 12 Abbildung 13
Ausgangspunkt Hauptmenü
SETTINGS > IP-CONFIG
Bildschirm IP CONFIGURATION
1. DHCP
Bei Betrieb des Carpet Crawlers in einem Netzwerk mit DHCP-Server,
wird die IP-Adresse sowie Subnetzmaske automatisch zugewiesen.
DHCP
CONFIG SAVE: Speichern und zurück
BACK: Ohne speichern zurück
2. Statische IP-Adresse
STATIC
MODIFY
Bildschirm IP ADDRESS
CE: Alten Werte löschen und über Tastenfeld neu einstellen
IP ADDRESS SAVE: Speichern und zurück
BACK: Ohne speichern zurück
Gleichen Vorgang für SUBNET MASK wiederholen
3. ARTNET
STATIC
ARTNET
CONFIG SAVE
BACK: Ohne speichern zurück
Die IP-Adresse wird aus der unveränderlichen MAC-Adresse des
Gerätes und einem OEM-Code gebildet. Die Subnetzmaske wird auf
255.0.0.0 eingestellt.
Figure 12 Figure 13
Starting point main menu
SETTINGS > IP-CONFIG
Display IP CONFIGURATION
1. DHCP
Operation of the Carpet Crawler in a network with DHCP server will
affect the automatic assignment of IP address and subnet mask.
DHCP
CONFIG SAVE: Save and return
BACK: Return without saving
2. Static IP address
STATIC
MODIFY
Display IP ADDRESS
CE: Delete old value and adjust new value via key panel
IP ADDRESS SAVE: Save and return
BACK: Return without saving
Repeat the same procedure for SUBNET MASK
3. ARTNET
STATIC
ARTNET
CONFIG SAVE
BACK: Return without saving
The IP address is made of the fixed MAC address of the device and an
OEM code. The subnet mask is set to 255.0.0.0.
6.7.3 Einstellen der IP-Adresse 6.7.3 Setting the IP address
14

6.8 Ausschalten des Gerätes 6.8 Turn off the device
7.1 Hintergrundbeleuchtung 7.1 Background lighting
Ventil der CO -Flasche vollständig schließen.
2
Sicherheitsschlauch entleeren, indem die Maschine veranlasst wird
das CO auszugeben.
2
Ansteuerung über DMX: Fader für CO am DMX-Pult ganz aufziehen.
2
Ansteuerung über Ethernet: In Steuersoftware den Kanal für das CO
2
auf einen hohen Wert setzen oder im Steuerpult den entsprechenden
Fader ganz aufziehen.
Ansteuerung über Analogeingang: Analogremote so einstellen, dass
das CO ausgegeben wird. Achtung: Evtl. wird durch die verwendeten
2
Presets Nebel ausgegeben. In diesem Fall 3Pol. XLR-Stecker der XLR-
Remote vom Analogeingang abziehen und den Carpet Crawler
manuell bedienen.
Manuelles ablassen des CO : Im Hauptbildschirm die Modify-Taste
2
drücken, anschließend die Start-CO Taste und mit der danebenliegen-
den +-Taste einen Wert größer als 0 auswählen.
Die internen Ventile sind nun geöffnet und das restliche CO kann aus
2
dem Schlauch entweichen.
Carpet Crawler durch Herausziehen des Netzsteckers bzw. Unter-
brechung der Stromzufuhr ausschalten.
Das Verfahren zum Ausschalten der Nebelmaschine ist der jeweiligen
Bedienungsanleitung der Nebelmaschine zu entnehmen.
Completely close the valve of the CO bottle.
2
Empty the security hose by determining the machine to exhaust the
remaining CO .
2
Control via DMX: Raise fader for CO at DMX console to the stop.
2
Control via Ethernet: Set channel for CO in control software to a
2
high value or raise the appropriate fader in the control panel to the
stop.
Control via analog input: Set analog remote that the remaining CO
2
is emitted. Attention: Because of the adjusted presets there may still
exit some fog. In this case disconnect the 3Pol. XLR connector of the
XLR remote from the analog input and operate the Carpet Crawler
manually.
Manually releasing the CO : Press Modify button in main menu.
2
Afterwards press Start CO button and adjust a value greater than 0
with the adjacent + button.
The internal valves are now open and the remaining CO can exhaust
2
from the hose.
Turn off the Carpet Crawler by pulling the power plug or
interrupting the power supply.
For instructions on how to switch off the fog machine connected to the
Carpet Crawler please refer to the manual of the fog machine.
Im Folgenden werden verschiedene Einstellungen, die am Carpet
Crawler vorgenommen werden können, erläutert.
Below are the various settings explained that can be made to the
Carpet Crawler.
1 1
2 2
33
7. Einstellungen 7. Settings
Abbildung 14 Figure 14
15

8.1 Hintergrundbeleuchtung 8.1 Background lighting
7.2 Bildschirmschoner 7.2 Screen Saver
Ausgangspunkt Hauptmenü
SETTINGS > NEXT > BRIGHTNESS
Bildschirm BRIGHTNESS
-/+: Wert einstellen
BRIGHT SAVE: Speichern und zurück
BACK: Ohne speichern zurück
Starting point main menu
SETTINGS > NEXT > BRIGHTNESS
Display BRIGHTNESS
-/+: Adjust value
BRIGHT SAVE: Save and return
BACK: Return without saving
Abbildung 15 Abbildung 16
Ausgangspunkt Hauptmenü
SETTINGS > NEXT > SCREENSAVER
Bildschirm SCREEN SAVER
-/+: Wert einstellen
SAVE: Speichern und zurück
BACK: Ohne speichern zurück
Die Dauer, bis sich der Bildschirmschoner einschaltet, kann zwischen
10 und 180 Sekunden gewählt werden.
Figure 15 Figure 16
Starting point main menu
SETTINGS > NEXT > SCREENSAVER
Display SCREEN SAVER
-/+: Adjust value
SAVE: Save and return
BACK: Return without saving
The duration until the screen saver switches on can be selected
between 10 and 180 seconds.
16

7.3 Geräteinformationen, Firmware Update 7.3 Device information, firmware update
7.4 Auf Werkseinstellungen zurücksetzen 7.4 Reset to factory settings
Abbildung 17
Ausgangspunkt Hauptmenü
SETTINGS > NEXT > INFO
Bildschirm INFO
Hier werden Informationen zu dem Gerät angezeigt und das Firmware
Update kann freigegeben werden.
Eine genaue Beschreibung des Updatevorgangs liegt dem jeweiligen
Update bei.
Figure 17
Starting point main menu
SETTINGS > NEXT > INFO
Display INFO
Displays information about the device and the firmware update can be
released.
A detailed description of the update procedure is provided with the
appropriate update.
Abbildung 18
ACHTUNG!
Beim Zurücksetzen auf Werkseinstellungen gehen alle Einstellungen
wie DMX-Adressen, IP-Adresse, eigene Presets, etc. verloren.
Figure 18
ATTENTION!
When resetting to factory settings all settings such as DMX adress, IP
adress, self defined Presets, et cetera will be lost.
! !
17
Table of contents
Other Smoke Factory Fog Machine manuals

Smoke Factory
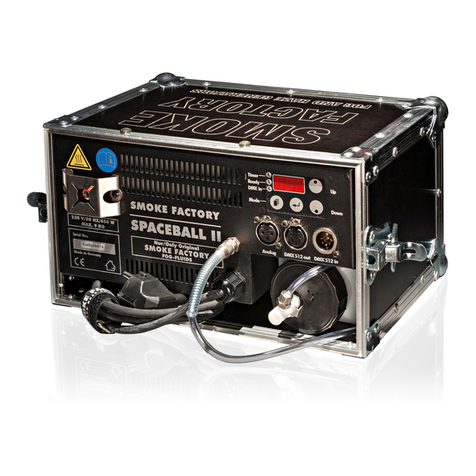
Smoke Factory Spaceball II User manual

Smoke Factory
Smoke Factory Tour Hazer II User manual

Smoke Factory
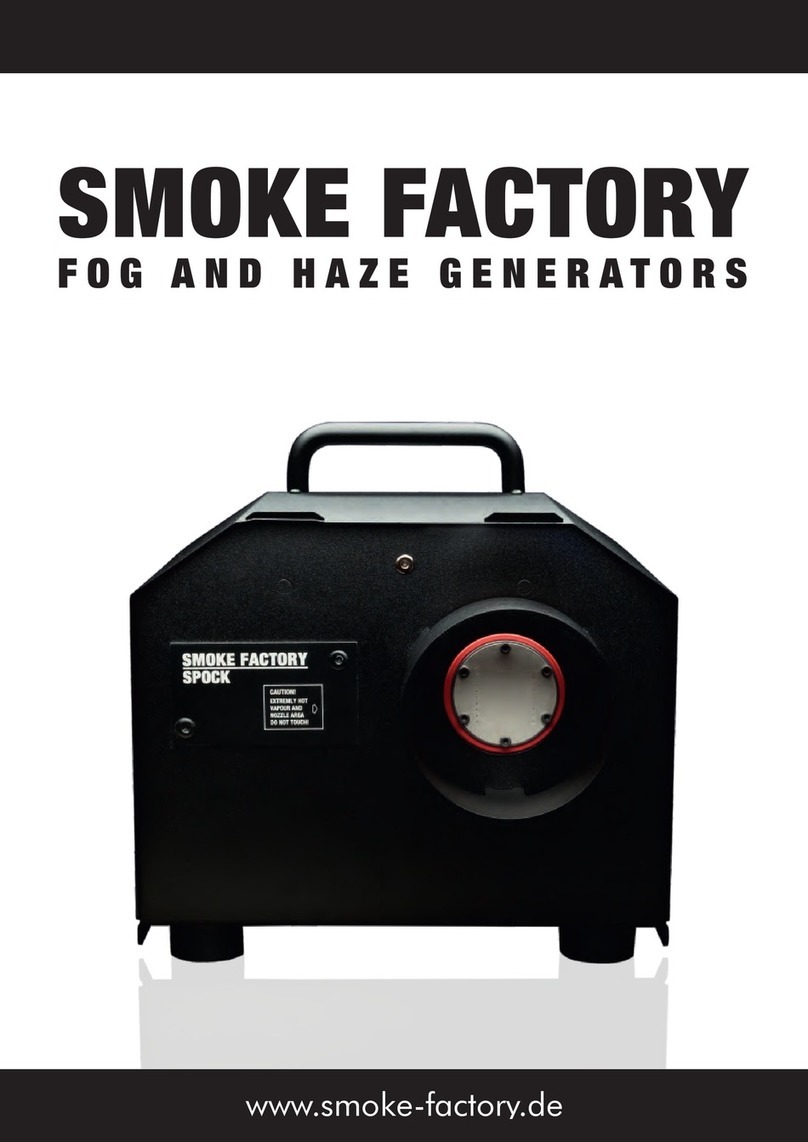
Smoke Factory Spock User manual

Smoke Factory
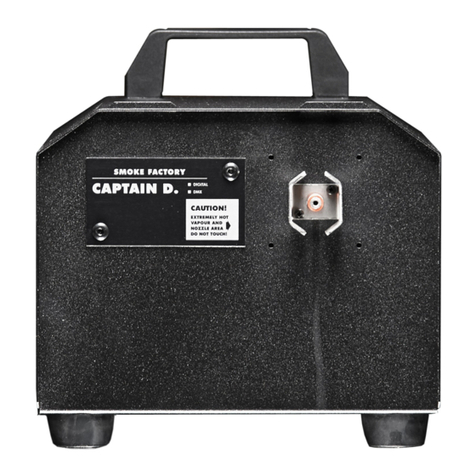
Smoke Factory Captain D. User manual

Smoke Factory
Smoke Factory Data ll User manual

Smoke Factory
Smoke Factory Spaceball II User manual

Smoke Factory
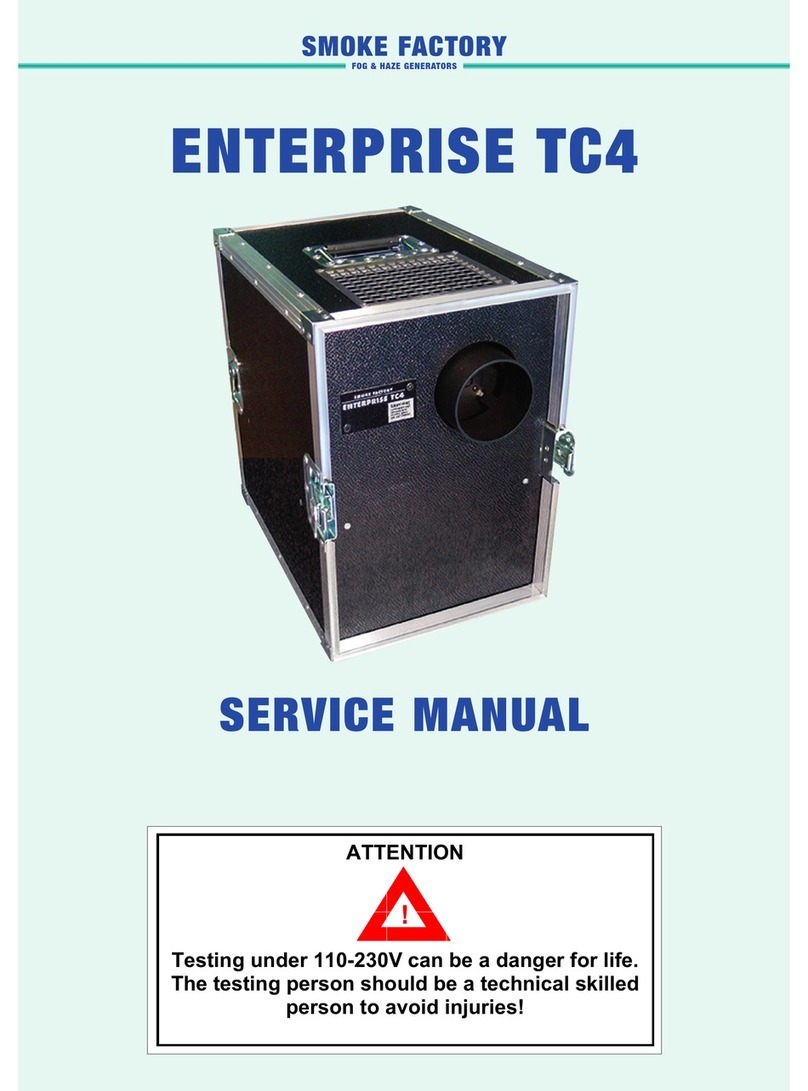
Smoke Factory ENTERPRISE TC4 User manual