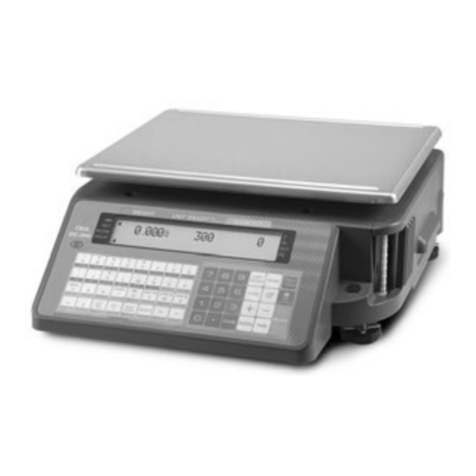
Snowrex GP-3H User manual

Price Computing Scale – GP
User Manual
SNOWREX INTERNATIONAL
CO., LTD.
SRGP20100415

Table of Contents
Specification ..........................................................................................2
Basic specification.......................................................................................... 2
Series specification(EC TYPE/OIMLAPPROVED)..................................... 2
Series specification(NON-APPROVED)....................................................... 2
Operation................................................................................................3
LCD display & Keypad.................................................................................. 3
Normal unit price input .................................................................................. 4
PLU Data setting............................................................................................ 4
Loading PLU.................................................................................................. 4
Modify PLU ................................................................................................... 4
Operation of M+............................................................................................. 4
Operation of MR ............................................................................................ 5
Setting and Calibration...........................................................................6
General setting (CAL 1)................................................................................. 6
Calibration Procedure (CAL 2)...................................................................... 7
Troubleshooting.............................................................................................. 9
1

Specification
Basic specification
Display Digit LCD, height 17mm, 5/6/6(Weigh/Unit Price/ Total Price)
Pan Size(mm) 280 x 200 (WxL)
Dimensions(mm) 280x330X110(WxLxH)
Net Weight(kg) 3.6kg(without pillar), 5.2kg(with pillar)
Operating
Temperature 0∘C to +40∘C
Relative
Humidity Less than 85%
Power DC9V / 500mA, AC adapter;
Built in 6V Rechargeable Battery
Interface RS-232C (optional)
Series specification(EC TYPE/OIML APPROVED)
Model GP-6D GP-15D GP-30D
Max1 / Max2= 3kg / 6kg 6kg / 15kg 15kg / 30kg
Min1 / Min2= 20g / 3kg 40g / 6kg 100g / 15kg
e1 / e2= 1g / 2g 2g / 5g 5g / 10g
Accuracy 1/3000(Dual) 1/3000(Dual) 1/3000(Dual)
Series specification(NON-APPROVED)
Model GP-3H GP-6H GP-15H GP-30H
Max. Capacity 3kg 6kg 15kg 30kg
d = 0.5g 1g 2g 5g
Accuracy 1/6000 1/6000 1/7500 1/6000
2

Operation
LCD display & Keypad
3

Normal unit price input
In weighing mode, press the white number keys to change the unit price. Total price will
be automatically calculated when there is weight on the scale.
PLU Data setting
1. Use the white number keys to set the Unit Price.
2. Press the preset PLU key (P1 or P2) to select the desired PLU memory.
3. Press PLU to save your settings.
zIf the input isn’t completed within 30 seconds, the setting will be suspended and
return to normal weighing mode.
Loading PLU
In weighing mode, press the PLU key to recall the unit price data.
Modify PLU
1. Press the white keys to enter the Unit Price.
2. Select the PLU you want to modify.
3. Press to save your setting. The old PLU data is overwritten and the new
price has been updated.
Operation of M+
1. Load the weight on the scale and input the unit price.
2. Press to accumulate the weighing result in memory. When a beep sounds,
M+ indicator appears on the LCD. “≣01≣“ appears in the Weight column to show
the first accumulation is recorded.
3. Clear the load on the weighting pan.
4. Input the unit price and place another load on the weighing pan. Then press .
After a beep sound, “≣02≣“ appears in the weight column, indicating second
data has been recorded.
4

zAfter each recording, if the load on the weighing pan is not cleared, pressing
will result in the long beep and the scale will not be able to record the next
weighing result.
zThe scale can save up to 199 weighing results.
Operation of MR
1. In weighing mode, press and the Unit Price column will be cleared. The
Weight column shows -1- as number of accumulation, or ≣xx≣as total number
of accumulated additions. The total price column shows the total price or total
accumulated price.
2. Press to toggle the weighing results and the total accumulation is displayed
when all weighing results are shown.
3. When you press the first time, the first accumulation is displayed. -01- and
the weight data is flashing in the Weight column, and the Total Price column shows
the Accumulated Price.
4. Pressing the second time, the accumulation is displayed. -02- and the weight
data is flashing in the Weight column and the Total Price column shows the
Accumulated Price. Press again to cycle through all the data on memory.
5. Press again, and when ≣xx≣is displayed in the Weight column, it
indicates the total number of accumulations. The total accumulated price is
displayed in the Total Price column.
6. When the total is shown, pressing will clear all the data on memory.
zPressing 0~9 numerical keys will exit this mode without clearing the recorded
data.
5

Setting and Calibration
1. Press and hold any key while powering on the scale ON. CAL is shown on the LCD
display.
2. Press to cycle through the calibration menus: CAL 1 and CAL 2.
zSelect CAL 1, press to enter General Setting menu.
zSelect CAL 2, press to enter the Calibration Procedure. (Need to remove
the jumper, JP3, from the PCB first. Put JP3 back when the calibration is
complete.)
General setting (CAL 1)
Press to toggle amount the options, and press to confirm your setting.
1. Aut.oFF– Auto shutdown setting
Display Explanation
Aut.oFF
0 Disable shutdown function.
Aut.oFF
1 If no operation, shutdown the scale in 5 minutes.
Aut.oFF
2 If no operation, shutdown the scale in 10
minutes.
Aut.oFF
3 If no operation, shutdown the scale in 20
minutes.
Aut.oFF
4 If no operation, shutdown the scale in 30
minutes.
2. BL Backlight setting
Display Explanation
b.LigHt
0 Shut down backlight
b.LigHt
1 Turn on backlight
6

b.LigHt
2 Automatic backlight
b.LigHt
3 Manual
3. Tare function
Display Explanation
tA
0 One time taring
tA
1 Multiple taring is allowed.
4. RS-232 Output
Display Explanation
Pr
LP-50 Parity: 8-N-1, LP-50 printer format
(Baud rate must be 9600)
Pr
PC Parity: 8-N-1, connecting to PC
5. Baud Rate
Display Descriptions
br
2400 Set the baud rate to 2400
br
4800 Set the baud rate to 4800
br
9600 Set the baud rate to 9600
Calibration Procedure (CAL 2)
Notice: This section can only be operated by engineers.
Please have the jumper JP3 switch OFF before you start the calibration process.
In Calibration procedure, press to toggle among the options, and press to save
the setting.
7

1. SEL maximum capacity
Display Maximum Capacity
LoAd
06 6 kg
LoAd
15 15 kg
LoAd
30 30 kg
2. Decimal points
Display Descriptions
dP
0 Disable decimal points.
dP
0.0 Set the price display to 1 decimal point.
dP
0.00 Set the price display to 2 decimal points.
3. Span Calibration
Display Explanation
SPAn The Weight column and the Unit Price column
display the Span Value.
1. Press key.
2. Press key.
3. Place the calibration weight on the pan.
When the scale is stable, press key to cycle through a list of permissible weights.
4. Remove the calibration weight from the pan and press key. The instrument will
restart automatically.
zPut the JP3 jumper back after calibration is completed.
8

Troubleshooting
Problem Possible Causes Solutions
No Display zAC adaptor is broken.
zMain board is broken.
zReplace the AC adapter
zReplace the main board.
Certain figures on
the display is
missing
Main board is broken zReplace the main board.
zCheck if the LCD is
soldered well.
Zero drift or span
drift is over the
limit
It is directly exposed to sunlight or located
close to extreme temperature such as
air-conditioner or heater
Move the instrument to a mild
temperature installation site.
Poor repeatability
of measured
values.
Large fluctuation
of the displayed
values
zWind and vibration
zLoad cell is touch something
zDirt or dust on the load cell
zMain board is damaged
zChange the installation
site.
zCheck the load cell and
the wire lead assembly.
zClean the dirt or dust on
the load cell.
zReplace the main board.
Key input is not
possible
Keypad was not connected well.
Main board is damaged.
Check the keypad connection.
Replace the main board
is
displayed
Overload Clear the pan or reduce the
weight.
is
displayed
zWeighing pan is not in place.
zWeighing range is below zero.
zEnsure the weighing pan
is correctly installed and
the accessories are not
touching the weighing
pan or load cell.
zReset the scale to zero.
is
displayed
Zeroing outside the zero setting range. Ensure that zeroing is
performed in the permissible
range. (20% of capacity)
9
This manual suits for next models
3
Table of contents
Other Snowrex Scale manuals
Snowrex
Snowrex NV-1.5 User manual
Snowrex
Snowrex HCR Quick start guide
Snowrex
Snowrex GC-6D User manual
Snowrex
Snowrex BS User manual
Snowrex
Snowrex BS series User manual

Snowrex
Snowrex PS 20 User manual
Snowrex
Snowrex GW-6D User manual
Snowrex
Snowrex Coin Checker NCR01SR User manual
Snowrex
Snowrex EJ-600 User manual
