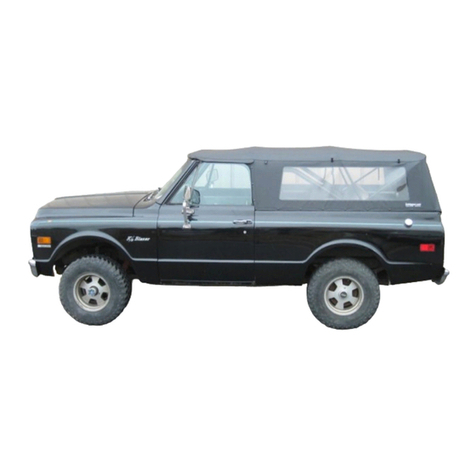
Softopper Ridgeline 60 User manual

Ridgeline 60 Installation Instructions
Please read instructions thoroughly before starting installation
**Remove all contents of the Softopper carefully to protect from scratches.**
Windows scratch easily! Keep protective layer placed between them when they are stacked.
Estimated Installation Time: 1 hour
Beginning Note: It is easiest to do the initial installation in warmer temperatures. The
fabric of the top is at its tightest when it is new. Installing it in warmer temperatures initially
will ensure that the fabric is easier to work with. The fabric of the top will relax slightly with
time and become easier to put on.
1-800-810-7227
www.softopper.com
Page 1

**Safety Notes**
Please read the following before driving with the Softopper installed:
1. It is highly recommended that a boot cover/storage bag (sold separately) is used when the
topper is in its retracted position. This will prevent the top from catching in the wind and
extend the longevity of the soft top.
2. DO NOT rely in any way on the soft top to contain occupants or objects within the vehicle
bed, or to protect against injury or death in the event of an accident or a roll-over.
3. This top will not protect the occupants or objects from falling or flying objects. Never
operate vehicle in excess of manufacturer’s recommendations or specifications.
Tools needed for installation:
-#3 Phillips Screwdriver
-Torx T-30 Tool (provided)
Table of Contents
1. Inventory…………………………………………………….……..3
2. Hardware Installation
1. Bedrails…………………………………………………………4
2. Folding Frame…………………………………………….……10
3. Soft Top Canopy Installation………………………………………12
4. Retracting the Soft Top…………………………………………….17
5. Optional Driving Configurations…………………………………..19
6. Rear Screen Installation (*Purchased Separately)…………………21
7. Softopper Care and Maintenance…………………………….……22
8. Warranty Information………………………………………….…..23
1-800-810-7227
www.softopper.com
Page 2

!
1-800-810-7227
www.softopper.com
Page 3
Your Softopper Kit Includes the Following Pieces
1. Driver Side Bedrail
2. Passenger Side Bedrail
3. Front Bedrail **Note: This bar is bent on purpose and is not damaged.
4. Rear Bar
5. Cross Bars (4)
6. Driver Side Upright
7. Passenger Side Upright
8. Softopper Canopy (not depicted above)
9. Various brackets and Hardware (not depicted above)
10. Pack of Velcro (not depicted above)
11.Bottle of Seam Sealer (not depicted above) !
1.
2.
3.
4.
5.
7.
6.

Bedrail Installation
**Note**Driver side depicted in all photos and illustrations throughout instructions.
Also, colored instructions are available on our website, softopper.com, under
“Installation Instructions”.
1. Locate the Driver Side bedrail, which has a sticker indicating the Driver Side bedrail.
2. Remove the
white paper
from the under
side of the
weather
stripping.
**The weather
stripping is
NON-
ADHESIVE and
will not stick to
your truck.
3. Locate the 3
pairs of bedrail
brackets (6 total)
and the bag
containing 22
#12 screws and
2 washers.
**Note: We
have also
provided a
small bag with
a few extra
screws of size
#14 just in case
any of the pre-
drilled holes in
the bedrails
become stripped out.
4. Mount the 6 brackets to the bedrails using a #3 Phillips
screwdriver with 2 of the #12 screws per bracket through the
1-800-810-7227
www.softopper.com
Page 4
Front Bracket
Middle Bracket
Rear Bracket
1”
1/2”
1/4”
Rear
Front
Pivot Bracket
Snap Side
Rear Bracket

pre-drilled holes in the bedrails and the 2 slots in the top of each bracket. Center the screws
in the slots and secure. Make sure the widest bracket is at the front, the middle bracket in
the middle, and the smallest bracket at the rear of the truck bed. The remaining #12 screws
will be installed elsewhere later.
5. Using a Torx T-30, remove the 6 bolts in the truck bed near the front, center, and rear, as
shown below. The depicted brackets will be installed later.
1-800-810-7227
www.softopper.com
Page 5
Torx T-30
Front
Rear

6. Place the Driver Side bedrail atop the side of the driver side of the truck bed rail with the
snaps facing outward as shown.
7. If the bedrail brackets were installed correctly,
the proper alignment of the bedrails will be as
follows: The FRONT of the bedrail will be
about 1/2” from the truck cab and 1” from the
inside of the truck bed. The inside edge of the
REAR of the bedrail will be flush with the
inside edge of the truck rail.
1-800-810-7227
www.softopper.com
Page 6
1”
1/2”
Driver Side Bedrail
Front Bedrail installed
later
Flush

8. Locate another small bag
containing (6) M6 screws, 6
washers, and the provided
Torx T-30 tool. LOOSELY
mount the 6 bedrail brackets
to the truck bed using a #3
Phillips screwdriver. Place
one washer and one M6
screw through the bottom
slot of each bracket.
Readjust the previously
installed #12 screws if
further adjustments are
needed for proper alignment.
9. Locate the 2 small 2” strips
of weather stripping. Take
the white protective paper
off of the adhesive side.
With the ADHESIVE SIDE
UP, place the weather
striping under the front of the
bedrail where there is a groove in the truck bed’s rail. Press down firmly on the bedrail
once the weather stripping is in place.
10. Tighten all M6 screws to fully secure the bedrails and ensure a waterproof seal underneath
the bedrails.
1-800-810-7227
www.softopper.com
Page 7

11. Locate the 2 Rear Bar Brackets and the 2 webbing straps with snaps. Using 1 of the #12
screws, 1 washer for each bracket, and a #3 Phillips screwdriver, mount the webbing snap
flap and the bracket to the rear of the bedrail through the 2nd most rearward pre-drilled
holes. Ensure that the flange with the hole in it is projecting into the truck bed and the snap
is facing DOWN as shown below. Use another #12 screw to mount the bracket to the
bedrail through the rear most pre-drilled hole in the bedrail. Align the bracket as shown,
with the gap between the 2 prongs beginning just at the edge of the bedrail. The rear bar
will later slide into this gap. Repeat this step on passenger side bedrail.
1-800-810-7227
www.softopper.com
Page 8
Snap Top
Flange
Driver Side Rear Bedrail
Tailgate
Gap

12. Locate the Front Bedrail, and the 2 small brackets in the bag with the #12 screws. Note that
the front
bedrail is
slightly
curved to
provide
adequate
pressure
forward and
down. The
bar is not
damaged.
13. Place the
Front Bedrail
on the front
of the truck
bed with the
bulb seal
down and the
snaps facing
forward.
14. Mount each bracket to the Front Bedrail and then to both Driver and Passenger side bedrails
using 3 #12 screws each.
1-800-810-7227
www.softopper.com
Page 9
(not to scale)
Bulb Seal
Snaps
Front Bedrail
Small Bracket

Folding Frame Assembly and Installation
1. Locate the 4 Cross Bars and the 2 Folding Frames.
2. Join the 4 cross bars to the 2 folding frames by coordinating the COLORED DOTS
provided on the pieces and ensuring ALL push pins are locked into their holes.
**Important: Keep fingers clear of the sharp, metal junction where the cross bars will
meet the folding frame when clipping them together. Injury is likely if fingers get
pinched.
3. **Tip: It helps to stand the folding frame uprights up, and with another person, jiggle
the cross bars down to join them to the uprights.
1-800-810-7227
www.softopper.com
Page 10

4. Remove the safety rings
from the pivot pins in the
pivot brackets by turning
the ring.
5. Using the pre-drilled holes
near the bottom of the
folding frame, slide the
frame onto the pivot pins on
each bedrail ensuring the
forward cross bar is
forward. The forward
crossbar is the one with the
RED DOT. Secure the
safety rings back on. [The
most common installation
error is installing the frame
on backwards. View photo
to ensure correct orientation
of the folding frame.]
6. Note: when reopening the
frame from its front position,
you must raise all of the cross bars to approximately cab-height before opening the folding
frame completely. If the rear cross bar is raised on its own, it will force the forward most
cross bar into the cab window.
7. Leave the 4 safety straps that are hanging on the folding frame unclipped for now.
1-800-810-7227
www.softopper.com
Page 11

Soft Top Canopy Installation
1. With the tailgate open, lower the folding frame to the rear of the vehicle.
2. Carefully place the canopy on the tailgate, as shown.
3. Locate the rear window panel snap flap and place it facing up and forward. The rear window
has zippers, but the front one does not.
4. Snap the canopy to the snaps on the bottom/rear most cross bar by slipping the fabric
UNDER the bar and around as shown. Snap the 2 outward most snaps first, then the
remaining snaps.
5. Locate the front snap flap.
1-800-810-7227
www.softopper.com
Page 12

8. Loosely latch the 2 rear safety straps to the hole in the flange on the rear bar brackets and
the 2 front safety straps to the bedrail loops as shown below. The straps are already riveted
to the folding frame.
9. Tighten down on each of the safety straps by pulling down on the front and rear cross bars
strongly.
10.Undrape the front window and snap it to the Front Bedrail.
11. Undrape the side panels. Snap the front most snap only.
12.On the same side, while pulling down on the rear cross
bar, tighten the rear safety strap. The safety straps should
be snug, not loose nor overtightened.
13.Connect the rear most snap on the side panel to the rear
most snap on the bedrail. This may take a little extra force
the first time, and the top will loosen slightly after the first
installation.
14.Tighten the safety straps further to relieve excess tension
on the snaps. **Note that it is a good idea to share
tension between the safety straps and the snaps instead
of having all the tension only on the snaps. This will
also help with any wrinkles in the corners.
15.Now snap the rest of the snaps on the driver side.
16.Repeat the above on passenger side. Note that we
recommend snapping the front most and rear most snaps
1-800-810-7227
www.softopper.com
Page 14
Front Safety Strap
Rear Safety Strap

first each time you close the top. This makes it easier to snap the remaining snaps and align
the canopy properly.
17.At this point or any other point during the life of your Softopper, if the canopy is too loose
or too tight, you can move the pivot pin to a higher or lower hole in the pivot bracket. Be
sure to reinstall the black, plastic E-Clips onto the pivot pins. Also, ensure with any new
adjustments that the folding frame does not impact the cab window.
18.Make sure the E-Clip is in the small indent in the pivot pin. It helps to use the flat edge of
something metal to push the E-Clip on.
1-800-810-7227
www.softopper.com
Page 15

19.Locate the Rear Bar and lower the Rear Window.
20.With the snap on the end facing UP, slide the bar into the 3 sleeves at the inside base of the
rear window.
21.Push the two plastic ends into the gaps in the rear bar retainers.
22.SNAP the rear bar into place with the webbing snap flap that is attached to the rear bar
retainer.
23.Zip closed the rear window panel.
24.Close the tailgate while lifting up slightly on the fabric hanging at the bottom of the window
panel.
25.Secure velcro around the front and rear window panels.
26.**Optional: Use the provided extra strips of velcro to hold the bottom of the rear window
flap to the tailgate. Wipe clean and dry the tailgate surface before placing the sticky side of
the velcro onto the vehicle. Before putting tension on the velcro, we recommend letting it
adhere for 24 hours.
Installation Complete!
**See the following pages for retraction instructions and optional driving configurations.
1-800-810-7227
www.softopper.com
Page 16

Retracting the Softopper
1. Undo all side snaps.
2. Raise the rear window
panel zippers all the
way to the top without
disconnecting them.
3. Release the rear
window retainer bar.
4. Optional: Unsnap the
front window.
Carefully and neatly
fold the front window
on top of the canopy
without creasing the
window. You can leave
the front window
secured while
retracting the canopy.
However, we
recommend putting it
on top if you plan on
storing the canopy in
the folded position for
a longer period of
time.
5. Fold the side panels
up onto the roof
canopy neatly.
6. Fold the rear window
panel up onto the roof
as well with the upper
zippers still
connected. You can
keep the bar in the
rear window or
remove it.
7. Release the 2 rear
safety straps.
8. Standing on the tailgate, or from the side of the vehicle, fold the folding frame forward with
the entire canopy on top of the cross bars. The top should fold itself nicely into sections
without damaging the windows. Ensure the correct folds are made the first few times.
1-800-810-7227
www.softopper.com
Page 17

9. **Clip the 2 rear safety straps onto the bedrail loops and tighten them for safety while
driving.
10. Optional: Place your Softopper boot cover
(purchased separately) around the Softopper
to make for clean, easy storage on or off the
vehicle.
11. To fully remove the Softopper, release all 4
safety straps, remove the 2 safety rings from
the pivot pins, and completely remove the
folding frame. Reinstall the safety rings.
Optional boot cover can be placed around
the Softopper to make for clean, easy
storage on or off the vehicle.
12. **Optional: Roll the side panels and the rear
window up to create an open air truck bed
without removing the upper canopy as
shown. Carefully and neatly roll up the
panels and secure them by buckling the
straps on the canopy. The truck can be
driven with the rear window rolled up, and
the sides rolled up. However DO NOT
drive the vehicle with the side panels rolled
up and the rear window down due to wind
resistance potentially causing damage to the
rear window or release of the rear bar from
the bar retainers.
1-800-810-7227
www.softopper.com
Page 18

Optional Driving Configurations
1. Retracted without boot cover.
**Secure both Safety Straps to
bedrail loops!
2. Retracted with boot cover
(purchased separately; makes for
clean, easy storage on or off the
vehicle). **Leave one safety strap
on each side out of the boot cover
and secure them to bedrail loops!
3. Rear window rolled up and buckled.
4. Rear window removed.
5. Front panel removed.
1-800-810-7227
www.softopper.com
Page 19
Secure Safety Straps
Secure Safety Straps

6. Side panels and rear
window rolled up and
buckled. **Rear
window MUST be
rolled up if side panels
are rolled up.
7. Side panels partially rolled up.
8. Softopper canopy and folding frame
removed from vehicle. Leave bedrails
installed. To fully remove the
Softopper, release all 4 safety straps,
remove the 2 safety rings from the pivot
pins, and completely remove the folding
frame. Reinstall the safety rings.
Optional boot cover can be placed
around the Softopper to make for clean,
easy storage on or off the vehicle.
1-800-810-7227
www.softopper.com
Page 20
Table of contents
Other Softopper Automobile Accessories manuals
Popular Automobile Accessories manuals by other brands

ULTIMATE SPEED
ULTIMATE SPEED 279746 Assembly and Safety Advice

SSV Works
SSV Works DF-F65 manual

ULTIMATE SPEED
ULTIMATE SPEED CARBON Assembly and Safety Advice

Witter
Witter F174 Fitting instructions

WeatherTech
WeatherTech No-Drill installation instructions

TAUBENREUTHER
TAUBENREUTHER 1-336050 Installation instruction


