SOGEDIS T21 Series User manual

FREESTANDING
(SERIES T21)
1

Information sheet..................................................................................................2
Barcode sticker code explanation.........................................................................3
Electrical components...........................................................................................4
Interface and hardware.........................................................................................10
Dısplay card model...............................................................................................10
Washing program..................................................................................................11
Rinse aid absence and salt absence
visualization...........................................................................................................12
Service test............................................................................................................19
Option selection.....................................................................................................13
Failure codes (possible problems).........................................................................24
Service failure codes.............................................................................................20
Inner light option....................................................................................................15
End test program....................................................................................................21
Necessary information have to be given to users while installing the
dishwasher.............................................................................................................28
Poor drying............................................................................................................27
Repair techniques components and resistance values ..........................................29
Component values measurement...........................................................................30
Disassembly...........................................................................................................43
2
Washing program duration.....................................................................................16
Software requirements...........................................................................................16
Feature of time phase ............................................................................................17
Renegeration cycle ...............................................................................................17
Water hardness set................................................................................................18
Rinse aid set..........................................................................................................18
Measurement the water hardness...........................................................................23

INFORMATION SHEET
BARCODE STICKER CODE EXPLANATION / DISHWASHER:
SERIAL NO
PRODUCT
CODE
01- w/o cartoon; w strip
02- w/o cartoon; w/o strip
03- w cartoon ; w strip
04- w cartoon ; 4- lane
05- w/o cartoon ; 4-lane
Work order
number Increases by
numeratically
In front of this numbers “55”
should be added for an order
number:
00205458 - 5500205458 is
the order number
In front of this numbers
“10” should be added for
an product code:
668316 - 10668316 is
the product code
04 668316 0001
00205458
3

*All kinds of star-head screws,
*in the phillips screws of the internal components,
Phillips screwdriver
Plier
*It is used to bend all kinds of sheet metal ends.
Multimeter
*Resistance values of all kinds of internal components,
*Electronic card resistors,
*It is used to measure the resistance of display cards.
TOOLS FOR DISASSEMBLE

Flat Screwdriver
It is used to remove all kinds of aesthetic parts (side
panels, front panels and external aesthetic parts of the
machine).
Side Cutter
It is used to cut cables of internal components or any
hard part.
Chargeable Drill
It is the most important tool used to remove and
install all kinds of screws in the machine.
ELECTRICAL COMPONENTS
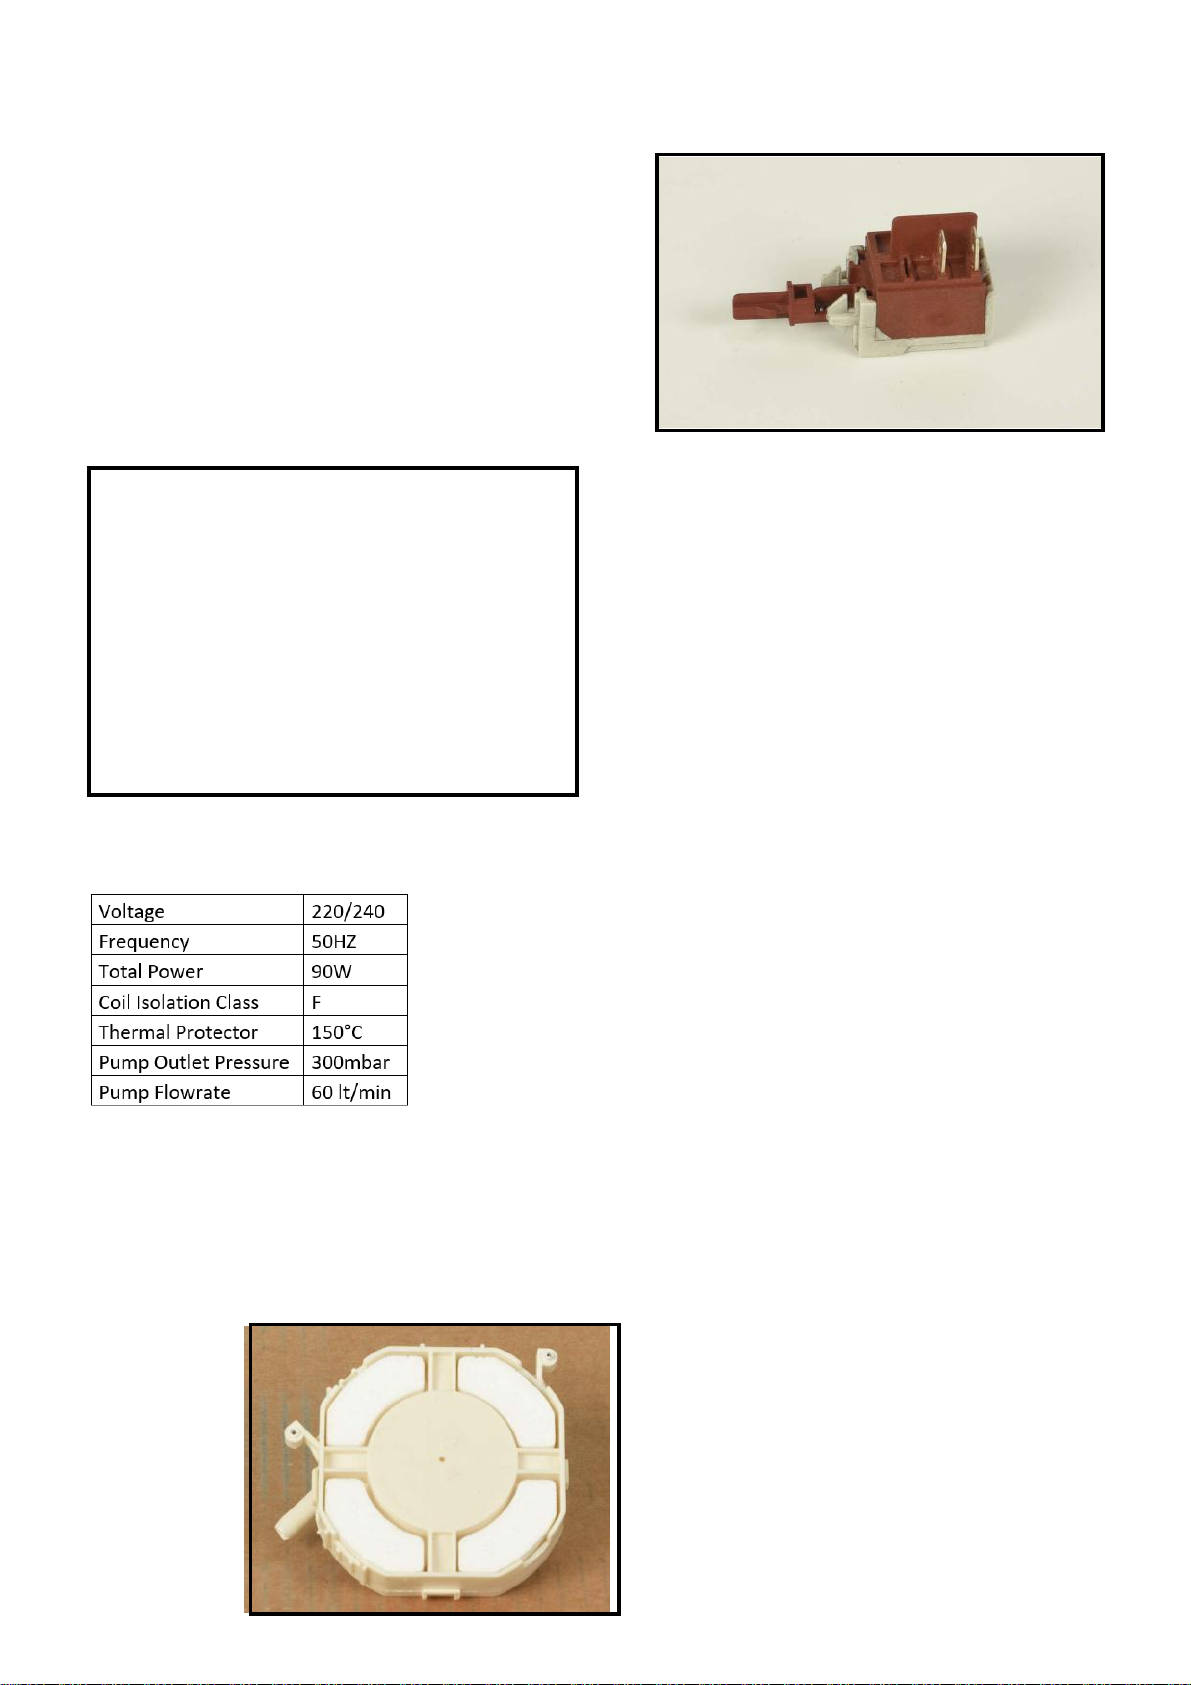
BUTTON ( ON / OFF SWITCH )
Voltage 250 V
Currency 16 (4 )
A
DOOR LOCK
It is a mechanical lock/release system that is
closing the door, supplying the connection
of electrical parts in the machine and
cutting off the connection.
Currency 16 (4 ) A
CIRCULATION PUMP
Single direction, single phase, asynchronus
and two pole.
It turns opposite clock direction.
It is assambled to the basement with
rubber hangers.
FLOATER
Button is assambled in the control panel
unit. ON /OFF (two pole)
4
Measurement of the primary windings of the
washing pump(118.2-135.9 Ω)
Measurement of the secondary windings of the
washing pump (white cable –blue cable)
(117.9-135.6 Ω)
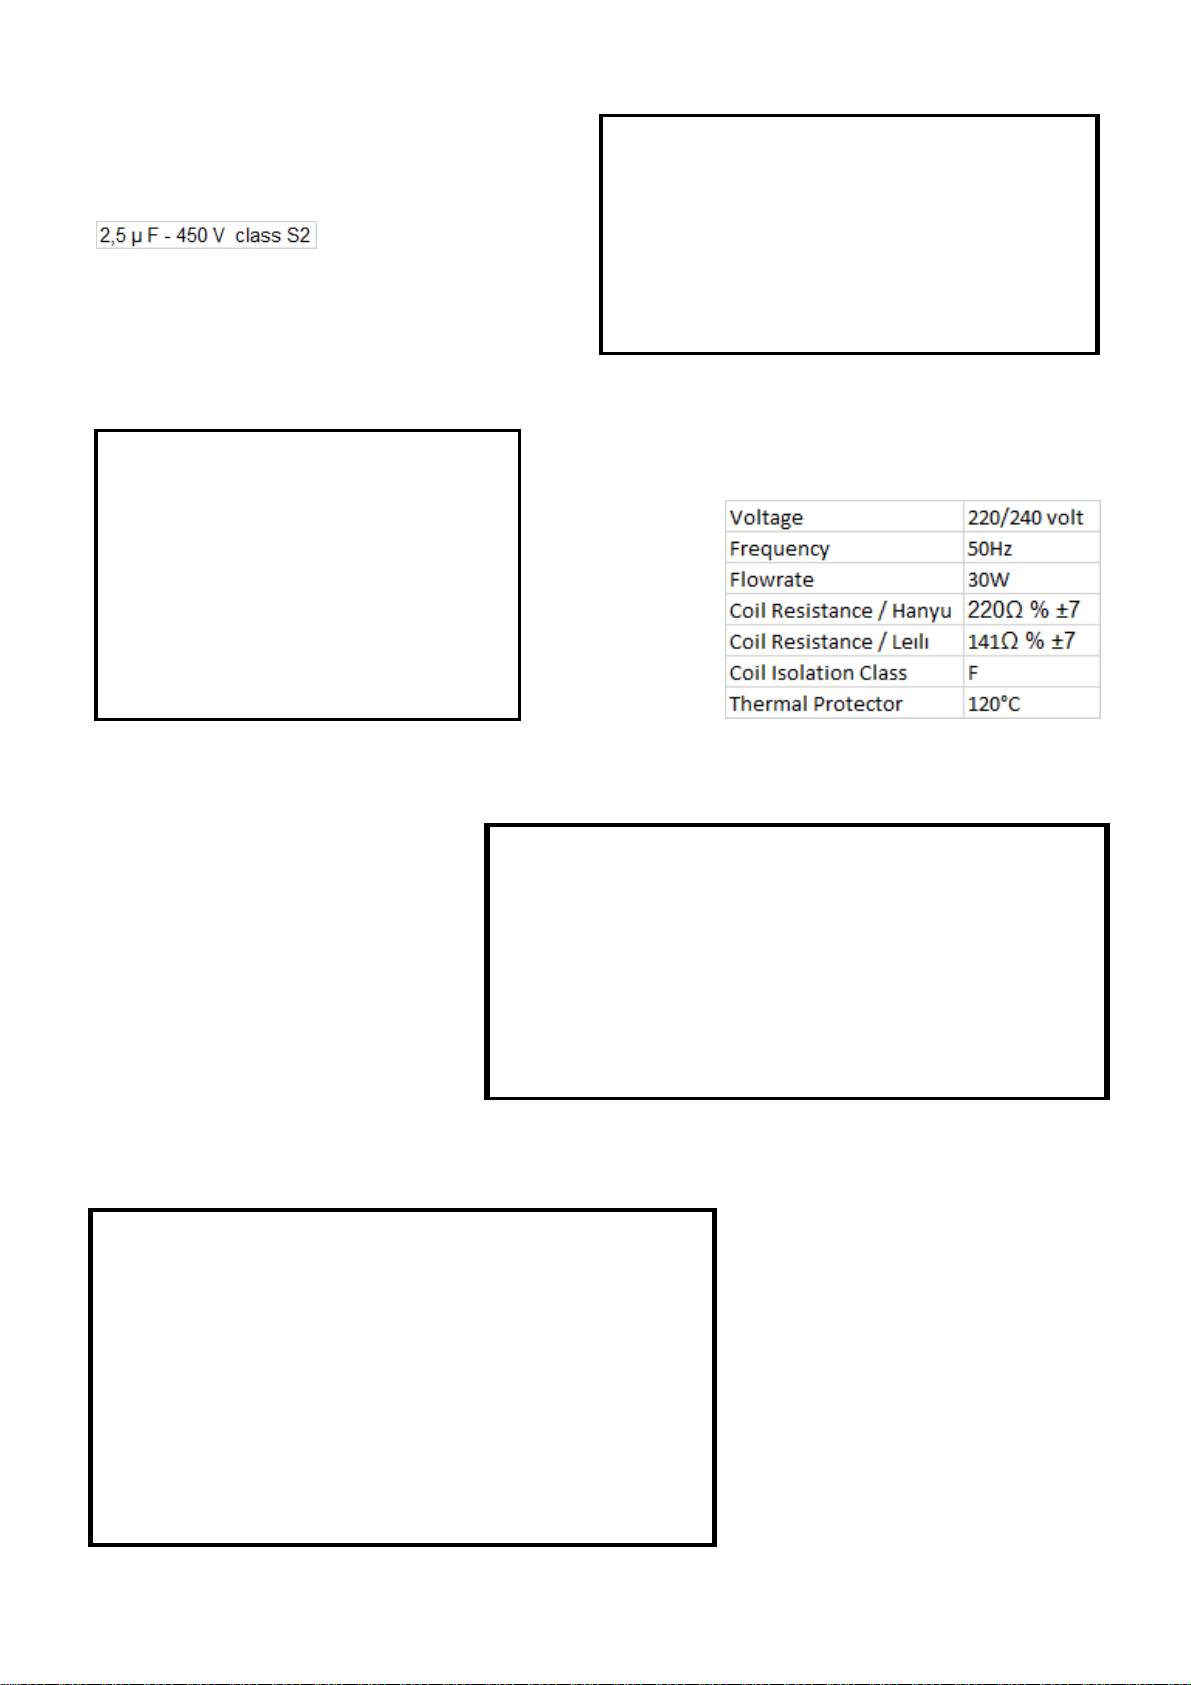
Capacitor is permanently connected
to the circulation pump coils.
CAPACITOR
DRAIN PUMP
Voltage 220/240 volt
Total power
1800W 27.6-30.6 ohm
HEATER
NTC
5

PRESSURE SWITCH
Voltage 220/240 v
Frequency 50/60 Hz 16 A
- 3 Pins
DIVERTER
There is diverter at freestanding
models It is assembled to the
Heater Casing Group.
WATER INLET VALVE
Single inlet and single outlet
standard single coil selenoid valve.
It is assembled to the basement
and connect to the airbreak by
hose.
6

REGENERATION VALVE
Regeneration valve is assembled
on the water softener.
PARASITE FILTER
It is used to prevent parasites
from the main supply It has been
assemblied to basement.
TURBO FAN MOTOR
There is a thermal protector shaded
pole motor, two pole temperature is
between -40-150 °C
7
Turbo fan resistance value: 265 ± %10 Ω (The
resistance of the torbo fan is measured with the
resistor switch).

SALT SENSOR
Voltage 250 V
Currency 50 mA
It is assembled to the water softener.
It warns if the salt is less than
requested quantity.
POWER CORD
DRAIN HOSE
8

UPPER SPRAY ARM
It distributes water from upper spray arm to dirty dishes in the upper basket.
It provides to wash the dishes in the upper basket through turning by the holes with
various angles.
LOWER SPRAY ARM
It distributes water from lower spray arm to dirty dishes in the lower basket.
It provides to wash the dishes in the lower basket through turning by the holes with
various angles.
DETERGENT / RINSE AID DISPANSER
Detergant dispenser consists of rinse aid and detergant compartment. It has been assemlied
to the ınner door by the snap fits. Only one bobbin has been used for operation the system.
9
INTERFACE AND HARDWARE
Interface T21_11
Apart ON/OFF switch that it is a separate component interface includes:
•Program button;
•Led “Rinse Aid”;
•Led “Salt”;
•“Start/Pause” button with integrated led;
•Leds according to program number;
•Program status with 4 leds; Led “Wash”; Led “Rinse”; Led “Dry”; Led “End”;
•“Half Load” button with 2 leds;
•“Extra Hygiene” option button with led;
•Extra button with 2 leds;
•“Tablet” option button with led;
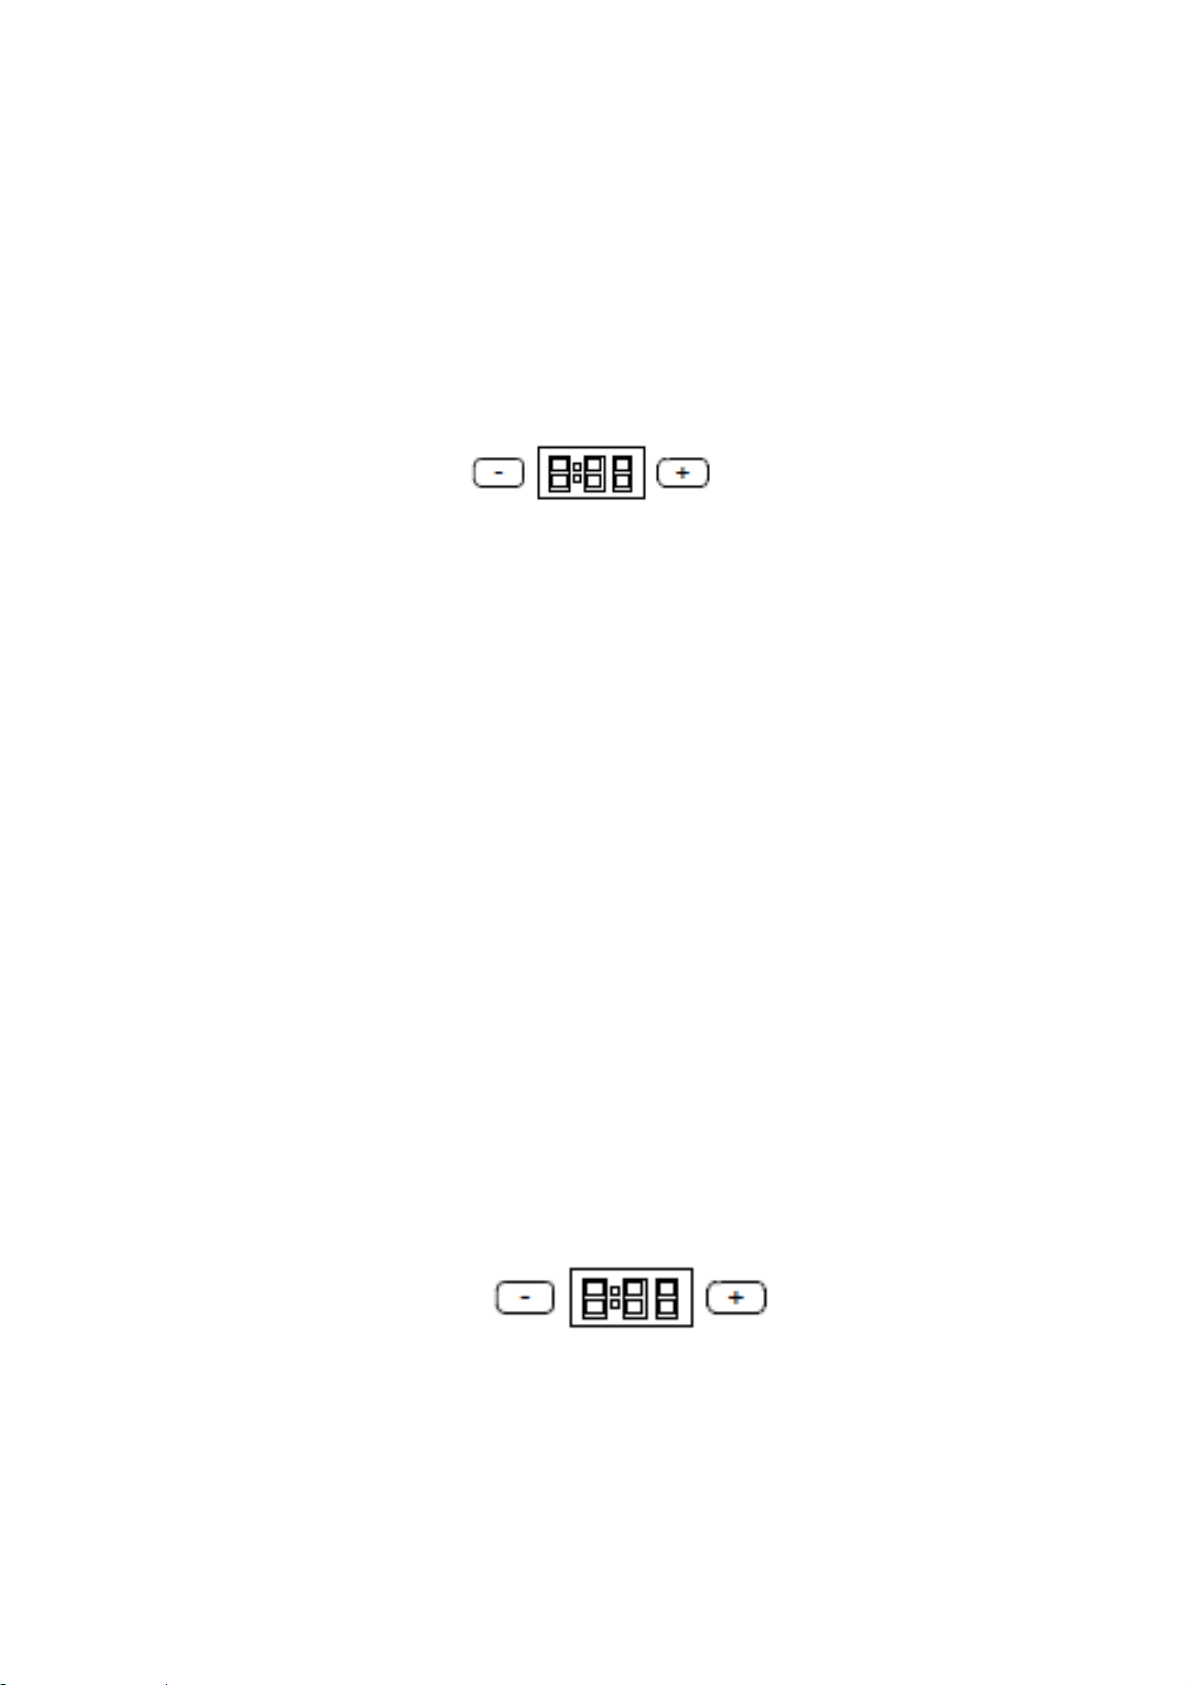
•3 Digit Display with “+” and “-”buttons
T21_11 Model
Note: Software of T21 main card will have the functionalities to use U31 & U21 displays also.
Also software of T21 main card will include “half load option” (button in the main card)
DISPLAY CARD MOD. T12_11&T13_11&T14_11&T21_11
When user switch ON the Dishwasher display shows the time of the selected program in
hour.
When program starts the remaining time is visualized in the same format and the led
corresponding at the wash phase is on (from Wash to End).
If the user push + or – a delay time occurs in format “Hnn” (max h:24).
When program starts it visualizes the remaining delay time in the same format (1 hour
steps).
When Child Lock option is switched on “CL” is shown for 2”. When Child Lock option is
switched off “CL” is shown twice, each time for 2”.
When a Failure is present the code of the failure is visualized.
Ex: “F2” with leds blink.
When service run the Salt Set program “SL” is visualized for 2” and then the last value
set is shown (if it’s the first time the default value “L3”). The value is chosen by
pressure of +/-.
Note: T11 software will also have the functionalities of digit display card (delay start,
remaining time) except Child lock function. Since child lock is activated in different
combination in T11 models.
10

WASHING PROGRAM
WASHING PROGRAM CROSS TABLE
Model Mini 14’ Quick
30’
40C
Delicate
40C
Economic
50C
Super
50’
60C
Intensive
65C
Daily
60C
Auto
Delicate
30°/50°C
Auto
Normal
50°/60°C
Auto
Intensive
60°/70°C
T11_11 - - - X X X - - - -
T12_11 - X - X X X - - - -
T13_11 X X X X X X - - - -
T14_11 X X - X X X - - - -
T21_11 X X - X X - X X X X
T21_2 prewash X - X X - X X X X
T21_4 X X - X X - X X X X
X = present
- = not present
Program start positions T21
T21_11 Model
Selecting, Starting, Running, and Termination of a Program
Flow indicators are: T1 = Wash/Dry led.
T2 = Wash/Rinse/Dry/End leds.
Selecting and starting program at Power On: When
dishwasher is switched on
S/P Flow ind. End Program led
Switch on ON OFF OFF ON
Select program ON OFF OFF ON
Pressure of S/P button OFF ON OFF ON
S/P Flow ind. End Program led
Door open ON OFF OFF ON
Door closed ON OFF OFF ON
Opening and closing door during program (not in dry steps):
During the program if the door is opened and re-closed without any modifications at the program
button and without the pressure of S/P button, the program continues. Washing program re-starts
after 8” if the measured temperature is equal or more than 45°C.
In model T12_11&T13_11&T21_11; the duration of the selected cycle is visualized in the display.
Button reaction time must be 200msn maximum.(after pushing P button, program must be changed in
200msn maximum) Opening and closing door before program starts:
Opening and closing door during program:
S/P Flow ind. End Program led
Door open Blink ON OFF ON
Door closed OFF ON OFF ON
11
Opening and closing door during program during a dry step:
During dry if the door is opened and re-closed, the program ends.
In model T12_11&T13_11&T14_11&T21_11; during dry if the door is opened and re-closed,
the program continues.
In model T12_11&T13_11&T14_11&T21_11;
S/P Flow ind. End Program led
Door open Blink ON OFF ON
Door closed OFF ON OFF ON
It is possible that the door is opened during a a regeneration cycle. If it occurs:
- During the first two step of a salt regeneration cycle ( 60” REGVALVE = ON or 60” REGVALVE
+DRAIN ON): at the door re-close the washing program will continuos.
- After the first two step of a salt regeneration cycle: at the door re-close the washing program will
end and the resin wash will be performed at the beginnin of the next washing cycle.
Selecting and starting program at door opened:
When dishwasher is switched on
S/P Flow ind. End Program led
Switch on ON OFF OFF ON
Door open ON OFF OFF ON
Select program ON OFF OFF ON
Pressure of S/P button Blink ON OFF ON
Door closed OFF ON OFF ON
Options & Models
Option T11 T12 T13 T14 T21
Half Load ( 1 mode ) X X X X -
Delay Start - X X X X
Half Load ( 3 modes ) - - - - X
Extra (Rinse&Drying) - - - - X
Prewash - - - - X
Tablet - - X X X
Hygiene x x x
Rinse Aid absence and Salt absence visualization
In all model, two leds for rinse aid absence and salt absence are present. They
are driven by hardware.
Note: T21 software will also include halfload (1 mode) option.
Compatibility between Options
Options Half Load Extra
Rinse
Extra
Drying
Tablet Delay Start Hygiene
Half Load - OK OK OK OK OK
Extra Rinse OK - OK OK OK OK
Extra Drying OK OK - OK OK -
Tablet OK OK OK - OK OK
Delay Start OK OK OK OK - OK
Hygiene OK OK - OK OK -
12

er selected
extra dry option(its led is on). Then, he selected extra hygiene. Extra dry option led turns off, extra hygiene led turns on.
Note: When incompatible options are selected, led of last selected option turns on, the
other one turns off. Ex: User selected extra dry option(its led is on). Then, he selected
extra hygiene. Extra dry option led turns off, extra hygiene led turns on.
Compatibility between Options&Programs(T21)
Half Load Hygiene Tablet Delay Start E.Rinse E.Dry
Mini 14’ X - - X - -
Quick 30’
40C
X - X X X X
Economic
50C
X X X X X X
Super 50’
60C
X X X X X X
Daily 60C X X X X X X
Auto Delicate X X X X X X
Auto Normal X X X X X X
Auto
Intensive
X X X X X X
Option Selection:
-In case of Power fail during washing , options are stored in memory.
-When the machine is switched on again, the last selected options are visualized and washing
must go on remaining.
-Due to Eco design requirements, each energized of the machine (by pressing ON/OFF) Eco
program must be fixed as default, the options that are chosen before will be cancelled.
In case of Power fail, options are stored in memory if it occurs in washing cycle.
At the end of the program, when drain step is performed, only the third digit that
is on the right of display will be ON. (It shows only one ‘‘0’’). Then, when the
users push any button, display shows the total time of the program).
Each energized of the machine (by pressing ON/OFF), Eco program will be set as
default setting. And the options that are chosen before (i.e: child lock, delay option
ex...) will be cancelled.
Half load (with 3 modes) (Alternating washing) (T21_11 models)
Half Load option is selected before program start by pressing the regarding option button.
When a half load option is chosen, washing program starts from main wash step (skipping the prewash step) When Half
Load button is pressed:
First time: upper spray led is ON and lower spray led is OFF. Wash is executed only with upper spray arm. Second time:
upper spray led is OFF and lower spray arm is ON. Wash is executed only with lower spray arm. Third time: upper spray
led is ON and lower spray arm is ON.
Fourth time: upper spray led is OFF and lower spray arm is OFF. Normal wash.
UPPER
LOWER
HALF
LOAD
13
Delay Start option (T12_11,T13_11,T14_11,T21_11 model)
Delay start option is selected before program start by pressing “+” and “-” button in the display
card. To change this option during a delay time it necessary to press s/p button and put the
machine in “pause” mode. Before start program, the delay is selected with pressure of “+” and
“-” buttons. The steps of increment/decrement are 1 hour. By pressing S_P, program starts and
the value of the chosen delay blinks one time. Then the display shows the program duration
and remaining delay time(with steps of one hour (H:01, H:02 etc)). The maximum value of the
delay is 24 hours.
Note for: H01 returns after H24. In pause mode of delay, program and delay durations are shown
alternately. Meanwhile, S/P blinks and program led is ON.
Extra Rinse and Extra Drying Option (T21_11 model)
Extra option is selected before program start by pressing the regarding option button.
When Extra button is pressed:
First time: Rinse led is ON and Drying led is OFF. Wash is executed with the following steps with “Rinse”
functions instead of the normal.
Second time: Rinse led is OFF and Drying led is ON. Wash is executed with the following steps with
“Drying” functions instead of the normal.
Third time: Rinse led is ON and Drying led is ON. Wash is executed with the following steps with both
“Rinse” and “Drying” functions instead of the normal.
Fourth time: Rinse led is OFF and Drying led is OFF. Normal wash.
Pre Wash Option (T13_11, T14_11, T21_11 models)
Pre Wash option is always selectable by pressing the regarding option button. With
this option a cold rinse is added at the beginning of the washing cycle.
In some program this option causes alterations in the washing lineagramma (Intensive 65°C becomes Extra Intensive
70°C and Hygiene becomes Extra Hygiene).
Note: T11 and T12 software will also include “Prewash” option.
Tablet (T13_11, T14_11, T21_11 models)
Tablet option is selectable at any time. If it is pressed during a washing program the program will execute the
following steps with “tablet” functions instead of the normal.
Note: T11 and T12 software will also include “Tablet” detergent option.
Child lock (T12_11, T13_11,T14_11, T21_11 model)
Child lock is enable/disabled by contemporary pressure of “+” and “-” buttons in the display card for
3”. When lock is enabled the “CL” is shown in the display for 2”. In T21, also wash led blinks once.
When lock is disabled the “CL” is shown twice in the display for 2”.In T21, also wash led blinks twice.
When lock is enabled and a button is touched “CL” is shown in the display for 2” (not for “+” or
“–“button).
IONIZER
For T2x:Ionizer function is activated/deactivated by pressing “Extra” button for 3”. When it is
activated, display shows “Ion”. Also, Ionizer can be deactivated by turning machine off and on.
14

When the door is closed and the function is selected, ionizer function will start. There is no
need to press Start/Pause button. Start/Pause button led is off while ionizer is working.
Ionizer does not work together with any program or not executed in any program.
The function will follow below loop and if there is no intervention, it continues until 24 hours is
completed. -During 5 minutes(Between 0-5 minutes): ionizer+mini fan+turbo fan will work.
-During 55 minutes(Between 5-60 minutes): ionizer+mini fan+turbo fan will not work.
After 24 hours, it is automatically deactivated.
When ionizer deactivated, machine is in standby position.
When the door is open and ionizer is activated, ionizer led and inner light become on.Also,
Start/Pause led blinks. Ionizer function pauses if the door is open. To continue, the door
should be closed.
INNER LIGHT OPTION: (T21_1,T21_4)
Machine must be ON position during activation and deactivation of inner
light modes. Note: open or close position of the door is not important
How to change from “ECO MODE” to “NORMAL MODE” for Inner Light option
•First energize the machine via main switch (if it is in OFF position).
•Press ‘Tablet and ‘’Hygiene” buttons simultaneously for 3 seconds.
•“IL0” will be shown in the display for 2 seconds to show the “Normal Mode” is selected for
inner light option.
After “Normal Mode” is selected, the inner light will be ON as long as the machine is energized and
machine door is open.
How to change from “NORMAL MODE” to “ECO MODE” for Inner Light option
•First energize the machine via main switch (if it is in OFF position).
•Press ‘’Tablet’’ and ‘’Hygiene’’ buttons simultaneously for 3 seconds.
•“IL1” will be shown in the digit display for 2 seconds to show the “Eco Mode” is selected for
inner light option.
15

•Also inner light turns OFF and ON again (blinks momentarily) to show this
selection is activated.
•After “Eco Mode” is selected, the inner light will be ON for 4min after machine door is
opened and then turns OFF.
If any user intervention occurs such as pressing buttons, Eco Mode cycle starts from beginning
(inner light is ON for 4min and then becomes OFF again)
Note: Factory setting for inner light is set to ‘’IL1’’.
Note: Light Module (TY9) is introduced to execute this specialist
feature.
WASHING PROGRAM DURATION (T12_11, T13_11, T14_11,T21_11 MODEL)
Before the beginning of the wash, the display card shows the duration of program.
During the wash, the display card shows the remaining time of program.
During the wash, if the user presses S/P and then presses the program selection button:
- If the new program has a corresponding step, the display shows the time of the new program
without the passed time.
- If the new program has not the corresponding step (ex: it starts in a subsequence step)
the entire time of the new program is shown.
SOFTWARE REQUIREMENTS
Heater
Heating relay must be switched with un-supplied
Heater. It means: - Stop Circulation Pump;
Wait (pressure switch certainly open);
-
-
-
-
Open/Close Heater Relay;
Wait (Heater relay certainly
close); Start Circulation Pump.
If Tablet is selected, heating steps must be < 58°C for steps before last rinse.
Water Fill
Action:
Water Load is obtained by flow meter signals. When a fixed quantity of
water is loaded, the reaching water level is checked by the activation of circulation
pump. When the pressure is high enough, the pressure switch is activated.
Precaution:
At the start program a drain 30” + empty is executed before fill.
When Inlet valve is ON, if there aren’t flow meter impulses, failure routine of “absence
of flow meter impulses routine” works (see on failure chapter).
If pressure sensing switch turn OFF during the wash, after a drain +20”, another water
load is executed (also see”return empty level” failure in failure chapter).
Water fill must work:
Pressure > 0,8l: all OK
0,3 < pressure < 0,8l: OK with time out
Pressure < 0,3l: stop cycle.
Note:
T2: lower spray arm starts.
16

Water drain
Precaution:
if pressure switch level doesn’t switch in Empty level (during circulation pump on),
failure of Water drain works (see failure chapter).
NOTE:drain is performed with lower spray arm.
Detergent dispenser step
T2: for the detergent step 2’ of upper spray arm are performed.
Rinse aid dispenser step
If the door is opened and re-closed during washing program, without a re-start program,
detergent dispenser must return in Rinse aid distribution state.
T2: for the rinse aid step 2’ of upper spray arm is performed.
FEATURE OF TIME PHASE:
At the beginning o the main wash of eco program, If temperature of water < 30C , Time
phase is not activated at the main wash of eco program
At the beginning o the main wash of eco program, If temperature of water > 30C , Time
phase is activated at the main wash of eco program
These two rules cover only eco programs.
Action: Water drain starts with drain pump ON for 33”. After 30”, circulation pump
ON.When empty level is recognised (by pressure switch signal), the circulation pump
stops and the machine continues for the request steps.
REGENERATION CYCLE
When it occurs the regeneration valve works after last rinse and during the drying steps.
When it occurs the regeneration valve works after last rinse and during the drying steps. There
are 6 hardness levels.
Water Hardness level Litres
Level 1 Never
Level 2 116 lt
Level 3 64 lt
Level 4 52 lt
Level 5 46 lt
Level 6 16 lt
The consumed litres are counted by flow meter impulses.
In case of flow meter broken, the litres corresponding at the flow meter time out are used
If user cancels a program during regeneration or after regeneration and before resin wash, at
the beginning of the next program the dishwasher performs the resin wash to remove the
salty water from the resin chamber. The resin wash will be: load 2 lt of water with drain pump
on. During the resin wash the circulation Pump must be off.
Regeneration is not performed at prewash program
If l water hardness level is changed from lower to higher, regeneration cycle is performed at
the end of the first program
If l water hardness level is changed from higher to lower, regeneration cycle is not performed
at the end of the first program. Regeneration is performed after water level reach to value of
level
17

•If Water hardnes level is 5 or 6
- First regeneration step is performed 0,2lt water
•If Water hardnes level is 2 or 3 or 4
- First regeneration step is performed 0,1lt water
•If Water hardnes level is 1
In case of Tablet option ON (only mod. T13 and T21):
- If the level set is less than L4: the regeneration cycle is not performed, but the quantity
of consumed water is counted. When the target value is reached, at the first cycle without the
tablet the regeneration cycle is performed.
- If the level set is equal or more than L5: the regeneration cycle is performed when the
quantity target is reached.
Water Hardness set for T12_11&T13_11&T14_11&T21_11 Models
Only service can execute this procedure.
→ Power OFF; pressure program selection button button.
→ Power ON and continue to pressure program selection button at
least for 3”. → If “Hardness set” is recognized “SL” is shown for 2”.
→ Release program selection button. The last setting level is viewed*.
→ Pressure + or – button to set the desired level.
At any pressure of + button hardness level is incremented. At any pressure of – button hardness level is
decremented. Hardness level 1 returns after hardness level 6.
*If it is the first hardness set, hardness level is L3.
Level Display
1 L1
2 L2
3 L3
4 L4
5 L5
6 L6
Regenartion step is not performed
The consumed litres are counted by flow meter impulses.
In case of flow meter broken, the litres corresponding at the flow meter time out are used
(2,1 lt + 2,5 lt).
-
RINSE AID SET
→ Power OFF; press program selection button button.
→ Power ON and continue to press program selection button for 5”.
→ If “Rinse aid set” is recognized
Without display modelsall leds blink twice.
With display models “rA” is shown for 2”.
→ Release program selection button. The last setting level is
viewed*.
→ Press
program selection button to set the desired level for models without display
+ or – button to set the desired level for models with display.
18
This manual suits for next models
7
Table of contents
Other SOGEDIS Dishwasher manuals


