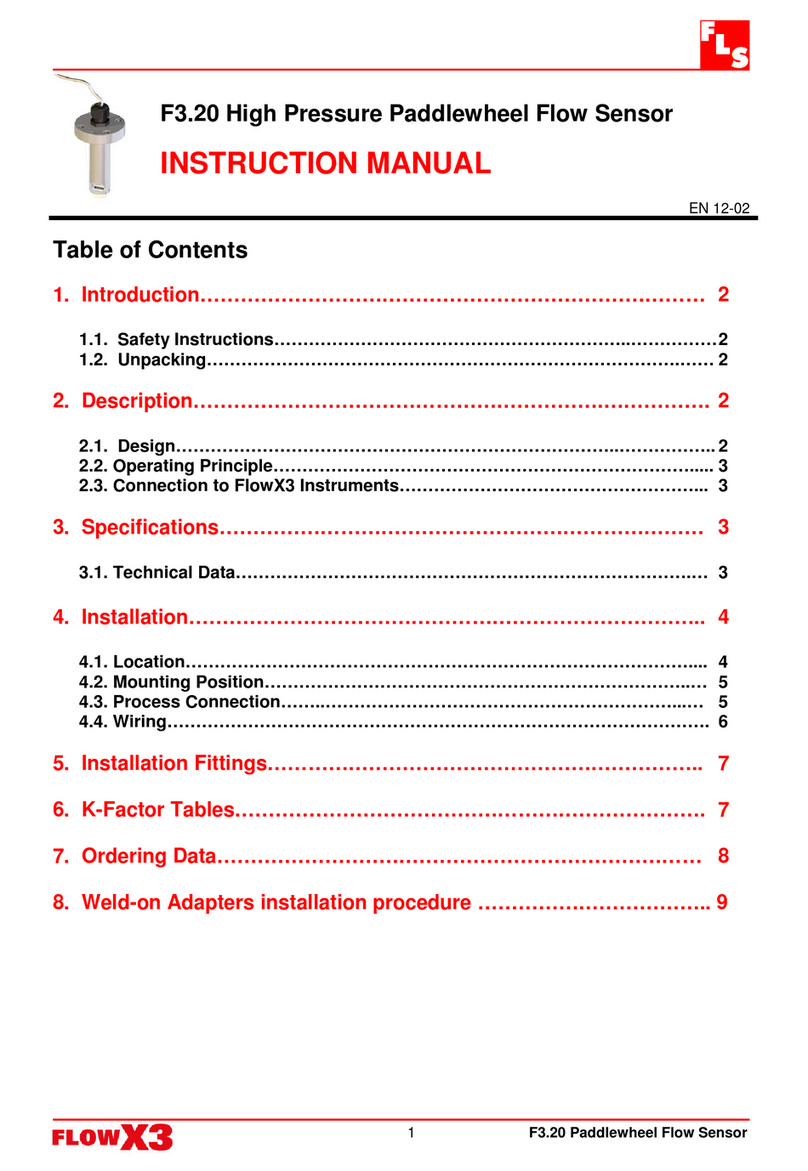
Sol Spring Manual

Pilot´s Manual
Harnesses
Spring
Spring
Airbag
07/2009

32
PLEASE READ THIS MANUAL CAREFULLY
AND NOTE THE FOLLOWING DETAILS
HIS HARNESS MEETS AT THE TIME OF DELIVERY THE
REQUIREMENTS OF THE LTF (LUFTTÜCHTIGKEITSFORDERUNGEN)
CERTIFICATION OR THE EN 926 (EURO NORM) OR THE AFNOR
SHV AND AEROTESTS).
ANY ALTERATIONS TO THE HARNESS WILL RENDER ITS
CERTIFICATION NULL AND VOID!
THE USE OF THIS HARNESS IS SOLELY AT THE USER'S OWN RISK!
MANUFACTURER AND DISTRIBUTOR DO NOT ACCEPT ANY LIABILITY.
PILOTS ARE RESPONSIBLE FOR THEIR OWN SAFETY AND THEIR
HARNESS'S AIRWORTHINESS.
THE AUTHOR ASSUMES, THAT THE PILOT IS IN POSSESSION OF
A VALID PARAGLIDING LICENCE !
Welcome to the SOL Team .............................................................35
About SOL ....................................................................................36
Philosophy ...................................................................................37
Introduction ................................................................................38
The SPRING and SPRING AIRBAG CYGNUS....................................39
Pre-Flight adjustments and installations.....................................39
Installing the protectors...............................................................40
Installing the airbag (Spring Airbag Cygnus).................................41
Installing the carabiners...............................................................41
Position adjustments ...................................................................41
Rescue parachute compartment ...................................................44
Installing the rescue parachute ....................................................44
Water Ballast Compartment..........................................................48
Storage in the airbag compartment...............................................48
Installing the speed system .........................................................48
Tension Spring Retrieve System....................................................49
Installing the foot stirrup..............................................................49
Installing the tow release system..................................................50
Installing a cockpit.......................................................................51
Final adjustments.........................................................................51
Maintenance, Repair and Cleaning ................................................52
Water Landing..............................................................................54
Technical Data .............................................................................55
Final Words ..................................................................................57
Distance measure between carabiners ..........................................43
33
INDEX
.
Technical innovations
Side protectors ..
protector
Tandem flight
SOL Harness with third party gliders
Maintenance
Repairs
Pulleys, Carabiners and click lock buckles...
Cleaning
...............................................................38
......................................................................39
Back ..........................................................................40
Flight position.............................................................................43
............................................................................52
..........................................52
..............................................................................52
.....................................................................................53
Zipper ......................................................................................53
.................................54
....................................................................................54
Size table ...................................................................................55
Features.....................................................................................56
Legend ......................................................................................56

We trust your harness will bring you many great life memories you will
cherish forever.
WELCOME TO THE SOL TEAM!
Thank you for selecting a SOL Paragliders harness. You have acquired a
high quality product, manufactured under one of the most demanding
industry standards worldwide.
We would like you to read this manual carefully and thoroughly. In it, you
will find important information about using your new equipment.
In the event you should have any questions about its usage or you should
wish to be updated on the latest news at SOL.We remain at your disposal
at our Sales and Service Departments at the phone +55(47)3275-7753
Don't forget to access our website frequently at www.solsports.com.br
to be updated on the latest models' launchings, results and news from
the world of paragliding.
Be welcome to the SOL Team of pilots.
35

It is part of our history to break various of the most important world records
in free flight and pilots winning national and international championships
all over the world, flying equipments designed and produced through SOL
ABOUT SOL
Founded in 1991, after six months of research and many visits to several
manufacturing facilities and suppliers, SOL began its production in
partnership with the European brands Condor, Comet and Nova, and
became autonomous in 1999 with its own testing and development centers.
From the beginning SOL Paragliders has adopted the philosophy of utilizing
certified designs, manufactured with imported materials of the highest
quality by specialized and skilled-trained staff.
In 1995, the company moved to its current facility, occupying an area of
3.400 m² and has at its disposal a team of 110 employees, 22 of which are
pilots. SOL provides a comprehensive benefits package such as Health Plan,
Life Insurance, partnerships with pharmacies, transportation vouchers,
education grants and incentive getaways to employees who outperform each
month.
At SOL, we take extreme measures to maintain our machinery and
manufacturing equipment current with the world market. This way, we
safeguard our accuracy everyday in the production process, control and
assuring the high quality of SOL brand and products throughout 65
countries around the world.
SOL is one of the few paragliding enterprises worldwide to have its own
manufacturing facilities able to test every new model before making it
available to the market, which fosters the reliability necessary for excellent
performance when flying.
In early 2004 SOL Paragliders became certified by DHV, which is the most
respected regulating body of free-flying worldwide. Its mandate is to make
sure its members have the capacity to reproduce faithfully the certified
equipment on an industrial scale. Few facilities in the world posess this
certification in their manufacturing process. SOL was one of the firsts to
obtain it.
Paragliders.
36
Safety: The new product has to offer a level of safety that is at par or
better than the one it is replacing;
PHILOSOPHY
SOL’s philosophy is to introduce products that are considerably better than
current ones, in order to guarantee significant advancements in four
aspects: Safety, Performance, Ease of Operation and Innovation.
Innovation: New products must display real benefits to the user, facilitating
free-flying, increased safety, or both.
Ease of Operation: The new product must display higher levels and better
operational ease than the one it is replacing;
Performance: The new product must perform better than the one it is
replacing;
37

Like any other SOL product, the materials used are carefully selected,
assuring greater durability and high safety ratings. All SOL harnesses are
manufactured at our own plant facility.
Since we spend a lot of time in the air - whether testing our products,
flying for leisure or breaking local and world records - nothing else makes
more sense than taking advantage of these opportunities to develop and
test our harnesses, always in search of safety innovations, handling and
comfort.
SOL offers a complete and the latest line of Harnesses available for all
levels, ranging from early flying stages to aerobatics.
INTRODUCTION
The development process and design of every new product begins at the
computer. Drawing Software, 2D, 3D modeling and simulation are utilized
before the actual manufacturing of prototypes, in order to ensure greater
accuracy in each new design.
38
The SPRING and SPRING AIRBAG CYGNUS
·Independent bridles system according to LTF/ EN norm;
·Adjustment straps manufactured according to LTF / EN norm;
·Adjustable Quick ock T-Cobra for 38-55 cm;
·Extended speed pulley;
·Waist adjustment;
·Side adjustment with trimmer and safety strap;
·ABS System;
·Quick Lock leg buckles;
·Passage for ballast hose exit;
·
·Anatomic shoulder cuts;
·Back composed by ergonomic foam and PP plate;
·Side foam protection;
·Spacious side pocket;
·Sliding shoulder straps;
·Shoulder strap attached to seat;
·Lateral reinforcement for better load distribution;
·Elastic rig for speed system and foot stirrup;
·Impact and perforation protection plate;
·Rescue compartment 5 blades;.
·Foot stirrup;
·Spacious back pockets;
·Water compartment;
·
·T
The SOL Harnesses provide a variety of adjustment possibilities, for the
pilot to find his/her ideal flying position.
Technical Innovations:
L
Self release system of foot stirrup on rescue deployment;
18 cm foam back protector;
ension spring retrieve speed system when not in use;
It may be necessary to do a few test flights until the ideal setting is
achieved, but the pilot will be rewarded with amazing comfortable flights.
The first adjustment must be done in a simulator where you can fit the
harness to the best flying position.
PRE-FLIGHT ADJUSTMENTS and INSTALLATIONS
39

INSTALLING THE CARABINERS
INSTALLING THE AIRBAG (Spring Airbag Cygnus)
The Spring Airbag harness is composed by
a detachable zip-airbag easy to handle.
POSITION ADJUSTMENTS
Before the first flight, we suggest the pilot to simulate the flying position
hanging the harness on a harness tester, sitting on SOL Harness and
trying to find the best position adjustment. This simulation becomes more
realistic if the back pocket is filled with objects the pilot would normally
carry during flight.
41
39
Attention:
-Install the back protection and the reserve parachute before adjusting
your SOL Harness.
For your first flight, choose calm weather conditions. Should you need to
make further adjustments, it will be easier to find the ideal position after
this first flight.
Attention:
-Do not carry instruments that may perforate the harness in case of impact!
INSTALLING THE PROTECTORS
Attention:
- The side protectors must be fed through the side pockets.
Back Protector
Side protectors
The entire harness body is equipped with an anti-perforating plate under
the back and the seat, side protections, back foam and adjustment straps
for the pilot’s safety.
Attention:
The back protector must be fed through the rear pocket!
40

Flight Position
Avoid a reclined flight position, as this alters the handling of the paraglider:
your command is shortened and you are more vulnerable to a twist.
The measure of 42cm (M) is premarked
on the chest webbing as a reference.
The easy check measure tape
is included in your harness for
you to set the exact distance
measure between the cara-
biners.
Distance between carabiners according to SOL paragliders sizes:
S - 40 cm M - 42cm L - 44 cm XL - 46cm Tandem - 44 cm
of the paraglider may not correspond to the certification.
Depending on the paraglider size, there is a recommended carabiner distance
to which the paraglider was designed and tested. With SOL paragliders you
must fly within these measures. In case you are outside of them, the behaivior
DISTANCE MEASURE BETWEEN CARABINERS
43
-The pilot must maintain the chest strap distance at the specified measurement
as shown in the manual, therefore the certification characteristics are not altered.
After adjusting the back, the pilot must choose the best body inclination,
respecting a central vertical line. We don't recommend a steep inclination,
so that vision and access to commands are not jeopardized.
The shoulder strap is adjustable, varying according to the pilots' height. For
better comfort, the shoulder straps support part of the dorsal weight.
The chest strap regulates the distance between the two carabiners, which
varies depending on the paraglider's size (verify through easy check measure tape).
The legs' straps adjustment is very accommodating and allows for a wide
range of heights. All SOL harnesses are equipped with leg locks, which works
together with the chest strap, making the connection of pilot and harness.
Attention:
Attention:
-The leg setting should not be too tight, to avoid jeopardizing good movement.
-Make sure the setting is symmetric.
Observe the details how to adjust the Spring and Spring Airbag harness
for flight :
42

Observe the details how to execute the rescue parachute installation.If
necessary, you should ask for professional help to be sure of the properly
installation of the resuce system.
INSTALLING THE RESCUE PARACHUTE
ness before the first flight.
The reserve parachute compartment of your
harness was designed for most of the parachute
models in the market. Any new combination of
rescue and harness need to be checked by a quali-
fied person or the respective manufacturer. Any
questions concerning its operation must be dealt
with during the installation and setting of the har-
RESCUE PARACHUTE COMPARTMENT
Attention:
Never sit down in your harness for tests
or other activities when it is layed on the
ground, this can damage the harness, the
rescue parachute compartment and its operation.
.
Pay special attention to the fact that a deployment
of your installed rescue system should be simulated
for your training.
44
Attention on illustration 5 and 11:
Pull the bridles firmly to stop an involuntary opening, avoiding a dangerous
friction of the looped bridles in case of a reserve deployment.
45

Attention:
The closure flaps maintain the rescue parachute in the right position
and protect it from dust and humidity (Figure 19).
In case of a water landing, the rescue parachute need to be removed
from the harness, be dried and re-packed before it is installed back
into the compartment.
- Before every flight, make sure that the rescue handle and its retention
cables are in the correct setting position.
- The rescue compartment size is adjustable to the rescue size to be
installed that corresponds to the harness size x pilot.
- Any new rescue installation must be checked through a qualified person.
The Spring and Spring Airbag features a rescue parachute installation
system with easy access and visible rescue handle.
47
46

TENSION SPRING RETRIEVE SYSTEM
The Spring and Spring Airbag
has a tension spring retrieve
system for the speed bar. It
makes sure that it maintains
close beaneath the seatboard
when not in use. Primarly for not
to interfere in an eventual rescue
deployment. The elastic need to
be installed as close as possible
to the speed bar but without any
tension applied.
INSTALLING THE FOOT STIRRUP
The foot stirrup that ac-
companies the harness
will be disconnected
automatically for your
safety in case of a rescue
deployment together with
the deployment handle.
49
INSTALLING THE SPEED SYSTEM
A system of pulleys is in task for
the load and travel of the speed
bar. The lines run on each side
from the D-ring (1), to the eyelet
(2), passing through the 2 pulleys
(3+4). The end of the cord is being
knotted (5-9) with the sister clip (A)
to be connected to the sister clip (B)
After the installation, the speed system
need to be sharp tuned to optimize
STORAGE IN THE AIRBAG COMPARTMENT
The paraglider back pack can be
easily stored in the pocket of the
Airbag compartment.
WATER BALLAST COMPARTMENT
Your harness Spring or Spring Airbag has
at its disposal a water compartment located
in an aerodynamically efficient place in the
rear pocket with easy access.
of the riser on each side
its travel and function.
48

FINAL ADJUSTMENTS
Before any take-off with your new SOL Harness, make sure to perform the
following inspection in detail:
1) check, i
2) check, i
3)
4) check, i
f all pockets are closed correctly;
f reserve parachute handle is in the
correct position;
check, if all click log buckles are connected;
f the recommended carabiner distance is
set according to the paraglider’s certification.
INSTALLING A COCKPIT
A cockpit for your instruments can be connected to the main carabiners. You shoud choose
the right model according to the functions it should perform (cockpit for instruments only,
as in the picture; cockpit for instruments with water ballast container or cockpit for instru-
ments with rescue container).
51
INSTALLING THE TOW RELEASE SYSTEM
Your SOL harness is suitable for towing, provided that it is attached to the
tow release system.
This must be fitted on the same carabiners that link the harness to the
paraglider, being activated by an elastic rope conveniently located which
releases the equipment for flight when pulled.
In any doubt, please consult the tow driver and the handbook of your
paraglider in the section ‘towing’.
Pay attention to the correct installation
of the speed system and the foot stirrup
to avoid any interference in case of a
rescue deployment.
50

In case of contact with sea water, rinse the harness carefully with fresh
water only. Sea water can diminish its resistance even so.
53
Zipper
The zipper should open and close softly
and the slider should travel through its path
easily. If you experience any trouble with
the slider, you should apply wax or lubricant
spray to minimize the friction between the
parts.
In most cases, you will be able to repair the
zipper yourself. In case the slider is not able
to close the zipper, bring it to the starting
point and with some pliers lighten the slider
on both sides.
We advise you, to get done any repair by the manufacturer or authorized
repair shop, where original materials are utilized and technical expertise are
Repairs:
second to none.
Tandem Flight
The Spring and Spring Airbag arnesses were not designed for Tandem
flights, neither for pilots nor for passengers.
H
SOL Harness with third party paragliders:
SOL Harnesses don't have any usage restriction in combination with any
other brand of paragliders. Please refer to your paraglider's manual.
MAINTENANCE, REPAIR AND CLEANING
Maintenance:
We recommend to check your SOL Harness completely at least once a year,
verifying the condition of the sewing and webbing parts and the operation of
the buckles. A regular ventilation and repacking of your rescue parachute is
essential.
In case of a rescue deployment of the parachute or any heavy loading
exposure, your harness should be checked by an authorised service
center or the manufacturer.
The harness fabric is made mainly out of Nylon, which like any other
synthetic material is sensitive to UV light radiation, causing it to
wearout, losing its mechanical resistance, and thus increasing its
deterioration. For this reason, the unnecessary exposure to sun light,
When not in use, leave the harness stored away at adequate ventilation
Avoid dragging your harness on the ground, on rocks or on wet surfaces
as this speeds up the aging process, furthermore, sharp corners may cut
Prolonged exposure to humidity and heat must also be avoided to
which carries out a high UV radiation level should be avoided.
prevent early und unnecessary material deterioration.
and well protected.
the fabric.
52

Seat width (cm)
Seat length (cm)
Height of connection point (cm)
Spring (Kg)
Spring Airbag (Kg)
Harness measures M L XL
35 37 39
36 38 40
39 41 43
(
)
Without Back Protector, Seat, Reserve
Parachute, Carabiners and Lateral Protectors
(
)
Without Back Protector, Seat, Reserve
Parachute, Carabiners and Lateral Protectors
TECHNICAL DATA
Maximum pilot weight allowed: 100 kg DHV
(Prüf-Nr. 11071400-11071421 SOL FLEX AB (ABS) )
·Back Protector 18 cm: 0.95Kg
·Seat Board: 0.80Kg
·Side Protectors: 0.26Kg
Size Table :
4,6 4,7 4,8
5,3 5,4 5,5
55
54
Use water and neutral soap to clean your SOL Harness, avoiding scrubbing
over the sewn areas.
Cleaning:
WATER LANDING
Usually safety courses are taught over water, or a poorly calculated landing
may force you to land in the water. In this event, you must be careful since
the back protector at the first moment will act as a floating device, therefore
forcing your head into the water and you could be in danger of drowning.
The foam, already saturated with water will get heavy and may naturally sink.
After a water landing you need to tear off the back protector, seat board,
reserve parachute, all lateral protectors and let them all dry under shade in
a breezy area.
It is very important to maintain all pulleys, carabiners, click-lock buckles
well lubricated, as this will keep from stressing the speed system lines and
guides. Apply wax or lubricant spray. Read carefully about the lubricant to
avoid spots and fabric deterioration. Do not apply on the stichings.
Pulleys, Carabiners and Click lock buckles

FINAL WORDS
We wish you good and safe flights with your SOL HARNESS.
We a part of the community in which we live: friends, family and even people
we don't necessarily know worry about us. Our obligation towards this
community is to keep ourselves healthy and that at each landing we will be
one landing happier than before. We fly so that we can feel more alive.
Don't overestimate your skills and be honest with yourself. Every year we
see many accidents which inmost cases could be prevented with a minor
adjustment.
Safety is the major theme of our sport. In order to fly safely, pilots must
train, study, practice and be alert to the dangers around us.
In order to achieve excellent safety levels, we must fly regularly as much
as possible, don't go beyond our limitations and avoid exposing ourselves
to unnecessary dangers. Learning to fly is a slow process and takes years,
so don't pressure yourself. If conditions are not favorable, keep your
equipment stored away.
57
Features :
Spring
Spring
Airbag
18 cm
18 cm
Legend:
27
Deutsch
Rücken Protektor 14cm
Rücken Protektor 18cm
Airbag Cygnus
Seiten Protektoren
Seiten Taschen
Rücken Stautaschen
Beinstrecker
Verbindungsleine für Rettungsschirm
Beschleuniger Lenkrolle
Beschleuniger Doppel Lenkrolle
Leichtschnallen
Schnellverschlüsse
Schnellverschlüsse-T safe
Schnellverschlüsse-V safe
Rettungsschirmcontainer unter Sitz
Rettungsschirmcontainer am Rücken
Português
Protetor Dorsal 14cm
Protetor Dorsal 18cm
Airbag Cygnus
Protetor lateral
Bolso lateral
Bolsa dorsal
Apoio de pé
Fita para o reserva
Roldana para acelerador
Roldana dupla para acelerador
Fechos leves
Fechos automático
Fechos automático-T
Fechos automático-V
Container de reserva inferior
Container de reserva dorsal
Français
Potection dorsale 14cm
Potection dorsale 18cm
Airbag Cygnus
Protection latérale
Poche latérale
Poche dorsale
Cale-pieds
Sangle de reserve
Poulie d´accélérateur
Double poulie d´accélérateur
Bouclerie légère
Bouclerie automatique
Bouclerie T-anti oubli
Bouclerie V-anti oubli
Poche de parachute inférieure
Poche de parachute dorsale
English
Back protector 14cm
Back protector 18cm
Airbag Cygnus
Side protector
Side pocket
Back pocket
Foot stirrup
Reserve bridles
Speed pulley
Double speed pulley
Lightweight buckles
Auto buckles
Auto buckles and safe T-bar
Auto buckles and safe V-bar
Bottom reserve container
Back reserve container
14cm
18cm
Trimmer Trimmer
Trimmer Compensateur
56
This manual suits for next models
1
Table of contents
