Solenso SLT User manual
Quick Installation Guide
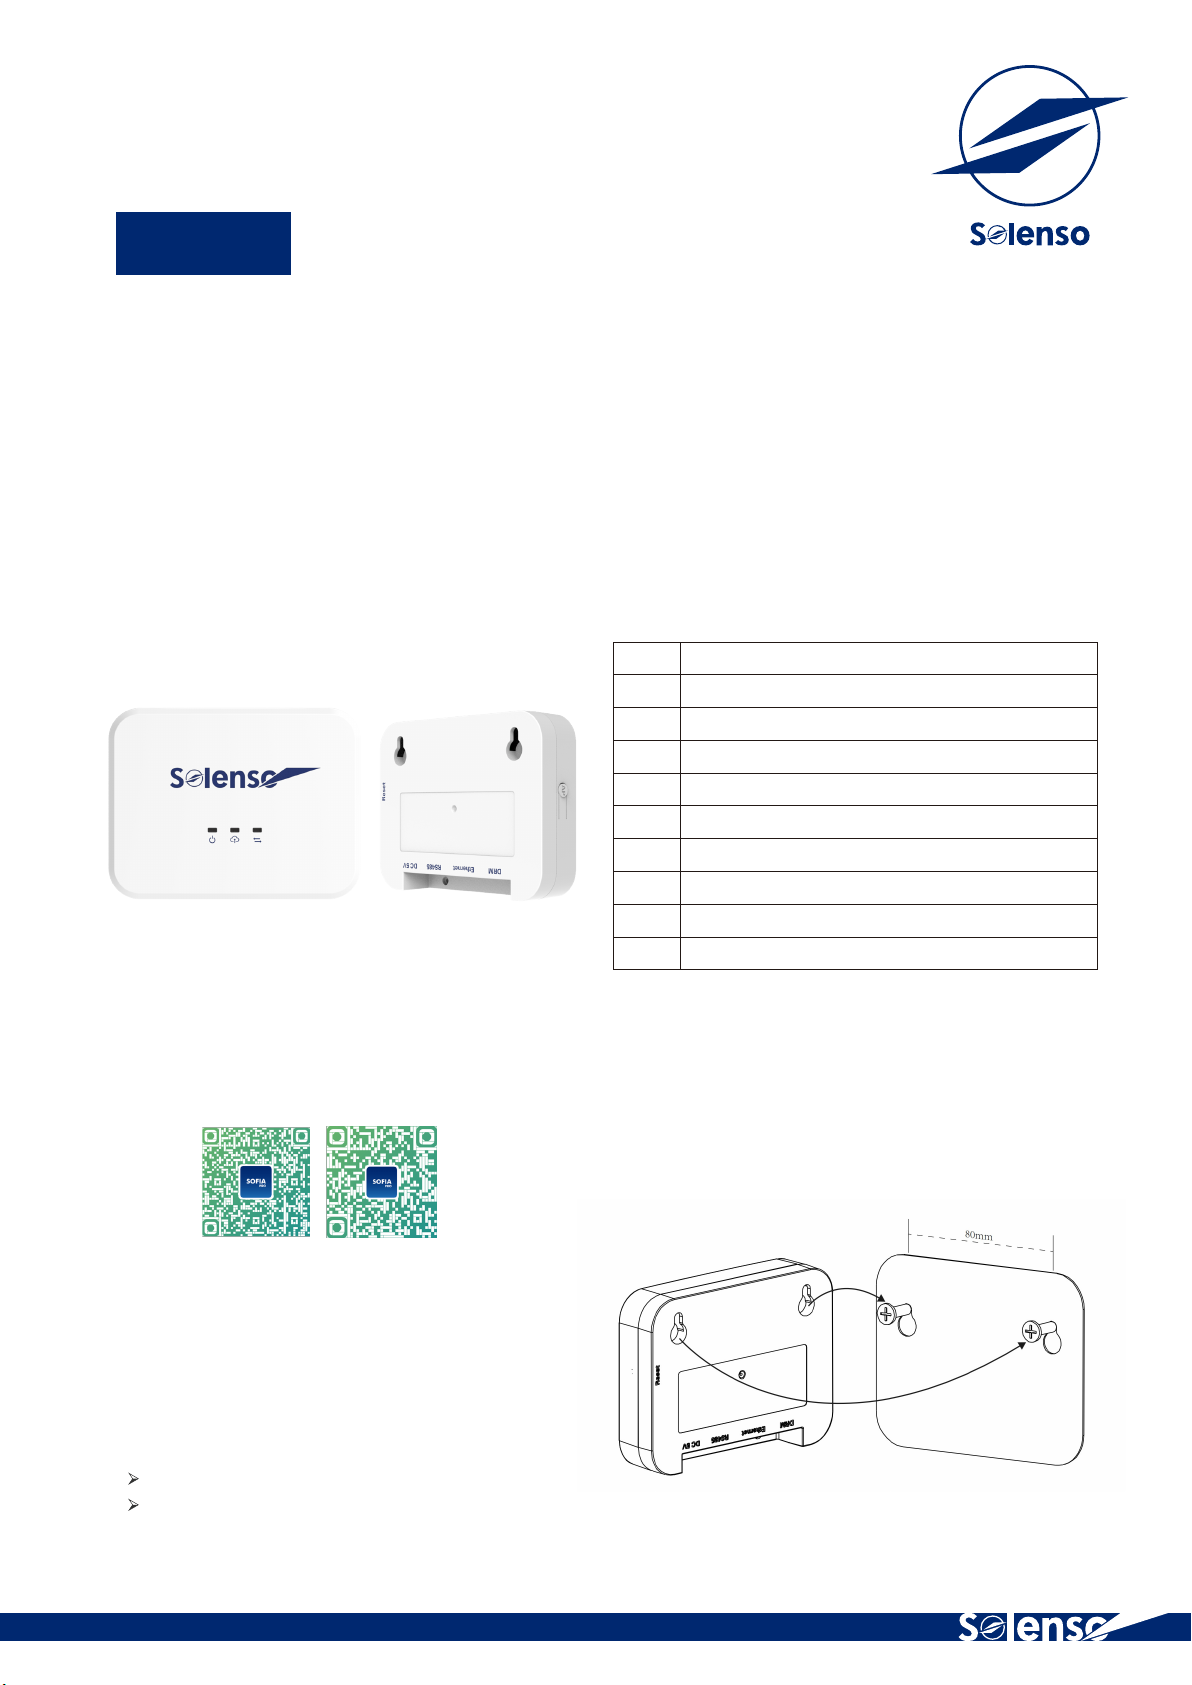
1.Interface Layout
2. Preparation
About the Manual
This manual contains important instructions for the SLT and must be read in its entirety before installing or commissioning the
equipment. For safety, only qualified technician, who has received training or has demonstrated skills can install and maintain
this SLT under the guide of this document.
Other Information
Product information is subject to change without notice. User manual will be updated frequently, please refer to Solenso
official website at https://www.solenso.com/ for the latest version.
2.1 Download the Solenso installer App Sofia Pro
2.2 Check the box for the following items
Solenso SLT
Adapter
√
√
Android IOS
Item
①
②
③
④
⑤
⑥
⑦
⑧
⑨
Description
LED1,SLT working condition light
LED2,SLT communicate with the platform indicator light
LED3,SLT communicate with the microinverter indicator light
Reset Button
DC 5V Input Port
RS485 Port
Ethernet Port
DRM Port
AP Button
Specific functions of each port see SLT USER MANUAL.
SLT
3. Installation
When installing a SLT with a wall-mounted bracket, select
a cool, dry indoor position, fit the wall installed by the SLT,
using two gypsum board screws or wall anchors, align
and slide the SLT to the mounting screw.
2.3 Choose the way SLT connect to the Internet
Router Ethernet Cable (if choose Ethernet option)
Smart Phone / Tablet with Solenso Sofia Pro App.
① ② ③
④
⑤⑥⑦⑧
⑨
Use Wi-Fi or Ethernet. Please prepare the following items:
AP040749 REV1.1

4. Online Setting
Go to Smart phone WLAN Settings, select the SLT's wireless network, click on Connect. (SLT's network name consists of
the SLT and the product serial number), Use the mobile phone to open the APP Sofia Pro and log in, and enter the "Oper-
ation and Maintenance Center" at the bottom of the page.
4.1 Network Configuration
4.1.1 Wi-Fi Configuration
1.Ethernet cable, one side connect to the house router and another side to SLT Ethernet port.
2.Make sure the router can connect to Internet.
3.With the smart phone to login the installer App ''SofiaPV pro''. Click ''O&M'' on the bottom of the page and then click
''Network Configuration”then select ''Ethernet''.
4.Click on ''Send to DTU'' and waiting for the ''Connection Succeeded'' tips.
4.1.3 Ethernet LAN configuration (If you choose Ethernet);
1.Please click ‘’Wi-Fi‘’and input the WIFI name and password of the client , ensure this WIFI can access the Internet.
2.Click ''Send to DTU'' .
3. Waiting for the‘’Connection Succeeded‘’tips which means DTU has connect to the server.
4. If it not success please check if the above setting is correct.
4.1.2 Complete the Wi-Fi configuration (If you choose Wi-Fi);
AP040749 REV1.1
Other Solenso Inverter manuals


Popular Inverter manuals by other brands


BARRON
BARRON EXITRONIX Tucson Micro Series installation instructions

Baumer
Baumer HUBNER TDP 0,2 Series Mounting and operating instructions

electroil
electroil ITTPD11W-RS-BC Operation and Maintenance Handbook

Silicon Solar
Silicon Solar TPS555-1230 instruction manual

Mission Critical
Mission Critical Xantrex Freedom SW-RVC owner's guide

HP
HP 3312A Operating and service manual


