Solid Apollo DMX User manual

PRODUCT MANUAL
DMX Addresser Toll Free. 425-582-7533
www.SolidApollo.com
info@SolidApollo.com
page 1
™
Product Description
Product Features
DMX Addresser
Thank you for purchasing Solid Apollo’s DMX Addresser!
Solid Apollo’s DMX Addresser has been designed to manually set
DMX Address for Solid Apollo products such as the Slim Ray 9 RGB
LED Spot light 60W, ECO Flood Wallwasher 40W and LED Light Bars.
This handy DMX Addresser conveniently allows you to set programs
& functions, set DMX addresses and eortlessly daisy-chain multiple
Slim Ray 9 RGB LED Spot light 60W, Eco Flood Wallwasher 40W or
LED Light Bars.
The DMX Addresser is easy to use! It features a simple 4 push button
control consisting of a Power Button, Forward Button, Up Button and
Conrm Button.The 4-Digit LED display makes it easy to navigate
through various programmable features and functions.
The DMX Addresser is super lightweight and can easily be stored or
transported virtually anywhere.Thanks to its ergonomic design, the
DMX Addresser ts comfortably on your hands for a secure grip -
perfect for on-eld installations.
Conveniently Set DMX Addresses and Programs
Can Set Up to 512 Channels and Easily Daisy-Chain Multiple DMX Fixtures
Easy to Read 4-Digit LED Display
User-Friendly 4 Button Controls Including On/O
Durable Plastic Encasing Featuring Ergonomic Design
Programmable & Personalize Lighting Sequences:
7 Single Pre-Set Colors
3 Special Lighting Eects: Jumping, Flashing & Fade Eect
9 Speed Adjustments and 9 Brightness Levels
Waterproof IP68 Female XLR Cable Included
Includes 9V Lithium Battery (Installed in Unit)
Manual will Review
Product Dimensions and
Button Functionalities
Installation and
Programming Instructions
Technical Information
Troubleshooting

PRODUCT MANUAL
DMX Addresser Toll Free. 425-582-7533
www.SolidApollo.com
info@SolidApollo.com
page 2
™
Product Dimensions & Button Features
B. 1.9in / 48mm
A. 3.2in / 83mm
A. Power Button
B. Up Button
C. Forward Button
D. Record Button
DMX Adresser
Dimensions
DMX Adresser Button Controls
C. 5.2in / 132mm
D. 1.3in / 34mm
Turns LED Lights ON and OFF
Changes the Digit in the LED Readout Display.
Allows you to move to each individual digit
as well as scrolling through dierent modes.
Allows you to record and conrm your settings.

PRODUCT MANUAL
DMX Addresser Toll Free. 425-582-7533
www.SolidApollo.com
info@SolidApollo.com
page 3
™
* Product Installation:
* Wallwasher DMX Programming Set-Up:
Check battery if it’s in operable condition (not turning ON). If
not operable, properly remove and replace the battery.
There are two modes within the DMX Addresser: “0 and 1”.Depending on the type of
product you have, you will need to set it to either“0”or ”1”. If you have aWallwasher
(Slim Ray or FloodWallwasher), then you would need to set it at“0”. Now, if you have a
DMX LED Lightbar you would have to set it at“1”.
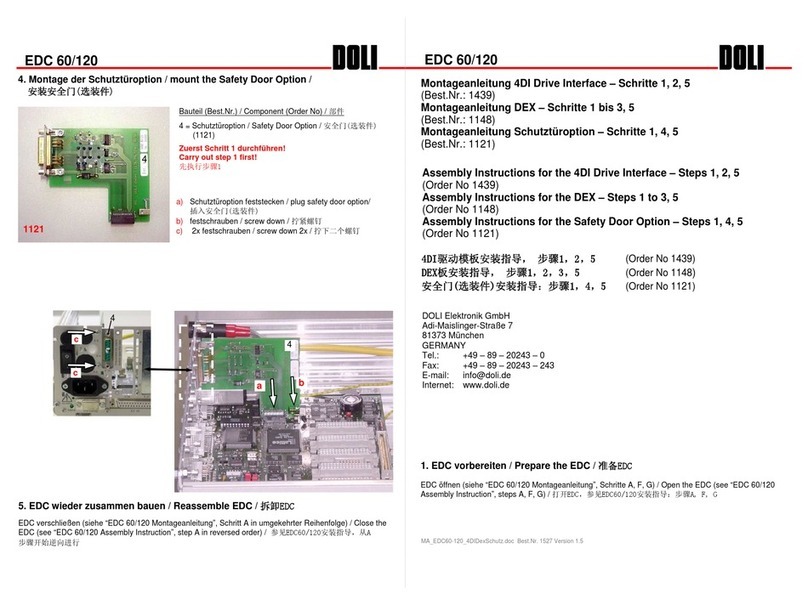
To set the Mode to either “0” or “1”, press and hold the Forward Button and
simultaneously, press the Power Button once. Refer to g. 1 & g. 2
When done correctly it should show a numeric digit, either 0or 1. The digit you want is
“0”because in this example we’re setting up aWallwasher (Refer to g. 1). If we were to
use a DMX LED Light Bar, we would then use“1” (Refer to g. 2). The number will stay
visible for a brief second, don’t worry if you miss it.Turn the DMX Adresser back OFF and
repeat the step until you see “0” on the display.
* Note: “0” and “1” will alternately be displayed each time the step is repeated.
Step 1:
Step 1: Fig. 1:
Mode 1:
Use for Slim Ray or Wallwasher Use for DMX LED Light Bars
Press & Hold Press Once
Product Installation & Programming Instructions
Connect the DMX Addreser’s Female XLR connector to your
Male XLR DMX Fixture.
Step 2:
Fig. 2:
Mode 2:
* Note: The DMX Addresser must be turned OFF, before
setting the DMX Addresser to mode “0” or “1”.
Once you see the zero on the screen,
wait until you see A001 is displayed and
you are set!
Press & Hold Press Once

PRODUCT MANUAL
DMX Addresser Toll Free. 425-582-7533
www.SolidApollo.com
info@SolidApollo.com
page 4
™
Setting DMX Address
Step 1:
Step 2:
Forward Button
Forward Button
Up Button
Record Button
A : DMX Address
A : DMX Address
Fig. 3
2nd Digit
3rd Digit
4th Digit
In order to set the DMX Address for Solid Apollo’s Slim Ray 9 RGB LED Spot light
60W or Eco Flood Wallwasher 40W, you must be in the category letter“A”. If
you’re not already in letter “A”, press the Forward Button repeatedly until it
displays A001 or the letter “A” appears on the rst digit. If you are already on
category“A”, proceed to step 2.
To set DMX Address, begin by pressing the Forward Button. Notice the
second digit will begin to ash (this indicates that you can now set the
numeric value for that digit).To change the value press the Up Button. To
set the remaining digits, press the Forward Button. Repeat the process
to set your DMX Address.When you are done, press the Record Button to
record your DMX address.
After you press the Record Button, it will display four lines in the LED display.
Ths indicates that the data is being transferred and recorded by the Slim Ray’s
or RGB FloodWall Washer’s internal addressing system. It is very important to
not disconnect while the DMX Addresser is processing the data, otherwise the
data will not be recorded. Once the four lines disappears, the data has been
successfully transferred and recorded.
DMX Addresser Programs
The DMX Addresser has three main functions: A, Pand C. The following images below (see Fig. 3, Fig. 4 and Fig. 5) explains what each function
corresponds to. Once you have a good grasp of the functionalities, the following steps will give you a thorough explanation on how to properly operate
within the programs and functions.
A : DMX Address - In this function you
will be able to set DMX Address to
Solid Apollo’s Slim Ray 9 RGB LED Spot
light 60W, Eco RGB Flood Wallwasher
40W or DMX LED Light Bars. It also has
the ability to set up to 512 Channels.
P : Program - Program is where you choose
various lighting eects as well as the option
to pick single color lighting. In this function,
not only you are able to pick lighting eects
but also adjust the speed and brightness for
each lighting eect.
C: ChannelTesting - Channel testing is
primarily used to test RGB Channels for the
DMX Fixture. If you want to check if the colors
RGB are working properly in your DMX xture,
input in the DMX Address in the DMX Addresser.
C : Channel TestP : Program
Fig. 4 Fig. 5
* Note: The DMX Addresser can set up to 512 channels - therefore, the
rst digit only goes from 1 to 5 and the other 2 digits goes from 1 to 9.

PRODUCT MANUAL
DMX Addresser Toll Free. 425-582-7533
www.SolidApollo.com
info@SolidApollo.com
page 5
™
Channel Test
Step 1:
Step 2:
Forward Button
Forward Button
Up Button
Record Button
C : Channel Test
2nd Digit
3rd Digit
4th Digit
Navigate to the category letter“C”. Do this by pressing the Forward
Button repeatedly until it displays C001 or the letter “C” appears
on the rst digit. Now, If the 2nd digit stops ashing, press the
Forward Button. If it is still ashing, proceed to step 2.
When it starts ashing, you can change the value by pressing
the Up Button. If you want to change the next digit, press the
Forward Button.
If you have your DMX xture’s address set to 001. Then by
default, 001 would then lit up the color Red, 002 would lit up
green and 003 will be blue. If your DMX Fixture has more colors
than the RGB like RGBW, then 004 would then be the 4th color.
Channel testing is primarily used to test RGB Channels for the DMX Fixture. If
you want to check if the colors RGB are working properly in your DMX xture,
input in the DMX Address in the DMX Addresser.
* You cannot change the order of the colors that will appear. It will
always be RGB or RGB + the fourth color regardless of what address you
set your DMX xture to. The next three addresses would always be in the
same order.
* Note: Channel testing does not aect the DMX Address,
it only tests the RGB.
Selecting Color and Lighting Sequences
Step 2:
Forward Button
Up Button
Record Button
Program
3rd Digit
4th Digit
(Adjust Speed &
Brightness)
To select programs, begin by pressing the Forward Button. Once it
starts ashing you can change the value by pressing the Up Button.
Choose the program you want, then press the Record Button to record
your selection. Wait for the four lines to record the data. Once the four
lines disappears, it has been successfully recorded.
Step 1:
P - A1: Fade Eect
P - b1: Strobe/Flash Eect
P - C1: Jump Eect
P - 81: V2-Jump Eect
P - 91: V2-fade Eect
P - 11: Red
P - 21: Green
P - 31: Yellow: Combo Green/Red
P - 41: Blue
P - 51: Purple: Combo Red/Blue
P - 61: Aquamarine: Combo Blue/Green
P - 71: White: RGB
Navigate to the category letter“P”. Do this by pressing the Forward Button
repeatedly until it displays P -A1 or the letter “P” appears on the rst digit.
Here are the following list of programs that are available:
Programs A, b, C, 8, and 9 have an adjustable Speed from 1-9 and
Brightness levels for Single Colors can be adjusted from 1-9.
The brightness Levels for the Lighting Eects (fade, Strobe or Flash
eects) cannot be adjusted, only speed.
*
Eects: Single Color:
*

PRODUCT MANUAL
DMX Addresser Toll Free. 425-582-7533
www.SolidApollo.com
info@SolidApollo.com
page 6
™
Continuous Address and Same Address Program
Besides the 3 main programs, the DMX Addresser has 2 hidden program features that will make setting up multiple addresses more easier and less
stressful. The hidden features are called“Continuous Address Program” and“Same Address Program”. The following images below (see Fig. 6
and Fig. 7) denes “Continuous Address Program” and“Same Address Program”. Once you have a good understanding of what the programs do,
the next following steps will give you a thorough explanation on how to navigate to the features and properly operate within the program.
C : Continuous Address Program
Fig. 6 :
C : Continuous Address Program - The Continuous Address Program
will allow you to set a DMX address to one DMX Fixture and have it
continuously set DMX addresses for multiple DMX Fixtures.
Normally you would have to manually set DMX addresses for each
individual DMX xtures but with the Continuous Program, it will
automatically do it for you.
Here’s how it works, for example : If you have 2 RGB DMX xtures
daisy-chained together and the rst DMX xture’s DMX Address is
set to 001 then by default 001 would be Red, 002 would be Green
and 003 would be Blue (if you have a fourth color then it would be
004). If you select ( C ) Continuous Address Program, the program
would automatically make the next DMX xture’s DMX Address after
003 (004 if you have a fourth color). With that said, the second DMX
Fixture’s DMX Addresses would then start at 004 Red, 005 Green and
006 Blue. This pattern (multiples of 3) would carry out to all the DMX
Fixture you have (007 Red, 008 Green, 009 Blue, etc...).
You can always conrm if these DMX addresses are set correctly by
using the Channel Test Program (Please refer to pg.5).
* Please note that you don’t necessarily have to start at 001. You can
start at DMX address 200. Just remember that the next 3 addresses will
always go in order (201, 202, 203, etc.) and will be reseserve based on
the number of channels you have in your DMX xture (RGB).
S : Same Address Program
Fig. 7 :
S: Same Address Program - The Same Address Program allows you
to set the same DMX address throughout all your DMX Fixture.
For example: If you have 5 DMX xtures daisy-chained together and
you want all of them to be set at DMX Address 001, by selecting the
( S ) Same Address Program it will automatically set DMX address
001 to all 5 DMX Fixtures.
The Same Address Program will conveniently set the DMX addresses
for you. No need to unplug, reconnect and manually setting each
DMX Fixture.
And just like the Continuous Address Program, you can also conrm
the DMX addresses are set correctly by using the Channel Test
Program (Please refer to Pg.5 of this manual).

PRODUCT MANUAL
DMX Addresser Toll Free. 425-582-7533
www.SolidApollo.com
info@SolidApollo.com
page 7
™
Selecting Continuous Address Program or Same Address Program
Step 1:
Step 2:
Step 3:
Forward Button
Up Button
4th Digit
Press the Forward Button and Up Button at the same time. The
LED display will then change to“CH-03”.
Once you have inputted your DMX Fixture’s channel, press the
Forward Button. You will notice the LED display changed to“L--C”.
In this section you will be able to choose between Continuous
Address Program and Same Address Program.
The rst selection is“L--C”for Continuous Address. If you press the
Up Button once, the fourth digit will change from“C“ to“S”. It
then will be “L--S”for Same Address (if you keep pressing the UP
Button, it will alternate between“C”and “S”).
Select the program you want and press the Record button. Wait for
the four lines to record the data, once the four lines disappears, it has
been successfully recorded.
When the program has been recorded, it will then ask you to set the starting
DMX address. Please refer to“Setting DMX Address”or “Page 4”of this
manual for setting the DMX address.
When you are done, press the Record Button to record your DMX address
and settings. Wait for the four lines to record the data, once the four lines
disappears, it has been successfully recorded.
If done correctly, if you choose Continuous Address, it will continuously
set the DMX addresses throughout your DMX Fixtures (up to 512).
And if you choose Same Address, all your DMX Fixtures would
automatically have the same DMX address.
If you want to verify if the DMX addresses are set correctly. Please refer to
“Channel Testing”or“Page 5”of this manual.
Step 1 (a) :
If your DMX Fixture have a fourth channel/color (RGB+W), press the
Forward Button twice to get over to the fourth digit and press the
Up Button to change it.
Step 1:
Press at the same time
Step 1 (a) :
4th Digit
Continuous Address Same Address
Step 2 :
4th Digit
Forward Button
Forward Button
Up Button
Up Button
Record Button
Record Button
A : DMX Address
2nd Digit
3rd Digit
4th Digit
Step 3 : ( Refer to Pg. 4 to Set DMX Address and Pg. 5 for Channel Testing )

PRODUCT MANUAL
DMX Addresser Toll Free. 425-582-7533
www.SolidApollo.com
info@SolidApollo.com
page 8
™
Technical Information
1. Press power button, if the LED Display does not come ON, check the battery.
2. When checking the battery make sure the battery is in operable or good condition. Check if wire’s are OK and the
battery is placed properly.
Troubleshooting
DMX Addresser Not working
DMX Addresser Not responding to my settings or selection.
1. Please revert back to Page 3 and make sure that you are in the appropriate mode. It is very important that you set
the DMX Addresser in“0”Mode to communicate with your DMX Fixture.
2. Assuming you are in the correct mode (0) when selecting lighting eects, colors, etc. You want to always conrm
your selections. By not conrming it, the DMX Addresser will not know you selected a program. As a result it will run
its own pre-loaded eects or it will automatically revert back to its default settings.
* Should you have any questions about installation, troubleshooting and other concerns, please don’t hesitate to
call us at 425.582.7533 and we will be glad to assist you.
Operating Voltage :
Warranty :
Weight :
Size :
IP Rating :
9V DC (Lithium Battery)
3 Years
0.40 lbs
L: 5.2in x W: 1.9in x H: 1.3in
IP20
RGB Channels :
DMX Channels :
Product Color :
Working Temperature :
Certicates :
3
512
Black Casing
- 4 to 113 F
CE, RoHs
Table of contents
Other Solid Apollo Controllers manuals
