Solutronic SolBattHome 5.0 Li User manual
Solutronic Energy GmbH Kelterstr. 59 72669 Unterensingen Germany
User Manual
SolBattHome 5.0 Li
User Manual SolBatt Home
Version: B0

Table of contents
SolBatt Home_User Manuel_B.00-EN
Table of contents
1 Introduction...............................................................................................................................................................................................1
1.1 Instructions for manual.......................................................................................................................................................1
1.2 SolBatt Home......................................................................................................................................................................... 1
1.3 Installation and maintenance............................................................................................................................................1
1.4 Symbols used in this manual............................................................................................................................................1
2 Safety........................................................................................................................................................................................................... 3
2.1 General safety........................................................................................................................................................................ 3
2.2 Appropriate use.....................................................................................................................................................................3
2.3 Safety instructions................................................................................................................................................................ 3
2.4 Non-adherence to warnings............................................................................................................................................. 4
2.5 Name plate............................................................................................................................................................................. 4
2.6 Safe function and protectionfrom the environment................................................................................................5
3 Contents of delivery................................................................................................................................................................................5
4Dimensions and weights....................................................................................................................................................................... 6
5 Connectors.................................................................................................................................................................................................6
6 Mounting....................................................................................................................................................................................................7
6.1 Mounting site.........................................................................................................................................................................8
6.2 Wall mounting guide............................................................................................................................................................9
6.3 Floor mounting guide.......................................................................................................................................................10
7 De-installation........................................................................................................................................................................................ 10
7.1 De-installation.....................................................................................................................................................................11
7.2 Disposal.................................................................................................................................................................................11
8 Electrical connection.............................................................................................................................................................................11
8.1 Additional PE connector...................................................................................................................................................11
8.2 Charger connection........................................................................................................................................................... 12
8.3 Communication connectors............................................................................................................................................13
9 Connection with a Solutronic SolHybrid........................................................................................................................................13
10 Product description.............................................................................................................................................................................. 14
10.1 Product features.................................................................................................................................................................14
10.2 Applications..........................................................................................................................................................................15
11 Technical Specification........................................................................................................................................................................ 16
12 Maintenance and cleaning................................................................................................................................................................. 17
13 Productregistration and warranty...................................................................................................................................................18
14 First commissioning..............................................................................................................................................................................19
14.1 Initial operation...................................................................................................................................................................19
14.2 LEDs and push button...................................................................................................................................................... 19
15 Normal operation..................................................................................................................................................................................20
15.1 No activity.............................................................................................................................................................................20
15.2 Charging mode................................................................................................................................................................... 20
15.3 Discharging mode..............................................................................................................................................................21
16 Error handling.........................................................................................................................................................................................21
17 Sleep mode..............................................................................................................................................................................................22

SolBatt Home_User Manuel_B.00-EN1/24
1 Introduction
1.1 Instructions for manual
We are delighted that you have decided to purchase a Solutronic SolBatt Home energy storage system.
This user manual supports installers and end customers to operate the SolBatt Home energy storage
system.Keep this document accessible at all times.
The SolBatt Home may only be used within the application areas given in this documentation. Another
usage outside of the applications described herein can cause damage to the SolBatt Home and other
devices. In any case, this leads automatically the loss of any warranty claims.
1.2 SolBatt Home
The SolBatt Home is modular energy storage unit with environmentally friendly lithium-ion battery
technology for residential and smaller commercial applications. It stores the excess energy and supplies
necessary power for load consumption. This economically optimizes your supply system. It is an ideal
option for the following applications:
Optimizing self-consumption for renewable energy
Covering peaks during high-demand periods
Supplying power for load during power outages
UPS applications
Compared with conventional lead batteries, Lithium-Ion cells allow higher current capacities while
chargingand discharging. This increases the available capacity substantially.
1.3 Installation and maintenance
The SolBatt Home must be installed and maintained exclusively by a qualified electrician. The qualified
electrician must have read this document in detail and be familiar with the safety procedures and
standards required for the installation.
Never attempt to repair the device by yourself. Improper repair work can be dangerous. Please contact
your dealer to solve your problem.
1.4 Symbols used in this manual
Please note the following safety instructions:
The hazard classes describe the risks of non-adherence to the safety instructions.
(The safety instructions describe the following ANSI hazard classes.)
Introduction

Introduction
Caution!
Caution designates a warning that can result in personal injury if it is
not adhered to!
Warning!
Warning designates a warning that can result in serious personal
injury or death if it is not adhered to!
Danger!
Danger designates a warning that can result in immediate death or
serious personal injury if it is not adhered to!
Attention!
Attention designates a warning that can result in material damage if
it is not adhered to!
Information
Useful information and instructions for the optimum operation of
SOLUTRONIC devices.
SolBatt Home_User Manuel_B.00-EN2/24
Safety
SolBatt Home_User Manuel_B.00-EN3/24
2 Safety
2.1 General safety
Please comply with the following safety operating and instructions in this manual. Otherwise it may
cause a significant threat to life security or/and additionally damage to the device or system.
These safety instructions must be adhered to at all times.
Please read through the safety instructions carefully before installing the unit and putting it into
operation for the first time. These safety instructions must also be passed on in the event of the sale,
rental and/or any other transfer of this device.
The SolBatt Home supplies power for other system components. This means the battery may discharge
even when switched off or standby. Keep this in mind that turn off the power and plugout the RJ45
cable firstly before install or connect other external equipment.
2.2 Appropriate use
The SolBatt Home is intended for indoor use only. All applicable and relevant safety regulations are to
be adhered to. Please keep it away from heat source and direct sunlight. Installations must only take
place as described in this manual.
Modifications of any kind and to the device, including the connectors and mounting components, are
not permissible and can result in serious safety problems as well as personal danger and a threat to life.
2.3 Safety instructions
Information
Please ensure you are informed on the standards and provisions that apply
to your installation site and adhere to these.
Warning!
Inappropriate handling of the SolBatt Home and non-adherence to the
warnings given here, as well as inappropriate interventions on the safety
device, can result in material damage, personal injury and electric shock.
SolBatt Home_User Manuel_B.00-EN4/24
Safety
2.4 Non-adherence to warnings
Solutronic Energy GmbH is not liable for any damage occurring asaconsequence of non-adherence to
the warnings given in this manual.
This manual and the relevant safety instructions must be read through and understoodprior to
commissioning.
Please contact and informthe supplier if the documentation in this language is not entirely clear and
comprehensible.
The flawless and safe operation of this electrical device requires appropriate and professional transport,
storage, mounting and installation, as well as careful operating and maintenance.
2.5 Name plate
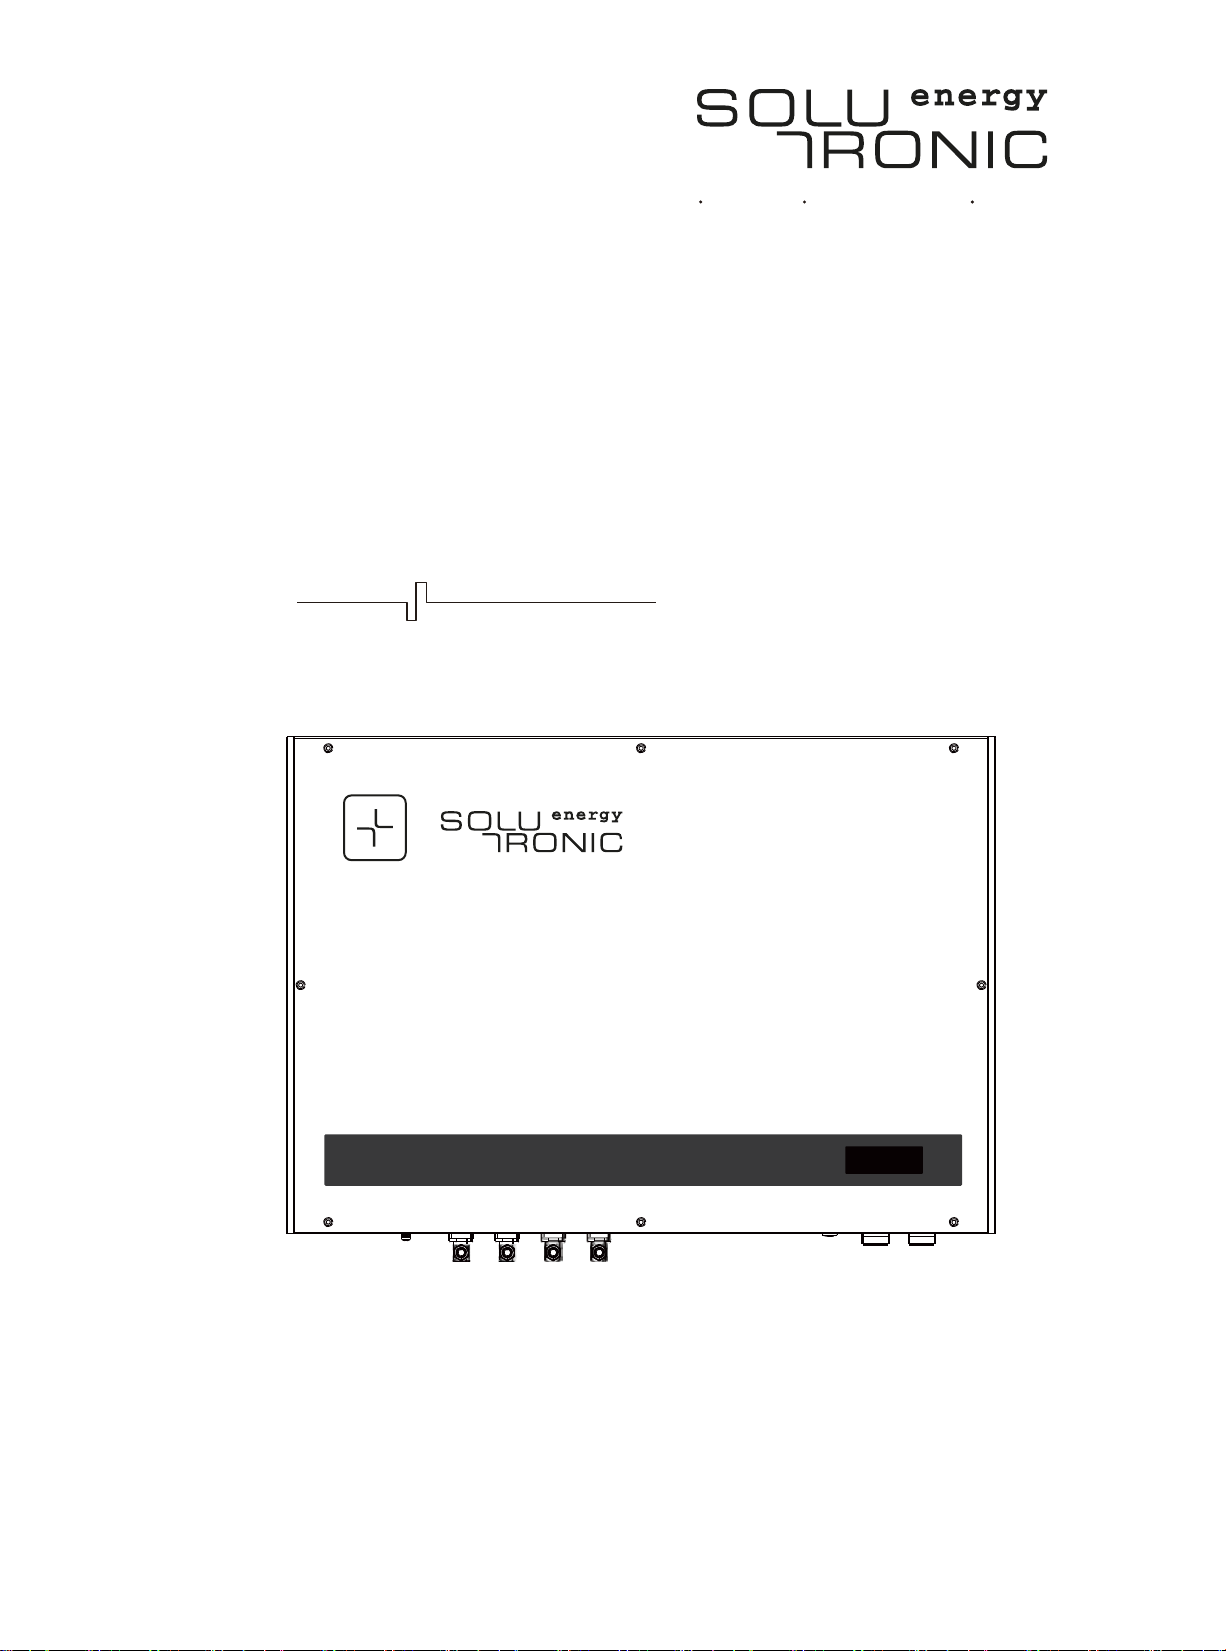
You can identify the SolBatt Home based on its name plate.
The name plate with the exact designation is on the right side of the housing.
Meaning of the symbols on the type plate:
Attention, caution, warning, danger
Attention, danger!
Beware of dangerous electrical voltage. The battery operates at highvoltages. All
work on the battery must be carried out by electrical technicians
Pleasereadthe installation and operating instructions
Please note!
All connections are to be pulled off before opening the device

Contents of delivery
SolBatt Home_User Manuel_B.00-EN5/24
This device should not be disposed of with household waste at the end of its lifetime.
Please return it to Solutronic Energy for appropriate disposal.
TUV certificate
2.6 Safe function and protection from the environment
Information
The IP65 protection rating that is indicated and safe function is only achieved and
guaranteed if all connectors are protected with the original covers or the original
mating connectors are customised and contact is made in accordance with
manufacturer specifications.
Non-adherence to these specifications may result in the guaranteed protection and
safe function being compromised.
The guarantee is rendered null and void for defects or damage that can be attributed
to non-adherence.
Unused connections must be covered to assure the ingress protection.
3 Contents of delivery
Your delivery contains the following components:
SolBatt Home Wall bracket A Wall bracket B Wall bracket C
X 2
Floor stand
X 4
Hex flange screw
M6*10/16
X 4
Hex self-lock nut M5
X 4
Hex set screw
M5*12/16
X 2
RJ45 terminal
connector
SolBatt Home_User Manuel_B.00-EN6/24
Dimensions and weights
4 Dimensions and weights
All details are approximate, without mounting and fixing components.
SolBatt Home SolBatt Home 5.0 Li
gk08thgieW
W x H x D (mm) 780*180*580
Wall bracket A and Wall bracket B, each about 1.5kg
Wall bracketCabout 0.5kg
2 floor stands, each about 0.9kg
5 Connectors
Information
Please retain the original packaging.
The original packaging can be used multiple times and provides
optimum protection from damage during transport when maintenance
is required.
Information
Subject to change without prior notice!
The appearance and/or equipment, as well as the labelling and
designation, may vary slightly depending on the technical status.
Please refer directly to your SolBatt Home for the concrete positions
for the connectors and the current options for connection.
Mounting
SolBatt Home_User Manuel_B.00-EN7/24
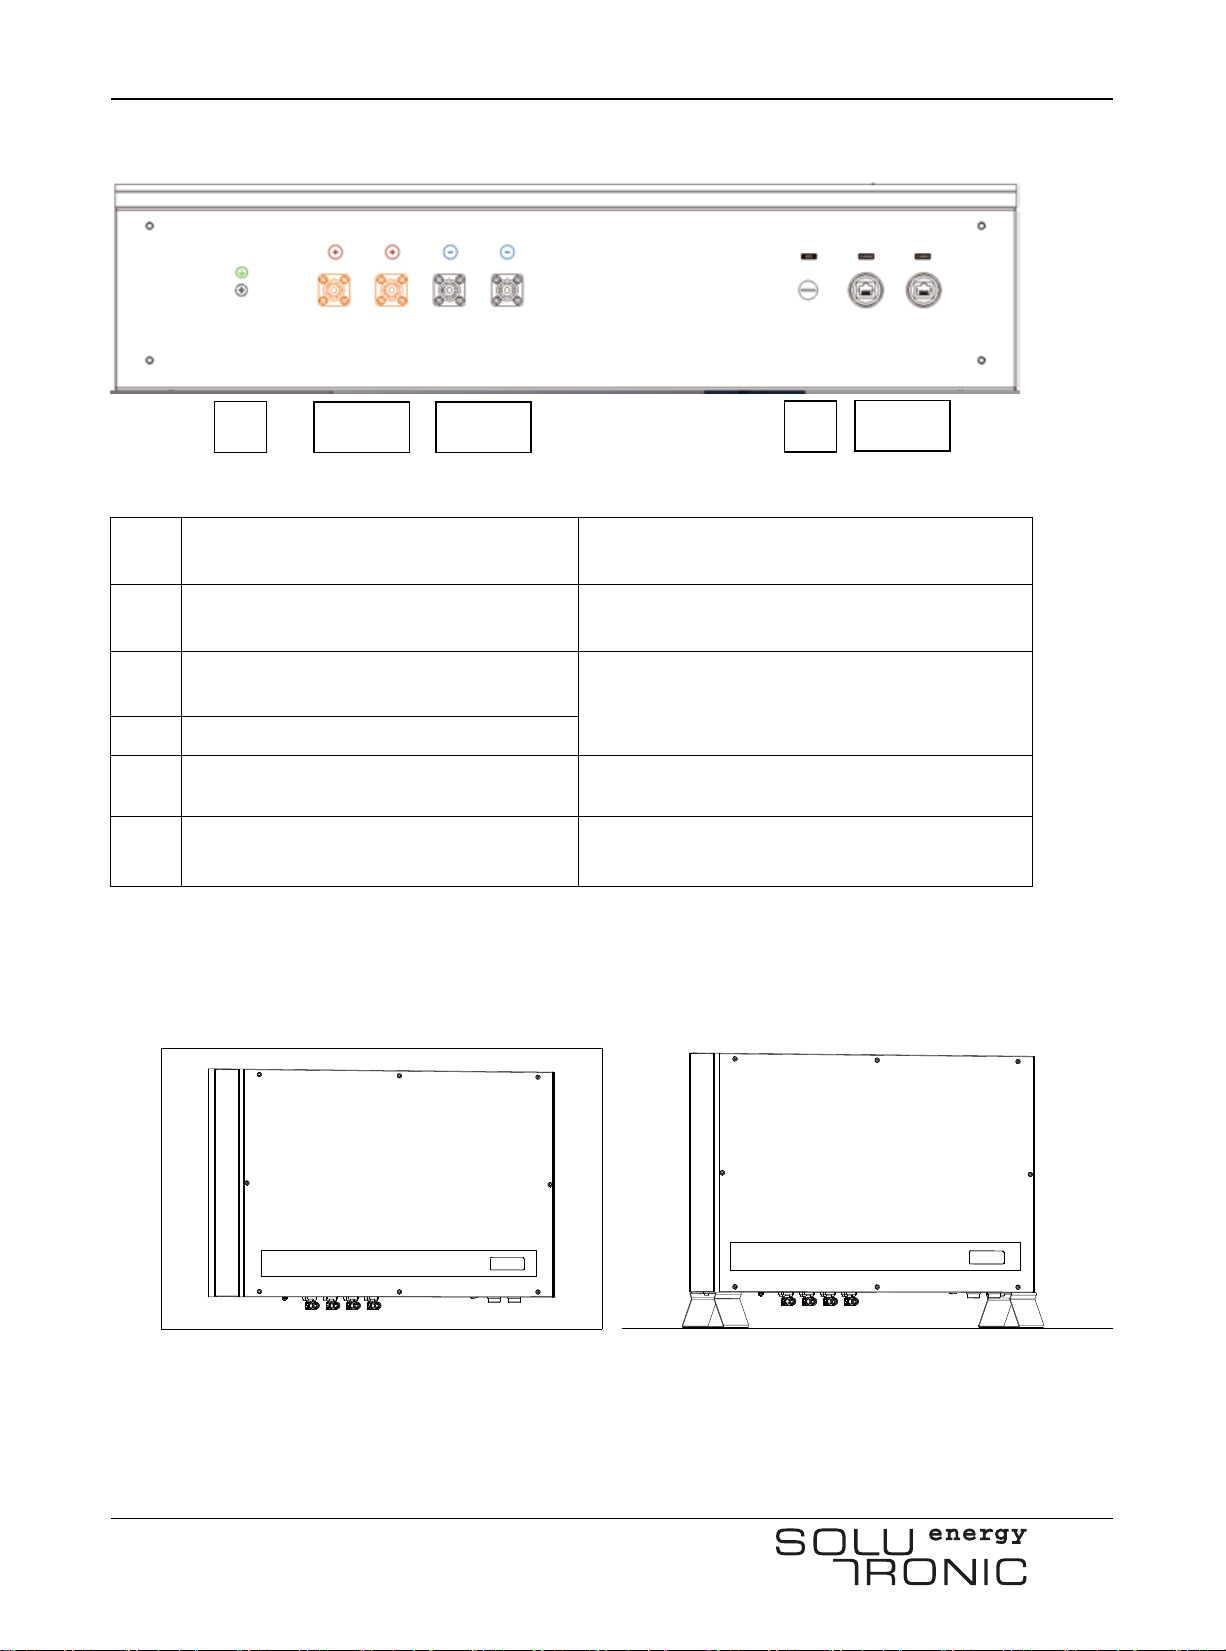
Underside of a SolBatt Home without wall bracket and floor stand
noitpircseDemaN.soP
mN0.3/5MrotcennocEP.txErotcennocEP1
2 Charger connector plus + Connecting to a Solutronic SolHybrid energy
manager or other external chargers, max.
56VDC
3 Charger connector minus -
noitcnufonyltnerruc,devreseRO/I4
5 CAN communication connector RJ45 CAN bus for SolHybrid or other
chargers
6Mounting
The SolBatt Home can be installed in two ways as followed:
gnitnuoMroolFgnitnuomllaW
2
135
4

SolBatt Home_User Manuel_B.00-EN8/24
Mounting
6.1 Mounting site
Information
Solutronic Energy GmbH is not liable for any damage caused by defective mounting!
Such damage includes:
damage to the foil covering the display and keyboard, negative impact on legibility
bleaching of the print on the housing, negative impact on the appearance of the
housing
The mounting site should therefore be selected to avoid any direct or indirect UV radiation
on the device:
the device must not be exposed to direct sunlight
the device must be protected from reflection from glass facades and similar
surfaces
Warning!
Only qualified and authorized installer is allowed to install SolBatt Home products strictly
follow this guide!
Any private installation leads automatically to invalidation of manufacturer warranty and
the distributor willnot shoulder any responsibility!
Information
The lifetime of a SolBatt Home is strongly dependent on the environmental conditions.
The higher the temperature and/or the humidity, the shorter the lifetime.
Please select a suitable mounting site.

Mounting
SolBatt Home_User Manuel_B.00-EN9/24
For wall mounting, make sure that the wall is able to carry the weight.
The maximum altitude for installation is 2000 meters above sea level. Derating factors must be
considered for installations at greater altitudes.
The recommended ambient temperature is in the range of >0 °C to +35 °C.
The distance between the top and bottom of the device and any other objects must be a minimum
of 30 cm, preferably 50 cm.
The distance betweenthe left and right side of the device and any other objects must be a
minimum of 20 cm, preferably 30 cm.
The SolBatt Home must be mounted on a non-flammable surface.
Installation in coastal areas is only permitted in sealed rooms. The reason for this is salt spray that
can cause corrosive damage to the housing, both externally and internally.
Attention: The SolBatt Home must never be exposed to ammonia or other aggressive vapours or
gases (stables!). Solutronic Energy provides no guarantees for installations in such areas. The dealer
or installer must pay for any damage in the event of possible subsequent maintenance.
6.2 Wall mounting guide
TheSolBatt Home is mounted with the aid of a wall bracket on a suitable wall that can take the weight.
No information can be provided here on suitable fixing materials due to the variety of fixing surfaces
(wall structure).
Use fixing material that you deem to be suitable.
Please note that the device weighs approx. 80 kg!
The person carrying out the mounting is liable for the work.
STEP1 Preparation
S1.1 Required tools
Hammer drill
Φ12mm drill
(Length 120mm+)
Hand drill
Φ4mm HEX Socket
(100 mm length)
PH2×100 Cross
screwdriverLevel ruler
SolBatt Home_User Manuel_B.00-EN10/24
Φ8mm Sleeve
(Length 120mm+)
Φ10mm Ratchet
wrench
Φ13mm Ratchet
wrench
S1.2 Check packaging
The SolBatt Home may be damaged in improper transportation. Please check carefullywhether the
external packaging is damaged after receiving the product. Please contact the distributor immediately
and reject the product if the above situation happens.
S1.3 Checkcomponents
Check the components according to Chapter 3 Contents of delivery.
STEP2 Wall mounting
6.3 Floor mounting guide
7 De-installation
Danger!
To safely de-install the SolBatt Home, the instructions in this chapter must
be followed.
De-installation
Read the installation manual for details
Read the installation manual for details
Electrical connection
SolBatt Home_User Manuel_B.00-EN11/24
7.1 De-installation
To de-install the SolBatt Home:
Disconnect the communication wires.
Disconnect any optional connections.
Disconnect the DC power wires.
Disconnect the battery wires.
Now the SolBatt Home can be removed for disposal or repair.
7.2 Disposal
When SolBatt Home reached the end of its service life, or is defect beyond repair:
Dispose of the SolBatt Home according to local regulations.
Submit the SolBatt Home to a collection point for electrical and electronic waste recycling.
8 Electrical connection
The electrical connection can be carried out once the SolBatt Home is solidly mounted.
8.1 Additional PE connector
Warning!
De-installation must be carried out by qualified personnel. Contact your installer/dealer.
48V Li-ion batteries are indicated as dangerous goods and may require special
transportation. Please Check the documentation of the supplier and local regulations.
Attention!
Please use the PE screw on the underside of the housing (Chapter 5) for additional fixed
protective earth connection. Use a yellow-green cable with a minimum gauge of4mm2, 10
mm² is recommended. Connect the other end of the PE cable to the equalisation panel for
the building.

SolBatt Home_User Manuel_B.00-EN12/24
Electrical connection
8.2 Charger connection
Technically, all types of DC charger within the voltage range of 42V to 56V can be used. A Solutronic
SolHybrid energy manager with a transformerless solar inverter and a bidirectional DC-DC converter
would be perfect for the SolBatt Home.
One cableeach with two high-power plugs for plus and minus are used to connect the Solutronic
SolHybrid and the SolBatt Home
These cables are customized specifically for this purpose and can be ordered from Solutronic Energy.
Connect the plus and minus connectors based on the colours. Please ensure the polarity is correct for
the connection.
The plugs have a locking function and are onlyconnected with the socket after they have audibly clicked
into place.
To remove the cable, press the button on the plug to trigger the release mechanism and pull the plug
off.
Caution!
Do not make contact or disconnect these plugs under load.
This may damage the electronics and/or the contacts.
Caution
Connection of the Solutronic products “SolHybrid” and “SolBatt
Home”is only permitted with the original set of compatible Solutronic
cables.
Solutronic Energy GmbH assumes no responsibility for wrong or defective
connections.
Release mechanism button
SolBatt Home_User Manuel_B.00-EN13/24
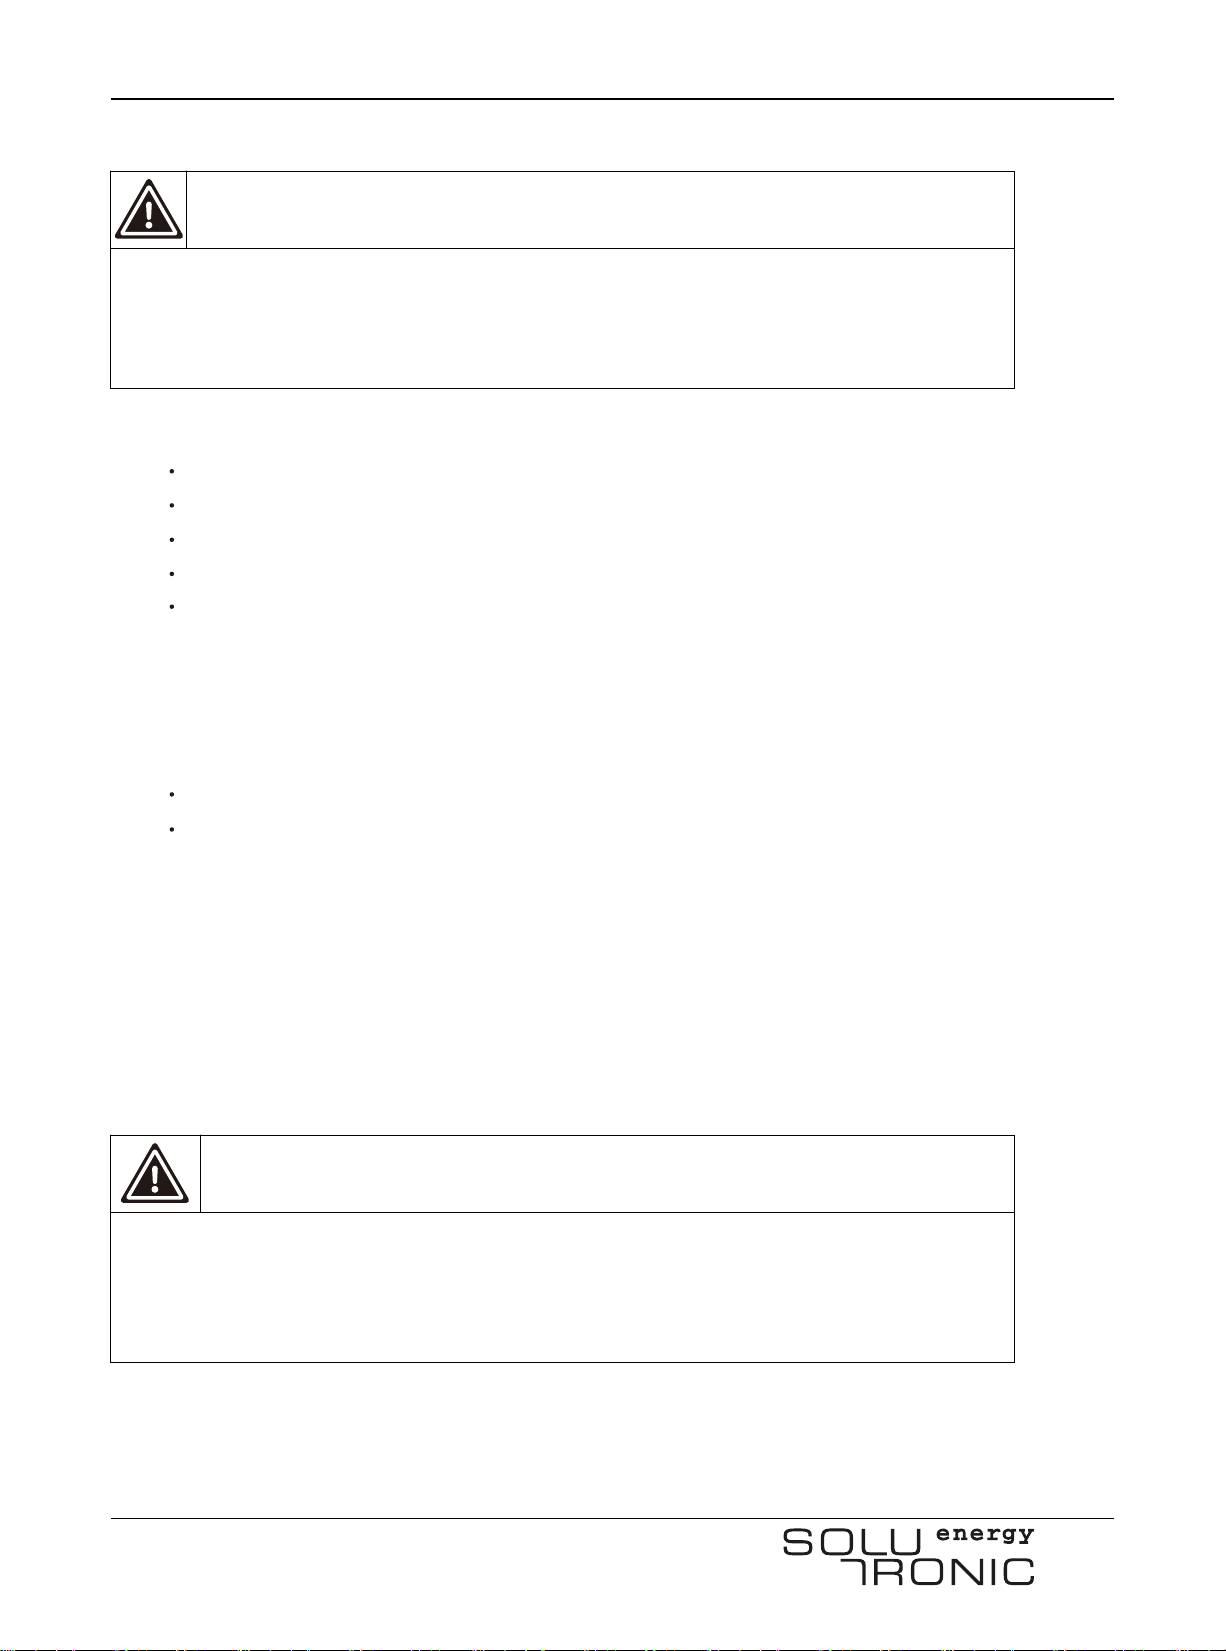
8.3 Communication connectors
RJ 45 CAN-battery
View from front
Connect the RJ 45 CAN-battery connectors on the "SolHybrid" and the "SolBatt Home" 1:1 using a
standard RJ 45 cable
Assemble the CAN cable throughtheRJ45 terminal connector (involved in
delivery) as the figure shown, and fasten it.
9 Connection withaSolutronic SolHybrid
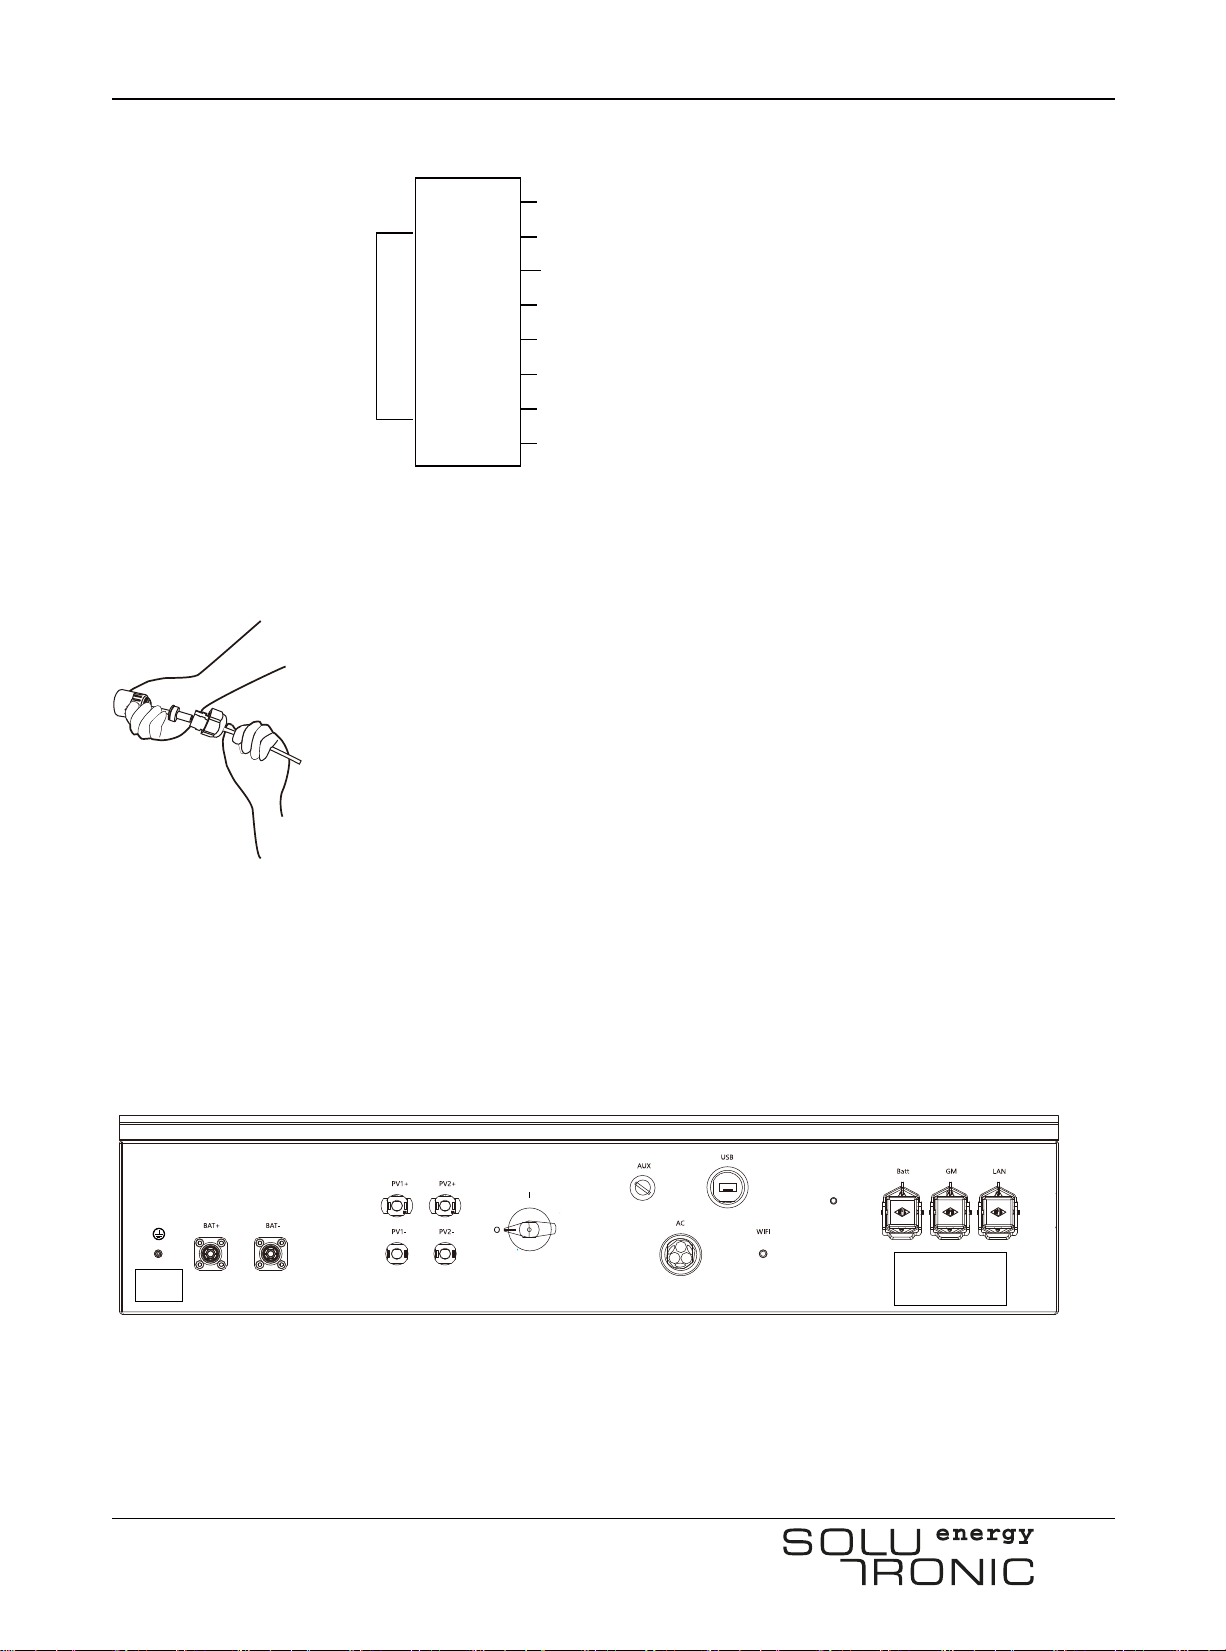
Please see the figure below of underside of a SolHybrid (without bracket).
Connector plugs for SolBatt Home:
BMS battery ON
GND
CAN high battery
empty
empty
CAN low battery
empty
empty
1
2
3
4
5
6
7
8
Connection with a Solutronic SolHybrid
C CAN Cable
Assemble the CAN cable through
the connector as the figure
shown, and fasten it.
Connect the CAN cable to SolBatt
Home.
Use battery cable to connect
SolBatt Home and SolHybrid.
Confirm the connection is correct
with a sound "ka".
ka!
RJ 45 CAN-
batt.
PE
SolBatt Home_User Manuel_B.00-EN14/24
Product description
Connector for Article description Connection gauge (mm2) Torque (Nm)
BAT+ customised cable, red customised (dependent on length) -
BAT- customised cable, black customised (dependent on length) -
1:1elbacdradnatssub-NAC54JRTTAB
0.301-4wolley/neergEP
(Note: You can refer to the Manuel of a SolHybrid for detailed information of other
connectors.)
Connection of connectors:
"BATT" SolBatt Home "CAN1 or CAN2"
"BAT+" /"BAT-"pairing SolBatt Home plus and minus
PE screw connection torque, 3.0 Nm.
Please refer to our homepage for detailed instructions and further information on the use of Solutronic
SolHybrid energy manager.
10 Product description
10.1 Product features
The SolBatt Home isakind of smart storage module which is easy to operate, efficient and suitablefor
household. It contains the following characteristics:
High efficiency and environmentally friendly lithium-ion battery technology
Ideal for solar, wind power and hybrid energy as well as UPS
More than 8000 charging/discharging cycles
Advanced industrial design offering highest reliability and robustness
Safe design with redundant shut down circuit in case of a failure
Integrated battery management system with following features
Voltage and temperature monitoring for each individual cell and modules
Balancing between the cells and the modules
Data logging functions (cycles, temperature, status, alarms, warnings)
The SolBatt Home is mainly composed of energy storage modules (li-ion batteries) and battery
management system (BMS). It can improve the energy efficiency and achieve self-sufficiency when used

Product description
SolBatt Home_User Manuel_B.00-EN15/24
together with renewable energy such as Photovoltaic system or hybrid system.
10.2 Applications
DC system (voltages are nominal values)
CAN
AC grid 230 V
230VAC
230VAC
48VDC
SolBatt Home SolHybrid DC system
g
Domestic consum
p
tion
PV generator
80
–
400 VDC
Grid mana er

SolBatt Home_User Manuel_B.00-EN16/24
AC system (voltages are nominal values)
Product description
48VDC
SolBatt Home AC grid 230 V
Domestic consum
p
tion
230VAC
SolHybrid AC system GridManager
Inverter,
1 or 3
p
hase
existing PV system
PV generator
230VAC

11 Technical Specification
Technical Specification
SolBatt Home_User Manuel_B.00-EN17/24
Type SolBatt Home 5.0 Li
Battery
Material LiFePO4
Nominal Capacity 5.1kWh
)DoD%08@(hWk1.4yticapaCelbaliavA
Voltage & Range 51.2V /42V to 56V
Expected life* 10 years or 8000 charging / discharging
cycles
Discharging
NominalCurrent 50A
Peak Current 50A
Temperature -10°C to +45°C
Self-discharge <1% per month
Depth of Discharge 80%
Charging
NominalCurrent 50A
Max. Current 50A
Max. Power 2.5kW
Recharge Time 2.5 hours
Temperature 0°C to +45°C
Features / Function
Certificates and approvals IEC 62619, EN 61000
Charge/discharge with BMS (Battery Management System) yes
y/sey/seyegrahcnoitazilauqe/egrahclluf/noitaluclacegrahcfoetatS es
Battery temperature sensor yes
Protection/Safty
ProtectionClass IP65
sey/seydaolrevO/tiucric-trohS
Overtemperature / battery deep discharge yes/yes
General data
Efficiency > 95%
Communication CAN-Bus
Dimensions (W H D) 780*580*180mm
Weight 80kg
Storage Temperature -20°C to +60°C
Humidity 90%, non-condensing
Warranty 3 years, optional prolongable
* @ 80 % DoD; up to 70% residual capacity

SolBatt Home_User Manuel_B.00-EN18/24
12 Maintenance and cleaning
Maintenance and cleaning
The SolBatt Home is fully automated and requires no servicing, but check the device at regular intervals
to ensure it is operating perfectly.
Cleaning the housing and display:
Information
Do not use corrosive, abrasive or solvent-based detergents.
You should also avoid detergents containing alcohol.
You can clean the display with a moist cloth if its legibility is compromised due to dust or grime. You
can also take the same approach to the housing and the stickers.
13 Product registration and warranty
The SolBatt Home warranty period is 3 years from the purchase date.
Extended warranty
For all SolBatt Home storage modules you can acquire a 2~4 year extension to the warranty,
achieve a total of 5~7 years of warranty coverage. The extended warranty can only be applied
within1month of the delivery date.
Warranty conditions
If a SolBatt Home becomes defective during its warranty period, one of the following services will
be performed at no charge for materials, but exclusive of labor costs, please contact your dealer for
help:
Repair at service center
Repair on site
Exchange for a replacement unit (of equivalent value according to model and age)
Exclusion of liability
Warranty claims and liability for direct or indirect damage are excluded if arising from:
Incorrect installation and/or commissioning Modifications, changes or attempted repairs by
untrained and unauthorized personnel
Incorrect use or inappropriate operation
Failure to observe the applicable safety regulations
Force majeure (e.g. lightning, overvoltage, storm, fire)
Damage due to moisture and/or other environmental conditions
Table of contents
Other Solutronic Inverter manuals


Popular Inverter manuals by other brands

Tronic
Tronic TSW 150 A1 operating instructions

Amerisolar
Amerisolar AS-B2 Series user manual

Champion Global Power Equipment
Champion Global Power Equipment 100515 Operator's manual

Xantrex
Xantrex RV2012GS owner's manual

Alpha Group
Alpha Group OutBack Power GS3548E installation manual

Hitachi
Hitachi CP-X200 CP-X300 instruction manual


actuant
actuant Mastervolt SunMaster CS15TL RP User and installation manual

Growatt
Growatt MIN 2500-6000TL-XH installation guide

Huawei
Huawei SUN2000-375W-USP0 quick guide

Growatt
Growatt TL3-X Series Installation & operation manual

Cerus Industrial
Cerus Industrial C Series Installation & operation manual

Northern Lights
Northern Lights ONL844T4E Operator's manual