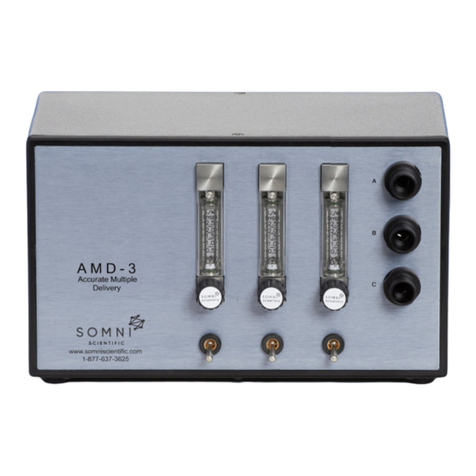
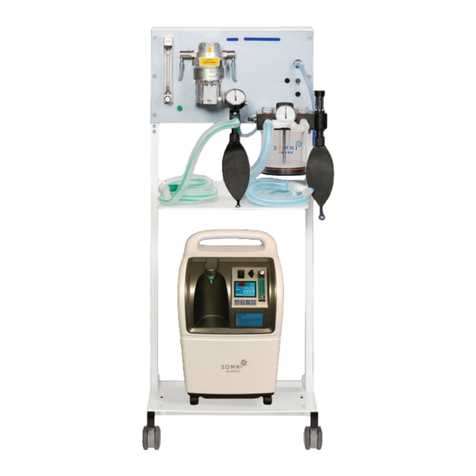
SOMNI AMD-3+ User manual

ACCURATE MULTI-DELIVERY SYSTEM
SOMNI AMD-3+
SOMNI PRODUCT MANUAL
Pressurized 3 Station Flowmeter Controlled Diverter System
Model AMD-17106, AMD-17217

TABLE OF CONTENTS
Intended use
Unpacking/ included items
Introduction
Warnings, definitions, about this manual
Description of controls/features
Product Operation
Routine Maintenance
Daily test
Cleaning
Troubleshooting
Warranty and Service Information
Supplies and Accessories
Specifications
2

INTENDED USE
The SOMNI AMD-3+ Accurate Multi-Delivery System is a pressurized flowmeter
controlled diverter system designed for Veterinary Use Only. The AMD-3+ gives
the user the ability to deliver accurate adjustable flow rates to three stations
simultaneously. Each station has a flowmeter to control the volume delivery
needed. For ease of use, each flowmeter also has a on/o toggle switch. Set
the flow rate needed on the flowmeter and utilize the switch when the flow
rate used is consistent. Use of a pressurized flow controlled anesthesia system
ensures continuous, consistent and accurate flowrates to each station for the
duration of the procedure. The SOMNI AMD-3+ system includes a SOMNI 3
6psi calibrated Isoflurane vaporizer. Only use the AMD-3+ system with a 6psi
specially calibrated vaporizer, failure to do so can result in equipment damage
and inconsistent flow rates/anesthetic concentration to the animal.
Unpacking/ included items
SOMNI AMD-3+
SOMNI 6psi Vaporizer with frame
2 - color coded 6’ Fresh gas delivery lines with common outlet
1 - color coded 6’ Fresh gas delivery line with 15mm adapter
Vaporizer Fill Instruction Protocol card (please keep near vaporizer)
3

WARNINGS, NOTES AND DEFINITIONS
Warning! System is pressurized to approximately 6 psi when in use! Fail-
ure to follow Depressurization procedure will result in high levels of anes-
thetic exposure!
Warning! Operator must read entire manual prior to operation and be
trained in the use of inhalant anesthetic equipment. Failure to do so may
harm the animal.
Warning! Only use accessories appropriate for use with nonrebreathing
anesthesia systems. Failure to use appropriate accessories can result in
animal injury, poor anesthetic delivery and waste gas exposure.
Warning! Do not connect unregulated carrier gas to the anesthesia system.
Oxygen or another carrier gas should be supplied at 50 psi.
Warning! Only use a 6psi calibrated vaporizer with this system. Use of a
vaporizer that has not been calibrated at 6psi may harm the vaporizer and
result in inaccurate anesthetic flow rates and/or concentrations to the
animal.
Warning! Vaporizer is pressurized when in use. Do not attempt to open
the fill cap and replenish agent without following depressurization proce-
dure!
Warning! Always operate inhalant anesthetic equipment with waste gas
scavenging systems. Failure to control waste anesthetic gas may cause
harmful exposure to personnel.
Note! Only use non-rebreathing style circuits and accessories
INTRODUCTION
4

DESCRIPTION OF CONTROLS/FEATURES
1
5
2
4
3
Pressure gauge
Common Outlets
“A” “B” “C”
Main Oxygen Supply
switch
Anesthetic Flow
Control Knobs
Flowmeter switch
“A” “B” “C”
1
2
3
4
5
5
6
10
8
9
7
• Connect the black tubing from the vaporizer inlet (6) to the
oxygen outlet (7) on the back of the AMD-3+.
• Connect the black tubing from the vaporizer outlet (8) to
the gas inlet (9) on the back of the AMD-3+.
• Connect the oxygen (carrier gas) supply hose to the DISS
male fitting (10) on the back of the machine. Turn the
carrier gas supply on at the source (cylinder regulator or
concentrator). Do not turn the AMD 3+ main oxygen supply
toggle switch on until ready to begin.

PRODUCT OPERATION
• Place the SOMNI AMD-3+ on a flat, stable surface and ensure the main oxygen
supply switch is in the “OFF” position.
• Connect the fresh gas delivery lines supplied to each of the common outlets
labelled A, B, or C. If one of the lines is not needed, it is not necessary to
disconnect it.
• Connect optional breathing accessory or induction chamber utilizing the color
coded fresh gas delivery lines.
• Connect appropriate active or passive waste gas scavenging system to each
accessory in use.
• Ensure vaporizer has been filled with anesthetic agent and allowed to wick for
a minimum of 1 hour, see vaporizer manual and filling protocol following this
section for further instructions.
• Turn the main oxygen supply toggle switch on/up. The pressure gauge should
read ~6psi.
• Toggle each flowmeter toggle switch up/on to allow flow to begin. Adjust
each flowmeter to the level of flow needed for each gas delivery line and
corresponding accessory. See suggested flow rates. Confirm oxygen flow
through each of the gas delivery lines.
• If all flowmeters will not be utilized, it is not necessary to turn the flowmeter o,
only toggle the toggle switch down/o to stop the flow.
• To begin, ensure the waste gas scavenging system is connected and turned on.
Place animal(s) into induction chamber and provide oxygen or other carrier gas
flow.
• Verify the chamber is closed and then turn on the vaporizer to the desired
anesthetic percentage.
Continue >
6

PRODUCT OPERATION CONT.
7
• Follow established guidelines regarding flowrates
and percent anesthetic concentration. Suggested
fresh gas flow to any accessory (except hooded style
induction chamber) SHOULD NOT EXCEED 1 LPM.
Recommended maximum fresh gas flow rate for
induction chamber is 2 LPM.
Suggested Fresh Gas Flow Rates*
Uniflow/Miniflow/Equaflow Rat: < 1 LPM
Equaflow 3: < 3 LPM
Equaflow 5: < 5 LPM
Equaflow 10: < 10 LPM
• At procedure completion, turn the anesthetic
vaporizer o and allow the anesthetic gas to be
removed by the scavenging system.
• Turn the oxygen (carrier gas) supply o at the source
(cylinder regulator or concentrator) and allow the
pressure gauge on the AMD-3+ to fall to 0.
• Next turn o each of the station flowmeter toggle
switches. Turn the main oxygen supply toggle switch
o and lastly turn o the scavenging system.
WARNING:
Anesthetic Vaporizer Is
Under Pressure
1
2
3
4
5
6
7
Wear safety goggles or safety glasses.
Please Follow this protocol for refilling vaporizer
Turn O2 supply primary switch to “OFF”
With vaporizer in “ON” position (2% concentration), drain oxygen from
line by turning “ON” fresh gas switch to induction chamber (be sure to
have evac for the induction chamber “ON”.
When oxygen stops flowing (flow meter will drop to zero and O2
pressure gauge will drop to zero), turn induction chamber fresh gas
supply to the “OFF” position.
Fill vaporizer with liquid anesthetic.
Turn vaporizer dial to “OFF” position.
Turn O2 supply primary switch to the “ON” position

ROUTINE MAINTENANCE TROUBLESHOOTING
Flowmeter will not turn o – Needle valve may be
worn
Animals will not go to sleep/stay asleep – Inspect
system for leak
• tighten any loose connections (vaporizer endcaps,
tubing connections)
• verify flowmeter toggle switch is on, flowmeter is
turned on
• confirm oxygen (carrier gas) supply is adequate and
on
• confirm liquid anesthetic level in vaporizer is
adequate
• inspect breathing circuit/nosecone and/or induction
chamber for leak or loose connection
• check active waste gas system function/attenuation
Call 877-637-3625 for assistance
Daily test: Oxygen Flow:
• Turn the oxygen supply source on.
• Turn the main oxygen supply toggle switch on.
• Turn each flowmeter knob fully open and observe
the float ascends and descends freely and rests
completely at the bottom when knob is turned o.
• Open and close each toggle switch, checking for gas
flow through delivery lines when open and verify loss
of flow when closed.
Daily test : Internal leak check:
• Turn the oxygen supply source on.
• Turn the main oxygen supply toggle switch on (AMD-
3+).
• Turn each flowmeter toggle switch on.
• Ensure scavenging system is turned on/connected.
• Turn Vaporizer on.
• Turn the oxygen supply source o.
• Turn flowmeter toggle switch o.
• Turn main oxygen supply toggle switch o (AMD-3+)
• Observe pressure gauge. If system pressure drops
contact Somni Support.
• Inspect lines, connectors and accessories for wear
prior to use.
Cleaning
• Use a damp cloth to clean, do not spray cleaning
agent directly onto the AMD-3+. Dilute Chlorhexidine
or similar cleaning and disinfecting agent can be
used. Do not use alcohol.
9

Limited Warranty
SOMNI Scientific (SOMNI) warrants to the original purchaser
that the products, not including accessories, shall be free
from defects in materials and workmanship under normal
use, if maintained in accordance with SOMNI’s guidelines
and used according to its labeling, for the period specified in
the manual.
Warranty period is 5 years from the invoiced date of
purchase.
THIS LIMITED WARRANTY, IS IN LIEU OF AND EXCLUDES ALL
OTHER WARRANTIES WHETHER EXPRESSED OR IMPLIED,
BY OPERATION OF LAW OR OTHERWISE, INCLUDING
BUT NOT LIMITED TO, ANY IMPLIED WARRANTIES OF
MERCHANTABILITY OR FITNESS FOR A PARTICULAR
PURPOSE.
This warranty is void if the product has been altered,
misused, damaged by neglect or accident, tampered with,
not properly maintained, not installed in strict compliance
with applicable codes and ordinances, or repaired by
persons not authorized by SOMNI. This warranty does
not cover normal wear and tear and maintenance items
and specifically excludes accessory items and any other
equipment used with the product.
WARRANTY AND SERVICE INFORMATION
Limitation of Remedies
SOMNI Scientific’s only obligation under this limited warranty is
the repair or replacement of the product. THIS IS THE EXCLUSIVE
REMEDY. SOMNI shall not be liable for and hereby disclaims any
direct, incidental, consequential or special damages or delays,
including but not limited to loss of use, downtime, lost business,
revenues and profits.
Warranty Procedure
To obtain warranty service, contact SOMNI Scientific
SOMNI Scientific
1900 Sleepy Hollow Road,
South Park, PA 15129
10

For Active type System
• EPS-3 Exposure Prevention System, active PN: WG-
15001
• Large Induction Chamber, Active Vacuum Style (9 Liter)
PN: IA-3009
• InductFlow-LA, Large RED Active Induction Chamber ,
Hooded PN: IR-3010
• InductFlow-MA, Medium RED Active Induction Chamber ,
Hooded PN: IR-3011
• Equaflow Manifolds – multiple options available see
somniscientific.com
Weight 14 lbs. / 6.5 kg
Dimensions 12 in W x 8 in. D x 8 in. H
(30 cm W x 20 cm D x 20 cm H)
Flowmeters: 0-2.5LPM
Oxygen inlet: DISS Male
Regulator: 0-30psi maximum operating range,
set at ~6psi
SUPPLIES AND ACCESSORIES SPECIFICATIONS
11
This manual suits for next models
2
Table of contents
Other SOMNI Medical Equipment manuals
Popular Medical Equipment manuals by other brands
Braun
Braun Aesculap Neurosurgery Instructions for use/Technical description
FujiFilm
FujiFilm SonoSite iViz user guide

Optos
Optos 200tx troubleshooting guide
Beurer
Beurer IH20 Instructions for use
Veterinary technics
Veterinary technics 7F-5 user manual
Care of Sweden
Care of Sweden Optimal 5zon Instructions for use

sensiplast
sensiplast PRO COMFORT Instructions for use
Creo Medical
Creo Medical 7-EMR-050 Instructions for use

Juzo
Juzo JuzoFlex Patella Xtra Instructions for use
Durr Dental
Durr Dental XR 24 Pro Installation and operating instructions
Invacare
Invacare Carroll CS Series user manual
NantCare
NantCare NantLife user manual
