Sonic World Sonix SW-VM10 User manual

REV. 01
Sonic World Co., Ltd. | www.sonicworld.kr
USER MANUAL
Please read this manual carefully before use.
1-125, Wonju Medical Industry Techno Park, 1720-26, Taejang-dong, Wonju-si, Gangwon-do, Korea
Integrated Sonic Wave System
Integrated Sonic Wave System
www.sonicworld.kr

Integrated Sonic Wave System

Package Components
Complete Configuation
Body and plate can be
packaged separately
2m
6mm
1 battery
Input
external audio
M8x45
1mm 2ea
1.5mm 1ea
Power cord
Remote Control
Audio
connection cable
T spanner 1pcs
bolt (8pcs)
Rubber Leveling Pad
hardcopy
User s Guide
IntegratedSonicWave System
3
2
USER MANUAL
· Please read this manual carefully before use.
· Please keep this manual in a safe place.
· This product has been manufactured for overseas use only.
Package Components
Safety Guidelines
- Safety guidelines for handling
- Safety guidelines for electric power
- Safety guidelines for installation
- Safety guidelines for operation
- Safety guidelines for maintenance & storage
Principle of Operation
- Beneficial Effects and Applications
- Nomenclatures
- Control Panel
- Buttons
- Display
- Audio System
- Safety System
Specifications(SW-VM10)
Assembly & Disassembly Instructions
How to use Remote Control
User Requirements
SONIX Training Programs
After Service
- Stimulation Area per Frequency
- Program Modes(SW-VM10)
- SONIX Training Programs
1
2
3
4
5
6
7
8
9
Safety Guideline for electric power
Safety guideslines
Safety guideline for handling
In order to prevent any accident or hazard,users shall follow the below instructions of cautions for safe
and proper operation of the product. This Product shall be overseas use only
The power plug should not be depressed by rear side of the product.
Do not touch power plug with wet hands.
Power cord shall not be bent excessively nor shall be placed under heavy object.
Any damaged power cord or outlet shall not be used.
An exclusive power outlet shall be assigned for the product.
Simultaneous use of other appliances may destroy fuses or may
cause a failure of the product.
Dusted power plug terminals shall be cleaned up with a dry cloth before use.
In any trouble of smoking or burning smell from the product,
please stop operation immediately and remove the power cord.
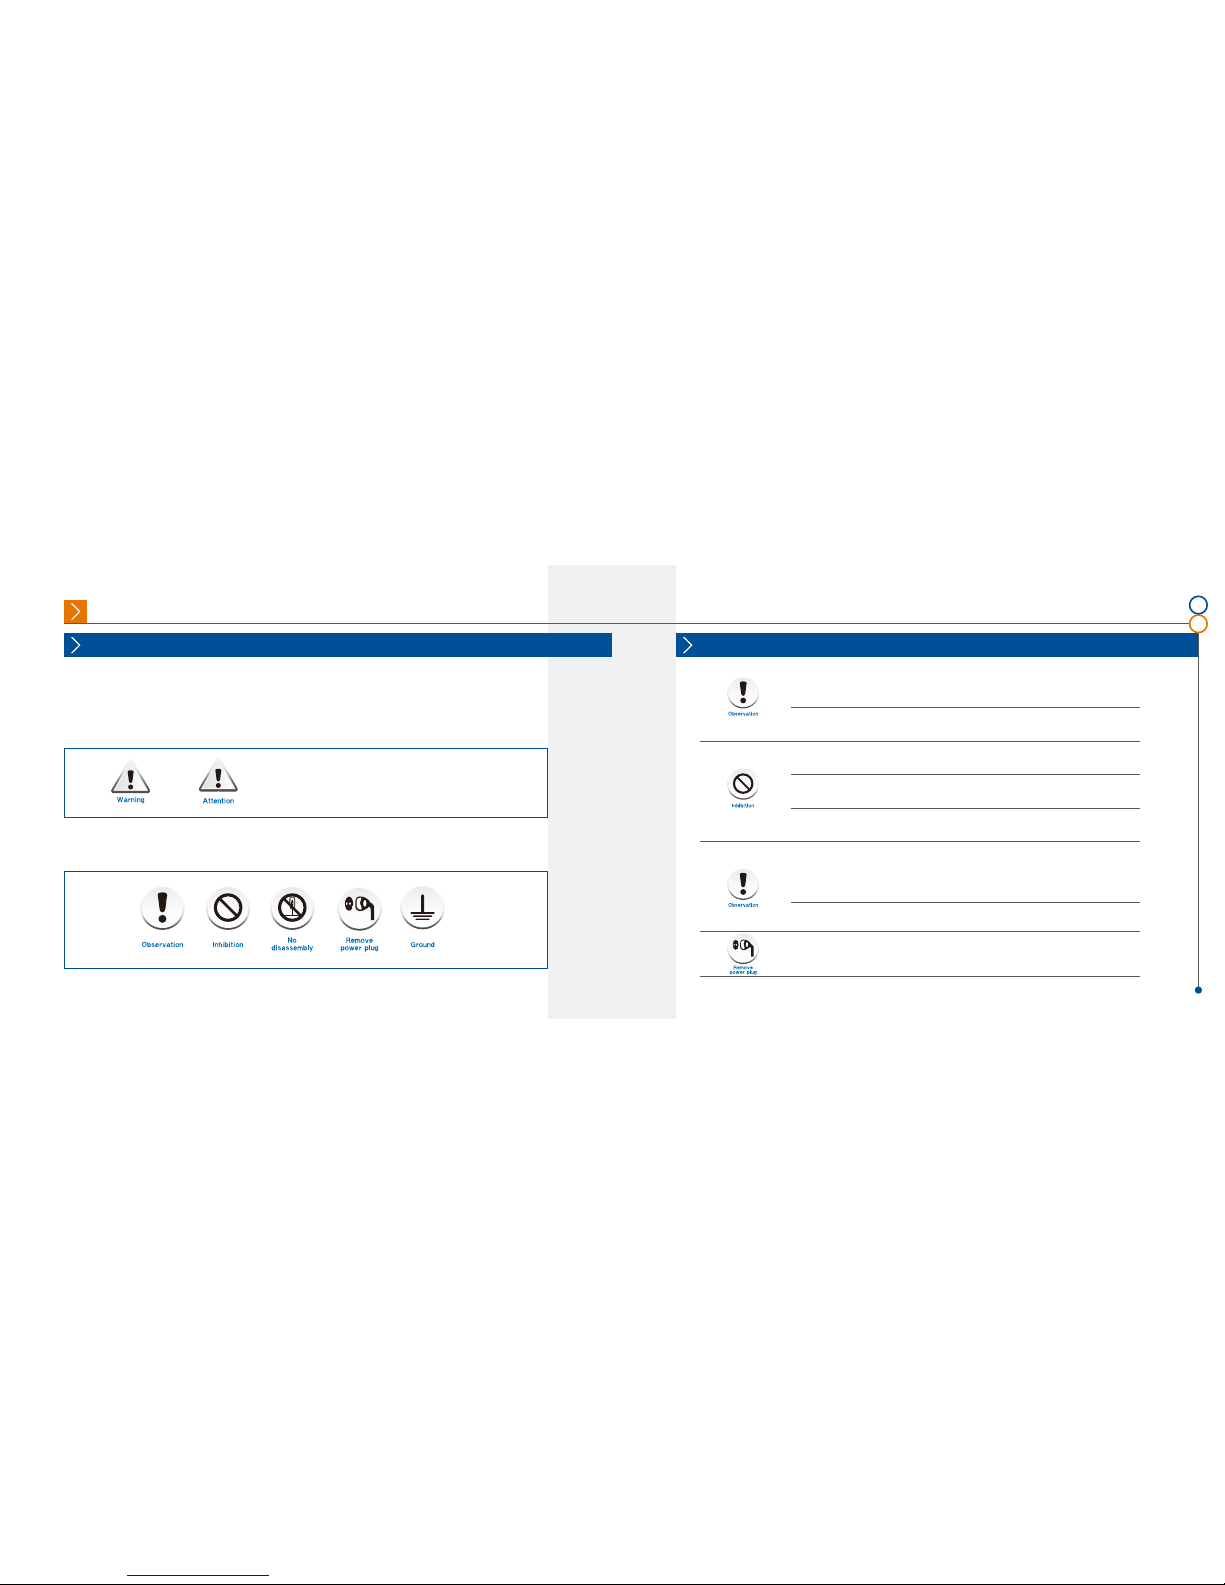
or injury or damage can be caused if not properly obeyed.
Cautions are distinguished into warning or attention
Meaning of Symbols
5
4

Please do not install the product in wet area or high humidity.
Please do not install the product in the areas where it may be exposed to water.
The product shall be installed at least 20 centimeters away from the wall.
The product shall be installed on solid and level floor.
Make sure if the power outlet is capable enough to support the maximum power
consumption of the product.
Proper carrier shall be used to move the product,or inappropriate move may
cause damage to the product.
To move the product, please lift and hold the product by holding
grips under the plate ( & in the photo).
Please press the "START" button after your stance is firm and stable : abrupt
operation at unstable stance may cause physical damage.
Stepping down from the plate while in motion may cause injury. Please press
"STOP" button and then make sure the product stops completely before
descending from the product.
For power saving,please unplug the power cord from the outlet.
.
Mischief like jumping on the plate while in operation may cause injury to human
body or damage to the product.
When the aged or children use the product,they need to be accompanied by
a guardian for safety.
Please do not disassemble,repair or modify the product in any case, to avoid
any consequential damage or malfunction of the product.
Safety guideline for operation
Safety guideline for installation
7
6
11
22
12

Please do not place any flammable material near the product.
Please do not spray water directly ,or do not use benzene,thinner or bleach to
clean the product.
Please unplug the power cord from the outlet before cleaning.
To clean the control panel, please wipe it out with dry cloth,Water shouild not get
into the control panel.
To clean the product surface,please use appropriate cleanser suitable
for the product material.
Please clean and dry the product before long term storage.
Safety guideline for maintenance & storage
Principle of Operation
Sonic wave vibrations are generated using new forms of speaker mechanism instead of rotating
motors and their energy is delivered to human body, stimulates muscle fibers(myocytes)
stronger than gravity, and exercises muscle fibers to repeat fast and strong contraction and
relaxation,whereby muscle strength is improved faster than usual muscle trainings.
Sonic wave vibration machine from SONIC WORLD, as one of the leaders in vibration
technology, is an innovative product developed with optimal application of sonic wave
frequencies so that it helps to improve training effect, immunity, and autotherapy in a short
period of time.
9
8
1
2
Beneficial Effects and Applications
General Training Help to improve body balance and health
It is very effective and efficient product for the people who can not exercise due to psychological or
physical problems or for the people who does not have time or space enough to exercise. You can
experience the effect of regular aerobic exercises, and you can also get the effect better and faster.
Special Training Increase muscle strength through intense power training
It helps to drive strong power by stimulating fast twitch muscle fiber. For the athletes who need
high power in a short time, like running, jumping, and throwing, it is very critical to maintain the
weight and performance of fast twitch muscle fiber. It also helps to improve muscular endurance
by stimulating Growth Hormon secretion to improve performance of slow twitch muscle fiber.
Safe but efficient Effect of Sonic Waves
Sonic waves exercise and soften tendons and ligaments which are hard to exercise. Sonic waves
exercise not only big muscles of human body but also small muscles such as facial muscles and
pelvic muscles which usual weight trainings can not exercise.
Whole body vibration exercise combined together with usual power training will increase
maximum muscle strength by additional 30%, reduce required training period by 85%, and will
also reduce training session by more than 50%.
Contrary to usual muscle training like weight lifting, vibration exercise does not cause any
overload to joint,tendon, or ligament;in other words, it does not cause any risk of injury.
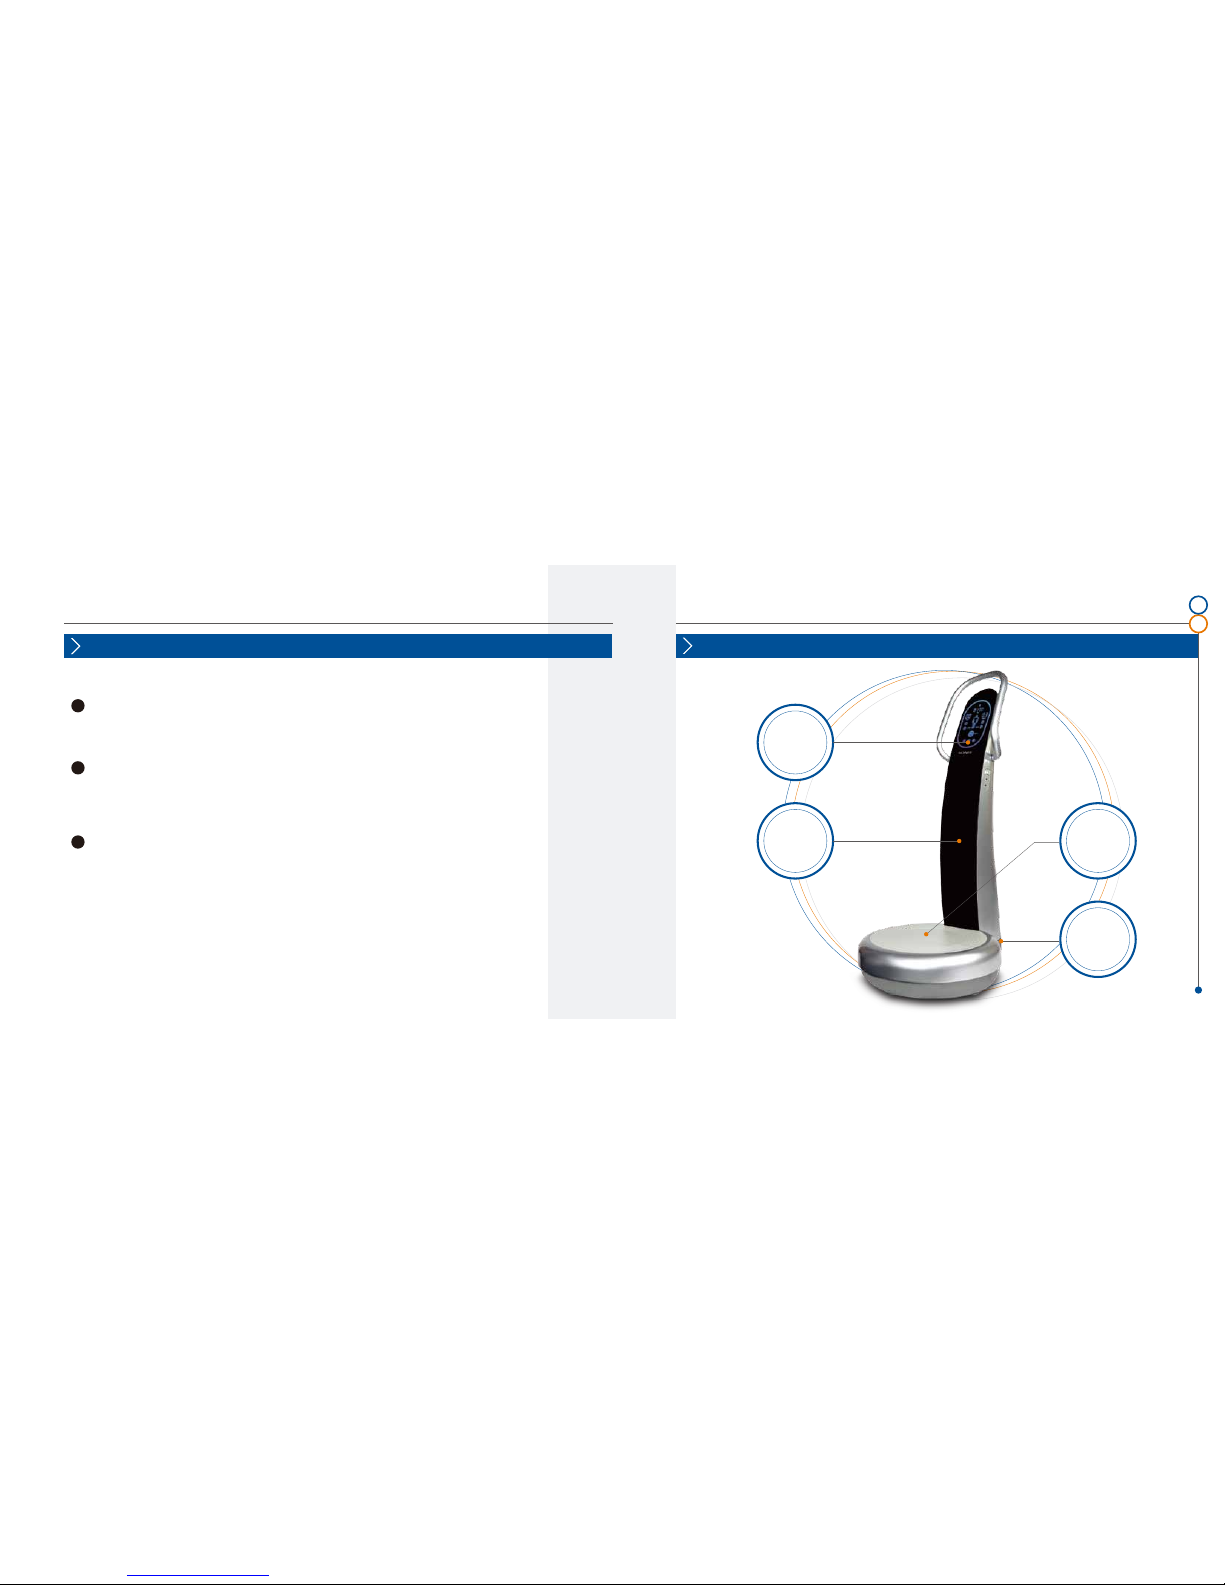
Control
Panel
Plate
Power
Inlet
Body
Nomenclatures
1
2
3
11
10
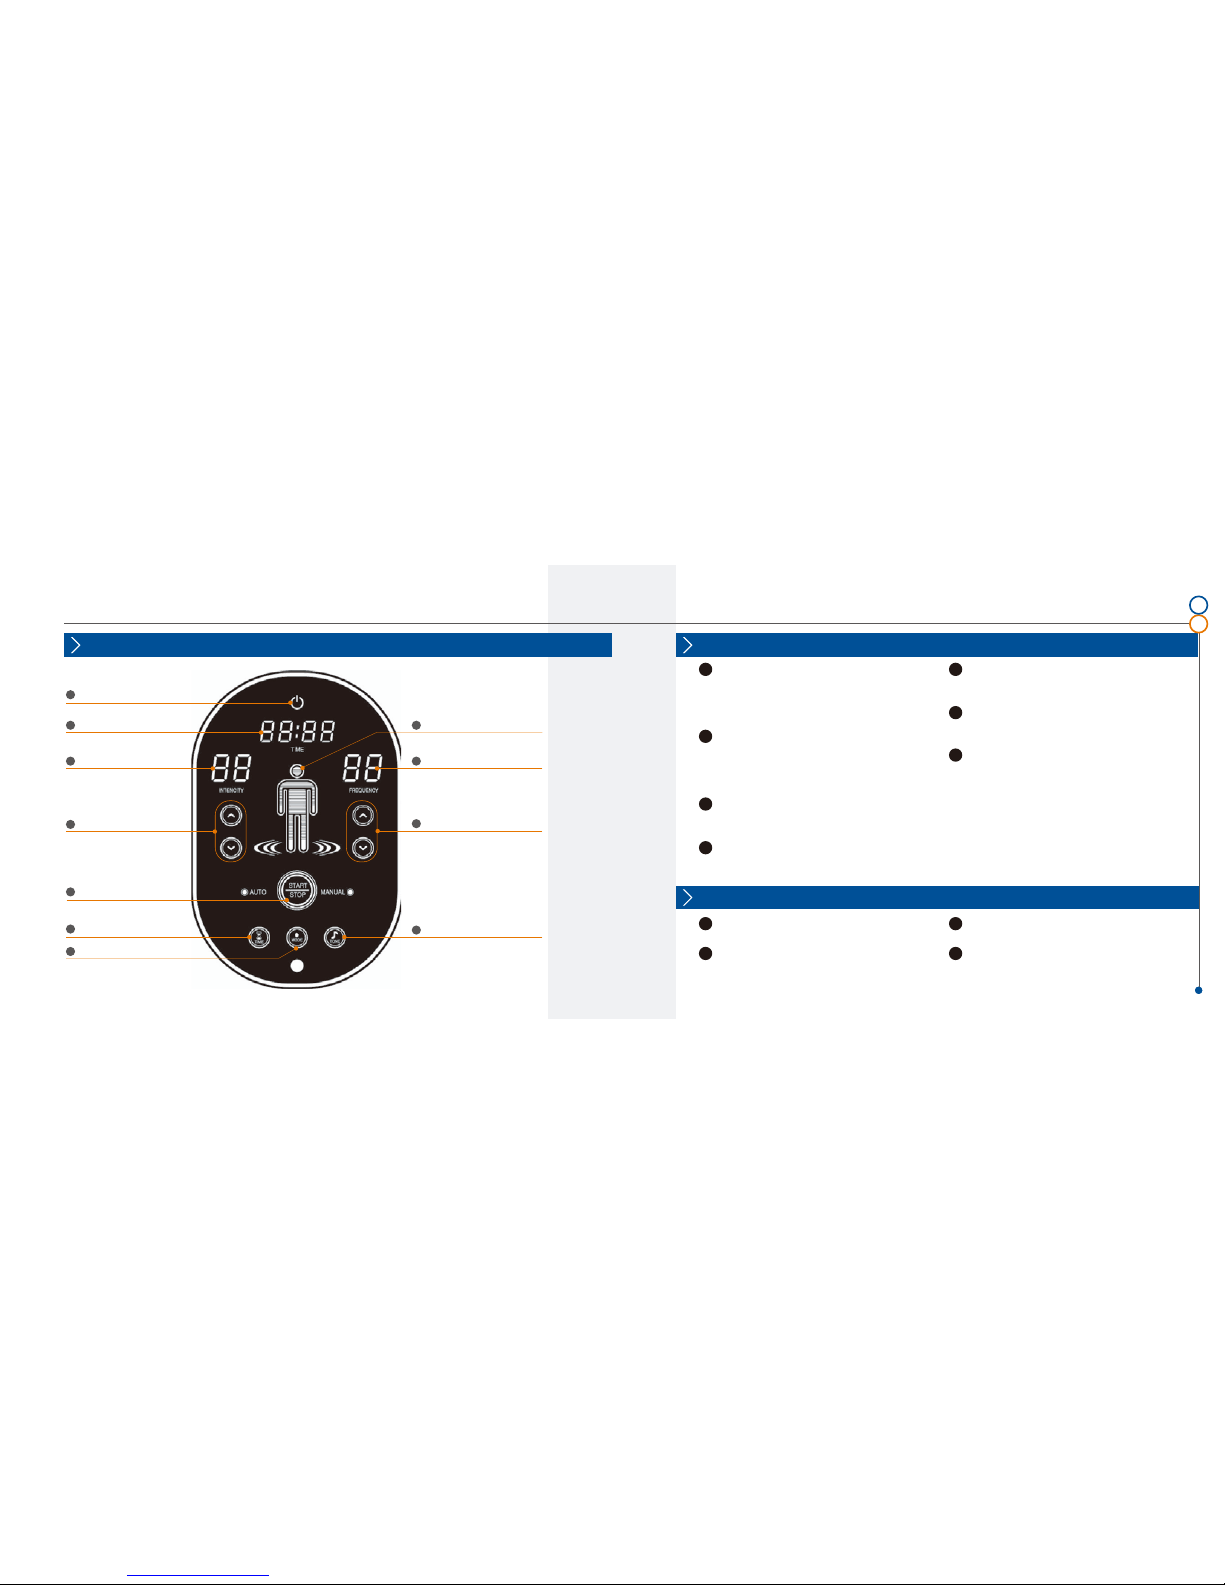
Buttons
Control Panel
Intensity Control Button
Power Button
Time Display
Intensity Display
Frequency Control Button
Start / Stop Button
Time Button
Mode Button
Frequency Display
Mode Display
Tone Button
Power Button
Press Power Button to check control panel (You will
hear buzz sound when it turns on). Every LED will turn
on with initial settings of frequency to 3Hz, intensity to
"0", and time to "1" minute.
Intensity Control Button
- In Manual mode, the level of intensity can be selected
in the range of 10~99(by increment of 10).
- In Pro mode, the intensity can be selected from 3
levels : [ HI (high), HL (middle),Lo (low)].
Start / Stop Button
Press this button once to start to operate. Press it again
to stop operation (blue:stop, red: in operation)
Time Button
Each press increases 1 minute up to maximum 10
minutes. You can use this button during operation.
Time Display
Remaining time is displayed.
Intensity Display
- Vibration intensity is displayed in the range of 10~99.
- In Pro mode,high (HI), middle (HL), or low (Lo) is
displayed.
Mode Button
Individual modes can be selected in sequence of
Manual, Pro1, Pro2, Pro3, and Pro4.
Frequency Control Button
In Manual mode, the frequency (Hz) can be selected
from 3 to 50 Hz by the increment of 1Hz.
Tone Button
Press this button once to feel vibration only with
sound off (when the music source is turned on).
Press it again to feel vibration and enjoy music at the
same time (blue:TONE off,red:TONE in operation).
Mode Display
Selected mode is displayed .
Frequency Display
Frequency range of 3 - 50Hz is displayed.
13
12
2
1
8
9
3
4
5
6
11
10
7
1
4
5
6
7
10
Display
3
28
9
11
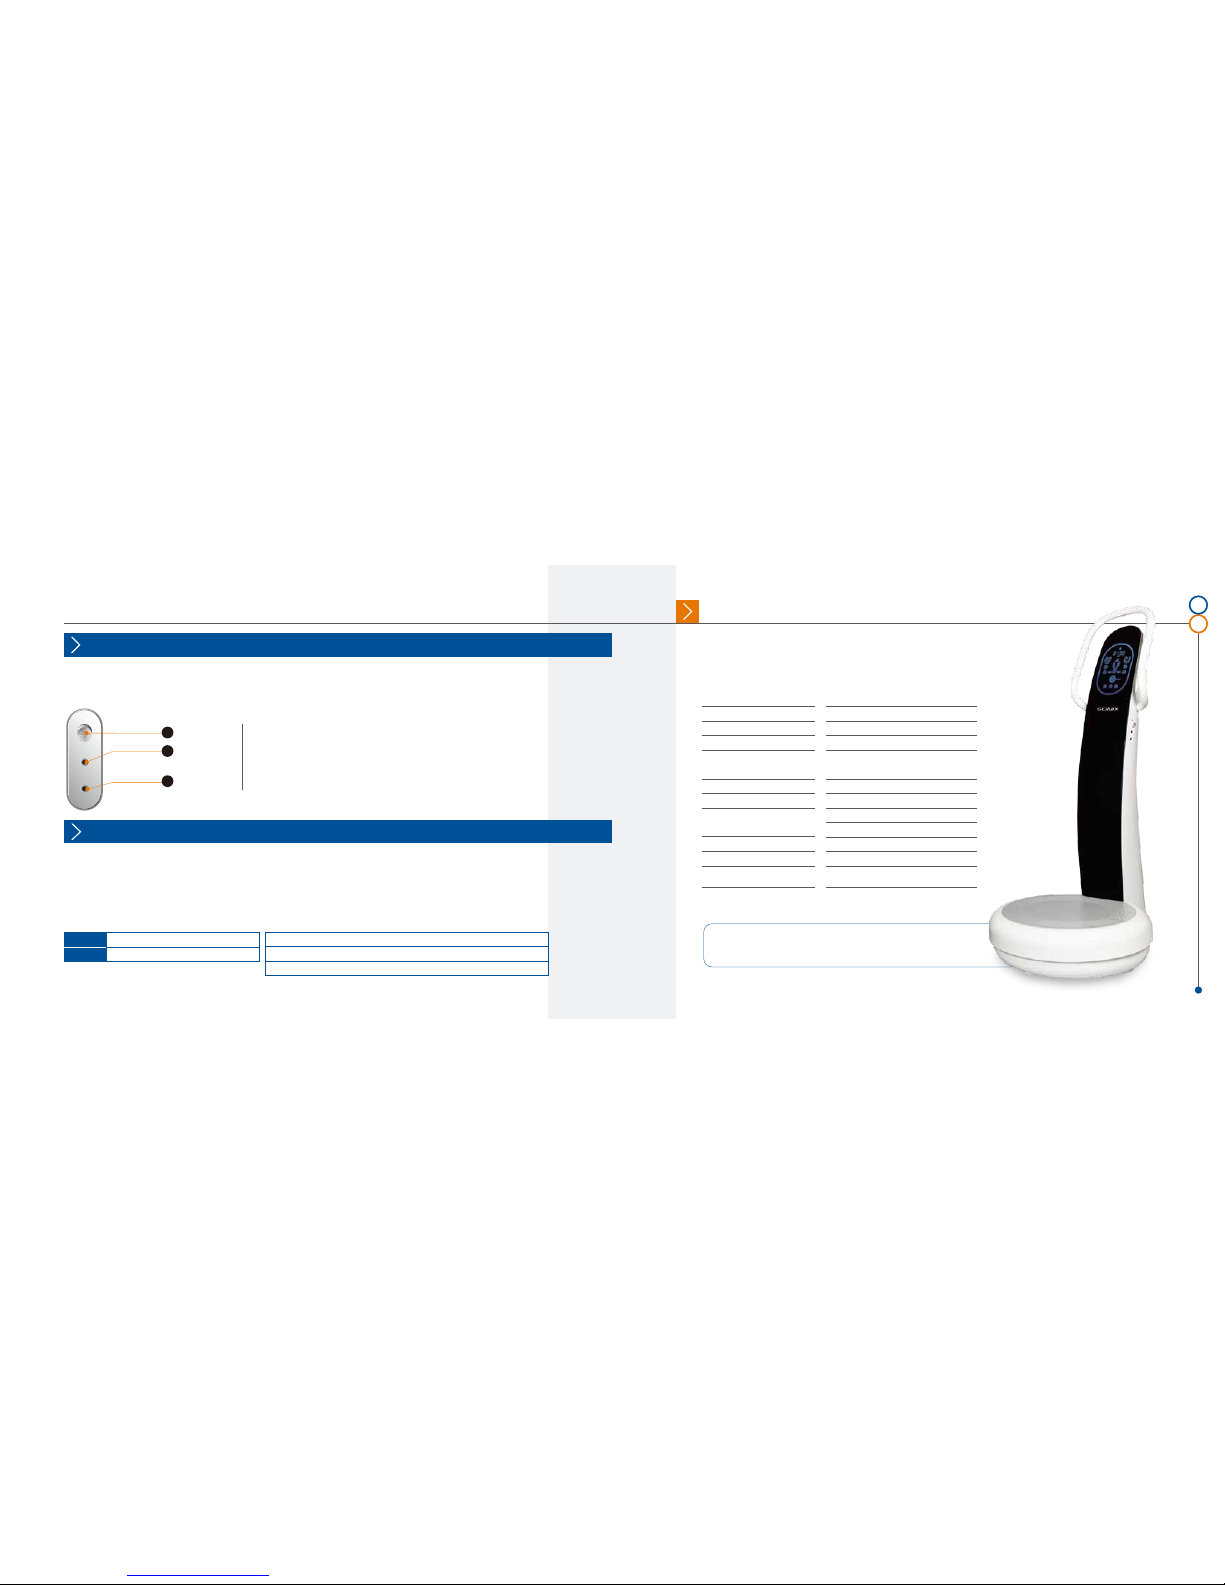
Specifications(SW-VM10)
Model
Applicable Frequency
Operating Frequency
Max. Loading Weight
Power Consumption
Sonic Wave Generator
Operating Conditions
Size
Weight
Color Options
SW-VM10
0.1~100,000Hz
3~50Hz
Max 120 Kg
110-120V/50Hz, 60Hz
220-240V/50Hz, 60Hz
500W
159φ
Temp. : 0-40℃(32-140℉)
Humidity : 0-80%
700mm X 820mm X 1450mm
Body 15kg , Plate 45Kg
* This specifications are subject to change at manufacturer's
discretion without prior notice.
Mode Display
Selected mode is displayed .
Frequency Display
Frequency range of 3 - 50Hz is displayed.
Audio System
External sound sources are to be plugged into the jack.
Headset or earphone is connected into this jack to enjoy the music itself.
Controls the intensity of sonic vibration and sound.
INPUT Jack
OUTPUT Jack
VOLUME
Power Source
Silver,White
15
14
DUO (Dual Mode Operation) Feature
SonicWorld's technology implemented this feature of DUO for the first time in the world,which allows the user to feel the
sound as well as the vibration at the same time,simply connecting external source from MP3 or PC into the audio input jack.
1
2
3
VM SAFETY SYSTEM
SAFETY SYSTEN MODE
※Machine is fixed for mode 1 when deliveried to customer.
VM SAFETY SYSTEM FUNCTION
We put auto control function for safety of user. Auto control function makes stop or control machine when machine has
not stable conditions. When nobody on plate or user suddenly down from plate, auto control function makes machine
stops to prevent any danger.
How to change MODE FUNCTION
MODE 1
- Not working start button less than 30~ 40kg
MODE 2
- working start button all the time.
- Push "Time button" and "Mode button" together, Mode 1 function will change to Mode2 function.
- After Mode Function change,color of "tone button" goes Blue color to Pink color.
- To change back to Mode1, push "Time button" and "Mode button" together again.
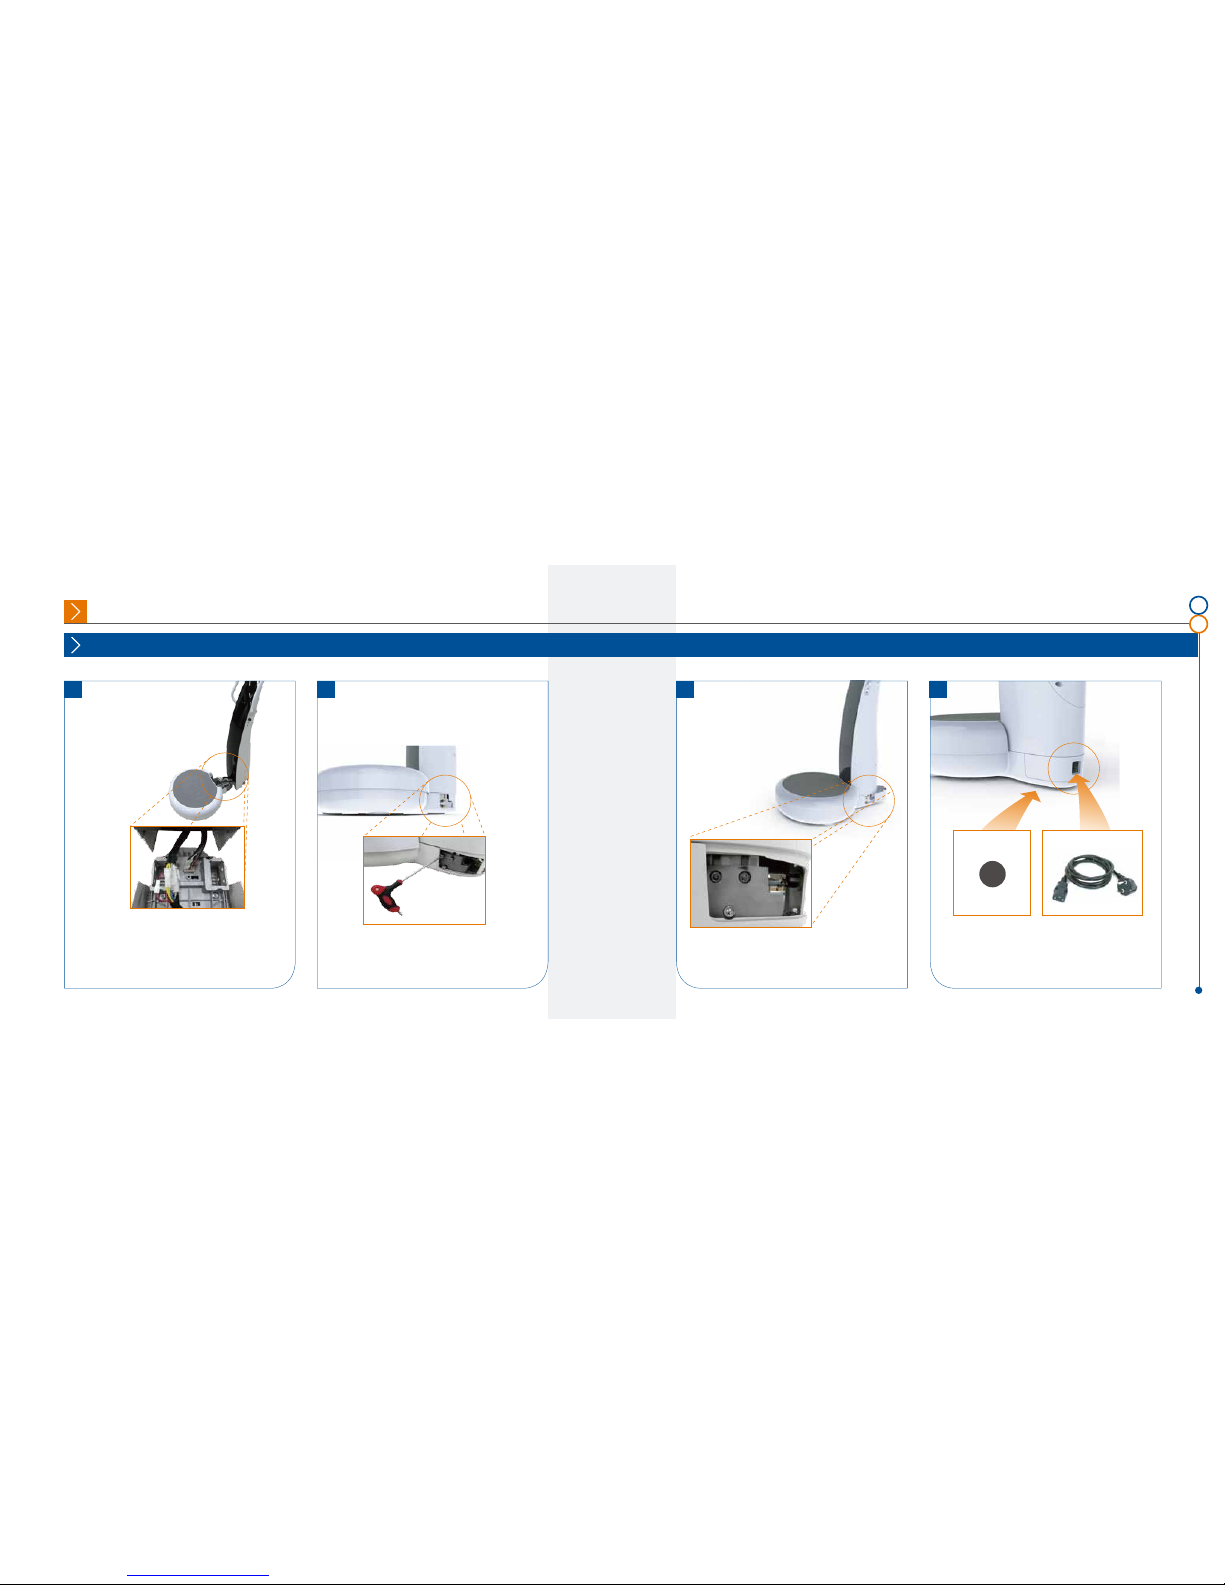
Assembly and Disassembly Instructions
Assembly
Align the guide pin of the plate to the body,
then insert the bolt under the plate.
Assemble the plate's cover.
With the body in place,use the enclosed T-wrench
to fasten bolts(3 bolts each on each side)
※Fasten the bolts tight for the body not to sway.
Place the body close to the plate like photo (don’t
place the body beside of the plate) and connect the
internal connection cables(5).
※Make sure cables are not placed in between plate
and body.
17
16
1 2 3 4
Please Use leveling pad under plate for make even level.
Plug power cable on to socket.

How to use Remote Control
In Manual Mode In Program Mode
Press Power Button to turn on the product (initial
settings: frequency to 3Hz, intensity to "0", and time
to "1" minute).
Press Time Button to set the time(increment by 1 min
per press,up to 10 minutes).
Press Start Button.
Adjust INTENSITY(0-99, increment by 10) and
FREQUENCY(3-50Hz) to your choice.
Press Stop Button to stop operation Step down from
the plate after it stops completely.
Press Power Button to stop operation and change
into standby.
Press Mode Button to select the program you want.
Press Intensity Button to adjust intensity.
Time is set to 10 minutes(You can't change intensity
and frequency during operation).
Press Start Button.
Press Stop Button to stop operation Step down from
the plate after it stops completely.
Press Power Button to stop operation and change
into standby.
19
18
Disassembly procedure is in the reverse order
of the assembly procedure.
Power cable must be removed in advance
prior to disassembly.
Proceed the disassembly following
the assembly sequence in reverse order
from #5 to #1.
Push "START" botton on control panel.
After push "START" botton, push "INTENSITY" and
"FREQUANCY" botton for setting your level.
Confirm the machine is operating properly.
Assembly Disassembly
6
Caution when disassembling
How to Operate SONIX
Do not hardly pull out Body from Plate when it
disassembly. May cables in plate and body tear
off from components and the machine will not
be operated.
Do not leave anything on plate.
"ddi-ring' sound will come from SONIX within 5 seconds after power cable on .
Should not put anything on plate before you hear the "ddi-ring" sound.
If leave anything on Plate before you hear "ddi-ring" sound from the machine,
put away things from plate and put power cable on again.
Caution when connect power cable
1
2
3
4
1
2
3
1
2
3
5
Check level of Plate.(If need leveling,use level pad)
Plug power cable located behind machine on to socket.
Check button(blue color) in top side of control panel.
Step up on the plate and place feet in shoulder size width.
1
2
3
4
5
6
7
8
9
5
6
7
8
9
10
10
User Requirements SONIX Training Program
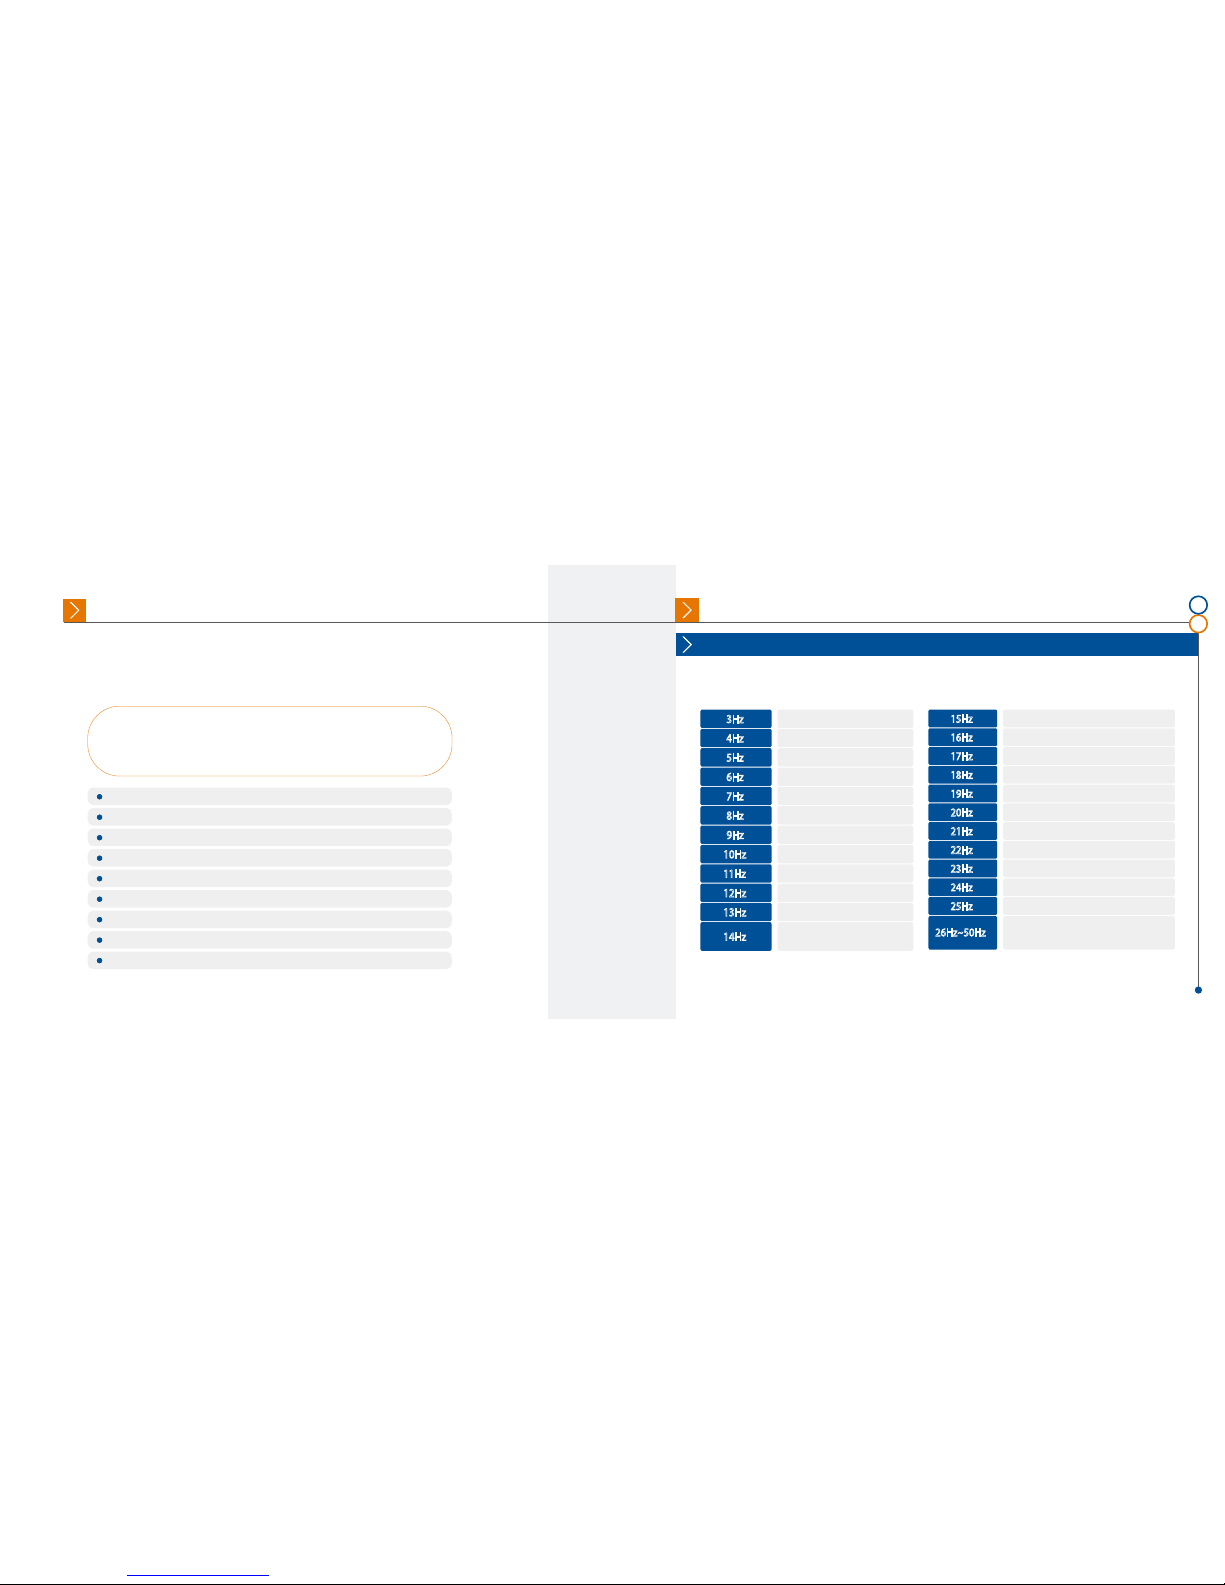
Stimulation Area per Frequency
whole body exercise
arms, shoulders
chest, shoulders
shoulders, back
hip, back, abdomen (Trunk)
abdomen, hip, thigh
hip, thigh, abdomen
waist, thigh(inner)
thigh(inner), prostate (male)
thigh, face
whole body(vertebra), face, knees
whole body(vertebra), shoulders,
knees
3Hz
4Hz
5Hz
6Hz
7Hz
8Hz
9Hz
10Hz
11Hz
12Hz
13Hz
14Hz
thigh(front), calves, knees
thigh(front), calves, knees
abdomen, thigh(inner), pelvis(front)
whole body stimulation(stretching)
whole body stimulation(stretching)
whole body stimulation(stretching)
pelvis(side), sartorius, lower abdomen(female)
pelvis(side), sartorius, lower abdomen(female)
calves, thigh(back)
calves, thigh(back)
calves, thigh(back)
entire upper muscle stimulation, neuromuscular training,
BMD enhancement, rehabilitation training, muscle
massage, circulation massage
15Hz
16Hz
17Hz
18Hz
19Hz
20Hz
21Hz
22Hz
23Hz
24Hz
25Hz
26Hz~50Hz
cardiovascular patient
vertebral disk patient
tumor and diabetic patient
patient in recovery after operation
in case artifical device like pacemaker is inserted inside body
in case of epileptic fit
in case broken bones are fixed with screw
the pregnant
in case birth control like IUD is put on
SONIX is leading-edge exerciser using sonic wave vibrations and is very safe
product. However, users are required to obey the following safety requirements;
in case these requirements are not obeyed by users' mistake, the company of
Sonic World is not responsible for any subsequent results.
1. Period of use: Excessive use can cause overload to human body. It is
recommended to use 30 minutes or less per session and 2 sessions a day.
2. In case of the following physical conditions, please consult with your
doctor or corresponding medical doctor before use.
21
20

Low Body Vibration.
Abdomen Vibration.
Upper Body Vibration.
Whole Body Vibration.
Pro 1
Pro 2
Pro 3
Pro 4
Lower Body
Programed to apply, based on bio-electromyographic experiments, a
range of frequencies which can mostly stimulate gluteus maximus,
femoral muscle, and soleus muscle: the mode of vibrational exercise
to easily influence hips,thighs, and calfs when standing erect.
Upper Body
Programed to apply, based on bio-electromyographic
experiments, a range of frequencies which can mostly stimulate
trapezius muscle, biceps, and pectoral muscle : the mode of
vibrational exercise to easily influence shoulders, arms,and chest
when standing erect.
Whole Body
Programed to apply whole range of frequencies (3-50Hz) and
all intensity levels(10-99) which can stimulate most of the
muscles in whole body: the general mode of vibrational
exercise you can feel and enjoy compelling rhythms of sonic
wave vibrations.
Abdomen
Programed to apply, based on bio-electromyographic experiments, a
range of frequencies which can mostly stimulate rectus abdominus
muscle and erector spinae muscules: the mode of vibrational
exercise to easily influence group of abdomen muscles when
standing erect. (rectus abdominus muscle is stimulated by all
frequencies when standing erect.)
Program Modes (SW-VM10)
23
22
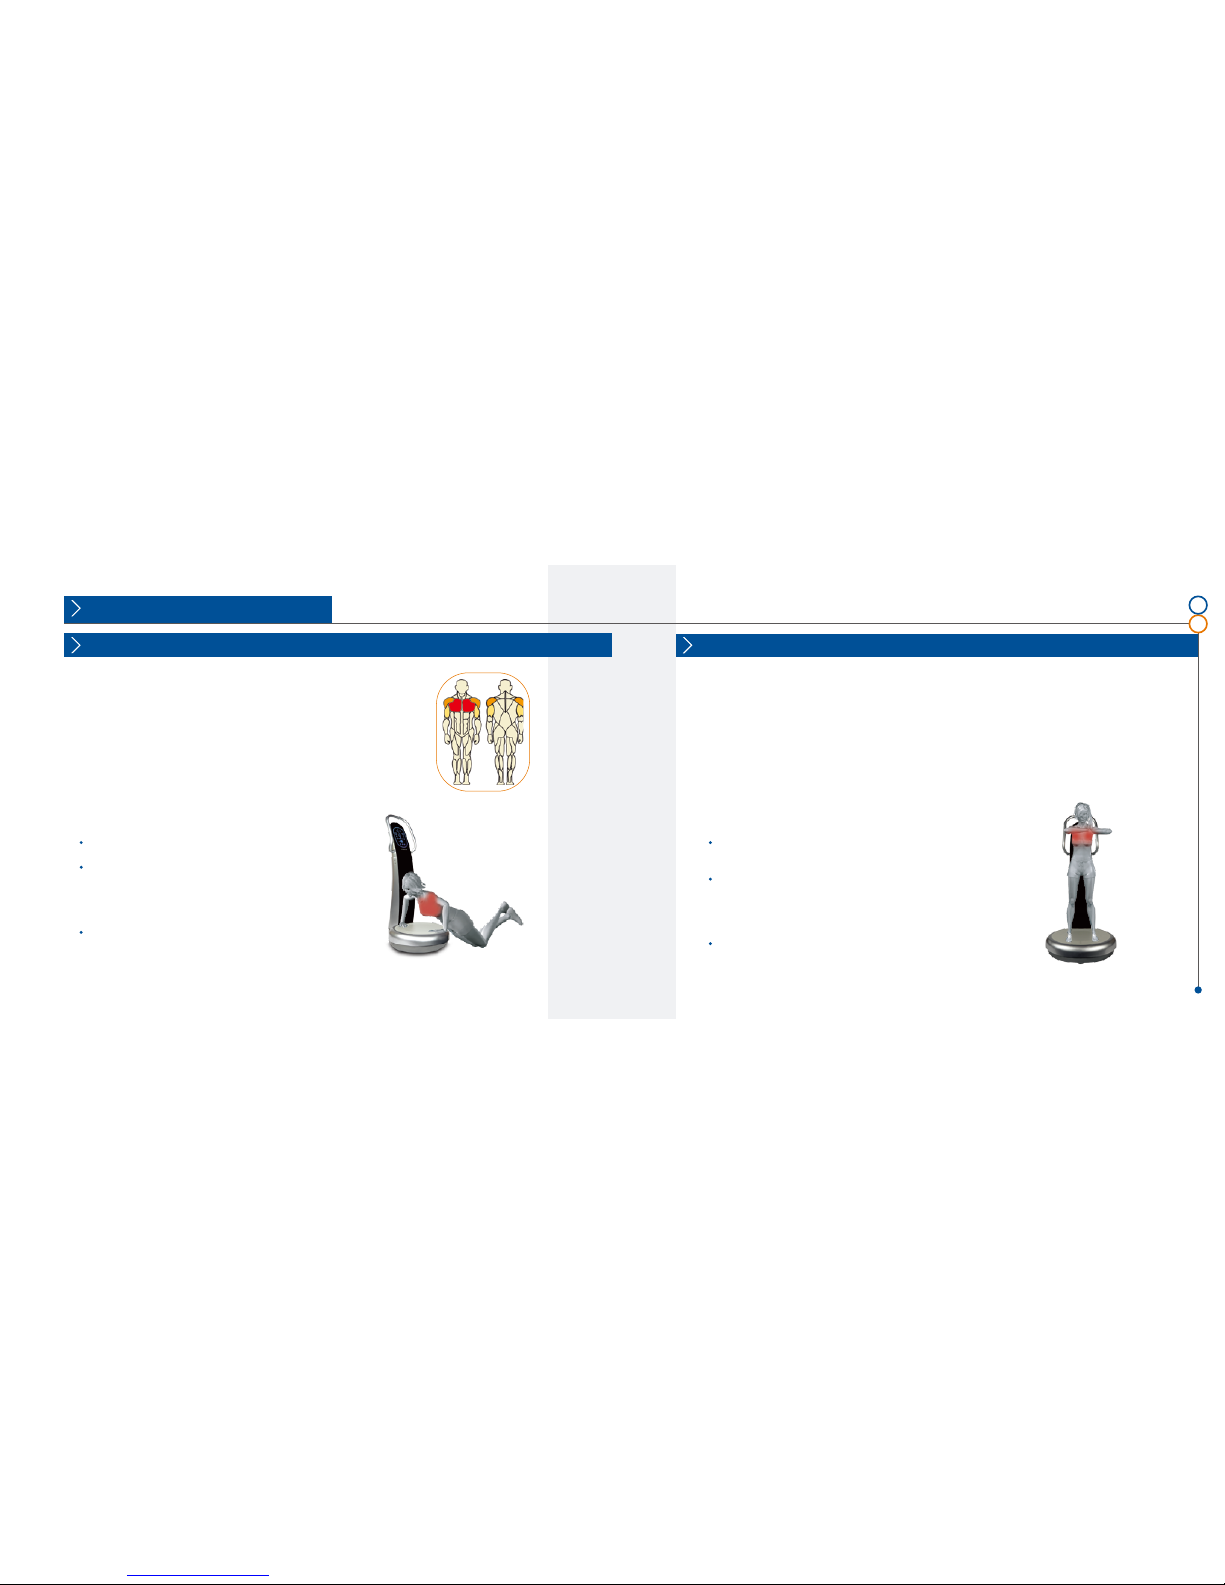
Extend elbows toward outside, lie face down on the
plate, and take a push-up pose.
Stick palms on the plate and exert force into the
directions of thumb ends.
Adjust shoulder and waist heights close to horizontal
level, so as to avoid the waist bending down.
Raise elbows to shoulder level, place hands in front of
the face with the palms touching each other. (similar
to praying pose)
Push each palm into inner directions and move them
to left and right alternately, without twisting body.
Do not move hands beyond the shoulder ends.
P2
PUSH EACH HAND
9Hz~13Hz
Pectoralis Pectoralis
SONIX Training Programs
Cautionㅣ
Positionㅣ
Cautionㅣ
Positionㅣ
P1
PUSH UP
10Hz~14Hz
////////// //////////
25
24

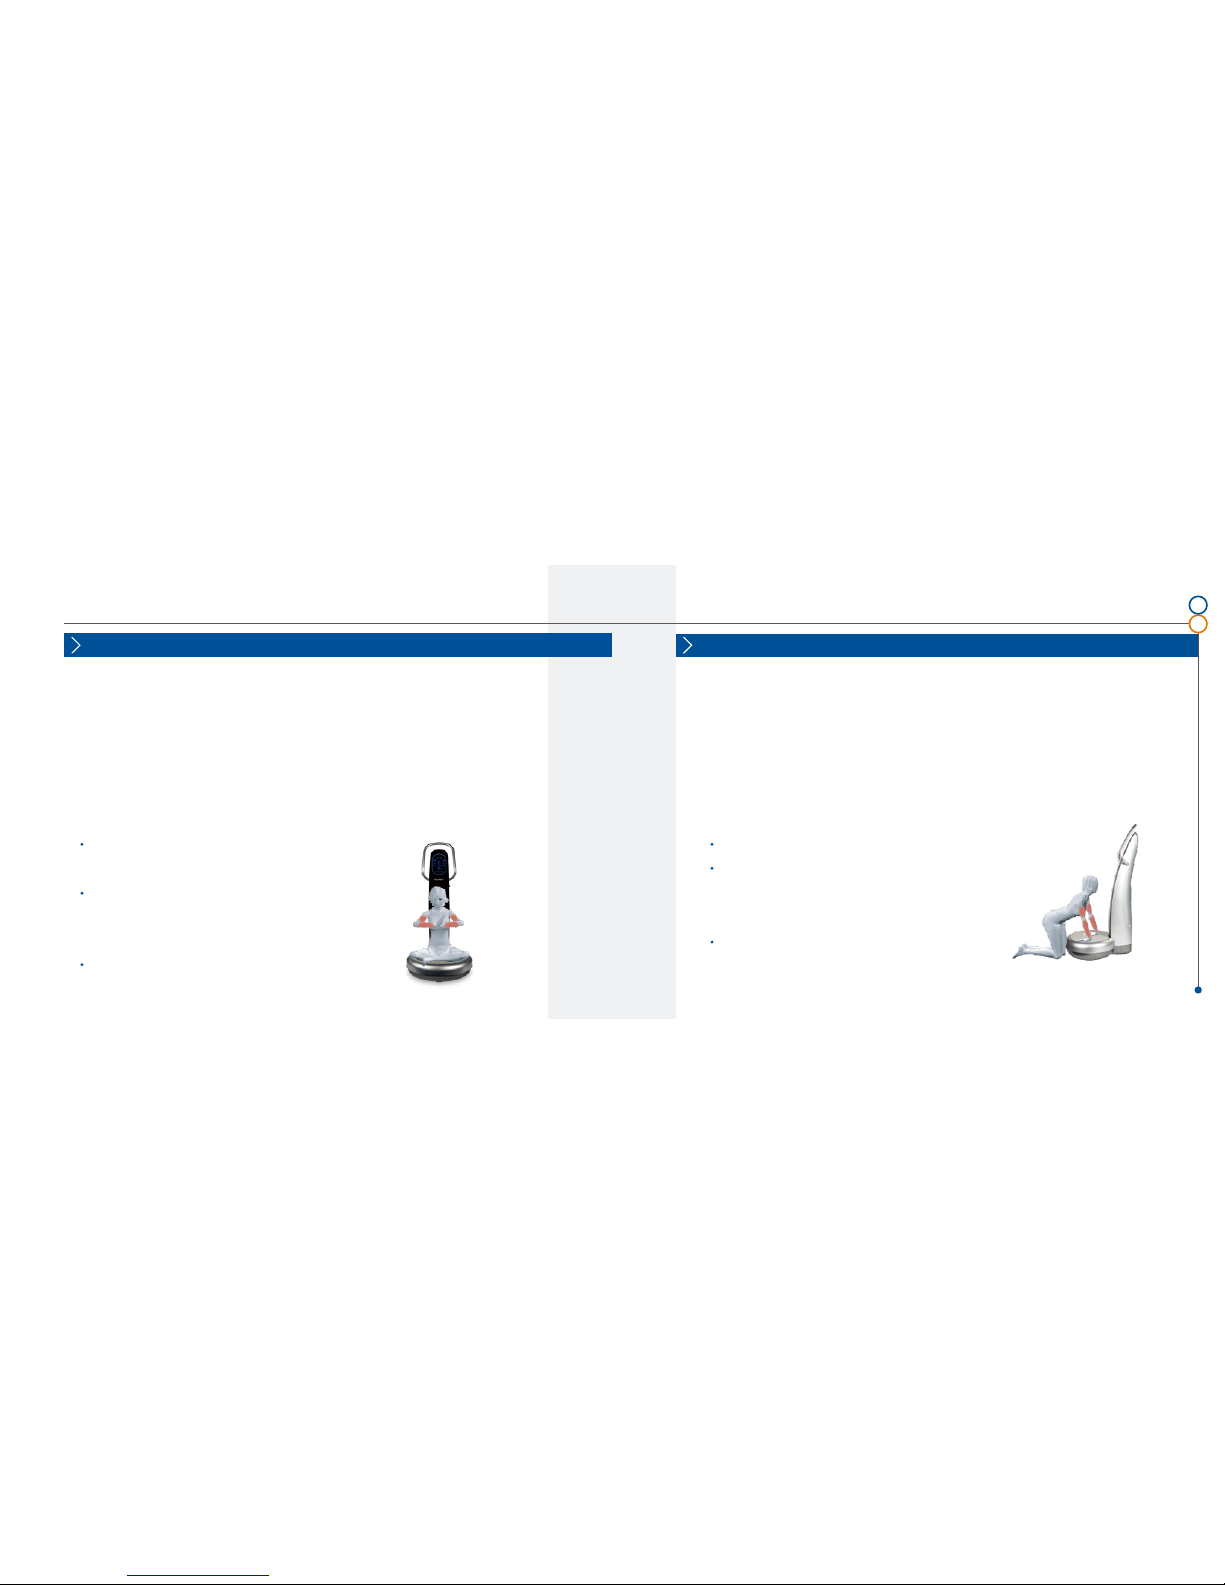
Sit on the plate edge with waist and back erect right,
and stretch one arm backward to the main body with
the arm in parallel with the floor.
Push your chest forward to extend chest muscles and
arm muscles as much as you can.
Raise hands with arms open to both sides.
Open your chest, push the shoulder blades toward
center of the back and maintain their tension, and
then push elbows down.
Push elbows down to the below line of your breast.
Keep facing forward while maintaining erect waist and
back not tilting or twisting upper body. Maintain forearms in vertical position to the floor
without leaning forward or backward, while pushing
down elbows.
B1
PULL DOWN
13Hz~18Hz
Pectoralis Back
Cautionㅣ
Positionㅣ
Cautionㅣ
Positionㅣ
////////// //////////
P3
PECTORALIS STRETCHING
8Hz~12Hz
27
26

Stretch arms forward in parallel and to shoulder level
with hands facing down.
Push the shoulder blades toward center of the back
while maintaining forearms in parallel with the floor,
and then push elbows back.
Move upper body backward as if you pull the handle slightly.
Take a square stance and hold the handle.
Push your back backward as much as possible while
trying to make your back convex outward, bending
knees a little bit and raising pelvis up and forward at the
same time.
Extend arms holding the handle and pull your jaw down.
Move upper body backward as if you pull the handle slightly.
B2
ROWING BACK
13Hz~18Hz
Back Back
B3
ROLLING UP SPINE
13Hz~18Hz
Cautionㅣ
Positionㅣ
Cautionㅣ
Positionㅣ
////////// //////////
29
28

Take a square stance on the plate, open and extend
arms to shoulder level.
Raise arms up and down for 3 seconds repeatedly
while maintaining elbows and hands in parallel with
the floor, as if you move entire arms.
Don’t raise arms above your shoulder. Don’t touch legs
with hands. Always maintain tension in your shoulders.
Stand on the floor facing the plate, bend the upper
body and put hands on the plate with fingertips facing
each other toward center of the plate.
Stand on the floor facing the plate, bend the upper
body and put hands on the plate with fingertips facing
each other toward center of the plate.
Raise heels to position shoulders and hands in a vertical line.
S1
LATERAL RAISE
5Hz~6Hz
Shoulder Shoulder
S2
SHOULDER PRESS
10Hz~14Hz
Cautionㅣ
Positionㅣ
Cautionㅣ
Positionㅣ
////////// //////////
31
30

Cautionㅣ
Positionㅣ
Cautionㅣ
Positionㅣ
Kneel down on the floor facing the plate, bend your
waist and back, and put hands on the plate with arms
extended.
Push your hips backward and push your chest down
until breast reaches to legs.
Be careful not to separate hands and forearms from
the plate but push hips as far as hips and hands can be
away from each other.
Sit on the edge of the plate facing forward, holding
edges with your hands.
Pull hips forward out of the plate edge, bend elbows
and then support the weight with your arms.
When bending elbows, move your body down not to
raise shoulders.
S3
NECK&SHOULDER STRETCHING
10Hz~14Hz
Shoulder Arm
A1
TRICEPS DIP
11Hz~15Hz
////////// //////////
33
32
Cautionㅣ
Positionㅣ
Cautionㅣ
Positionㅣ
Sit down on the plate center folding legs in front, keep
waist and back straight, and hold hands in front of
your breast with fingertips unfold and forearms in
parallel with the floor.
Push hands right and left alternately without moving
their location in front of your breast, while tilting
fingertips.
Be careful to maintain forearms in parallel with the floor.
Kneel down on the floor facing the plate, and put
hands on the plate.
Turn wrists around for your fingertips to direct to you,
push hips backward to extend the muscles in and
around your wrists.
Don’t apply any bounds to your wrists. Keep hands
firmly on the plate.
A2
PRAY EXERCISE
6Hz~9Hz
Arm Arm
A3
WRIST STRETCHING
13Hz~16Hz
////////// //////////
35
34
//////////
Take a square stance on the plate center, hold handle,
erect back right, and bend knees as if you sit down.
Push hips backward keeping knees in range of your
tiptoes, and push upper body forward down without
bending your back.
Be careful to place tiptoes and knees in the same
direction and to hold the handle softly with your hands
only to maintain body balance with out applying forces.
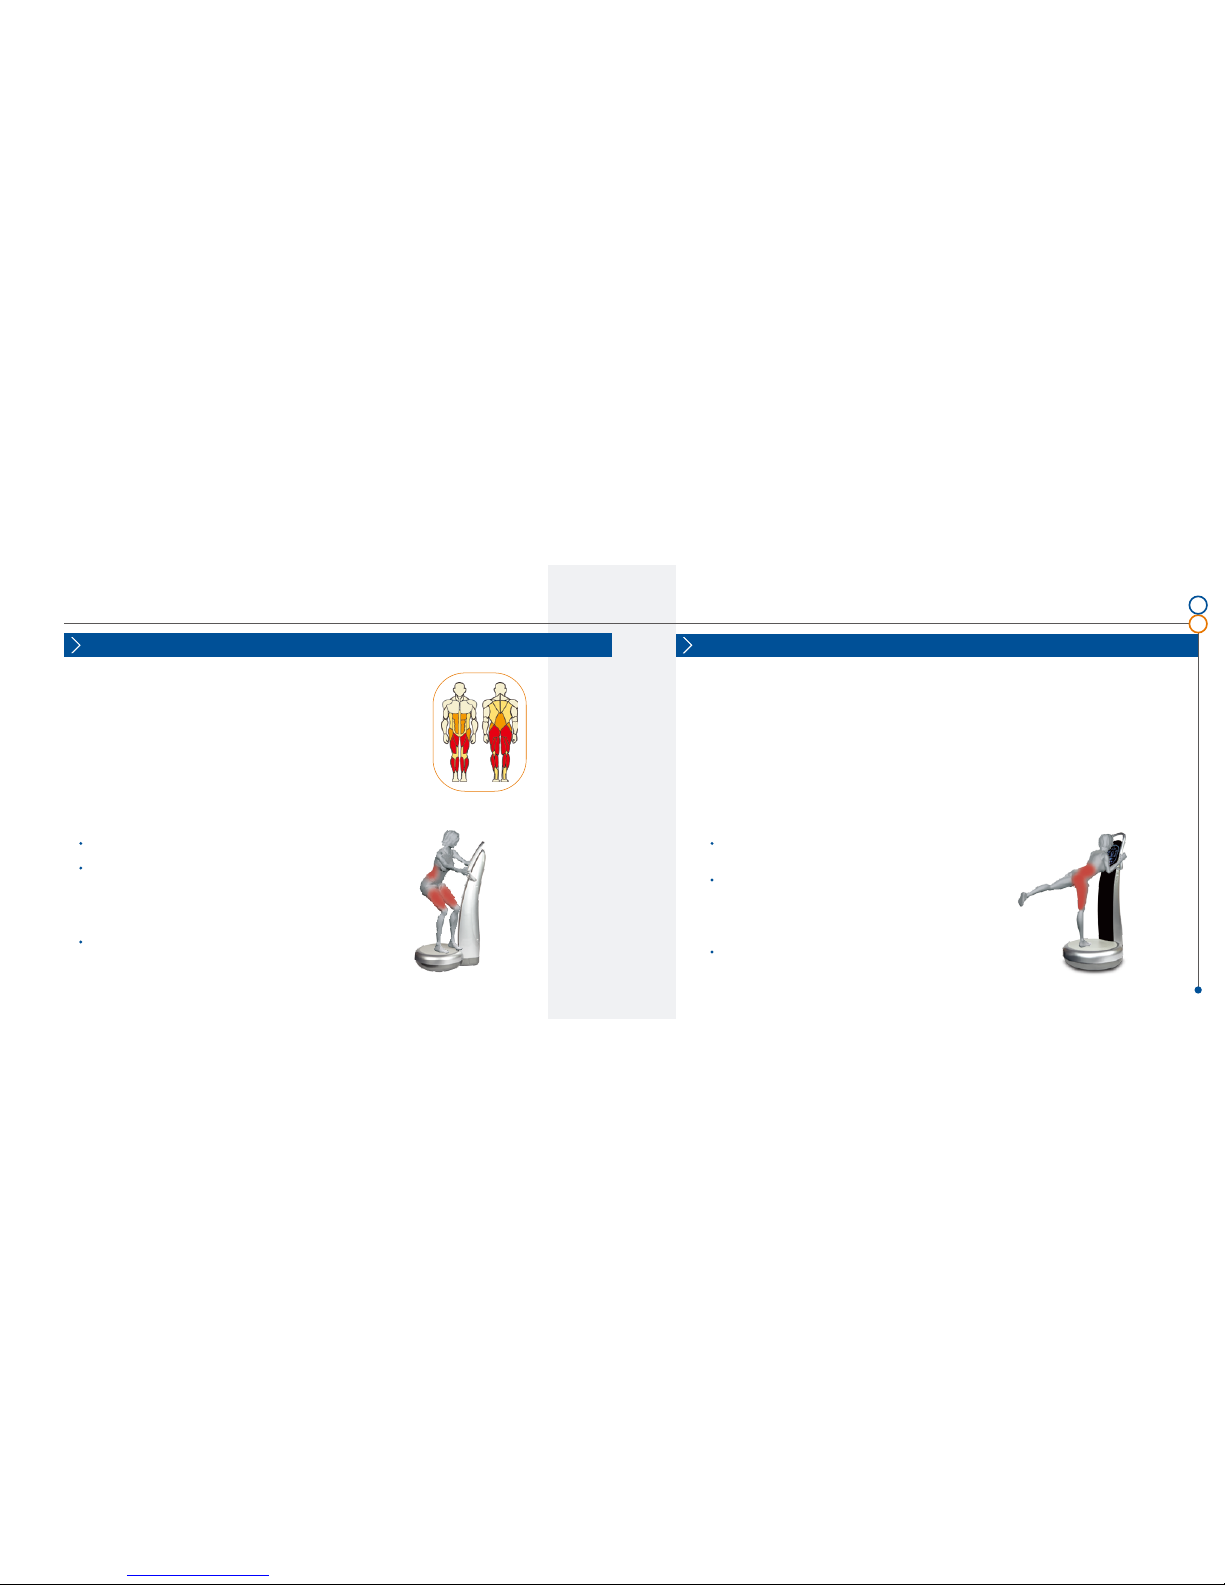
L1
SQUAT
12Hz~16Hz
Stand on the plate center, hold handle with hands,
raise one leg backward, and push upper body forward
down until T-shape is made.
Keep the knee of supporting leg extended, load body
weight into the heel, and hold the handle to maintain
body balance.
Raise one leg as if you push the heel. Push down the
pelvis of raised leg not to twist the pelvis itself.
L2
T-BALANCE
13Hz~17Hz
Legs Legs
Cautionㅣ
Positionㅣ
Cautionㅣ
Positionㅣ
//////////
37
36
Table of contents
Other Sonic World Fitness Equipment manuals

Popular Fitness Equipment manuals by other brands

HMS
HMS LSS01 Manual instruction

bodyswiss
bodyswiss SWISSROWER RWB202 Manual and Instructions

Matrix Fitness
Matrix Fitness AURA Series instructions

Impex
Impex DBR 94 owner's manual

Insportline
Insportline IN 4071 Verge owner's manual

TrekDesk Treadmill Desks
TrekDesk Treadmill Desks Treadmill desk user manual


