Sonoro Eklipse User manual
Instruction Manual

sonoro audio GmbH & Co. KG
Unter Goldschmied 6
50667 Köln
Germany
fon +49 221 - 16 79 29 - 0
fax +49 221 - 16 79 29 - 290
www.sonoro-audio.com
12/08
The manufacturer continuously works on the further development of all types and models.
We ask for your understanding that changes of the scope of delivery in regard to form, components and technology are
therefore possible at any time. The information, illustrations and descriptions in this manual therefore shall not
constitute an entitlement to any claims.
Replication, copying or translation, even in parts, is not permitted without the written consent of the manufacturers.
The manufacturer explicitly reserves all rights pursuant to the law governing the copyright.
Subject to changes.
iPod is a trademark of Apple Inc., registered in the US and in other countries.
Apple is not responsible for the functionality of this device or its compliance with the safety guidelines.

English
3
Contents
1. Introduction
2. Safety Instructions
2.1 Symbols in this Operating Manual
2.2 Intended Use
2.3 Children and Persons with Limited Cognitive Abilities
2.4 Power Supply
2.5 Batteries
2.6 Laser
2.7 Transport
2.8 Environmental Conditions
2.9 Operation
2.10 Use of Headsets
2.11 Defect
2.12 Cleaning
2.13 Disposal
3. Scope of Delivery
4. Supported Formats
5. Unpack Device and Start Operation
5.1 Unpack Device
5.2 Insert Batteries
5.3 Establish Power Supply
5.4 Connect Antenna
5.5 Prepare Remote Control
5.6 Prepare iPod Docking Station
5.7 Connect Headset
6. Controls and Connectors
7. Set Basic Functions
7.1 Set Display Language
7.2 Set the Brightness of Display and Click Wheel
7.3 Set Time Format
7.4 Set Time
7.5 Set the Sound
7.6 Set Sleep Timer
7.7 Reset Device to Factory Setting
8. Alarm Function
8.1 Set Alarm Time
8.2 Alarm signal via Radio, CD or iPod
8.3 Set Alarm Volume
8.4 Turn Alarm On and Off
8.5 Turn Off Alarm Function After Alarm Goes Off
8.6 Set Interval for Repeat Alarm Function (Snooze)
9. General Functions of the Audio Playback
9.1 Set Volume
9.2 Mute Playback
9.3 Select Playback Mode
............................................................................................................... 5
..................................................................................................... 6
......................................................................... 6
....................................................................................................... 6
............................................ 6
....................................................................................................... 7
.............................................................................................................. 7
.................................................................................................................... 8
.............................................................................................................. 8
..................................................................................... 8
............................................................................................................. 9
................................................................................................... 9
.................................................................................................................. 9
............................................................................................................... 9
............................................................................................................. 10
..................................................................................................... 11
.................................................................................................. 12
......................................................................... 13
................................................................................................... 13
................................................................................................... 13
....................................................................................... 14
................................................................................................ 15
..................................................................................... 15
............................................................................. 16
................................................................................................ 16
.......................................................................................... 17
.................................................................................................. 22
......................................................................................... 22
..................................................... 23
................................................................................................. 24
............................................................................................................. 24
..................................................................................................... 25
.................................................................................................. 25
........................................................................... 26
........................................................................................................ 27
................................................................................................... 27
...................................................................... 28
............................................................................................... 29
....................................................................................... 29
..................................................... 30
................................................. 30
................................................................. 31
......................................................................................................... 31
................................................................................................... 31
........................................................................................ 31

4
Contents
10. Radio Playback
10.1 Search Station
10.2 Preset Station
10.3 Retrieve Preset Station
11. CD Playback
12. iPod Playback
13. AUX Playback
14. Trouble Shooting
15. Technical Data
16. Warranty
........................................................................................................ 33
.................................................................................................... 34
..................................................................................................... 34
....................................................................................... 35
............................................................................................................ 36
.......................................................................................................... 38
.......................................................................................................... 40
...................................................................................................... 41
......................................................................................................... 43
.................................................................................................................. 45

English
5
1. Introduction
Congratulations on purchasing a sonoro eklipse.
This operating manual provides you with all information concerning the correct and safe
operation of the device.
Please read this operating manual in its entirety before using the device.•
Keep these instructions at a safe place.•
In case you pass this device on to a third party, please also include the operating manual.•
Non-compliance with this manual may lead to serious injuries and damage to the device.•
We may not be held liable for damage that was caused due to non-compliance with this•
operating manual.
Please take special note of the chapter „Safety Instructions“ on page 6.•
The illustrations in this operating manual serve the purpose to visualize processes and always
appear in front of the descriptions which they refer to.
Enjoy your device!
6
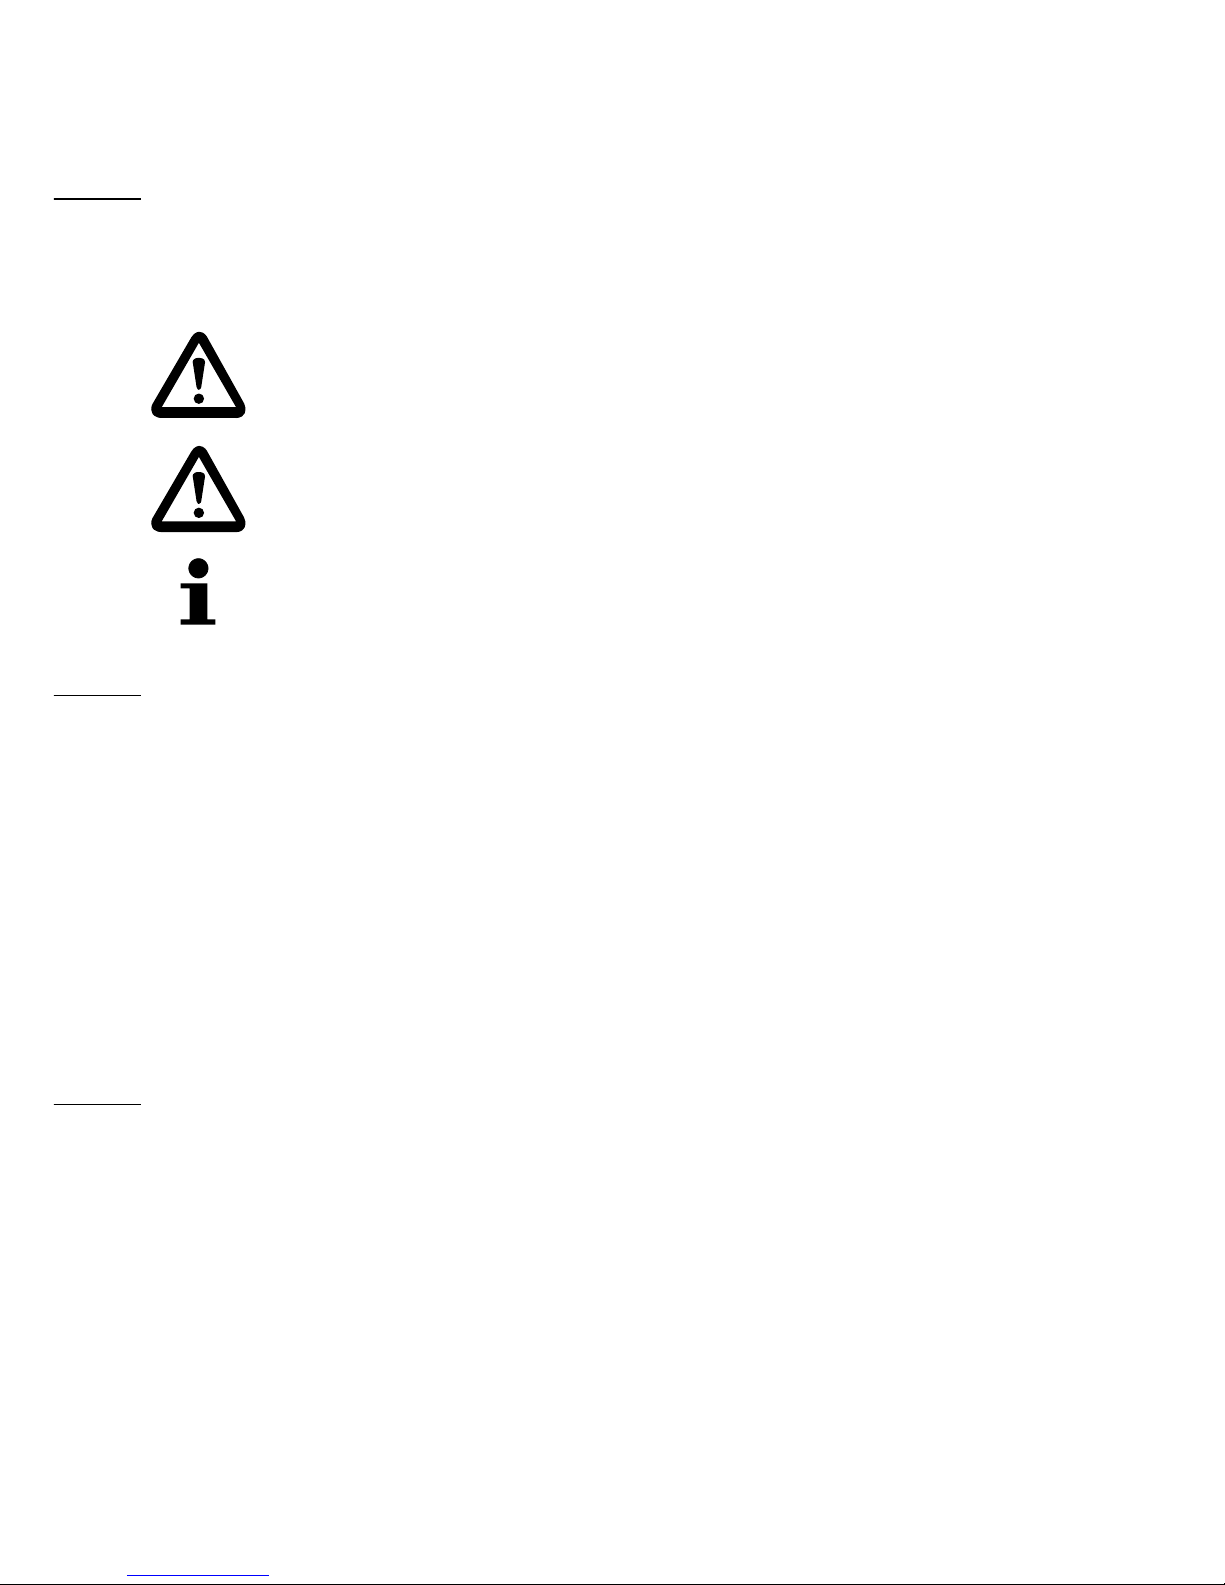
2.1 Symbols in this Operating Manual
Important information relative to your safety is especially marked. It is imperative that you
adhere to this information to avoid accidents and damage to the device:
RISK!
Warning concerning risks to your health and indication of potential risk of
injury.
WARNING!
Indicates potential risks for the device and other objects.
NOTE!
Highlights tips and information for you.
2.2 Intended Use
The device is only for private use. It is not suitable for commercial use. The device is
exclusively intended for the following tasks:
Play back radio signals•
Play audio and MP3 CDs•
Play audio directly from an iPod, charging function for the iPod•
Play audio for external devices that are connected via AUX.•
Any other use is not intended and is prohibited. We may not be held liable for damage
caused through unintended use.
2.3 Children and Persons with Limited Cognitive Abilities
Do not leave the device unattended and do not use it if children or people are in close•
range who may not be able to assess the associated risks.
Persons (including children) who based on their physical, sensory or mental capacities or•
their inexperience or lack of knowledge are not able to safely use this device may not use
this device without supervision or without instructions provided by a responsible person.
Please store this device at an inaccessible location.
Packaging material may not be used for playing. It presents a suffocation risk.•
2. Safety Instructions

English
7
2.4 Power Supply
The device is powered by electricity; therefore there is always a risk of an electric shock. For
this reason, especially adhere of the following instructions:
Never touch the power plug with wet hands.•
If you want to pull the plug from the power outlet, always pull directly on the plug. Never•
pull on the cable, it may rip.
Please ensure unobstructed access to the utilized power outlet at all times, so that the•
plug can be pulled immediately in case of an emergency.
Please ensure that the electric cord is not bent, wedged or rolled over. Install the electric•
cord so that it cannot become a tripping hazard and so that it is out reach for children.
Only use extension cords that are designed to handle the power input of the device.•
Keep the device away from rain and moisture as well as from any heat sources•
Only operate the device when the electric voltage on the type label of the device and on•
the plug match the voltage of your electrical outlet. An incorrect voltage can destroy the
device.
If you will not use the device for a longer period of time, separate the device completely•
fromthepowersupplysystemtopreventapotentialrehazard.Forthat,pulltheplug
from the electrical outlet.
2.5 Batteries
Remove batteries/ rechargeable batteries from the battery compartment as soon as they•
are empty or if the device will not be used for a longer period of time.
Donotthrowthebatteries/rechargeablebatteriesinareandnevermakethemsubject•
to high temperatures.
Never try to recharge batteries. Do not try to open or short-out batteries/ rechargeable•
batteries. This may present an explosion hazard.
Liquid that leaks during the incorrect use of the batteries may cause skin irritations. In the•
event of direct contact with the liquid, wash it off with plenty of water. When the liquid gets
into the eyes, do not rub the eyes. Flush the eyes with water for 10 minutes and immedia-
tely seek medical assistance.

8
2.6 Laser
Thisdevicehasbeenclassiedasaclass1laserdevice.Laserbeamscandamagetheeyes.
Therefore, please adhere to the following:
Do not attempt to disassemble the device.•
Risk prevention: Maintenance and repair work must only be•
performed through the manufacturer or the manufacturer‘s
respective customer service.
2.7 Transport
To avoid damage to the inserted medium, please remove it from the device prior to trans-•
port/shipping.
Store the device during the transport in a vehicle in such a fashion that the occupants are•
not endangered.
If you ship the device, pack it in the original packaging. Therefore, keep the packaging.•
2.8 Environmental Conditions
The safe operation of the device requires appropriate environmental conditions. Therefore,
please adhere to the following:
Protect the device from exposure to effects imposed by the weather. Never use it outside•
andneversetitupatlocationsthataresubjecttosignicantdirectsunlight.
Neverplacethedeviceonorinimmediateproximityofreorheatsourcessuchasfor•
example burning candles, stove tops, ovens etc.
Setupthedevicesothatsufcientairsupplyisguaranteed.Thiswillavoidheataccu-•
mulation on the inside of the device. Always keep a minimum distance of 10 cm to other
devices or walls.
Protect the device from strong mechanical vibrations and place it on solid surfaces.•
Protect the remote control from effects imposed by the weather, moisture and high•
temperatures (e.g. from direct sunlight).
Protectthedevicefromsplashingordrippingwater.Neverplaceacontainerlledwith•
liquid next to or onto the device.
Never install/ remove the batteries that came with the device in an environment that bears•
the potential risk of explosions (e. g. gas station areas, fuel lines, gasoline storage areas,
areaswheretheairmaycontainchemicalsorexplosiveparticles/dust(e.g.ourdustor
metal powder) or areas in which you have been instructed to turn off the engine of your
vehicle). This may present an explosion hazard.

English
9
2.9 Operation
Never insert any objects into the CD slot of the device other than the approved CDs.•
Special formats, mini CDs etc. will cause damage to your device.
Never place any other than the approved iPod types into the iPod docking station.•
2.10 Use of Headsets
Always decrease the volume of the device before putting on the headset. Only increase•
the volume to the desired level after the headset is in the correct position.
Do not set the volume too high when using the headset. If you hear a permanent noise•
or a background sound in your ears (ringing), decrease the volume or stop using the
headset.
Even if your headset is designed so that you are still able to hear exterior sounds, never•
set the volume to such a high level that you are no longer able to be aware of your
surroundings.
2.11 Defect
Nevertrytoxyourdeviceonyourownifitbecomesdefective.
If the power plug, the adapter or the power cord of this device is damaged, they must be•
replaced by the manufacturer or the manufacturer‘s customer service to avoid the risk of
electric shock.
If liquid gets into the device or if the device was dropped or otherwise damaged, it must•
be checked by an authorized dealer. Separate the device from the power supply and
contact an authorized dealer.
2.12 Cleaning
Only use the cloth that came with the packet or another dry, soft cloth to clean the exterior•
surfaces of the device. Never use any abrasive or dissolvent cleaning agents, because
these may damage the surface of the device.
If the device is extremely dirty, it may also be wiped down with a slightly moist cloth and•
dried with a dry, soft cloth.

10
2.13 Disposal
Devices that are marked with the symbol on the left may not be disposed of with
the regular household trash, but must be dropped off at a recycling center for
electric and electronic devices.
Batteries/ rechargeable batteries may contain toxic heavy metals and are subject to special
refuse treatment. Drop off the batteries/rechargeable batteries at a communal collection site
or bring them to a specialized store for disposal.
Please consider that your electronic entertainment device is subject to the European guideline
2002/96/EC for the reduction of electronic waste.
Therefore please note that you are not permitted to dispose of your device in your•
household waste.
You can receive information regarding the disposal of old devices at the municipal•
administration, the waste disposal administration and the store where your purchased this
product
You can drop off your device free of charge at communal collection points.•
With the proper diposal of old devices you prevent environmental damage and don‘t•
damage your health.

English
11
3. Scope of Delivery
Numerous accessories are necessary to receive the radio frequencies or to connect additional
devices. They are part of the packet of the sonoro eklipse.
sonoro eklipse (with bag)•
Remote control•
Power supply unit with universal adapter•
FM antenna•
AM antenna•
AUX cable•
iPod dock adapters•
2 batteries 1.5 volt alkali manganese, size: Mignon LR06/AA•
Cleaning cloth•
Gloves•
Operating manual•
12
4. Supported Formats
Supported CD formats:
Compact Disc Digital Audio CD-DA, CD-R*, CD-RW*•
(* Playback depends on the CD quality and recording quality)
Supported audio formats:
CD-DA, MP3, WMA•
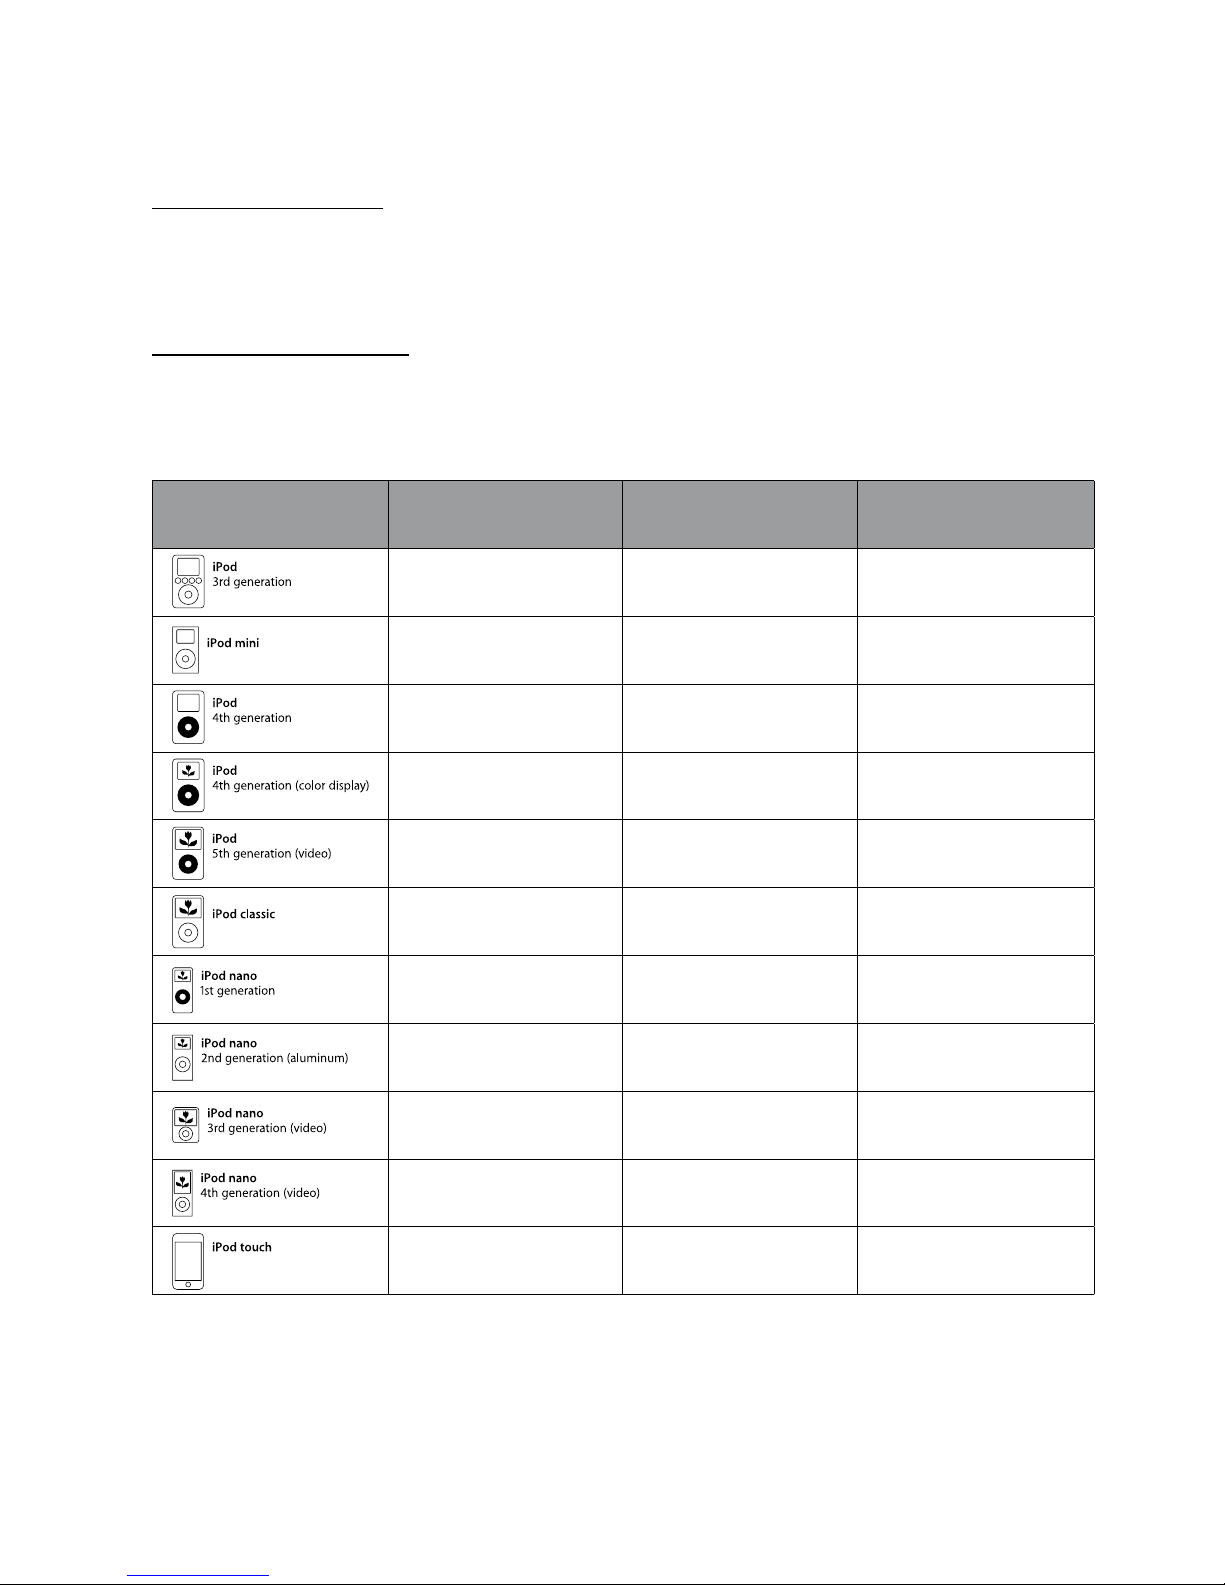
Compatible iPod types with required operating manual:
iPod model Adapter T2/ A Adapter T2/ B iPod adapter from
scope of delivery
10 GB, 15 GB,
40 GB
20 GB, 30 GB
4 GB, 6 GB
40 GB 20 GB
20 GB, 60 GB 30 GB, 40 GB
30 GB 60 GB, 80 GB
80 GB, 160 GB
1 GB, 2 GB, 4 GB
2 GB, 4 GB, 8 GB
4 GB, 8 GB
8 GB, 16 GB
8 GB, 16 GB, 32 GB
English
13
5. Unpack Device and Start Operation
You may only use connecting cables and external devices that comply with this device in
regardtoelectromagneticcompatibilityandinsulationquality.Thisdevicefulllsallrelevant
standards and guidelines in conjunction with US and European regulation. In the event of
a device change that has not been coordinated with the manufacturer, the compliance with
the standards and guidelines is no longer guaranteed. Only use the accessories listed by the
manufacturer.
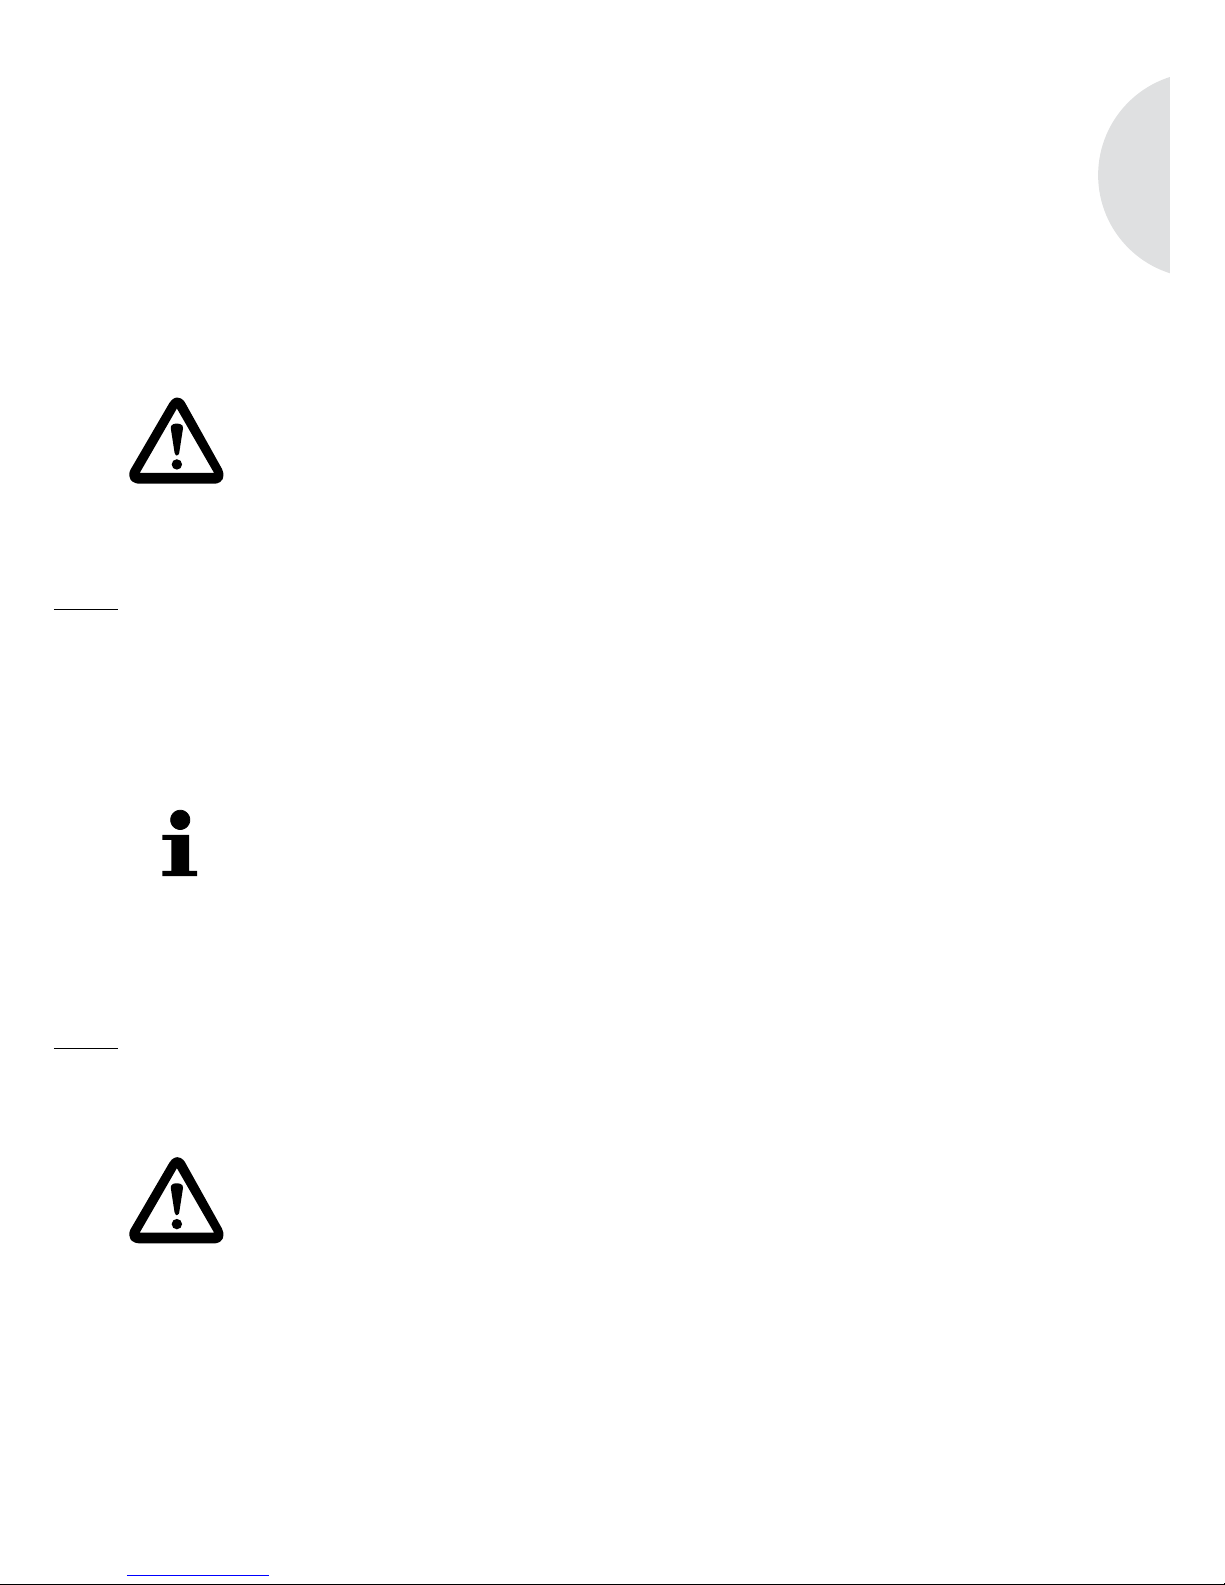
RISK!
Playing with packaging material presents a suffocation risk!
Playing with packaging material presents a suffocation risk. Keep the
packaging material out of the reach of children and persons who may not be
able to assess the risks.
5.1 Unpack Device
All parts of the device come in one box.
1. Unpack the device and all accessories and check the content for completeness and
proper condition.
NOTE!
In case you detect damage due to transportation or if parts of the packet are
missing, contact your dealer immediately.
2. Set up the device at a suitable location. Adhere to the security instructions concerning the
environmental conditions on page 6.
5.2 Insert Batteries
The batteries ensure the functioning of the clock in the event of power failure.
RISK!
Injury hazard due to incorrect handling of batteries!
Batteries must be treated with special care.
- Remove batteries/ rechargeable batteries from of the battery compartment
as soon as they are empty or if the device will not be used for a longer period
of time.
-Donotthrowthebatteries/rechargeablebatteriesintoareandnevermake
them subject to high temperatures.
14
– Do not try to recharge standard batteries. This may present an explosion
hazard. Do not try to open or short-out the batteries/ rechargeable batteries.
- Leaking liquid in conjunction with an incorrect use of the batteries may
cause skin irritations. In the event of contact with the liquid, wash it off with
plenty of water. If the liquid gets into the eyes, do not rub the eyes. Flush the
eyes with water for 10 minutes and immediately seek medical assistance.
1. Open the battery compartment lid by pressing down the clamp locking mechanism.
2. Insert the batteries that were delivered with the packet (1.5 v, AA) into the battery com-
partment according to the polarity as shown on the imprint on the back of the device.
3. Insert the battery compartment lid again.
5.3 Establish Power Supply
The device is powered via the power supply unit that comes with the packet. The power
supplyunitwiththeuniversaladaptermustbeassembledpriortoitsrstuse.
RISK!
Injury hazard due to inappropriate handling!
Improper handling of the universal power supply unit may result in the risk of
an electric shock.
– Make sure that the power supply unit and the universal adapter are always
rmlyconnectedwitheachother.
– Pull the power supply unit with the universal adapter from the outlet in a
strait motion so that the adapter will not break off the mounting.
WARNING!
Property damage due to incorrect voltage connection
Connection values that exceed the permissible maximum values of the device
can destroy the device.
– Only use the power supply unit that came with the device.
– Only operate the device when the voltage indicated on the power supply unit
matches the voltage on your electrical outlet.
1. Slide the universal adapter onto the power supply unit until it has snapped into position.
2. Plug the connecting plug of the power supply into the 12V 2A DC port on the back of the
device.
3. Plug the power plug into an electrical outlet.

English
15
5.4 Connect Antenna
The sonoro eklipse has an internal antenna to receive the radio signal in the FM frequency
range.Ifthereceptionisnotsufcientattheset-uplocationorifyouwouldliketoreceive
additional FM or AM stations, attach the FM or AM antenna that came with the packet or
hook up a respective home antenna.
NOTE!
The FM frequency wave band corresponds with the ultra short wave range
and falls into the VHF band II between 87.5 MHz and 108.0 MHz. The AM
frequency wave band corresponds with the medium wave range and falls
between 522 kHz and 1620 kHz for AU-3000, and 520 kHz and 1710 kHz
for AU-3001.
FM antenna or home antenna
1. Plug the FM antenna that came with the packet or your home antenna into the FM
antenna port on the back of the device.
2. Turn the FM switch from INT to EXT.
3. Adjust the FM antenna that came with the packet so that you have an optimal reception.
NOTE!
If no external antenna is connected to the FM port, the switch should be set at
INT to ensure the best possible reception via the internal antenna.
AM antenna
1. Plug the AM antenna that came with the packet into the AM antenna port on the back of
the device.
2. Adjust the position of the AM antenna for an optimal reception.
5.5 Prepare Remote Control
The remote control of sonoro eklipse already includes a battery. The protective foil must be
removedpriortotherstuse.
1. Carefully pull out the insulating strip that sticks out of the battery component on the
bottom of the device. It is not necessary to open the battery component to do so.

16
5.6 Prepare iPod Docking Station
Two universal dock adapters are included in the packet to ensure the secure positioning of
youriPodinthedockingstation.Refertothetableonpage12tondoutwhichdockadap-
ter is to be used.
WARNING!
Physical damage through improper operation!
Pointy or sharp edged objects may damage the PIN connector.
– Do not use any such objects to insert or remove the dock adapter.
Insert dock adapter
1. Press the lid of the docking station to unlock it and then slightly fold back the lid.
2. Carefully insert the appropriate dock adapter for your iPod into the docking station so that
the opening on the side faces toward the back.
3. Carefully push on the back edge of the dock adapter until it snaps into place.
Remove dock adapter
Ifyouwanttoremovethedockadapter,insertyourngernailintothebackslitonthesideof
the dock adapter and carefully pull it up and out of the docking station.
5.7 Connect Headset
The device supports the connection with headsets featuring 3.5-mm stereo jacks (not inclu-
ded in the packet).
RISK!
Risk of injury due to improper use of headsets!
Animproperuseofheadsetscanleadtosignicantaccidentsandcause
damage to one‘s health.
- Do not set the volume too high when using the headset.
- Even if your headset is designed so that you are still able to hear exterior
sounds, never set the volume to such a high level that you are no longer able
to be aware of your surroundings.
1. Before you connect the headset, set the volume to the minimum level. For that, press the
VOL- button.
2. Insert the headset jack into the headset port on the backside of the device .
3. Slowly increase the volume by pressing the Vol+ button.
English
17
1 2 34
7
5
6
8
91011121314
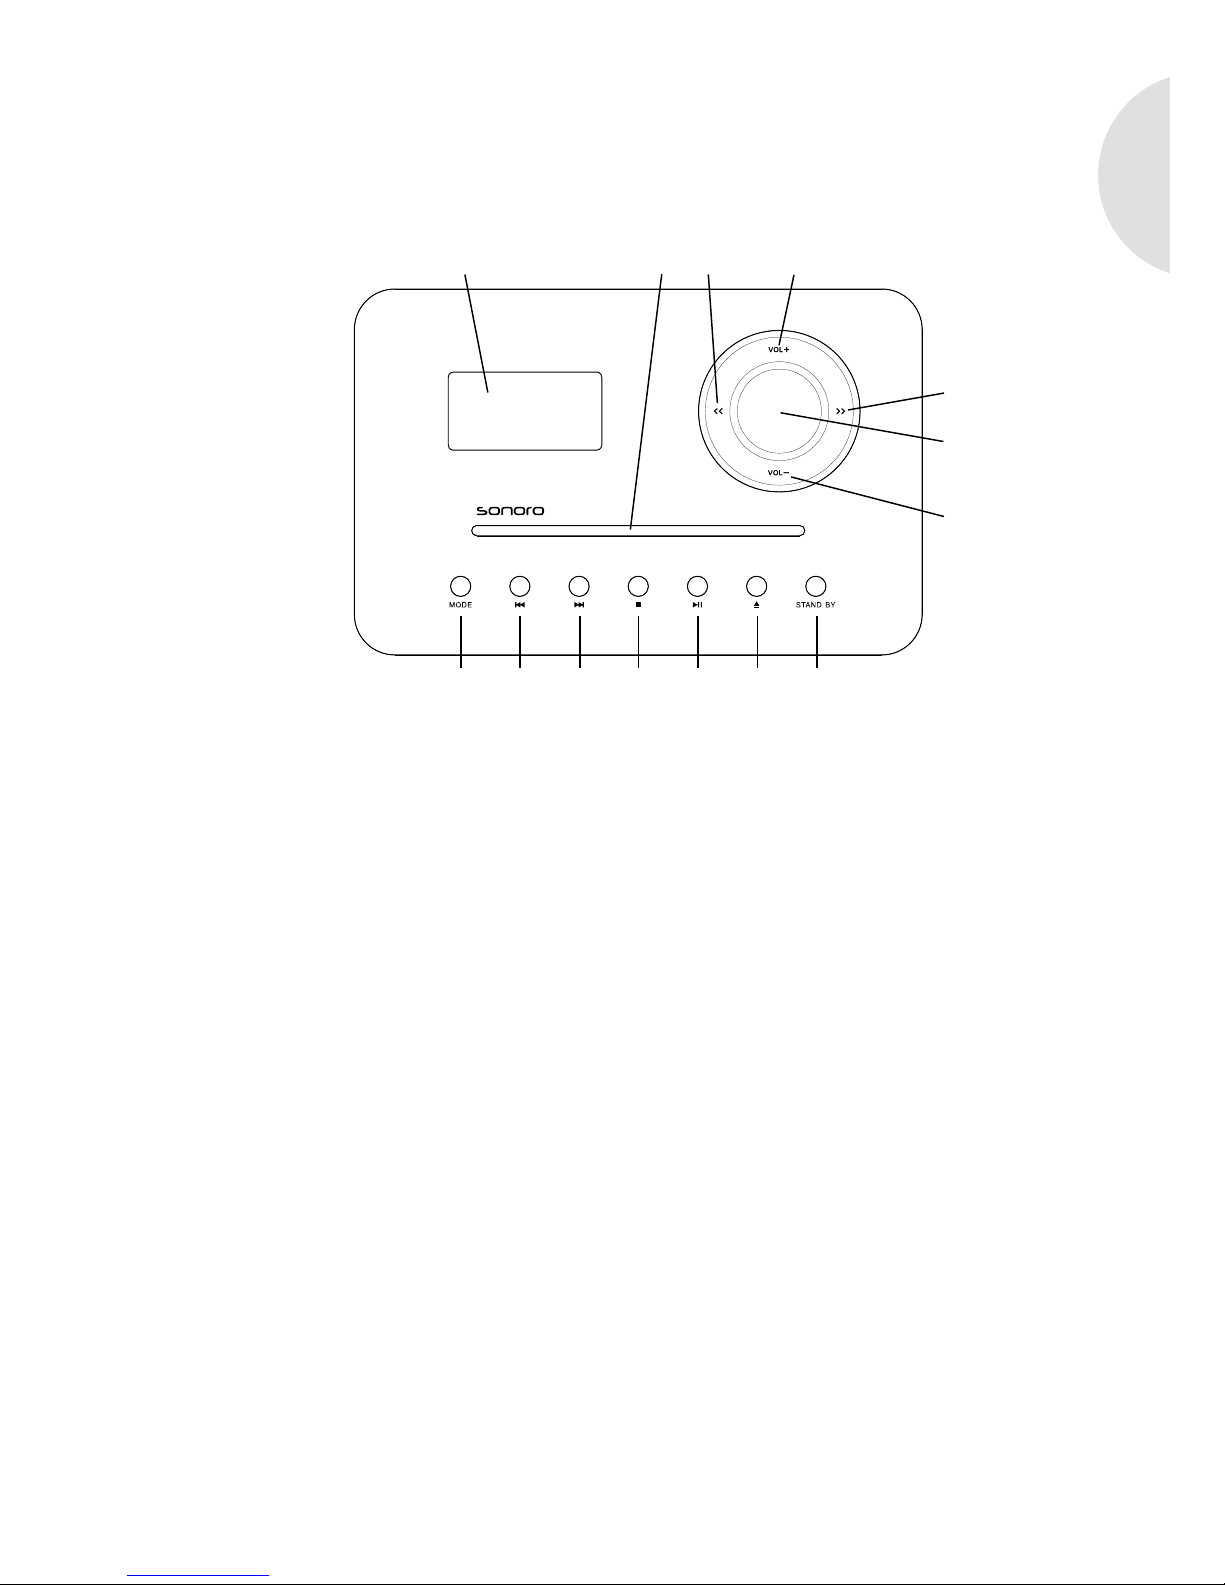
The controls of the sonoro eklipse facilitate fast and easy access to all functions. The operating
functions are also accessible via the remote control unit.
eklipse front:
1OLED display Shows the current time when the device is turned off, provides
information about the active mode when the device is turned on.
2CD slot CD slot only accepts CDs when the device is turned on,
ejection of CDs possible when the device is in stand-by mode.
3<< (Previous) FM/AM: Search stations in lower frequency range.
CD/iPod: Previous/Rewind.
Menu selection: Switch to the next higher menu, exit Setup Menu.
4VOL+ All playback modes: Increase volume
Menu selection (Setup Menu and iPod): Switch to previous
menu setting (up).
5>> (Forward) FM/AM: Search stations in higher frequency range.
CD/iPod: Next/Fast-forward.
6 Menubutton Pressbriey:Open/Starthighlightedmenuitem
Press and hold: Open Setup Menu.
7VOL- All playback modes: Decrease volume
Menu selection (Setup Menu and iPod): Switch to next menu
setting (down).
8STAND BY Turn device on/off.
9Eject Eject CD
10 Start/Pause CD/iPod: Start/Pause playback.
11 Stop CD: End playback.
iPod: Switch to the next higher menu.
12Next/Fast-forward CD/iPod:Pressbriey:Playnexttitle.
CD/iPod: Press and hold: Fast forward within title.
13 Previous/Rewind CD/iPod:Pressbriey:Playprevioustitle.
CD/iPod: Press and hold: Rewind within title.
14 MODE Switch to next play mode.
6. Controls and Connectors
18
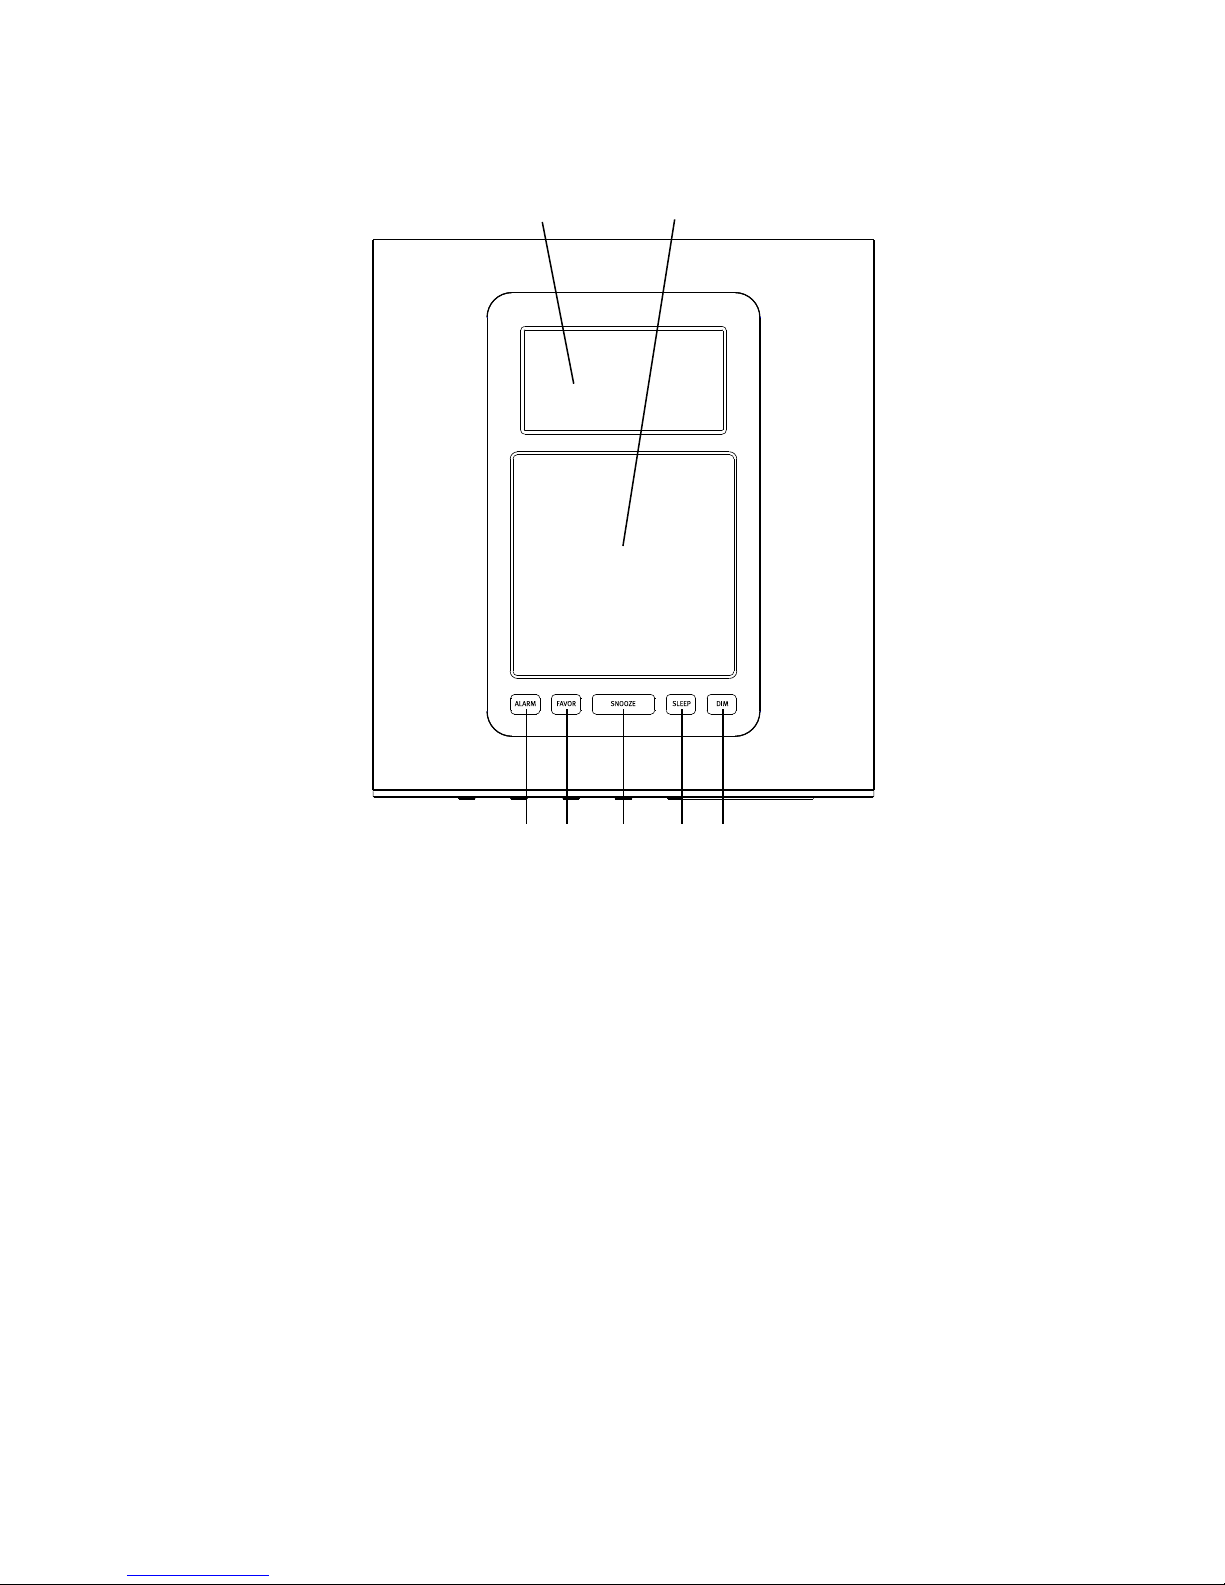
eklipse top:
1iPod dock Plug in iPod with suitable dock adapter (refer to compatible
iPodtypesonpage12).Opencoverbybrieypressingit
down.
2Loudspeaker Loudspeaker opening.
3DIM Open Dimmer menu to set the display and wheel lighting.
4 SLEEP Pressbriey:Turnon/offautomaticturn-off(SleepTimer).
Press and hold: Open Sleep Timer menu to set the time after
which the device is supposed to turn off automatically.
5 SNOOZE Pressbriey(inplaymode):Turnplaymodeon/off(Mute
Setting).
Pressbriey(inAlarmmode):Startrepeatalarm(Snooze).
Press and hold: Open Snooze Setting menu to set the repeat
alarm time.
6FAVOR Save station.
7 ALARM Pressbriey:Turnalarmfunctionson/off;endalarm.
Press and hold: Open Set alarm menu to select the alarm
functions.
12
34
5
6
7

English
19
10 11 1 2
34
5
6
7
8
9
eklipse back:
1Battery compartment 2 batteries (1.5 V AA) ensure the continued
operation of the clock in the event of power
failure.
2 Bassreexopening Thedistancetothenextwallshouldmeasure
at least 3 cm.
3Keylock Connection for theft protection.
4Power supply connection 12 V port for the power supply unit that came
with the packet.
5LINE OUT Port of the eklipse for external audio devices.
6AUX IN Port for external audio devices.
7Headset Port for a headset.
8AM ATENNA Port for AM antenna that came with the
packet.
9FM EXT/INT antenna switch To switch setting when using an internal or
external FM antenna.
10 FM ANTENNA Port for FM antenna that came with the
packet.
11 Signal transmitter Sends alarm signal.

20
12
5
3
4
11
10
9
8
7
6
13
14
15
16
17
18
12
Remote control:
1<< (Previous) FM/AM: Search for stations in lower frequency range.
CD/iPod: Previous/Rewind.
Menu selection: Switch to the next higher menu, exit Setup
Menu.
2VOL+ All playback modes: Increase volume
Menu selection (Setup Menu and iPod): Switch to previous
menu setting (up).
3 Menubutton Pressbriey:Open/starthighlightedmenuitem
Press and hold: Open Setup Menu.
4>> (Forward) FM/AM: Search stations in higher frequency range.
CD/iPod: Next/Fast-forward.
5VOL- All play modes: Reduce volume
Menu selection (Setup Menu and iPod): Switch to next
menu setting (down).
6MODE Switch to next play mode.
7STAND BY Turn device on/ off.
81/Start/Pause FM/AM: Program button for radio station 1.
CD/iPod: Start/pause playback.
92/Stop FM/AM: Program button for radio station 2.
CD: End play.
iPod: Switch to the next higher menu.
Table of contents
Other Sonoro Docking Station manuals


