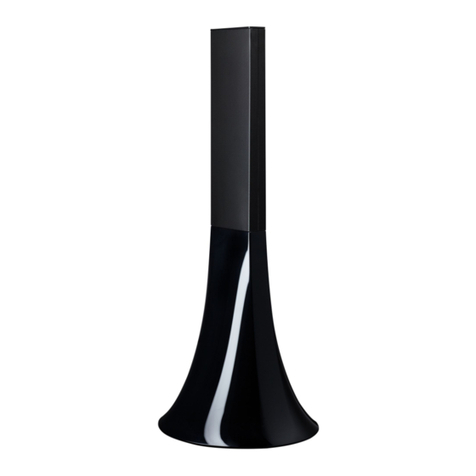
Sonoro Elements W User manual

Instruction Manual

sonoro audio GmbH & Co. KG
Unter Goldschmied 6
50667 Köln
Germany
fon +49 221 - 16 79 29 - 0
fax +49 221 - 16 79 29 - 290
www.sonoro-audio.com
Current as of 01/09
The manufacturer is constantly working on the improvement of all types and models.
We hope you understand that changes in the scope of delivery in terms of format, equipment and technology are therefore
possible at any time. For this reason no claims can be made based on the statements, illustrations and descriptions inclu-
ded in this instruction manual.
The reprinting, copying or translation in whole or in parts is not permitted without the written permission of the manufac-
turer.
The manufacturer reserves all rights in accordance with the copyright laws.
Subject to change.
iPod is a trademark of Apple Inc., registered in the US and other countries.
Apple is not responsible for the functionality of this device or its compliance with the safety guidelines.

Table of Contents
1. Preliminary notes 5
2. Safety information 6
2.1 Symbols used in these instructions 6
2.2 Appropriate use 6
2.3 Persons with limited perception 6
2.4 Power supply 7
2.5 Batteries 7
2.6 eDock (optionally available) 7
2.7 Transportation 8
2.8 Environmental conditions 8
2.9 Operation 8
2.10 Using headphones 8
2.11 Defects 9
2.12 Cleaning 9
2.13 Disposal 9
3. Scope of delivery 10
4. Supported formats 10
5. Unpacking and activating the device 11
5.1 Unpacking the device 11
5.2 Inserting batteries in the device 11
5.3 Creating a power supply 12
5.4 Connecting the antenna 12
5.5 Connecting the headphones 13
6. Control elements and connections 14
7. Setting the basic functions 19
7.1 Setting the display language 19
7.2 Setting the brightness of the display and navigation ring 20
7.3 Setting the time format 20
7.4 Setting the time 21
7.5 Setting the time (in iRadio mode) 22
7.6 Setting the sound 22
7.7 Setting the sleep timer 23
7.8 Setting the time interval for the sleep timer 23
7.9 Restoring the factory settings of the device 24
8. Alarm function 25
8.1 Setting the alarm 25
8.2 Alarm function through FM-radio, iPod, iRadio or buzzer 26
8.3 Setting the volume of the alarm 26
8.4 Turning the alarm on and off 27
8.5 Turning off the alarm after the alarm sound 28
8.6 Snooze setting 28

9. Saving energy 28
10. General functions of the audio playback 29
10.1 Setting the volume 29
10.2 Muting the playback 29
10.3 Selecting the playback mode 30
11. FM-Radio playback 31
11.1 Searching for a station 32
11.2 Storing a station 32
11.3 Storing a station with the remote control 32
11.4 Accessing stored stations (on the device) 33
11.5 Accessing a station (with the remote control) 33
12. iRadio 34
12.1 Setting up the network connection 34
12.2 Selecting a station (Internet radio) 36
12.2.1 Location 36
12.2.2 Genre 37
12.2.3 Search 38
12.2.4 Storing a station 38
12.2.5 Storing a station with the remote control 39
12.2.6 Accessing stored stations (on the device) 39
12.2.7 Accessing a station (with the remote control) 39
12.3 My stuff 40
12.4 Media player 40
12.4.1 Sharing 40
12.4.2 UPNP Server 45
12.4.3 Playback options 47
12.4.4 Clearing the playback 48
12.5 Settings 48
12.5.1 Network settings 48
12.5.2 Version 50
12.5.3 Firmware update 50
12.5.4 Language 50
12.5.5 Resetting the Radio (restoring the factory settings) 50
12.5.6 Registration 50
12.5.7 WLAN signal strength 50
13. iPod playback 51
14. AUX playback 52
15. Troubleshooting 53
16. Technical data 55
17. Warranty 59

English
5
1. Preliminary notes
Thank you for deciding to purchase a sonoro elements W.
This instruction manual will provide you with all the information needed for the awless and
safe operation of the device.
Read this instruction manual in its entirety before using the device.•
Store the instructions in a safe place.•
If you give the device to third parties, also include the instruction manual.•
Non-compliance with these instructions may result in serious injuries and damages to•
the device.
We do not assume any liability for damages resulting from the non-compliance with this•
instruction manual.
Please pay particular attention to the chapter “Safety information” starting on page 6.•
The illustrations in this instruction manual serve to depict operations and always precede the
descriptions that they refer to.
We hope you enjoy the device!

6
2. Safety information
2.1 Symbols used in these instructions
Important information regarding your safety is specially marked. Please be sure to pay attention
to this information in order to avoid accidents and damages to the device:
DANGER
This warns you about dangers to your health
and indicates possible risks of injury.
CAUTION
This indicates possible dangers to the device
or other objects.
NOTE
This provides you with tips and information.
2.2 Appropriate use
The device may only be used for private use. It is not suitable for commercial use. The device
is intended exclusively for the following functions:
Playback of radio stations•
Audio playback from an iPod, loading function for an iPod (connecting adapter optionally•
available)
Audio playback for external devices that are connected through AUX•
Any other use is considered to be inappropriate and prohibited. We do not assume any liability
for damages resulting from inappropriate use.
2.3 Persons with limited perception
Do not leave the device unattended and do not use it if children or persons who are unable•
to assess the dangers are nearby.
Persons (including children) who are not able to use the device safely due to their physical,•
sensory or mental capacities or their inexperience or unfamiliarity may not use this device
without the supervision or instruction by a responsible person. Store it in an inaccessible
location.
The packaging materials may not be used to play with. There is a danger of suffocation.•

English
7
2.4 Power supply
The device is operated with electrical power, which means that there is the fundamental danger
of receiving an electric shock. Therefore pay particular attention to the following:
Never touch the power plug with wet hands.•
If you want to pull the power plug out of the power socket, always pull directly on the power•
plug. Never pull on the cable since it might tear.
Make sure that unrestricted access to the used power socket is guaranteed at any time so•
that the power plug may be pulled out immediately in an emergency situation.
Make sure that the power cable doesn’t get bent, pinched or run over. Place the power cab-•
le in such a way that it will not result in stumbling or be reachable by children.
Only use extension cables that are designed for the device’s power consumption.•
Keep the device away from rain and moisture as well as heat sources.•
Only operate the device if the electrical voltage specied on the identication plate of the •
device and power plug corresponds to the voltage of your power socket. Incorrect voltage
can destroy the device.
In order to avoid the risk of re, completely disconnect the device from the power supply if •
you are not using the device for a longer time period. To do this, pull the power plug from
the power socket.
2.5 Batteries
Remove the batteries from the battery compartment as soon as they are spent or if the•
device will presumably not be used for a longer time period.
Do not throw the batteries into re and never expose them to high temperatures.•
Do not try to recharge non-rechargeable batteries. Do not try to open the batteries or short-•
circuit them. There is a danger of explosion.
Liquid that is released if the batteries are used improperly can lead to skin irritations. If you•
come in contact with this liquid, rinse it with a lot of water. If the liquid gets into the eyes,
do not rub the eyes but immediately rinse them for ten minutes with water and consult a
physician at once.
2.6 eDock (optionally available)
Only connect the eDock if the cable and plug as well as the adapter itself are undamaged. You
should therefore pay attention to the following:
Do not try to disassemble the adapter. It does not contain any serviceable parts. If the adap-•
ter or the cable shows a defect, contact an authorized specialized dealer.
Make sure that the adapter is subject to the same environmental conditions as described•
below under 2.8.

8
2.7 Transportation
When driving in a car, store the device in such a way that the passengers are not endange-•
red.
If you ship the device, store it in its original package. Save the package for this purpose.•
2.8 Environmental conditions
The safe operation of the device presumes that the environmental conditions are appropriate
for the device. You should therefore pay attention to the following:
Protect the device from any weather inuences. Never use it outside and never position it in •
places with a large amount of sunshine.
Never place the device on or directly near sources of re and heat, such as burning candles, •
stovetops, ovens, etc.
Position the device in such a way that a sufcient air supply is ensured. This way you will •
avoid heat accumulation in the interior of the device. Always keep a minimum distance of 10
cm to other objects or walls.
Protect the device from strong mechanical vibrations and place it on stable surfaces.•
Protect the remote control from any weather inuences, moisture and high temperatures •
(e.g. through direct sunlight).
Protect the device from sprayed and dripping water. Never place liquid-lled containers next •
to or on top of the device.
Never install/remove the provided battery pack in an environment that poses a risk of explo-•
sions (e.g. tank areas, fuel transfer points, fuel storage areas, areas where the air contains
chemicals or explosive particles/dust (e.g. our dust or metal powder) as well as areas in
which you are instructed to turn off your vehicle engine). There is a danger of explosion.
2.9 Operation
Do not insert any objects into the device. When you plug in or remove the cables, make•
sure this is done in a horizontal position.
Avoid a lateral pull of the cables. This might result in damage to the connecting jacks and•
lead to a defect in the device.
Do not place any types of iPods on the iPod docking station other than those that are appro-•
ved.
2.10 Using headphones
Always reduce the volume of the device before you put on your headphones. Only increase•
the volume to the desired level once the headphones are properly positioned.
When you listen with headphones, do not turn the volume too high. If you feel a continuous•

English
9
noise or background sound in your ears (ringing), reduce the volume or discontinue using
the headphones.
Even if your headphones are designed in such a way that you can continue to perceive ex-•
ternal sounds, you should never set the volume so high that you are unable to still perceive
your environment.
2.11 Defects
If the device should ever have any defects, do not attempt to repair it by yourself.
If the power plug, the adapter or the power cable of this device are damaged, they have•
to be replaced by the manufacturer or his customer service to avoid dangers resulting in
electric shock.
If any liquid has entered the device or if it was dropped or otherwise damaged, the device•
has to be checked by an authorized specialized dealer. Unplug the device from the power
grid and contact an authorized specialized dealer.
2.12 Cleaning
Always turn off the device before cleaning it.•
Only clean the device on the outside with the provided cloth or another dry, soft cloth. Never•
use any harsh or solvent-containing cleaning materials, since these damage the surface of
the device.
If the device is extremely dirty, it may also be wiped off with a slightly moist cloth and dried•
off with a dry, soft cloth.
Clean the eDock in the same way as the device.•
During the cleaning, make sure that there is no lateral pull on the cables. This might dama-•
ge the connecting jacks.
2.13 Disposal
Devices that are marked with the symbol shown here may not be disposed of in household
trash but have to be brought to a reception point for the recycling of electrical and electrotech-
nical devices.
Batteries may contain toxic heavy metals and are subject to hazardous waste
treatment. Bring the batteries to a municipal collection point or have a specialized
company dispose of them.

10
3. Scope of delivery
The scope of delivery of the sonoro elements W includes numerous accessories that you need
to receive the radio frequencies and to connect additional devices.
sonoro elements W•
Power adapter•
FM antenna•
AUX cable•
2 batteries 1.5 volts, alkaline manganese, size: Mignon LR06/AA•
Cloth•
Instruction manual•
Remote control (optionally available)•
eDock (optionally available)•
4. Supported formats
Streaming format:
RTSP Real Time Streaming Prototcol•
Internet radio:
MMS Microsoft Media Streaming Protocol•
HTTP Hyper Text Transfer Protocol•
Supported playback formats for the media player:
WMA Windows Media Audio•
AAC MPEG4 audio•
MP3 MPEG layer 3 Audio•
AIFF Audio Interchange File Format•
AU Sun Microsystems uncompressed audio format•
WAV Microsoft/IBM uncompressed audio format•
RA Real Audio RA4/5/8•
OGG•

English
11
5. Unpacking and activating the device
Only those connection cables and external devices may be used that correspond to the current
device in respect to safety, electromagnetic compatibility and shielding quality. This device ful-
ls all relevant standards and guidelines in respect to CE conformity. If the device is altered in a
way that has not been coordinated with the manufacturer, the compliance with these standards
and guidelines is no longer guaranteed. Use only the accessories specied by the manufac-
turer. If you do not use the device within Europe and USA, you have to observe the regional
regulations or laws of the country of use.
DANGER!
There is a danger of suffocation when playing with packaging materials!
When playing with packaging materials there is a danger of suffocation. Store
the packaging materials in a place that is not accessible to children and persons
who are unable to assess the dangers.
5.1 Unpacking the device
All parts of the device are delivered in a box.
1. Unpack the device and all accessories and check the contents for completeness and intact-
ness.
NOTE
If you notice any damage from the transportation, contact your dealer immedia-
tely.
2. Place the device in a suitable location. Make sure you pay attention to the safety information
regarding the environmental conditions above under 2.8.
5.2 Inserting batteries in the device
The batteries ensure that the clock continues to function if there is a power failure.
DANGER
There is a risk of injury if the batteries are used improperly!
Batteries have to be handled with special care.
Remove the batteries from the battery compartment as soon as they are•
spent or if the device will presumably not be used for a longer time period.
Do not throw the batteries into re and never expose them to high tempera-•
tures.
Do not try to recharge the batteries. There is a danger of explosion. Do not•
try to open the batteries or short-circuit them.
Liquid that is released if the batteries are used improperly can lead to skin•

12
irritations. If you come in contact with this liquid, rinse it with a lot of water.
If the liquid gets into the eyes, do not rub the eyes but immediately rinse
them for ten minutes with water and consult a physician at once.
1. Open the lid of the battery compartment on the back of the device by slightly pressing down
on the clamping closure.
2. Insert the provided batteries (1.5 V, AA) in the battery compartment according to the indica-
ted polarity.
3. Reinsert the lid of the battery compartment.
5.3 Creating a power supply
The power supply for the device is provided by the supplied power adapter. If the power adap-
ter is used with the universal adapter, this has to be connected before the rst use.
DANGER
Improper handling may result in injury!
The improper use of the universal adapter poses the danger of an electric
shock.
- Make sure that the power adapter and universal adapter are always tightly
connected to each other.
- Pull the power adapter with the universal adapter from the power socket in a
straight manner so that the adapter is not torn from its holder.
CAUTION
The wrong voltage connection can cause material damages!
Connected loads that exceed the maximum permissible levels of the device can
destroy the device.
- Only use the provided power adapter.
- Only operate the device if the electrical voltage specied on the identication
label of the power adapter corresponds to the voltage of your power socket.
1. Slide the power plug adapter onto the power adapter until it audible snaps into place.
2. Plug the connector plug of the power adapter on the back of the device into the DC connec-
tion 12 V 2A.
3. Insert the power plug into a power socket.
5.4 Connecting the antenna
The sonoro elements W has an internal antenna for radio reception in the FM frequency range.
If the reception at the device’s location is insufcient or if you would like to receive additional
FM stations, connect the provided FM antenna or an appropriate house antenna.

English
13
NOTE
The FM frequency band lies between 87.5 MHz and 108.0 MHz in the VHF
band II.
FM antenna or house antenna
1. Plug the provided FM antenna or your house antenna into the FM antenna socket on the
back of the device.
2. Change the FM switch from INT to EXT.
3. Align the provided FM antenna in such a way that you have the best reception.
NOTE
If no external antenna is connected to the FM connection, the switch should
be set to INT in order to guarantee the best possible reception with the internal
antenna.
5.5 Connecting the headphones
Headphones with a 3.5 mm jack plug (not included in the scope of delivery) can be connected
to this device.
DANGER
The improper use of headphones may result in injury!
Using headphones improperly can result in serious accidents and damages to
your health.
When you listen with headphones, do not turn the volume too high.•
Even if your headphones are designed in such a way that you can continue•
to perceive external sounds, you should never set the volume so high that
you are unable to still perceive your environment.
1. Before you connect your headphones, reduce the volume to a minimum level. You can do so
by pressing the VOL- button.
2. Plug the headphone jack into the headphone socket at the rear of the device.
3. Slowly increase the volume. You can do so by pressing the VOL+ button.
The control elements of the sonoro elements W enable quick and simple access to all func-
tions. The operating functions can also be accessed with the remote control.

14
6. Control elements and connections
Front of the elements W:
1 On/off touch sensor To switch the device on/off. Briey touch the Sonoro lettering.
Then the device will switch on or off.
2OLED display When the device is switched off, it shows the current time of
day; if the device is switched on, it displays information about
the active mode.
3UP Navigation to the top. During radio operation: station search
for the station at the next higher frequency.
4BACK Back button, returns to the previous menu item
5MODE Switch to the next playback mode.
6 Menu button Press briey: open/conrm the indicated menu entry.
Press for a longer time: open the setup menu; iPod: pause
button; iRadio: open the iRadio menu.
7DOWN Navigation to the bottom. During radio operation: station
search for the station at the next lower frequency.
1
2
3
4
5
6
7

English
15
Top of the elements W:
1Speaker Speaker opening.
2 ALARM Press briey: switch the alarm function on/off; deactivate the
alarm. Press for a longer time: open the alarm settings menu
to select the alarm functions.
3FAVOR Station memory.
4 SNOOZE Press briey (in playback mode): switch the sound play-
back (muting) on/off. Press briey (in alarm mode): start the
repeating of the alarm (snooze). Press for a longer time: Open
the snooze settings menu to set the snooze period.
5VOL - Reduce the volume
6VOL + Increase the volume
1 65432

16
Back of the elements W:
1FM ANTENNA FM antenna connector socket
2FM EXT/INT Switch to change between the internal or external FM anten-
na.
3Headphones Headphone connector socket
4AUX IN Connector socket for external audio devices.
5LINE OUT Connector socket to connect the elements W with external
audio devices.
6iPod Connector socket for iPod eDock
7Battery compartment Two batteries (1.5 V AA) ensure that the clock continues to
function if there is a power failure.
8ETHERNET Connector socket for the network cable.
9Signaler Sends the alarm signal.
10 Power adapter socket 12-V connection for the provided power adapter.
11 Keylock Connection for anti-theft protection.
12 Bass reex opening Please do not close or cover up in order to ensure the best
sound quality.
7 9 12111086541 2 3

English
17
Remote control:
1UP FM: Station scanning in the next higher frequency range;
iPod: menu navigation to the top.
2 Menu button Press briey: open/conrm the indicated menu entry.
Press for a longer time: open the setup menu; iPod: play-
back button and pause button; iRadio: open the iRadio
menu. iRadio: Access the iRadio menu
3BACK back button; returns to the previous menu item
4MODE Switch to the next playback mode.
5DOWN FM: Station scanning in the next lower frequency range;
iPod: menu navigation to the bottom.
6 MUTE/SNOOZE Press briey (in playback mode): switch the sound playback
(muting) on/off. Press briey (in alarm mode): start the snoo-
ze period. Press for a longer time: open the snooze settings
menu to set the snooze period.
7VOL+ All playback modes: increase the volume. Menu selection
(setup menu and iPod): switch to the previous menu entry
(to the top).
8 ALARM Press briey: Switch the alarm function on/off. Deactivate the
6
8
10
5
1
3
7
9
11
2
4
13
15
12
14
16
18
17

18
alarm. Press for a longer time: open the alarm settings menu
to select the alarm functions.
9VOL- All playback modes: Reduce the volume.
10 3/Stop FM: Program button radio station 3 (press briey), store the
current station under this program button (press for a long
time); iPod: stop playback.
11 2/start/pause FM: Program button radio station 2 (press briey), store the
current station under this program button (press for a long
time); iPod: start/pause playback.
12 REPLY/MENU iPod: Access the menu; if pressed repeatedly, switch to the
next higher navigation level.
13 STAND BY Turn the device on/off.
14 SLEEP Press briey: switch the automatic deactivation (sleep timer)
on/off. Press for a long time: open the sleep timer menu to
set the time after which the device should be automatically
deactivated.
15 1/BROWSE FM: Program button radio station 1 (press briey), store the
current station under this program button (press for a long
time).
16 4/back/fast rewind FM: Program button radio station 4 (press briey), store the
current station under this program button (press for a long
time); iPod: Press briey: play back the previous title; iPod:
press and hold: fast rewind in the title.
17 5/advance/fast forward FM: Program button radio station 5 (press briey), store the
current station under this program button (press for a long
time); iPod: Press briey: play back the next title; iPod: press
and hold: fast forward in the title.
18 Battery compartment Battery compartment of the remote control (on the back).
Preparing the remote control
The remote control of the sonoro elements W already contains a battery. The protective lm has
to be removed before the rst use.
Carefully pull out the insulation strip protruding from the battery compartment at the lower
section of the remote control. It is not necessary to open the battery compartment.

English
19
7. Setting the basic functions
1. Switch on the device by briey touching the sonoro lettering.
2. Press the menu button of the elements W or the remote control for a long time until the
setup menu appears.
The display shows the following information in the setup menu:
Setup Menu
Audio
Sleep Timer
Clock
Dimmer
The arrow refers to additional entries in the list.
3. Switch to the desired menu entry by pressing the UP or DOWN button.
4. In order to open the selected menu entry, briey press the menu button again and perform
the settings.
5. To change to the next higher menu or leave the setup menu, press the BACK button.
NOTE
If you stop adjusting the settings for about 10 seconds, the setup menu closes
and the display will return to its original mode.
7.1 Setting the display language
The language of the menus as well as the playback display can be customized.
1. Press the menu button of the elements W or the remote control for a long time until the
setup menu appears.
2. Select the language entry by pressing the UP or DOWN buttons and conrm the entry by
pressing the menu button again.
3. Here you can choose between German and English. Select the desired language and press
the menu button to conrm. Please note that the language of the iRadio module can be
Language
English
Deutsch

20
set separately and that additional languages are available here (see iRadio mode section
12.5.4).
7.2 Setting the brightness of the display and navigation ring
The brightness of the display and ring backlight can be set independently of each other in
three steps (display) and four steps (ring backlight).
This function is also available in the stand-by mode of the device.
NOTE
The lifespan of an OLED display decreases as the brightness increases. Therefo-
re it is recommended to set a low to medium brightness.
1. Press the menu button of the elements W or the remote control for a long time until the se-
tup menu appears and select the dimmer entry with the UP or DOWN buttons. Conrm your
selection by pressing the menu button.
Display Brightness
Middle
2. To set the brightness of the display, select display by pressing the UP or DOWN button.
Conrm your selection by pressing the menu button.
To set the brightness of the ring backlight, select the light item also in the dimmer menu by
pressing the UP or DOWN button.
3. In both cases you can reach the desired brightness setting by pressing the UP or DOWN
button.
4. To conrm the entry, press the menu button one more time.
5. To exit the menu, press the BACK button repeatedly until you have returned to the desired
menu item or wait approx. 10 seconds until the device automatically returns to the start
menu.
7.3 Setting the time format
The display can show the time in a 12-hour format or in a 24-hour format.
This function is also available in the stand-by mode of the device.
1. Press the menu button of the elements W or the remote control for a long time until the
setup menu appears.
2. Select the clock entry by pressing the UP or DOWN buttons and conrm the entry by pres-
sing the menu button again. Now select format and conrm your selection again by pressing
the menu button. The active time format is indicated with an asterisk.
Table of contents
Other Sonoro Docking Station manuals
