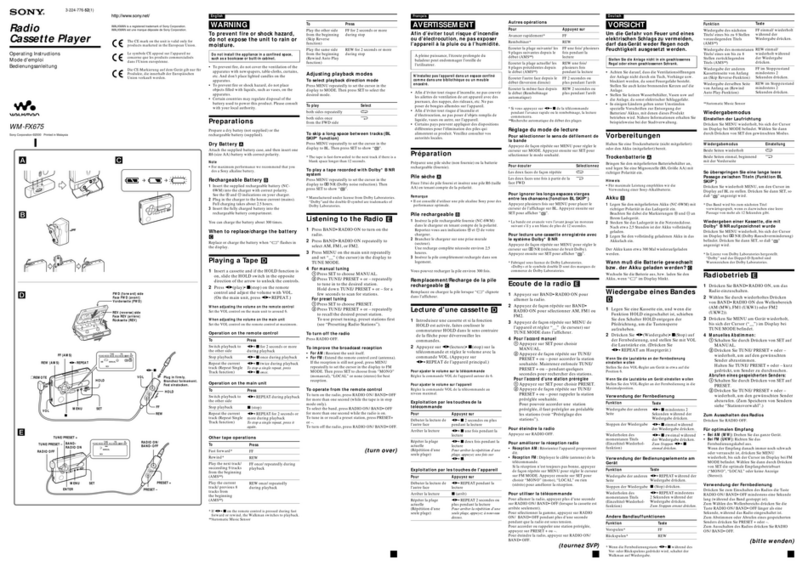
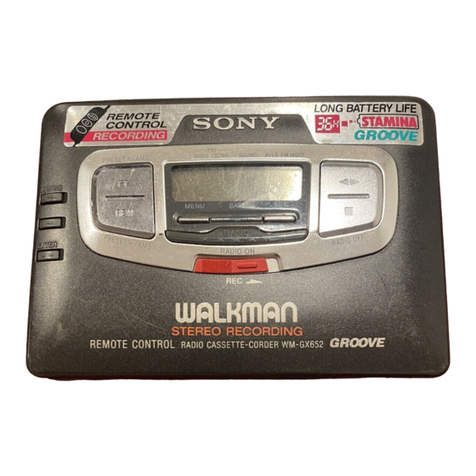
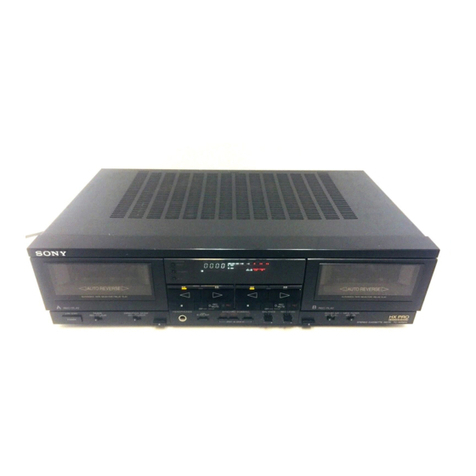
Sony TCM-27 User manual

SONY
TCM-27
Operating
Instructions
Before
operating
the
unit,
please
read
this
manual
thoroughly
and
retain
it
for
future
reference.
h
3-750-021-21
(2)
Owner’s
Record
The
model
number
is
located
on
the
left
side
and
the
serial
number
is
located
in
the
battery
compartment.
Record
the
serial
number
in
the
space
provided
below.
Refer
to
these
numbers
whenever
you
call
upon
your
Sony
dealer
regarding
this
product.
Model
No.
TCM-27
Serial
No.
¢
With
the
time-index-recording
function
the
date
and
time
of
recording
and
a
memo
appear
in
the
display
window
during
tape
playback.
¢
Timer
function
starts
the
tape
playback
and
recording
at
any
desired
time
with
the
built-in
timer.
Precautions
On
operation
©
Operate
the
unit
on
3
V
DC.
For
AC
operation
or
car
battery
operation,
use
accessories
recommended
for
the
unit.
*
Do
not
leave
the
unit
in
a
location
near
heat
sources,
in
a
place
subject
to
direct
sunlight,
excessive
dust,
sand,
moisture,
rain,
mechanical
shock,
in
the
direct
sunlight,
temperature
below
5°C,
or
in
a
car
with
its
windows
closed.
¢
If
the
unit
has
not
been
used
for
a
long
time,
set
it
in
playback
mode
and
warm
it
up
for
a
few
minutes
before
inserting
a
cassette.
¢
Should
anv
solid
ohiect
or
liaisid
fall
into
the
unit,
remove
the
batteries
and
disconnect
the
AC
power
adaptor,
and
have
the
unit
checked
by
qualified
personnel
before
operating
it
any
further.
¥,
Cue
marker
and
auto-stop
function
for
search-
ing
for
a
particular
point
quickly.
*
Since
a
strong
magnet
is
used
for
the
speaker,
keep
personal
credit
cards
using
magnetic
coding
or
spring-wound
watches
away
from
the
unit
to
prevent
possible
damage
from
the
magnet.
¢
The
nameplate
indicating
operating
voltage,
etc.
is
located
on
the
bottom.
Note
on
cassettes
longer
than
90
minutes
The
use
of
cassettes
longer
than
90
minutes
is
not
recommended
except
for
jong
continuous
playback.
if
you
have
any
question
or
problem
concerning
your
unit
that
is
not
covered
in
this
manual,
please
consult
your
nearest
Sony
dealer.

INFORMATION
This
equipment
generates
and
uses
radio
frequency
energy
and
if
not
installed
and
used
properly,
that
is,
in
strict
accordance
with
the
manufacturer's
instructions,
may
Cause
interference
to
radio
and
television
reception.
It
has
been
type
tested
and
found
to
comply
with
the
limits
for
a
Class
B
computing
device
in
accordance
with
the
specifications
in
Subpart
J
of
Part
15
of
FCC
Rules,
which
are
designed
to
provide
reasonable
protection
against
such
interference
ina
residential
installation.
However,
there
is
no
guarantee
that
interference
will
not
occur
in
a
particular
installation.
If
this
equipment
does
cause
interference
to
radio
or
television
reception,
which
can
be
determined
by
turning
the
equipment
off
and
on,
the
user
is
encouraged
to
try
to
correct
the
interference
by
one
or
more
of
the
following
measures:
Reorient
the
receiving
antenna
Relocate
the
equipment
with
respect
to
the
receiver
Move
the
equipment
away
from
the
receiver
Plug
the
equipment
into
a
different
outlet
so
that
equipment
and
receiver
are
on
different
branch
circuits.
If
necessary,
the
user
should
consult
the
dealer
or
an
experienced
radio/television
technician
for
additional
suggestions.
The
user
may
find
the
following
booklet
prepared
by
the
Federal
Communications
Commission
helpful:
“How
to
Identify
and
Resolve
Radio-TV
Interference
Problems”.
This
booklet
is
available
from
the
U.S.
Government
Printing
Office,
Washington,
DC
20402,
Stock
No.004-000-00345-4.
Sony
Corporation
©1989
Printed
in
Japan

Zonnections/Preparations
Recording
with
an
external
microphone
MIC
Pye=4
Microphone
(optional)
Miniplug
When
a
microphone
with
PLUG
IN
POWER
system
is
connected,
power
is
supptied
with
the
microphone
from
TCM-27.
Recording
from
a
radio
or
TV
equipped
with
a
recording
jack
F——>
Jyh
To
recording
out
jack
MIC
exo
aun}
RK-G69
(op
ional)
Tune
in
a
desired
station.
Dubbing
from
another
cassette-corder
HI
EAR,
EARPHONE,
©)
MIC
(c)
RK-G64
(optional)
Ci
Set
it
in
the
playback
mode
and
adjust
it
to
your
normai
listening
level.
Recording
from
a
radio
or
TV
equipped
with
an
earphone
jack
EAR,
EARPHONE,
©)
<<
}o»———___—_
RK-G64
(optiona:)
[|
E==3}
Tune
in
a
desired
station
and
adjust
the
radioor
TVto.
9
TCM-27
a
normal
listening
level.
If
your
radio,
TV,
etc.,
is
not
Sony
product,
refer
to
the
instruction
manual
of
that
unit.

Recording
with
the
Built-in
fot
ce)
elavey
ar
REC/BATT
The
¥
button
is
depressed
automatically.
No
recording
level
adjustment
is
necessary.
The
sound
to
be
recorded
can
be
listened
with
the
optional
earphone.
Notes
*
Do
not
press
the
built-in
microphone
forcibly.
¢
When
monitoring
with
the
earphone,
do
not
set
the
volume
too
high.
Otherwise,
a
howling
effect
may
occur.
Adjusting
the
Microphone
Sensitivity
TONE/MIC
SENS
selector
To
pick
up
sounds
at
H
(high)
|
some
distance.
To
pick
up
relatively
loud
sounds
near
the
microphone.
To
review
the
portion
just
recorded
Simply
depress
the
4
button
while
recording.
By
releasing
the
4
button,
the
recorder
will
go
into
the
playback
mode
for
review
of
the
recorded
material.
To
start
recording
again,
depress
the
@
button.
To
correct
a
previously
recorded
portion
During
playback,
simply
depress
the
@
button
and
the
recorder
will
immediately
change
to
the
recording
mode.
Notes
*
Make
sure
that
nothing
is
connected
to
the
MIC
jack.
Otnerwise,
a
recording
with
the
built-in
microphone
cannot
be
made.
¢
When
you
record
with
an
external
microphone,
you
cannot
adjust
the
microphone
sensitivity.

To
pick
up
the
speaker's
voice
more
clearly
at
the
conference
Place
the
unit
on
a
table
horizontally
for
maximum
performance
of
the
built-in
flat
microphone
(Sony
Boundary
Effect
system).
Recording
from
Various
Sound
Sources
To
record,
depress
the
@
button
of
the
TCM-27
after
completing
the
connections
and
preparations
below.

Ciao
We
MUcieme
elaine
Matcere)coliale|
—Time-Index-Recording
Function
You
can
create
a
memo
or
a
label
of
up
to
5
letters
for
the
material
to
be
recorded.
Press
SET.
\Ue
Ge)
}
[pow
=
--
7UN
A
blinking
cursor
(indicating
where
a
letter
can
be
entered)
will
appear.
Press
+
or
—,
until
the
first
letter
you
want
appears.
Example:
If
+
is
pressed
6
times,
F
will
appear.
Press
to
move
the
cursor
to
the
next
position,
and
use
either
+
or
—
to
select
the
next
letter.
¥
Repeat
steps
2
and
3
to
complete
the
memo.
5
After
setting
the
fifth
letter,
press
SET.
(If
you
want
to
use
fewer
than
5
letters,
press
SET
several
times
to
complete
the
setting.)
Memo
is
entered.
Start
recording.
(The
date
and
time
will
be
entered
automatically.)
If
you
want
to
change
the
memo,
follow
the
procedure
from
step
1.
If
you
want
to
change
the
memo
while
recording,
stop
the
cassette
for
a
moment
with
the
PAUSE
switch.
37
characters
and
a
space
can
be
used
for
the
memo.
Each
time
+
is
pressed,
characters
will
appear
in
the
following
order.

Use
—
button
to
go
back
to
a
previous
character.
Note
¢
When
recording,
use
only
TYPE
|
tapes.
if
you
use
another
type
of
tape,
the
time-index-
recording
may
not
function.
For
the
time-index-recording
function,
it
is
necessary
to
record
continuously
for
more
than
10
seconds.
If
the
recording
is
less
than
10
seconds,
you-cannot
enter
the
memo,
date,
or
time.
“

Pe.
-
Tee
cqnererertr
enue
be:
aoe
:
Assigning
a
Cue
Marker
During
|
steve
collie
Press
at
the
position
you
want
to
listen
to
afterward.
CUE
MARKER
indicator
lights
up
and
a
cue
marker
is
assigned.
You
can
locate
the
cue
marker
position
quickly
by
pressing
FF/CUE
or
REW/REVIEW
button
during
playback.
(See
“Locating
the
CUE
MARKER
position”)
When
recording
starts
(including
after
a
pause)
Acue
marker
is
assigned
automatically.
When
you
will
not
use
the
auto
stop
function
Slide
AUTO
STOP
switch
to
OFF.
Notes
on
the
cue
marker
You
can
assign
as
many
cue
markers
as
you
want.
*
If
you
press
STOP
immediately
after
pressing
CUE
MARKER,
the
cue
marker
is
not
assigned.
*
After
pressing
CUE
MARKER,
wait
until
the
mdicator
goes
out
before
continuing
to
record.
*
When
you
play
back
the
tape
recorded
with
1
long
passage
of
low
frequency
sound,
the
unit
may
not
function
correctly.
Locating
the
Cue
Marker
Position
—Auto
Stop
Function
1
auto
storie
Slide
AUTO
STOP
switch
to
ON.
Keeping
PLAY
depressed,
press
4
REW/REVIEW
or
y
FF/CUE
button
continuously.
3
At
the
cue
marker
position,
the
cassette
stops
automatically.
Release
4
REWIREVIEWor
¥
FF/CUE
button
to
start
play
back.

Recording
with
the
Timer
—Timer
Function
1
Display
=>
®
TIMER
indication.
Set
the
timer
for
the
date
and
the
time
you
want
recording
to
begin.
(See
How
to
Set
the
Date/Time.)
If
you
want
to
make
a
label
for
the
material
to
be
recorded,
enter
a
memo.
(See
Entering
a
Memo
during
Recording.
Be
sure
to
set
the
timer
before
entering
a
memo.)
TIMER
STANDBY
switch
Recording
will
start
automatically
at
the
time
set.
When
entering
a
memo
Be
sure
to
set
the
timer
before
entering
a
memo.
You
cannot
enter
a
memo
before
setting
the
timer.
You
can
start
the
playback
at
the
time
set.
For
the
step
5,
press
A
button
in
place
of
@
button.
To
Release
the
TIMER
STANDBY
Switch
before
the
Preset
Time
Press
the
II
button
and
press
the
TIMER
STANDBY
RELEASE
button.

>
TIMER
STANDBY
(+7
RELEASE
button
x
SRENS
{
oe
To
check
the
time
set
for
the
timer
recording
Press
DISPLAY
MODE
so
that
“TIMER”
indication
appears.
The
indication
displayed
is
the
time
set.

Tape
Playack
VOLUME
H
(high)
For
more
treble
L
(low)
For
less
treble
To
locate
a
desired
Position
during
tape
playback
Keep
pressing
the
4
or
¥
button
during
playback.
At
the
desired
point
found
by
listening
to
the
high-speed
sound,
release
the
pressed
button
to
restart
playing
back.
To
stop
the
tape
To
rewind
the
tape
|
To
restart.
slide
it
up

Displaying
the
Memo
and
Date/Time
during
Playback
Press
during
playback
to
display
the
“RECORDED
“eX
TIME”
indication.
The
date
and
time
of
recording
and
the
memo
will
be
displayed
after
a
short
time.
Information
Display
Each
time
you
press
DISPLAY
MODE,
the
display
changes
in
the
order
indicated
by
the
arrows.
|
Current
date/time
display
|
“CLOCK”
indication
is
displayed.
The
current
date
and
time
are
A
indicated.
Timer
display
[
Memo
display
“TIMER”
indication
is
displayed.
“RECORDED
TIME”
indication
is
The
date
and
time
set
for
the
timer
&
displayed.
The
date
and
time
of
the
are
displayed.
(When
the
timer
is
not
recording
and
the
memo
will
be
Set,
the
current
date
and
time
is
displayed
only
during
playback
displayed.)
(not
during
recording).
Note
After
displaying
the
date
and
time
of
recording
and
the
memo,
the
indications
remain
displayed
if
you
play
back
a
cassette
recorded
on
equipment
other
than
the
TCM-27.

arts
Identification
Counter
reset
button
COUNTER
(tape
counter)
VOLUME
control
REC/BATT
ADJUST
button
~
button
@
REC
(record)
button
Re
mire
eet
SET
button
+
button
¥
PLAY
(playback)
button
h
Tele
eee
:
i
a
REW/REVIEW
’
Display
window
DISPLAY
MODE
(rewind/review)
button
|
button
¥
FFICUE
(fast
forward/cue)
button
TIMER
STANDBY
RELEASE
button
TIMER
STANDBY
switch
svro
sror(
HH)
Hand
strap
se
is
DC
IN
3V
(external
power
input)
jack
AUTO
STOP
switch
Connect
the
AC
power
—
REMOTE
control
jack
adaptor
here.
CUE
MARKER
CUE
MARKER
button
MIC
(PLUG
IN
POWER)
indicator
(external
microphone)
input
jack
EAR
(earphone)
jack
RESET
button
Press
this
button
with
a
ballpoint
pen
or
similar
object
after
battery
replacement
or
when
no
button
or
control
functions.
(Do
not
use
something
that
breaks
easily
like
the
lead
point
of
a
pencil.)
@
#
STOP/EJECT
button
TONE/MIC
SENS
(microphone
sensitivity)
selector
PAUSE.
switch
Speaker
Battery
compartment

Installing
Batteries
Insert
two
size
AA
(R6)
batteries
with
correct
polarity.
|
0
remove
—
|
Before
inserting
the
cassette,
take
up
any
slack
in
the
tape
with
a
thick
pencil.
Side
to
be
recorded
7
or
played
back
Battery
replacement
During
tape
playback,
when
the
indicator
glows
faintly
and
sound
becomes
distorted
or
unstable,
replace
both
batteries.
On
battery
life
and
other
power
sources,
see
“Specifications”.
To
keep
the
preset
memories
Replace
the
batteries
within
two
minutes.
The
memories
of
the
current
time
and
a
memo
will
be
erased
about
two
minutes
after
the
batteries
are
removed.
When
no
button
functions
after
replacing
,
the
batteries
Press
the
RESET
button,
and
preset
the
indications.
To
prevent
accidental
erasure
Break
out
the
tab
corresponding
to
the
side
to
be
recorded
on.
Recording
on
that
side
will
be
protected.
Recording
side
Tab
Yy
To
reuse
a
wae
0)

You
cannot
set
the
clock
during
tape
playback
or
recording
if
“CLOCK”
indication
is
not
displayed.
press
DISPLAY
MODE
several
times
until
“CLOCK”
indication
appears.
Example:
To
set
the
time/date
to
1:05
p.m.,
December
27,
1989
Press
SET
while
keeping
CLOCK
;
ADJUST
ADJUST
pressed.
—p
pier
a
are
Set
the
hour
using
the
+
or
—
buttons.
Se)
When
the
+
or
—
button
is
kept
=p
Se
mragrt
tT
/
pressed,
the
digits
advance
rapidly.
Press
SET
to
make
the
minute
digits
blink.
Set
minute,
month,
day,
and
yearinsequence.
First
adjust
the
blinking
item
with
+
7
or
—
buttons,
and
then
press
SET.
=—>
(The
day
of
the
week
is
automati-
cally
set
when
the
year,
month
and
the
day
are
registered.)
Choose
the
12-
or
24-hour
indication
and
then
press
SET.
See,
“MENS
.
A
flashing
“12H”
and
“24H”
mo
6)
alternately
appear
with
each
press
—
er
ae
;
4,
of
the
+
or
—
button.
MEMO
The
clock
will
now
start.
To
change
the
date/time
MODE
once)
until
“CLOCK”
indication
appears
Press
SET
while
keeping
ADJUST
pressed.
Press
SET
several
times
to
make
the
digit
you
want
to
change
blink.
After
changing
the
number,
press
SET
several
times
(or
press
DISPLAY

Cleaning
the
heads
Prolonged
use
may
contaminate
the
tape
heads
and
the
tap’:
path.
Contamination
causes
insufficient
1
ecording
or
sound
drop-outs
in
playback.
After
cleaning,
press
the
il
&
button.
Cleaning
the
case
To
enjoy
optimum
sound,
wipe
the
heads,
capstan
and
pinch
roller
with
a
cotton
swab
moistened
with
alcohol
after
every
10
hours
of
use.
Cotton
swab
Record/playback
head
Capstan
Erase
head
Pinch
roller
Do
not
use
alcohol,
benzine
or
thinner
to
clean
the
case.
BicelUlel(=vatexeliiare
MELel(e(=
Trouble
Causes
The
VY
button
cannot
be
locked.
Tape
does
not
move.
Cassette
cannot
be
inserted.
*
The
¥
button
is
depressed.
The
@
button
cannot
be
depressed.
|
¢
No
cassette
in
the
cassette
compartment.
The
cassette
inserted
has
had
the
tabs
removed.
Cover
the
slot
with
a
small
piece
of
plastic
tape.
The
tape
is
completely
wound
towards
the
arrow
direction
on
the
cassette
compartment
lid.
Rewind
the
tape
with
the
4
button.
*
incorrect
polarity
of
batteries.
*
Weak
batteries.
*
The
PAUSE
switch
slides
down.
*
Battery
operation
is
attempted
while
the
AC
power
adaptor
or
car
battery
cord
is
connected
to
the
recorder
but
not
to
the
wall
outlet
or
the
cigarette
lighter
socket.
No
sound
from
the
speaker.
[
¢
The
earphone
is
plugged
in.
©
The
VOLUME
control
is
turned
down
completely.
Weak
or
distorted
sound,
sound
[
dropouts,
or
excessive
noise.
No
indication
appears.
©
Weak
batteries.
See
‘Battery
installation”.
*
Dirty
heads.
See
“Maintenance”.
Recording
cannot
be
made
or
is
unsatisfactory.
¢
improper
connection.
See
“Recording
from
various
sound
sources”.
The
wrong
indications
appear
in
the
display
window.
No
buttons
function
to
set
or
change
the
indications.
¢
Press
RESET.
(The
indication
will
be
cleared.
Repeat
the
steps
again
from
the
beginning.)
Memo
cannot
be
entered
for
the
;
material
to
be
recorded.
«
“TIMER”
indication
appears
in
the
display
window.
Press
DISPLAY
MODE
so
that
the
current
date/time
display
appears
_
be
entered.
4
For
timer
recording,
amemo
cannot;
*
Set
the
dale
and
time
vetore
emlering
Ine
memo
Memo
display
does
not
disappear.
*
After
displaying
the
date
and
time
of
recording
and
the
memo,
the
indications
remain
displayed
if
you
play
back
a
cassette
recorded
on
equipment
other
than
TCM-27.
To
clear
the
indications.
press
DISPLAY
MODE
so
that
the
current
date/time
display
appears
the
memo
do
not
appear
during
playback.
a
The
date
and
time
of
recording
and
«
The
recording
time
is
less
than
10
seconds
For
the
time-index-recording
function,
it
is
necessary
to
record
continuously
for
more
than
10
seconds.
ame

Specifications
Recording
system
Frequency
response
Power
output
(DC)
Input
Output
Power
requirements
|
Where
purchased
|
United
Kingdom
1
|
United
States
2-track
1-channel
monaural
200-8,000
Hz
(For
normal
tape
TYPE
!)
Speaker:
350
mW
(at
10%
harmonic
distortion)
Microphone
input
jack
(minijack)
sensitivity
0.2mV
for
3kQ
or
lower
impedance
microphone
Earphone
jack
(minijack)
for
8—
300
ohm
earphone
3V
DC,
two
size
AA
(R6)
batteries
DC
IN
3V
jack
accepts:
*
Sony
AC-D2M
AC
power
adaptor
Operating
voltage
240
V
AC,
50
Hz
|
120V
AC,
60
Hz
|
©
Sony
DCC-70
car
battery
,
cord
(optional)
for
use
on
12
V
car
battery
Battery
life
(hours)
Batteries
Recording
Sony
batteries
SUM-3
(NS)
Approx.
2.5
|
Sony
alkaline
batteries
AM3
(N)
Approx.
7
Dimensions
Weight
Accessory
supplied
Approx.
91
x
119.2
x
39.7
mm
(wih/d)
(35/5
x
4°/,
«
1
°/,
inches)
incl.
projecting
parts
and
controls
Approx.
310
g
(11
02)
incl.
batteries
Carrying
case
(1)
Optional
accessories
AC
power
adaptor
AC-D2M
Car
battery
cord
OCC-70
One
point
microphone
ECM-202
Electret
condenser
microphone
ECM-K7.
ECM-K8,
ECM-011,
ECM-D5
Foot
switch
FS-10A
Monaural
earphone
ME-81,
ME-L82
Connecting
cord
RK-G64,
RK-G69
Your
dealer
may
not
handle
some
of
the
above
listed
optional
accessories.
Please
ask
the
dealer
for
detailed
information
about
the
optional
accessories
available
in
your
country.
Note
Use
only
the
recommended
AC
power
adaptor
or
car
battery
cord
manufactured
by
Sony.
Polarity
of
the
plugs
of
other
manufacturers
may
be
different.
On:
ae
4
Polarity
of
the
Sony
plug
Design
and
specifications
subject
to
change
without
notice.
Note:
This
appliance
conforms
with
EEC
Directives
76/889
and
82/499
regarding
interference
suppression.
Table of contents
Other Sony Cassette Player manuals

Sony
Sony TC-WR465 User manual

Sony
Sony Pressman TCM-50DV User manual

Sony
Sony Walkman WM-EX621 User manual

Sony
Sony CFD-V37 User manual

Sony
Sony Walkman WM-GX652 User manual

Sony
Sony WM-FX321 User manual

Sony
Sony Walkman WM-EX552 User manual

Sony
Sony TC-KA6ES User manual

Sony
Sony TC-K370 User manual

Sony
Sony SLV-EZ715AS User manual

Sony
Sony Walkman WM-FX195 User manual

Sony
Sony CFM-10 Operating Instructions (primary... User manual

Sony
Sony Walkman WM-EX910 User manual

Sony
Sony WM-FX673 User manual

Sony
Sony TC-W21 User manual

Sony
Sony CFD-V8 User manual

Sony
Sony Walkman WM-FX195 User manual

Sony
Sony Walkman wm-FX105 User manual

Sony
Sony TC-K333ESA User manual

Sony
Sony HCD-EP30 User manual