Para iniciar SmartWi™
Connection Utility
(disponible sólo en modelos con
la función de WAN inalámbrica)
En el primer inicio, aparece la pantalla principal de SmartWi™ Connection
Utility desde la barra de tareas. Haga clic en la pantalla principal o haga
doble clic en el icono de la herramienta para iniciar SmartWi Connection
Utility.
1Encienda la computadora.
2Busque el seleccionador WIRELESS en la computadora y deslícelo a
la posición ON.
3Haga clic en Inicio > Todos los programas > SmartWi Connection
Utility.
4Haga clic en Activate with Cingular/AT&T.
5Recorra el asistente de activación para activar el dispositivo WWAN.
La Ayuda de SmartWi proporciona información detallada acerca de cómo
usar SmartWi Connection Utility.
1Haga clic en Inicio > Todos los programas > SmartWi Connection
Utility.
2Haga clic en Ayuda de SmartWi.
To start SmartWi™
Connection Utility
(available on models with the
wireless WAN function only)
At initial startup, the SmartWi™ Connection Utility main screen
appears from the taskbar. Click the main screen or double-click
the tool icon to start the SmartWi Connection Utility.
1Turn on your computer.
2Locate the WIRELESS switch on your computer and slide
the switch to the ON position.
3Click Start > All Programs > SmartWi Connection Utility.
4Click Activate with Cingular/AT&T.
5Go through the activation wizard to activate your WWAN
device.
The SmartWi Connection Utility Help provides detailed
information on how to use the SmartWi Connection Utility.
1Click Start > All Programs > SmartWi Connection Utility.
2Click SmartWi Connection Utility Help.
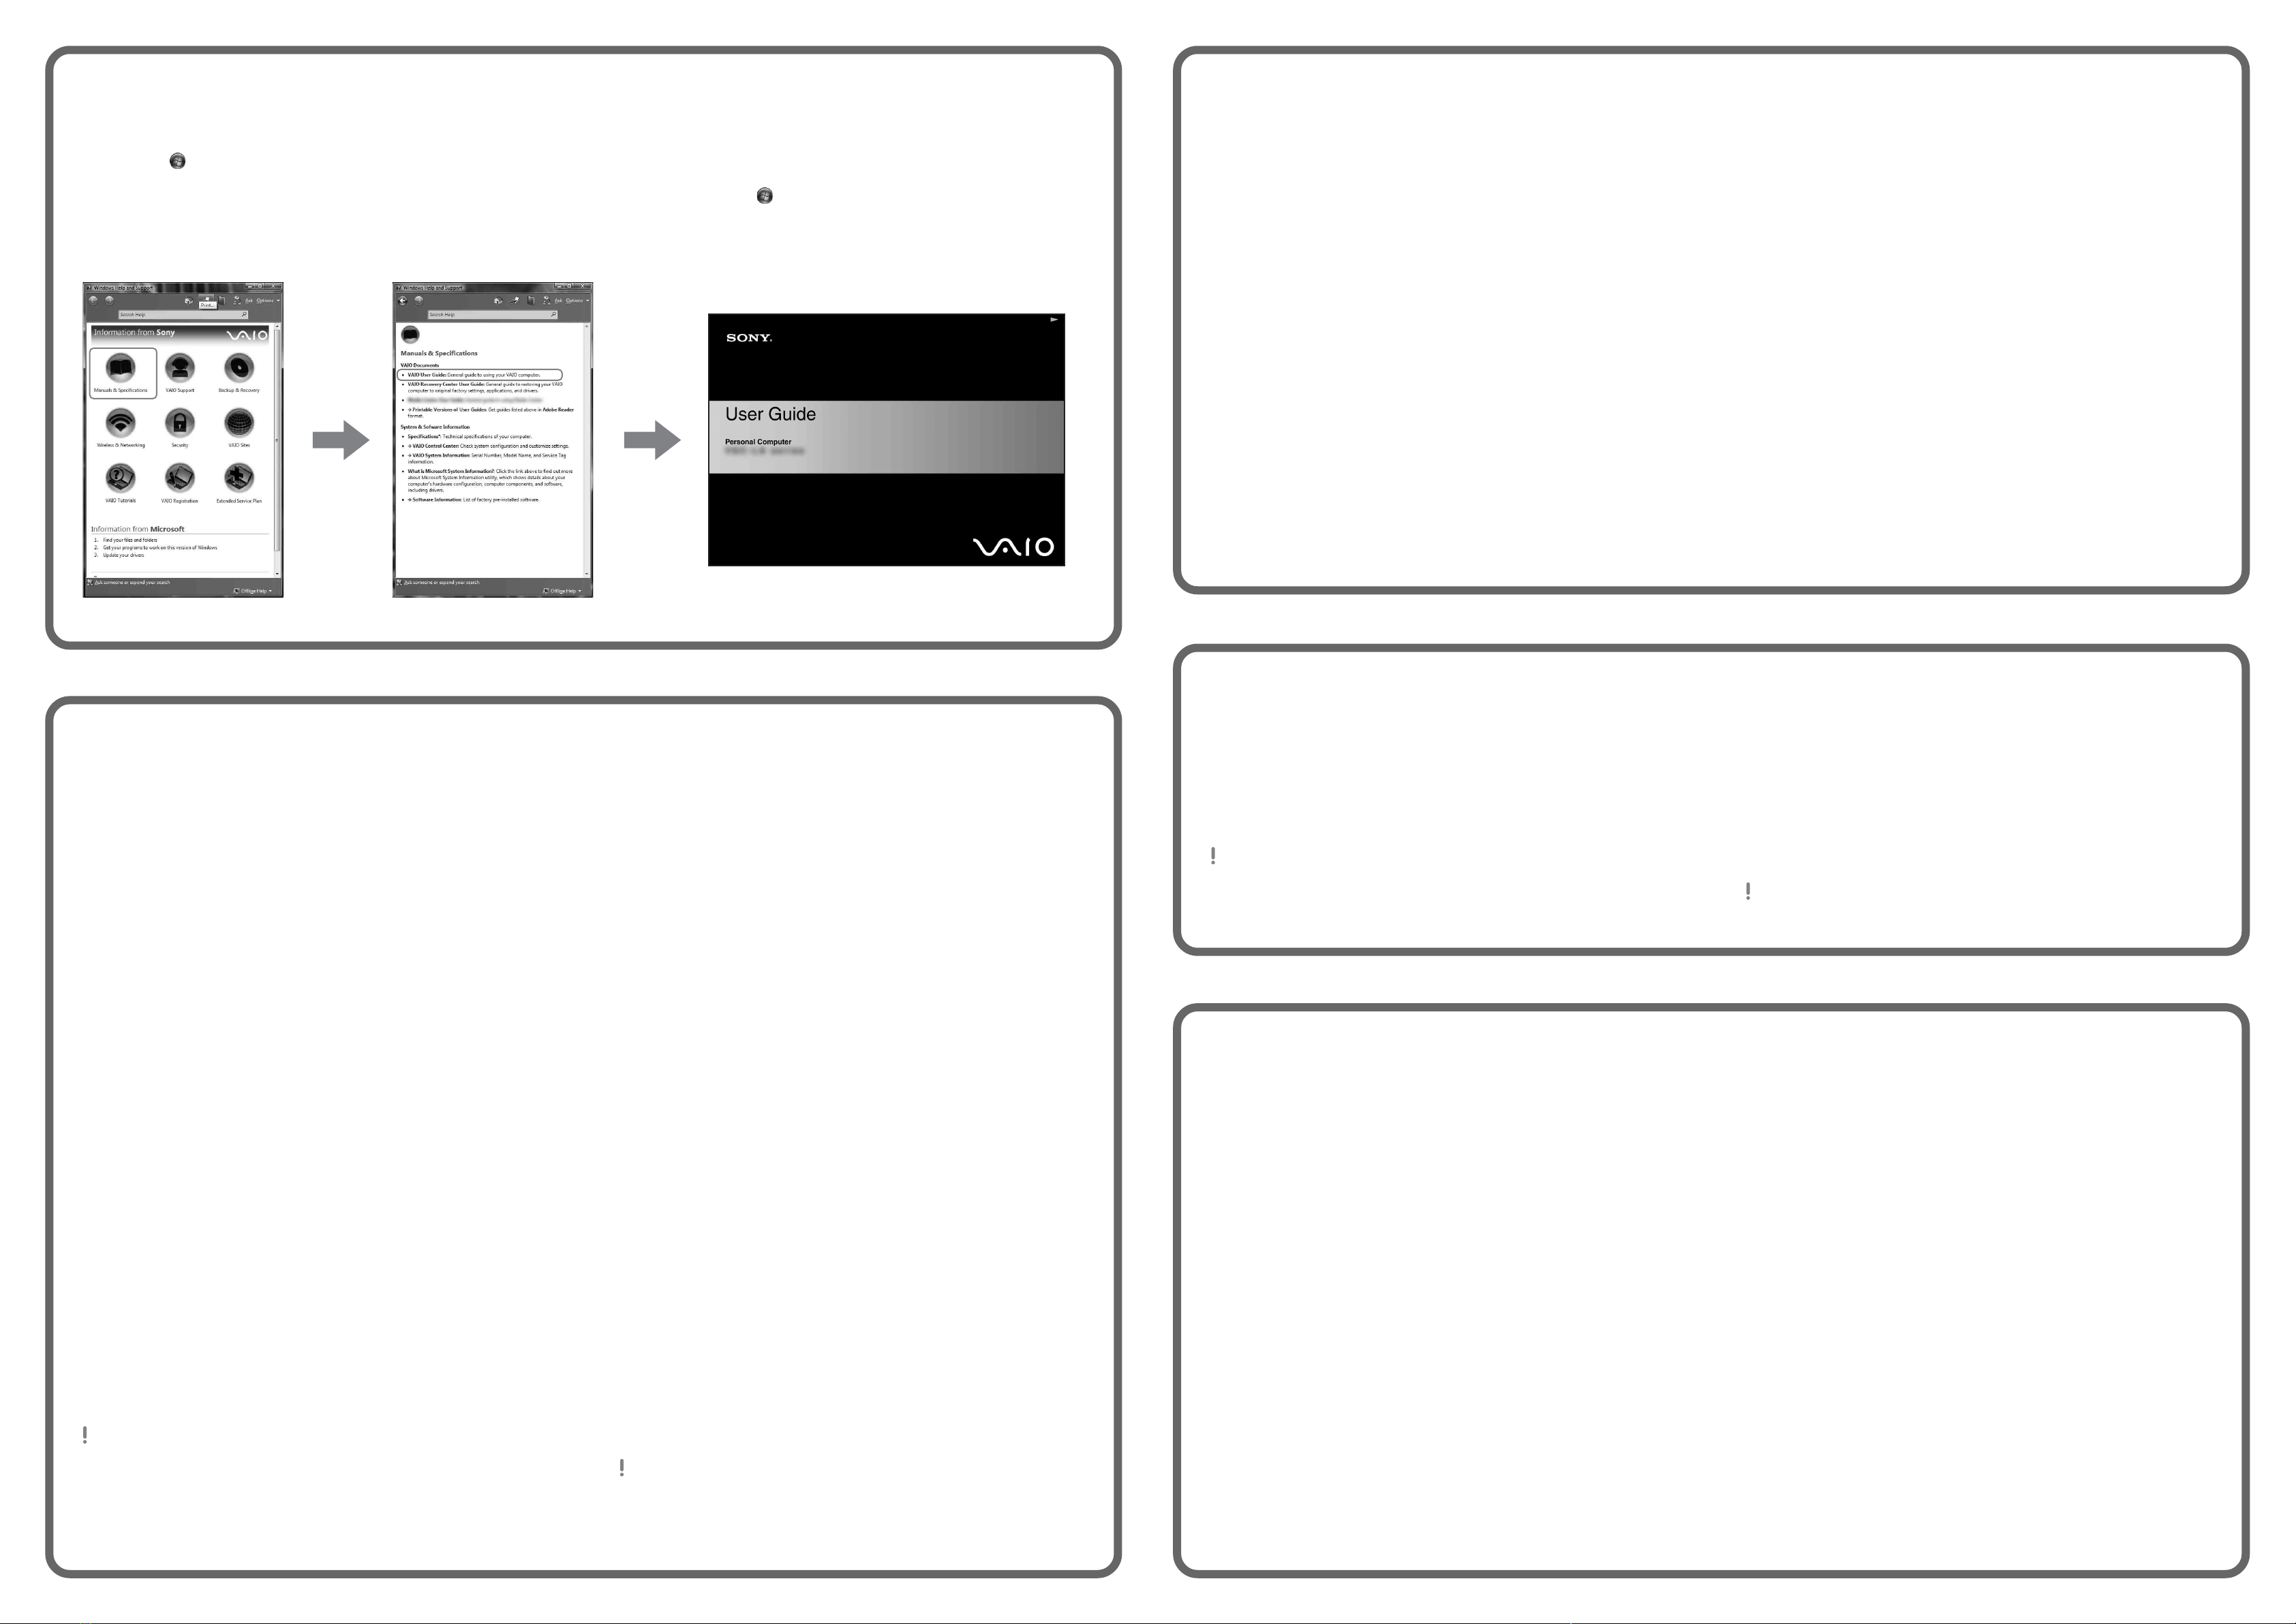
Para ubicar la Guía del
usuario
1Haga clic en Inicio > Ayuda y soporte técnico.
2Haga clic en Manuales y especificaciones.
3Haga clic en Guía de Usuario de VAIO.
To locate the User Guide
1Click Start > Help and Support.
2Click Manuals & Specifications.
3Click VAIO User Guide.
HDD recovery
Your computer is equipped with the VAIO®Recovery Center, a
utility program that recovers your computer’s operating system
and preinstalled software to their original factory-installed
settings.
System and/or application recovery media are not delivered
with your computer.
For on-screen information about hard
disk recovery:
1Click Start > Help and Support.
2Click Manuals & Specifications.
3Click VAIO Recovery Center User Guide.
To access
the VAIO Recovery Center utility
from the Windows Vista®operating
system:
1Click Start > Help and Support.
2Click Backup & Recovery.
3Click VAIO Recovery Center.
Recuperación de la
unidad de disco duro
La computadora tiene instalado VAIO®Recovery Center,
programa utilitario que restablece el sistema operativo de la
computadora y el software preinstalado a los valores originales
instalados de fábrica.
El sistema o medio de recuperación de aplicaciones no viene
con la computadora.
Para obtener información en pantalla
acerca de la recuperación del disco
duro:
1Haga clic en Inicio > Ayuda y soporte técnico.
2Haga clic en Manuales y especificaciones.
3Haga clic en VAIO Recovery Center Guía del usuario.
Para acceder al programa utilitario
VAIO Recovery Center desde el
sistema operativo Windows Vista®:
1Haga clic en Inicio > Ayuda y soporte técnico.
2Haga clic en Copia de seguridad y recuperación.
3Haga clic en VAIO Recovery Center.
Troubleshooting
What should I do if my computer
does not start?
The power indicator on your computer is off when the computer
is not securely attached to a source of power. Make sure the
computer is plugged into the AC adapter and the adapter is
plugged into an outlet. If you are using battery power, make
sure the battery pack is installed properly and charged. You
may check the power source by disconnecting the AC adapter
and removing the battery pack. Wait three to five minutes
before reattaching the AC adapter and reinstalling the battery
pack.
Additional suggestions include:
■If your computer is plugged into a power strip or an
uninterruptible power supply (UPS), make sure the power
strip or UPS is turned on and working.
■If your computer is connected to an external display, such
as a multimedia monitor, make sure the display is plugged
into a power source and turned on. The brightness and
contrast controls may need to be adjusted. See the manual
that came with your display for more information.
■If your computer is booting from a floppy disk, eject the disk
from the floppy disk drive (if applicable).
■If you notice condensation on your computer, do not use the
computer for at least one hour. Condensation may cause
the computer to malfunction.
How do I keep my computer
updated?
Download and install the latest updates regularly using the
preinstalled software applications, such as Windows Update
and VAIO Update 3 so that the computer can run more
efficiently.
To download and install the updates, your computer must be
connected to the Internet.
Solución de problemas
¿Qué debo hacer si la computadora
no se inicia?
El indicador de encendido de la computadora está apagado
cuando la computadora no está conectada en forma segura a
una fuente de alimentación. Asegúrese de que la computadora
esté conectada al adaptador de CA y que el adaptador esté
conectado a una toma de corriente. Si está usando energía de
la batería, asegúrese de que esté correctamente instalada y
cargada. Puede verificar la fuente de alimentación al desconectar
el adaptador de CA y retirar la batería. Espere de tres a cinco
minutos antes de volver a conectar el adaptador de CA y
reinstalar la batería.
Las sugerencias adicionales incluyen:
■Si la computadora está conectada a una regleta o fuente de
alimentación ininterrumpida (UPS), asegúrese de que la
regleta o UPS esté encendida y funcionando.
■Si la computadora está conectada a una pantalla externa,
como un monitor multimedia, asegúrese de que la pantalla
esté conectada a una fuente de alimentación y que esté
encendida. Es posible que deba ajustar los controles de
brillo y contraste. Consulte el manual que viene con la
pantalla para obtener más información.
■Si la computadora se inicia desde un disquete, retire el
disco de la unidad (si corresponde).
■Si observa condensación en la computadora, no la use
durante una hora por lo menos. La condensación puede
causar una falla de funcionamiento en la computadora.
¿Cómo mantengo actualizada la
computadora?
Descargue e instale en forma periódica las últimas actualizaciones
usando las aplicaciones de los software preinstalados, como
Windows Update y VAIO Update 3 para que la computadora
funcione en forma más eficiente.
Para descargar e instalar las actualizaciones, la computadora
debe estar conectada a Internet.
To register your computer
You can register your computer online at the following URLs:
http://www.sony.com/vaioregistration/ for customers in USA
http://www.sonystyle.ca/registration/ for customers in Canada
http://vaio.sony-latin.com/ for customers in Latin American countries or
areas
Sony product registration is voluntary. Failure to register will not diminish
your limited warranty rights.
Para registrar la
computadora
Puede registrar la computadora en línea en las siguientes URL:
http://www.sony.com/vaioregistration/ para clientes en Estados Unidos
http://www.sonystyle.ca/registration/ para clientes en Canadá
http://vaio.sony-latin.com/ para clientes en países o regiones de América
Latina
El registro de los productos Sony es voluntario. No hacerlo no afecta los
derechos que le concede la garantía limitada.
 User manual")


