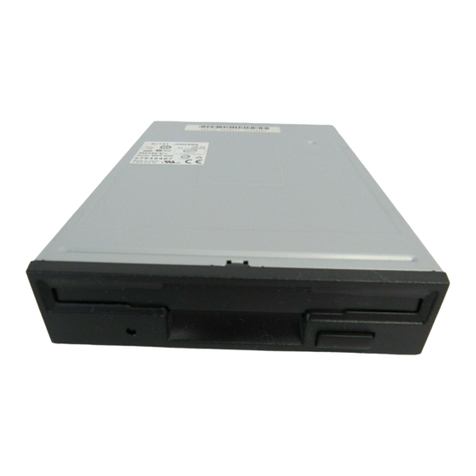
Sony SFD-FW200P User manual

4-645-546-21(1)
1999 Sony Corporation
Operating Instructions Page 5
Mode d’emploi Page 23
Bedienungsanleitung Seite 42
Guía de instrucciones Página 61
Istruzioni per l’uso Pagina 80
SFD-FW200P
External HiFD
™
Drive
FR
DE
GB
ES
IT

2
Owner’s Record
The model number and the serial number are located on the bottom of the drive unit. Record
the serial number in the space provided below. Refer to these numbers whenever you call
upon your Sony dealer regarding this product.
Model No. SFD-FW200P Serial No.
WARNING
To prevent fire or shock hazard, do not expose the unit to
rain or moisture.
To avoid electrical shock, do not open the cabinet. Refer
servicing to qualified personnel only.
CAUTION
— Reorient or relocate the receiving antenna.
— Increase the separation between the
equipment and receiver.
— Connect the equipment into an outlet on a
circuit different from that to which the receiver
is connected.
— Consult the dealer or an experienced radio/TV
technician for help.
This shielded interface cable recommended in this
manual must be used with this equipment in order
to comply with the limits for a digital device
pursuant to subpart B of Part 15 of FCC.
You are cautioned that any changes or
modifications not expressly approved in this
manual could void your authority to operate this
equipment.
This equipment has been tested and found to
comply with the limits for a Class B digital device,
pursuant to Part 15 of the FCC Rules. These
limits are designed to provide reasonable
protection against harmful interference in a
residential installation. This equipment generates,
uses, and can radiate radio frequency energy
and, if not installed and used in accordance with
the instructions, may cause harmful interference
to radio communications. However, there is no
guarantee that interference will not occur in a
particular installation. If this equipment does
cause harmful interference to radio or television
reception, which can be determined by turning the
equipment off and on, the user is encouraged to
try to correct the interference by one or more of
the following measures:
Declaration of Conformity
Trade Name: SONY
Model No: SFD-FW200P
Responsible Party: Sony Electronics Inc.
Address: 1 Sony Drive, Park Ridge, NJ.07656 USA
Telephone No.: 201-930-6970
This device complies with Part 15 of the FCC Rules. Operation is subject to the following two
conditions:
(1) This device may not cause harmful interference, and
(2) This device must accept any interference received, including interference that may cause
undesired operation.

3
NOTICE TO USERS
Program ©1999 Sony Corporation/Documentation ©1999 Sony Corporation
All rights reserved. This manual or the software described herein, in whole or in
part, may not be reproduced, translated or reduced to any machine readable form
without prior written approval from Sony Corporation.
IN NO EVENT SHALL SONY CORPORATION BE LIABLE FOR ANY
INCIDENTAL, CONSEQUENTIAL OR SPECIAL DAMAGES, WHETHER
BASED ON TORT, CONTRACT, OR OTHERWISE, ARISING OUT OF OR IN
CONNECTION WITH THIS MANUAL, THE SOFTWARE OR OTHER
INFORMATION CONTAINED HEREIN OR THE USE THEREOF.
No warranty is provided with regard to recorded data. No liability will be
assumed for data loss resulting from inability to read or write disks due to
problems with hardware or software.
Sony Corporation reserves the right to make any modification to this manual or
the information contained herein at any time without notice.
The software described herein may also be governed by the terms of a separate
user license agreement.
Trademarks
• HiFD is a trademark of Sony Corporation.
• Microsoft, MS-DOS and Windows are registered trademarks of Microsoft
Corporation (USA) in the USA and in other countries.
• PC/AT is a registered trademark of International Business Machines Corporation.
• The TM and ® marks are not indicated in the text of this manual.
All other trademarks and registered trademarks are trademarks or registered
trademarks of their respective holders.
CE Sicherheitsbestimmungen
Diese Ausrüstung erfüllt die Europäischen EMC-Bestimmungen für die
Verwendung in folgender / folgenden Umgebung(en):
• Wohngegenden
• Gewerbegebiete
• Leichtindustriegebiete
(Diese Ausführung erfüllt die Bestimmungen der Norm EN55022, Klasse B.)

4
Caution
The mains plug on this equipment must be used to disconnect mains power.
Please ensure that the socket outlet is installed near the equipment and shall be
easily accessible.
Précaution
La prise principale de cet appareil doit être utilisée pour arrêter l’alimentation
principale. Prière de s’assurer que la prise murale est installée à côté de l’appareil
et facilement accessible.
Achtung
Zur Trennung vom Netz ist der Netzsecker aus der Steckdose zu ziehen, welche
sich in der Nähe des Gerätes befinden muß und leicht zugänlich sein soll.
Precaución
Para desconectar la alimentación debe desenchufarse la clavija del cable de
alimentación. Asegúrese de que la toma de corriente esté instalada cerca del
equipo, en un lugar al que pueda accederse fácilmente.
Attenzione
Per spegnere quest’unità, toglierne la spina di alimentazione dalla presa.
Controllare che la presa sia vicina all’unità e facilmente accessibile.
Hinweis
Der höchste Schalldruckpegel beträt 70 dB(A) order weniger gemäß ISO7779.

5
Contents
Introduction...................................................................... 6
Features...........................................................................6
System requirements.......................................................6
Precautions......................................................................6
Installation........................................................................ 8
Package Contents............................................................8
Front/Rear of drive .........................................................9
Orientation of the HiFD Drive......................................10
Hardware Installation....................................................11
Connecting to an AC outlet ..........................................13
Software Installation .....................................................14
Operation........................................................................ 16
Using the HiFD drive....................................................16
Inserting a disk..............................................................17
Removing a disk ...........................................................17
Formatting HiFD Disks ................................................18
Write protecting data ....................................................18
Usable floppy disks ......................................................18
The Utility Program ....................................................... 19
Running “HiFD Connect-iT”........................................19
Connecting the HiFD drive...........................................20
Disconnecting the HiFD drive ......................................20
Additional Information .................................................. 21
Maintenance, cleaning the case ....................................21
Troubleshooting ............................................................21
Service & Support Contacts in Europe .........................22
Specifications ................................................................ 22
GB
English

6
Introduction
Introduction
Features
This HiFD (High-Capacity Floppy Disk) 3.5 inch floppy drive
system offers the following:
• 200 MB* formatted storage capacity
• Compatibility with 1.44 MB & 720 kB diskettes
• High speed seek time (49 ms average)
• Parallel port interface
• Printer connector for printer attachment to drive
• 600 kB/s max transfer rate (with EPP/ECP port)
* 200 MB capacity, where 1 MB = 1 million bytes.
System requirements
• IBM-compatible PC, Pentium or higher
• Windows 95 or Windows 98
• 16 MB or more system RAM
• 5 MB of hard disk space
• Printer port with DB25 connector
• 3.5" floppy disk drive
Precautions
On InstallationAvoid areas with high humidity or temperature, mechanical
vibration and direct sunlight.
During Operation
• Operate drive only on a sturdy, flat surface.
• Do not move drive during operation, it may cause a
malfunction.
•Avoid sudden temperature change, it may cause internal
condensation. When moving the unit out of a low
temperature and into a place of high temperature, wait for a
while (one hour if possible) before turning on the unit.
Immediate operation after sudden temperature change may
cause malfunction.

7
On Transportation
• Save original packaging for later use.
• Always remove diskette before moving unit.
General Safety• If any solid object falls into drive, unplug it and before further
operation, have qualified personnel inspect the unit.
• Do not place foreign objects into DC IN 5V jack.
On Power Sources
• Unplug the AC power cord only via its plug end.
• This HiFD drive does not feature a power switch. Turn off
drive unit only by unplugging AC power cord from wall outlet.
On the Drive Unit
• Avoid heat sources (includes closed vehicles in sunlight) and
direct sunlight. Avoid exposure to dust or sand, moisture,
rain, mechanical shock.
• If unit causes radio or television reception interference, move
it to another area to operate.
HiFD/Floppy Disk Handling
Please follow these steps to protect diskette/data:
• Avoid magnets and magnetic fields (TV, radio).
• Avoid heat sorces and direct sunlight.
• Never touch the disk surface (do not open shutter by hand), as
dirt on or marring of surface will render data unreadable and
disk unwritable.
• Avoid letting liquids contact HiFD/floppy disks.
• Store diskette in its case, not in drive.
Caution
• Cleaning diskettes for ordinary floppy drives will damage
this drive. Never insert such a diskette into this drive.
• Never insert FlashPath floppy adapters into this HiFD
drive. Doing so can cause damage to the drive.

8
Installation
Installation
Package Contents
Assure the following items are included in the package.
Should anything be missing, contact local dealer or Sony.
HiFD Drive
Interface cable
AC power cord
AC power adapter
SA10-0515V
Installation disks 2 pcs
HiFD blank disk
Quick Start Guide
Operating Instructions
Warranty/Registration card

9
Front/Rear of drive
Front View
2
5
31
4
1Disk Slot
Insert a HiFD or floppy disk here.
2200 MB Indicator
When a HiFD disk is present and the HiFD drive is on, this
lamp lights in green.
3BUSY Indicator
This lamp blinks Amber while the HiFD drive is operating.
Status Meaning
Blinks Amber During seeking, reading and writing
4POWER Indicator
This lamp lights green when HiFD power is on.
Note
This HiFD drive does not feature a power switch. When it
is not in use, the HiFD drive automatically switches to the
standby mode. The POWER Indicator lights even when the
drive is in standby mode.
5EJECT Button
Press this button to remove the HiFD or floppy disk from
the drive.
Note
Do not press the EJECT button too hard.
It may cause damage to the HiFD drive.
Do not push the EJECT button while the BUSY indicator is lit.
Disk Slot
200 MB Indicator
BUSY Indicator
POWER Indicator
EJECT Button

10
Installation
Rear View
1 2 3
1DC IN Jack
Connect the supplied AC power adapter here.
2Printer Port Connector
When using a printer, connect the printer cable (sold
separately) here.
When a printer is connected through the HiFD drive, the
HiFD drive must be powered on in order to use the printer.
3PC Connector
Connect the supplied interface cable here.
Orientation of the HiFD Drive
You may position the HiFD drive either horizontally or
vertically.
DC IN Jack
Printer Port
Connector PC Connector
Horizontal Use Vertical Use

11
Hardware Installation
1Locate the connection port.
The parallel port is a 25-pin connector either vertically or
horizontally positioned. It may be labelled “PRINTER” or
with printer symbol.
2Connect the printer cable.
If a printer is connected, disconnect its cable and reconnect
it to the HiFD’s port labelled “TO PRINTER”.
Parallel port
PC’s 25 pin parallel port
Printer Cable
(25 pin)
disconnect
←to printer

12
Installation
3Attach the supplied cable to other HiFD drive port.
4Attach other end (25-pins) of same interface cable to PC’s
parallel port.
Note
Avoid tugging on cables, it may cause damage.
(44 pin) Interface cable
(supplied)
Connect to
either port (25 pin)
Interface cable (supplied)
Parallel port
Parallel
port

13
Connecting to an AC outlet
Connect the drive to an AC outlet as illustrated.
To switch unit off, disconnect AC power cord from outlet.
Drive has no power switch on its own.
Note
• Supplied AC power cord may differ depending on country.
Use only the supplied cord and power adapter.
to DC IN 5V jack
AC power adapter
(supplied)
AC power cord
(supplied)
to AC outlet
Plug polarity

14
Installation
Software Installation
The HiFD driver software must be installed from the
installation disk before the drive can be used. This HiFD driver
software is exclusively for use with Windows 95/98.
1Install HiFD hardware and switch it on.
2Turn on PC.
3After the system boots up on your PC, insert the supplied
“Installation Disk 1” in the PC’s floppy drive.
4Click [Start] button on the task bar and click [Run].
5Type “A:\setup.exe” and click [OK].

15
6Choose the language of operation, then follow the on-
screen instructions.
7Complete the installation by following the instructions
displayed on the PC’s display screen.
Note
If your PC prompts you to “Insert Disk 2,” insert the
floppy disk labeled “Installation Disk 2” and click [OK].
8When installation is complete, remove the installation disk.
To Uninstall
Click the task bar’s [Start] button, point to [Programs], [HiFD]
and select [UNINSTALL].

16
Operation
Operation
Using the HiFD drive
Follow these steps to connect and power up the system.
The correct power-on sequence must be followed.
1Attach supplied 44-pin interface cable to drive.
(See step 3 on page 12)
2Attach other end of cable to PC’s parallel port.
(See step 4 on page 12)
3If using a printer, connect it to drive’s printer port.
(See step 2 on page 11)
4Plug AC power cord into an appropriate outlet.
5Switch PC on. HiFD software must first be installed in
order for drive to operate.
Note
For Windows to recognize the HiFD drive, it must be
powered-on before starting the PC.

17
Inserting a disk
Insert a HiFD/Floppy disk into the drive.
Before a floppy disk may be used, it must be formatted.
Commercially available pre-formatted 200 MB* HiFD or 1.44
MB/720 kB DOS disks do not need to be reformatted.
See Usable Floppy Disks on page 18 for compatibility details.
* 200 MB capacity, where 1 MB = 1 million bytes.
Removing a disk
Confirm BUSY indicator is not lit and press EJECT button.
Should disk not eject after pressing EJECT, contact Hotline
Support listed at the end of this manual.
EJECT
Button
BUSY
Indicator
HiFD/Floppy disk

18
Operation
Formatting HiFD Disks
HiFD disks can be formatted in much the same manner as
ordinary floppy disks. To format, simply select the HiFD drive
instead of a floppy drive. Then format the disk in the same
manner you would with an ordinary floppy.
Write protecting data
Floppy disks have a “write protect” tab to prevent accidentally
erasing data. Illustrated below are its settings.
Rear View of Floppy Disk
Rear View of HiFD
Usable floppy disks
HiFD, 2HD and 2DD 3.5" disks are supported in this drive.
Their formatted capacity and capabilities are listed below:
Media Type Capabilities
HiFD 200 MB* Format, read and write
2HD 1.44 MB Format, read and write
2DD 720 kB Format, read and write
* 200 MB capacity, where 1 MB = 1 million bytes.
Write-Enabled
Write-Protected
Write-Enabled
Write-Protected

19
The Utility Program
The “HiFD Connect-iT” utility program is supplied with the
HiFD drive.
It is installed in the HiFD Group or folder, selected in the
Programs Menu, during installation.
Running “HiFD Connect-iT”
Click the task bar’s [Start] button, point to [Programs], then
[HiFD], and click [Connect-iT].
HiFD drive’s displayed properties depend on it being powered-
on when PC was started.
If power was supplied, [Connected] appears in the [Device] of
[Properties] box. Port address, IRQ and read/write mode of
HiFD also appear in this box.
If power was not supplied, [Disconnected] appears in the
[Device] of the [Properties] box.

20
The Utility Program
Connecting the HiFD drive
If PC was booted with HiFD drive unplugged, “HiFD Connect-
iT” may be used to cause Windows to recognize the drive.
1Run “HiFD Connect-iT”.
2Click the [Connect] tab, and click [Connect] button.
[Connected] appears in the [Device] of [Properties] box.
Disconnecting the HiFD drive
To remove the HiFD drive without shutting down the PC,
perform the same steps as above, except instead of selecting
[Connect] button, select [Disconnect].
Table of contents
Languages:
Other Sony Floppy Disk Drive manuals

Sony
Sony MPF920-Z User’s Guide User manual

Sony
Sony MSFD-20U User manual

Sony
Sony MSFD-20U User manual

Sony
Sony MPF920-Z User’s Guide User manual

Sony
Sony MSFD-20U User manual

Sony
Sony MP-F17W User manual

Sony
Sony OA-D32W User manual

Sony
Sony MPF82E User manual

Sony
Sony M-PF88E User manual

Sony
Sony MPF920-Z User’s Guide User manual