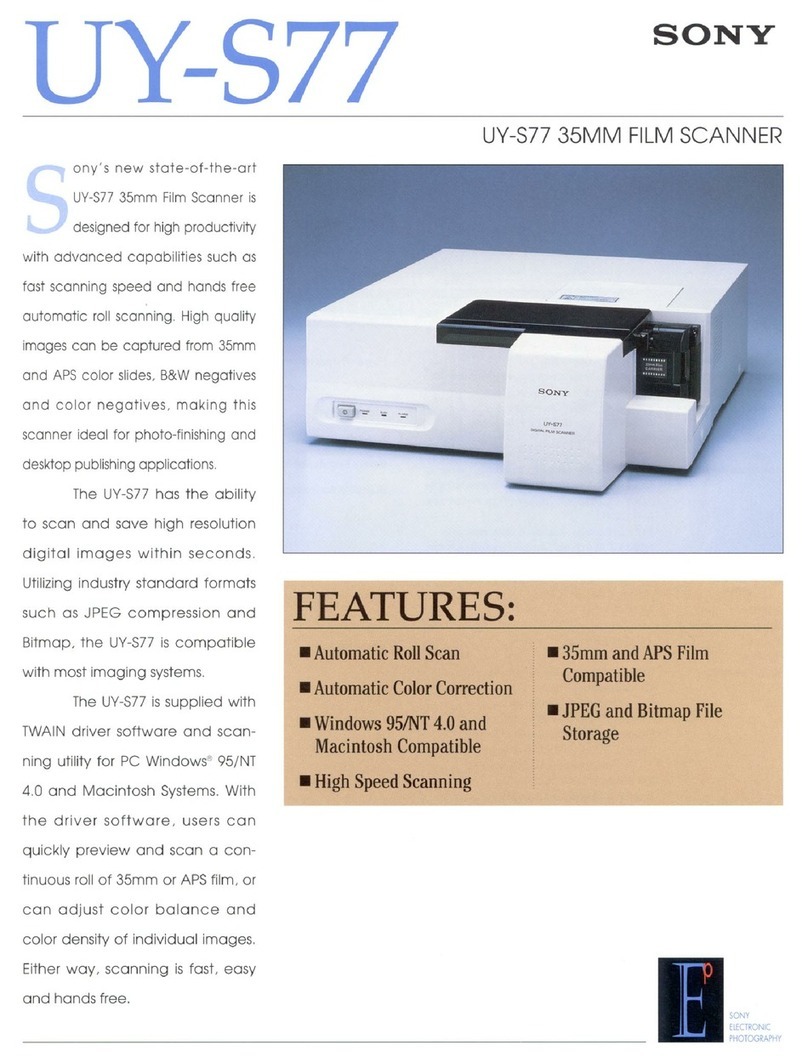
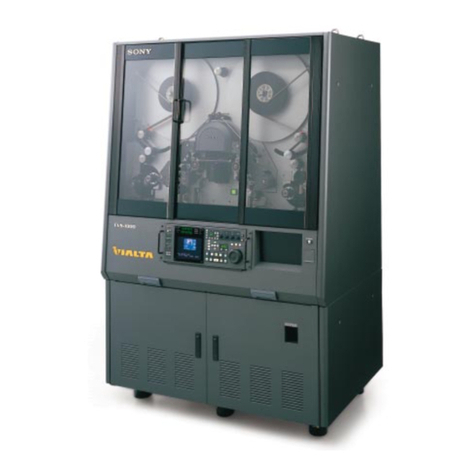
Sony UY-S100 User manual

Operating Instructions
3-206-174-21 (1)
Film Scanner
UY-S100
© 2001 Sony Corporation

2
For the Customers in the U.S.A.
This equipment has been tested and found to comply with
the limits for a Class A digital device, pursuant to Part 15 of
the FCC Rules. These limits are designed to provide
reasonable protection against harmful interference when the
equipment is operated in a commercial environment. This
equipment generates, uses, and can radiate radio frequency
energy and, if not installed and used in accordance with the
instruction manual, may cause harmful interference to radio
communications. Operation of this equipment in a residential
area is likely to cause harmful interference in which case the
user will be required to correct the interference at his own
expense.
You are cautioned that any changes or modifications not
expressly approved in this manual could void your authority
to operate this equipment.
The shielded interface cable recommended in this manual
must be used with this equipment in order to comply with the
limits for a digital device pursuant to Subpart B of Part 15 of
FCC Rules.
Description of signal words
WARNING: Used for the critical situation which may
possibly cause a death or serious injury if the
situation is not avoided.
CAUTION: Used for the critical situation which may
possibly cause a slight injury or a medium
degree of injury if the situation is not avoided.
This word is also used for the critical situation
under which a material damage will be
caused.
Note
It is forbidden to copy or duplicate copyrighted matters
without the permission of the copyright holder.
Possession of copies or duplicates of currency, coins,
securities, uncancelled stamps or postcards, revenue
stamps and other certificates of value is punishable by
law.
To prevent fire or shock hazard, do not
expose the unit to rain or moisture.
To avoid electrical shock, do not open the
cabinet. Refer servicing to qualified personnel
only.
THIS APPARATUS MUST BE EARTHED.
Owner’s Record
The model and serial numbers are located at the rear.
Record the serial number in the space provided below.
Refer to these numbers whenever you call upon your Sony
dealer regarding this product.
Model No. UY-S100
Serial No. _______________________________
WARNING
3
IMPORTANT SAFETY INSTRUCTIONS
When using your photographic equipment, basic safety precautions should always be followed,
including the following:
1. Read and understand all instructions before using.
2. Close supervision is necessary when any appliance is used by or near children. Do not
leave appliance unattended while in use.
3. Care must be taken as burns can occur from touching hot parts.
4. Do not operate appliance with a damaged cord or if the appliance has been dropped or
damaged — until it has been examined by a qualified service personnel.
5. Position the cord so that it will not be tripped over, pulled, or contact hot surfaces.
6. If an extension cord is necessary, a cord with a current rating at least equal to that of the
appliance should be used. Cords rated for less amperage than the appliance may overheat.
7. Always unplug appliance from electrical outlet before cleaning and servicing and when not in
use. Never yank cord to pull plug from outlet. Grasp plug and pull to disconnect.
8. Let appliance cool completely before putting away. Loop cord loosely around appliance
when storing.
9. To reduce the risk of electric shock, do not immerse this appliance in water or other liquids.
10.To reduce the risk of electric shock, do not disassemble this appliance, but take it to a
qualified service personnel when service or repair work is required. Incorrect reassembly
can cause electric shock when the appliance is used subsequently.
11.The use of an accessory attachment not recommended by the manufacturer may cause a
risk of fire, electric shock, or injury to persons.
12.Connect this appliance to a grounded outlet.
SAVETHESE INSTRUCTIONS

4
The Film Scanner comes together with the following accessories. Check
that nothing is missing from your package.
AC power cord (1)
Ferrite filter (2)
CD-ROM (SCANNER DRIVER UY-S100/S90/S77) (1)
Operating Instructions (1)
Software licence agreement (1)
Warranty booklet (1)
Notes
•Retain the original carton and packing materials in case you have to
transport the unit in the future.
•Remove the carrier when transporting the Film Scanner.
•The optional UYA-S77TR film tray cannot be used with this unit. Use
the supplied film tray only.
Checking the Package
Film carrier (1) Slide carrier (1)
Carrier cover (1) Halogen lamp (1)
Film tray (1) SCSI cable clamp (1)

5
Table of Contents
Introduction
Features ............................................................................. 6
Location and Function of Parts and Controls ................ 7
Using the Film Scanner
Hooking Up ........................................................................ 8
Attaching the supplied SCSI cable clamp .........................9
Setting the DIP Switch .................................................... 10
Installing the Scanner Software..................................... 11
Usable Films and Carriers.............................................. 12
Mounting/Removing the Carrier .................................... 13
Loading the Film in the Carrier ...................................... 14
Loading a sleeve film into the carrier..............................14
Loading a slide into the carrier........................................14
Loading an IX240 cartridge film into the carrier ............15
Turning the Power ON/OFF ............................................ 16
Maintenance, Checking and
Other Information
Precautions...................................................................... 17
About the conditions of film ends and remedies.............17
On safety..........................................................................19
On installation .................................................................19
On heat build-up..............................................................19
On cleaning......................................................................19
On repacking ...................................................................19
Maintenance .................................................................... 20
Cleaning inside the film carrier .......................................20
Cleaning cabinet ..............................................................20
Troubleshooting.............................................................. 21
Specifications.................................................................. 22

6
The UY-S100 Film Scanner scans negative film or slides.
This manual contains precautions, explanations for installation,
connection, information for using the films, and so on.
For information about the procedures for scanning films using the Film
Scanner, please consult the Software Manual stored in the supplied CD-
ROM.
Scanning various types of film is possible
By changing the carriers, scanning the following types of film is possible:
•sleeve film (color negative, color positive or monochrome)
•slide (mounted 135 film, or mounted IX240 film)
•IX240 cartridge film
Selection of four scanning resolutions
You can choose from four scanning resolutions for either 135 film or
IX240 film.
The following shows the available resolution modes and the number of
scanned pixels when 135 film is scanned in the normal cropping mode.
•LD: low definition (384 ×256 pixels)
•SD: standard definition (768 ×512 pixels)
•HD: high definition (1,536 ×1,024 pixels)
•UD: ultra definition (3,072 ×2,048 pixels)
Note
The number of scanned pixels differs according to the film type and
cropping mode (panorama, slide, etc.).
Manual adjustment of colors and density of pictures is possible
You can manually adjust the density, and colors (for color pictures) or
contrast (for monochrome pictures) of the prescanned image. In addition,
the full correction which adjusts a picture taken under different lighting
conditions from other pictures, and the lower correction which adjusts a
picture composed almost in one color, are possible.
Consult the Software Manual about procedures.
Features

7
Replacing the halogen lamp
The life of the halogen lamp is about 1,000 hours.
When the supplied lamp burns out, replace it with
the MPS-L60 lamp (not supplied).
For replacement of the halogen lamp, contact your
authorized Sony dealer.
6Connector cover
The slide feeder connector is inside.
7Slide feeder connector (D-sub 9-pin)
Connect the optional UYA-S90SF auto slide feeder.
Caution
This connector allows the connection of the UYA-
S90SF only. Never connect other equipment, as doing
so may cause electrical shock or damage to the
equipment.
8Carrier
Use the correct carrier according to the types of film.
For details, see page 12.
Caution To avoid injury, do not insert your hand or
fingers into the movable area of the carrier.
Location and Function of Parts and Controls
Introduction
1POWER switch and indicator (green)
Press to turn the Film Scanner on or off.
The indicator lights up while the power is ON.
2BUSY indicator (green)
Lights while the Film Scanner is in operation.
3ALARM indicator (orange)
Lights when a problem occurs.
4Carrier cover
Protects the carrier.
If the carrier cover is open, prescanning and scanning
cannot be performed. Also, opening the cover during
prescanning or scanning stops the operation. Make
sure to close the carrier cover.
5Lamp cover
The halogen lamp is inside.
If the lamp cover is open, prescanning and scanning
cannot be performed. Also, opening the cover during
prescanning or scanning stops the operation. Make
sure to close the lamp cover.

8
The Film Scanner connects to the computer that supports the SCSI
interface.
Caution
Turn off the power for each device before attempting to make any
connections. Otherwise, electrical shock may be caused or the device may
be damaged.
Notes
•Connect the AC power cord last.
•For details about connections of computer, consult its manual as well.
Hooking Up
*Connect to either of two SCSI connectors.
SCSI cable
(not supplied)
to SCSI*
to AC IN
AC power cord (supplied) to AC outlet
UY-S100 Film Scanner
DIP switch
(
See page 10
.
)
To remove
Computer
Ferrite filters (supplied)
To connect the SCSI cable
SCSI cable clamp (supplied)
(See page 9.)
12

9
Notes on the SCSI cabling
•Insert the connector into the socket firmly.
•The total length of the SCSI cabling used with a single-host computer
should be less than 3 meters (10 feet).
•The length of the SCSI cabling used with a single-host computer should
be less than 1 meter (3 feet 3 inches).
•If your SCSI cable is not equipped with ferrite filters, attach the supplied
ferrite filters near the connectors at both ends of the cable. (See the figure
on page 8.)
To attach the ferrite filters, release the lock of the ferrite filter with a
screwdriver or a similar tool, pass the cable through the ferrite filter and
lock the filter in place.
Attaching the supplied SCSI cable clamp
To secure the SCSI cabling, use the supplied SCSI cable clamp. Attach the
SCSI cable clamp to the rear panel of the scanner as follows:
1Hook the SCSI cable clamp to the screws on the rear panel.
2Tighten the screws.
Using the Film Scanner

10
Setting the DIP Switch
ON
OFF
4
0
2
0
1
0
00
1
0
2
0
000
0
21
4
00
4
0
1
42
0
421
TERMINATOR
SCSI ID
The DIP switches on the rear panel determine the on/off state of the
internal SCSI bus terminator and SCSI device ID number.
The DIP switches are preset at the factory to “2”as shown below.
Note
Turn off the power before changing the DIP switch setting.
TERMINATOR ON/OFF setting
ON: If the scanner is located at the end of the SCSI bus, this switch should
be set to ON. The internal terminator is ON.
OFF: If another device is at the end of the bus, this switch should be OFF.
SCSI ID setting
The SCSI ID selection must be different from any other device on the bus.
If two SCSI ID devices have the same ID, a malfunction will occur.
SCSI ID SCSI ID switches
0
1
2
3
4
5
6
7

11
Installing the Scanner Software
The UY-S100 Film Scanner is supplied with the TWAIN driver and utility
program in the CD-ROM.
In addition, the instruction manual (Software Manual) for the scanner is
also stored in the CD-ROM.
When using the scanner for the first time
Before starting operation, install the scanner driver porgram and
perform required setup.
For details, read the “README” file in the CD-ROM.
Updating the driver program and firmware
You can download the updated driver program and scanner firmware via
the Internet.
Access the following site:
http://www.sony.co.jp/en/Products/DP-driver/index.html

12
Usable Films and Carriers
The carrier is a device which loads film or slides in the correct position.
Mount a carrier appropriate to the type of film to be scanned.
Film Carrier
135 film Film carrier (supplied)
•Sleeve film
•Film with more than
three frames*
135 film, IX240 film Slide carrier (supplied)
•Slides (mounted)
UYA-S90SF auto slide feeder (optional)
IX240 cartridge film IX240 film carrier (optional)
.......................................................................................................................................................................................................
* The length of three frames should be more than 114 mm or 4 1/2in. (38 mm or 1 1/2in. ×3).
A film with a length of less than 114 mm or 4 1/2in. cannot be scanned.

13
Mounting and removing procedures are the same for all types of carriers.
The illustration below shows the supplied film carrier.
Mounting the carrier
Insert the carrier down into the scanner and fold down the handle to lock.
Then close the carrier cover.
Note
Be sure to close the carrier cover and lamp cover. If either cover is open,
prescanning and scanning cannot be performed. Also, opening the cover
during prescanning or scanning stops the operation.
Removing the carrier
Press the handle to unlock and lift the carrier.
Mounting/Removing the Carrier
Lamp cover
Carrier cover

14
Loading the Film in the Carrier
14
DX code should be located
on the bottom
Emulsion side should
be facing you
Emulsion side should be facing you
This section explains the procedures for loading each type of film in the
carrier. For the procedures previous to loading the film, consult the
instruction manual (Software Manual) stored in the supplied CD-ROM.
Loading a sleeve film into the carrier
Insert the film from the last frame so that the frame numbers are reversed
or the emulsion side facing you. Film is automatically fed into the carrier.
Notes
•If the film contains a transparent portion such as an exposed area of
positive film, the film cannot be fed properly. Cut off the transparent
portion.
•The curling condition of the sleeve film and film ends may cause feeding
error. Fix the film correctly before inserting it into the carrier.
For details, see “About the conditions of film ends and remedies” on page 17.
Loading a slide into the carrier
Insert the slide into the carrier with the emulsion side facing you, and push
in the carrier fully.
Loading slides one by one automatically
The optional UYA-S90SF auto slide feeder allows you to load slides one
by one automatically.
For details on the use of the auto slide feeder, refer to the operating instructions
supplied with the auto slide feeder.

15
Film status indicators
1 Unexposed
2 Partially exposed
3 Exposed (unprocessed)
4 Processed
Shading lid
Process indicator tab
Cartridge eject lever
Make sure that the process
indicator tab is removed.
Loading an IX240 cartridge film into the carrier
Notes
•Before inserting the cartridge, make sure that the shading lid is closed.
•Be sure to use only processed cartridge film whose process indicator tab
is removed. If you insert a cartridge with its tab intact or not removed
completely, “Not processed film is in this cartridge. Please remove the
cartridge.”appears on the screen. In this case, make sure that the
cartridge film is processed and remove the tab completely. Then insert
the cartridge film again.
•Do not touch the carrier or open the lid of the cartridge holder during
prescanning or scanning. This may cause improper scanning.
Parts identification of IX240 cartridge film
1Press the cartridge eject lever and open the lid.
2Insert the cartridge with the film status indicator end up.
3Close the lid.

16
Note
Turn on the power of the computer after turning on the power of all the
other devices.
Turning on the power of the Film Scanner
Press the POWER switch for two seconds or more until the green POWER
indicator lights. The power of the scanner turns on.
When you release the POWER switch, the green BUSY indicator lights
and the green POWER indicator flashes. During this period, the unit
initializes the carrier conditions. When the initialization is completed, the
BUSY indicator goes out and the POWER indicator remains lit in green.
Note
If any trouble occurs when the power is turned on, the ALARM indicator
remains lit in orange. In this case, check if the carrier, carrier cover and
lamp cover are mounted correctly. (page 13)
Turning off the power of the Film Scanner
Press the POWER switch for two seconds or more until the green POWER
indicator starts flashing, then release the switch.
Note
If you cannot turn off the power using the POWER switch, press the reset
switch using a thin tool.
Turning the Power ON/OFF
POWER switch and indicator
ALARM indicator
Reset switch
BUSY
indicator

17
Remedies
Reroll both ends of the film in the opposite direction
of the curl (for about 20 cm or 8 in. each).
(If they cannot be fixed, insert the film while correcting the
curls by hand.)
Reroll both ends of the film in the direction of protrusion of
the curls (for about 20 cm or 8 in. each).
Cut it perpendicularly.
Sleeve film conditions
Sleeve film curls strongly so that the end curls to form a
circle when hanging.
The following curl is more than 5 mm or 3/16 in.
An end is cut diagonally.
An end is torn.
Precautions
About the conditions of film ends and remedies
Reroll in the opposite
direction of the curl
Reroll in the direction of
protrusion of the curls
More than
5 mm or 3/16 in.
Curling conditions
Film ends conditions
In order to avoid feeding errors of the sleeve film in
the film carrier, check the curling condition of the film
and film ends before inserting it into the film carrier.
Please fix the following before inserting the film into
the carrier.
Notes
•If film in bad condition is inserted, it could cause
feeding errors or damage the film.
•If positive film (sleeve) has a transparent portion at
the end, it might be mispositioned during scanning.
Please cut the film end so that the transparent portion
is eliminated.
Maintenance, Checking and Other Information
(continued)

18
Precautions
Remedies
Remove the tape so as not to break the perforations.
Peel them off so that no tape remains.
Fix the broken portion with tape.
(If an end of the film is broken, cut it off.)
Sleeve film conditions
Perforations are broken or space between the last
perforation and the film end is too small.
Tape is attached at the end.
Tape is attached at all edges.
Ends are folded.
Space between perforations is broken.
Film ends conditions
Perforation conditions
If there is enough space
between the broken
perforation and the image
area, cut the broken portion.
If there is not enough
space, cut it off
diagonally.
If there is enough space
between the taped portion
and the image area, cut
the taped portion.
If there is not enough
space, peel off the
tape completely.
Less than the mark
width of DX code
Tape
Tape
Straighten
If there is not enough
space, straighten the
folded portion.
If there is enough space
between the folded end and
the image area, cut the
folded end.

19
On safety
•The rating plate indicating operating voltage, power
consumption, etc. is located at the rear.
•Should any solid object or liquid fall into the cabinet,
unplug the unit and have it checked by qualified
personnel before operating it further.
•Unplug the unit from the wall outlet if it is not to be
used for several days or more.
•To disconnect the AC power cord, pull it out by the
plug. Never pull the cord itself.
•Do not attempt to disassemble the cabinet. Refer
servicing to qualified personnel only.
•Do not replace the halogen lamp by yourself when it
is burned out. Ask your authorized Sony dealer to
replace the halogen lamp.
On installation
•Allow adequate air circulation to prevent internal heat
build-up. Do not place the unit on surfaces (rugs,
blankets, etc.) or near materials (curtains, draperies)
that may block the ventilation holes.
•Do not install the unit in a location near heat sources
such as radiators or air ducts, or in a place subject to
direct sunlight, excessive dust or humidity,
mechanical vibration or shock.
•If the unit is brought directly from a cold to a warm
location, moisture may condense inside the unit and
cause damage to the unit. When you first install the
unit, or when you move it from a cold to a warm
location, wait for a while before operating the unit.
On heat build-up
Heat builds up in the unit if it is used for an extended
period of time. If this occurs, allow the unit to cool
down.
On cleaning
To keep the unit looking brand-new, periodically clean
it with a mild detergent solution. Never use strong
solvents, such as thinner or benzine, or abrasive
cleansers since these will damage the cabinet. As a
safety precaution, unplug the unit before cleaning it.
On repacking
Do not throw away the carton and packing materials.
They make an ideal container in which to transport the
unit.
When shipping the unit to another location, repack it
as illustrated on the carton.
If you have any questions about this unit, contact your
authorized Sony dealer.
NOTICE TO USERS
IN NO EVENT SHALL SONY CORPORATION BE
LIABLE FOR ANY INCIDENTAL,
CONSEQUENTIAL OR SPECIAL DAMAGES,
WHETHER BASED ON TORT, CONTRACT, OR
OTHERWISE, ARISING OUT OF OR IN
CONNECTION WITH THIS MANUAL, THE
SOFTWARE OR OTHER INFORMATION
CONTAINED HEREIN OR THE USE THEREOF.
Sony Corporation reserves the right to make any
modification to this manual or the information
contained herein at any time without notice.
The software described herein may also be governed
by the terms of a separate user license agreement.

20
Cleaning inside the film carrier
There are five rubber rollers (shaded in the figure below) inside the film
carrier. Clean away the dust and dirt on the rubber rollers using alcohol.
Otherwise, the dust and dirt may slip on to the film and causes film
misfeeding. We recommend that you clean the rubber rollers once a
day.
Note
Use alcohol for cleaning the rubber rollers only. Do not use it for cleaning
other portions.
Cleaning cabinet
When the cabinet becomes dirty, wipe it with a close moistened with water
or neutral detergent dissolved in water. Do not use benzene, alcohol,
thinner or chemical cloth as they may damage the finish.
Maintenance
Press the tab to open
Rubber roller
Table of contents
Other Sony Scanner manuals

Sony
Sony UYA-S77FC User manual

Sony
Sony FVS-1000 Series User manual

Sony
Sony SmartFile Finder User manual

Sony
Sony FVS-1000 Series User manual

Sony
Sony SmartFile Finder SF-F1 User manual

Sony
Sony FVS-1000 Series User manual

Sony
Sony UY-S77 User manual

Sony
Sony UYA-S77TR User manual

Sony
Sony UY-S90 User manual
Popular Scanner manuals by other brands

Pepperl+Fuchs
Pepperl+Fuchs IDM-Z1-161-M-1D-J1-BT-N-N0 manual

Honeywell
Honeywell 4800dr - Document Camera quick start guide

Fujitsu
Fujitsu fi-5650C Operator's guide

Visioneer
Visioneer RoadWarrior Strobe XP 200 installation guide

Sceptre
Sceptre S1200 Installation

RSF Elektronik
RSF Elektronik MS AK MS 11 Mounting instructions