3
GB
Table of Contents
List of Button Locations and
Reference Pages
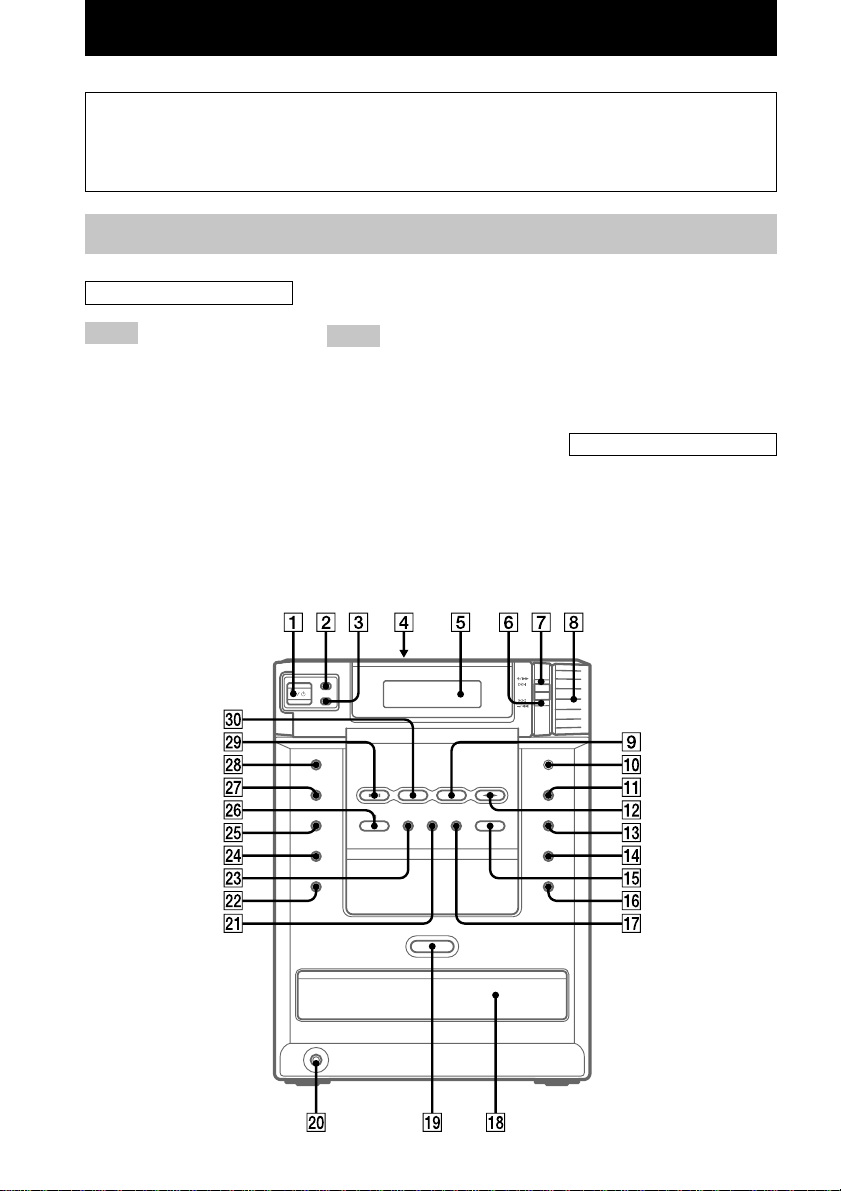
Main unit ................................................... 4
Remote control .......................................... 5
Getting Started
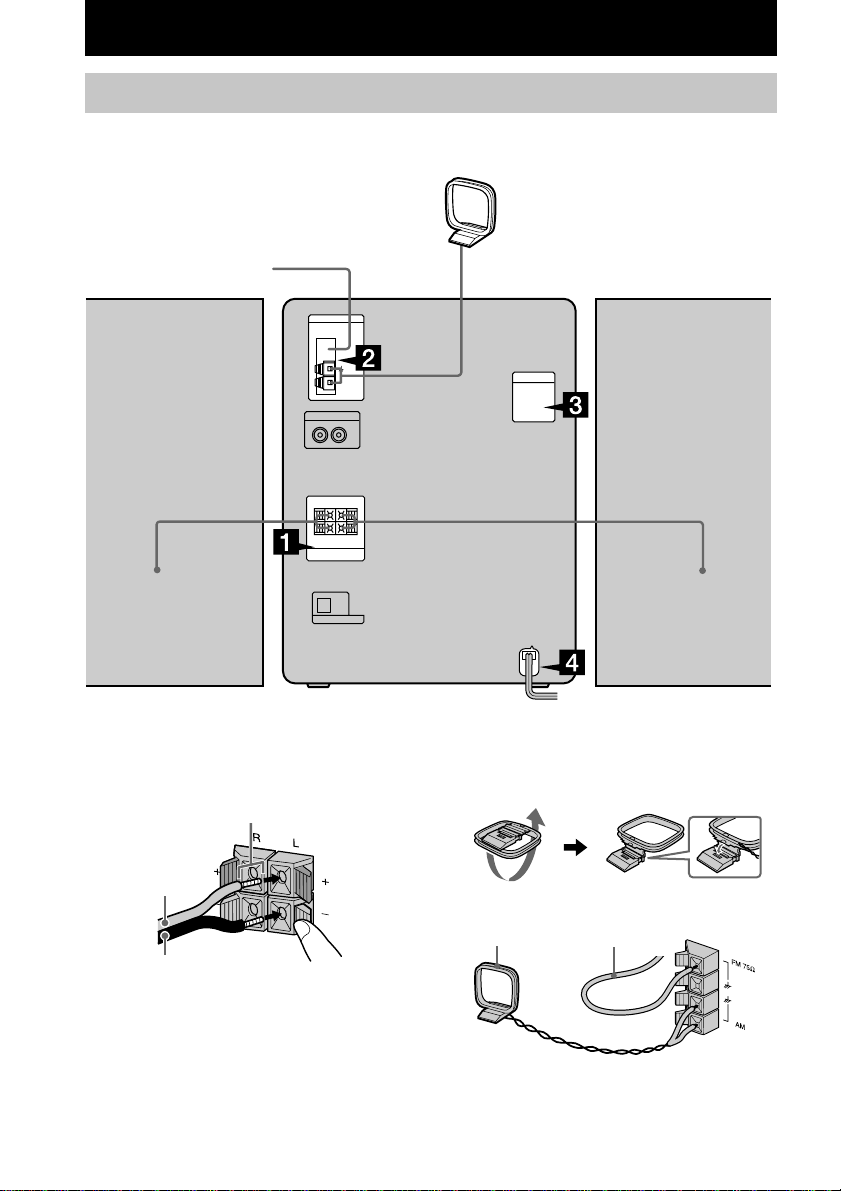
Hooking up the system.............................. 6
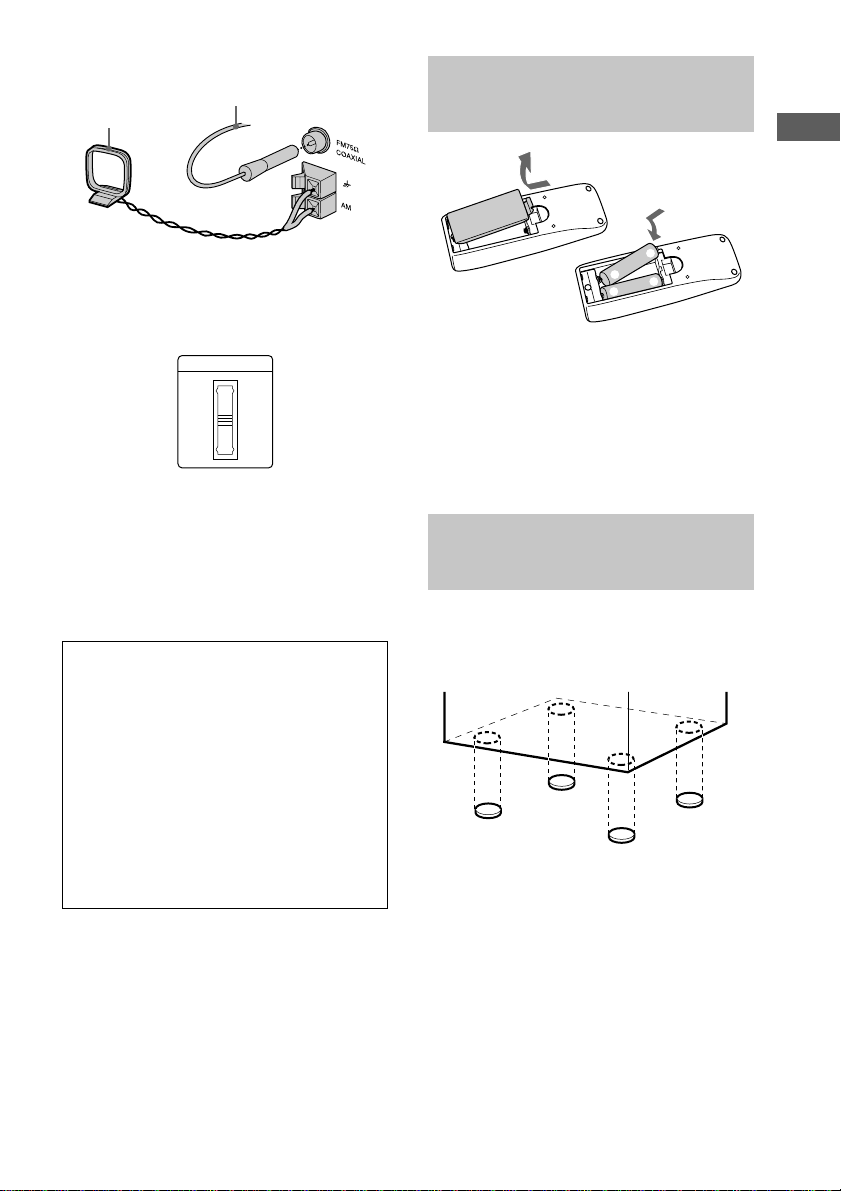
Inserting two R6 (size AA) batteries
into the remote .................................... 7
Attaching the speaker pads ....................... 7
Setting the clock ........................................ 8
CD
Loading a CD ............................................ 8
Playing a CD
—Normal Play/Shuffle Play /Repeat
Play ..................................................... 9
Programing CD tracks
—Program Play ................................ 10
Tuner
Presetting radio stations .......................... 11
Listening to the radio
—Preset Tuning ................................ 13
—Manual Tuning ............................. 13
Using the Radio Data System (RDS)* .... 14
Tape
Loading a tape ......................................... 15
Playing a tape .......................................... 15
Recording to a tape
—CD Synchro Recording/Recording
Manually/Program Edit .................... 16
Timer-recording radio programs ............. 17
Sound Adjustment
Adjusting the sound—GROOVE ............ 18
Selecting the preset music menu ............. 19
Timer
Falling asleep to music
— Sleep Timer ................................. 20
Waking up to music
— Daily Timer ................................. 20
Display
Turning off the display
— Power Saving Mode .................... 21
Adjusting the brightness of the display
back light .......................................... 22
Using the display..................................... 22
Optional Components
Hooking up optional components ........... 23
Listening to audio from a connected
component ........................................ 24
Recording on a connected digital
component ........................................ 24
Recording audio from a connected
component ........................................ 24
Troubleshooting
Problems and remedies ........................... 25
Messages ................................................. 27
Additional Information
Precautions .............................................. 28
Specifications .......................................... 30
* European model only