Sony WX-GT90BT User manual

SERVICE MANUAL
Sony Corporation
Published by Sony Techno Create Corporation
SPECIFICATIONS
9-893-631-01
2012L33-1
© 2012.12
US Model
Canadian Model
AEP Model
UK Model
E Model
WX-GT90BT
Russian Model
WX-GT90BTE
Indian Model
WX-GT99BT
Ver. 1.0 2012.12
Model Name Using Similar Mechanism MEX-BT4100U/
WX-GT80UE/GT80UI/GT88UI
Mechanism Type MG-101CA-188
Optical Pick-up Name DAX-25A
• The tuner and CD sections have no adjustments.
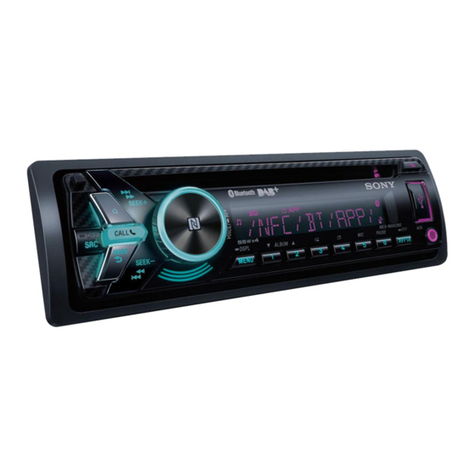
Photo: WX-GT90BT
WX-GT90BT/GT90BTE/
GT99BT
AUDIO SYSTEM
(US and Canadian models)
Tuner section
FM
Tuning range: 87.5 – 107.9 MHz
Antenna (aerial) terminal:
External antenna (aerial) connector
Intermediate frequency: 25 kHz
Usable sensitivity: 8 dBf
Selectivity: 75 dB at 400 kHz
Signal-to-noise ratio: 80 dB (stereo)
Separation: 50 dB at 1 kHz
Frequency response: 20 – 15,000 Hz
AM
Tuning range: 530 – 1,710 kHz
Antenna (aerial) terminal:
External antenna (aerial) connector
Intermediate frequency:
9,115 kHz or 9,125 kHz/5 kHz
Sensitivity: 26 μV
CD Player section
Signal-to-noise ratio: 120 dB
Frequency response: 10 – 20,000 Hz
Wow and utter: Below measurable limit
USB Player section
Interface: USB (Full-speed)
Maximum current: 1 A
Wireless Communication
Communication System:
Bluetooth Standard version 2.1 + EDR
Output:
Bluetooth Standard Power Class 2
(Max. +4 dBm)
Maximum communication range:
Line of sight approx. 10 m (33 )*1
HFP (Handsfree Prole) 1.5
PBAP (Phone Book Access Prole)
SPP (Serial Port Prole)
*1 e actual range will vary depending on
factors such as obstacles between devices,
magnetic elds around a microwave oven,
static electricity, reception sensitivity, antenna
(aerial)’s performance, operating system,
soware application, etc.
*2 Bluetooth standard proles indicate the
purpose of Bluetooth communication
between devices.
Power amplier section
Output: Speaker outputs
Speaker impedance: 4 – 8 ohms
Maximum power output: 52 W ×4 (at 4 ohms)
General
Outputs:
Audio outputs terminal (front, rear, sub)
Power antenna (aerial)/Power amplier control
terminal (REM OUT)
Inputs:
SiriusXM input terminal
(US and Canadian models only)
Remote controller input terminal
Antenna (aerial) input terminal
MIC input terminal
AUX input jack (stereo mini jack)
USB port
Power requirements: 12 V DC car battery
(negative ground (earth))
Dimensions: Approx. 178 ×100 ×178 mm
(7 1/8×4 ×7 1/8in) (w/h/d)
Mounting dimensions: Approx. 182 ×111 ×159
mm (7 1/4×4 3/8×6 3/8in) (w/h/d)
Mass: Approx. 1.4 kg (3 lb 2 oz)
Supplied accessories:
Remote commander: RM-X231
Microphone
Parts for installation and connections (1 set)
FOR UNITED STATES CUSTOMERS. NOT
APPLICABLE IN CANADA, INCLUDING
(US and Canadian models only)
IN THE PROVINCE OF QUEBEC.
POUR LES CONSOMMATEURS AUX
ÉTATS-UNIS. NON APPLICABLE AU
CANADA, Y COMPRIS LA PROVINCE DE
QUÉBEC.
CEA2006 Standard
Power Output: 17 Watts RMS 4 at
4 Ohms < 1% THD+N
SN Ratio: 80 dBA
(reference: 1 Watt into 4 Ohms)
AUDIO POWER SPECIFICATIONS
(US and Canadian models only)
Design and specications are subject to change
without notice.
Tuner section
(AEP and UK models)
FM
Tuning range: 87.5 – 108.0 MHz
Antenna (aerial) terminal:
External antenna (aerial) connector
Intermediate frequency: 25 kHz
Usable sensitivity: 8 dBf
Selectivity: 75 dB at 400 kHz
Signal-to-noise ratio: 80 dB (stereo)
Separation: 50 dB at 1 kHz
Frequency response: 20 – 15,000 Hz
MW/LW
Tuning range:
MW: 531 – 1,602 kHz
LW: 153 – 279 kHz
Antenna (aerial) terminal:
External antenna (aerial) connector
Intermediate frequency:
9,124.5 kHz or 9,115.5 kHz/4.5 kHz
Sensitivity: MW: 26 μV, LW: 45 μV
Tuner section (Russian model)
FM
Tuning range:
FM1/FM2: 87.5 – 108.0 MHz (at 50 kHz step)
FM3: 65 – 74 MHz (at 30 kHz step)
Antenna (aerial) terminal:
External antenna (aerial) connector
Intermediate frequency: 25 kHz
Usable sensitivity: 8 dBf
Selectivity: 75 dB at 400 kHz
Signal-to-noise ratio: 80 dB (stereo)
Separation: 50 dB at 1 kHz
Frequency response: 20 – 15,000 Hz
MW/LW
Tuning range:
MW: 531 – 1,602 kHz
LW: 153 – 279 kHz
Antenna (aerial) terminal:
External antenna (aerial) connector
Intermediate frequency:
9,124.5 kHz or 9,115.5 kHz/4.5 kHz
Sensitivity: MW: 26 μV, LW: 45 μV
Tuner section (E and Indian models)
FM
Tuning range:
87.5 – 108.0 MHz (at 50 kHz step)
87.5 – 108.0 MHz (at 100 kHz step)
87.5 – 107.9 MHz (at 200 kHz step)
FM tuning step:
50 kHz/100 kHz/200 kHz switchable
Antenna (aerial) terminal:
External antenna (aerial) connector
Intermediate frequency: 25 kHz
Usable sensitivity: 8 dBf
Selectivity: 75 dB at 400 kHz
Signal-to-noise ratio: 80 dB (stereo)
Separation: 50 dB at 1 kHz
Frequency response: 20 – 15,000 Hz
AM
Tuning range:
531 – 1,602 kHz (at 9 kHz step)
530 – 1,710 kHz (at 10 kHz step)
AM tuning step: 9 kHz/10 kHz switchable
Antenna (aerial) terminal:
External antenna (aerial) connector
Intermediate frequency:
9,124.5 kHz or 9,115.5 kHz/4.5 kHz
(at 9 kHz step)
9,115 kHz or 9,125 kHz/5 kHz
(at 10 kHz step)
Sensitivity: 26 μV
Frequency band:
2.4 GHz band (2.4000 – 2.4835 GHz)
Modulation method: FHSS
Compatible Bluetooth Proles*2:
A2DP (Advanced Audio Distribution Prole)
1.2
AVRCP (Audio Video Remote Control Prole)
1.3

WX-GT90BT/GT90BTE/GT99BT
2
NOTES ON CHIP COMPONENT REPLACEMENT
• Never reuse a disconnected chip component.
• Notice that the minus side of a tantalum capacitor may be dam-
aged by heat.
FLEXIBLE CIRCUIT BOARD REPAIRING
• Keep the temperature of soldering iron around 270 °C during
repairing.
• Do not touch the soldering iron on the same conductor of the
circuit board (within 3 times).
• Be careful not to apply force on the conductor when soldering
or unsoldering.
SAFETY-RELATED COMPONENT WARNING!
COMPONENTS IDENTIFIED BY MARK 0OR DOTTED LINE
WITH MARK 0ON THE SCHEMATIC DIAGRAMS AND IN
THE PARTS LIST ARE CRITICAL TO SAFE OPERATION.
REPLACE THESE COMPONENTS WITH SONY PARTS
WHOSE PART NUMBERS APPEAR AS SHOWN IN THIS
MANUAL OR IN SUPPLEMENTS PUBLISHED BY SONY.
ATTENTION AU COMPOSANT AYANT RAPPORT
À LA SÉCURITÉ!
LES COMPOSANTS IDENTIFIÉS PAR UNE MARQUE 0SUR
LES DIAGRAMMES SCHÉMATIQUES ET LA LISTE DES
PIÈCES SONT CRITIQUES POUR LA SÉCURITÉ DE FONC-
TIONNEMENT. NE REMPLACER CES COMPOSANTS QUE
PAR DES PIÈCES SONY DONT LES NUMÉROS SONT DON-
NÉS DANS CE MANUEL OU DANS LES SUPPLÉMENTS
PUBLIÉS PAR SONY.
CAUTION
Use of controls or adjustments or performance of procedures
other than those specified herein may result in hazardous radia-
tion exposure.
US and Canadian models:
CAUTION
The use of optical instruments with this
product will increase eye hazard.
SiriusXM Connect Vehicle Tuner and
Subscription sold separately.
www.siriusxm.com
Sirius, XM and all related marks and logos
are trademarks of Sirius XM Radio Inc. All
rights reserved.
e Bluetooth word mark and logos are
owned by the Bluetooth SIG, Inc. and any
use of such marks by Sony Corporation is
under license. Other trademarks and trade
names are those of their respective owners.
is product is protected by certain
intellectual property rights of Microso
Corporation. Use or distribution of such
technology outside of this product is
prohibited without a license from Microso
or an authorized Microso subsidiary.
Pandora, the Pandora logo, and the Pandora
trade dress are trademarks or registered
trademarks of Pandora Media, Inc., used
with permission.
Android is a trademark of Google Inc. Use
of this trademark is subject to Google
Permissions.
BlackBerry® is the property of Research In
Motion Limited and is registered and/or
used in the U.S. and countries around the
world. Used under license from Research In
Motion Limited.
ZAPPIN and Quick-BrowZer are
trademarks of Sony Corporation.
Windows Media is either a registered
trademark or trademark of Microso
Corporation in the United States and/or
other countries.
iPhone, iPod, iPod classic, iPod nano, and
iPod touch are trademarks of Apple Inc.,
registered in the U.S. and other countries.
App Store is a service mark of Apple Inc.
MPEG Layer-3 audio coding technology
and patents licensed from Fraunhofer IIS
and omson.
For the State of California, USA only
Perchlorate Material – special handling
may apply, See
www.dtsc.ca.gov/hazardouswaste/perchlorate
Perchlorate Material: Lithium battery
contains perchlorate

WX-GT90BT/GT90BTE/GT99BT
3
SECTION 1
SERVICING NOTES
The laser diode in the optical pick-up block may suffer electro-
static break-down because of the potential difference generated by
the charged electrostatic load, etc. on clothing and the human body.
During repair, pay attention to electrostatic break-down and also
use the procedure in the printed matter which is included in the
repair parts.
The flexible board is easily damaged and should be handled with
care.
NOTES ON LASER DIODE EMISSION CHECK
Never look into the laser diode emission from right above when
checking it for adjustment. It is feared that you will lose your sight.
If the optical pick-up block is defective, please replace the whole
optical pick-up block.
Never turn the semi-fixed resistor located at the side of optical
pick-up block.
optical pick-up
semi-fixed resistor
UNLEADED SOLDER
Boards requiring use of unleaded solder are printed with the lead-
free mark (LF) indicating the solder contains no lead.
(Caution: Some printed circuit boards may not come printed with
the lead free mark due to their particular size)
: LEAD FREE MARK
Unleaded solder has the following characteristics.
• Unleaded solder melts at a temperature about 40 °C higher
than ordinary solder.
Ordinary soldering irons can be used but the iron tip has to be
applied to the solder joint for a slightly longer time.
Soldering irons using a temperature regulator should be set to
about 350 °C.
Caution: The printed pattern (copper foil) may peel away if
the heated tip is applied for too long, so be careful!
• Strong viscosity
Unleaded solder is more viscous (sticky, less prone to flow)
than ordinary solder so use caution not to let solder bridges
occur such as on IC pins, etc.
• Usable with ordinary solder
It is best to use only unleaded solder but unleaded solder may
also be added to ordinary solder.
1. SERVICING NOTES ............................................. 3
2. GENERAL .................................................................. 9
3. DISASSEMBLY
3-1. Disassembly Flow........................................................... 15
3-2. Mini Fuse (Blade Type) (10A/32V) (FU1), Cover ......... 16
3-3. Front Panel Block ........................................................... 16
3-4. CD Mechanism Deck (MG-101CA-188) ....................... 17
3-5. Connection Cable (MIC) (MJ1)...................................... 17
3-6. MAIN Board (with BT Board) ....................................... 18
3-7. SERVO Board................................................................. 18
3-8. Chassis (T) Sub Assy ...................................................... 19
3-9. Roller Arm Assy.............................................................. 19
3-10. Chassis (OP) Assy........................................................... 20
3-11. Chucking Arm Sub Assy................................................. 20
3-12. Sled Motor Assy.............................................................. 21
3-13. Optical Pick-up Section .................................................. 22
3-14. Optical Pick-up ............................................................... 22
3-15. Knob................................................................................ 23
4. TEST MODE ............................................................ 24
5. DIAGRAMS
5-1. Block Diagram - SERVO Section - ................................ 25
5-2. Block Diagram - MAIN Section -................................... 26
5-3. Block Diagram
- PANEL/POWER SUPPLY Section -............................ 27
5-4. Schematic Diagram - MAIN Section (1/5) -................... 29
5-5. Schematic Diagram - MAIN Section (2/5) -................... 30
5-6. Schematic Diagram - MAIN Section (3/5) -................... 31
5-7. Schematic Diagram - MAIN Section (4/5) -................... 32
5-8. Schematic Diagram - MAIN Section (5/5) -................... 33
5-9. Printed Wiring Board - MAIN Section (1/2) -................ 34
5-10. Printed Wiring Boards - MAIN Section (2/2) - .............. 35
5-11. Printed Wiring Board
- KEY Board (Component Side) -................................... 36
5-12. Printed Wiring Board
- KEY Board (Conductor Side) - .................................... 37
5-13. Schematic Diagram - KEY Board - ................................ 38
6. EXPLODED VIEWS
6-1. Main Section ................................................................... 49
6-2. Front Panel Section......................................................... 50
6-3. CD Mechanism Deck Section (MG-101CA-188) .......... 51
7. ELECTRICAL PARTS LIST .............................. 52
Accessories are given in the last of the electrical parts list.
TABLE OF CONTENTS NOTES ON HANDLING THE OPTICAL PICK-UP
BLOCK OR BASE UNIT

WX-GT90BT/GT90BTE/GT99BT
4
NOTE THE MAIN BOARD OR SYSTEM CONTROLLER
(IC501) REPLACING
When the MAIN board or system controller (IC501) is replaced,
the destination setting is necessary.
1. Prior Setting
It is necessary to set with the remote commander so that it can
operate by the main unit.
Setting method:
1. In the state of power on, press the buttons in order of the [4] t
[5] t[6] on the remote commander (press only the [6] button
for two seconds).
2. Press the buttons in order of the [ ] t[ ] t[ENTER] on
the remote commander.
Setting screen
12 digit
OP5 OP4 OP3 OP2 OP1 OP0
TP
3. Press the buttons in order of the [ENTER] (four times) t[ ]
t[ENTER] (two times) on the remote commander.
4. Setting is completed, and the unit returns to the state of source
off (the clock is displayed on the liquid crystal display).
2. Destination Setting
Set destination according to the procedure below.
2-1. Setting the Destination Code
1. In the state of source off (the clock is displayed), enter the test
mode by pressing the buttons in order of the [ 4] t[MIC/
ZAP 5] t[PAUSE 6] (press only the [PAUSE 6] button for
two seconds).
2. In the state in which the system controller version is displayed
on the liquid crystal display (refer to following figure), enter
the destination setting mode by pressing the buttons in order
of the [M> SEEK+] t[SEEK– . m] t[PUSH EN-
TER/MENU/ APP].
(Displayed characters/values in the following figure are ex-
ample)
System controller version
3. Input the alphanumeric character of 12 digits of “F XXXXXX”
displayed on the liquid crystal display, and execute the destina-
tion setting.
Note: Refer to following “2-3. Entering the Destination Code” for opera-
tion method.
4. The resetting operation is executed by pressing the [SOURCE
OFF] button for 1 second after the setting ends, and the unit
returns to the normal condition.
2-2. Display in Destination Setting Mode
(Displayed characters/values in the following figure are example)
Destination code
12 digit
OP5 OP4 OP3 OP2 OP1 OP0
2-3. Entering the Destination Code
• Method of operation by main unit
1. Rotate the control dial, and select the alphanumeric character
of “0 to F”.
2. The digit advances by pressing the [PUSH ENTER/MENU/
APP] or [M> SEEK+] button.
The digit returns by pressing the [MODE ] or [SEEK– .
m] button.
3. The setting is completed by pressing the [PUSH ENTER/
MENU/ APP] button, and the initialization operation is done.
• Method of operation by remote commander
1. Press the [ ] or [ ] button, and select the alphanumeric char-
acter of “0 to F”.
2. The digit advances by pressing the [ ] button.
The digit returns by pressing the [ ] button.
3. The setting is completed by pressing the [ENTER] button, and
the initialization operation is done.
PTY 1 2 3 4 5 6

WX-GT90BT/GT90BTE/GT99BT
5
TEST DISCS
Use following TEST DISC (for CD) when this set confirms the
operation and checks it.
Part No. Description
3-702-101-01 DISC (YEDS-18), TEST
4-225-203-01 DISC (PATD-012), TEST
NOTE FOR REPLACEMENT OF THE BT BOARD
When repairing, the complete BT board should be replaced since
any parts in the BT board cannot be repaired.
NOTE FOR REPLACEMENT OF THE SERVO BOARD
When repairing, the complete SERVO board should be replaced
since any parts in the SERVO board cannot be repaired.
NOTE FOR REPLACEMENT OF THE SENSOR BOARD
When the SENSOR board is defective, exchange the MECHANI-
CAL BLOCK ASSY.
IMPORTANT NOTE OF “INITIALIZING”
The purpose of “Bluetooth Initialize” is to initialize the Bluetooth
connection history (HF/Audio Streaming). (To delete the device
information for the devices that you connected to when searching,
etc.)
When the complete BT board or complete MAIN board (including
BT board) are replaced, it is necessary to initialize this unit.
Refer to the following, initialize this unit.
Note: Phonebook data and dialed/received call history can be deleted by
executing “Reset.”
Initializing Bluetooth Settings
You can initialize all the Bluetooth related
settings (pairing information, preset
number, device information, etc.) from this
unit.
1Press and hold for 1
second to turn o the power.
2Press , rotate the control dial
until "BT" appears, then press it.
e menu list appears.
3Rotate the control dial to select “BT
INIT,” then press it.
e conrmation appears.
4Rotate the control dial to select “INIT-
YES,” then press it.
“INITIAL” ashes while initializing the
Bluetooth settings; “COMPLETE”
appears when initializing has nished.
5Press (BACK) to return to the
previous display.
Note
When disposing of this unit, preset numbers
should be deleted with “BT INIT.”
NOTE ON CONNECTION
If speaker and amplier are not connected correctly,
“FAILURE” appears in the display. In this case, make sure
the speaker and amplier are connected correctl
y
.
2-4. Destination Code
Model Destination OP5 OP4 OP3 OP2 OP1 OP0
WX-GT90BT
US, Canadian 5 E 1 6 0 2
AEP, UK 4 C 1 6 0 1
E6C1E00
WX-GT90BTE Russian C C 1 6 2 7
WX-GT99BT Indian 6 C 1 E 1 0
3. Confirmation After Destination Setting
Execute the following operation after completing the destination
setting, and confirm a correct destination was set.
Destination setting checking method:
1. In the state of source off (the clock is displayed on the liquid
crystal display), enter the test mode by pressing the buttons in
order of the [ 4] t[MIC/ZAP 5] t[PAUSE 6] (press only
the [PAUSE 6] button for two seconds).
2. In the state in which the system controller version is displayed
on the liquid crystal display (refer to following figure), enter
the destination setting value display mode by pressing the
[DSPL SCRL] button three times.
(Displayed characters/values in the following figure are ex-
ample) System controller version
3. Confirm the alphanumeric character of 12 digits in liquid crys-
tal display is an value correctly input.
(Displayed characters/values in the following figure are ex-
ample)
Destination code
12 digit
OP5 OP4 OP3 OP2 OP1 OP0
4. The resetting operation is executed by pressing the [SOURCE
OFF] button for 1 second after the confirming ends, and the
unit returns to the normal condition.

WX-GT90BT/GT90BTE/GT99BT
6
NOTE FOR REPLACEMENT OF THE USB CONNEC-
TOR (CN971) AND THE AUX JACK (J901)
To replace the USB connector and AUX jack requires alignment.
1. Insert the USB connector and AUX jack into the front panel.
2. Place the KEY board on the front panel and align the terminals
of the USB connector and AUX jack with the holes in the KEY
board.
3. Solder seven terminals of the connector and three terminals of
the jack.
KEY board
front panel
USB (socket)
connector
(CN971)
AUX jack
(J901)
REPLACING THE LITHIUM BATTERY
OF THE REMOTE COMMANDER
When the battery becomes weak, the range
of the remote commander becomes shorter.
Replace the battery with a new CR2025
lithium battery. Use of any other battery
may present a risk of re or explosion.
Notes on the lithium battery
tKeep the lithium battery out of the reach of
children. Should the battery be swallowed,
immediately consult a doctor.
tWipe the battery with a dry cloth to assure a
good contact.
tBe sure to observe the correct polarity when
installing the battery.
tDo not hold the battery with metallic tweezers,
otherwise a short-circuit may occur.
+ side up
WARNING
Battery may explode if mistreated.
Do not recharge, disassemble, or dispose
of in re.
You can cancel the demonstration display
which appears while this unit is turned off.
1Press , rotate the control dial
until “DISPLAY” appears, then press
it.
2Rotate the control dial until “DEMO”
appears, then press it.
3Rotate the control dial to select
“DEMO-OFF,” then press it.
e setting is complete.
4Press (BACK) to return to the
previous display.
e display returns to normal reception/
play mode.
CANCELING THE DEMO MODE

WX-GT90BT/GT90BTE/GT99BT
7
EXTENSION CABLE AND SERVICE POSITION
When repairing or servicing this set, connect the jig cable (extension cable (CD mecha)) as shown below.
• Connect the MAIN board (CN700) and the SERVO board (CN401) with the jig cable.
Jig cable:
Part No. Description
A-1818-424-A EXTENSION CABLE (CD MECHA)
SERVO board
(CN401)
MAIN board
(CN700)
extension cable (CD mecha)

WX-GT90BT/GT90BTE/GT99BT
8
6. Bluetooth Phone (Hands Free) Function Check
Note 1: Depending on the connecting device, Signal-strength/Battery-
remaining indications might not be displayed.
Or, depending on the connecting device, the levels of indications
are shown incorrectly.
Even if you see no indications or wrong indications, they are not
failures of WX-GT90BT/GT90BTE/GT99BT.
1. Search for this unit from the Bluetooth device (cellular phone),
and confirm whether this unit (“Sony Automotive”) is dis-
played.
2. Search for the distance of this unit and the Bluetooth device
(cellular phone) about 5 m apart.
Confirm whether the Bluetooth device (or this unit) is dis-
played after it searches.
3. Do the pairing of the cellular phone and this unit (input of
passkey).
4. Connect the cellular phone with this unit, and confirm the
“HF” icon ( ) lights.
5. Confirm the connection continues even if the distance of the
cellular phone and this unit is separated by about 5 m.
6. Set this unit besides the “BT PHONE” source, and call the cel-
lular phone connected with this unit.
Confirm the automatic change of this unit into “BT PHONE”
source, and the change into the screen for incoming calls.
Confirm the ring tone is heard from the front speaker.
7. Take a phone call (press the [CALL ] button), and start a
conversation.
Confirm the other person voice is heard from the speaker.
Speak toward an external microphone at the following condi-
tion, and confirm the other party hears its voice (An external
microphone is connected).
Compare the sound quality with a normal set. Confirm that
there is no big difference.
8. Turn on ACC from off, and confirm whether this set connects
Bluetooth with the cellular phone again.
Note 2: Depending on the cellular phone, it might not reconnect automati-
cally when ACC is turned on.
7. Bluetooth Audio Function Check
Note 1: Depending on the connecting BT Audio device, track information
(e.g. track name, playback time) can be on display.
If the device doesn’t support AVRCP1.3, or, if AVRCP1.3 fea-
ture of the device has not been validated with WX-GT90BT/GT-
90BTE/GT99BT, the track information won’t be shown.
Even if there is no track information on display during playback
of an AVRCP1.3 device, it is not a failure of WX-GT90BT/GT-
90BTE/GT99BT.
1. Connect the Bluetooth audio device (or cellular phone with
Bluetooth audio function) with this unit, and confirm the “Au-
dio Streaming” icon ( ) lights.
2. Playback Bluetooth audio. Confirm the sound is emitted from
this unit when this unit is switched to “Bluetooth Audio”
source.
3. Confirm whether Bluetooth audio can be controlled by oper-
ating this unit (the [SEEK+ > M], [m. SEEK–] and
[PAUSE 6] buttons operation).
Note 2: Varies depending on the connected Bluetooth audio device.
8. What to Do after Checking
• After checking, select “BT INIT” from the menu list of this
unit to execute initialization.
(Connected device information is deleted)
BLUETOOTH FUNCTION CHECKING METHOD USING
A CELLULAR PHONE
1. Required Equipment
• Set to be tested (WX-GT90BT/GT90BTE/GT99BT), external
microphone of attachment
• Cellular phone (Recommended SEMC W880 or W910i, or se-
lect from connectable cellular phones list)
• Bluetooth audio devices (SONY NWZ-A826, or select from
connectable cellular phones/audio devices list)
• Speaker connection (at least Front L/R ch)
• DC power supply (12 V)
2. Preparation
• Confirm the setting of the WX-GT90BT/GT90BTE/GT99BT,
and note down it.
• Press the [CALL ] button and rotate the control dial until
“SET PAIRING” appears, then press it, confirm that the Blue-
tooth signal icon ( ) is flashing.
• Turn on the Bluetooth function of the cellular phone.
3. Test Environment
• No other Bluetooth device is making a communication in the
periphery (within 20 m).
• No other WX-GT90BT/GT90BTE/GT99BT are supplied with
electric power.
• There are no two or more wireless LAN access points in the
periphery (with 50 m) (one is OK).
• The set should be tested in a place such as a meeting room, free
from ambient noise.
• The speaker at the far end should be in a place such as another
meeting room separated acoustically.
4. Setting
Install the WX-GT90BT/GT90BTE/GT99BT on the desktop.
Speaker
Approx. 50 cm
WX-GT90BT/GT90BTE/GT99BT
Tester
Approx. 80 cm
5. Precautions
Beware of the following points when conducting the
talking test:
• There is no fault if a talking can be made by adjusting appro-
priately the volume of the telephone of the other party and the
cellular phone connected through the Bluetooth, besides the
setup of WX-GT90BT/GT90BTE/GT99BT.
• The speaker’s voice will become loud naturally if the periph-
ery is noisy, or become low if quiet (even though the speaker
intents to talk on the same volume level).
• The speaker’s voice will become loud naturally if the other
party’s voice is loud.

WX-GT90BT/GT90BTE/GT99BT
9
SECTION 2
GENERAL This section is extracted
from instruction manual.
(US and Canadian models)
Notes on speaker connection
Before connecting the speakers, turn the unit o.
Use speakers with an impedance of 4 to 8 ohms, and with adequate
power handling capacities to avoid its damage.
Do not connect the speaker terminals to the car chassis, or connect the
terminals of the right speakers with those of the left speaker.
Do not connect the ground (earth) lead of this unit to the negative (–)
terminal of the speaker.
Do not attempt to connect the speakers in parallel.
Connect only passive speakers. Connecting active speakers (with
built-in ampliers) to the speaker terminals may damage the unit.
To avoid a malfunction, do not use the built-in speaker leads installed in
your car if the unit shares a common negative (–) lead for the right and
left speakers.
Do not connect the unit’s speaker leads to each other.
Note on connection
If speaker and amplier are not connected correctly, “FAILURE” appears in
the display. In this case, make sure the speaker and amplier are
connected correctly.
English
Cautions
Be sure to install this unit in the dashboard of the car as
the rear side of the unit becomes hot during use.
is unit is designed for negative ground (earth) 12 V
DC operation only.
Do not get the leads under a screw, or caught in moving
parts (e.g. seat railing).
Before making connections, turn the car ignition off to
avoid short circuits.
Connect the yellow and red power supply leads only
after all other leads have been connected.
Run all ground (earth) leads to a common ground
(earth) point.
Be sure to insulate any loose unconnected leads with
electrical tape for safety.
e use of optical instruments with this product will
increase eye hazard.
Notes on the power supply lead (yellow)
When connecting this unit in combination with other
stereo components, the connected car circuit’s rating
must be higher than the sum of each component’s fuse.
When no car circuits are rated high enough, connect the
unit directly to the battery.
Connection example ( )
Subwoofer Direct Connection ( -C)
For details on the setting for the connection, see the
supplied Operating Instruction.
*1 not supplied ( -B)
*2 Do not connect a speaker in this connection ( -C).
Notes
Be sure to connect the ground (earth) lead before connecting the
amplier.
The alarm will only sound if the built-in amplier is used.
Français
Précautions
Installez cet appareil sur le tableau de bord de la voiture,
car l’arrière de l’appareil chaue en cours d’utilisation.
Cet appareil est exclusivement conçu pour fonctionner
sur une tension de 12 V CC avec masse négative.
Évitez de xer des vis sur les câbles ou de coincer ceux-ci
dans des pièces mobiles (par exemple, armature de siège).
Avant d’eectuer les raccordements, coupez le moteur
pour éviter un court-circuit.
Raccordez les câbles d’alimentation jaune et rouge
seulement après avoir terminé tous les autres
raccordements.
Rassemblez tous les câbles de mise à la masse en
un point de masse commun.
Pour des raisons de sécurité, veillez à isoler avec du
ruban isolant tout câble libre non raccordé.
L’utilisation d’instruments optiques avec ce produit
augmente les risques pour les yeux.
Remarques sur le câble d’alimentation (jaune)
Lorsque cet appareil est raccordé à d’autres éléments
stéréo, la valeur nominale du circuit de la voiture
raccordé doit être supérieure à la somme des fusibles de
chaque élément.
Si aucun circuit de la voiture n’est assez puissant,
raccordez directement l’appareil à la batterie.
Exemple de raccordement
()
Raccordement direct d’un caisson de graves ( -C)
Pour plus de détails sur le réglage pour le raccordement,
reportez-vous au mode d’emploi fourni.
*1 non fourni ( -B)
*2 Ne raccordez pas un haut-parleur avec cette connexion ( -C).
Remarques
Raccordez d’abord le câble de mise à la masse avant de raccorder
l’amplicateur.
L’alarme est émise uniquement lorsque l’amplicateur intégré est utilisé.
Connection diagram ( )
To a metal surface of the car
First connect the black ground (earth) lead, then connect the yellow
and red power supply leads.
To the power antenna (aerial) control lead or
power supply lead of antenna (aerial) booster
Notes
It is not necessary to connect this lead if there is no power antenna
(aerial) or antenna (aerial) booster, or with a manually-operated
telescopic antenna (aerial).
When your car has a built-in FM/AM antenna (aerial) in the rear/
side glass, see “Notes on the control and power supply leads.”
To AMP REMOTE IN of an optional power
amplier
This connection is only for ampliers and a power antenna (aerial).
Connecting any other system may damage the unit.
To a car’s illumination signal
Be sure to connect the black ground (earth) lead to a metal surface of
the car rst.
To the +12V power terminal which is energized
in the accessory position of the ignition switch
Notes
If there is no accessory position, connect to the +12 V power
(battery) terminal which is energized at all times.
Be sure to connect the black ground (earth) lead to a metal surface
of the car rst.
When your car has a built-in FM/AM antenna (aerial) in the rear/
side glass, see “Notes on the control and power supply leads.”
To the +12V power terminal which is energized
at all times
Be sure to connect the black ground (earth) lead to a metal surface of
the car rst.
Notes on the control and power supply leads
REM OUT lead (blue/white striped) supplies +12 V DC when you turn on
the unit.
When your car has built-in FM/AM antenna (aerial) in the rear/side
glass, connect REM OUT lead (blue/white striped) or the accessory
power supply lead (red) to the power terminal of the existing antenna
(aerial) booster. For details, consult your dealer.
A power antenna (aerial) without a relay box cannot be used with this
unit.
Memory hold connection
When the yellow power supply lead is connected, power will always be
supplied to the memory circuit even when the ignition switch is turned o.
Schéma de raccordement ( )
À un point métallique de la voiture
Branchez d’abord le câble de mise à la masse noir et, ensuite, les
câbles d’alimentation jaune et rouge.
Au câble de commande d’antenne électrique ou
au câble d’alimentation de l’amplicateur
d’antenne
Remarques
Il n’est pas nécessaire de raccorder ce câble s’il n’y a pas d’antenne
électrique ni d’amplicateur d’antenne, ou avec une antenne
télescopique manuelle.
Si votre voiture est équipée d’une antenne FM/AM intégrée dans la
vitre arrière/latérale, voir « Remarques sur les câbles de commande
et d’alimentation ».
Au niveau de AMP REMOTE IN de l’amplicateur
de puissance en option
Ce raccordement s’applique uniquement aux amplicateurs et à une
antenne électrique. Le branchement de tout autre système risque
d’endommager l’appareil.
Vers le connecteur du signal d’éclairage de la
voiture
Raccordez d’abord le câble de mise à la masse noir à un point
métallique du véhicule.
À la borne d’alimentation +12 V qui est alimentée
quand la clé de contact est sur la position
accessoires
Remarques
S’il n’y a pas de position accessoires, raccordez la borne
d’alimentation (batterie) +12 V qui est alimentée en permanence.
Raccordez d’abord le câble de mise à la masse noir à un point
métallique du véhicule.
Si votre voiture est équipée d’une antenne FM/AM intégrée dans la
vitre arrière/latérale, voir « Remarques sur les câbles de commande
et d’alimentation ».
À la borne d’alimentation +12 V qui est alimentée
en permanence
Raccordez d’abord le câble de mise à la masse noir à un point
métallique du véhicule.
Remarques sur les câbles de commande et d’alimentation
Le câble REM OUT (rayé bleu/blanc) fournit une alimentation de +12 V
CC lorsque vous mettez l’appareil en marche.
Lorsque votre voiture est équipée d’une antenne FM/AM intégrée dans
la vitre arrière/latérale, raccordez le câble REM OUT (rayé bleu/blanc) ou
le câble d’alimentation des accessoires (rouge) à la borne
d’alimentation de l’amplicateur d’antenne existant. Pour plus de
détails, consultez votre détaillant.
Une antenne électrique sans boîtier de relais ne peut pas être utilisée
avec cet appareil.
Raccordement pour la conservation de la mémoire
Lorsque le câble d’alimentation jaune est raccordé, le circuit de la
mémoire est alimenté en permanence même si la clé de contact est sur la
position d’arrêt.
Remarques sur le raccordement des haut-parleurs
Avant de raccorder les haut-parleurs, éteignez l'appareil.
Utilisez des haut-parleurs ayant une impédance de 4 à 8 ohms avec une
capacité électrique adéquate pour éviter de les endommager.
Ne raccordez pas les bornes du système de haut-parleurs au châssis de
la voiture et ne raccordez pas les bornes du haut-parleur droit à celles
du haut-parleur gauche.
Ne raccordez pas le câble de mise à la masse de cet appareil à la borne
négative (–) du haut-parleur.
N’essayez pas de raccorder les haut-parleurs en parallèle.
Raccordez uniquement des haut-parleurs passifs. Le raccordement de
haut-parleurs actifs (avec amplicateurs intégrés) aux bornes des
haut-parleurs peut endommager l’appareil.
Pour éviter tout problème de fonctionnement, n’utilisez pas les câbles
des haut-parleurs intégrés installés dans votre voiture si l’appareil
possède un câble négatif commun (–) pour les haut-parleurs droit et
gauche.
Ne raccordez pas entre eux les cables des haut-parleurs de l’appareil.
Remarque sur le raccordement
Si le haut-parleur et l’amplicateur ne sont pas raccordés correctement, le
message « FAILURE » s’ache. Dans ce cas, assurez-vous que les
haut-parleurs et l’amplicateur sont bien raccordés.
A
*2
B
C
Satellite radio tuner
(SiriusXM)*1
Syntoniseur radio satellite
(SiriusXM)
*1
Equipment used in illustrations (not supplied)
Appareils utilisés dans les illustrations (non fournis)
Front speaker
Haut-parleur avant
Subwoofer
Caisson de graves
Power amplier
Amplicateur de puissance
*1
*1
REM OUT
Max. supply current 0.4 A
Courant max. fourni 0,4 A
Fuse (10 A)
Fusible (10 A)
Blue/white striped
Rayé bleu/blanc
ACC
BATTERY
White
Blanc
Green
Vert
Purple
Violet
White/black striped
Rayé blanc/noir
Gray/black striped
Rayé gris/noir
Green/black striped
Rayé vert/noir
Gray
Gris
Left
Gauche
Right
Droit
Left
Gauche
Right
Droit
Purple/black striped
Rayé violet/noir
from car antenna
(aerial)
à partir de l’antenne
du véhicule
Satellite radio tuner
(SiriusXM)*3
Syntoniseur radio satellite
(SiriusXM)*3
ILLUMINATION
*1 RCA pin cord (not supplied).
*2 Depending on the type of car, use an adaptor for a
wired remote control (not supplied).
*3 not supplied
*4 For details on installing the microphone, see “Installing
the microphone ( )” on the reverse side.
*5 Whether in use or not, route the microphone input cord
such that it does not interfere with driving. Secure the
cord with a clamp, etc., if it is installed around your feet.
*1 Cordon à broche RCA (non fourni).
*2 Selon le type de voiture, il pourrait être nécessaire
d’utiliser une télécommande câblée (non fournie).
*3 non fourni
*4 Pour les détails sur l’installation du microphone,
référez-vous à « Installation du microphone ( ) » au
verso.
*5 Qu’il soit en usage ou non, acheminez le cordon d’entrée
du microphone de telle sorte qu’il ne gêne pas votre
conduite. Fixez le cordon à l’aide d’une attache, etc., s’il
est installé autour de vos pieds.
Red
Rouge
Yellow
Jaune
Orange/white striped
Rayé orange/blanc
Black
Noir
Rear speaker
Haut-parleur arrière
*4

WX-GT90BT/GT90BTE/GT99BT
10
Français
Précautions
Choisissez soigneusement l’emplacement d’installation
pour que l’appareil ne gêne pas le conducteur pendant la
conduite.
Évitez d’installer l’appareil dans un endroit exposé à la
poussière, à la saleté, à des vibrations excessives ou à des
températures élevées comme en plein soleil ou à
proximité de conduits de chauage.
Pour garantir un montage sûr, n’utilisez que le matériel
fourni.
Réglage de l’angle de montage
Réglez l’inclinaison à un angle inférieur à 45°.
Montage de l’appareil ( )
-A Montage de l’appareil à l’aide d’un kit
d’installation (non fourni)
Vous pouvez utiliser un kit d’installation DIN double
disponible sur le marché. Choisissez un kit d’installation
dont la taille du cadre de la façade est la suivante :
Largeur minimale de 172 × 97 mm (6 7/8× 3 7/8 po) (l/h),
avec un rayon d’arrondi interne inférieur à 0,5 mm
(1/32 po).
Remarque
Veillez à utiliser exclusivement les vis fournies .
-B Montage de l’appareil dans une
voiture japonaise
Cet appareil ne peut pas être installé dans certaines
voitures japonaises. Consultez, dans ce cas, votre détaillant
Sony.
Lors de la fixation de cet appareil dans les supports
pré-installés du véhicule, vissez les vis fournies dans les
trous appropriés selon le modèle de véhicule : T pour
TOYOTA, M pour MITSUBISHI et N pour NISSAN.
Remarque
Pour éviter tout problème de fonctionnement, utilisez uniquement les vis
fournies pour le montage.
Warning if your car’s ignition
has no ACC position
Be sure to set the Auto Off function. For details, see the
supplied Operating Instructions.
e unit will shut off completely and automatically in the
set time aer the unit is turned off, which prevents battery
drain.
If you do not set the Auto Off function, press and hold
until the display disappears each time
you turn the ignition off.
Fuse replacement ( )
When replacing the fuse, be sure to use one matching the
amperage rating stated on the original fuse. If the fuse
blows, check the power connection and replace the fuse. If
the fuse blows again after replacement, there may be an
internal malfunction. In such a case, consult your nearest
Sony dealer.
Installing the microphone
()
To capture your voice during handsfree calling, you need
to install the microphone (supplied).
Cautions
Keep the microphone away from extremely high
temperatures and humidity.
It is extremely dangerous if the cord becomes wound
around the steering column or gearstick. Be sure to keep
it and other parts from obstructing your driving.
If airbags or any other shock-absorbing equipment is in
your car, contact the store where you purchased this
unit, or the car dealer, before installation.
-A Installing on the sun visor
1 Install the microphone on the clip .
2 Install the clip on the sun visor.
3 Install clips (not supplied) and adjust the length
and position of the cord so that it does not
obstruct your driving.
-B Installing on the dashboard
1 Install the microphone on the clip , then
place the cord along the groove of the clip .
2 Attach the clip to the dashboard with the
double-sided tape .
3 Install a clip (not supplied) and adjust the length
and position of the cord so that it does not
obstruct your driving.
Notes
Before attaching the double-sided tape , clean the surface of the
dashboard with a dry cloth.
Adjust the microphone angle to the proper position.
The microphone can be installed without using the clip .
In this case, directly attach the microphone to the dashboard with the
double-sided tape . Keep the unused clip for future use.
Remarques
Avant de xer le ruban adhésif à double face , nettoyez la surface du
tableau de bord avec un tissu sec.
Réglez l’angle du microphone à la bonne position.
Le microphone peut être installé sans utiliser la pince .
Le cas échéant, xez directement le microphone au tableau de bord à
l’aide d’un ruban adhésif à double face . Gardez la pince inutilisée
pour utilisation ultérieure.
Avertissement si le contact de
votre véhicule ne comporte
pas de position ACC
Veillez à régler la fonction Auto Off. Pour obtenir
davantage d’informations, reportez-vous au mode d’emploi
fourni.
L’appareil s’éteint complètement et automatiquement après
le laps de temps choisi une fois l’appareil arrêté afin d’éviter
que la batterie ne se décharge.
Si vous ne réglez pas la fonction Auto Off, appuyez sur la
touche et maintenez-la enfoncée jusqu’à
ce que l’achage disparaisse à chaque fois que vous
coupez le contact.
Remplacement du fusible ( )
Lorsque vous remplacez le fusible, veillez à utiliser un
fusible dont l’intensité, en ampères, correspond à la valeur
indiquée sur le fusible usagé. Si le fusible grille, vériez le
branchement de l’alimentation et remplacez le fusible. Si le
nouveau fusible grille également, il est possible que
l’appareil soit défectueux. Dans ce cas, consultez votre
détaillant Sony le plus proche.
Installation du microphone
( )
Pour capturer votre voix au cours d’un appel en mains
libres, vous devez installer le microphone (fourni).
Avertissements
Éloignez le microphone de l’humidité et des
températures extrêmement élevées.
Il est extrêmement dangereux que le cordon s'enroule
autour de la colonne de direction ou du levier de
vitesses. Assurez-vous d’éviter que le cordon et les autres
parties puissent encombrer votre conduite.
Si des coussins gonflables ou tout équipement antichoc
se trouvent dans votre voiture, communiquez avec le
magasin où vous avez acheté cet appareil, ou le
concessionnaire, avant l’installation.
-A Installation sur le pare-soleil
1 Installez le microphone sur la pince .
2 Installez la pince sur le pare-soleil.
3 Installez les pinces (non fournies) et réglez la
longueur et la position du cordon de façon à ne
pas encombrer votre conduite.
-B Installation sur le tableau de bord
1 Installez le microphone sur la pince , puis
placez le cordon le long de la rainure de la pince
.
2 Fixez la pince au tableau de bord à l’aide d’un
ruban adhésif à double face .
3 Installez la pince (non fournie) et réglez la
longueur et la position du cordon de façon à ne
pas encombrer votre conduite.
English
Precautions
Choose the installation location carefully so that the unit
will not interfere with normal driving operations.
Avoid installing the unit in areas subject to dust, dirt,
excessive vibration, or high temperatures, such as in
direct sunlight or near heater ducts.
Use only the supplied mounting hardware for a safe and
secure installation.
Mounting angle adjustment
Adjust the mounting angle to less than 45°.
Mounting the unit ( )
-A Mounting the unit with an installation
kit (not supplied)
You can use a commercially available double DIN
installation kit. Choose an installation kit with the
following panel frame size.
Larger than 172 × 97 mm (6 7/8× 3 7/8 in) (w/h), with an
inner corner radius of less than 0.5 mm (1/32 in).
Note
Be sure to use the supplied screws .
-B Mounting the unit in a Japanese car
You may not be able to install this unit in some makes of
Japanese cars. In such a case, consult your Sony dealer.
When mounting this unit to the preinstalled brackets of
your car, use the supplied screws in the appropriate
screw holes, based on your car: T for TOYOTA, M for
MITSUBISHI and N for NISSAN.
Note
To prevent malfunction, install only with the supplied screws .
Bracket
Support
Bracket
Support
to dashboard/center console
vers le tableau de bord/la console centrale
Existing parts supplied with your car
Pièces existantes fournies avec la voiture
size
5 × max. 8 mm
(7/32 × max. 5/16 in)
dimension
5 × max. 8 mm
(7/32 × 5/16 po max.)
size
5 × max. 8 mm
(7/32 × max. 5/16 in)
dimension
5 × max. 8 mm
(7/32 × 5/16 po max.)
Fuse (10 A)
Fusible (10 A)
B
To dashboard/center console
Vers le tableau de bord/la console centrale
Installation kit (not supplied)
Kit d’installation (non fourni)
Larger than
97 mm (3 7/8in)
Largeur minimale
de 97 mm (3 7/8po)
Larger than
172 mm (6 7/8in)
Largeur minimale de
172 mm (6 7/8po)
A
2
Clip (not supplied)
Pince (non fournie)
A
2
1
Clips (not supplied)
Pinces (non fournies)
B1

WX-GT90BT/GT90BTE/GT99BT
11
(AEP, Russian and UK models)
Italiano
Attenzione
Assicurarsi di installare l’apparecchio nel cruscotto
dell’auto, poiché la parte posteriore dell’apparecchio
stesso si surriscalda durante l’uso.
Questo apparecchio è stato progettato per l’uso solo a 12
V CC con massa negativa.
Evitare che i cavi rimangano bloccati da una vite o
incastrati nelle parti mobili (ad esempio nelle guide
scorrevoli dei sedili).
Prima di eettuare i collegamenti, spegnere il motore
dell’automobile onde evitare di causare cortocircuiti.
Collegare il cavo di alimentazione all’apparecchio e ai
diusori prima di collegarlo al connettore di
alimentazione ausiliaria.
Portare tutti i cavi di messa a terra a un punto di
massa comune.
Per sicurezza, assicurarsi di isolare qualsiasi cavo non
collegato utilizzando del nastro adesivo.
Note sul cavo di alimentazione (giallo)
Se questo apparecchio viene collegato in combinazione
con altri componenti stereo, la potenza nominale dei
circuiti dell’automobile deve essere superiore a quella
prodotta dalla somma dei fusibili di ciascun componente.
Se la potenza nominale dei circuiti dell’automobile non è
suciente, collegare l’apparecchio direttamente alla
batteria.
Esempio di collegamento ( )
Connessione diretta al subwoofer ( -B)
Per informazioni sull’impostazione della connessione,
vedere le istruzioni per l’uso in dotazione.
*Non collegare un diusore in questa connessione.
Note
Assicurarsi di collegare il cavo di terra prima di collegare l’apparecchio
all’amplicatore.
L’allarme viene emesso solo se è in uso l’amplicatore incorporato.
Deutsch
Warnhinweise
Installieren Sie das Gerät unbedingt im Armaturenbrett
des Fahrzeugs, denn die Rückseite des Geräts erwärmt
sich bei Betrieb.
Dieses Gerät ist ausschließlich für den Betrieb bei 12 V
Gleichstrom (negative Erdung) bestimmt.
Achten Sie darauf, dass dieKabel nicht unter einer
Schraube oder zwischen beweglichen Teilen wie
z. B. in einer Sitzschiene eingeklemmt werden.
Schalten Sie, bevor Sie irgendwelche Anschlüsse
vornehmen, die Zündung des Fahrzeugs aus, um
Kurzschlüsse zu vermeiden.
Verbinden Sie das Stromversorgungskabel mit dem
Gerät und den Lautsprechern, bevor Sie es mit dem
Hilfsstromanschluss verbinden.
Schließen Sie alle Erdungskabel an einen
gemeinsamen Massepunkt an.
Aus Sicherheitsgründen müssen alle losen, nicht
angeschlossenen Drähte mit Isolierband abgeklebt
werden.
Hinweise zum Stromversorgungskabel (gelb)
Wenn Sie dieses Gerät zusammen mit anderen
Stereokomponenten anschließen, muss der
Autostromkreis, an den die Geräte angeschlossen sind,
eine höhere Leistung aufweisen als die Summe der
Sicherungen der einzelnen Komponenten.
Wenn kein Autostromkreis eine so hohe Leistung
aufweist, schließen Sie das Gerät direkt an die Batterie
an.
Anschlussbeispiel ( )
Direktverbindung mit Tiefsttonlautsprecher ( -B)
Einzelheiten zur Einstellung für die Verbindung nden Sie
in der mitgelieferten Bedienungsanleitung.
*Schließen Sie an diesen Anschluss keinen Lautsprecher an.
Hinweise
Schließen Sie unbedingt zuerst das Massekabel an, bevor Sie den
Verstärker anschließen.
Der Warnton wird nur ausgegeben, wenn der integrierte Verstärker
verwendet wird.
Connection diagram ( )
Warning
If you have a power antenna (aerial) without a relay box,
connecting this unit with the supplied power supply lead
may damage the antenna (aerial).
Notes on the control and power supply leads
REM OUT lead (blue/white striped) supplies +12 V DC when you turn on
the unit.
When using an optional power amplier, connect REM OUT lead (blue/
white striped) or the accessory power supply lead (red) to its AMP
REMOTE IN.
When your car has built-in FM/MW/LWantenna (aerial) in the rear/side
glass, connect REM OUT lead (blue/white striped) or the accessory
power supply lead (red) to the power terminal of the existing antenna
(aerial) booster. Fordetails, consult your dealer.
A power antenna (aerial) without a relay box cannot be used with this unit.
Memory hold connection
When the yellow power supply lead is connected, power will alwaysbe
supplied to the memory circuit even when the ignition switch is turned o.
Notes on speaker connection
Before connecting the speakers, turn the unit o.
Use speakers with an impedance of 4 to 8 ohms, and with adequate
power handling capacities to avoid its damage.
Do not connect the speaker terminals to the car chassis, or connect the
terminals of the right speakers with those of the left speaker.
Do not connect the ground (earth) lead of this unit to the negative (–)
terminal of the speaker.
Do not attempt to connect the speakers in parallel.
Connect only passive speakers. Connecting active speakers (with
built-in ampliers) to the speaker terminals may damage the unit.
Toavoid a malfunction, do not use the built-in speaker leads installed in
your car if the unit shares a common negative (–) lead for the right and
left speakers.
Do not connect the unit’s speaker leads to each other.
Note on connection
If speaker and amplier are not connected correctly,“FAILURE” appears in
the display. In this case,make sure the speaker and amplier are
connected correctly.
Power connection diagram
()
Auxiliary power connector may vary depending on the
car. Check your car’s auxiliary power connector diagram
to make sure the connections match correctly. ere are
three basic types ( -1, -2, -3). You may need to
switch the positions of the red and yellow leads in the car
stereo’s power supply lead.
Aer matching the connections and switched power
supply leads correctly, connect the unit to the car’s power
supply. If you have any questions and problems connecting
your unit that are not covered in this manual, please
consult the car dealer.
Français
Précautions
Installez cet appareil sur le tableau de bord de la voiture,
car l’arrière de l’appareil chaue en cours d’utilisation.
Cet appareil est conçu pour fonctionner uniquement sur
un courant continu de 12 V avec masse négative.
Evitez de coincer les câbles sous des vis ou dans des
pièces mobiles (par exemple, armature de siège).
Avant d’eectuer des raccordements, coupez le moteur
pour éviter les courts-circuits.
Branchez le câble d’alimention sur l’appareil et les
haut-parleurs avant de le brancher sur le connecteur
d’alimentation auxiliaire.
Rassemblez tous les câbles de mise à la masse en
un point de masse commun.
Veillez à isoler tout câble lâche non raccordé avec du
ruban isolant.
Remarques sur le câble d’alimentation (jaune)
Lorsque cet appareil est raccordé à d’autres équipements
stéréo, la valeur nominale du circuit raccordé du
véhicule doit être supérieure à la somme des fusibles de
chaque élément.
Si aucun circuit de la voiture n’est assez puissant,
raccordez directement l’appareil à la batterie.
Exemple de raccordement ( )
Connexion directe du caisson de graves ( -B)
Pour plus d’informations sur l’établissement de la
connexion, reportez-vous au mode d’emploi fourni.
*Ne raccordez pas de haut-parleur à cette connexion.
Remarques
Raccordez d’abord le câble de mise à la masse avantde connecter
l’amplicateur.
L’alarme est émise uniquement lorsque l’amplicateur intégré est utilisé.
English
Cautions
Be sure to install this unit in the dashboard of the car as
the rear side of the unit becomes hot during use.
is unit is designed for negative ground (earth) 12 V
DC operation only.
Do not get the leads under a screw, or caught in moving
parts (e.g. seat railing).
Before making connections, turn the car ignition off to
avoid short circuits.
Connect the power supply lead to the unit and
speakers before connecting it to the auxiliary power
connector.
Run all ground (earth) leads to a common ground
(earth) point.
Be sure to insulate any loose unconnected leads with
electrical tape for safety.
Notes on the power supply lead (yellow)
When connecting this unit in combination with other
stereo components, the connected car circuit’s rating
must be higher than the sum of each component’s fuse.
When no car circuits are rated high enough, connect the
unit directly to the battery.
Connection example ( )
Subwoofer Direct Connection ( -B)
For details on the setting for the connection, see the
supplied Operating Instruction.
*Do not connect a speaker in this connection.
Notes
Be sure to connect the ground (earth) lead before connecting the
amplier.
The alarm will only sound if the built-in amplier is used.
*1Depending on the type of car, use an adaptor (not
supplied) if the antenna connector does not t.
*2RCA pin cord (not supplied).
*3Depending on the type of car, use an adaptor for a
wired remote control (not supplied).
*4Speaker impedance: 4 – 8 ohms × 4
*5Whether in use or not, route the microphone input
cord such that it does not interfere with driving. Secure
the cord with a clamp, etc., if it is installed around your
feet.
*6For details on installing the microphone, see
“Installing the microphone ( )” on the reverse side.
*1Abhängig vom Autotyp müssen Sie einen Adapter
(nicht mitgeliefert) verwenden, wenn der
Antennenanschluss nicht passt.
*2Cinchkabel (nicht mitgeliefert).
*3Abhängig vom Autotyp müssen Sie einen Adapter für
eine kabelgebundene Fernbedienung (nicht
mitgeliefert) verwenden.
*4Lautsprecherimpedanz: 4 – 8 Ohm × 4
*5Führen Sie das Mikrofoneingangskabelso, dass es
beim Fahren nicht hinderlich ist, unabhängig davon,
ob es gerade in Gebrauch ist oder nicht. Sichern Sie
das Kabel mit einer Kabelklemme usw., falls es durch
den Fußraum geführt werden muss.
*6Erläuterungen zur Installation des Mikrofons nden
Sie unter „Installieren des Mikrofons ( )“ auf der
Rückseite.
*1Selon le type de voiture, utilisez un adaptateur (non
fourni) si le connecteur de l’antenne ne convient pas.
*2Cordon à broche RCA (non fourni).
*3Selon le type de voiture, utilisez un adaptateur pour
télécommande laire (non fournie).
*4Impédance des haut-parleurs : 4 – 8 ohms × 4
*5Que vous utilisiez ou non le microphone, acheminez
son cordon de manière à ce qu’il ne gêne pas la
conduite. Fixezle cordon à l’aide d’une attache, par
exemple, si vous l’installezà proximité des pieds.
*6Pour plus d’informations sur l’installationdu
microphone, reportez-vous à la section « Installation
du microphone ( ) » au verso.
*1In base al tipo di automobile, utilizzare un adattatore
(non in dotazione) nel caso in cui il connettore
dell'antenna non sia adatto.
*2Cavo a piedini RCA (non in dotazione).
*3In base al tipo di automobile, utilizzare un adattatore
per un telecomando cablato (non in dotazione).
*4Impedenza diusori: 4 – 8 ohm × 4
*5Indipendentemente dal fatto che venga utilizzato o
meno, sistemare il cavo di ingresso del microfono in
modo che non interferisca con la guida. Se il cavo è
installato nella parte dell’abitacolo riservato ai piedi,
ssarlo con un fermacavo o simili.
*6Per ulteriori informazioni sull’installazione del
microfono, consultare “Installazione del microfono
()” sul lato opposto.
*1Afhankelijk van het soort wagen gebruikt u een
adapter (niet bijgeleverd) als de antenneconnector
niet past.
*2Tulpstekkersnoer(niet bijgeleverd).
*3Afhankelijk van het soort wagen gebruikt u een
adapter voor een bedrade afstandsbediening (niet
bijgeleverd).
*4Luidsprekerimpedantie: 4 – 8 ohm × 4
*5Zorg ervoor dat de microfooningangskabel u niet kan
hinderen tijdens het rijden. Bevestig de kabel met een
klem enz. als deze in de buurt van uw voeten
geïnstalleerd is.
*6Meer informatie over de installatie van de microfoon
vindt u onder "De microfoon installeren ( )" op de
keerzijde.
Negative polarity positions 2, 4, 6, and 8 have striped leads.
An den negativ gepolten Positionen 2, 4, 6 und 8 benden sich gestreifte Adern.
Les positions de polarité négative 2, 4, 6 et 8 sont dotées de cordons rayés.
Le posizioni a polarità negativa 2, 4, 6 e 8 hanno cavi rigati.
De posities voor negatieve polariteit (2, 4, 6 en 8) hebben gestreepte kabels.
1Purple
Violett
Violet
Viola
Paars
+
Speaker, Rear, Right
Lautsprecher hinten rechts
Haut-parleur, arrière,droit
Diusore, posteriore, destro
Luidspreker,achter, rechts
2–
Speaker, Rear, Right
Lautsprecher hinten rechts
Haut-parleur, arrière,droit
Diusore, posteriore, destro
Luidspreker,achter, rechts
3Gray
Grau
Gris
Grigio
Grijs
+
Speaker, Front,Right
Lautsprecher vorne rechts
Haut-parleur, avant,droit
Diusore, anteriore, destro
Luidspreker,voor, rechts
4–
Speaker, Front,Right
Lautsprecher vorne rechts
Haut-parleur, avant,droit
Diusore, anteriore, destro
Luidspreker,voor, rechts
5White
Weiß
Blanc
Bianco
Wit
+
Speaker, Front,Lef t
Lautsprecher vorne links
Haut-parleur, avant,gauche
Diusore, anteriore, sinistro
Luidspreker,voor, links
6–
Speaker, Front,Le ft
Lautsprecher vorne links
Haut-parleur, avant,gauche
Diusore, anteriore, sinistro
Luidspreker,voor, links
7Green
Grün
Vert
Verde
Groen
+
Speaker,Rear, Left
Lautsprecher hinten links
Haut-parleur, arrière,gauche
Diusore, posteriore, sinistro
Luidspreker,achter, links
8–
Speaker,Rear, Left
Lautsprecher hinten links
Haut-parleur, arrière,gauche
Diusore, posteriore, sinistro
Luidspreker,achter, links
Schema di collegamento ( )
Avvertenza
Quando si collega l’apparecchio con il cavo di
alimentazione in dotazione , si potrebbe danneggiare
l’antenna elettrica se questa non dispone di scatola a relè.
Note sui cavi di controllo e di alimentazione
Il cavo REM OUT (rigato blu e bianco) fornisce alimentazione da +12 V
CC all’accensionedell’apparecchio.
Quando si utilizza un amplicatore di potenza opzionale, collegare il
cavo REM OUT (rigato blu e bianco) o il cavo di alimentazione
accessoria (rosso) al rispettivo AMP REMOTEIN.
Se l’automobile è dotata di antenna FM/MW/LWincorporata nel vetro
posteriore/laterale, collegare il cavoREM OUT (rigato blu e bianco) o il
cavo di alimentazione accessoria (rosso) al terminale di alimentazione
del preamplicatore dell’antenna esistente.Per ulteriori informazioni,
consultare il rivenditore.
Non è possibile usare un’antennaelettrica senza scatola a relè con
questo apparecchio.
Collegamento per la conservazione della memoria
Quando il cavo di ingresso alimentazione giallo è collegato, viene sempre
fornita alimentazione al circuito di memoria anche quando l’interruttore
di accensione è spento.
Note sul collegamento dei diusori
Prima di collegare i diusori spegnere l’apparecchio.
Usare diusori di impedenza compresa tra 4 e 8 ohm e con capacità di
potenza adeguata, altrimenti i diusori potrebbero venire danneggiati.
Non collegare i terminali del sistema diusori al telaio dell’auto e non
collegare i terminali del diusore destro a quelli del diusore sinistro.
Non collegare il cavo di terra di questo apparecchio al terminale
negativo (–) del diusore.
Non collegare i diusori in parallelo.
Assicurarsi di collegare soltanto diusori passivi, poiché il collegamento
di diusori attivi, dotati di amplicatori incorporati, ai terminali dei
diusori potrebbe danneggiare l’apparecchio.
Per evitare problemi di funzionamento, non utilizzare i cavidei diusori
incorporati installati nell’automobile se l’apparecchiocondivide un
cavo comune negativo (–) per i diusori destro e sinistro.
Non collegare fra loro i cavi dei diusori dell’apparecchio.
Nota sui collegamenti
Se l’amplicatore e il diusore non sono collegati correttamente,
“FAILURE”viene visualizzato nel display. In tal caso, accertarsi che
l’amplicatore e il diusore siano collegati correttamente.
Diagramma dei collegamenti
di alimentazione ( )
Il connettore di alimentazione ausiliaria può variare a
seconda della macchina. Controllare il diagramma del
connettore di alimentazione ausiliaria della macchina per
essere sicuri che i collegamenti corrispondano
correttamente. Vi sono tre tipi di base ( -1, -2, -3).
Potrebbe essere necessario cambiare le posizioni dei li
rosso e giallo nel cavo di alimentazione dello stereo della
macchina.
Dopo aver fatto corrispondere i collegamenti e aver
commutato i cavi di alimentazione, collegare l’apparecchio
all’alimentazione della macchina. Se si hanno domande o
se sorgono problemi che non sono stati trattati nel
manuale nel collegare l’apparecchio, contattare
l’autoconcessionario.
Nederlands
Let op
Installeer dit apparaat in het dashboard van de auto
omdat de achterkant van hetapparaat tijdens gebruik
heet kan worden.
Dit apparaat is ontworpen voor gebruik op een
auto-accu van 12 V gelijkstroom, negatieve aarde.
Zorg ervoor dat de draden niet onder een schroef of
tussen bewegende onderdelen (bv. rail van de autostoel)
terechtkomen.
Voordat u de aansluitingen maakt, moet u het contact
uitzetten om kortsluiting te vermijden.
Sluit de voedingskabel aan op het apparaat en de
luidsprekers voordat u de kabel aansluit op de
hulpvoedingsaansluiting.
Sluit alle aardingskabels op een
gemeenschappelijk aardpunt aan.
Voorzie niet-aangesloten kabels om veiligheidsredenen
altijd van isolatietape.
Opmerkingen bij de voedingskabel (geel)
Wanneer u dit apparaat aansluit samen met andere
componenten, moet het vermogen van de aangesloten
autostroomkring groter zijn dan de som van de
zekeringen van elke component afzonderlijk.
Wanneer het vermogen ontoereikend is, moet u het
apparaat rechtstreeks aansluiten op de accu.
Voorbeeldaansluitingen ( )
Rechtstreekse subwooferverbinding ( -B)
Raadpleeg de bijgeleverde gebruiksaanwijzing voor meer
informatie over het doorvoeren van de verbinding.
*Sluit geen luidspreker aan in deze verbinding.
Opmerkingen
Sluit eerst de aarddraad aan voordat u de versterkeraansluit.
U hoort de pieptoon alleen als de ingebouwde versterker wordt
gebruikt.
Aansluitschema ( )
Waarschuwing
Indien u een elektrische antenne hebt zonder relaiskast,
kan het aansluiten van dit apparaat met de bijgeleverde
voedingskabel de antenne beschadigen.
Opmerkingen over de bedienings- en voedingskabels
De REM OUT-kabel(blauw/wit gestreept) lever t +12 V DC als u het
apparaat inschakelt.
Als u een optionele versterker gebruikt, sluit u de REM OUT-kabel
(blauw/wit gestreept) of de voedingskabel voor accessoires (rood) aan
op de AMP REMOTE IN-aansluiting van de versterker.
Als uw auto uitgerust is met een FM/MW/LW-antennein de achter- of
zijruit, sluit u de REM OUT-kabel(blauw/wit gestreept) of de
voedingskabel voor accessoires (rood) aan op de voedingsaansluiting
van de bestaande antenneversterker.Contacteer uw handelaar voor
meer informatie.
Met dit apparaat is het niet mogelijk een elektrische antenne zonder
relaiskast te gebruiken.
Instandhouden van het geheugen
Zolang de gele voedingskabel is aangesloten, blijft de stroomvoorziening
van het geheugen intact, ook wanneer het contact van de auto wordt
uitgeschakeld.
Opmerkingen betreende het aansluiten van de luidsprekers
Zorg dat het apparaat is uitgeschakeld alvorens de luidsprekers aan te
sluiten.
Gebruik luidsprekers met een impedantie van 4 tot 8 ohm en let op dat
die het vermogen van de versterker kunnen verwerken. Als u dit niet
doet, kunnen de luidsprekers ernstig beschadigd raken.
Verbind in geen geval de aansluitingen vande luidsprekers met het
chassis van de auto en sluit de aansluitingen van de rechter- en
linkerluidspreker niet op elkaar aan.
Verbind de aarddraad vandit apparaat niet met de negatieve (–)
aansluiting van de luidspreker.
Probeer nooit de luidsprekers parallel aan te sluiten.
Sluit geen actieve luidsprekers (met ingebouwde versterkers) aan op de
luidsprekeraansluiting van dit apparaat.Dit zal leiden tot beschadiging
van de actieve luidsprekers. Sluit dus altijd uitsluitend luidsprekers
zonder ingebouwde versterker aan.
Om defecten te vermijden mag u de bestaande luidsprekerbedrading in
uw auto niet gebruiken wanneer er een gemeenschappelijke negatieve
(–) draad is voor de rechter- en linkerluidsprekers.
Verbind de luidsprekerdradenniet met elkaar.
Opmerking over aansluiten
Als de luidspreker en versterker niet correct zijn aangesloten, wordt
"FAILURE"in het display weergegeven. In dit geval moet u zorgen dat de
luidspreker en versterker correct zijn aangesloten.
Voedingsaansluitschema ( )
De hulpvoedingsaansluiting kan verschillen afhankelijk
van de auto. Controleer het hulpvoedingsaansluitschema
dat bij dit apparaat wordt geleverd om te zien of de
aansluitingen kloppen. Er zijn drie basistypes ( -1,
-2, -3). Het is mogelijk dat u de posities van de rode
en gele kabels in de voedingskabel van het
autoaudiosysteem moet omwisselen.
Als de aansluitingen en geschakelde voedingskabels
kloppen, sluit u het apparaat aan op de voeding van de
auto. Indien u nog vragen of problemen hebt in verband
met het aansluiten van het apparaat die niet in deze
handleiding worden behandeld, raadpleeg dan de
autodealer.
Schéma de raccordement
( )
Avertissement
Si vous disposez d’une antenne électrique sans boîtier de
relais, le branchement de cet appareil au moyen du cordon
d’alimentation fourni risque d’endommager l’antenne.
Remarques sur les câbles de commande et d’alimentation
Fil REM OUT (rayé bleu/blanc) fournit une tension de +12 V CC lors de la
mise sous tension de l’appareil.
Si vous utilisez un amplicateur de puissance en option, raccordez le l
REM OUT (rayé bleu/blanc) ou le l d’alimentation des accessoires
(rouge) à son AMP REMOTE IN.
Si votre véhicule est équipé d’une antenne FM/MW (PO)/LW(GO)
intégrée dans la vitre arrière/latérale, raccordezle l REM OUT (rayé
bleu/blanc) ou le l d’alimentation des accessoires (rouge) à la borne
d’alimentation de l’amplicateurd’antenne existant. Pour plus
d’informations, consultez votre revendeur.
Une antenne électrique sans boîtier de relais ne peut pas être utilisée
avec cet appareil.
Raccordement pour la conservation de la mémoire
Lorsque le câble d’alimentationjaune est raccordé, le circuit de la
mémoire est alimenté en permanence même si la clé de contact est en
position d’arrêt.
Remarques sur le raccordement des haut-parleurs
Avant de raccorder les haut-parleurs, mettre l’appareilhors tension.
Utiliser des haut-parleurs ayant une impédance de 4 à 8 ohms et une
capacité adéquate sous peine de les endommager.
Ne pas raccorder les bornes du système de haut-parleurs au châssis de
la voiture et ne pas connecter les bornes des haut-parleurs droit à celles
des haut-parleurs gauche.
Ne pas raccorder le câble de mise à la masse de cet appareil à la borne
négative (–) du haut-parleur.
Ne pas tenter de raccorder les haut-parleurs en parallèle.
Connecter uniquement des haut-parleurs passifs. La connexion de
haut-parleurs actifs (avec des amplicateurs intégrés) aux bornes des
haut-parleurs pourrait endommager l’appareil.
Pour éviter tout problème de fonctionnement, n’utilisezpas les câbles des
haut-parleurs intégrés installés dans votre voiture si l’appareildispose
d’un câble négatif (–) commun pour les haut-parleurs droit et gauche.
Ne raccordez pas entre eux les cordons des haut-parleurs de l’appareil.
Remarque sur le raccordement
Si les haut-parleurs et l’amplicateur ne sont pas raccordés correctement,
le message « FAILURE» s’ache. Dans ce cas, assurez-vous que les
haut-parleurs et l’amplicateur sont raccordés correctement.
Schéma de raccordement
d’alimentation ( )
Le connecteur d’alimentation auxiliaire peut varier suivant
le type de voiture. Vériez le schéma du connecteur
d’alimentation auxiliaire de votre voiture pour vous
assurer que les connexions correspondent. Il en existe trois
types de base ( -1, -2, -3). Il se peut que vous
deviez commuter la position des ls rouge et jaune du
câble d’alimentation de l’autoradio.
Après avoir établi les connexions et commuté
correctement les câbles d’alimentation, raccordez l’appareil
à l’alimentation de la voiture. Si vous avez des questions ou
des dicultés à propos de cet appareil qui ne sont pas
abordées dans le présent mode d’emploi, consultez votre
concessionnaire automobile.
Anschlussdiagramm ( )
Warnung
Wenn Sie eineMotorantenne ohne Relaiskästchen
verwenden, kann durch Anschließen dieses Geräts mit
dem mitgelieferten Stromversorgungskabel die
Antenne beschädigt werden.
Hinweise zu den Steuer- und Stromversorgungsleitungen
Die REM OUT-Leitung(blauweiß gestreift) liefert +12 V Gleichstrom,
wenn Sie das Gerät einschalten.
Wenn Sie einen gesondert erhältlichen Endverstärker verwenden,
schließen Sie die REM OUT-Leitung (blauweiß gestreift) oder die
Stromversorgungsleitung für Zubehörgeräte (rot) an AMP REMOTE IN
an.
Wenn das Fahrzeugmit einer in der Heck-/Seitenfensterscheibe
integrierten FM (UKW)/MW/LW-Antenne ausgestattet ist, schließen Sie
die REM OUT-Leitung(blauweiß gestreift) oder die
Stromversorgungsleitung für Zubehörgeräte (rot) an den
Stromversorgungsanschluss des vorhandenen Antennenverstärkersan.
Einzelheiten dazu erhalten Sie bei Ihrem Händler.
Es kann nur eine Motorantenne mit Relaiskästchenangeschlossen werden.
Stromversorgung des Speichers
Wenn die gelbe Stromversorgungsleitung angeschlossen ist, wird der
Speicher stets (auch bei ausgeschalteter Zündung) mit Strom versorgt.
Hinweise zum Lautsprecheranschluss
Schalten Sie das Gerät aus, bevor Sie die Lautsprecher anschließen.
Verwenden Sie Lautsprecher mit einer Impedanz zwischen 4 und 8 Ohm
und ausreichender Belastbarkeit. Ansonsten können die Lautsprecher
beschädigt werden.
Verbinden Sie die Lautsprecheranschlüsse nicht mit dem Wagenchassis
und verbinden Sie auch nicht die Anschlüsse des rechten mit denen des
linken Lautsprechers.
Verbinden Sie die Masseleitung dieses Geräts nicht mit dem negativen
(–) Lautsprecheranschluss.
Versuchen Sie nicht, Lautsprecher parallel anzuschließen.
An die Lautsprecheranschlüsse dieses Geräts dürfen nur
Passivlautsprecher angeschlossen werden. Schließen Sie keine
Aktivlautsprecher (Lautsprecher mit eingebauten Verstärkern)an, da
das Gerät sonst beschädigt werden könnte.
Um Fehlfunktionen zu vermeiden, verwenden Sie nicht die im Fahrzeug
installierten, integrierten Lautsprecherleitungen, wenn am Ende eine
gemeinsame negative (–) Leitung für den rechten und den linken
Lautsprecher verwendet wird.
Verbinden Sie nicht die Lautsprecherkabel des Gerätsmiteinander.
Hinweis zum Anschließen
Wenn Lautsprecher und Verstärkernicht richtig angeschlossen sind,
erscheint „FAILURE“im Display. Vergewissern Sie sich in diesem Fall, dass
Lautsprecher und Verstärker richtig angeschlossen sind.
Stromanschlussdiagramm ( )
Der Hilfsstromanschluss kann je nach Fahrzeugtyp
unterschiedlich sein. Sehen Sie im Hilfsstroman-
schlussdiagramm für Ihr Fahrzeug nach, wie die
Verbindung ordnungsgemäß vorgenommen werden muss.
Es gibt, wie unten abgebildet, drei grundlegende Typen
(-1, -2, -3). Sie müssen möglicherweise die rote
und gelbe Leitung des Stromversorgungskabels der
Autostereoanlage vertauschen.
Stellen Sie die Anschlüsse her, schließen Sie die
geschalteten Stromversorgungsleitungen richtig an und
verbinden Sie dann das Gerät mit der Stromversorgung
Ihres Fahrzeugs. Wenn beim Anschließen des Geräts
Fragen oder Probleme aureten, die in dieser Anleitung
nicht erläutert werden, wenden Sie sich bitte an den
Autohändler.
A
B
*
Positions 1, 2 and 3 do not have pins.
An Position 1, 2 und 3 benden sich keine Stifte.
Les positions 1, 2 et 3 ne comportent pas de broches.
Le posizioni 1, 2 e 3 non hanno piedini.
De posities 1, 2 en 3 hebben geen pins.
4
Yellow
Gelb
Jaune
Giallo
Geel
continuous power supply
permanente Stromversorgung
alimentation continue
alimentazione continua
continue voeding
5
Blue/white striped
Blauweiß gestreift
Rayé bleu/blanc
Rigato blu e bianco
Blauw/wit gestreept
power antenna (aerial) /power amplier control (REM OUT)
Steueranschluss für Motorantenne/Endverstärker (REM OUT)
commande de l’antenne électrique/amplicateur de puissance (REM
OUT)
antenna elettrica/controllo dell’amplicatore di potenza (REM OUT)
elektrische antenne / versterker (REM OUT)
6
Orange/White
Orangeweiß
gestreift
Rayé orange/blanc
Arancione/bianco
Oranje/wit
switched illumination power supply
geschaltete Beleuchtungsstromversorgung
alimentation de l’éclairagecommuté
alimentazione illuminazione commutata
geschakelde voeding voor verlichting
7
Red
Rot
Rouge
Rosso
Rood
switched power supply
geschaltete Stromversorgung
alimentation commutée
alimentazione commutata
geschakelde voeding
8
Black
Schwarz
Noir
Nero
Zwart
ground (earth)
Masse
masse
terra
aarding
Equipment used in illustrations (not supplied)
In Abbildungen dargestellte Geräte (nicht mitgeliefert)
Appareils utilisés dans les illustrations (non fournis)
Apparecchiatura utilizzata nelle illustrazioni (non in dotazione)
Apparatuur gebruikt in de afbeeldingen (niet bijgeleverd)
Front speaker
Frontlautsprecher
Haut-parleur avant
Diusore anteriore
Voorluidspreker
Rear speaker
Hecklautsprecher
Haut-parleur arrière
Diusore posteriore
Achterluidspreker
Subwoofer
Tiefsttonlautsprecher
Caisson de graves
Subwoofer
Subwoofer
Power amplier
Endverstärker
Amplicateur de puissance
Amplicatore di potenza
Eindversterker
Fuse (10 A)
Sicherung (10 A)
Fusible (10 A)
Fusibile (10 A)
Zekering (10 A)
from the car’spower connector
vom Stromanschluss des Fahrzeugs
du connecteur d’alimentation de la voiture
dal connettore di alimentazione dell’auto
van de autovoedingsaansluiting
See “Powerconnection diagram ( )” for details.
Näheres dazu nden Sie im „Stromanschlussdiagramm( ) “.
Voir le « Schéma de raccordement d’alimentation( ) » pour plus
de détails.
Per dettagli, consultare il "Diagramma dei collegamenti di
alimentazione ( )".
Zie "Voedingsaansluitschema ( )" voor meer details.
from the car’sspeaker connector
vom Lautsprecheranschluss des Fahrzeugs
du connecteur de haut-parleur de la voiture
dal connettore dei diusori dell’auto
van de autoluidsprekeraansluiting
*1from car antenna (aerial)
von Autoantenne
de l’antenne de la voiture
dall’antenna dell’auto
van een auto-antenne
*4
*2
*2
Auxiliary power connector
Hilfsstromanschluss
Connecteur d’alimentation auxiliaire
Connettore di alimentazione ausiliaria
Hulpvoedingsaansluiting
Red
Rot
Rouge
Rosso
Rood
Red
Rot
Rouge
Rosso
Rood
Yellow
Gelb
Jaune
Giallo
Geel
Yellow
Gelb
Jaune
Giallo
Geel
the car without ACC position
Fahrzeug ohne Zubehörposition (ACCoder I)
Véhicule sans position ACC
Auto priva della posizione ACC
Auto zonder ACC-positie
Red
Rot
Rouge
Rosso
Rood
Red
Rot
Rouge
Rosso
Rood
Yellow
Gelb
Jaune
Giallo
Geel
Yellow
Gelb
Jaune
Giallo
Geel
4
Yellow
Gelb
Jaune
Giallo
Geel
continuous power supply
permanente Stromversorgung
alimentation continue
alimentazione continua
continue voeding
7
Red
Rot
Rouge
Rosso
Rood
switched power supply
geschaltete Stromversorgung
alimentation commutée
alimentazione commutata
geschakelde voeding
Red
Rot
Rouge
Rosso
Rood
Red
Rot
Rouge
Rosso
Rood
Yellow
Gelb
Jaune
Giallo
Geel
Yellow
Gelb
Jaune
Giallo
Geel
4
Yellow
Gelb
Jaune
Giallo
Geel
switched power supply
geschaltete Stromversorgung
alimentation commutée
alimentazione commutata
geschakelde voeding
7
Red
Rot
Rouge
Rosso
Rood
continuous power supply
permanente Stromversorgung
alimentation continue
alimentazione continua
continue voeding
2
13
*6

WX-GT90BT/GT90BTE/GT99BT
12
Deutsch
Sicherheitshinweise
Wählen Sie den Einbauort sorgfältig so aus, dass das
Gerät beim Fahren nicht hinderlich ist.
Bauen Sie das Gerät so ein, dass es keinen hohen
Temperaturen (keinem direkten Sonnenlicht, keiner
Warmlu von der Heizung), keinem Staub, keinem
Schmutz und keinen starken Vibrationen ausgesetzt ist.
Für eine sichere Befestigung verwenden Sie stets die
mitgelieferten Montageteile.
Hinweis zum Montagewinkel
Das Gerät sollte in einem Winkel von weniger als 45°
montiert werden.
Abnehmen der Halterung ( )
Nehmen Sie vor dem Installieren des Geräts die
Halterung vom Gerät ab.
1
Führen Sie beide Löseschlüssel zwischen dem
Gerät und der Halterung ein, bis sie mit einem
Klicken einrasten.
2
Ziehen Sie die Halterung nach unten und das
Gerät nach oben, um die beiden zu trennen.
Montagebeispiel ( )
Installation im Armaturenbrett
Hinweise
Vergewissern Sie sich vor dem Installieren, dass die Verriegelungenan
beiden Seiten der Halterung um 3,5 mm nach innen gebogen sind.
Wenn die Verriegelungen geradeoder nach außen gebogen sind, lässt
sich das Gerät nicht sicher installieren und kann herausspringen (-1).
Falls erforderlich, biegen Sie diese Klammern für einen sicheren Halt
nach außen (-2).
Montieren Sie das Gerät an der mitgelieferten Halterung (-3).
Montieren des Geräts in einem
japanischen Fahrzeug ( )
Dieses Gerät lässt sich möglicherweise in einigen
Modellen japanischer Fahrzeughersteller nicht einbauen.
Wenden Sie sich in einem solchen Fall an Ihren
Sony-Händler.
Wenn Sie dieses Gerät an der eingebauten Halterung des
Fahrzeugs montieren, befestigen Sie es mit den
mitgelieferten Schrauben in den für den jeweiligen
Fahrzeugtyp geeigneten Schraubenbohrungen: T für
TOYOTA, M für MITSUBISHI und N für NISSAN.
Hinweis
Um Fehlfunktionen zu vermeiden, verwenden Sie zum Einbauen des
Geräts nur die mitgelieferten Schrauben .
English
Precautions
Choose the installation location carefully so that the unit
will not interfere with normal driving operations.
Avoid installing the unit in areas subject to dust, dirt,
excessive vibration, or high temperature, such as in
direct sunlight or near heater ducts.
Use only the supplied mounting hardware for a safe and
secure installation.
Mounting angle adjustment
Adjust the mounting angle to less than 45°.
Removing the bracket ( )
Before installing the unit, remove the bracket
from the unit.
1
Insert both release keys together between the
unit and the bracket until they click.
2
Pull down the bracket , then pull up the unit to
separate.
Mounting example ( )
Installation in the dashboard
Notes
Before installing, make sure that the catches on both sides of the
bracket are bent inwards 3.5 mm (5/32 in). If the catchesare straight
or bent outwards, the unit will not be installed securely and may spring
out (-1).
Bend these claws outward for a tight t, if necessary (-2).
Mount the unit onto the supplied bracket (-3).
Mounting the unit in a
Japanese car ( )
You may not be able to install this unit in some makes of
Japanese cars. In such a case, consult your Sony dealer.
When mounting this unit to the preinstalled brackets of
your car, use the supplied screws in the appropriate
screw holes, based on your car: T for TOYOTA, M for
MITSUBISHI and N for NISSAN.
Note
To prevent malfunction, install only with the supplied screws .
Warning if your car’s ignition
has no ACC position
Be sure to set the Auto Off function. For details, see the
supplied Operating Instructions.
e unit will shut off completely and automatically in the
set time aer the unit is turned off, which prevents battery
drain.
If you do not set the Auto Off function, press and hold
until the display disappears each time
you turn the ignition off.
Fuse replacement ( )
When replacing the fuse, be sure to use one matchingthe
amperage rating stated on the original fuse. If the fuse
blows, check the power connection and replace the fuse. If
the fuse blows again after replacement, there may be an
internal malfunction. In such a case, consult your nearest
Sony dealer.
Installing the microphone
()
To capture your voice during handsfree calling, you need
to install the microphone (supplied).
Cautions
Keep the microphone away from extremely high
temperatures and humidity.
It is extremely dangerous if the cord becomes wound
around the steering column or gearstick. Be sure to keep
it and other parts from obstructing your driving.
If airbags or any other shock-absorbing equipment is in
your car, contact the store where you purchased this
unit, or the car dealer, before installation.
-A Installing on the sun visor
1 Install the microphone on the clip .
2 Install the clip on the sun visor.
3 Install clips (not supplied) and adjust the length
and position of the cord so that it does not
obstruct your driving.
-B Installing on the dashboard
1 Install the microphone on the clip , then
place the cord along the groove of the clip .
2 Attach the clip to the dashboard with the
double-sided tape .
3 Install a clip (not supplied) and adjust the length
and position of the cord so that it does not
obstruct your driving.
Notes
Before attaching the double-sided tape , clean the surface of the
dashboard with a dry cloth.
Adjust the microphone angle to the proper position.
The microphone can be installed without using the clip .
In this case, directly attach the microphone to the dashboard with the
double-sided tape . Keep the unused clip for future use.
Warnhinweis, wenn die
Zündung Ihres Fahrzeugs nicht
über eine Zubehörposition
(ACC oder I) verfügt
Aktivieren Sie unbedingt die Abschaltautomatik. Näheres
dazu nden Sie in der mitgelieferten Bedienungsanleitung.
Nach dem Ausschalten wird das Gerät dann nach der
voreingestellten Zeit automatisch vollständig abgeschaltet,
so dass der Autobatterie kein Strom mehr entzogen wird.
Wenn Sie die Abschaltautomatik nicht aktivieren, müssen
Sie jedes Mal, wenn Sie die Zündung ausschalten, die Taste
gedrückt halten, bis die Anzeige
ausgeblendet wird.
Austauschen der Sicherung
()
Wenn Sie eine Sicherung austauschen, achten Sie darauf,
eine Ersatzsicherung mit dem gleichen Ampere-Wert wie
die Originalsicherung zu verwenden. Dieser ist auf der
Originalsicherung angegeben. Wenn die Sicherung
durchbrennt, überprüfen Sie den Stromanschluss und
tauschen die Sicherung aus. Brennt die neue Sicherung
ebenfalls durch, kann eine interne Fehlfunktion vorliegen.
Wenden Sie sich in einem solchen Fall an Ihren
Sony-Händler.
Installieren des Mikrofons
()
Damit bei Freisprechanrufen Ihre Stimme übertragen
werden kann, müssen Sie das Mikrofon (mitgeliefert)
installieren.
Sicherheitshinweise
Schützen Sie das Mikrofon vor extrem hohen
Temperaturen und Feuchtigkeit.
Es ist sehr gefährlich, wenn sich das Kabel um die
Lenksäule oder den Schalthebel wickelt. Achten Sie
unbedingt darauf, dass das Kabel und andere Teile beim
Fahren nicht hinderlich sind.
Wenn Ihr Auto mit Airbags oder anderen
Aufprallschutzsystemen ausgestattet ist, wenden Sie sich
vor der Installation an den Händler, bei dem Sie dieses
Gerät erworben haben, oder an den Autohändler.
-A Befestigung an der Sonnenblende
1 Befestigen Sie das Mikrofon am Clip .
2 Bringen Sie den Clip an der Sonnenblende an.
3 Bringen Sie Clips (nicht mitgeliefert) an und
wählen Sie die Länge und Verlegung des Kabels
so, dass es beim Fahren nicht hinderlich ist.
-B Befestigung am Armaturenbrett
1 Befestigen Sie das Mikrofon am Clip und
führen Sie das Kabel entlang der Kerbe des Clips
.
2 Bringen Sie den Clip mit dem doppelseitigen
Klebeband am Armaturenbrett an.
3 Bringen Sie einen Clip (nicht mitgeliefert) an und
wählen Sie die Länge und Verlegung des Kabels
so, dass es beim Fahren nicht hinderlich ist.
Hinweise
Reinigen Sie die Oberäche des Armaturenbretts mit einem trockenen
Tuch, bevor Sie das doppelseitige Klebeband anbringen.
Stellen Sie den Mikrofonwinkel nach Bedarf ein.
Das Mikrofon kann auch ohne Clip befestigt werden.
Bringen Sie das Mikrofon in diesem Fall mit dem doppelseitigen
Klebeband direkt am Armaturenbrett an. Bewahren Sie den nicht
verwendeten Clip zum späteren Gebrauch auf.
Français
Précautions
Choisir soigneusement l’emplacement de l’installation
afin que l’appareil ne gêne pas la conduite normale du
véhicule.
Eviter d’installer l’appareil dans un endroit exposé à de la
poussière, de la saleté, des vibrations violentes ou à des
températures élevées, comme en plein soleil ou à
proximité d’un conduit de chauage.
Pour garantir un montage sûr, n’utiliser que le matériel
fourni.
Réglage de l’angle de montage
Ajuster l’inclinaison à un angle inférieur à 45°.
Retrait du support ( )
Avant d’installer l’appareil, retirez le support de
l’appareil.
1 Insérez les deux clés de déblocage
simultanément entre l’appareil et le support
jusqu’au déclic indiquant qu’elles sont en place.
2 Tirez le support vers le bas, puis tirez
l’appareil vers le haut pour les séparer.
Exemple de montage ( )
Installation dans le tableau de bord
Remarques
Avant l’installation, assurez-vous que les loquets des deux côtés du
support sont bien pliés de 3,5 mm vers l’intérieur. Si les loquets sont
droits ou pliés vers l’extérieur, l’appareil ne peut pas être xé solidement
et peut se détacher (-1).
Pliez ces gries vers l’extérieurpour assurer une prise correcte si
nécessaire (-2).
Montez l’appareil sur le support fourni (-3).
Montage de l’appareil dans
une voiture japonaise ( )
Il est possible que vous ne puissiez pas installer cet
appareil dans certaines marques de voitures japonaises.
Dans ce cas, consultez votre revendeur Sony.
Lorsque vous montez cet appareil sur les supports
préinstallés de votre voiture, utilisez les visfournies
dans les trous appropriés, selon votre voiture : T pour
TOYOTA, M pour MITSUBISHI et N pour NISSAN.
Remarque
Pour éviter tout mauvais fonctionnement, utilisez exclusivement les vis
fournies pour l’installation.
Avertissement au cas où le
contact de votre voiture ne
dispose pas d’une position
ACC
Veillez à régler la fonction de mise hors tension
automatique. Pour obtenir davantage d’informations,
reportez-vous au mode d’emploi fourni.
L’appareil s’éteint complètement et automatiquement après
le laps de temps choisi une fois qu’il a été mis hors tension
afin d’éviter que la batterie ne se décharge.
Si vous ne réglez pas la fonction de mise hors tension
automatique, appuyez sur la touche et
maintenez-la enfoncée jusqu’à ce que l’achage
disparaisse à chaque fois que vous coupez le contact.
Remplacement du fusible ( )
Lorsque vous remplacez le fusible, veillez à utiliser un
fusible dont l’intensité, en ampères, correspond à la valeur
indiquée sur le fusible usagé. Si le fusible saute, vériez le
branchement de l’alimentation et remplacez-le. Si le
nouveau fusible saute également, il est possible que
l’appareil soit défectueux. Dans ce cas, consultez votre
revendeur Sony le plus proche.
Installation du microphone
()
Pour capturer la voix pendant un appel en mains libres,
vous devez installer le microphone (fourni).
Avertissements
Conservez le microphone à l’abri de la chaleur et de
l’humidité extrêmement élevées.
Il est extrêmement dangereux que le cordon s’enroule
autour de la colonne de direction ou du changement de
vitesse. Veillez à ce que le cordon et les autres pièces
n’entravent pas la conduite.
Si votre véhicule est équipé d’airbags ou d’autres
dispositifs d’absorption des chocs, contactez le
revendeur de l’appareil ou votre concessionnaire avant
de procéder à l’installation.
-A Installation sur le pare-soleil
1 Fixez le microphone au clip .
2 Fixez le clip au pare-soleil.
3 Fixez des clips (non fournis), puis réglez la
longueur et la position du cordon an qu’il
n’entrave pas la conduite.
-B Installation sur le tableau de bord
1 Fixez le microphone au clip , puis placez le
cordon dans la rainure du clip .
2 Fixez le clip au tableau de bord avec de
l’adhésif double face .
3 Fixez un clip (non fourni), puis réglez la longueur
et la position du cordon an qu’il n’entrave pas la
conduite.
Remarques
Avant de xer l’adhésifdouble face , nettoyez la surface du tableau
de bord avec un chion sec.
Réglez l’angle du microphone sur la position correcte.
Le microphone peut être installé sans utiliser le clip .
Dans ce cas, xez le microphone directement au tableau de bord avec
de l’adhésif double face . Conservez le clip de réserve en vue d’une
utilisation ultérieure.
Italiano
Precauzioni
Scegliere con attenzione la posizione per l’installazione
in modo che l’apparecchio non interferisca con le
operazioni di guida del conducente.
Evitare di installare l’apparecchio dove sia soggetto ad
alte temperature, come alla luce solare diretta o al getto
di aria calda dell’impianto di riscaldamento, o dove
possa essere soggetto a polvere, sporco e vibrazioni
eccessive.
Usare solo il materiale di montaggio in dotazione per
un’installazione stabile e sicura.
Regolazione dell’angolo di montaggio
Regolare l’angolo di montaggio in modo che sia inferiore a
45°.
Rimozione della staa ( )
Prima di installare l’apparecchio, rimuovere la staa
dall’apparecchio.
1 Inserire contemporaneamente entrambe le
chiavette di rilascio tra l’apparecchio e la
staa no a che non scattano in posizione.
2 Estrarre la staa , quindi sollevare
l’apparecchio per rimuoverlo.
Esempio di montaggio ( )
Installazione nel cruscotto
Note
Prima di installare l’unità, accertarsi di ripiegare i fermi presenti su
entrambi i lati della staa verso l’interno di 3,5 mm. Se i fermi sono
diritti o ripiegati verso l’esterno,l’apparecchio non verrà installato in
modo sicuro e potrebbe fuoriuscire (-1).
Piegare verso l’esternoquesti morsetti per un’installazione più sicura, se
necessario (-2).
Montare l’apparecchio sulla staa in dotazione (-3).
Montaggio dell’apparecchio
su un’auto giapponese ( )
Potrebbe risultare impossibile installare questo
apparecchio su alcuni tipi di vetture giapponesi. In tal
caso, rivolgersi al rivenditore Sony.
Durante il montaggio del presente apparecchio sulle stae
preinstallate dell’auto, inserire le viti in dotazione negli
appositi fori, in base al modello dell’auto: T per TOYOTA,
M per MITSUBISHI e N per NISSAN.
Nota
Per evitare problemi di funzionamento, utilizzare per l’installazione
esclusivamente le viti in dotazione .
Avvertenza relativa all’installazione
su un’auto sprovvista della
posizione ACC (accessoria) sul
blocchetto di accensione
Accertarsi di impostare la funzione di spegnimento
automatico. Per ulteriori informazioni, fare riferimento
alle istruzioni per l’uso in dotazione.
L’apparecchio si spegne completamente e automaticamente
all’ora impostata dopo che è stato disattivato, onde evitare
che la batteria si scarichi.
Se la funzione di spegnimento automatico non è stata
impostata, ogni volta che il motore viene spento tenere
premuto nché il display non viene
disattivato.
Sostituzione del fusibile ( )
Per la sostituzione del fusibile, assicurarsi di utilizzare un
fusibile dello stesso amperaggio di quello indicato
sull’originale. Se il fusibile si brucia, controllare i
collegamenti dell’alimentazione e sostituire il fusibile. Se
dopo la sostituzione il fusibile si brucia di nuovo, è
possibile che si tratti di un problema interno. In tal caso,
rivolgersi al più vicino rivenditore Sony.
Installazione del microfono
()
Per catturare la voce durante le chiamate vivavoce, è
necessario installare il microfono (in dotazione).
Attenzione
Non sottoporre il microfono a temperature e umidità
eccessivamente elevate.
Se il cavo rimane avvolto al piantone dello sterzo o alla leva
del cambio, possono vericarsi situazioni di estremo
pericolo. Accertarsi quindi di posizionare il cavo e altri
componenti in modo che non ostruiscano la guida.
Se nell’auto sono presenti air-bag o altri dispositivi di
assorbimento degli urti, prima dell’installazione
contattare il negozio in cui è stato acquistato
l’apparecchio o l’autoconcessionario.
-A Installazione sull’aletta parasole
1 Installare il microfono sul fermaglio .
2 Installare il fermaglio sull’aletta parasole.
3 Installare i fermagli (non in dotazione) e regolare
la lunghezza e la posizione del cavo in modo che
non ostacoli la guida.
-B Installazione sul cruscotto
1 Installare il microfono sul fermaglio , quindi
inserire il cavo nella scanalatura del fermaglio
stesso .
2 Applicare il fermaglio al cruscotto utilizzando
il nastro biadesivo .
3 Installare un fermaglio (non in dotazione) e
regolare la lunghezza e la posizione del cavo in
modo che non ostacoli la guida.
Note
Prima di applicare il nastro biadesivo , pulire la supercie del
cruscotto con un panno asciutto.
Regolare l’angolazione del microfono sulla posizione corretta.
È possibile anche installare il microfono senza utilizzare il fermaglio
.
In questo caso, applicare direttamente il microfono al cruscotto
utilizzando il nastro biadesivo . Conservare il fermaglio inutilizzato
per usi futuri.
Nederlands
Voorzorgsmaatregelen
Kies de installatieplaats zorgvuldig zodat het apparaat de
bestuurder niet hindert tijdens het rijden.
Installeer het apparaat niet op plaatsen waar het
blootgesteld wordt aan hoge temperaturen, bv. in direct
zonlicht of bij de warme luchtstroom van de
autoverwarming, aan sterke trillingen, of waar het in
contact komt met veel stof of vuil.
Gebruik voor het veilig en stevig monteren van het
apparaat uitsluitend de bijgeleverde montage-
onderdelen.
Maximale montagehoek
Installeer het apparaat nooit in een hoek van meer dan 45°
met het horizontale vlak.
De beugel verwijderen ( )
Voordat u het apparaat gaat installeren, moet u de
beugel verwijderen van het apparaat.
1 Plaats de ontgrendelingssleutels tussen het
apparaat en de beugel tot deze vastklikken.
2 Trek de beugel omlaag en trek het apparaat
omhoog om deze van elkaar te scheiden.
Montagevoorbeeld ( )
Montage in het dashboard
Opmerkingen
Voordat u het apparaat installeert, moet u de grepen aan beide zijden
van de beugel 3,5 mm naar binnen buigen. Als de grepen recht zijn
of naar buiten gebogen, kan het apparaat niet goed worden bevestigd
en kan dit losschieten (-1).
Indien nodig kunt u deze klemhaken ombuigen voor een stevigere
bevestiging (-2).
Monteer het apparaat op de bijgeleverde beugel (-3).
Het apparaat installeren in een
Japanse auto ( )
Het is mogelijk dat u dit apparaat niet kunt installeren in
bepaalde Japanse auto's. Contacteer in dat geval uw
dichtstbijzijnde Sony-handelaar.
Bij het monteren van dit apparaat op de voorgeïnstalleerde
beugels van uw auto, brengt u de bijgeleverde schroeven
aan in de schroefopeningen die geschikt zijn voor uw
auto: T voor TOYOTA, M voor MITSUBISHI en N voor
NISSAN.
Opmerking
Om defecten te voorkomen, mag u alleen de bijgeleverde schroeven
gebruiken.
Waarschuwing als het
contactslot van de auto geen
ACC-positie heeft
Zorg ervoor dat u de functie voor automatisch
uitschakelen instelt. Raadpleeg de bijgeleverde
gebruiksaanwijzing voor meer informatie.
Het apparaat wordt na de ingestelde tijd automatisch
volledig uitgeschakeld nadat het apparaat is uitgeschakeld.
Zo wordt voorkomen dat de accu leegloopt.
Als u de functie voor automatisch uitschakelen niet instelt,
moet u ingedrukt houden tot het display
verdwijnt telkens wanneer u het contact uitschakelt.
Zekering vervangen ( )
Vervang een zekering altijd door een exemplaar van
eenzelfde amperage als op de oorspronkelijke zekering
wordt vermeld. Als de zekering doorbrandt, moet u de
voedingsaansluiting controleren en de zekering vervangen.
Brandt de zekering vervolgens nogmaals door, dan kan er
sprake zijn van een defect in het apparaat. Raadpleeg in
dat geval de Sony-dealer bij u in de buurt.
De microfoon installeren ( )
Om uw stem te kunnen registreren tijdens het handsfree
bellen, moet u de microfoon (bijgeleverd) installeren.
Opgelet
Stel de microfoon niet bloot aan extreem hoge
temperaturen of aan een hoge vochtigheidsgraad.
Het is uiterst gevaarlijk als de kabel rond de stuurkolom
of de versnellingspook verstrikt raakt. Zorg ervoor dat
de kabel en andere onderdelen u niet kunnen hinderen
tijdens het rijden.
Als uw auto uitgerust is met airbags of andere
schokdempende apparatuur, contacteert u de winkel
waar u dit apparaat hebt gekocht of uw autodealer voor
u het apparaat installeert.
-A Bevestigen aan de zonneklep
1 Bevestig de microfoon aan de klem .
2 Bevestig de klem aan de zonneklep.
3 Gebruik klemmen (niet bijgeleverd) en pas de
lengte en positie van de kabel aan zodat deze u
niet hindert tijdens het rijden.
-B Bevestigen op het dashboard
1 Bevestig de microfoon aan de klem en
plaats de kabel in de gleuf in de klem .
2 Bevestig de klem op het dashboard met
behulp van de dubbelzijdige kleefband .
3 Gebruik een klem (niet bijgeleverd) en pas de
lengte en positie van de kabel aan zodat deze u
niet hindert tijdens het rijden.
Opmerkingen
Voor u de dubbelzijdige kleefband vastmaakt , reinigt u het
oppervlak van het dashboard met een droge doek.
Breng de microfoon in de juiste hoek.
De microfoon kan ook geïnstalleerd worden zonder de klem te
gebruiken.
Bevestig in dit geval de microfoon rechtstreeks op het dashboard met
behulp van de dubbelzijdige kleefband . Bewaar de ongebruikte klem
voor toekomstig gebruik.
Fuse (10 A)
Sicherung (10 A)
Fusible (10 A)
Fusibile (10 A)
Zekering (10 A)
A2
1
Clips (not supplied)
Clips (nicht mitgeliefert)
Clips (non fournis)
Fermagli (non in dotazione)
Klemmen (niet bijgeleverd)
2
B1
Clip (not supplied)
Clip (nicht mitgeliefert)
Clip (non fourni)
Fermaglio (non in dotazione)
Klem (niet bijgeleverd)
Face the hook inwards.
Der Haken muss nach innen weisen.
Tournez le crochet versl’intérieur.
Con il gancetto rivolto verso l’interno.
Het haakje moet naar binnen wijzen.
12
Claws
Klammern
Gries
Morsetti
Klemhaken
Catch
Verriegelung
Loquet
Fermo
Greep
Larger than 182 mm (7 1/4in)
Größer als 182 mm
Plus de 182 mm
Superiore a 182 mm
Meer dan 182 mm
Larger than 111 mm
(4 3/8in)
Größer als 111 mm
Plus de 111 mm
Superiore a 111 mm
Meer dan 111 mm
3
Dashboard
Armaturenbrett
Tableau de bord
Cruscotto
Dashboard
Bracket
Halterung
Support
Staa
Beugel
Bracket
Halterung
Support
Staa
Beugel
to dashboard/center console
an Armaturenbrett/Mittelkonsole
vers le tableau de bord/la console centrale
al cruscotto/alla console centrale
naar dashboard/middenconsole
Existing parts supplied with your car
Vorhandene, mit dem Fahrzeuggelieferte Teile
Pièces existantes fournies avec votrevoiture
Parti in dotazione con l’auto
Bestaande onderdelen geleverd bij de auto
size
5 × max. 8 mm
(7/32 × max. 5/16 in)
Größe
5 × max. 8 mm
taille
5 × 8 mm max.
Dimensioni
5 × max. 8 mm
formaat
5 × max. 8 mm
size
5 × max. 8 mm
(7/32 × max. 5/16 in)
Größe
5 × max. 8 mm
taille
5 × 8 mm max.
Dimensioni
5 × max. 8 mm
formaat
5 × max. 8 mm

WX-GT90BT/GT90BTE/GT99BT
13
(E and Indian models)
A
*
B
Equipment used in illustrations (not supplied)
Equipo utilizado en las ilustraciones (no suministrado)
Front speaker
Altavoz frontal
Subwoofer
Altavoz potenciador
de graves
Power amplier
Amplicador de potencia
*1 Speaker impedance: 4 – 8 ohms × 4
*2 RCA pin cord (not supplied).
*3 Depending on the type of car, use an adaptor for a
wired remote control (not supplied).
*4 For details on installing the microphone, see “Installing
the microphone ( )” on the reverse side.
*5 Whether in use or not, route the microphone input cord
such that it does not interfere with driving. Secure the
cord with a clamp, etc., if it is installed around your feet.
*1 Impedancia de los altavoces: de 4 a 8 × 4
*2 Cable con terminales RCA (no suministrado)
*3 Según el tipo de automóvil, utilice un adaptador para
control remoto por cable (no suministrado).
*4 Para obtener detalles sobre la instalación del micrófono,
consulte “Instalación del micrófono ( )”al reverso.
*5 Se esté utilizando o no, coloque el cable de entrada del
micrófono de modo que no interera en el manejo del
automóvil. Si instala los cables cerca de la zona de los
pies, fíjelos con una abrazadera, etc.
Rear speaker
Altavoz posterior
*2
*2
REM OUT
Max. supply current 0.4 A
Corriente máx. de alimentación de 0,4 A
Fuse (10 A)
Fusible (10 A)
Blue/white striped
Con rayas azules y blancas
ACC
BATTERY
White
Blanco
Green
Verde
Purple
Morado
White/black striped
Con rayas blancas y negras
Gray/black striped
Con rayas grises y negras
Green/black striped
Con rayas verdes y negras
Gray
Gris
Left
Izquierdo
Right
Derecho
Left
Izquierdo
Right
Derecho
Purple/black striped
Con rayas moradas y negras
from car antenna
(aerial)
desde la antena
del automóvil
ILLUMINATION
Red
Rojo
Yellow
Amarillo
Orange/white striped
Con rayas naranjas y
blancas
Black
Negro
*4
*1
English
Cautions
Be sure to install this unit in the dashboard of the car as
the rear side of the unit becomes hot during use.
is unit is designed for negative ground (earth) 12 V
DC operation only.
Do not get the leads under a screw, or caught in moving
parts (e.g. seat railing).
Before making connections, turn the car ignition off to
avoid short circuits.
Connect the yellow and red power input leads only
after all other leads have been connected.
Run all ground (earth) leads to a common ground
(earth) point.
Be sure to insulate any loose unconnected leads with
electrical tape for safety.
Notes on the power supply lead (yellow)
When connecting this unit in combination with other
stereo components, the connected car circuit’s rating
must be higher than the sum of each component’s fuse.
When no car circuits are rated high enough, connect the
unit directly to the battery.
Connection example ( )
Subwoofer Direct Connection ( -B)
For details on the setting for the connection, see the
supplied Operating Instruction.
*Do not connect a speaker in this connection.
Notes
Be sure to connect the ground (earth) lead before connecting the
amplier.
The alarm will only sound if the built-in amplier is used.
Connection diagram ( )
To a metal surface of the car
First connect the black ground (earth) lead, then connect the yellow,
and red power supply leads.
To the power antenna (aerial) control lead or
power supply lead of antenna (aerial) booster
Notes
It is not necessary to connect this lead if there is no power antenna
(aerial) or antenna (aerial) booster, or with a manually-operated
telescopic antenna (aerial).
When your car has a built-in FM/AM antenna (aerial) in the rear/
side glass, see “Notes on the control and power supply leads.”
To AMP REMOTE IN of an optional power
amplier
This connection is only for ampliers and a power antenna (aerial).
Connecting any other system may damage the unit.
To a car’s illumination signal
Be sure to connect the black ground (earth) lead to a metal surface of
the car rst.
To the +12V power terminal which is energized
in the accessory position of the ignition switch
Notes
If there is no accessory position, connect to the +12 V power
(battery) terminal which is energized at all times.
Be sure to connect the black ground (earth) lead to a metal surface
of the car rst.
When your car has a built-in FM/AM antenna (aerial) in the rear/
side glass, see “Notes on the control and power supply leads.”
To the +12V power terminal which is energized
at all times
Be sure to connect the black ground (earth) lead to a metal surface of
the car rst.
Notes on the control and power supply leads
REM OUT lead (blue/white striped) supplies +12 V DC when you turn on
the unit.
When your car has built-in FM/AM antenna (aerial) in the rear/side
glass, connect REM OUT lead (blue/white striped) or the accessory
power supply lead (red) to the power terminal of the existing antenna
(aerial) booster. For details, consult your dealer.
A power antenna (aerial) without a relay box cannot be used with this
unit.
Memory hold connection
When the yellow power input lead is connected, power will always be
supplied to the memory circuit even when the ignition switch is turned o.
Notes on speaker connection
Before connecting the speakers, turn the unit o.
Use speakers with an impedance of 4 to 8 ohms, and with adequate
power handling capacities to avoid its damage.
Do not connect the speaker terminals to the car chassis, or connect the
terminals of the right speakers with those of the left speaker.
Do not connect the ground (earth) lead of this unit to the negative (–)
terminal of the speaker.
Do not attempt to connect the speakers in parallel.
Connect only passive speakers. Connecting active speakers (with
built-in ampliers) to the speaker terminals may damage the unit.
To avoid a malfunction, do not use the built-in speaker leads installed in
your car if the unit shares a common negative (–) lead for the right and
left speakers.
Do not connect the unit’s speaker leads to each other.
Note on connection
If speaker and amplier are not connected correctly, “FAILURE” appears in
the display. In this case, make sure the speaker and amplier are
connected correctly.
Español
Precauciones
Asegúrese de instalar la unidad en el tablero del
automóvil, ya que la parte posterior de la unidad se
calienta durante el uso.
Esta unidad ha sido diseñada para alimentarse sólo con
cc de 12 V de masa negativa.
No coloque los cables debajo de ningún tornillo, ni los
aprisione con partes móviles (p. ej. los rieles del asiento).
Antes de realizar las conexiones, apague el automóvil
para evitar cortocircuitos.
Conecte los cables de fuente de alimentación amarillo y
rojo solamente después de haber conectado los demás.
Conecte todos los cables de conexión a masa a un
punto común.
Por razones de seguridad, asegúrese de aislar con cinta
aislante los cables sueltos que no estén conectados.
Notas sobre el cable de fuente de alimentación
(amarillo)
Cuando conecte esta unidad en combinación con otros
componentes estéreo, la capacidad nominal del circuito
conectado del automóvil debe ser superior a la suma del
fusible de cada componente.
Si no hay circuitos del automóvil con capacidad nominal
suficientemente alta, conecte la unidad directamente a la
batería.
Ejemplo de conexiones ( )
Conexión directa de altavoz de subgraves ( -B)
Para obtener más información sobre cómo configurar la
conexión, consulte el Manual de instrucciones
suministrado.
*No conecte un altavoz a esta conexión.
Notas
Asegúrese de conectar primero el cable de conexión a masa antes de
realizar la conexión del amplicador.
La alarma sonará únicamente si se utiliza el amplicador incorporado.
Diagrama de conexión ( )
A una supercie metálica del automóvil
Conecte primero el cable de conexión a masa negro, y después los
cables amarillo y rojo de fuente de alimentación.
Al cable de control de la antena motorizada o al
cable de fuente de alimentación del amplicador
de señal de la antena
Notas
Si no se dispone de antena motorizada ni de amplicador de señal
de la antena, o se utiliza una antena telescópica accionada
manualmente, no será necesario conectar este cable.
Si el automóvil tiene una antena de FM/AM incorporada en el
cristal trasero o lateral, consulte “Notas sobre los cables de control
y de fuente de alimentación”.
A AMP REMOTE IN de un amplicador de
potencia opcional
Esta conexión es sólo para amplicadores y una antena motorizada.
La conexión de cualquier otro sistema puede dañar la unidad.
A una señal de iluminación del automóvil
Asegúrese de conectar primero el cable de conexión a masa negro a
una supercie metálica del automóvil.
Al terminal de alimentación de +12 V que recibe
energía en la posición de accesorio del
interruptor de encendido
Notas
Si no hay posición de accesorio, conéctelo al terminal de
alimentación (batería) de +12 V que recibe energía sin
interrupción.
Asegúrese de conectar primero el cable de conexión a masa negro
a una supercie metálica del automóvil.
Si el automóvil tiene una antena de FM/AM incorporada en el
cristal trasero o lateral, consulte “Notas sobre los cables de control
y de fuente de alimentación”.
Al terminal de alimentación de +12 V que recibe
energía sin interrupción
Asegúrese de conectar primero el cable de conexión a masa negro a
una supercie metálica del automóvil.
Notas sobre los cables de control y de fuente de alimentación
El cable REM OUT (rayado azul y blanco) suministra cc +12 V al
encender la unidad.
Si el automóvil dispone de una antena de FM/AM incorporada en el
cristal trasero o lateral, conecte el cable REM OUT (rayado azul y
blanco) o el cable de fuente de alimentación auxiliar (rojo) al terminal
de alimentación del amplicador de señal de la antena existente. Para
obtener más detalles, consulte a su distribuidor.
Con esta unidad no es posible utilizar una antena motorizada sin caja
de relé.
Conexión para protección de la memoria
Si conecta el cable de fuente de alimentación amarillo, el circuito de la
memoria recibirá siempre alimentación, aunque apague el interruptor de
encendido.
Notas sobre la conexión de los altavoces
Antes de conectar los altavoces, desconecte la alimentación de la
unidad.
Utilice altavoces con una impedancia de 4 a 8 Ω con la capacidad de
potencia adecuada para evitar que se dañen.
No conecte los terminales de altavoz al chasis del automóvil, ni conecte
los terminales del altavoz derecho con los del izquierdo.
No conecte el cable de conexión a masa de esta unidad al terminal
negativo (–) del altavoz.
No intente conectar los altavoces en paralelo.
Conecte solamente altavoces pasivos. Si conecta altavoces activos (con
amplicadores incorporados) a los terminales de altavoz, puede dañar
la unidad.
Para evitar fallas de funcionamiento, no utilice los cables de altavoz
incorporados instalados en el automóvil si la unidad comparte un cable
negativo común (–) para los altavoces derecho e izquierdo.
No conecte los cables de altavoz de la unidad entre sí.
Nota sobre la conexión
Si el altavoz y el amplicador no están conectados correctamente,
aparecerá “FAILURE” en la pantalla. Si es así, compruebe la conexión de
ambos dispositivos.

WX-GT90BT/GT90BTE/GT99BT
14
123
Dashboard
Tablero
Claws
Uñas
Face the hook inwards.
El gancho debe encontrarse
en la parte interior.
Catch
Enganche
Larger than 182 mm (7 1/4in)
Superior a 182 mm
Larger than 111 mm
(4 3/8in)
Superior a 111 mm
A
B
2
2
1
1
Clips (not supplied)
Clips (no suministrados)
Clip (not supplied)
Clip (no suministrado)
Fuse (10 A)
Fusible (10 A)
Bracket
Soporte
Bracket
Soporte
to dashboard/center console
al tablero o consola central
Existing parts supplied with your car
Piezas existentes suministradas con su automóvil
size
5 × max. 8 mm
(7/32 × max. 5/16 in)
tamaño
5 × 8 mm máx.
size
5 × max. 8 mm
(7/32 × max. 5/16 in)
tamaño
5 × 8 mm máx.
Installing the microphone
()
To capture your voice during handsfree calling, you need
to install the microphone (supplied).
Cautions
Keep the microphone away from extremely high
temperatures and humidity.
It is extremely dangerous if the cord becomes wound
around the steering column or gearstick. Be sure to keep
it and other parts from obstructing your driving.
If airbags or any other shock-absorbing equipment is in
your car, contact the store where you purchased this
unit, or the car dealer, before installation.
-A Installing on the sun visor
1 Install the microphone on the clip .
2 Install the clip on the sun visor.
3 Install clips (not supplied) and adjust the length
and position of the cord so that it does not
obstruct your driving.
-B Installing on the dashboard
1 Install the microphone on the clip , then
place the cord along the groove of the clip .
2 Attach the clip to the dashboard with the
double-sided tape .
3 Install a clip (not supplied) and adjust the length
and position of the cord so that it does not
obstruct your driving.
Notes
Before attaching the double-sided tape , clean the surface of the
dashboard with a dry cloth.
Adjust the microphone angle to the proper position.
The microphone can be installed without using the clip .
In this case, directly attach the microphone to the dashboard with the
double-sided tape . Keep the unused clip for future use.
Notes on the tuning step
For how to set the tuning step, see the supplied
Operating Instructions.
If replacing the car battery or changing the connections,
the tuning step setting will be erased.
Instalación del micrófono ( )
Para capturar la voz durante llamadas con manos libres,
debe instalar el micrófono (suministrado).
Precauciones
Mantenga el micrófono alejado de lugares con humedad
y temperaturas muy altas.
Que el cable se enrolle alrededor del volante o de la
palanca de cambios es extremadamente peligroso.
Asegúrese de impedir que el cable y otros componentes
obstruyan la conducción.
Si el vehículo dispone de airbags u otros dispositivos de
amortiguación de impactos, póngase en contacto con el
establecimiento donde ha adquirido esta unidad o con el
concesionario de automóviles antes de llevar a cabo la
instalación.
-A Instalación en la visera
1 Instale el micrófono en el clip .
2 Instale el clip en la visera.
3 Instale los clips (no suministrados) y ajuste la
longitud y la posición del cable de modo que no
obstruya la conducción.
-B Instalación en el salpicadero
1 Instale el micrófono en el clip y, a
continuación, coloque el cable en la ranura del
clip .
2 Enganche el clip en el salpicadero con la cinta
adhesiva de dos caras .
3 Instale un clip (no suministrado) y ajuste la
longitud y la posición del cable de modo que no
obstruya la conducción.
Notas
Antes de colocar la cinta adhesiva de doble cara , limpie la supercie
del tablero con un paño seco.
Ajuste el ángulo del micrófono en la posición adecuada.
El micrófono se puede instalar sin el clip .
En este caso, enganche directamente el micrófono al tablero con cinta
adhesiva de dos caras . Conserve el clip sin usar por si lo necesita
en el futuro.
Notas acerca de la
sintonización
Para obtener información sobre cómo ajustar la
sintonización, consulte el manual de instrucciones
suministrado.
Si se reemplaza la batería del auto o se cambian las
conecciones, la configuración de la sintonización se
borrará.
Mounting the unit in a
Japanese car ( )
You may not be able to install this unit in some makes of
Japanese cars. In such a case, consult your Sony dealer.
When mounting this unit to the preinstalled brackets of
your car, use the supplied screws in the appropriate
screw holes, based on your car: T for TOYOTA, M for
MITSUBISHI and N for NISSAN.
Note
To prevent malfunction, install only with the supplied screws .
Warning if your car’s ignition
has no ACC position
Be sure to set the Auto Off function. For details, see the
supplied Operating Instructions.
e unit will shut off completely and automatically in the
set time aer the unit is turned off, which prevents battery
drain.
If you do not set the Auto Off function, press and hold
until the display disappears each time
you turn the ignition off.
Fuse replacement ( )
When replacing the fuse, be sure to use one matching the
amperage rating stated on the original fuse. If the fuse
blows, check the power connection and replace the fuse. If
the fuse blows again after replacement, there may be an
internal malfunction. In such a case, consult your nearest
Sony dealer.
Montaje de la unidad en un
automóvil japonés ( )
Es posible que no pueda instalar esta unidad en algunos
automóviles japoneses. En tal caso, consulte a su
distribuidor Sony.
Al montar esta unidad en los soportes preinstalados de su
automóvil, utilice los tornillos suministrados en los
oricios correspondientes, según el modelo de su
automóvil: T para TOYOTA, M para MITSUBISHI y N
para NISSAN.
Nota
Para evitar que se produzcan fallas de funcionamiento,realice la
instalación solamente con los tornillos suministrados .
Advertencia: si el encendido
del automóvil no dispone de
una posición ACC
Asegúrese de ajustar la función de desconexión
automática. Para obtener más información, consulte el
manual de instrucciones suministrado.
La unidad se apagará completa y automáticamente en el
tiempo establecido después de que se desconecte la
unidad, lo que evita que se desgaste la batería.
Si no ha ajustado la función de desconexión automática,
mantenga presionado cada vez que
apague el interruptor de encendido, hasta que la pantalla
desaparezca.
Sustitución del fusible ( )
Al sustituir el fusible, asegúrese de utilizar uno cuyo
amperaje coincida con el especicado en el original. Si el
fusible se funde, verique la conexión de alimentación y
sustitúyalo. Si el fusible vuelve a fundirse después de
sustituirlo, es posible que exista alguna falla de
funcionamiento interno. En tal caso, consulte con el
distribuidor Sony más cercano.
Español
Precauciones
Elija cuidadosamente el lugar de montaje de forma que
la unidad no interera con las funciones normales de
conducción.
Evite instalar la unidad donde pueda quedar expuesta a
polvo, suciedad, vibraciones excesivas o altas
temperaturas, por ejemplo, a la luz solar directa o cerca
de conductos de calefacción.
Para realizar una instalación segura y rme, utilice
solamente elementos de instalación suministrados.
Ajuste del ángulo de montaje
Ajuste el ángulo de montaje a menos de 45°.
Extracción del soporte ( )
Antes de instalar la unidad, retire el soporte de la
misma.
1 Inserte ambas llaves de liberación entre la
unidad y el soporte hasta que encajen.
2 Presione el soporte y, a continuación, levante
la unidad para separar ambos elementos.
Ejemplo de montaje ( )
Instalación en el tablero
Notas
Antes de instalar la unidad, compruebe que los enganches de ambos
lados del soporte estén doblados hacia adentro 3,5 mm. Si no lo
están o están doblados hacia afuera, la unidad no se instalará
correctamente y puede saltar (-1).
Si es necesario, doble las uñas hacia fuera para que encaje rmemente
(-2).
Monte la unidad en el soporte suministrado (-3).
English
Precautions
Choose the installation location carefully so that the unit
will not interfere with normal driving operations.
Avoid installing the unit in areas subject to dust, dirt,
excessive vibration, or high temperatures, such as in
direct sunlight or near heater ducts.
Use only the supplied mounting hardware for a safe and
secure installation.
Mounting angle adjustment
Adjust the mounting angle to less than 45°.
Removing the bracket ( )
Before installing the unit, remove the bracket
from the unit.
1
Insert both release keys together between the
unit and the bracket until they click.
2
Pull down the bracket , then pull up the unit to
separate.
Mounting example ( )
Installation in the dashboard
Notes
Before installing, make sure that the catches on both sides of the
bracket are bent inwards 3.5 mm (5/32 in). If the catchesare straight
or bent outwards, the unit will not be installed securely and may spring
out (-1).
Bend these claws outward for a tight t, if necessary (-2).
Mount the unit onto the supplied bracket (-3).

WX-GT90BT/GT90BTE/GT99BT
15
SECTION 3
DISASSEMBLY
• This set can be disassembled in the order shown below.
3-1. DISASSEMBLY FLOW
3-2. MINI FUSE (BLADE TYPE) (10A/32V) (FU1),
COVER
(Page 16)
3-3. FRONT PANEL BLOCK
(Page 16)
3-4. CD MECHANISM DECK (MG-101CA-188)
(Page 17)
3-5. CONNECTION CABLE (MIC) (MJ1)
(Page 17)
3-15. KNOB
(Page 23)
SET
3-7. SERVO BOARD
(Page 18)
3-8. CHASSIS (T) SUB ASSY
(Page 19)
3-9. ROLLER ARM ASSY
(Page 19)
3-10. CHASSIS (OP) ASSY
(Page 20)
3-6. MAIN BOARD (WITH BT BOARD)
(Page 18)
3-12. SLED MOTOR ASSY
(Page 21)
3-13. OPTICAL PICK-UP SECTION
(Page 22)
3-14. OPTICAL PICK-UP
(Page 22)
3-11. CHUCKING ARM SUB ASSY
(Page 20)

WX-GT90BT/GT90BTE/GT99BT
16
3-3. FRONT PANEL BLOCK
Note: Follow the disassembly procedure in the numerical order given.
3-2. MINI FUSE (BLADE TYPE) (10A/32V) (FU1), COVER
2two bosses
3three claws
2two bosses
4cover
1mini fuse (blade type) (10A/32V)
(FU1)
2two claws
2two claws
2two claws
5front panel block
4
connector
(
CN102
)
3
Remove the front panel block
in the direction of an arrow.
1
screw
(PTT2.6
u
6)
1
screw
(PTT2.6
u
6)

WX-GT90BT/GT90BTE/GT99BT
17
3-5. CONNECTION CABLE (MIC) (MJ1)
3-4. CD MECHANISM DECK (MG-101CA-188)
1
screw
(PTT2.6
u
6)
1
two screws
(PTT2.6
u
6)
1
screw
(PTT2.6
u
6)
4 two
screws
(PTT2.6
u
4)
5 bracket (CD)
6 CD mechanism deck
(MG-101CA-188)
3
connector
(
CN700
)
2
Lift up the
CD mechanism block .
2connector
(CN1002)
1Remove the connection cable (MIC)
from the lead pin.
3connection cable (MIC)
(MJ1)
&RQQHFWLRQFDEOH0,&0-VHWWLQJ
MAIN board BT board
lead pin
connection cable (MIC) (MJ1)

WX-GT90BT/GT90BTE/GT99BT
18
3-7. SERVO BOARD
Note: When the complete MAIN board is replaced, the destination
setting is necessary. Refer to “NOTE THE MAIN BOARD OR
SYSTEM CONTROLLER (IC501) REPLACING” on page 4.
3-6. MAIN BOARD (WITH BT BOARD)
1three ground point screws
(PTT2.6 u6)
2
screw
(PTT2.6
u
8)
2
screw
(PTT2.6
u
8)
3MAIN board
(with BT board)
BT board
6SERVO board
3claw
4claw
SERVO board
2toothed lock screw
(M1.7 u2.5)
2toothed lock screw
(M1.7 u2.5)
1Remove the eleven solders.
GRY
YEL
BLU
ORG
RED
BLK
RED
WHT
BLK
RED
WHT
5optical pick-up (16 core)
(CN101)
CD mechanism deck
–CD mechanism deck bottom side view –

WX-GT90BT/GT90BTE/GT99BT
19
3-8. CHASSIS (T) SUB ASSY
3-9. ROLLER ARM ASSY
3chassis (T) sub assy
2claw
1two screws
(M1.7 u2.5)
1two screws
(M1.7 u2.5)
3washer
5roller arm assy
1spring (RAL)
2spring (RAR)
4gear (HRA)

WX-GT90BT/GT90BTE/GT99BT
20
3-10. CHASSIS (OP) ASSY
3-11. CHUCKING ARM SUB ASSY
6two coil springs (damper) (natural)
7coil spring (damper) (blue)
8chassis (OP) assy
5
1tension spring (KF)
2gear (LE1)
3lever (D)
4slider (R)
3chucking arm sub assy
2
1spring
Note 1: Have this portion receive the chassis.
Note 2: Be careful not to touch the turn table.
Other manuals for WX-GT90BT
4
This manual suits for next models
2
Table of contents
Other Sony Stereo System manuals