BElel(-mepm@eolahc-laha
introduction
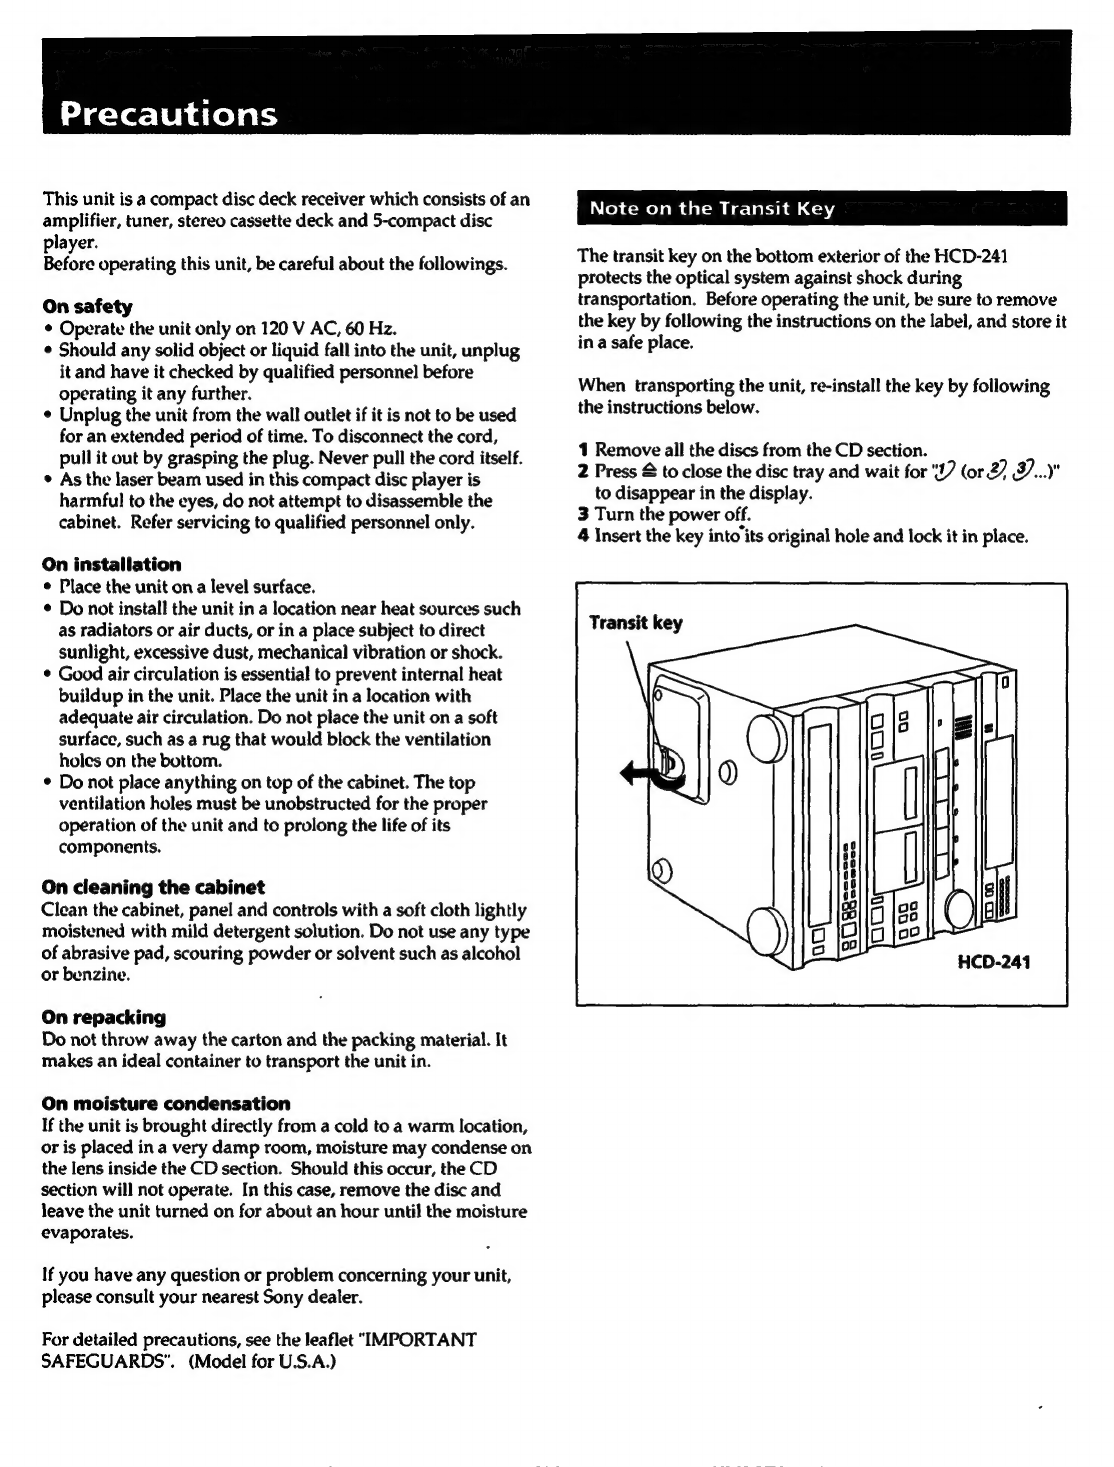
PRECAUTIONS
os
insaeceosedscossscsesndssasesebesseegessves
sesccduensactelasucabaslebssbesoaetees
3
Getting
Started
Remote
COMMANET
o........cccccsccessesscersccsecesenseescesccsecscseesscseesectee
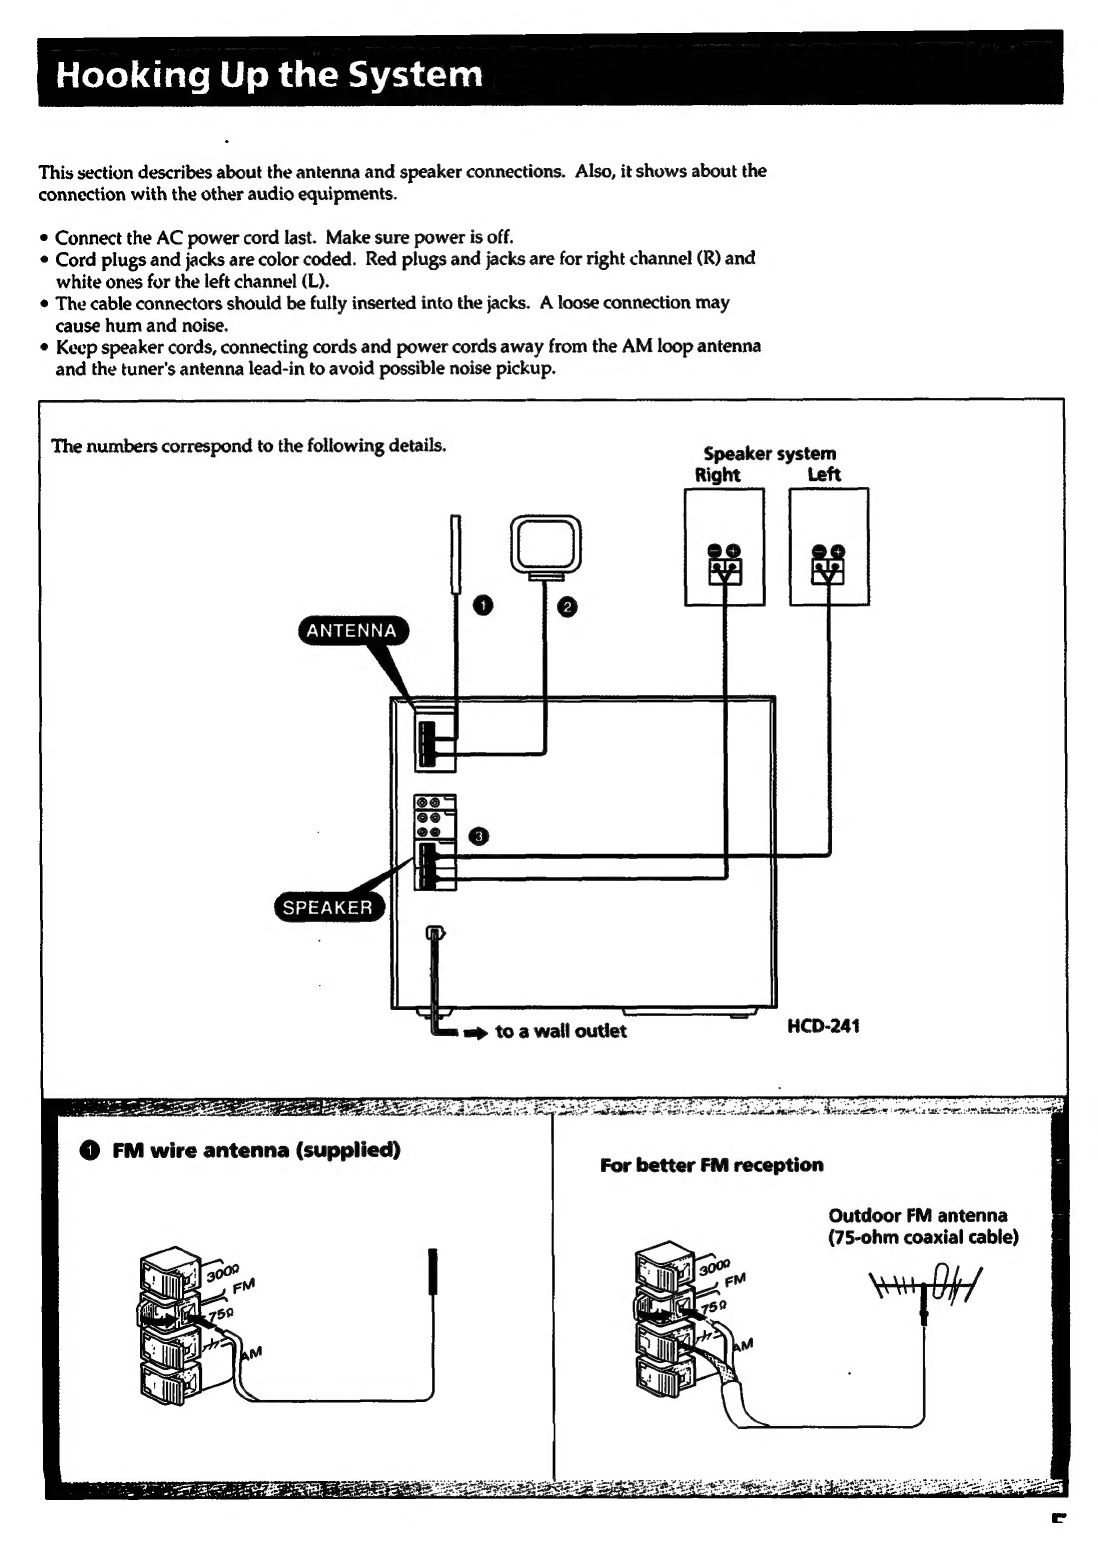
Hooking
up
the
system
Using
Your
Stereo
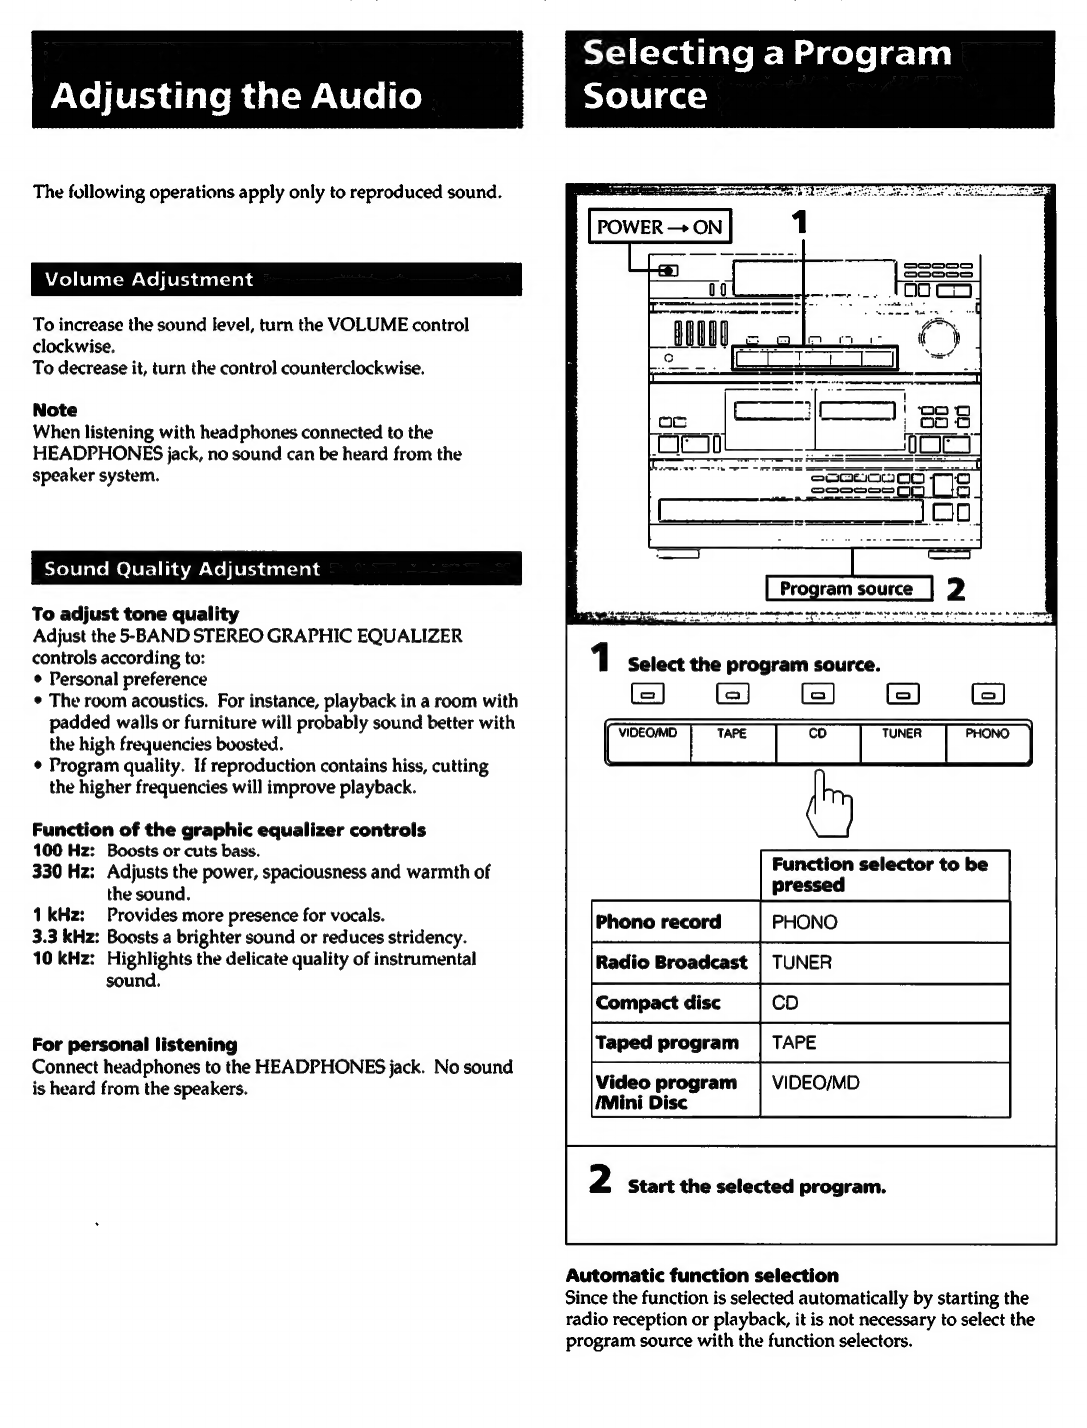
Adjusting
the
audio
.......cccessscssssssssssssssecssssesesseesscssseessessesessnoees
Volume
adjustment
Sound
quality
adjustment
:
Selecting
a
Program
SOUICE
......ssssssecssesssesssesrseeenesssseeeecesssessseees
Receiving
broadcast
........sessessseessersssessesessecsessscenecsscesesecensgseeees
Storing
station
frequencies
intO
MEMOTY
......sessecerersseserees
9
Tuning
in
a
stored
Station
......ccsssssssgyooseseesersstesesseseessssesees
9
Playing
back
tapes
(on
cither
deck
A
or
B)
:
10
Recording
on
tapes
(Deck
B).........
we
11
Dubbing
tapes
(from
deck
A
to
B)......
ay
Playing
the
discs
-
Continuous
play
...
13
Information
display
.......ssseseee
soe
14
Selecting
a
desired
disc
........secssssesssesssesssssesssesesessssessscenseseees
15
Locating
a
particular
selection
........
ian
Sssvosdoeisesacendocesesnconsboes
15
Locating
a
particular
point
in
a
selection
........cssssssssosese
15
Playing
in
a
random
order
-
Shuffle
play
.......scssessossorseesseses
16
Shuffle
play
on
specified
disc
-
Select
shuffle
play
...........
16
Playing
in
a
desired
order
-
Program
play
...........cssscsssssvsesees
Designating
the
total
playing
time
-
Time
edit
..
Playing
repeatedly
-
Repeat
play
.......sssssesssecressssseeseceseseseeeee
20
General
Maintenance
..........00
edges
coiactiserestvesnpoeseceas
sdesbstnedsenss
es
hasesavetoses
21
Specifications
.....esserssccresrsscesecssessnesrescenecsnecssesenecesesssesesecenseesees
22
Troubleshooting
......cssessssessssesessessssscsssseesessessnsnsssessseseensenees
23
Remote
Commander
The
remote
commander
supplied
with
this
unit
can
control
the
unit
from
a
distance.
Battery
life
About
half
a
year
of
normal
operation
can
be
expected
when
using
the
Sony
SUM-3
(NS)
batteries.
When
the
batteries
are
exhausted,
the
remote
commander
can
no
longer
operate
the
unit.
If
this
happens,
replace
both
batteries
with
new
ones.
To
avoid
battery
leakage
When
the
commander
is
not
tu
be
used
for
a
long
time,
remove
the
batteries
to
avoid
damage
caused
by
battery
leakage
and
corrosion.
Inserting
the
batteries
into
the
remote
commander
2
Insert
two
size-AA
(RO)
batteries
with
correct
polarity.
0...
57)
1
Open
the
cover.