Chapter 2: the CD Player
8
Playing Tracks in
Random Order
(shuffle play)
You can play all the tracks on one CD or all
CDs in random order.
Use the buttons on the unit to do this
operation.
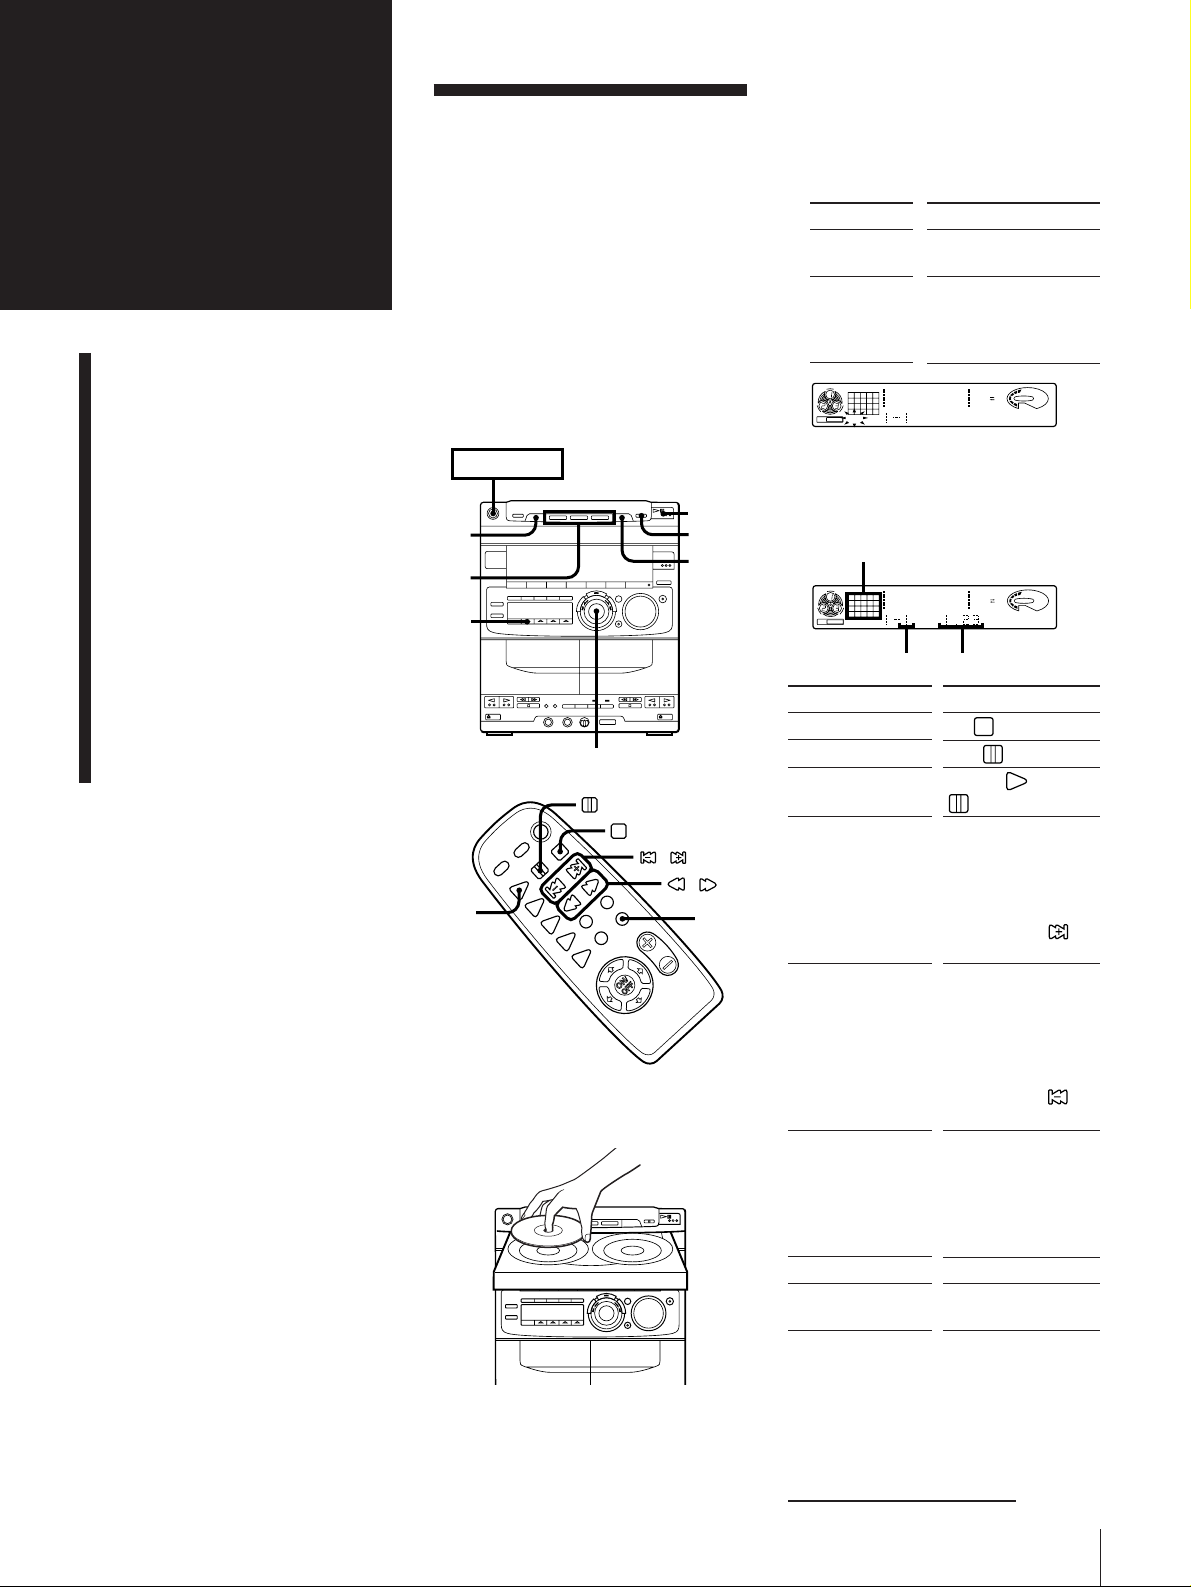
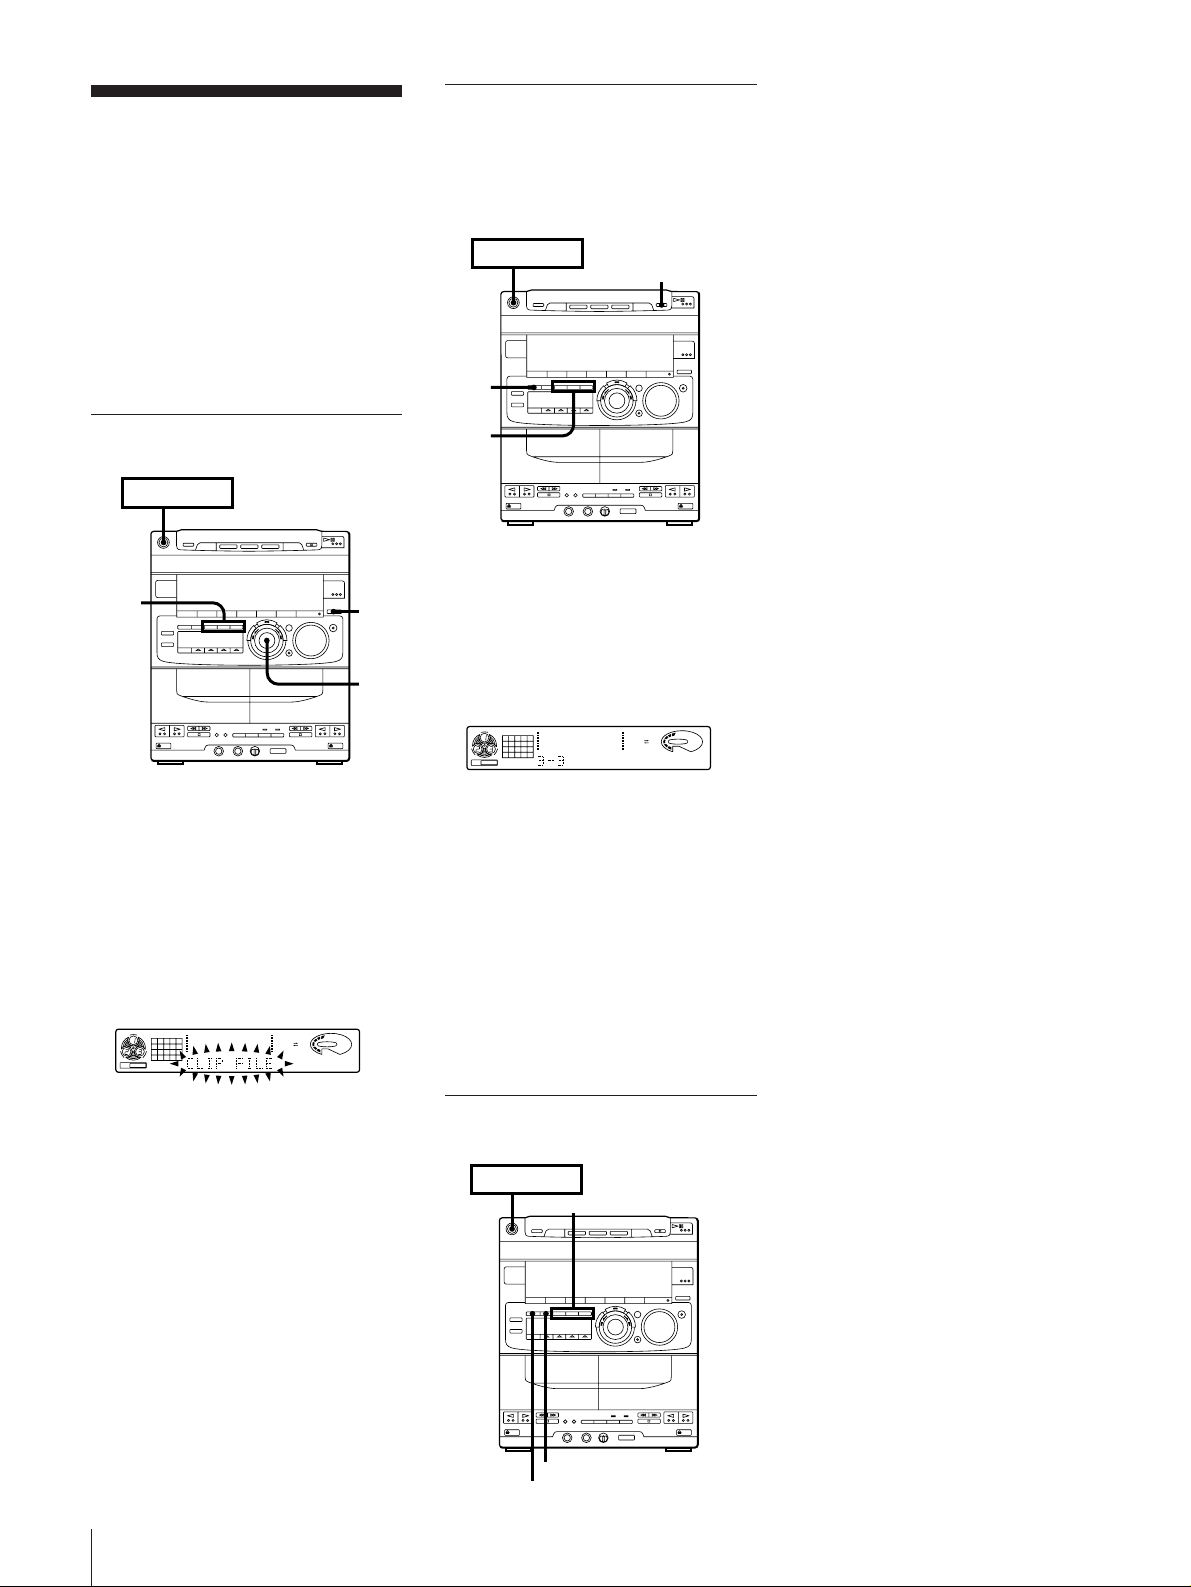
1Press FUNCTION repeatedly until “CD”
appears in the display.
2Press §OPEN/CLOSE and place the
CDs on the disc tray. Then, press
§OPEN/CLOSE again to close the disc
tray.
3Press 1/ALL DISCS to choose “1 DISC”
or “ALL DISCS”.
4Press PLAY MODE repeatedly until
“SHUFFLE” appears in the display.
5Press fl.
“ J” appears and then all the tracks
play in random order.
To stop shuffle play
Press πon the CD player.
To cancel shuffle play
Press PLAY MODE repeatedly until
“SHUFFLE” disappears from the display.
The tracks continue playing in their original
order.
To select a desired CD
Press DISC 1 – 3 during shuffle play.
To skip an undesired track
Turn the JOG dial clockwise (or press
on the remote).
DISC SKIP EX-CHANGE functions differently
depending on a different situation
To select a particular CD, press DISC SKIP
EX-CHANGE while you stop playing a CD.
To remove or exchange CDs while playing
or pause playing a CD, press DISC SKIP
EX-CHANGE.
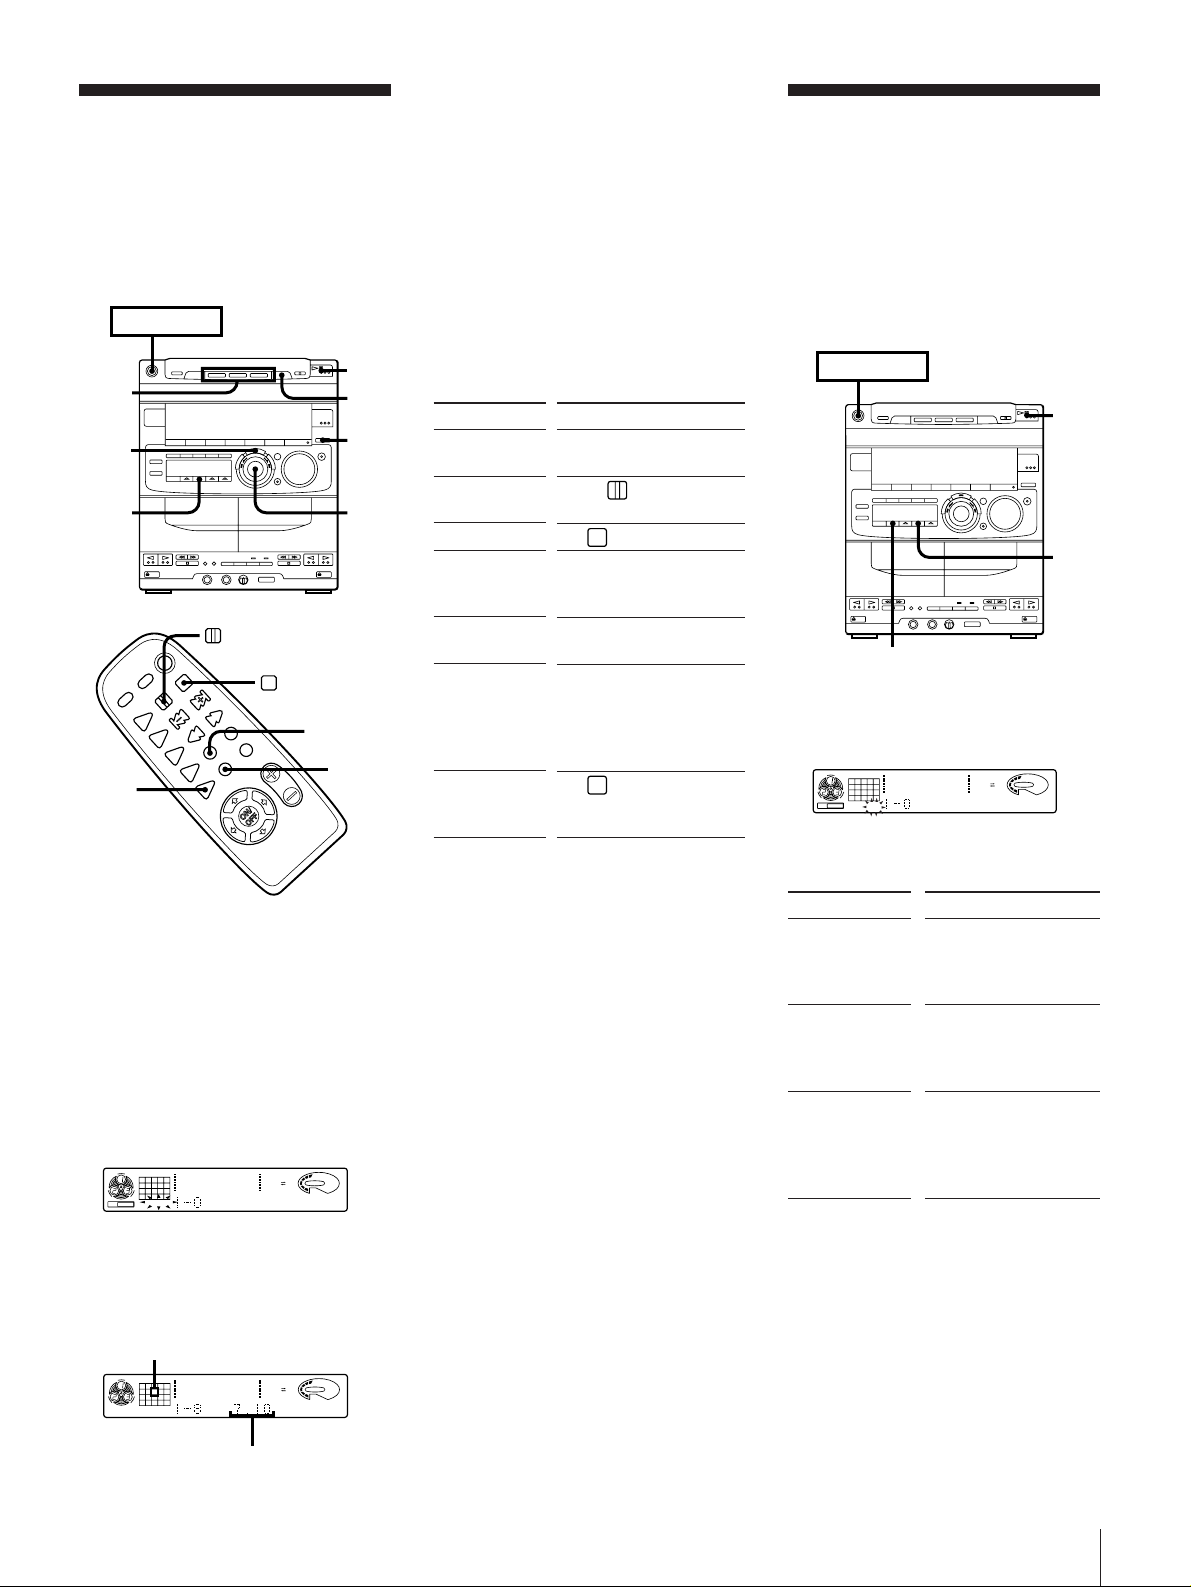
To find a point in a track
You can find a particular point in a track
while the track is playing or while it’s in
pause mode.
Use the buttons on the remote to operate
this feature.
To check the remaining time during
playback
Press DISPLAY/DEMO repeatedly.
Each time you press the button, the
display changes as follows:
mPlaying time on the current track
µ
Remaining time on the current track
µ
Remaining time on the current CD*1or
“PLAY” display*2
µ
Clock display (for eight seconds)
µ
Effect (or P FILE) name or
”EFFECT ON (OFF)“
*11 DISC mode
*2ALL DISCS mode
To check the total playing time and
the total number of tracks
Press DISPLAY/DEMO in stop mode.
When you press DISPLAY/DEMO again,
the display shows the clock display for
eight seconds and returns to the previous
indication.
Notes
•You cannot check the total playing time
during program play.
•The disc number, total playing time and
number of tracks also appear in the
display when you press §OPEN/CLOSE
to close the disc tray.
•“--.--” appears in the display when the
total playing time is 100 minutes or more.
One Touch Play feature
Press flon the CD player (or CD on
the remote) when the power is off. When a
CD is in the player, you will be able to start
listening to the CD without pressing any
other buttons.
The Music Calendar Display
This display lights according to the number
of tracks on the CD. As each track is played,
the corresponding number disappears.
Tracks numbered in excess of 20 are not
displayed.
What the green and orange DISC 1-3
button indicators indicate
Indicators are provided on the DISC
buttons for each of the respective disc trays
(DISC 1–3).
•A green indicator shows that the tray is
selected (either during playback or
standby, or when the tray is open) no
matter if there is a CD inside or not.
•An orange indicator shows that there is a
CD on the tray but the tray is not selected.
•When the indicator is off, there is no CD
on the tray and the tray is not selected.
Automatic Source Selection
If the CD player has been in the normal
play mode, you can select the CD player
just by pressing flor the DISC 1 – 3
buttons.
If the CD player has been in the program
play or the shuffle play mode, only flcan
be used for this function.
If there is no CD in the player
“CD NO DISC” appears in the display.
Press fl(or CD on the remote) while
the indication is on, then the disc tray will
open automatically.
12563 250 500 1k 2k 4k 8k 16k(Hz)
DOLBY NR
OFF
CD
CLIP
SHUFFLE
12345
678
VOLUME
POWERnON
1
4
DISC 1-3
5
2
3
π
➔continued
Press
on the remote and
release it at the desired
point.
on the remote and
release it at the desired
point.
, then press or
on the remote. Press
CD or again at
the desired point.
To
Go forward
quickly in a
track
Go backwards
quickly in a
track
Search quickly
without
listening


 User manual")


 User manual")