manuals.online logo
Brands
  1. Home
  2. •
  3. Brands
  4. •
  5. Sony
  6. •
  7. TV
  8. •
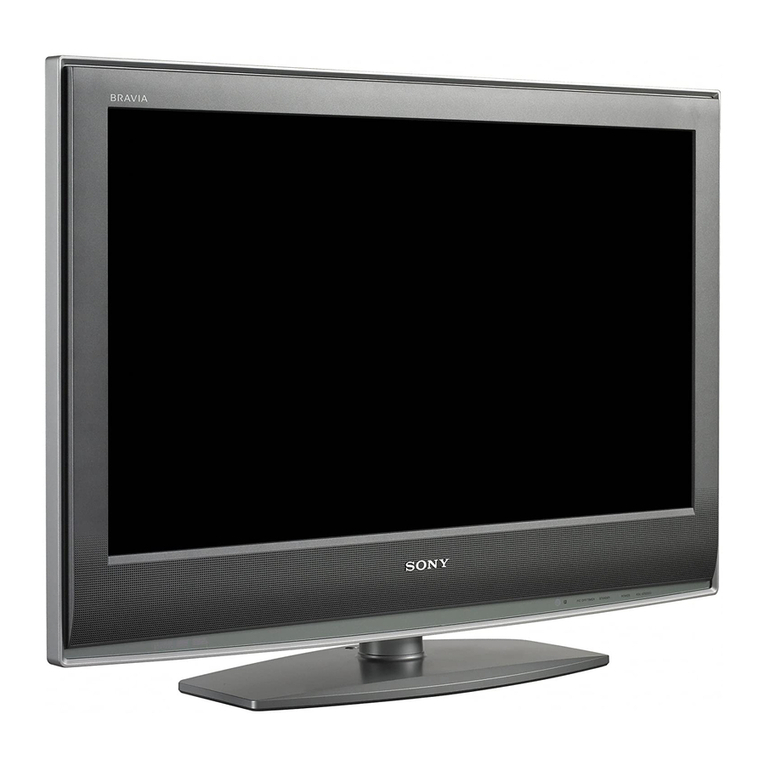
  9. Sony WEGA KLV-S20G10 Manual

Sony WEGA KLV-S20G10 Manual

Installing the Wall-Mount Bracket to the TV
To Customers:
For product protection and safety reasons, Sony strongly recommends that wall-
mounting of your TV be performed by a reliable licensed contractor. Do not attempt
to install it yourself.
Your KLV-S20G10 can be wall-mounted using SU-WL11 Wall-Mount Bracket (sold
separately). Please provide your contractor with this installation supplement as well
as the Instructions (supplied with SU-WL11 Wall-Mount Bracket). Read these
documents carefully for safety and proper installation.
To Sony Dealers and Contractors:
Provide full attention to safety during the installation, periodic maintenance and
examination of this product.
Installation du support de fixation mural sur le téléviseur
À l’attention des clients :
Par souci de protection du produit et pour des raisons de sécurité, Sony recommande
vivement que l’installation du support de fixation mural de votre téléviseur soit
confiée à un installateur qualifié agréé. N’essayez surtout pas de procéder vous-même
à l’installation.
Le KLV-S20G10 peut être fixé au mur à l’aide du support de fixation mural
SU-WL11 (vendu séparément). Fournissez à l’installateur ce supplément
d’installation, ainsi que le mode d’emploi (fourni avec le support de fixation mural
SU-WL11). Lisez attentivement ces documents qui concernent la sécurité et
l’installation adéquate.
À l’attention des revendeurs Sony et des installateurs :
Accordez une attention particulière à la sécurité lors de l’installation, de l’entretien
périodique et de la vérification de ce produit.
Instalación del soporte de montaje mural en el televisor
Para los clientes:
Por razones de protección del producto y de seguridad, Sony recomienda que el
montaje mural del televisor sea realizado por un contratista autorizado de Sony.
No intente instalarlo usted mismo.
Puede instalarse el modelo KLV-S20G10 en una pared mediante el soporte de
montaje mural SU-WL11 (se vende por separado). Muestre al contratista este
suplemento para la instalación, así como el manual de instrucciones (suministradas
con el soporte de montaje mural SU-WL11). Lea atentamente estos documentos para
realizar la instalación correctamente y de manera segura.
Para distribuidores y contratistas de Sony:
Ponga especial atención a la seguridad durante la instalación, mantenimiento
periódico y comprobación de este producto.
KLV-S20G10
Español
Français
English
© 2005 Sony Corporation Printed in Taiwan 2-633-137-01(1)
Display Model/ Display Dimensions/
Unit: mm (inches)/
Length for each mounting angle/
Unit: mm (inches)/
Weight/
Modèle d’écran
/Dimensions de l’écran/
Unité : mm (pouces)/
Longueur de chaque angle de montage
/
Unité : mm (pouces)/
Poids/
Modelo de
Dimensiones de la pantalla
Unidad: mm (pulgadas)
Longitud de cada ángulo de montaje
Unidad: mm (pulgadas)
Peso
Mounting angle (
α
°)/
(×4)*
pantalla ABCDE
Angle de montage (
α
°)/
FG H
Ángulo de montaje(
α
°)
0° 155 (6 1/8)64 (2 5/8)289 (11 1/2)7.5 kg
504 467 110 23 266
KLV-S20G10 5° 177 (7) 53 (2 1/8)299 (11 7/8)(16 lb 09 oz)
(19 7/8) (18 1/2) (4 3/8)(
29/32) (10 1/2)(30 kg
10° 198 (7 7/8)40 (1 5/8)308 (12 1/4)(66 lb 03 oz))
114
(4 1/2±1/32)
0.5
280
(11 1/8)
168
(6 5/8)
A
B
D
E
B
F
G
H
C
*The wall must be strong enough to support at least four times the weight of the display that you are installing./
*Le mur doit être suffisamment solide pour supporter au moins quatre fois le poids de l’écran que vous installez./
* La pared debe ser suficientemente resistente para soportar como mínimo cuatro veces el peso de la pantalla que está instalando.
KLV-S20G10
English Installation dimensions table
Français Tableau des dimensions pour l’installation
Español Tabla de las dimensiones de instalación
Step 3: Attach bracket Ato the
wall
Attach bracket Ato the wall.
Refer to the Instructions for the SU-WL11.
Step 4: Remove the Tabletop
Stand from the TV
Before removing the Tabletop Stand, disconnect all the
cables from the TV.
Refer to the Instructions for the SU-WL11.
1
Pull the rear cover out from the
bottom of the TV, then remove
from the top.
To prevent damaging the surface of the LCD
display, place the TV on a soft mat.
Note
Lay the display face down on a stable and level
surface with the Tabletop Stand hanging over
the edge of the surface. Having the display face
and the base of the Stand on the same level
surface will create unstable working condition
and can damage the unit.
Installing the TV
on a wall
The TV can be installed on a wall by attaching a Wall-
Mount Bracket (sold separately).
Verify your TV’s model number and be sure to use the
bracket specified for your model only. Refer to the
Steps on this leaflet along with the Instructions
supplied with SU-WL11 Wall-Mount Bracket, to
properly carry out the installation.
Sufficient expertise is required in installing this
product, especially to determine the strength of
the wall for withstanding the TV’s weight. Be sure
to entrust the attachment of this product to the
wall to Sony dealers or licensed contractors and
pay adequate attention to safety during the
installation. We are not liable for any damage or
injury caused by mishandling or improper
installation.
For customers with
KLV-S20G10
Install the SU-WL11 Wall-Mount Bracket (sold
separately).
Step 1: Check the parts
Open the Wall-Mount Bracket package and check the
contents for all required parts along with the
Instructions.
Step 2: Decide the location
Decide where you want to install your TV. Turn to the
back cover of this leaflet for the display installation
dimensions and determine the location.
Refer to the Instructions for the SU-WL11.
English
Soft mat
Rear cover
1(US)
Tabletop
Stand
Step 5: Attach brackets B, C, D,
and Eto the TV
Refer to the Instructions for the SU-WL11.
1
Attach bracket Bto the TV.
Using the four screws which were removed in
Step 4, secure bracket Bto the TV.
2
Connect the cables.
For details on the cable connection, refer to the
Operating Instructions for your TV.
Bracket E
3
Determine the mounting angle
then choose a bracket Cthat
corresponds to your desired angle.
Bracket Ccomes in three
different tilting angles. Attach
bracket Cto Bby using two of
the supplied screws.
4
Attach bracket Dto bracket C,
and secure the brackets together
with two of the supplied screws.
5
Attach bracket Eto bracket C,
and secure the brackets together
with two of the supplied screws.
Step 6: Secure the TV to the wall
Refer to the Instructions for the SU-WL11.
Bracket C
Bracket D
Shaft
The angle 0°, 5°, or 10° is
marked on the side of
bracket C.
Bracket B
2(US)
2
Remove the four screws as shown
below, and remove the Tabletop
Stand from the TV.
Note
Hold the Tabletop Stand firmly while removing
the last screw.
Français
Fixation du téléviseur
sur un mur
Le téléviseur peut être installé sur un mur à l’aide du
support de fixation mural (vendu séparément).
Vérifiez la référence du modèle de votre téléviseur et
veillez à utiliser uniquement le support spécifié pour
ce modèle. Reportez-vous aux étapes de ce document
ainsi qu’au mode d’emploi fourni avec le support de
fixation mural SU-WL11 pour effectuer correctement
l’installation.
Une certaine expérience est requise pour installer
ce produit, notamment pour vérifier la résistance
du mur par rapport au poids du téléviseur.
Veuillez confier la fixation de ce produit au mur à
des revendeurs Sony ou à des installateurs agréés
et soyez particulièrement vigilants en matière de
sécurité au cours de l’installation. Nous ne
pouvons être tenus responsables de tout
dommage ou blessure résultant d’une
manipulation ou d’une installation incorrecte.
Pour les clients avec le
KLV-S20G10
Installez le support de fixation mural SU-WL11
(vendu séparément).
Etape 1 : Vérification des pièces
Ouvrez l’emballage du support de fixation mural et
vérifiez que toutes les pièces nécessaires sont
présentes au moyen du mode d’emploi.
Etape 2 : Choix de l’emplacement
Déterminez l’emplacement d’installation de votre
téléviseur. Reportez-vous au verso de ce document
pour connaître les dimensions d’installation de l’écran
et déterminer l’emplacement d’installation.
Reportez-vous au mode d’emploi du SU-WL11.
Etape 3 : Fixation du support A
au mur
Fixation du support Aau mur.
Reportez-vous au mode d’emploi du SU-WL11.
Etape 4 : Retrait du support de
table du téléviseur
Avant d’enlever le support de table, débranchez tous
les câbles du téléviseur.
Reportez-vous au mode d’emploi du SU-WL11.
1
Tirez sur le couvercle arrière à la
base du téléviseur, puis enlevez-le
en tirant sur la partie du haut.
Afin de ne pas endommager la surface de l’écran
ACL, placez le téléviseur sur un tissu doux.
Remarque
Couchez l’écran, face orientée vers le sol, sur
une surface plane et stable, en laissant le
support de table dépasser. Le fait de placer la
face de l’écran et la base du support sur la même
surface plane risque d’entraîner une instabilité
du téléviseur et d’endommager l’appareil.
Tissu doux
Couvercle arrière
1(FR)
Etape 5 : Pose des supports B, C,
Det Esur le téléviseur
Reportez-vous au mode d’emploi du SU-WL11.
1
Fixez le support Bau téléviseur.
Fixez le support Bau téléviseur à l’aide des
quatre vis retirées à l’étape 4.
2
Raccordez les câbles.
Pour obtenir davantage de détails sur le
raccordement des câbles, reportez-vous au mode
d’emploi de votre téléviseur.
Support
de table
Support B
3
Déterminez l’angle de montage,
puis choisissez un support C
correspondant à l’angle souhaité.
Le support Cpropose trois angles
d’inclinaison différents. Fixez le
support Cà Bà l’aide de deux
des vis fournies.
4
Fixez le support Dau support C
et fixez les deux supports
ensemble à l’aide de deux des vis
fournies.
5
Fixez le support Eau support C
et fixez les deux supports
ensemble à l’aide de deux des vis
fournies.
Etape 6 : Fixation du téléviseur
au mur
Reportez-vous au mode d’emploi du SU-WL11.
Support E
Support C
Support D
Axe
L’angle est gravé sur le
côté du support C(0°, 5°
ou 10°).
2(FR)
Español
Instalación del
televisor en una
pared
Puede instalar el televisor en una pared sujetándolo con
el soporte de montaje mural (se vende por separado).
Compruebe el número de modelo del televisor y
asegúrese de utilizar solamente el soporte especificado
para dicho modelo. Consulte los pasos de este folleto,
junto con el manual de instrucciones suministrado con
el soporte de montaje mural SU-WL11, para realizar la
instalación correctamente.
Se requiere bastante experiencia para instalar este
producto, especialmente para determinar la
resistencia de la pared para soportar el peso del
televisor. Cerciórese de encargar el montaje mural
de este producto a distribuidores o contratistas
autorizados de Sony y preste la debida atención a
la seguridad durante la instalación. No nos
hacemos responsables de los daños materiales o
personales provocados por una manipulación o
instalación incorrecta.
Para los clientes con el modelo
KLV-S20G10
Instale el soporte de montaje mural SU-WL11 (se
vende por separado).
Paso 1: Compruebe las piezas
Abra el embalaje del soporte de montaje mural y
compruebe que contiene todas las piezas necesarias,
junto con el manual de instrucciones.
Paso 2: Decida la ubicación
Decida dónde desea instalar el televisor. Consulte en
la contraportada de este folleto las dimensiones de
instalación de la pantalla y determine la ubicación de
la instalación.
Consulte el manual de instrucciones del soporte
SU-WL11.
Paso 3: Fije el soporte Aa la
pared
Fije el soporte Aa la pared.
Consulte el manual de instrucciones del soporte
SU-WL11.
Paso 4: Retire el soporte de
escritorio del televisor
Antes de retirar el soporte de escritorio, desconecte
todos los cables del televisor.
Consulte el manual de instrucciones del soporte
SU-WL11.
1
Separe la cubierta posterior de la
parte inferior del televisor y, a
continuación, retírela por la parte
superior.
Para evitar posibles daños en la superficie de la
pantalla de cristal líquido, sitúe el televisor
sobre una esterilla blanda.
Nota
Coloque la pantalla cara abajo sobre una
superficie plana y estable, de forma que el
soporte de escritorio sobresalga por el borde de
la superficie. Si coloca la pantalla y la base del
soporte en una superficie al mismo nivel, las
condiciones de trabajo serán inestables y la
unidad podría resultar dañada.
Cubierta
Posterior
Esterilla blanda
1(ES)
Soporte de
escritorio
Paso 5: Fije los soportes B, C, D
y Eal televisor
Consulte el manual de instrucciones del soporte
SU-WL11.
1
Fije el soporte Bal televisor.
Fije el soporte Bal televisor con los cuatro
tornillos que retiró en el Paso 4.
2
Conecte los cables.
Para obtener más información sobre la conexión
de los cables, consulte el manual de
instrucciones del televisor.
3
Determine el ángulo de montaje
y, a continuación, elija un soporte
Cque corresponda al ángulo
deseado. El soporte Cse
suministra con tres ángulos de
inclinación diferentes. Instale el
soporte Cen Bmediante dos de
los tornillos suministrados.
4
Fije el soporte Dal soporte Cy
fije los soportes entre sí con dos
de los tornillos suministrados.
5
Fije el soporte Eal soporte Cy
fije los soportes entre sí con dos
de los tornillos suministrados.
Paso 6: Fije el televisor a la pared
Consulte el manual de instrucciones del soporte
SU-WL11.
Soporte B
Soporte E
Soporte C
Soporte D
Eje
El ángulo 0°, 5° o 10°
está marcado en el lado
del soporte C.
2(ES)
2
Retirez les quatre vis comme
indiqué ci-dessous, puis retirez le
support de table du téléviseur.
Remarque
Tenez fermement le support de table lorsque
vous retirez la dernière vis.
2
Extraiga los cuatro tornillos tal
como se muestra más abajo y retire
el soporte de escritorio del televisor.
Nota
Al retirar el último tornillo, sujete firmemente el
soporte de escritorio.
Other manuals for WEGA KLV-S20G10

4

This manual suits for next models

4

Other Sony TV manuals

Sony BRAVIA KD-75XG95 Series User manual

Sony

Sony BRAVIA KD-75XG95 Series User manual

Sony FD Trinitron KV-24LS35U User manual

Sony

Sony FD Trinitron KV-24LS35U User manual

Sony BRAVIA XBR-55X700D User manual

Sony

Sony BRAVIA XBR-55X700D User manual

Sony KDL-40HX752 Installation guide

Sony

Sony KDL-40HX752 Installation guide

Sony KV-XA21M30 User manual

Sony

Sony KV-XA21M30 User manual

Sony XBR-70X850B User manual

Sony

Sony XBR-70X850B User manual

Sony FD Trinitron WEGA KV-29FQ76 K User manual

Sony

Sony FD Trinitron WEGA KV-29FQ76 K User manual

Sony TRINITRON KV-DR29M61 User manual

Sony

Sony TRINITRON KV-DR29M61 User manual

Sony KV-SW14M50 User manual

Sony

Sony KV-SW14M50 User manual

Sony BRAVIA KDL-40R350C User manual

Sony

Sony BRAVIA KDL-40R350C User manual

Sony Trinitron WEGA KV-DZ29 User manual

Sony

Sony Trinitron WEGA KV-DZ29 User manual

Sony KDL-32S5600 User manual

Sony

Sony KDL-32S5600 User manual

Sony TRINITRON KV1926RA User manual

Sony

Sony TRINITRON KV1926RA User manual

Sony FD Triniton KV-29FQ76E User manual

Sony

Sony FD Triniton KV-29FQ76E User manual

Sony KD-75XE85 SERIES User manual

Sony

Sony KD-75XE85 SERIES User manual

Sony Bravia XBR-75X940C User manual

Sony

Sony Bravia XBR-75X940C User manual

Sony KV-2127R User manual

Sony

Sony KV-2127R User manual

Sony BRAVIA KD-55X9350D User manual

Sony

Sony BRAVIA KD-55X9350D User manual

Sony TRINITRON KV-2725R User manual

Sony

Sony TRINITRON KV-2725R User manual

Sony KD-34XBR2 - 34" Hdtv Fd Trinitron Wega User manual

Sony

Sony KD-34XBR2 - 34" Hdtv Fd Trinitron Wega User manual

Sony TRINITRON KV-T25SZ8 User manual

Sony

Sony TRINITRON KV-T25SZ8 User manual

Sony Bravia XR-75X9 J Series User manual

Sony

Sony Bravia XR-75X9 J Series User manual

Sony TRINITRON KV-HA21M80J User manual

Sony

Sony TRINITRON KV-HA21M80J User manual

Sony BRAVIA KD-55XE70 Series User manual

Sony

Sony BRAVIA KD-55XE70 Series User manual

Popular TV manuals by other brands

Haier 21T07 Service manual

Haier

Haier 21T07 Service manual

Sanyo CP21KX2 Service manual

Sanyo

Sanyo CP21KX2 Service manual

Teac CT-M488 Service manual

Teac

Teac CT-M488 Service manual

IKUSI SHC-111 manual

IKUSI

IKUSI SHC-111 manual

Magnavox PS1980 owner's manual

Magnavox

Magnavox PS1980 owner's manual

LG RT-21FA35R Service manual

LG

LG RT-21FA35R Service manual

LEGRAND SANUS CCSTVK owner's guide

LEGRAND

LEGRAND SANUS CCSTVK owner's guide

JVC AV-28KH1BUF Gebruiksaanwijzing

JVC

JVC AV-28KH1BUF Gebruiksaanwijzing

XOCECO TK2055D Service manual

XOCECO

XOCECO TK2055D Service manual

Panasonic TX-25XDP3 operating instructions

Panasonic

Panasonic TX-25XDP3 operating instructions

Panasonic TX-25LK10F operating instructions

Panasonic

Panasonic TX-25LK10F operating instructions

Philips 4764 Series quick start guide

Philips

Philips 4764 Series quick start guide

Insignia NS-42D240A13 Guide d'installation rapide

Insignia

Insignia NS-42D240A13 Guide d'installation rapide

Philips 32PFL2507 quick start guide

Philips

Philips 32PFL2507 quick start guide

Samsung HC-R4245W Quick setup guide

Samsung

Samsung HC-R4245W Quick setup guide

TECHWOOD T32PLD12 operating instructions

TECHWOOD

TECHWOOD T32PLD12 operating instructions

JVC AV-20320, AV-20321, C-20310, C-13310,... user guide

JVC

JVC AV-20320, AV-20321, C-20310, C-13310,... user guide

JVC InteriArt AV-28R47SK Service manual

JVC

JVC InteriArt AV-28R47SK Service manual

manuals.online logo
manuals.online logoBrands
  • About & Mission
  • Contact us
  • Privacy Policy
  • Terms and Conditions

Copyright 2025 Manuals.Online. All Rights Reserved.