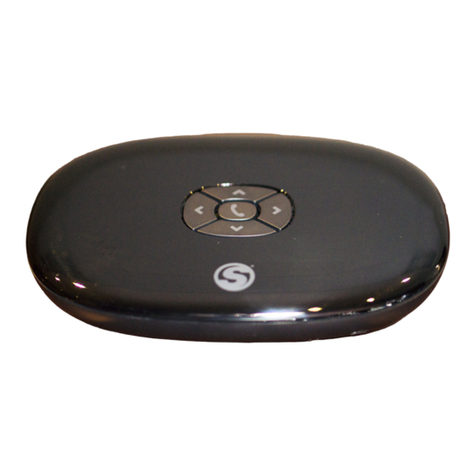
Sorenson ntouch VP2 Reference guide

QuickHelp Sorenson ntouch VP2
Bluetooth and Networking Features
Use the bookmarks in the left-hand column to jump to the QuickHelp answers to these questions:
How do I connect a Bluetooth keyboard to my ntouch VP2?
How do I change my network connection from Wired to Wireless?
How do I use the HDMI Pass-Through feature?
How do I connect a Bluetooth keyboard to my ntouch VP2?
You can connect Bluetooth keyboards to your ntouch VP2. Sorenson has confirmed that
these keyboards work with ntouch VP2: Logitech K480 and K380, B-Typer BK-310,
Apple Keyboard MC184LL/B, SPARIN Mini Bluetooth Keyboard, SIG 02-1720A.
Step 1. Start at the Home screen as shown below.
Step 2. Select the Settings button to open the screen shown below.
Step 3. Select the Device Options button to open the screen shown below.
Settings button
Device Options button

Step 4. Move to the Bluetooth button as shown below.
Step 5. Move to the Allow Bluetooth devices? checkbox as shown below.
Step 6. Select the Allow Bluetooth devices? checkbox to add a check as shown below.
Selecting the Allow Bluetooth devices? checkbox as revealed the Scan for devices...
button at the top-right of the screen.
Step 7. Move to the Scan for devices... button as shown below.
Step 8. Put your Bluetooth device into its “pairing” (or “connect”) mode before continuing.
Your ntouch VP2 will not be able to detect the device unless it is ready to pair.
Bluetooth button
Allow Bluetooth devices?
checkbox
Allow Bluetooth devices?
checkbox
Scan for devices... button

Step 9. Select the Scan for devices... button to begin the scan as shown below.
Step 10. When the scan is completed, you will see a message like the one shown below.
This example shows one keyboard (a Logitech K480) was detected by the videophone.
Step 11. Select the Pair button for the device you want to connect to the videophone. You
will then see a message like the one shown below.
If you see a dialog that says the connection failed, select the Try again button in the dialog
to restart the pairing.
Step 12. You will then see a pairing request dialog like the one shown below.
Searching for devices...
message
Found devices list
Bluetooth pairing message
Bluetooth pairing request
message

Step 13. On the Bluetooth keyboard, type the characters shown in the dialog to complete
the pairing process and display the screen shown below.
The right side of the screen now shows a list of Saved/Paired Bluetooth devices. The green
checkmark next to the device name shows that the device is currently connected. You can
have more than one keyboard paired and connected at a time.
Return to the Home screen by pressing the Home key on the remote control. Your
selections will be saved.
Step 14. If you need to unpair a device, move to the device you want to unpair as shown
below.
Step 15. To unpair the device, select the Unpair button to open the dialog shown below.
Step 16. Select the Yes button to unpair the device.
List of paired devices
Green checkmark shows
device is connected
List of paired devices
Selected device shows its
Unpair button

How do I change my network connection from Wired to Wireless?
Step 1. Start at the Home screen as shown below.
Step 2. Select the Settings button to open the screen shown below.
Step 3. Select the Network/Admin button to open the screen shown below.
Step 4. Move to the Wireless button as shown below.
Settings button
Network/Admin button
Wireless button

Step 5. Select the Wireless button to begin a scan for wireless networks. The available
networks (those within range) will appear in a list as shown below.
The network names in this sample image all have two-character names such as “B9.” You
should only connect to known, secured networks (i.e., you own wireless router).
Step 6. Select the Connect button for the wireless network you want to use. The Enter
password dialog will then appear as shown below.
Step 7. Select the Edit button to open the dialog shown below.
Step 8. Use the on-screen keyboard to enter the password (key) for the wireless network.
As you enter the password, the text will change to black dots as shown below.
List of available networks
Enter password Edit button
Enter password field
Enter password field
Done button

Step 9. Select the Done button to return to the dialog shown below.
Step 10. Select the Done button to send the password and attempt to connect to the
wireless network. If successful, you will see the screen shown below.
The green checkmark next to the network name shows that the videophone is currently
connected to that network.
Return to the Home screen by pressing the Home key on the remote control. Your
selections will be saved.
Done button
Green checkmark shows
network is connected

How do I use the HDMI Pass-Through feature?
The HDMI Pass-Through feature lets you connect external devices, such as a DVD or
Blu-Ray player, HD Cable TV set-top box, or HD Satellite TV set-top box to the
HDMI-In port on the back of the ntouch VP2 Main Unit. You will need an HDMI Type
A Male-to-Type D (Micro) Male connector plug to make this connection.
The external device connected to ntouch VP2 must be able to generate a constant output
signal of 720p/60, 1080p/60 or 1080p/24 (Blu-Ray movie) “progressive” resolution for
the HDMI Pass-Through feature to work properly. The “interlaced” 1080i resolution is
not supported by ntouch VP2.
After you have connected the external device to the ntouch VP2’s HDMI In port, you can
switch back and forth between the videophone display and the external device display.
Step 1. Connect a Male Type A-to-Mail Type D HDMI cable to ntouch VP2’s HDMI In port.
The back panel of the ntouch VP2 Main Unit is shown below.
Step 2. Look for the Switch to TV button on ntouch VP2’s Home screen as shown below.
If you do not see the Switch to TV button on the Home screen as shown above, either
there is no signal coming from the external device, or the signal that is being sent is not
supported by ntouch VP2. Check to make sure your external device is set to output a
constant 1080p or 720p resolution.
Be aware that HD Satellite TV set-top boxes usually default to 1080i (the “interlaced”
resolution), so they must be manually set to 720p in order to work with ntouch VP2.
HDMI In port (Micro Type-D)
Switch to TV button

Step 3. ntouch VP2 will display the dialog shown below when an incoming call is received.
The dialog is displayed over the video image from the external device.
You can also switch back to the ntouch VP2 display by turning off the external device.
Incoming call dialog
Image from external
device
Other manuals for ntouch VP2
3
Table of contents
Other Sorenson Telephone manuals

