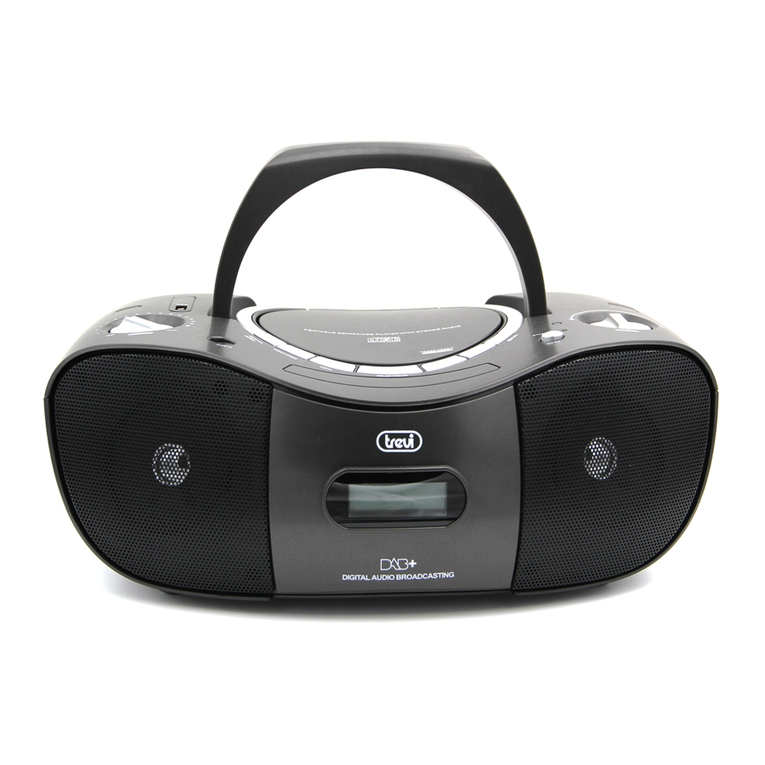
Sound-X NPCD-270 User manual

NPCD-270
NBCD-270
CD Radio Boombox
Boombox Radio / CD
OPERATION MANUAL
MANUAL DE INSTRUCCIONES
CD270 SoundX Eng.indd 1 2010/4/8 9:58:51 AM

GB - 1
CAUTION : TO REDUCE THE RISK OF ELECTRIC SHOCK, DO NOT REMOVE
COVER (OR BACK). NO USER-SERVICEABLE PARTS INSIDE, REFER
SERVICING TO QUALIFIED SERVICE PERSONNEL.
The lighting ash with arrowhead symbol, within an equilateral triangle, is intended to alert
the user to the presence of uninsulated “dangerous voltage” within the product’s enclosure
that may be of sufcient magnitude to constitute a risk of electric shock to persons.
The exclamation point within an equilateral triangle is intended to alert the user to presence of
important operating and maintenance (servicing) instructions in the literature accompanying
the appliance.
WARNING
To prevent re or shock hazard, do not expose this appliance to rain or moisture.
The apparatus should not be exposed to dripping or splashing. Objects lled with liquids, such as vases,
should be placed on the apparatus.
The ventilation should not be impeded by covering the ventilation openings with items, such as
newspapers, table-cloths, curtains, etc.
Naked ame sources, such as lighted candles, should not be placed on the apparatus.
The mains plug is used as the disconnect device, the disconnect device should remain readily operable.
In order to disconnect the apparatus from the mains completely, the mains outlet plug should be
disconnected from the electrical outlet completely.
Excess sound pressure from earphones and headphones can cause hearing loss.
CAUTION
TO PREVENT ELECTRIC SHOCK, DO NOT USE THIS PLUG WITH ANY EXTENSION CORD, OR OTHER
OUTLET UNLESS THE PLUG CAN BE FULLY INSERTED WITHOUT EXPOSING ANY PARTS OF THE BLADES.
TO PREVENT ELECTRIC SHOCK, MATCH WIDE BLADE OF PLUG TO WIDE SLOT, FULLY INSERT.
IMPORTANT
Since the CD circuity may cause interference to other radio tuners nearby, switch this unit off when not in use or
move it away from the affected radio tuner.
This device complies with Part 15 of the FCC Rules. Operation is subject to the following two conditions: (1) This
device may not cause harmful interference, and (2) this device must accept any interference received, including
interference that may cause undesirable operation. These limits are designed to provide reasonable protection
against harmful interference in a residential installation.
Caution: Changes or modications to this unit not expressly approved by the party responsible for compliance
could void the user’s authority to operate the equipment.
This appliance generates, uses and can radiate radio frequency energy and, if not installed and used in accordance
with the instructions, may cause harmful interference to radio communications. However, there is no guarantee
that interference will not occur in a particular installation. If this equipment does cause harmful interference to
radio or television reception, which can be determined by tuning the equipment off and on, the user is encouraged
to try to correct the interference by one or more of the following measures:
• Reorient or relocate the receiving antenna.
• Increase the separation between the equipment and receiver.
•
Connect the equipment into an outlet on a circuit different from that to
which the receiver is connected.
• Consult the dealer or an experienced radio / TV technician for help.
This Class B appliance complies with Canadian ICES-003.
DANGER
LASER SAFETY
This unit employs an optical laser beam system in the CD mechanism, designed with built -in
safeguards. Do not attempt to disassemble, refer to qualied service personnel. Exposure
to this invisible laser light beam may be harmful to the human eye.
THIS IS A CLASS-1 LASER PRODUCT. USE OF CONTROLS, OR ADJUSTMENTS
OR PROCEDURES OTHER THAN THOSE SPECIFIED HEREIN, MAY RESULT IN
HAZARDOUS LASER LIGHT BEAM EXPOSURE.
INVISIBLE LASER RADIATION
WHEN OPEN AND INTERLOCK
FAILED OR DEFEATED. AVOID
DIRECT EXPOSURE TO LASER
BEAM.
RISK OF ELECTRIC SHOCK
DO NOT OPEN
CD270 Eng 12A.indd 1 2009/7/13 11:19:06 AM

GB - 2
IMPORTANT SAFETY INSTRUCTIONS
- Read before operating equipment
This product was designed and manufactured to meet strict quality and safety standards. There
are, however, some installation and operation precautions which you should be particularly
aware of.
1. Read Instructions — All the safety and operating instructions should be read before the
appliance is operated.
2. Retain Instructions — The safety and operating instructions should be retained for future
reference.
3. Heed Warning — All warnings on the product and in the operating instructions should be
adhered to.
4. Follow Instructions — All operating and use instructions should be followed.
5. Cleaning — Unplug this product from the wall outlet before cleaning. Do not use liquid
cleaners or aerosol cleaners. Use a damp cloth for cleaning.
Exception: A product that is meant for uninterrupted service and that for some specific reason,
such as the possibility of the loss of an authorization code for a CATV converter, is not intended
to be unplugged by the user for cleaning or any other purpose, may exclude the reference to
unplugging the product in the cleaning description otherwise required in 131.8(5).
6. Attachments – Do not use attachments not recommended by the product manufacturer as
they may cause hazards.
7. Water and Moisture — Do not used this product near water – for example, near a bath tub,
wash bowl, kitchen sink, or laundry tub, in a wet basement, or near a swimming pool; and
the like.
8. Accessories – Do not place this product on an unstable cart, stand, tripod, bracket, or
table. The product may fall, causing serious injury to a child or adult, and serious damage
to the product. Use only with a cart, stand, tripod, bracket, or table recommended by the
manufacturer, or sold with the product. Any mounting of the product should follow the
manufacturer’s instructions, and should use a mounting accessory recommended by the
manufacturer.
9. A product and cart combination should be moved with care. Quick stops,
excessive force, and uneven surface may cause the product and cart combination
to overturn.
10. Ventilation — Slots and openings in the cabinet are provided for ventilation and to ensure
reliable operation of the product and to protect it from overheating, and these openings
must not be blocked or covered. The openings should never be blocked by placing the
product on a bed, sofa, rug, or other similar surface. This product should not be placed in
a built-in installation such as a bookcase or rack unless proper ventilation is provided or the
manufacturer’s instructions have been adhered to.
11. Power Sources — The product should be operated only from the type of power source
indicated on the marking label. If you are not sure of the type of power supply to your home,
consult your product dealer or local power company. For products intended to operate from
battery power, or other sources, refer to the operating instructions.
12. Grounding or Polarization —
This product may be equipped with a
polarized alternating-current line plug (a plug having one blade wider
than the other). This plug will t into the power outlet only one way.
This is a safety feature. If you are unable to insert the plug fully into the
outlet, try reversing the plug. If the plug should still fail to t, contact
your electrician to replace your obsolete outlet. Do not defeat the safety
purpose of the polarized plug.
CD270 Eng 12A.indd 2 2009/7/13 11:19:07 AM

GB - 3
Alternative Warnings – This product is equipped with a three-wire grounding-type plug,
a plug having a third (grounding) pin. This plug will only t into a grounding-type power
outlet. This is a safety feature. If you are unable to insert the plug into the outlet, contact
your electrician to replace your obsolete outlet. Do not defeat the safety purpose of the
grounding-type plug.
13. Power-Cord Protection — Power-supply cords should be routed so that they are not
likely to be walked on or pinched by items placed upon or against them, paying particular
attention to cords at plugs, convenience receptacles, and the point where they exit from the
appliance.
14. Protective Attachment Plug – The product is equipped with an attachment plug having
overload protection. This is a safety feature. See Instruction Manual for replacement or
resetting of protective device. If replacement of the plug is required, be sure the service
technician has used a replacement plug specied by the manufacturer that has the same
overload protection as the original plug.
15. Lightning – For added protection for this product during a lightning storm, or when it is left
unattended and unused for long periods of time, unplug it from the wall outlet and disconnect
the antenna or cable system. This will prevent damage to the product due to lightning and
power-line surges.
16. Power Lines — An outside antenna system should be located in the vicinity of overhead
power lines or other electric light or power circuits, or where it can fall into such power lines
or circuits. When installing an outside antenna system, extreme care should be taken to
keep from touching such power lines or circuits as contact with them might be fatal.
17. Overloading – Do not overload wall outlets, extension cords, or integral convenience
receptacles as this can result in a risk of re or electric shock.
18. Object and Liquid Entry – Never push objects of any kind into this product through openings
as they may touch dangerous voltage points or short-out parts that could result in a re or
electric shock. Never spill liquid of any kind on the product.
19. Servicing — Do not attempt to service the product yourself as opening or removing covers
may expose you to dangerous voltage or other hazards. Refer all servicing to qualied
service personnel.
20. Damage Requiring Service — Unplug this product from the wall outlet and refer servicing
to qualied service personnel under the following conditions:
a. When the power-supply cord or the plug is damaged,
b. If liquid has been spilled, or objects have fallen into the product,
c. If the product has been exposed to rain or water,
d. If the product does not operate normally by following the operating instructions. Adjust only
those controls that are covered by the operating instructions as an improper adjustment
of other controls may result in damage and will often require extensive work by a qualied
technician to restore the product to its normal operation,
e. If the product has been dropped, or damaged in any way, and
f. When the product exhibits a distinct change in performance – this indicates a need for
service.
21. Replacement Parts – When replacement parts are required, be sure the service technician
has used replacement parts specied by the manufacturer or have the same characteristics
as the original part. Unauthorized substitutions may result in re, electric shock, or other
hazards.
22. Safety Check – Upon completion of any service or repairs to this product, ask the service
technician to perform safety checks to determine that the product is in proper operating
condition.
23. Heat — The product should be situated away from heat sources such as radiators, heat
registers, stoves, or other products (including ampliers) that produce heat.
CD270 Eng 12A.indd 3 2009/7/13 11:19:07 AM

GB - 4
CONTROLS AND INDICATORS
1. SPEAKERS
2. CD DOOR
3. POWER INDICATOR
4. HANDLE
5. DISPLAY
6. STOP / PRESET + BUTTON
7. CD PLAY/PAUSE ( ) BUTTON /
MEMORY BUTTON
- At Radio : preset memory mode.
8. VOLUME + BUTTON
9. SKIP / TUNING + BUTTON
- CD mode: Skip or Fast forward
- Radio mode: tune up radio
frequency
10. MODE BUTTON
- Selects CD play mode, repeat 1,
all, random and intro.
- At CD stop : CD program mode.
- At Radio : Select FM radio mono
/ stereo.
11. STANDBY BUTTON
- Switches the unit on and off.
12. FUNCTION BUTTON
- Selects AM, FM / CD / Aux modes.
13. VOLUME - BUTTON
14. SKIP / TUNING - BUTTON
- CD mode: Skip or Fast backward
- Radio mode: tune down radio
frequency
15. CD DOOR OPEN / CLOSE ( )
BUTTON
16. FM ANTENNA
17. AUX IN JACK
18. PHONE JACK
19. BATTERY COMPARTMENT
20. AC JACK
1 2
6 7 8 9 10
11 12 13 14 15 19 20
3 4 5 1 16 17 18
CD270 Eng 12A.indd 4 2009/7/13 11:19:10 AM

GB - 5
PREPARATION FOR USE
AC Operation
Connect the power cord to the AC jack on rear side of the unit, and plug the other end to an
AC electrical outlet. Use of the AC power cord disconnects the batteries automatically.
Note :
- Before operating the unit in a new area for the rst time, it is absolutely necessary to
check the operating voltage of your unit is identical with the voltage of your local power
supply.
- This unit is to be operated only at the printed power source voltage on the back
panel.
- When the unit will not be for a long period, you must disconnect the AC power cord
from AC outlet.
Battery Power
1. Remove the battery compartment lid by applying a slight downward thumb pressure on
the latches to release, then swing in a outward direction to remove.
2. Insert 6 "C" size batteries observing proper ( +/– ) polarity markings inside the
compartment.
3. Re-attach the compartment lid and unplug the AC cord from both the outlet and the
player.
CAUTION: Reversed or mixed polarities will result in damage to the batteries and /or the
player.
REMINDER…
YOUR PLAYER WILL NOT OPERATE ON BATTERY POWER IF THE LINE CORD IS
LEFT INSERTED IN THE AC JACK.
Tips on battery use
• During storage or while batteries will not be used for an extended period of time, be sure
to remove them to avoid possible damage caused by battery leakage and corrosion.
• Weak or distorted sound usually indicates your batteries are low. Remove and discard
appropriately and replace with new batteries.
• Bear in mind that battery life expectancy is based upon volume and press listening
levels maximum battery power consumption applies during maximum settings.
Note:
• The batteries (battery pack or batteries installed) shall not be exposed excessive heat
such as sunshine, re or the like.
• Do not attempt to recharge, short-circuit, disassemble, heat or throw the batteries into
a re.
• During storage or when batteries will not be used for an extended period of time, be sure
to remove them to avoid possible damage caused by battery leakage and corrosion.
• Do not mix old and new batteries.
•
Do not mix alkaline, standard (Carbon-zinc), or rechargeable (ni-cad, ni-mh, etc) batteries.
• Do not try to recharge batteries not intended to be recharged; they can overheat and
ruptune. (Follow battery maufacturer's directions).
• Dispose of old batteries properly in accordance with local laws.
CD270 Eng 12A.indd 5 2009/7/13 11:19:10 AM

GB - 6
HEADPHONES JACK
For private listening, connect a 32 ohm stereo headphones set (3.5mm plug) into the
headphone jack. Adjust volume controls to your level preference. Note the speakers are
disconnected automatically.
CAUTION
HEARING EXPERTS ADVISE AGAINST EXPOSURE TO CONTINUOUS EXTENDED
PLAY AT LOUD/HIGH VOLUME LEVELS WHILE USING HEADPHONES OR
EARPHONES. POSSIBLE HEARING LOSS MAY RESULT. IF YOU EXPERIENCE
ARINGING IN THE EARS. REDUCE VOLUME OR DISCONTINUE USE.
ADJUSTING THE VOLUME
Press the VOLUME -/+ until the desired volume is reached, and the volume level is
displayed on the LCD.
RADIO OPERATION
1.
Press the STANDBY button once to turn the unit on. The Power Indicator will light up.
2. Press the FUNCTION button to select “AM, FM” mode.
3. Press the TUNING + or TUNING – button momentarily (less than 0.5 sec.) to step up
or down the receiving frequency in order to select the desired station.
4. For auto tuning, keep pressing the TUNING + or TUNING – button (more than 0.5 sec.)
until the displayed frequency starts to change, then release the button. Tuning will stop
automatically when a station is received.
5. To turn the unit off after use, simply press the STANDBY button once again and the
Power Indicator will turn off.
FM RECEPTION
Extend the FM ROD ANTENNA to its full length and adjust angle and direction for best
reception. “ST” indicator will appear on the display only if an actual stereo broadcast
station is being received.
Under unstable or noisy conditions, press the MODE button to select MONO mode. After
FM MONO mode is select, “ST” indicator will disappear from the display.
AM RECEPTION
Rotate the unit horizontally to change direction or relocate the unit for best reception as
the built-in ferrite bar antenna is directional.
PRESET STATIONS
1. Press the FUNCTION button to select “AM, FM” mode.
2. When a desired station is tuned, press the MEMORY button and then select the location
you want to store station by pressing the PRESET + button.
3. Press the MEMORY button again to conrm the preset station.
4. Repeat step 2 and 3 to enter remaining preset stations.
Note : The preset memory can store a maximum of 20 FM stations and 12 AM stations.
TUNING TO A PRESET STATION
To recall any preset stations within the selected band, simply press the PRESET + button
until the preset number selection appears on the display.
CD270 Eng 12A.indd 6 2009/7/13 11:19:11 AM

GB - 7
COMPACT DISC OPERATION
TIPS ON HANDLING COMPACT DISC
Discs should be handled with care. Dirt, dust, scratches and warps can cause the sound
to skip during play deteriorating the sound quality. the following guidelines will heop
ensure maximum enjoyment from your CD collection:
• Only use discs bearing the audio compact disc
identication logo.
• During non-use periods, always store CDs in their
protective case.
• To keep discs clean, always handles by the edge.
DO NOT touch surface, stick paper on surface or
stick tape on its surface. Fingerprints and dust
should be carefully wiped off with a soft cloth. Wipe
in a staright motion from the inside out.
• Do not use cleaning chemicals such as: benzine,
thinner, alcohol, cleaning or anti-static sprays.
These may permanently damage the disc’s plastic
surface.
• Do not write or stick anything on either side of the
disc, especially the non-label side.
• To prevent wapping of the disc, do not expose it to direct sunlight, extreme temperatures,
heat sources, or humidity for any extended period of time.
• Dirty, scratched or warped discs may cause skipping or noise.
CAUTION
TO AVOID DAMAGE TO YOUR DISC AND/OR PLAYER, ALWAYS MAKE SURE THE DISC
HAS FULLY STOPPED ROTATION BEFORE OPENING THE DISC COMPARTMENT
DOOR.
CD OPERATION
Loading a CD
1. Press FUNCTION button to select CD mode.
Note: “no disc” appears on the display if no CD inside.
2. Press OPEN/CLOSE button to open the CD tray. “OPEn” appears on the display.
3. Place your desired CD into the tray with label facing upwards.
4. Press OPEN/CLOSE button again to close the CD tray, “CL” appears on the display
and “ -- -- ” appears soon afterward.
5. The display has a “CD” indicator if the disc is a standard CDDA format audio CD.
Note:
• Once the CD tray is opened and then closed, the pick-up head automatically searches
for a CD. Once the disc is found, the display shows its total number of tracks and total
playing time (CD Audio Disc only). However, if no CD can be found, the pick-up head
stops and the display shows “no disc”.
INSERT WITH
THE LABEL
FACING UP
PRESS THE CLAWS
AT THE CENTER OF
THE DISC CASE.
PRESS THE
DISC GENTLY
TO INSERT IT
LIFT OUT WITHOUT
TOUCHING THE
RECORDED SURFACE.
INCORRECT
CORRECT
FROM THE CENTER TO THE EDGE
INCORRECT
CD270 Eng 12A.indd 7 2009/7/13 11:19:12 AM

GB - 8
Playing Discs
1. After a CD is loaded, press PLAY/PAUSE ( ) button to play a CD. The display
shows the track number and playing time.
2. Press or button to skip backwards or forwards to a desired track.
3. To stop CD play at any time, press STOP ( ) button.
Note:
• Press and hold or button to search within a track from disc during play.
• To temporarily stop CD play, press PLAY/PAUSE ( ). The “ ” shows on the display.
Press PLAY/PAUSE ( ) button again to resume play.
• Play stops automatically after all tracks have been played.
Playing Mode
Press MODE button to select CD playing mode during CD playing.
Normal REPEAT 1 REPEAT ALL RANDOM INTRO
Repeat Play
• Repeat One Track
1. Press or to select a desired track.
2. Press MODE button until “REPEAT 1” appears on the display. The selected track
plays repeatedly.
Note: To cancel this function, press MODE button until “REPEAT 1” disappears from
the display.
• Repeating the Disc
Press MODE button until “REPEAT ALL” appears on the display.
Note: To cancel this function, press MODE button until “REPEAT ALL” disappears from
the display.
Random Play
Enables all tracks on a disc to be played in random (shufe) sequence.
• Press MODE button to select RANDOM mode until “RANDOM” appears on the
display.
• To cancel Random play mode, press MODE button again until “RANDOM” disappears
on the display.
Intro Play
• Press MODE button to select INTRO mode until “INTRO” appears on the display.
• To scan play rst 10 seconds song of disc from each track.
CD270 Eng 12A.indd 8 2009/7/13 11:19:14 AM

GB - 9
Program Play
Programming Disc Play
This feature programs the order in which tracks are played.
1. After CD is loaded, ensure the CD is in stop mode.
2. Press MODE button, “PROGRAM” ashes and “--P 01” appears on the display.
3. Press or to locate a desired track.
4. Press MODE button to conrm. “--P 02” appears on the display.
5. Repeat steps 3 and 4 to program other tracks for your desired sequence. Up to 20
tracks can be stored for programmed play.
6. Press PLAY/PAUSE ( ) button to play your programmed sequence.
Note:
• To cancel Programmed Play mode before the sequence begins, you may either power
off the unit or open the CD tray.
• When in Programmed Play mode, press STOP button to stop the Programmed Play
mode. If PLAY button is pressed again, you return to the already Programmed Play
mode.
• To cancel Programmed Play mode, press STOP button twice.
Editing Programmed Memory
1. While stopped in Programmed Play mode, press MODE button repeatedly until the
desired programmed track is selected.
2. Press or button to select the track you want to replace the programmed track
with.
3. Press MODE button again to conrm.
4. Repeat steps 1-3 to edit other programmed tracks.
AUX IN OPERATION
Caution: Turn off power and unplug the power cord before connection.
You can connect to other audio equipment through an audio cable (not included) including
a video recorder to provide sound output for other audio equipment.
Preparation
1. Connect the audio equipment's "LINE OUTPUT" to "AUX IN" jack of the unit using an
audio cable (not included).
2. Press the FUNCTION button to AUX IN mode.
3. Adjust VOLUME control to your listening preference.
Note:
When not in use, set the player to CD or OFF.
CD270 Eng 12A.indd 9 2009/7/13 11:19:14 AM

GB - 10
TROUBLESHOOTING GUIDE
SYMPTON
No power even
when STANBY is set
to “ON”.
CD will not play
No sound
Sound skips
CAUSE
• Poor AC plug connection.
• Disc is loaded upside
down.
• Disc is dirty.
• Disc error.
• Improper amplier
operation.
• Player is subject to
vibrations or physical
shock.
• Laser lens is dirty.
• Disc is dirty.
ACTION
• Insert AC power plug rmly into
AC outlet.
• Reload disc with label facing
upwards.
• Clean disc with a soft cloth.
Wipe in a straight motion from
inside to outside of the disc.
• Reload correct disc and wait
ten seconds, the switch unit
back on and retry.
• Make sure that volume controls
set properly.
• Change the position of player
propertly.
• Clean using a quality laser lens
cleaner.
• Clean disc.
CD270 Eng 12A.indd 10 2009/7/13 11:19:14 AM

GB - 11
SPECIFICATIONS
RADIO SECTION
Frequency Range FM: 87.5 - 108MHz
AM: 520 - 1710kHz
Antennas FM: Telescopic - Antenna
AM: Built-in Ferrite Bar
CD SECTION
Sampling Frequency 44.1kHz
Frequency Response 20Hz - 20kHz
GENERAL
Speaker 76mm x 2 8 ohms
Power Output 1W x 2
Power Supply AC 120V ~ 60Hz
DC 9V ... , 6 x “C” size batteries (NOT INCLUDED)
Power Consumption 14W in AC operation
Dimension Approx. 305 (L) x 200 (W) x 208 (H) mm
Weight Approx.2 kgs without batteries
* Design and specication are subject to change without notice.
CD270 Eng 12AA.indd 11 2009/8/27 2:14:39 PM

ES - 1
PRECAUCIÓN: PARAREDUCIR ELRIESGO DE DESCARGAELÉCTRICA, NO QUITE
LA CUBIERTA (NI LA PARTE DE ATRÁS). DENTRO NO HAY NINGÚN ELEMENTO
CUYO MANTENIMIENTO PUEDA SER REALIZADO POR EL USUARIO, DIRÍJASE A
UN PROFESIONAL CUALIFICADO PARA REALIZAR LAS REVISIONES.
El símbolo en forma de echa brillante, dentro de un triangulo equilátero, alerta al usuario de la
presencia de un “voltaje peligroso” sin aislar dentro de la carcasa del producto que podría ser de
suciente magnitud como para constituir un riesgo de descarga eléctrica a personas.
La exclamación dentro de un triángulo equilátero, alerta al usuario de la presencia de
instrucciones sobre operaciones importantes de funcionamiento y mantenimiento
(revisiones) en los documentos incluidos con el dispositivo.
ADVERTENCIA
Para evitar un incendio o peligro de choque eléctrico, no exponga este aparato a la lluvia o a la humedad.
El aparato no debe ser expuesto a goteo o salpicaduras. Los objetos que contengan líquidos, como jarrones, no
deben colocarse sobre el aparato.
No debe impedir la ventilación cubriendo las aperturas de ventilación con objetos, tales como periódicos,
manteles, cortinas, etc.
Las fuentes de llamas descubiertas, como velas encendidas, no deben colocarse sobre el aparato.
El enchufe es el dispositivo utilizado para desconectar el aparato. Este dispositivo debe funcionar siempre
correctamente.
Para desconectar completamente el aparato, debe retirar el enchufe de la toma de corriente.
Un volumen de sonido excesivo en los auriculares puede provocar pérdida auditiva.
PRECAUCIÓN
PARA EVITAR UN POSIBLE CHOQUE ELÉCTRICO, NO UTILICE ESTE ENCHUFE CON UN CABLE DE
EXTENSIÓN U OTRA TOMA DE CORRIENTE A MENOS QUE PUEDA SER INTRODUCIDO TOTALMENTE SIN
QUE SE VEAN LAS PATAS. PARA EVITAR UN POSIBLE CHOQUE ELÉCTRICO, INTRODUZCA TOTALMENTE
LA PATA ANCHA DEL ENCHUFE EN LA RANURA ANCHA DE LA TOMA.
IMPORTANTE
Puesto que el circuito puede causar interferencias con otros sintonizadores de radio, apague la unidad cuando
no la utilice o apártela de la radio afectada.
Este aparato cumple con el apartado 15 de la normativa FCC. Su uso está sujeto a dos condiciones: (1) Este
aparato no debe causar interferencias perjudiciales, y (2) este aparato debe aceptar cualquier interferencia
recibida, incluyendo interferencias que puedan causar un funcionamiento indeseado Estos límites han sido
establecidos para ofrecer una protección razonable contra interferencias dañinas en una instalación doméstica.
Precaución: Los cambios o modicaciones de esta unidad no aprobados expresamente por la parte responsable
del cumplimiento pueden anular el derecho del usuario a utilizar el equipo.
Este equipo genera, utiliza y puede emitir energía de frecuencia de radio. Si no se instala y utiliza el equipo de
acuerdo con las instrucciones, el mismo podría causar interferencias perjudiciales con las comunicaciones de
radio. Sin embargo, no hay garantía de que tal interferencia no se pueda producir en una determinada instalación.
Si este equipo causa interferencias en la recepción de radio o televisión que puedan determinarse apagando y
encendiendo el equipo, el usuario puede tratar de corregirlas con alguna de las siguientes medidas:
• Volver a orientar o colocar la antena.
• Aumentar la separación entre el equipo y el receptor.
•
Conectar el equipo a una toma de corriente de un circuito distinto al del receptor.
• Consulte a su distribuidor o a un técnico experto en radio / televisión para
obtener ayuda.
Este aparato de clase B cumple con la normativa canadiense ICES-003.
PELIGRO
SEGURIDAD LÁSER
Esta unidad cuenta con un rayo láser óptico en el mecanismo del CD, fabricado con
funciones de seguridad incorporadas. No intente desmontar el aparato. Póngase en
contacto con el servicio técnico. La exposición al rayo láser invisible puede ser perjudicial
para el ojo humano.
ESTE ES UN PRODUCTO LÁSER DE CLASE 1. EL USO DE OTROS CONTROLES,
AJUSTES O PROCEDIMIENTOS QUE NO SEAN LOS ESPECIFICADOS AQUÍ PUEDE
DERIVAR EN RIESGO DE EXPOSICIÓN AL RAYO LÁSER.
PRECAUCIÓN
RIESGO DE DESCARGA ELECTRICA
NO ABRIR
RADIACIÓN LÁSER INVISIBLE
EXISTENTE CUANDO ESTÁ
ABIERTO O EL CIERRE DE
BLOQUEO HA FALLADO O
HA SIDO FORZADO. EVITE
LA EXPOSICIÓN DIRECTA AL
RAYO LÁSER
CD270 Spa 12A.indd 1 2009/7/13 11:21:34 AM

ES - 2
INSTRUCCIONES DE SEGURIDAD IMPORTANTES
- Leer antes de utilizar el equipo
Este producto ha sido diseñado y fabricado cumpliendo estrictos estándares de calidad y seguridad. Sin
embargo, existen ciertas precauciones de funcionamiento e instalación que debería tener en cuenta.
1. Lea las instrucciones - Debe leer todas las instrucciones de seguridad y de funcionamiento
antes de utilizar el aparato.
2. Conserve las instrucciones - Debe conservar las instrucciones de seguridad y de
funcionamiento para consultas futuras.
3. Atención a las advertencias - Debe seguir todas las advertencias sobre el producto.
4. Siga las instrucciones - Debe seguir todas las instrucciones de seguridad y de
funcionamiento.
5. Limpieza - Desconecte el aparato de la toma de corriente antes de limpiarlo. No utilice
limpiadores líquidos o aerosoles. Utilice un trapo húmedo para su limpieza.
Excepción: Un producto diseñado para un servicio ininterrumpido y que por alguna razón, como la
pérdida del código de autorización de un convertidor CATV, no debe ser desconectado por el usuario
para limpieza u otro propósito, puede no incluir la advertencia en cuanto a no desconectar el aparato
en la descripción del procedimiento de limpieza, por otro lado necesaria en 131.8 (5).
6. Adjuntos - No utilice adjuntos no recomendados por el fabricante del producto ya que
pueden provocar daños.
7. Agua y humedad - No utilice este producto cerca del agua - por ejemplo, cerca de una
bañera, lavabo, fregadero de cocina, lavadero, sobre un suelo húmedo o cerca de una
piscina y lugares similares.
8. Accesorios - No coloque este sobre un carro inestable, una tarima, un trípode, un soporte o
una mesa. Podría caerse provocando heridas graves a niños o adultos y daños importantes
al aparato. Utilícelo sobre con un carro, tarima, trípode, soporte o mesa recomendada por el
fabricante o proporcionada con el producto. Para el montaje del producto se deben seguir
las instrucciones del fabricante y se debe utilizar un accesorio de montaje recomendado
por el fabricante.
9. La combinación del producto y el carro de transporte debe moverse con cuidado.
Frenazos bruscos, demasiada fuerza y una supercie desnivelada puede hacer
que el carro y el producto vuelquen.
10. Ventilación - Las ranuras y las aperturas del cuerpo están diseñadas para la ventilación, para
asegurar un funcionamiento estable del aparato y para protegerlo de sobrecalentamiento.
Estas aperturas no deben ser bloqueadas o cubiertas. Nunca deben bloquearse colocando
el producto encima de una cana, sofá, alfombra u otra supercie similar. Este producto no
debe colocarse sobre una instalación empotrada, como una estantería o perchero, a menos
que exista ventilación o que las instrucciones del fabricante lo permitan.
11. Fuentes de corriente - El producto debería funcionar sólo con el tipo de fuente corriente
indicado en la etiqueta del producto. Si usted no está seguro del tipo de corriente que
recibe en su casa, consulte a su vendedor o a su compañía eléctrica. Para los productos
previstos para funcionar con batería u otras fuentes, reérase a las instrucciones de
funcionamiento.
12. Tierra o polarización - Este producto se puede equipar con una
toma de línea de corriente alterna polarizada (una toma que tiene
una hoja más ancha que la otra). Esta toma encajará dentro de la
salida de corriente sólo de una manera. Esta es una característica
de seguridad. Si usted no puede insertar la toma dentro de la salida,
intente darle la vuelta a la toma. Si la toma todavía no encaja,
contacte con su electricista para reemplazar el enchufe obsoleto.
No desprecie el propósito de seguridad de la toma polarizada.
Advertencias alternativas- Este producto está equipado con una toma de tierra equipada con
tres cables, donde una toma dispone de una tercera clavija (tierra). Esta toma sólo se adecua
CD270 Spa 12A.indd 2 2009/7/13 11:21:35 AM

ES - 3
a las salidas de corriente con toma de tierra. Esta es una característica de seguridad. Si
usted no puede insertar la toma en el enchufe, contacte con su electricista para reemplazar
el enchufe obsoleto. No desprecie el propósito de seguridad de la toma de tierra.
13. Protección del cable de alimentación - Los cables de alimentación deben canalizarse
para no ser pisados o comprimidos por objetos colocados encima o contra ellos, prestando
especial atención a los cables con enchufes, los receptáculos convenientes y el punto desde
donde salen del aparato.
14. Enchufe adjunto protector - El producto cuenta con un enchufe adicional con protección
contra sobrecargas. Esta es una función de seguridad. Consulte el manual de instrucciones
para reponer o volver a instalar el dispositivo de protección. Si fuese necesario reponer el
enchufe, asegúrese de que el técnico utiliza un enchufe de repuesto especicado por el
fabricante que tenga la misma protección contra sobrecarga que el enchufe original.
15. Rayos - Para una protección adicional de este producto contra los rayos durante una
tormenta eléctrica, o cuando no utilice la unidad durante un periodo prolongado, desconecte
el aparato de la toma de corriente y desconéctelo de la antena o sistema de cable. Con
ello, evitará los daños al producto producidos por un rayo o por sobrecargas de la red
eléctrica.
16. Líneas eléctricas - Se debería colocar un sistema de antena exterior cerca de las líneas
eléctricas elevadas u otros circuitos de luz eléctrica o potencia, o donde pueda caer en estas
líneas o circuitos de potencia. Cuando instale un sistema de antena exterior, debe tener
especial cuidado de no tocar dichas líneas de potencia o circuitos ya que dicho contacto
podría ser fatal.
17. Sobrecarga - No sobrecargue los enchufes de pared, alargos o tomas de corriente integrales
ya que pueden acarrear peligro de incendio o descarga eléctrica.
18. Entrada de objetos y líquidos - Nunca introduzca objetos dentro del aparato a través de
la aperturas ya que podrían tocar puntos de voltaje peligrosos o provocar un corto circuito,
lo que derivaría en incendio o choque eléctrico. Nunca derrame líquido sobre el producto.
19. Reparación - No intente reparar el producto usted mismo ya que abrir o retirar las tapas
puede exponerle a voltaje peligroso y otros peligros. Para cualquier reparación, póngase
en contacto con el personal del servicio técnico.
20. Averías que requieren reparación - Desconecte el aparato de la toma de corriente y
póngase en contacto con personal técnico cualicado para su reparación bajo las siguientes
condiciones:
a. Si el cable de alimentación o el enchufe están dañados.
b. Si un líquido se ha vertido o algún objeto ha caído sobre el aparato.
c. Si el producto se ha expuesto a la lluvia o al agua.
d. Si el producto no funciona normalmente cuando se siguen las instrucciones de
funcionamiento. Ajuste sólo los controles que cubren las instrucciones de funcionamiento
ya que un ajuste incorrecto de otros controles puede producir daños y a menudo requerirá
un arduo trabajo realizado por un técnico cualicado que devuelva al producto su
funcionamiento normal.
e. Si el producto se ha caído o dañado de alguna manera.
f. Cuando el producto muestra un cambio en el rendimiento, esto indica una necesidad de
revisión.
21. Piezas de repuesto - Cuando se requiere un cambio de piezas, asegúrese de que el servicio
técnico haya utilizado piezas de repuesto especicadas por el fabricante o que tengan las
mismas características que la parte original. Las sustituciones no autorizadas pueden dar
como resultado un incendio, descargas eléctricas u otros peligros.
22. Comprobaciones de seguridad - Una vez que cualquier reparación o mantenimiento sobre
este producto haya nalizado, pida al servicio técnico que lleve a cabo las comprobaciones
para determinar si el producto está en las condiciones adecuadas de funcionamiento.
23. Calor - El producto se debe situar lejos de las fuentes de calor como los radiadores, registros
de calor, hornos u otros productos(incluyendo amplicadores) que producen calor.
CD270 Spa 12A.indd 3 2009/7/13 11:21:36 AM

ES - 4
CONTROLES E INDICADORES
1. ALTAVOCES
2. TAPA DEL CD
3. INDICADOR DE ENCENDIDO
4. MANGO
5. PANTALLA
6. BOTÓN DETENER /
PRE-PROGRAMAR +
7. BOTÓN REPRODUCIR/PAUSAR CD
() /BOTÓN MEMORIA
- En radio: modo memoria pre-
programada.
8. BOTÓN VOLUMEN +
9. BOTÓN / SALTAR /
SINTONIZAR +
- Modo CD: Saltar o Avanzar
- Modo radio: Subir frecuencia de
radio
10. BOTÓN MODO
- Selecciona el modo CD, repetir 1,
todos, al azar o introducción.
- En CD detenido: Modo programar
CD.
- En radio: Selecciona radio FM
mono / estéreo.
11. BOTÓN ESPERA
- Apaga y enciende la unidad.
12. BOTÓN FUNCTION
- Selecciona los modos AM, FM / CD
/ Aux.
13. BOTÓN VOLÚMEN -
14.
BOTÓN SALTAR / SINTONIZAR -
- Modo CD: Saltar o Retroceder
- Modo radio: Bajar frecuencia de
radio
15. BOTÓN ( ) DE APERTURA/CIERRE
DE LA TAPA
16. ANTENA FM
17. CLAVIJA AUX IN
18. CLAVIJA DE TELÉFONO
19. COMPARTIMIENTO PARA PILAS
20. CLAVIJA AC
1 2
6 7 8 9 10
11 12 13 14 15 19 20
3 4 5 1 16 17 18
CD270 Spa 12A.indd 4 2009/7/13 11:21:38 AM

ES - 5
PREPARACIÓN ANTES DE SU UTILIZACIÓN
Funcionamiento del AC
Conecte el cable de alimentación a la clavija AC de la parte posterior de la unidad y
conecte el otro extremo a una toma de corriente AC. El uso del cable de alimentación
desconecta automáticamente las pilas.
Nota:
- Antes de utilizar esta unidad en un área nueva por primera vez, es absolutamente
necesario que compruebe que el voltaje del aparato es idéntico al de su fuente de
alimentación local.
- Esta unidad solo debe ser utilizada con el voltaje indicado en la placa trasera.
- Cuando la unidad no vaya ser utilizada durante un largo periodo de tiempo, debe
desconectar el cable AC de la toma AC.
Pilas
1. Retire la tapa del compartimiento de la batería presionando suavemente hacia abajo
con el pulgar sobre los cerrojos para abrirla.
2. Introduzca 6 pilas de tamaño “C” prestando atención a las marcas de polaridad (+/-)
del interior del compartimiento.
3. Vuelva a colocar la tapa del compartimiento y desconecte el cable AC de la toma y del
reproductor.
PRECAUCIÓN: Las polaridades invertidas o mezcladas pueden provocar daños en las
pilas y/o el reproductor.
RECORDATORIO
SU REPRODUCTOR NO FUNCIONARÁ CON PILAS SI EL CABLE ESTÁ CONECTADO
A LA CLAVIJA AC.
Consejo para el uso de las pilas
• Durante su almacenamiento o en el caso de que las pilas no vayan a ser utilizadas
durante un largo periodo de tiempo, asegúrese de retirarlas para evitar posibles daños
causados por pérdidas de la pila y corrosión.
• Un sonido débil o distorsionado a veces indica que las pilas se están agotando. Retire
las pilas, deshágase correctamente de ellas y coloque otras nuevas.
• Tenga en cuenta que la esperanza de vida de una pila depende del volumen con lo
que subir los niveles al máximo aumenta el consumo de pilas.
Nota:
• Las pilas (paquete de pilas o pilas incorporadas) no deben ser expuestas a calor
excesivo como luz del sol, fuego o condiciones similares.
•
No intente recargar, provocar un corto circuito, desmontar, calentar o lanzar las pilas al fuego.
• Durante su almacenamiento o en el caso de que las pilas no vayan a ser utilizadas
durante un largo periodo de tiempo, asegúrese de retirarlas para evitar posibles daños
causados por pérdidas de la pila y corrosión.
• No mezcle pilas viejas y nuevas de la mezcla.
• No mezcle pilas alcalinas, estándar (carbono-zinc) o recargables de la mezcla (ni-cad,
ni-Mh, etc).
• No intente recargar pilas que no estén diseñadas con tal n. Podrían sobrecalentarse.
(Siga las instrucciones proporcionadas por el fabricante).
• Deshágase correctamente de las pilas viejas siguiendo la normativa local.
CD270 Spa 12A.indd 5 2009/7/13 11:21:39 AM

ES - 6
CLAVIJA PARA AURICULARES
Para escuchar música en privado, conecte unos auriculares estéreos de 32 ohm (3.5mm)
a una clavija para auriculares. Ajuste los controles de volumen a su nivel deseado.
Recuerde que los auriculares se desconectarán automáticamente.
PRECAUCIÓN
LOS EXPERTOS EN AUDICIÓN NO ACONSEJAN LA EXPOSICIÓN A UNA
REPRODUCCIÓN LARGA Y CONTINUADA CON NIVELES DE VOLUMEN ALTOS
UTILIZANDOAURICULARES. PUEDE PROVOCAR PERDIDADEAUDICIÓN SI SIENTE
UN ZUMBIDO EN EL OÍDO. REDUZCA EL VOLUMEN O EL USO CONTINUADO.
AJUSTAR EL VOLÚMEN
Pulse VOLUMEN -/+ hasta alcanzar el volumen deseado y ver el nivel de volumen
reejado en la pantalla LCD.
FUNCIONAMIENTO DE LA RADIO
1. Pulse el botón ESPERA una vez para encender la unidad. El indicador de encendido
se iluminará.
2. Pulse el botón FUNCIÓN para seleccionar modo “AM, FM”.
3.
Pulse el botón SINTONIZAR + o SINTONIZAR – momentáneamente (menos de 0.5 seg.)
para adelantar o retroceder la frecuencia con el n de seleccionar la emisora deseada.
4.
Para sintonizar automáticamente, mantenga pulsado el botón SINTONIZAR + o SINTONIZAR
– (más de 0.5 seg.) hasta que la frecuencia mostrada empiece a cambiar, después suelte el
botón. La sintonización se detendrá de forma automática cuando se encuentre una emisora.
5. Para apagar la unidad después de su uso, pulse el botón ESPERA una vez más y el
indicador de encendido se apagará.
RECEPCIÓN FM
Extienda totalmente la vara de la antena FM y ajuste el ángulo y la dirección para una
mejor recepción. El indicador “ST” aparecerá en pantalla solo si se ha encontrado una
emisora de retransmisión estéreo.
En condiciones inestables y ruidosas, pulse el botón MODO para seleccionar el
modo MONO. Una vez el modo FM MONO haya sido seleccionado, el indicador “ST”
desaparecerá de la pantalla.
RECEPCIÓN AM
Gire la unidad horizontalmente para cambiar la dirección o vuelva a colocar la unidad
para obtener una mejor recepción ya que la antena de barra de ferrita incorporada es
direccional.
EMISORAS PRE-PROGRAMADAS
1. Pulse el botón FUNCIÓN para seleccionar modo “AM, FM”.
2.
Cuando haya sintonizado la emisora deseada, pulse el botón MEMORIA y después seleccione
la ubicación en la que desee almacenar la emisora pulsando el botón PRE-PROGRAMAR +.
3. Pulse el botón MEMORIA otra vez para conrmar la emisora pre-programada.
4. Repita los pasos 2 y 3 para acceder a las emisoras pre-programadas.
Nota: La memoria pre-programada puede almacenar un máximo de 20 emisoras FM y
12 emisoras AM.
SINTONIZAR UNA EMISORA PRE-PROGRAMADA
Para buscar cualquier emisora pre-programada en la banda seleccionada, presione el
botón PRE-PROGRAMAR + hasta que la selección de número aparezca en pantalla.
CD270 Spa 12A.indd 6 2009/7/13 11:21:39 AM

ES - 7
FUNCIONAMIENTO DEL CD
CONSEJOS PARA MANEJAR EL CD
Los discos deben manejarse con cuidado. La suciedad, el polvo, los arañazos y las
deformaciones pueden provocar que el sonido se corte durante la reproducción
deteriorando la calidad de éste. Las siguientes instrucciones le ayudarán a disfrutar al
máximo su colección de CDs:
• Solo utilice discos que lleven el logo
de identicación de CD de audio.
• Cuando no los utilices, almacene siempre sus
CDs en sus cajas protectoras.
• Para mantener los discos limpios, cójalos
siempre por el borde. NO toque la supercie ni
pegue papel o cinta adhesiva sobre ella. Limpie
con cuidado las huellas dactilares y el polvo
utilizando un trapo. Hágalo con un movimiento
rme desde el interior hacia el exterior.
• NO utilice productos químicos como benzina,
disolvente, alcohol o aerosoles de limpieza o
anti-estáticos. Éstos podrían dañar de forma
permanente la supercie de plástico del disco.
• No escriba o pegue nada sobre las supercies del
disco, especialmente sobre el lado sin etiqueta.
• Para eviar que el disco se deforme, no lo exponga a luz solar directa, temperaturas
extremas, fuentes de calor o humedad durante largos periodos de tiempo.
• Los discos sucios, rayados o deformados pueden hacer que el sonido se corte y
provocar ruidos.
PRECAUCIÓN
PARA EVITAR DAÑAR SU DISCO Y/O SU REPRODUCTOR, ASEGÚRESE SIEMPRE DE QUE
EL DISCO HA DEJADO DE GIRAR ANTES DE ABRIR LA TAPA COMPARTIMENTO DEL DISCO.
FUNCIONAMIENTO DEL CD
Cargar un CD
1. Pulse el botón FUNCIÓN para seleccionar el modo “CD”
Nota: “no disc” aparecerá en la pantalla si no hay un disco dentro.
2. Pulse el botón ABRIR/CERRAR para abrir la bandeja del CD. “OPEN” aparecerá en
la pantalla
3. Coloque el CD deseado en la bandeja con la etiqueta orientada hacia arriba.
4. Pulse el botón ABRIR/CERRAR otra vez para cerrar la bandeja del CD, “CL” aparecerá
en pantalla y “ -- --” aparecerá un poco después.
5. La pantalla contará con un indicador de “CD” si el disco es un formato de audio
CDDA.
Nota:
•
Una vez la bandeja del CD haya sido abierta y después cerrada, se buscará inmediatamente
el CD. Una vez se haya encontrado el CD, la pantalla mostrará el número total de pistas y
el tiempo total de reproducción (solo discos de audio CD). Sin embargo, si no se encuentra
ningún CD, la búsqueda se detendrá y “no disc” aparecerá en la pantalla.
COLOQUE LA
ETIQUETA
HACIA
ARRIBA
PRESIONE LAS
PINZAS DEL
CENTRO
PRESIONE
SUAVEMENTE
EL DISCO
LÉVANTELO SIN
TOCAR LA
SUPERFICIE
GRABADA
INCORRECTO
CORRECTO
DESDE EL CENTRO HACIA
EL BORDE
INCORRECTO
CD270 Spa 12A.indd 7 2009/7/13 11:21:40 AM

ES - 8
Reproducir discos
1. Una vez el CD se haya cargado, pulse el botón REPRODUCIR/PAUSA ( ) para
reproducir un CD. En la pantalla aparecerá el número de pista y el tiempo de
reproducción.
2. Pulse el botón o para adelantar o retroceder hacia la pista deseada.
3. Para detener el CD en cualquier momento, pulse el botón DETENIDO ( ).
Nota:
• Pulse y mantenga el botón o para realizar una búsqueda en una pista del disco
durante su reproducción.
• Para detener el CD temporalmente, pulse REPRODUCIR/PAUSA ( ). “ ” aparecerá
en pantalla. Pulse el botón REPRODUCIR/PAUSA ( ) otra vez para reiniciar la
reproducción.
• La reproducción se detendrá una vez todos las pistas hayan sido reproducidas.
Modo reproducción
Pulse el botón MODO para seleccionar un modo de reproducción durante la reproducción
del CD.
Normal REPETIR 1 REPETIR TODOS ALAZAR INTRODUCCIÓN
Repetición
• Repite una pista
1. Pulse o para seleccionar la pista deseada.
2. Pulse el botón MODO hasta que “REPETIR 1” aparezca en pantalla. La pista
seleccionada se reproduce una y otra vez.
Nota: Para cancelar esta función, pulse el botón MODO hasta que “REPETIR 1”
desaparezca de la pantalla.
• Reproducir al azar
Pulse el botón MODO hasta que ”REPETIR TODOS” aparezca en pantalla.
Nota: Para cancelar esta función, pulse el botón MODO hasta que “REPETIR TODOS”
desaparezca de la pantalla.
• Reproducir al azar
Permite que todas las pistas de un mismo disco se muestren en una secuencia al
azar.
• Pulse el botón MODO para seleccionar el modo “AL AZAR” hasta que “AL AZAR “
aparezca en pantalla.
• Para cancelar el modo de reproducción al azar, pulse el botón MODO otra vez
hasta que “AL AZAR” desaparezca de la pantalla.
Reproducir introducción
• Pulse el botón MODO para seleccionar el modo “INTRODUCCIÓN” hasta que
“INTRO” aparezca en pantalla.
• El escáner reproduce los primeros 10 segundos de cada pista del disco.
CD270 Spa 12A.indd 8 2009/7/13 11:21:42 AM
This manual suits for next models
1
Table of contents
Languages:
Other Sound-X Radio manuals
