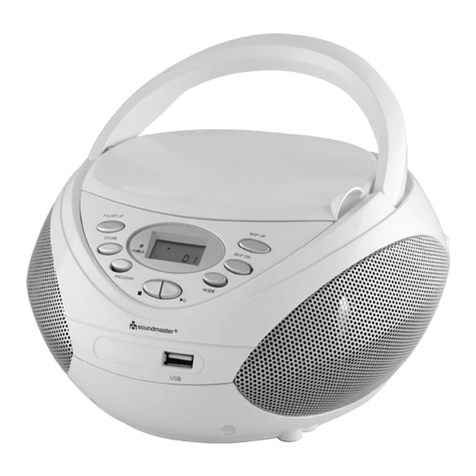
SOUNDMASTER RCD5000WS User manual

RCD5000WS / RCD5000SW
DEUTSCH PORTUGUÊS
ENGLISH NORSK
FRANÇAIS SVENSK
NEDERLANDS SUOMI
ESPAÑOL

Dieses Symbol zeigt an, dass im Inneren des Gerätes
gefährliche Spannungen vorhanden sind, und einen
Stromschlag verursachen können.
Dieses Symbol weist auf wichtige Bedienungs- und
Wartungsanweisungen bezüglich des Geräts hin.
Sicherheits- / Umwelt- / Aufstellhinweise
•Das Gerät ausnahmslos nur in trockenen Innenräumen betreiben.
•Niemals mit Feuchtigkeit in Verbindung bringen.
•Schützen Sie das Gerät vor tropfenden oder spritzenden Flüssigkeiten, und stellen Sie keine mit Flüssigkeit gefüllten Gefäße (z. B. Vasen) auf das
Gerät.
•Niemals das Gerät öffnen. STROMSCHLAGGEFAHR ! Dies ist nur Fachpersonal gestattet.
•Schließen Sie das Gerät nur an eine vorschriftsmäßig installierte und geerdete Netzsteckdose an. Die Netzspannung muss mit den Angaben auf
dem Typenschild des Gerätes übereinstimmen.
•Achten Sie darauf, dass im Betrieb das Netzkabel niemals nass oder feucht wird. Das Netzkabel darf nicht eingeklemmt oder anderweitig
beschädigt werden.
•Der Netzstecker muss immer leicht erreichbar sein, um das Gerät vom Stromnetz zu nehmen.
•Der Netzstecker dient als Trennvorrichtung und muss ohne Schwierigkeiten benutzbar sein.
•Achten Sie beim Verlegen des Netzkabels darauf, dass es beim Betrieb des Gerätes nicht zu einer Stolperfalle werden kann.
•Lassen Sie beschädigte Netzstecker oder Netzkabel sofort von dem Kundenservice austauschen.
•Ziehen Sie bei Gewitter oder einer längerer Abwesenheit (z.B. Urlaub) den Netzstecker und entnehmen Sie ggf. die Batterien.
•Kinder sollten das Gerät nur unter Aufsicht Erwachsener betreiben.
•Das Gerät ausnahmslos nur mit einem trockenen Abstaubtuch reinigen.
KEINE REINIGUNGSMITTEL oder TÜCHER mit GROBEN Material verwenden!!!
•Das Gerät keiner Sonnenbestrahlung oder anderen Hitzequellen aussetzen.
•Stellen Sie das Gerät so auf, dass kein Hitzestau entstehen kann, also frei und gut belüftet.
•Achten Sie darauf, dass an den Seiten ein Mindestabstand von 10 cm besteht, um eine ausreichende Luftzirkulation zu gewährleisten.
•Decken Sie niemals die Belüftungsöffnungen zu!!!
•Lassen Sie das Gerät während des Gebrauchs nicht unbeaufsichtigt.
•Offene Brandquellen, wie z.B. brennende Kerzen, dürfen nicht auf das Gerät gestellt werden.
•Es dürfen keine mit Flüssigkeit befüllten Behälter (z.B. Vasen) auf oder in die Nähe des Gerätes gestellt werden.
•Das Gerät an einem sicheren, erschütterungsfreien Platz aufstellen.
•Gerät möglichst weit entfernt von Computern und Mikrowellengeräten platzieren, da es sonst evtl. zu Empfangsstörungen im Radiobetrieb
kommen kann.
•Benutzen Sie das Gerät nicht, wenn es Beschädigungen aufweist, wenn es heruntergefallen ist oder nicht einwandfrei funktioniert.
•Prüfen Sie das Gerät, das Netzkabel sowie den Netzstecker regelmäßig auf sichtbare Beschädigungen. Verwenden Sie das Gerät auf keinen Fall,
wenn Sie Beschädigungen festgestellt haben.
•Sie dürfen das Gehäuse nicht öffnen oder reparieren. In diesem Falle ist die Sicherheit nicht gegeben und die Garantie erlischt. Reparaturen sind
ausschließlich durch einen Service-Center/Kundencenter auszuführen.
•Das Gerät verfügt über einen „Klasse 1 Laser“. Setzen Sie sich nicht dem Laserstrahl aus, dies kann zu Augenverletzungen führen.
•Verwenden Sie nur Batterien, die frei von Quecksilber & Cadmium sind.
•Verbrauchte Batterien sind Sonderabfall und gehören NICHT in den Hausmüll!!! Geben Sie diese Ihrem Händler zurück oder entsorgen Sie diese
an geeigneten Sammelstellen Ihrer Stadt oder Gemeinde.
•Batterien dürfen nicht in die Hände von Kindern gelangen. Kinder können Batterien verschlucken. Wurde eine Batterie verschluckt, muss sofort
medizinische Hilfe in Anspruch genommen werden.
•Überprüfen Sie regelmäßig die Batterien um ein Auslaufen der Batterie zu vermeiden.
•Batterien dürfen keiner Hitze (z. B. Sonnenbestrahlung), Feuer ausgesetzt werden.
•ACHTUNG: Explosionsgefahr bei falscher Batteriehandhabung. Nur durch den selben oder baugleichen Batterietyp ersetzen.
VORSICHT
–
UNSICHTBARE LASERSTR
AHLUNG TRITT AUS, WE
NN DER
DECKEL GEÖFFNET, UND DIE SICHERHEITSVERRIEGELUNG
NIEDERGEDRÜCKT WIRD. SETZEN SIE SICH NICHT DEM STRAHL AUS.

RCD5000 Deutsche Bedienungsanleitung
1
BEDIENELEMENTE
1 Lautsprecher 13 BAND Schalter
2 Antenne 14 BASS Taste
3 FOLDER DW Taste 15 CD Fach
4 FOLDER UP Taste 16 LCD Display
5 MODE Taste 17 CD Fach Open Taste
6 SKIP |<< Taste 18 AUX-IN Buchse
7 SKIP >>| Taste 19 Batteriefach
8 STOP/USB Taste 20 Netzanschluss
9 PLAY/PAUSE Taste 21 Griff
10 VOLUME/Lautstärke 22 USB Ladebuchse
11 TUNING Regler 23 USB Wiedergabebuchse
12 FUNKTION Schalter 24 NFC Sensor
NETZBETRIEB
Stellen Sie sicher, dass Ihr Hausstromnetz AC 230V~50Hz hat. Schließen Sie das Netzkabel an die Buchse AC IN
(20) und das Gegenstück in eine Steckdose.
ACHTUNG
1. Ziehen Sie den Stecker nicht heraus oder hinein, wenn Sie nasse Hände haben.
2. Wenn Sie das Gerät längere Zeit nicht benutzen, ziehen Sie den Stecker aus der Steckdose.
3. Wenn Sie den Netzstecker aus der Steckdose ziehen, ziehen Sie nicht am Kabel, um Risiken eines
Stromschlags durch beschädigte Kabel zu verhindern.
BATTERIEBETRIEB
Ziehen Sie das Netzkabel komplett heraus. Öffnen Sie das Batteriefach und legen Sie 8x UM-2/C 1.5V Batterien
gemäß der angegebenen Batteriepolarität in das Batteriefach ein.
USB LADEFUNKTION (1 A)
Dieses Produkt kann 1A Ladung über die USB Ladebuche (22) bieten, wenn das Gerät mit dem Netz verbunden
ist. Sie können die meisten Smartphones und Tablets damit laden. Bitte denken Sie daran, Ihr Gerät an den USB-
Steckplatz anzuschließen und wenn es komplett geladen ist, wieder zu entfernen.
BASS EFFEKT
Drücken Sie die BASS Taste, um den Bassverstärker zu aktivieren.
RADIO BETRIEB
1. Stellen Sie den FUNKTION Schalter (12) auf die Position RADIO.
2. Mit dem Drehregler TUNING (11) stellen Sie gewünschte Radiofrequenz ein.
3. Stellen Sie die gewünschte Lautstärke mit dem Drehregler VOLUME (10) ein.
4. Um das Radio auszuschalten, stellen Sie den FUNKTION Schalter (12) auf Pos. OFF.
UKW Stereo/Mono
Für UKW Mono, stellen Sie den BAND Schalter auf die Pos. FM.
Für UKW-Stereo stellen Sie den BAND Schalter auf die Pos. FM-ST. „ST“ wird im Display angezeigt, sobald der
Sender Stereo empfängt.

2
ANTENNE
Für den besten Empfang ziehen Sie dei UKW-Wurfantenne vollständig aus, um UKW-Sender zu empfangen.
MP3/AUX IN
1. Stellen Sie den FUNKTION Schalter auf die Position BT/AUX.
2. Stecken Sie ein Ende des Audio-Kabels (erfordert einen 3.5mm Klinkenstecker) in die Line-Out oder
Kopfhörerbuchse Ihres Audio-Gerätes und andere Ende in die AUX-IN Buchse Ihres Gerätes.
3. Schalten Sie Ihr Audiogerät ein und befolgen Sie die Anweisungen zur Wiedergabe.
4. Wählen Sie die passende Lautstärke.
5. Um diese Funktion anzuhalten, schalten Sie einfach das Audiogerät aus.
CD/MP3/USB BETRIEB
Wiedergabe von Audio CDs
1. Stellen Sie den FUNKTION Schalter auf die Position CD/USB.
2. Öffnen Sie das CD-Fach durch Tastendruck PUSH/CLOSE und legen Sie die CD mit der bedruckten Seite zu
Ihnen zeigend ein und schließen vorsichtig das Fach wieder. Die Wiedergabe startet automatisch.
3. Während der Wiedergabe, drücken Sie die PLAY/PAUSE Taste, um die Wiedergabe kurz zu pausieren. Um
fortzufahren, drücken Sie erneut die Taste PLAY/PAUSE.
4. Wählen Sie die passende Lautstärke mit dem VOLUME Regler.
5. Um die Wiedergabe zu stoppen, drücken Sie die STOP Taste.
Wiedergabe von MP3 CDs
1. Stellen Sie den FUNKTION Schalter auf die Position CD/USB.
2. Öffnen Sie das CD-Fach durch Tastendruck PUSH/CLOSE und legen Sie die CD mit der bedruckten Seite zu
Ihnen zeigend ein und schließen vorsichtig das Fach wieder. Die Wiedergabe startet automatisch.
3. Falls Alben in der MP3/CD vorhanden sind, können Sie diese mit der Taste FOLDER DN / FOLDER UP
anwählen.
4. Während der Wiedergabe, drücken Sie die PLAY/PAUSE Taste, um die Wiedergabe kurz zu pausieren. Um
fortzufahren, drücken Sie erneut die Taste PLAY/PAUSE.
5. Wählen Sie die passende Lautstärke mit dem VOLUME Regler.
6. Um die Wiedergabe zu stoppen, drücken Sie die STOP Taste.
Wiedergabe von MP3 über USB-Stick
1. Stellen Sie den FUNKTION Schalter auf die Position CD/USB.
2. Drücken und halten Sie die STOP/USB Taste, um den USB-Modus zu starten. Im Display erschein „USB“.
3. Schließen Sie Ihren USB-Stick in die Buchse USB (23) an. Die Wiedergabe startet automatisch.
4. Falls Alben im USB vorhanden sind, können Sie diese mit der Taste FOLDER DN / FOLDER UP anwählen.
5. Während der Wiedergabe, drücken Sie die PLAY/PAUSE Taste, um die Wiedergabe kurz zu pausieren. Um
fortzufahren, drücken Sie erneut die Taste.
6. Wählen Sie die passende Lautstärke mit dem VOLUME Regler.
7. Um die Wiedergabe zu stoppen, drücken Sie die STOP Taste.
Verschiedene Wiedergabe-Modi
Drücken Sie die MODE Taste, um die verschiedenen Wiedergabe-Modis anzuwählen.
Für Audio CDs : Repeat 1 (Titelwiederholung) Repeat All (Wiederholung Alle) Normal
Für MP3 : Repeat 1 (Titelwiederholung) Repeat Folder (Wiederholung Album) Repeat All ((Wiederholung Alle)
Normal
Repeat 1 – Titelwiederholung
Repeat All – Wiederholung aller Titel
Repeat Folder – Wiederholung der Titel im Album
Normal – Normale Wiedergabe
RCD5000 Deutsche Bedienungsanleitung

RCD5000 Deutsche Bedienungsanleitung
3
Skip Titelsprung
1. Während der Wiedergabe oder Pause die Taste SKIP >>| drücken, um den nächsten Titel anzuwählen.
2. Während der Wiedergabe oder Pause die Taste SKIP |<< drücken, um den vorherigen Titel anzuwählen.
Titelprogrammierung
Die Titelprogrammierung muss im Stop-Modus erfolgen
1. Drücken Sie auf die MODE Taste. Im Display erscheint P01.
2. Wählen Sie mit den Tasten SKIP |<< oder SKIP >>| den gewünschten Titel.
3. Drücken Sie erneut die MODE Taste, um dieses Lied zu speichern. Im Display erscheint P02 und blinkt.
4. Wiederholen Sie die Schritte 2 – 3, um mehr Lieder zu speichern. Sie können bis zu 20 Titel bei CD-Audio und
max. 99 Titel bei MP3 Titel speichern.
5. Drücken Sie die PLAY/PAUSE Taste, um die Programmwiedergabe zu starten.
6. Um die Wiedergabe zu stoppen, drücken Sie die STOP Taste.
7. Um die Titelprogrammierung zu löschen, drücken Sie zwei Mal die STOP Taste oder stellen den FUNKTION
Schalter auf OFF.
BLUETOOTH
1. Stellen Sie den FUNKTION Schalter auf die BT/AUX Position. Das LCD Display zeigt „bt“ im Display an und
das Bluetooth Icon blinkt.
2. Aktivieren Sie Bluetooth auf Ihrem Bluetooth-Gerät und suchen Sie an dem Gerät “RCD5000”.
3. Wenn die Verbindung erfolgreich war, sollte „bt“ aufhören zu blinken.
4. Wählen Sie die Audio-Dateien aus und spielen Sie diese über Ihr Bluetooth-Gerät.
5. Um diese Funktion zu stoppen, wechseln Sie in einen anderen Modus oder deaktivieren Sie Bluetooth auf
Ihrem Bluetooth-Gerät.
BLUETOOTH ÜBER NFC VERBINDUNG
1. Stellen Sie den FUNKTION Schalter auf die BT/AUX Position. Das LCD Display zeigt “bt” im Display an und
das Bluetooth Icon blinkt.
2. Aktivieren Sie die NFC Funktion Ihres Bluetooth-Gerätes und halten Sie es an den NFC Sensor (24) am CD
Fach für paar Sekunden. Der Verbindungsaufbau startet.
3. Wenn die Verbindung erfolgreich war, hört “bt” zu blinken.
4. Wählen Sie die Audio-Dateien aus und spielen Sie diese über Ihr Bluetooth-Gerät.
5. Um diese Funktion zu stoppen, wechseln Sie in einen anderen Modus oder deaktivieren Sie Bluetooth auf
Ihrem Bluetooth Gerät.
AUTO PAIRING(Auto Kopplung)
Sobald das Gerät mit dem Bluetooth-Gerät gekoppelt wurde, wird es, wenn Sie das Gerät und das Bluetooth-Gerät
das nächste Mal einschalten, automatisch mit diesem Gerät verbunden.
TECHNISCHE DATEN
UKW Frequenz: UKW 87.5 - 108 MHz
Netzspannung: AC 100-240V ~ 50/60Hz
Batteriebetrieb: DC 12V (UM-2 x 8)
Technische Änderungen und Druckfehler vorbehalten.
Copyright by Wörlein GmbH, 90556 Cadolzburg
Vervielfältigung nur mit ausdrücklicher Genehmigung der Wörlein GmbH
HERSTELLER
Wörlein GmbH Tel.: +49 9103 71 67 0
Gewerbestraße 12 Fax.: +49 9103 71 67 12
D 90556 Cadolzburg Email: service@woerlein.com
Deutschland Web: www.woerlein.com
WICHTIGER HINWEIS
Automatische Standby-Schaltung
Um die ErP2 Richtlinie (Ökodesignrichtlinie) zu erfüllen und Energie zu sparen, schaltet das Gerät nach ca. 11 Minuten
Innaktivität (z.B. im CD-Stop Modus) automatisch in den Standby-Modus, ohne vorherige Ankündigung. Um das Gerät
wieder einzuschalten, schalten Sie es wie in der Bedienungsanleitung beschrieben wieder ein.

This symbol indicates the presence of dangerous
voltage inside the enclosure, sufficient enough to
cause electric shock.
This symbol indicates the presence of important
operating and maintenance instructions for the
device.
Safety, Environmental and Setup Instructions
•Use the device in dry indoor environments only.
•Protect the device from humidity.
•Do not open the device. RISK OF ELECTRIC SHOCK! Refer opening and servicing to qualified personnel.
•Connect this device to a properly installed and earthed wall outlet only. Make sure the mains voltage corresponds with the
specifications on the rating plate.
•Make sure the mains cable stays dry during operation. Do not pinch or damage the mains cable in any way.
•Disconnect device warning: Main plug is used as the connection, so it should always remain ready operate.
•The mains plug is used as the disconnect device, the disconnect device shall remain readily operable.
•A damaged mains cable or plug must immediately be replaced by an authorized service center.
•In case of lightning, immediately disconnect the device from the mains supply.
•Children should be supervised by parents when using the device.
•Clean the device with a dry cloth only.
Do NOT use CLEANING AGENTS or ABRASIVE CLOTHS!
•Do not expose the device to direct sunlight or other heat sources.
•Install the device at a location with sufficient ventilation in order to prevent heat accumulation.
•Do not cover the ventilation openings!
•The ventilation should not be impeded by covering the ventilation openings with items, such as newspaper, table-cloths, curtains, etc.
•It shall be not be exposed to dripping or splashing and that no objects filled with liquids, such as vases, shall be placed on the
apparatus.
•The unit should not be exposed to direct sunlight, very high or low temperature, moisture, vibrations or placed in dusty environment.
•Never attempt to insert wires, pins or other such objects into the vents or opening of the unit.
•Install the device at a safe and vibration-free location.
•No naked flame sources, such as lighted candles, should be placed on the apparatus.
•Install the device as far away as possible from computers and microwave units; otherwise radio reception may be disturbed.
•Do not open or repair the enclosure. It is not safe to do so and will void your warranty. Repairs only by authorized service/ customer
center.
•The device is equipped with a “Class 1 Laser”. Avoid exposure to the laser beam as this could cause eye injuries.
•Only use mercury and cadmium-free batteries.
•Batteries shall not be exposed to excessive heat such as sunshine, fire or the like.
•Used batteries are hazardous waste and NOT to be disposed of with the household waste!!! Return the batteries to your dealer or to
collection points in your community.
•Keep batteries away from children. Children might swallow batteries. Contact a physician immediately if a battery was swallowed.
•Check your batteries regularly to avoid battery leakage.
CAUTION
-
INVISIBLE LASER RADIATION
WHEN OPENING
THE COVER
OR
PRESSING THE SAFETY INTERLOCK. AVOID EXPOSURE TO THE LASER BEAM.
ENVIRONMENTAL PROTEC
TION
Do not dispose of this product with the normal household waste at the end
of its life cycle. Return it to a collection point for the recycling of electrical
and electronic devices. This is indicated by the symbol on the product,
user manual or packaging.
The materials are reusable according to their markings. By reusing, recycling or
other forms of utilization of old devices you make an important contribution to
the protection of our environment.
Please contact your local authorities for details about collection points.
WARNING
Risk of electric shock
Do not open
!
Caution: To reduce the risk of electric shock, do not remove the cover (or back). There
are no user serviceable parts inside. Refer servicing to qualified service personnel.
Used batteries are hazardous waste and NOT to be disposed
of with the household waste! As a consumer you are legally
obligated to return all batteries for environmentally responsible
recycling – no matter whether or not the batteries contain harmful
substances*).
Return batteries
free of charge
to public collection points in your
community or to shops selling batteries of the respective kind.
Only return fully discharged batteries.
*) marked Cd = cadmium, Hg = mercury, Pb = lead

RCD5000 English Instruction Manual
1
LOCATION OF CONTROLS
1 Speaker 13 BAND Switch
2 Antenna 14 BASS Button
3 FOLDER DOWN Button 15 CD Compartment
4 FOLDER UP Button 16 LCD Button
5 MODE Button 17 CD Door Open Button
6 SKIP DOWN Button 18 AUX-IN Jack
7 SKIP UP Button 19 Battery Compartment
8 STOP/USB Button 20 AC Socket
9 PLAY/PAUSE Button 21 Handle
10 VOLUME Control 22 USB Slot (1A Charging)
11 TUNING Control 23 USB Slot (Decoding)
12 FUNCTION Switch 24 NFC Sensor
AC OPERATION
Before operation, please make sure that the VOLTAGE mentioned on the unit is same as the voltage of your local
area. Unravel the AC power cord, insert one end into the AC socket on the set, and the other end into a standard
AC outlet.
ATTENTION
1. Do not plug or unplug the power cable while you have wet hands.
2. When planning not to use this unit for a long time, disconnect the power cable from the wall outlet.
3. When disconnecting the power cord from the wall outlet, do not pull on the cord in order to avoid shock risks
caused by damaged cable.
BATTERY OPERATION
Disconnect the AC cord set completely. Open the battery compartment door and insert 8 pieces UM-2 "C" size
batteries into the battery compartment with battery polarity as shown inside the battery compartment.
USB CHARGING (1 A)
This product can provide 1A charging when it is under AC operation. You can charge most of the smartphones and
tablets. Please be reminded to connect your device to the correct USB slot.
BASS EFFECT
Press BASS button for bass effect.
RADIO OPERATION
1. Set the FUNCTION switch to RADIO position.
2. Rotate the TUNING control to tune to your desired radio station.
3. Adjust the sound level by rotating the VOLUME control.
4. To turn off the radio, set the FUNCTION switch to OFF position.
FM Stereo/Mono Broadcast
For FM Mono Broadcast, set the BAND switch to FM.
For FM stereo broadcast, set the BAND switch to FM ST. "ST." will be shown on the display.

RCD5000 English Instruction Manual
2
ANTENNA
For best reception, fully extend the FM Antenna to receive FM stations.
MP3/AUX IN CONNECTION
1. Set the FUNCTION switch to BT/AUX position.
2. Insert one side of the audio cable (requires 3.5mm stereo plug, not supplied) into the line-out jack or phones
jack on your MP3 player and the other side to the aux-in jack on the unit.
3. Turn on your MP3 player and follow the playback instruction.
4. Adjust the sound level by rotating the VOLUME control.
5. To stop this function, simply turned off your MP3 player.
CD/MP3/USB OPERATION
Playing Audio CDs
1. Set the FUNCTION switch to CD/USB position.
2. Insert a CD disc in the CD compartment and close the CD door, the unit will start reading the disc and will play
automatically.
3. During playing, press the PLAY/PAUSE button to temporarily pause playing. To resume, press the
PLAY/PAUSE button again.
4. Adjust the sound level by rotating the VOLUME control.
5. To stop playing the CD, press the STOP button.
Playing MP3 Discs
1. Set the FUNCTION switch to CD/USB position.
2. Insert a MP3 disc into the CD Compartment and close the door, the unit will start reading the disc and will play
automatically.
3. If your MP3 disc has folders, you can use the FOLDER DOWN/FOLDER UP button to select the desired folder.
4. During playing, press the PLAY/PAUSE button to temporarily pause playing. To resume, press the
PLAY/PAUSE button again.
5. Adjust the sound level by rotating the VOLUME control.
6. To stop playing the CD, press the STOP button.
Playing MP3 files with USB device
1. Set the FUNCTION switch to CD/USB position.
2. Press and hold the STOP/USB button to select the USB mode, USB will appear on the LCD display.
3. Plug your USB device into the USB port on the unit, the unit will start reading the files in the USB device and
play automatically.
4. If your USB device has folders, you can use the FOLDER DOWN/FOLDER UP button to select the desiredfolder.
5. During playing, press the PLAY/PAUSE button to temporarily pause playing. To resume, press the
PLAY/PAUSE button again.
6. Adjust the sound level by rotating the VOLUME control.
7. To stop playing the files in the USB, press the STOP button.
Note:
Because of non-standardized format definition/production of MP3 format, playback quality & performance are not
guaranteed.
Manufacturer is not responsible for the playability of MP3 in any case due to recording conditions such as PC
performance, writing software, media ability and etc.
Different Play Mode
Press the MODE button to select different kinds of play mode with the following sequence.
For Audio CDs : Repeat 1 Repeat All Normal
For MP3 Files : Repeat 1 Repeat Folder Repeat All Normal
Repeat 1 – repeat the track being played.
Repeat All – repeat all the tracks in the storage media.
Repeat Folder – repeat the tracks in the entire folder.
Normal – play the tracks in sequence.

RCD5000 English Instruction Manual
3
Skip Mode
1. During play or pause mode, press the SKIP UP button to go to the next track.
2. During play or pause mode, press the SKIP DOWN button to go back to the previous track.
Programming
In case of Playing Audio CD/MP3 disc
The programming should be done during STOP mode
1. Press the MODE button, the LCD display will show P01.
2. Use the SKIP UP or SKIP DOWN button to select the desired track.
3. Press the MODE button again to store the selected track in the memory, the LCD display will show P02 and
flash continuously.
4. Repeat step 2 to 3 to store more tracks in the memory. You can store up to 20 tracks in the memory for CD disc
and 99 tracks in the memory for MP3 disc.
5. Press the PLAY/PAUSE button to start playing the disc in the programmed order.
6. To stop playing, press the STOP/USB button.
7. To cancel the programming list, press the STOP/USB button and set the FUNCTION switch to OFF position.
BLUETOOTH STREAMING
1. Set the FUNCTION switch to BT/AUX position. The LCD display will show “bt” and the bluetooth icon will flash.
2. Turn on your Bluetooth of your Bluetooth device and search the boombox for connection. Your Bluetooth device
should find “RCD5000”.
3. If the connection is successful, the bluetooth icon on the LCD display will stop flashing.
4. Select and play the audio files though your Bluetooth device.
5. To stop this function, switch to other mode or shut down your Bluetooth of your Bluetooth device
BLUETOOTH STREAMING THROUGH NFC PAIRING
1. Set the FUNCTION switch to BT/AUX position. The LCD display will show “bt” and the bluetooth icon will flash.
2. Enable your NFC function of your Bluetooth device and place the device near the NFC sensor on the CD door
for 5 to 10 seconds.
3. If the connection is successful, your Bluetooth device will show that it is connected and the bluetooth icon on
the LCD display will stop flashing.
4. Select and play the audio files though your Bluetooth device.
5. To stop this function, switch to other mode or shut down your Bluetooth of your Bluetooth device
AUTO PAIRING
Once the unit paired with the Bluetooth device, it will automatically pair with that device next time when you turn on
the unit and that Bluetooth device.
SPECIFICATIONS
Frequency Range: FM 87.5 - 108 MHz
Power Supply: AC 100-240V ~ 50/60Hz
DC 12V (UM-2 x 8)
Specifications are subject to change without further notice.
IMPORTANT NOTICE
Automatic standby mode
To comply with the ErP2 directive, the unit automatically switches to standby after approx. 11 minutes without a signal.
(For instance in CD-Stop mode). To switch the unit on again, please follow the instructions mentioned in instruction
manual.

Ce symbole indique la présence d’une tension
dangereuse à l’intérieur de l'appareil, qui est
suffisante pour provoquer un choc électrique.
Ce symbole indique la présence de consignes
importantes de fonctionnement et d’entretien de
pour l’appareil.
Consignes de sécurité, d’environnement et d’installation
•N'utilisez l'appareil qu’à l’intérieur dans un lieu sec
•Protégez l’appareil contre l’humidité
•N’ouvrez pas l’appareil RISQUE D’ELECTROCUTION ! Faites effectuer l’ouverture et l’entretien par un personnel
qualifié
•Ne connectez cet appareil qu'à une prise murale correctement installée et reliée à la terre Assurez-vous que la tension
principale corresponde aux recommandations de la plaque d’indice
•Assurez-vous que le câble d’alimentation reste au sec pendant le fonctionnement. Ne pincez pas le câble et ne
l’endommagez d’aucune façon
•Un câble de réseau ou une prise abimés doivent être immédiatement remplacés par un centre agréé.
•En cas de tonnerre, débranchez immédiatement l’appareil de l’alimentation.
•Les enfants doivent être surveillés par leurs parents lorsqu’ils utilisent l’appareil.
•Ne nettoyez l’appareil qu’avec un tissu sec.
N’utilisez PAS de PRODUITS DETERGENTS ou de CHIFFONS ABRASIFS !
•N’exposez pas l’appareil à la lumière directe du soleil ou toute autre source de chaleur
•Installez l’appareil dans un emplacement suffisamment ventilé pour éviter une accumulation de chaleur.
•Ne recouvrez pas les grilles d’aération !
•Installez l’appareil dans un emplacement sécurisé et sans vibrations.
•Ne pas installer l’appareil à proximité d’ordinateurs et fours à micro-ondes; sinon la réception de radio pourrait être
perturbée.
•Ne pas ouvrir ou réparer l’appareil. Cela est dangereux et annulerait la garantie. La réparation doit être uniquement
effectuée que par un centre de réparations / service agréé.
•L’appareil est équipé d’un « Laser Classe 1 ». Evitez toute exposition au rayon laser car cela pourrait blesser les yeux.
•N’utilisez que des piles au mercure et sans cadmium.
•Les piles usagées sont des déchets dangereux et ne doivent PAS être jetées avec les ordures ménagères !!! Ramenez
les piles à votre point de vente ou aux points de collecte de votre ville.
•Eloignez les piles des enfants. Les enfants pourraient avaler les piles. En cas d’ingestion d’une pile, contactez
immédiatement un médecin.
•Vérifiez régulièrement vos piles pour éviter les fuites.
CLASS 1 LASER PRODUCT
KLASSE 1 LASER PRODUKT
LUOKAN 1 LASER LAITE
KLASS 1 LASER APPARAT
PRODUCTO LASER CLASE 1
ATTENTION – RADIATION LASER INVISIBLE LORSQUE VOUS
OUVREZ LE COUVERCLE OU APPUYEZ SUR
L’ENCLENCHEMENT DE SECURITE. EVITEZ TOUTE
EXPOSITION AU RAYON LASER
PROTECTION DE L’ENVIRONNEMENT
Ne jetez pas ce produit avec les ordures ménagères lorsqu’il est usagé.
Retournez-le à un point de collecte pour le recyclage des appareils
électriques et électroniques. Cette recommandation est indiquée par le
symbole sur le produit, le mode d’emploi ou l’emballage.
Les composants sont réutilisables en fonction de leur marquage. En réutilisant,
recyclant ou employant autrement les vieux appareils, vous contribuerez de
façon signifiante à la protection de notre environnement.
Veuillez contacter vos collectivités locales pour vous renseigner sur les points
de collecte.
ATTENTION
Risque d’électrocution
Ne
p
as ouvrir!
A
ttention!: Pour réduire le risque d’électrocution, ne retirez pas le couvercle (ou
l’arrière). L’usager ne peut entretenir aucune pièce à l’intérieur. Confiez l’entretien à un
personnel qualifié.
Les piles usages sont des déchets dangereux et ne doivent
PAS être jetées avec les ordures ménagères ! La loi impose
aux consommateurs de disposer de toutes les piles pour un
recyclage écologique – et ce que les piles soient de contenance
dangereuse ou pas*).
Disposer gratuitement des piles dans les points de collecte de votre
communauté ou auprès des magasins détaillant les piles de même
catégories.
Ne disposez que de piles entièrement vides.
*) marquée Cd = cadmium, Hg = mercure, Pb = plomb

Mode d’Emploi Français RCD5000
1
EMPLACEMENTS DES COMMANDES
1 Haut-parleur 13 Bouton de BANDE
2 Antenne 14 Bouton de GRAVE
3 Bouton de DOSSIER BAS 15 Compartiment CD
4 Bouton DOSSIER HAUT 16 BOUTON LCD
5 Bouton MODE 17 BOUTON OUVERTURE du
tiroir du CD
6 Bouton SAUTER BAS 18 Prise Aux-in
7 Bouton SAUTER HAUT 19 Compartiment de la pile
8 Bouton ARRET/USB 20 Prise CA
9 Bouton LECTURE/PAUSE 21 Poignée
10 Commande du VOLUME 22 Fente USB (1A
Rechargement)
11 Bouton de REGLAGE 23 Fente USB (Décryptage)
12 Bouton de FONCTION 24 Capteur NFC
FONCTIONNEMENT CA
Avant la mise en marche, veillez à ce que la TENSION indiquée sur l’appareil soit identique à celle de votre région.
Déployez le cordon d’alimentation CA, branchez une extrémité dans la prise CA de l’appareil, et l’autre extrémité
dans la prise normale CA.
ATTENTION
1. Ne branchez ou ne débranchez pas le cordon d’alimentation lorsque vos mains sont mouillées.
2. Débranchez le cordon d’alimentation de la prise murale si l’appareil ne doit pas être utilisé pendant une longue
période.
3. Lors du débranchement du cordon d’alimentation de la prise murale, ne tirez pas sur le cordon afin d’éviter
des dangers de chocs provoqués par un cordon endommagé.
FONCTIONNEMENT AVEC PILE
Débranchez complètement le cordon CA d’alimentation. Ouvrez le cache du compartiment des piles et insérez 8
piles de dimensions UM-2 ‘C’ dans le compartiment des piles avec la polarité des piles telle indiquée à l’intérieur du
compartiment.
UTILISATION DU RECHARGEMENT USB (1 A)
Cet appareil peut fournir un rechargement 1 A lors de son fonctionnement avec CA. Il est possible de recharger la
majorité des smart phones et tablettes. Veuillez ne pas oublier de brancher votre appareil dans la fente USB
appropriée.
SON DE GRAVES
Appuyez sur le bouton GRAVES pour le son grave.
UTILISATION DE LA RADIO
1. Mettez le bouton de FONCTION sur la position RADIO.
2. Tournez le bouton de REGLAGE pour régler votre station de radio préférée.
3. Réglez le niveau du son en tournant la commande du VOLUME.
4. Mettez le bouton de FONCTION sur la position ARRET (off) pour éteindre la radio.

Mode d’Emploi Français RCD5000
2
Diffusion Stéréo FM/Mono
Pour la diffusion FM Mono, mettez le bouton BANDE sur FM.
Pour la diffusion FM Stéréo, mettez le bouton BANDE sur FM ST. ‘ST’ s’affichera à l’écran.
ANTENNE
Déployez entièrement l’antenne FM pour une meilleure réception des stations FM.
BRANCHEMENT MP3/AUX IN
1. Mettez le bouton de FONCTION sur la position BT/AUX.
2. Branchez une extrémité du câble audio (prise stéréo de 3,5 mm nécessaire, non fournie) dans la prise de
sortie (line out) ou la prise des téléphones de votre lecteur MP3 et l’autre extrémité dans la prise Aux in de
l’appareil.
3. Allumez votre lecteur MP3 et suivez les instructions de lecture.
4. Réglez le niveau du son en tournant la commande du VOLUME.
5. Pour arrêter cette fonction, éteignez simplement votre lecteur MP3.
FONCTIONNEMENT du CD/MP3/USB
Lecture des CD audio
1. Mettez le bouton de FONCTION sur la position CD/USB.
2. Insérez un disque CD dans le compartiment du CD et refermez le tiroir, l’appareil commencera la lecture du
disque et démarrera automatiquement.
3. Pendant la lecture; appuyez sur le bouton LECTURE/PAUSE pour l'arrêt temporaire de la lecture. Appuyez à
nouveau sur le bouton LECTURE/PAUSE pour continuer
4. Réglez le niveau du son en tournant la commande du VOLUME.
5. Appuyez sur la touche ARRET pour arrêter la lecture du CD.
Lecture de disques MP3
1. Mettez le bouton de FONCTION sur la position CD/USB.
2. Insérez un disque MP3 dans le compartiment du CD et refermez le tiroir, l’appareil commencera la lecture du
disque et démarrera automatiquement.
3. Si votre disque MP3 contient des dossiers, il vous est possible d’utiliser le bouton DOSSIER BAS / DOSSIER
HAUT pour sélectionner le dossier souhaité.
4. Pendant la lecture, appuyez sur le bouton LECTURE/PAUSE pour l'arrêt temporaire de la lecture. Appuyez à
nouveau sur le bouton LECTURE/PAUSE pour continuer
5. Réglez le niveau du son en tournant la commande du VOLUME.
6. Appuyez sur la touche ARRET pour arrêter la lecture du CD.
Lecture de fichiers MP3 avec un dispositif USB
1. Mettez le bouton de FONCTION sur la position CD/USB.
2. Maintenez le bouton STOP/USB enfoncé pour sélectionner le mode USB, USB apparaitra sur l’écran LCD.
3. Branchez votre dispositif USB dans le port USB de l’appareil; l’appareil commencera à lire les fichiers du
dispositif USB et démarrera automatiquement.
4. Si votre appareil USB contient des dossiers, il vous est possible d’utiliser le bouton DOSSIER BAS/DOSSIER
HAUT pour sélectionner le dossier souhaité.
5. Pendant la lecture; appuyez sur le bouton LECTURE/PAUSE pour l'arrêt temporaire de la lecture. Appuyez à
nouveau sur le bouton LECTURE/PAUSE pour continuer
6. Réglez le niveau du son en tournant la commande du VOLUME.
7. Appuyez sur la touche ARRET pour arrêter la lecture des fichiers USB.
NB :
A cause de la non standardisation du format de définition/fabrication du format MP3, la qualité et la performance de
lecture ne sont pas garanties.
Le fabricant n’est pas responsable de la capacité de lecture des MP3 dans toutes circonstances suite aux
conditions d’enregistrement, telles la performance du PC, le logiciel de gravure, la capacité média, etc.
Divers modes de lectures
Appuyez sur le bouton MODE pour sélectionner différents modes de lecture dans la séquence suivante :
Pour les CD audio : Répéter 1 Tout répéter Normal
Pour les Fichiers MP3 : Répéter 1 Répéter Dossier Tout répéter Normal
Répéter 1 – répétition de la piste en cours de lecture

Mode d’Emploi Français RCD5000
3
Tout répéter – répétition de toutes les pistes du dispositif de stockage.
Répéter Dossier – répétition des pistes de la totalité du dossier.
Normal – lecture des pistes dans l’ordre.
Mode ‘Sauter’
1. Appuyez sur le bouton SAUTER HAUT pour revenir à la piste suivante pendant le mode de lecture ou pause.
2. Appuyez sur le bouton SAUTER BAS pour revenir à la piste précédente pendant le mode de lecture ou pause.
Programmation
Lors de la Lecture de disque Audio CD/MP3
La programmation devrait être effectuée durant le mode ARRET.
1. Appuyez sur le bouton MODE, l’écran LCD affichera P01.
2. Sélectionnez la piste désirée en utilisant le bouton ‘SAUT HAUT’ ou ‘SAUT BAS’.
3. Appuyez à nouveau sur le bouton MODE pour sauvegarder la piste sélectionnée dans la mémoire,
l'écran LCD affichera P02 et clignotera constamment.
4. Répétez les étapes 2 à 3 pour sauvegarder davantage de pistes dans la mémoire. Un maximum de 20 pistes
peut être sauvegardé en mémoire d’un disque CD et 99 pistes pour un disque MP3.
5. Appuyez sur le bouton LECTURE/PAUSE pour commencer la lecture du disque dans la séquence programmée.
6. Appuyez sur le bouton ARRET/USB pour arrêter la lecture.
7. Pour annuler la liste de programmation, appuyez sur le bouton ARRET/USB et mettez le bouton de FONCTION
sur la position ARRET (Off).
BLUETOOTH EN CONTINU
1. Mettez le bouton de FONCTION sur la position BT/AUX. L'écran LCD affichera ‘bt’ et l’icône Bluetooth
clignotera.
2. Allumez Bluetooth sur votre dispositif Bluetooth et cherchez la connexion ‘boombox’. Votre dispositif Bluetooth
devrait trouver ‘’RCD5000’.
3. Si la connexion est réussie, l’icône Bluetooth arrêtera de clignoter sur l’écran LCD.
4. Sélectionnez et lisez les fichiers audio par votre dispositif Bluetooth.
5. Pour arrêter cette fonction, basculez sur un autre mode ou éteignez Bluetooth de votre dispositif Bluetooth.
BLUETOOTH EN CONTINU PAR APPAIRAGE NFC
1. Mettez le bouton de FONCTION sur la position BT/AUX. L'écran LCD affichera ‘bt’ et l’icône Bluetooth
clignotera.
2. Activez la fonction NFC de votre dispositif Bluetooth et posez l’appareil à proximité du capteur NFC du tiroir CD
pendant 5 à 10 secondes.
3. Si la connexion est réussie, votre dispositif Bluetooth affichera la connexion et l’icône Bluetooth s’arrêtera de
clignoter sur l’écran LCD.
4. Sélectionnez et lisez les fichiers audio par votre dispositif Bluetooth.
5. Pour arrêter cette fonction, basculez sur un autre mode ou éteignez Bluetooth de votre dispositif Bluetooth.
APPAIRAGE AUTOMATIQUE
Lorsque l’appareil est apparié avec le dispositif Bluetooth, il s’appariera automatiquement avec ce dispositif la fois
suivante lorsque l'appareil et ce dispositif Bluetooth seront allumés.
CARACTERISTIQUES
Bande de fréquence : FM 87.5 - 108 MHz
Alimentation électrique : CA 100-240V ~, 50/60Hz
CC 12V (UM-2 x 8)
Les caractéristiques peuvent être modifiées sans avis préalable.
REMARQUE IMPORTANTE
Passage en veille automatique
Conformément à la directive ERP2, cet appareil passe automatiquement en veille au bout d'environ 11 minutes sans
signal. Pour redémarrer l'appareil, éteignez-le comme décrit dans le manuel de nouveau.

Dit symbool wijst op de aanwezigheid van een
gevaarlijke spanning binnenin de behuizing, die
groot genoeg is om electrische schokken te
veroorzaken.
Dit symbool wijst de gebruiker op de
aanwezigheid van belangrijke gebruiks- en
onderhoudsinstructies voor het apparaat.
Veiligheids-, milieu- en instellingsaanwijzingen
•Gebruik het apparaat alleen binnenshuis in een droge omgeving.
•Bescherm het apparaat tegen vocht.
•Open het apparaat niet. ELECTRISCHE SCHOKGEVAAR! Laat opening en reparatie over aan gekwalificeerd
onderhoudspersoneel.
•Sluit dit apparaat alleen aan op een goed geïnstalleerd en geaard stopcontact. Zorg ervoor dat de netspanning
overeenkomt met het de specificaties op het etiket.
•Zorg ervoor dat het electriciteitssnoer droog blijft tijdens gebruik. Zorg ervoor dat het electriciteitssnoer niet afgeknepen
of op een andere manier beschadigd wordt.
•Beschadigde snoeren of stekkers moeten meteen vervangen worden door geautoriseerd onderhoudspersoneel.
•In geval van bliksem moet de stekker onmiddellijk uit het stopcontact getrokken worden.
•Wanneer kinderen het apparaat gebruiken, moeten de ouders toezicht houden.
•Reinig het apparaat alleen met een droge doek.
Gebruik GEEN SCHOONMAAKMIDDELEN of SCHUURSPONSJES!
•Stel het apparaat niet bloot aan direct zonlicht of andere hittebronnen.
•Installeer het apparaat op een plaats met voldoende ventilatie, om oververhitting te voorkomen.
•Dek de ventilatieopeningen niet af!
•Installeer het apparaat op een veilige en vibratie-vrije plaats.
•Installeer het apparaat zo ver mogelijk uit de buurt van computers en magnetrons; anders kan de radio-ontvangst
gestoord worden.
•Open de behuizing niet en probeer het apparaat niet te repareren. Dit is gevaarlijk en doet uw garantie vervallen.
Reparaties mogen alleen uitgevoerd worden door geautoriseerd onderhoudspersoneel.
•Dit apparaat is uitgerust met een “Klasse 1 Laser”. Vermijd blootstelling aan de laserstraal; dit kan verwondingen aan de
ogen veroorzaken.
•Gebruik alleen kwik- en cadmium-vrije batterijen.
•Gebruikte batterijen zijn gevaarlijk afval en mogen NIET weggegooid worden bij het huishoudelijk afval!!! Breng de
batterijen terug naar uw handelaar of naar inzamelingspunten in uw gemeente.
•Houd batterijen buiten bereik van kinderen. Kinderen kunnen batterijen per ongeluk inslikken. Raadpleeg onmiddellijk
een dokter wanneer een kind een batterij ingeslikt heeft.
•Controleer uw batterijen regelmatig om batterijlekkage te voorkomen.
CLASS 1 LASER PRODUCT
KLASSE 1 LASER PRODUKT
LUOKAN 1 LASER LAITE
KLASS 1 LASER APPARAT
PRODUCTO LASER CLASE 1
WAARSCHUWING - ONZICHTBARE LASERSTRALING WANNEER
DE BEHUIZING GEOPEND WORDT OF DE INTERNE BEVEILIGING
UITGESCHAKELD. VERMIJD BLOOTSTELLING AAN DE
LASERSTRAAL.
MILIEUBESCHERMING
Gooi dit product niet weg bij het huishoudafval aan het einde van de
levensduur ervan. Breng het product terug naar een inzamelingspunt voor
hergebruik van electrische en electronische apparatuur. Dit wordt
aangegeven door dit symbool op het product, in de gebruiksaanwijzing of
op de verpakking.
De materialen zijn herbruikbaar volgens de markeringen. Door materiaal te
recyclen of oude apparaten op een andere manier te hergebruiken draagt
u bij aan het bescherming van ons milieu.
Neem a.u.b. contact op met uw gemeente voor informatie over inzamelingspunten.
Waarschuwing: Verwijder de behuizing (of achterzijde) niet, om het risico op elektrische
schokken te verkleinen. Geen voor de gebruiker te onderhouden onderdelen binnenin het
apparaat. Laat reparatie over aan gekwalificeerd onderhoudspersoneel.
Gebruikte batterijen zijn gevaarlijk afval en mogen NIET
weggegooid worden bij het huishoudelijk afval!!! Als consument
bent u wettelijk verplicht alle batterijen terug te brengen voor
milieuvriendelijk hergebruik - of de batterijen gevaarlijke stoffen*)
bevatten of niet.
U kunt batterijen gratis terugbrengen naar openbare inzamelingspunten in
uw gemeente of bij winkels die de betreffende soort batterijen verkopen.
Alleen volledig lege batterijen.
*) met de markering Cd = cadmium, Hg = kwik, Pb = lood
WAARSCHUWING
Risico voor een elektrische schok
Niet openen!

RCD5000 Nederlandse Handleiding
1
PLAATS VAN DE KNOPPEN
1 Luidspreker 13 Bandkeuzeschakelaar
2 Antenne 14 BAS knop
3 MAP omlaag knop 15 Cd-compartiment
4 MAP omhoog knop 16 LCD-knop
5 MODUS knop 17 Cd klep open knop
6 Omlaag overslaan knop 18 AUX-in aansluiting
7 Omhoog overslaan knop 19 Batterijcompartiment
8 STOP/USB knop 20 AC-ingang
9 Afspelen/Pauze knop 21 Handvat
10 Volumeregeling 22 USB-aansluiting (1A laden)
11 Afstemknop 23 USB-aansluiting (Decoderen)
12 Functieschakelaar 24 NFC-sensor
GEBRUIKEN OP NETSPANNING
Voordat u het apparaat gaat gebruiken dient u er zeker van te zijn dat de op het apparaat aangegeven SPANNING
overeenkomt met uw netspanning. Wikkel het netsnoer af, steek de ene kant in de AC-ingang van de set en de
andere kant in een stopcontact.
LET OP
1. Gebruik het netsnoer niet met natte handen.
2. Wanneer het apparaat langere tijd niet gebruikt gaat worden, haal dan de stekker uit het stopcontact.
3. Wanneer u de stekker uit het stopcontact haalt, trek dan niet aan de kabel om het risico op een elektrische
schok door een beschadigde kabel te vermijden.
GEBRUIKEN OP BATTERIJEN
Verwijder het gehele netsnoer. Open het batterijcompartiment en plaats 8 UM-2 "C" batterijen in het
batterijcompartiment met de polariteit zoals aangegeven in het batterijcompartiment.
USB-LADEN (1A)
Dit apparaat kan 1A laden wanneer het werkt op netstroom. U kunt dus de meeste smartphones en tablets
opladen. Denk u er wel aan het apparaat op de juiste USB-aansluiting aan te sluiten.
BASS EFFECT
Druk op de bass knop voor een bass effect.
BEDIENING VAN DE RADIO
1. Zet de functieschakelaar op RADIO.
2. Draai aan de afstemknop om de gewenste stations te vinden.
3. Stel het geluidsniveau in met de volumeknop.
4. Om de radio uit te zetten, zet u de functieschakelaar op UIT.
FM Stereo/Mono uitzending
Voor een FM mono uitzending, zet u de bandkeuzeschakelaar op FM.
Voor een FM stereo uitzending, zet u de bandkeuzeschakelaar op FM ST. Er wordt nu “ST” op het scherm getoond.

RCD5000 Nederlandse Handleiding
2
ANTENNE
Voor de beste ontvangst, schuift u de FM antenne helemaal uit.
MP3/AUX IN AANSLUITING
1. Zet de functieschakelaar op BT/AUX.
2. Steek de ene kant van de audio-kabel (3,5 mm stereoplug benodigd, wordt niet meegeleverd) in de lijnuitgang
of hoofdtelefoonaansluiting van uw MP3-speler en het andere eind in de AUX-in aansluiting op het apparaat.
3. Zet de MP3-speler aan en volg de instructies voor het afspelen.
4. Stel het geluidsniveau in met de volumeknop.
5. Om deze functie te stoppen zet u simpelweg de MP3-speler uit.
CD/MP3/USB GEBRUIKEN
Audio CD's afspelen
1. Zet de functieschakelaar op CD/USB. .
2. Plaats een CD in het Cd-compartiment en sluit het deurtje. Het apparaat zal de CD nu automatisch gaan lezen
en afspelen.
3. Om het afspelen te pauzeren, drukt u op de AFSPELEN/PAUZE knop. Om verder te gaan, drukt u nogmaals
op de AFSPELEN/PAUZE knop.
4. Stel het geluidsniveau in met de volumeknop.
5. Om het afspelen van de CD te stoppen, drukt u op de STOP knop.
MP3-CD's afspelen
1. Zet de functieschakelaar op CD/USB.
2. Plaats een MP3-CD in het CD-compartiment en sluit de klep. Het apparaat zal de CD nu automatisch gaan
lezen en afspelen.
3. Wanneer uw MP3-CD mappen heeft kunt u de knoppen map omhoog en map omlaag gebruiken om door de
mappen te bladeren.
4. Om het afspelen te pauzeren, drukt u op de AFSPELEN/PAUZE knop. Om verder te gaan, drukt u nogmaals
op de AFSPELEN/PAUZE knop.
5. Stel het geluidsniveau in met de volumeknop.
6. Om het afspelen van de CD te stoppen, drukt u op de STOP knop.
MP3-bestanden afspelen met een USB-apparaat
1. Zet de functieschakelaar op CD/USB.
2. Druk op de CD/USB knop en houd deze vast om de USB modus te selecteren, het USB-icoon zal op het LCD-
scherm verschijnen.
3. Sluit uw USB-apparaat aan op de USB-aansluiting van het apparaat. Het apparaat zal dan de bestanden op
het USB-apparaat automatisch lezen en afspelen.
4. Wanneer uw USB-apparaat mappen heeft kunt u de knoppen MAP OMHOOG en MAP OMLAAG gebruiken om
door de mappen te bladeren en de gewenste map kiezen.
5. Om het afspelen te pauzeren, drukt u op de AFSPELEN/PAUZE knop. Om verder te gaan, druk nogmaals op
de AFSPELEN/PAUZE knop.
6. Stel het geluidsniveau in met de volumeknop.
7. Om het afspelen van de USB-bestanden te stoppen, drukt u op de STOP knop.
Let op:
Omdat het formaat van MP3's geen standaard formaat is, kunnen wij de kwaliteit en prestaties van de af te spelen
bestanden niet garanderen.
De fabrikant is niet verantwoordelijk voor de afspeelbaarheid van MP3's omdat de opnamecondities zoals
prestaties van de PC, schrijfsoftware, mediakwaliteit etc. sterk kunnen wisselen.
Verschillende afspeelmodi
Druk op de MODUS knop om de verschillende afspeelmodi in de volgende volgorde te kiezen.
Voor audio CD's: 1 herhalen Alles herhalen Normaal
Voor MP3 bestanden: 1 herhalen Map herhalenAlles herhalen Normaal
1 herhalen - herhaal het nummer dat wordt afgespeeld.
Alles herhalen - herhaal alle opgeslagen nummers.
Map herhalen - herhaal alle nummers in de map.
Normaal - speel alle nummers in volgorde af.

RCD5000 Nederlandse Handleiding
3
Overslaan modus
1. Tijdens afspelen of pauze drukt u op de omhoog overslaan knop om naar het volgende nummer te gaan.
2. Tijdens afspelen of pauze drukt u op de omlaag overslaan knop om naar het vorige nummer te gaan.
Programmeren
Het afspelen van een Audio CD/MP3 CD
Het programmeren dient te gebeuren wanneer het afspelen gestopt is.
1. Druk op de MODUS knop, het LCD-scherm toont P01.
2. Druk op de omhoog overslaan of omlaag overslaan knop om de gewenste track te selecteren.
3. Druk de MODUS knop nogmaals in om het geselecteerde nummer op te slaan in het geheugen. Het
LCD-scherm toont P02 en knippert continu.
4. Herhaal de stappen 2 tot 3 om meer nummers in het geheugen op te slaan. U kunt tot 20 nummers in het CD-
geheugen opslaan en 99 nummers in het MP3 geheugen.
5. Druk op de AFSPELEN/PAUZE knop om het afspelen in de geprogrammeerde volgorde te starten.
6. Om het afspelen te stoppen, drukt u op de STOP/USB knop.
7. Om de geprogrammeerde lijst te annuleren, drukt u op de STOP/USB knop en zet u de functieschakelaar op
UIT.
BLUETOOTH STREAMEN
1. Zet de functieschakelaar op BT/AUX. Het LCD-scherm toont “bt” en het Bluetooth icoon knippert.
2. Zet de Bluetooth van uw Bluetooth-apparaat aan en zoek naar de boombox om verbinding te maken. Uw
Bluetooth-apparaat dient “RCD5000” te vinden.
3. Wanneer de verbinding gemaakt is, zal het Bluetooth icoon op het LCD-scherm stoppen met knipperen.
4. Selecteer de audio-bestanden die u wilt afspelen via uw Bluetooth-apparaat en speel deze af.
5. Om deze functie te stoppen, schakelt u naar een andere modus of zet u uw Bluetooth-apparaat uit.
BLUETOOTH STREAMEN VIA EEN NFC KOPPELING
1. Zet de functieschakelaar op BT/AUX. Het LCD-scherm toont “bt” en het Bluetooth icoon knippert.
2. Stel de NFC-functie van uw Bluetooth-apparaat in en houd het apparaat gedurende 5-10 seconden vlak bij de
NFC-sensor op het deurtje van de CD.
3. Wanneer de verbinding gemaakt is, zal het Bluetooth-apparaat dit aangeven en zal het Bluetooth-icoon op het
LCD-scherm stoppen met knipperen.
4. Selecteer de audio-bestanden die u wilt afspelen via uw Bluetooth-apparaat en speel deze af.
5. Om deze functie te stoppen, schakelt u naar een andere modus of zet u uw Bluetooth-apparaat uit.
AUTOMATISCH KOPPELEN
Wanneer het apparaat gekoppeld is met een Bluetooth-apparaat, zal het de volgende keer automatisch met het
apparaat koppelen wanneer het apparaat en dat Bluetooth-apparaat aangezet worden.
SPECIFICATIES
Frequentiebereik: FM 87,5 - 108 MHz
Voeding: AC 100-240 V ~ 50/60 Hz
DC 12V (UM-2 x 8)
De specificaties kunnen zonder kennisgeving vooraf gewijzigd worden.
BELANGRIJKE OPMERKING
Automatische standby schakeling
Om te voldoen aan de ERP2 richtlijn, schakelt het apparaat na ca. 11 minuten automatisch naar de standby stand, zonder
dit aan te duiden. Om het apparaat opnieuw te starten, schakel deze dan uit, zoals beschreven in de handleiding weer.

Este símbolo indica la presencia de tensión
peligrosa en el interior, la suficiente para provocar
una sacudida eléctrica.
Este símbolo indica la presencia de instrucciones
de funcionamiento y mantenimiento importantes
para el aparato.
Medidas de seguridad, medioambientales y de montaje
•Utilice el aparato solo en entornos secos e interiores.
•Proteja el aparato de la humedad.
•No abra el aparato. ¡PELIGRO DE SACUDIDA ELÉCTRICA! Consulte con personal cualificado para su apertura y
reparación.
•Conecte el aparato a una toma de corriente correctamente instalada y con conexión a tierra. Asegúrese de que la
tensión de la red se corresponde con la que aparece en las especificaciones.
•Asegúrese de que el cable permanece seco durante el funcionamiento. No pinche ni dañe el cable de conexión a red
de ningún modo.
•Un cable de red dañado o clavija debe ser reemplazado inmediatamente por el centro de reparación autorizado.
•En caso de tormenta, desenchufe de la red inmediatamente.
•Los padres deberán supervisar a los niños cuando utilicen el aparato.
•Limpie el aparato solamente con un paño seco.
NO utilice LIMPIADORES NI PAÑOS ABRASIVOS
•No exponga el aparato a la luz solar directa o a otras fuentes de calor.
•Instale el aparato en un lugar con suficiente ventilación con el fin de evitar acumulación de calor.
•No cubra las aberturas de ventilación.
•Coloque el aparato en un lugar seguro y sin vibraciones.
•Coloque el aparato lo más lejos posible de ordenadores y microondas, de otro modo puede resultar afectada la
recepción de la radio.
•No abra ni repare el aparato. No es seguro hacerlo y anula la garantía. Las reparaciones solo las pueden realizar los
centros de atención al cliente autorizados.
•El dispositivo lleva incorporado un “Láser de Clase 1”. Evite la exposición al haz de láser porque podría dañarse la
vista.
•Utilice solo baterías sin mercurio y cadmio.
•Las baterías utilizadas son residuos peligrosos y no se deben desechar con la basura doméstica. Lleve las baterías a
su proveedor o a los puntos de recogida de su comunidad.
•Mantenga las baterías lejos de los niños. Podrían tragarse las baterías. En caso de tragarse una batería, consulte a un
médico inmediatamente.
•Compruebe las baterías regularmente para evitar fugas.
CLASS 1 LASER PRODUCT
KLASSE 1 LASER PRODUKT
LUOKAN 1 LASER LAITE
KLASS 1 LASER APPARAT
PRODUCTO LASER CLASE 1
PRECAUCIÓN - RADIACIÓN INVISIBLE DE LÁSER AL ABRIR
LA TAPA O PULSAR EL INTERBLOQUEO DE SEGURIDAD.
EVITE LA EXPOSICIÓN AL HAZ DE LÁSER.
PROTECCIÓN MEDIOAMBI
ENT
AL
No elimine este producto con la basura doméstica al terminar su vida útil.
Llévelo a un punto de recogida para reciclado de aparatos eléctricos y
electrónicos. Esto se indica mediante el símbolo en el producto, en el
manual de usuario o en el embalaje.
Los materiales son reutilizables conforme a los símbolos. Al reutilizar, reciclar u
otras formas de utilización de aparatos antiguos, está contribuyendo a proteger
el medio ambiente.
Consulte a las autoridades la información sobre los puntos de recogida.
ADVERTENCIA
Riesgo de sacudida eléctrica
¡
No abrir!
Precaución: Para evitar el riesgo de sacudida eléctrica, no retire la tapa (o parte
posterior). No hay piezas útiles en el interior. Consulte cualquier reparación a personal
cualificado.
Las baterías utilizadas son residuos peligrosos y No se deben
desechar con la basura doméstica. Como consumidor está
legalmente obligado a llevar todas las baterías para un reciclaje
de manera responsable, no importa si las baterías contienen o no
sustancias perjudiciales.
Lleve las baterías sin gasto alguno a los puntos de recogida públicos
de su comunidad o a las tiendas que venden baterías del tipo
correspondiente.
Entregue solo baterías totalmente descargadas.
*) marcado Cd = cadmio, Hg = mercurio, Pb = plomo

RCD5000 Manual de Instrucciones en Español
1
SITUACIÓN DE LOS CONTROLES
1 Altavoz 13 Interruptor de BANDA
2 Antena 14 Botón BAJOS
3 Botón CARPETA ANTERIOR 15 Compartimento CD
4 Botón CARPETA SIGUIENTE 16 Botón LCD
5 Botón MODO 17 Botón Abrir Puerta CD
6 Botón SALTAR ATRÁS 18 Jack AUX-IN
7 Botón SALTAR ADELANTE 19 Compartimento pilas
8 Botón PARADA/USB 20 Enchufe CA
9 Botón REPRODUCCIÓN/PAUSA 21 Manilla
10 Control VOLUMEN 22 Ranura USB (Carga 1A)
11 Control SINTONIZACIÓN 23 Ranura USB (Descodificación)
12 Interruptor de FUNCIÓN 24 Sensor NFC
FUNCIONAMIENTO CON CA
Antes de poner en funcionamiento el aparato, asegúrese de que el VOLTAJE mencionado en la unidad sea igual al
de su zona local. Desenrolle el cable de corriente CA, introduzca un extremo en el enchufe del aparato y el otro en
el enchufe estándar de salida CA.
ATENCIÓN
1. No enchufe ni desenchufe el cable de corriente con las manos mojadas.
2. Si prevé que no utilizará el aparato durante un largo período de tiempo, desconecte el cable de corriente del
enchufe de la pared.
3. Cuando desenchufe el cable de alimentación de la pared, no tire de él, evitará así el peligro de descargas
eléctricas en caso de que el cable esté dañado.
FUNCIONAMIENTO CON PILAS
Desconectecompletamente el cable de corriente. Abra el compartimento de las baterías e introduzca 8 pilas de
tamaño UM-2 "C" con la polaridad de las mismas como se indica en dicho compartimento.
CARGA USB (1 A)
Este producto puede proporcionar carga 1A cuando está funcionando con CA. Por tanto es posible cargar la mayor
parte de los smartphones y tabletas. Por favor, no olvide conectar su dispositivo a la ranura USB correcta.
EFECTO BAJOS
Presione el botón BAJOS para activar dicho efecto.
FUNCIONAMIENTO DE LA RADIO
1. Coloque el interruptor FUNCIÓN en la posición RADIO.
2. Gire el control de SINTONIZACIÓN hasta encontrar la emisora de radio deseada.
3. Ajuste el nivel de sonido girando el control de VOLUMEN.
4. Para apagar la radio coloque el interruptor de FUNCIÓN en la posición APAGADO.
Difusión FM Estéreo/Mono
Para la difusión en FM Mono, coloque el interruptor de BANDA en FM.
Para la difusión en FM Estéreo, coloque el interruptor de BANDA en FM ST. La pantalla mostrará "ST.".

RCD5000 Manual de Instrucciones en Español
2
ANTENA
Para una mejor recepción, extienda completamente la antena FM para recibir emisoras en FM.
CONEXIÓN MP3/AUX IN
1. Coloque el interruptor FUNCIÓN en la posición BT/AUX.
2. Introduzca un extremo del cable audio (es necesario un enchufe estéreo de 3,5 mm., no incluido) en el jack de
salida o en el de los auriculares de su reproductor de MP3 y el otro extremo en el jack aux-in de la unidad.
3. Encienda el reproductor de MP3 y siga las instrucciones para la reproducción.
4. Ajuste el nivel de sonido girando el control de VOLUMEN.
5. Para detener esta función, simplemente apague el reproductor de MP3.
FUNCIONAMIENTO CD/MP3/USB
Reproducción de CDs audio
1. Coloque el interruptor FUNCIÓN en la posición CD/USB.
2. Introduzca un CD en el compartimento del CD y cierre la puerta del CD, la unidad comenzará a leer el disco y
lo reproducirá automáticamente.
3. Durante la reproducción, presione el botón REPRODUCCIÓN/PAUSA para detener temporalmente la
reproducción. Para reanudar la reproducción, vuelva a presionar el botón REPRODUCCIÓN/PAUSA.
4. Ajuste el nivel de sonido girando el control de VOLUMEN.
5. Para detener la reproducción del CD, pulse el botón PARADA.
Reproducción de discos MP3
1. Coloque el interruptor FUNCIÓN en la posición CD/USB.
2. Introduzca un disco MP3 en el compartimento del CD y cierre la puerta del CD, la unidad comenzará a leer el
disco y lo reproducirá automáticamente.
3. Si su disco MP3 tiene carpetas, podrá utilizar el botón CARPETA ANTERIOR/CARPETA SIGUIENTE para
seleccionar la carpeta deseada.
4. Durante la reproducción, presione el botón REPRODUCCIÓN/PAUSA para detener temporalmente la
reproducción. Para reanudar la reproducción, vuelva a presionar el botón REPRODUCCIÓN/PAUSA.
5. Ajuste el nivel de sonido girando el control de VOLUMEN.
6. Para detener la reproducción del CD, pulse el botón PARADA.
Reproducción de archivos MP3 mediante el dispositivo USB
1. Coloque el interruptor FUNCIÓN en la posición CD/USB.
2. Presione y mantenga presionado el botón PARADA/USB para seleccionar el modo USB, el icono USB
aparecerá en la pantalla LCD.
3. Conecte su dispositivo USB al puerto USB de la unidad, ésta comenzará a leer los archivos del dispositivo
USB y los reproducirá automáticamente.
4. Si su dispositivo USB tiene carpetas, podrá utilizar el botón CARPETA ANTERIOR/CARPETA SIGUIENTE
para seleccionar la carpeta deseada.
5. Durante la reproducción, presione el botón REPRODUCCIÓN/PAUSA para detener temporalmente la
reproducción. Para reanudar la reproducción, vuelva a presionar el botón REPRODUCCIÓN/PAUSA.
6. Ajuste el nivel de sonido girando el control de VOLUMEN.
7. Para detener la reproducción de los archivos del USB, presione el botón PARADA.
Importante:
Dado que la definición/producción de los formatos MP3 no es estándar, no se garantiza la calidad ni el
funcionamiento del aparato.
El fabricante no es responsable del funcionamiento del MP3 en todos los casos debido a las condiciones de la
grabación, como funcionamiento del PC, software de escritura, capacidad de los medios, etc.
Diverso modo de reproducción
Presione el botón MODO para seleccionar diversos tipos de modo de reproducción con la siguiente secuencia.
Para CDs audio: Repetir 1 Repetir TodoNormal
Para archivos MP3: Repetir 1 Repetir Carpeta Repetir Todo Normal
Repetir 1 – repite la pista que se está reproduciendo.
Repetir Todo – repite todas las pistas almacenadas en el dispositivo.
Repetir Carpeta – repite todas las pistas de la carpeta.
Normal – reproduce las pistas en secuencia.
This manual suits for next models
1
Table of contents
Languages:
Other SOUNDMASTER Portable Stereo System manuals

SOUNDMASTER
SOUNDMASTER SCD3750DS User manual

SOUNDMASTER
SOUNDMASTER SCD6900 User manual

SOUNDMASTER
SOUNDMASTER UR 2080 User manual

SOUNDMASTER
SOUNDMASTER SCD1900 User manual

SOUNDMASTER
SOUNDMASTER SCD1980 User manual

SOUNDMASTER
SOUNDMASTER HighLine UR 2150USB User manual

SOUNDMASTER
SOUNDMASTER SCD7600 User manual

SOUNDMASTER
SOUNDMASTER SCD 6800MP3 User manual

SOUNDMASTER
SOUNDMASTER SCD8100 User manual

SOUNDMASTER
SOUNDMASTER SCD1990SW User manual