Southwest Graphic Whizard PT320 CC User manual

PT320 CC
Business card cutter
SET UP/OPERATOR’S MANUAL
755 Griffith Court, Burlington, Ontario, CANADA Tel +905-633-7663 Fax +905-637-4419
WWW.GRAPHICWHIZARD.COM
1

Table of Contents
Chapter 1 Safety........................................................................................4
1 Safety Precautions .........................................................................4
1-1 Safety Precautions....................................................................4
1-2 Warning Labels.........................................................................5
2 Safety Devices................................................................................5
2-1 Operational Safety Guidelines...................................................6
Chapter 2 General......................................................................................7
1 Outline of mechanism .....................................................................7
1-1 Purpose ...................................................................................7
1-2 Main technical parameters ........................................................7
1-3 Accessories ..............................................................................7
1-4 Machines Diagram....................................................................8
Chapter 3 Set-up, operation and maintenance .............................................9
1 Set-up............................................................................................9
1-1 Set-up Guide............................................................................9
1-2 Set-up Guidelines ...................................................................10
2 Operation .....................................................................................11
2-1 Cutting ..................................................................................11
2-2 Operation Panel......................................................................12
2-3 Datum Selection.....................................................................13
2-4 Cutting mode.........................................................................14
24 UP - 12" x 18" QUICK SET-UP….………………………………………………………………………..14
2-5 Set-up of the Cutting Parameters.............................................30
2-6 Job Guidelines........................................................................34
2-7 Longitudinal Knife Assembly Replacement................................36
2-8 Paper Weight Adjustment........................................................37
3 Troubleshooting............................................................................38
2

3-1 Safety cover fails....................................................................38
3-2 Paper Jamming ......................................................................38
3-3 Long Blade Jam......................................................................39
3-4 Cut Mark■not detected..........................................................39
3-5 Cut Mark Sensor failed............................................................40
3-6 Paper Size..............................................................................40
3-7 Paper Feeding........................................................................41
4 Aftercare......................................................................................42
4-1 Maintenance
4-2 Machine Parts Lifespan ...........................................................42
5 System troubleshooting analysis .........................................42
3

Chapter 1 Safety
This manual is designed to help you operate and maintain the PT320 CC
machine. Please read, understand and keep this manual in a convenient place
for easy access.
DO NOT operate the machine until you have read and understand the
instructions in this manual.
Graphic Whizard Inc. shall not be held liable for incidental consequential
damages resulting from: improper or inadequate maintenance by the
customer; unauthorized modifications or misuse; or operation outside of the
environment specified for the machine.
Graphic Whizard Inc. is committed to continually improving the design and
performance of our product line. Please note: The design and specifications
of this machine are subject to change without notice and without our legal
obligation.
All rights are reserved. No part of this manual may be photocopied, reproduced
or translated to another language without the prior written consent of Graphic
Whizard Inc.
1 Safety Precautions
1-1 Safety Precautions
To prevent any accidents, please follow the precautions below strictly.
(1) Have the ground-wire of the power supply well grounded.
(2) Ensure that any loose hair or clothing are tied back and away from moving
parts of the machine when operating.
(3) Do not touch any electric components of the machine and ensure electrical
components stay dry and out of contact.
(4) Always turn the machine off when not in use.
(5) In case of any issue with the machine, turn off the main power.
4
(6) Please contact your dealer or Graphic Whizard with any questions or
concerns and before attempting to service machines.
1-2 Warning Label
Operators are required to pay special attention to the places fitted with
the warning labels during operation.
Description of the warn labels
2 Safety devices
To prevent accidents and possible injury to the machine and operator
safety measures have been put in place. Please ensure the Operator is aware of
all safety features and possible hazards on the machine.
2-1 Operational Safety Guidelines
Both fixing and lock covers are set to prevent any tools and clothes from
being rolled into the machine.
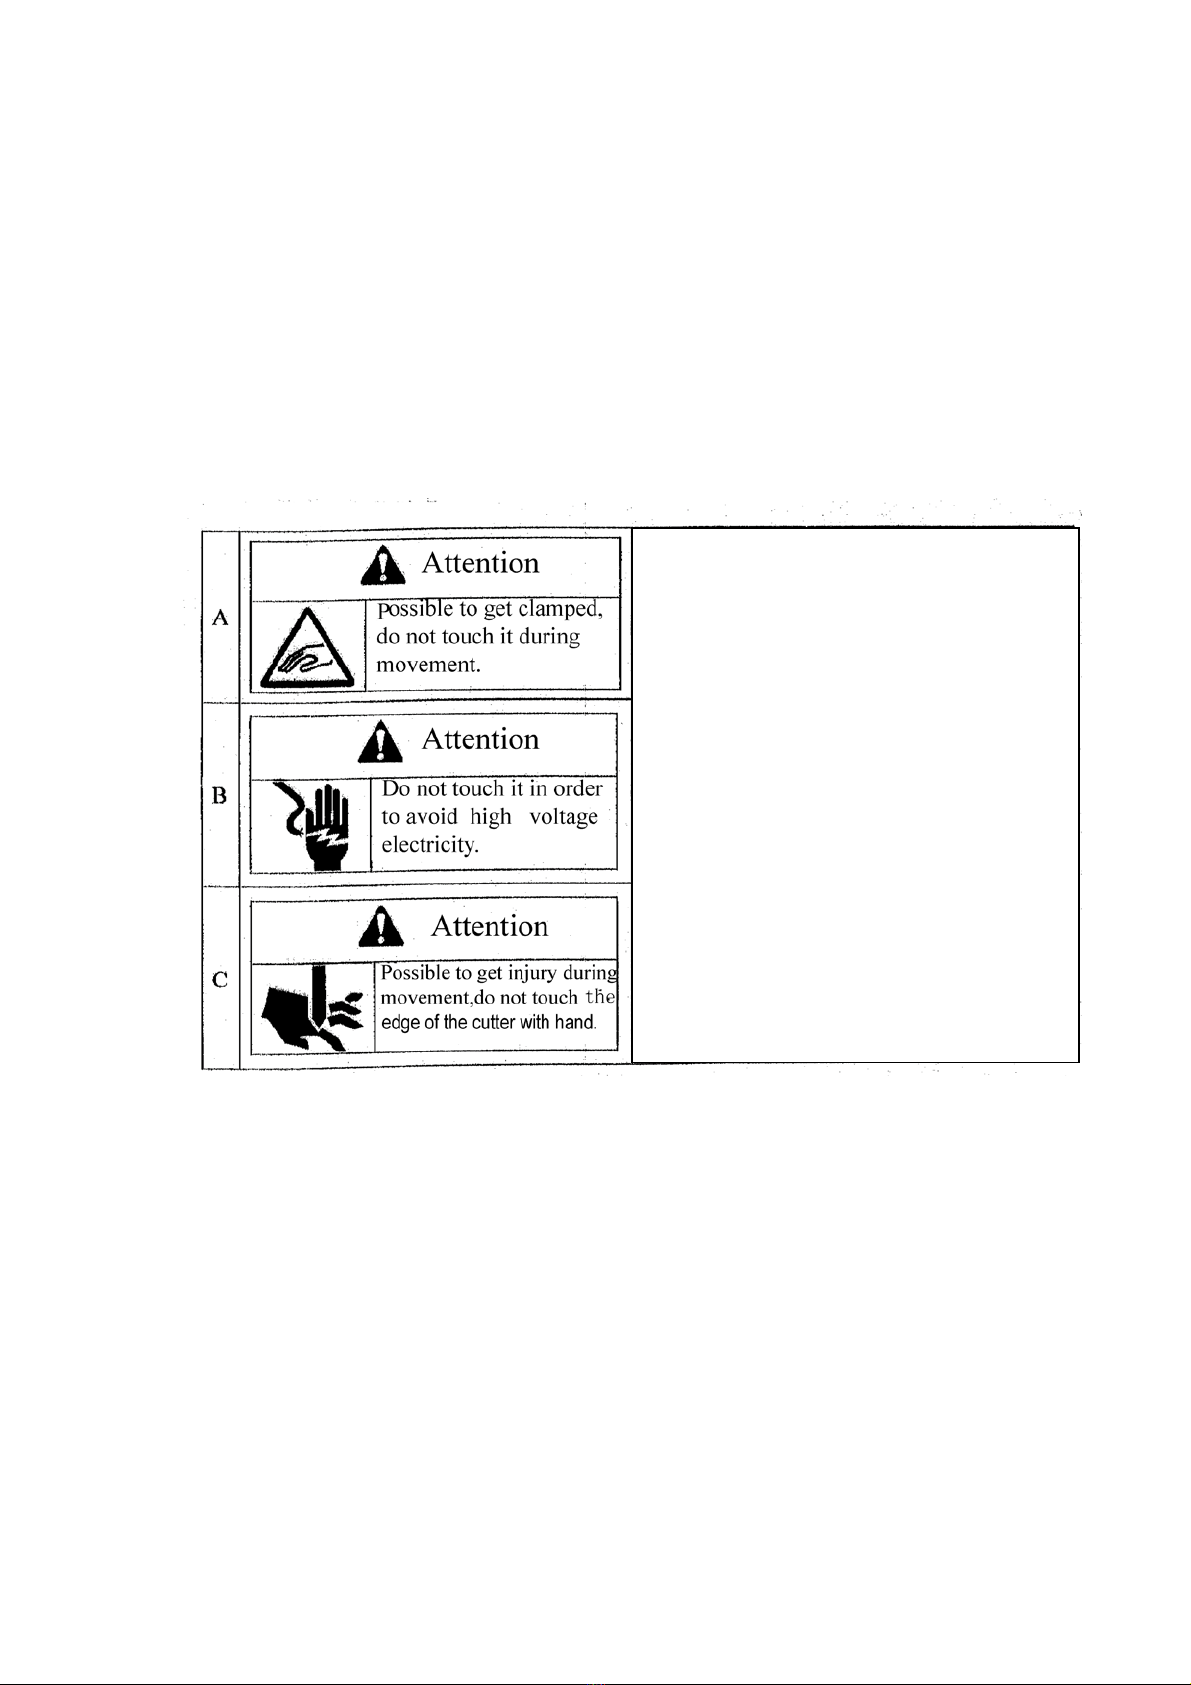
A. This warning indicates a pinch point.
Please exercise caution and ensure you are
well clear of nay moving parts
B. This warning indicates a chance of
electric shock. Please do not tamper with
or attempt to repair any electrical machine
components.
C. The machine uses an extremely sharp
cutting blade- do not attempt to touch
anywhere near working parts while it is
running and exercise caution when near
the blades.
5

Never run the machine if either of the covers are open or damaged. Once
the lock cover is opened, the machine will stop moving right away.
2-1-2 Lock cover, fixing cover
⒈Upper cover ⒉Switch for lock cover
⒊Left-side cover
⒋Right-side cover
⒌Front cover
Fig.1-1Front
Fig. 1-2 Top Fig. 1-3 Back
Safety Labels
⒍Take care- pinch point ⒎Take care of sharp cutter edge
⒏Take care of sharp cutter edge ⒐Take care of sharp cutter edge
⒑Take care of electric shock
6

Chapter 2 General
1 Outline of mechanism
1-1 Purpose
A quick and simple card cutting machine to expertly cut finished cards from a
12” by 18” stock.
1-2 Main technical parameters
Cutting Longitudinal: cutting by a roller;
horizontal: cutting by a lateral guillotine blade
Feeding Automatic soft friction feeding
Paper size A3(297×420mm) 11” x 17”,SRA3(320×450mm) 12” x 18”
Paper thickness
0.20mm(180g/m²)--- ~0.35mm(350g/m²)
Cutting speed 250 business cards in under 2 minutes
Cutting size Longitudinal:( 89, 85,90,95)mm
Horizontal:(45;50;54;90;95;127)mm;40-250mm,customize)
Mechanical
dimension 550mm×350mm×240mm (L x W x H)
Operating
environment -15
℃
~+40
℃
humidity 35%~70%
Weight About 21Kg, 46 lbs
Power supply AC 90~260V,50/60HZ,0.5A
1-3 Accessories
No
Item
Quantity
Remark
1 Operating instructions 1 (This manual)
2 Business card catcher 1 For collecting name cards
3 Cross Screwdriver 1 For machine adjustments
7

1-4 Machine Diagram
1 Left side cover 2 Right side cover
3 Operation panel 4 Upper cover
5 Paper feed tray 6 Feeding wheel
7 Power switch 8 Frontal cover
9 Power cord 10 Lock nut
11 Paper weight adjustment needle 12 Paper weight adjustment needle
13 Left paper guide plate 14 Right paper guide plate
15 Paper feed wheel 16 Horizontal knife
17 Cut wheel 18 Static prevention
19 Business card catcher 20 Waste collection
8

1
Setting 320CC Parameters
The 320 Card Cutter is capable of cutting 24 business cards from 12X18 sheet stock. To produce the
cleanest cuts, some adjustments may be required. Let’s start by defining the menu options.
When the 320CC is powered on and ready, the screen will display the current settings. Here’s a
breakdown of the selected settings in the image below.
0024 –this displays the number of cards the cutter will cut from a sheet of 12X18
SRA3 –although this is a European size definition, the 320CC has been set up to accept 12X18 sheets.
The actual measurements for this setting is 12.59 X 17.71, which is well within the capabilities of the
320CC.
3.50X2.00* - defines the size of the cut cards
in –the current measurement value.
Now, this can be changed according to your needs. There are 4 buttons above the display that let you
make changes to the current cut options.
Mode Changeover –allows the user to change the cut size of the business card. See appendix for all
available options
Set Parameter –allows the user to make changes to the parameters with is a subscribed mode.
Start (+) –starts the cut process. The + is used to change parameter settings.
Stop (-) –stops the cut process. The –is used to change parameter settings.

2
Now we will take a look at the Set Parameter options. Press the Set Parameter button to navigate
through the options.
Note: though many of the parameters are adjustable, the selected mode will program the default
parameters. Some changes should not be required.
Cut Pieces –this is defined by the Mode. In this instance the 320CC is set to cut 24 pieces. This number
increases in increments of 24.
Datum selection: frontal end or mark █–this sets the datum type. In this instance, the 320CC will use
the frontal end. Mark █will read the registration mark.

3
Language –set to English
Mark █posit comp: +0.000 in –registration mark compensation. When setting the 320CC to cut for the
first time, set the compensation to 0.000 and make changes only if needed. Changes to this parameter
will only be reflected when the Datum is set to Mark █.
First cut comp: +0.000 in –first cut compensation. When setting the 320CC to cut for the first time, set
the compensation for 0.000 and make changes only if needed. This permits the user to adjust the
position of the first cut.
Card length comp: +0.000 in –card length compensation. Use this to adjust the size of the card length.
When setting the 320CC to cut for the first time, set the compensation for 0.000 and make changes only
if needed. This adjusts the length of the card f you are cutting standard business cards (3.5 X 2).
4
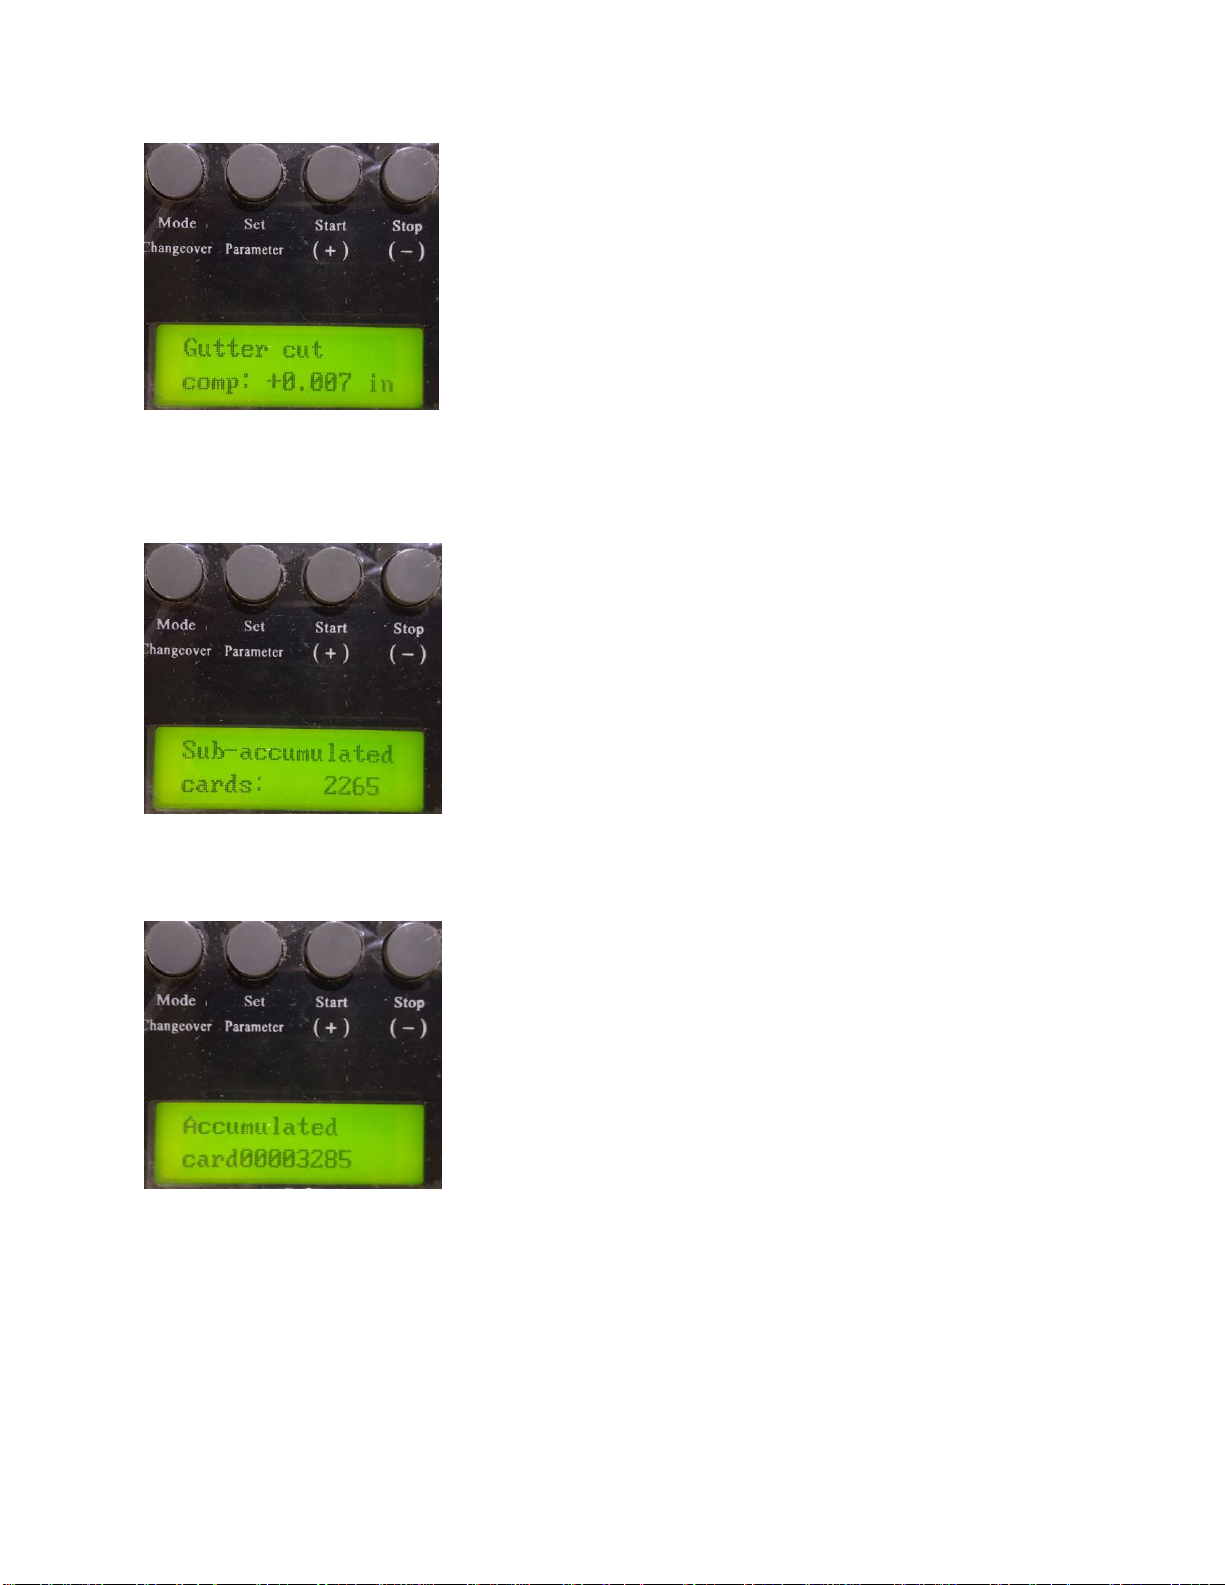
Gutter cut comp: +0.000 in –gutter cut compensation. Use this to adjust the size of the gutter cut
between cards. When setting the 320CC to cut for the first time, set the compensation for 0.000 and
make changes only if needed.
Sub-accumulated cards: 2265 –current subtotal of cards cut per current job. This parameter can be
cleared by pressing the (-) stop button.
Accumulated card 0000NNNN (where N = number) –life counter of total number of cards cut. This
number cannot be cleared.
5
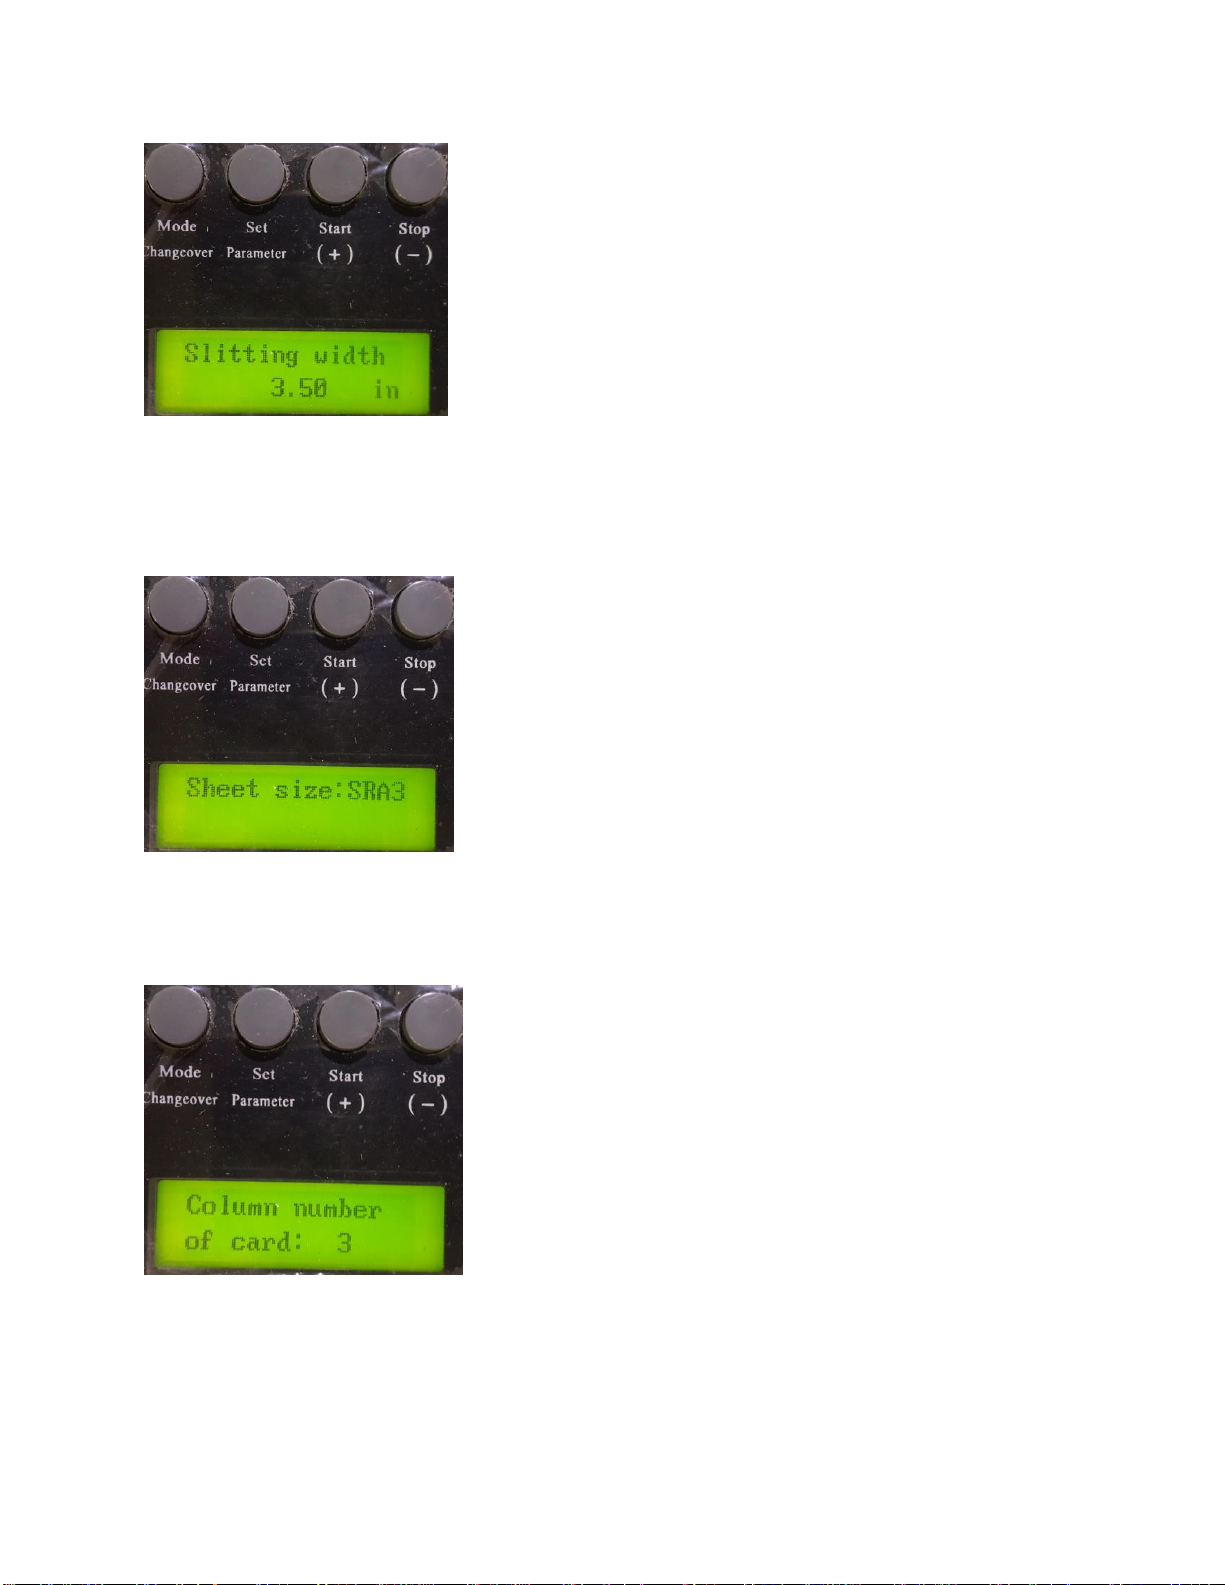
Slitting width –displays the current slitting width. This parameter is set based on the mode selected.
This can be adjusted however, the default is set based on the selected mode. Note: the slitters are fixed
and cannot be changed. Though the data can change the slit cut will remain at 3.5. Any change to this
parameter will not be reflected in the cut. This parameter is for information only.
Sheet size: A3 or SRA3 –displays the current sheet size. Note: though the option is defined as SRA3, the
320CC has been set up for North American parameters. This parameter is for information only. Changes
to this parameter will not be reflected in the cut.
Column number of card –displays the number of columns under the selected mode. 1 –4 columns can
be set. The default selection is set based on the selected mode. This parameter is for information only.
Changes to this parameter will not be reflected in the cut.
6
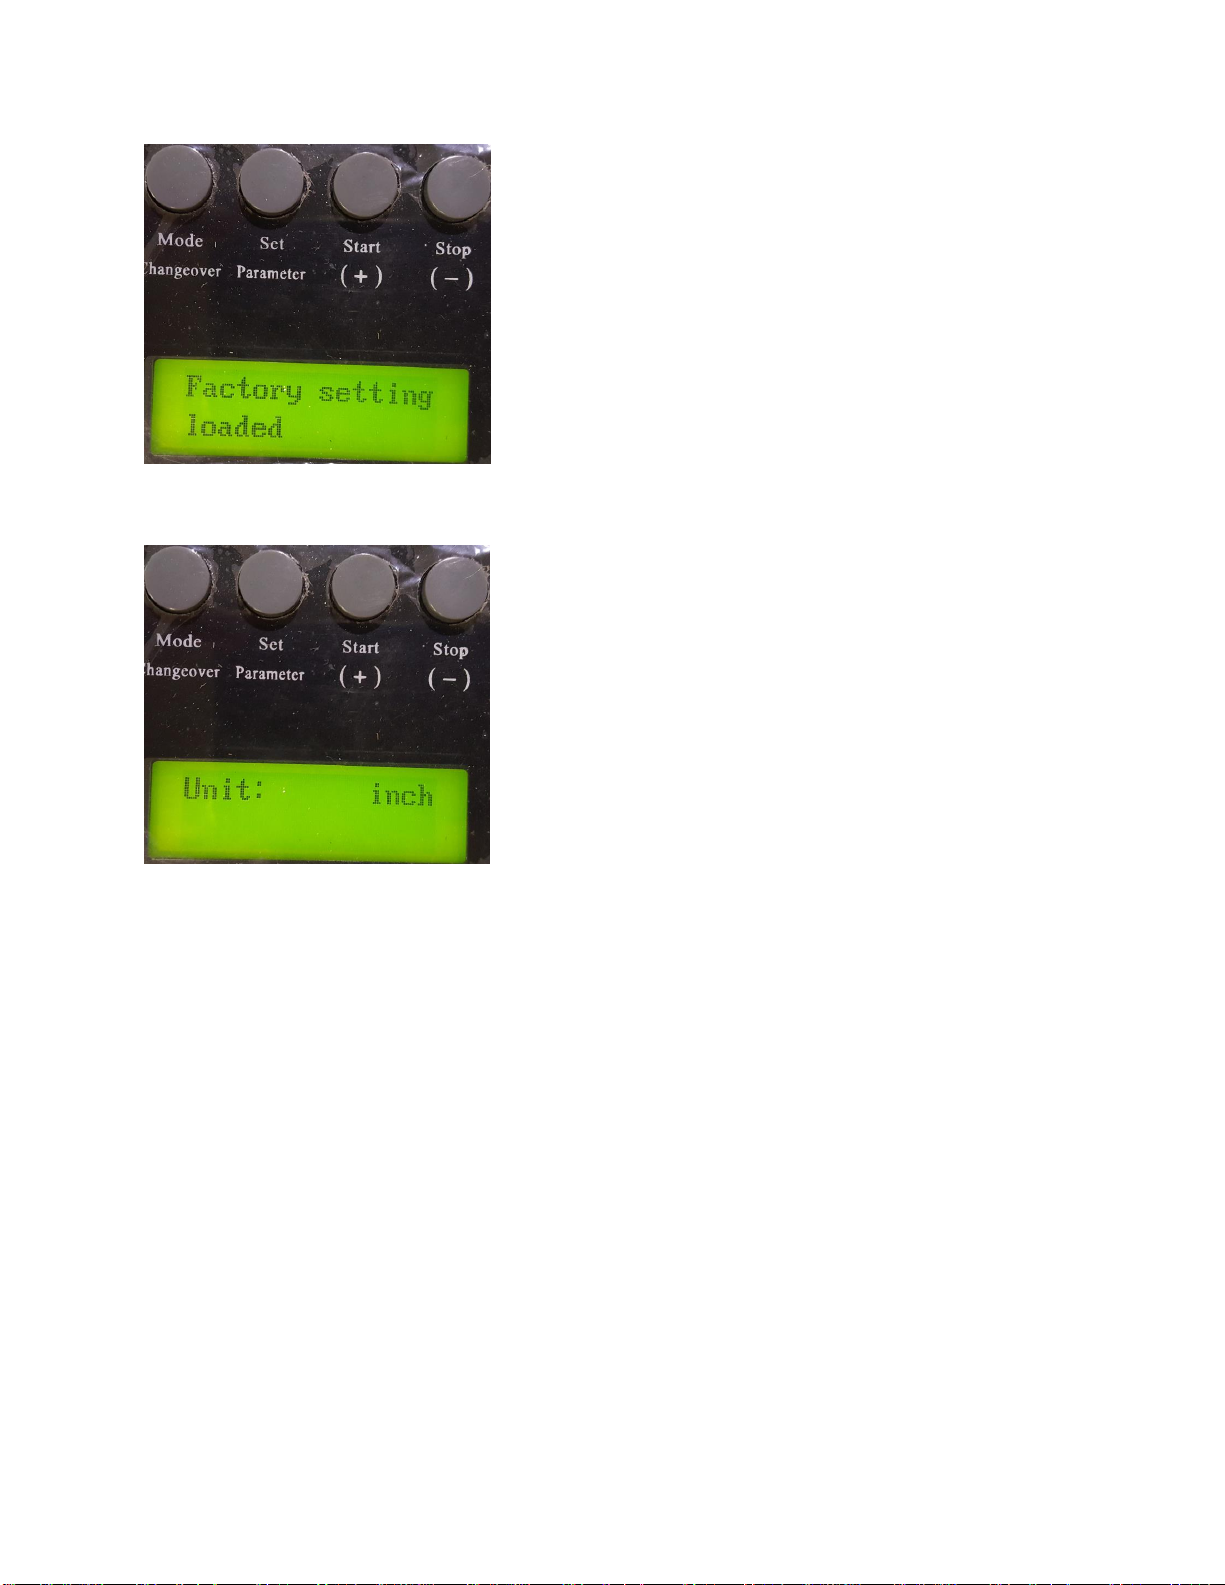
Factory setting loaded –loads the factory settings. Do not change this setting.
Unit –allows the user to set the unit of measurement: inch or mm
Making adjustments for cut accuracy
Though digital and offset printing creates near-perfect templates, there will be instances where some
minor adjustments are required. Please use the following to create the best cut for your business cards.
Paper alignment (slitter cut)
The slitters are fixed in the 320CC and should not require adjusting. Before making any electronic
adjustments, ensure your cut material is properly centred in the 320CC feed table. As depicted in the
image below, the paper position is adjustable. Simply move the left and right tabs to align the paper.
Once the template is centred, you can make adjustments to the gutter cut. Run a test cut to check the
alignment of the business card and adjust the following as needed.

7
Registration mark variance
Permits the user to adjust the cutter to compensate for the registration mark position. Run the first cut
and check the alignment of the image. Make adjustments according to the outcome. A negative number
will shorten the cut; a positive number will lengthen the cut.
First cut variances
The first cut can be adjusted. Note, the numbers below show centre, maximum, and minimum variance
of the first cut from the leading edge. This parameter is not used with the registration mark.
First cut at 0.000 = 0.3410 inches
First cut at +0.078 = 0.4335 inches
First cut at -0.078 = 0.2940 inches
Card length
To adjust the length of the card, increase or decrease the card length parameter as needed. Note, there
is no adjustment for card width.
Gutter cut
The gutter cut compensation changes the size of the gutter as the cards are cut. This parameter
compensates for image shifting.
8
Demonstration in Images
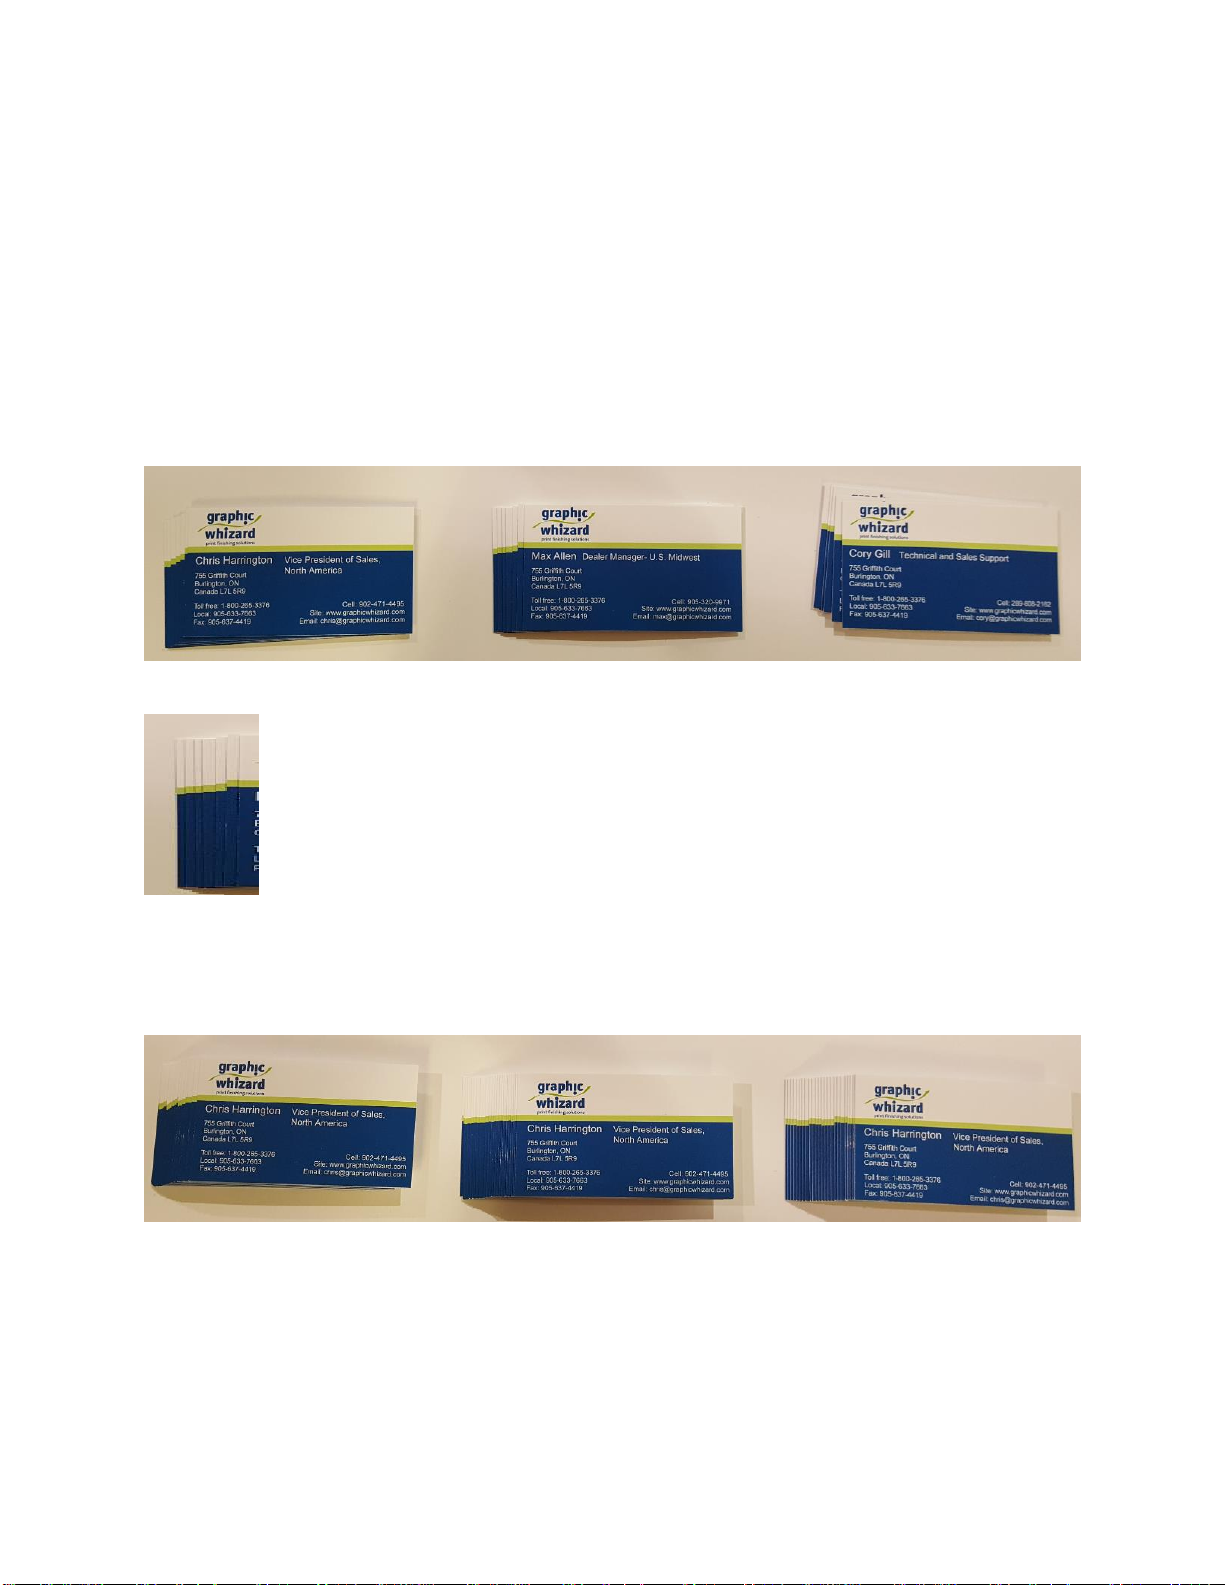
The following details setting the parameters for Graphic Whizard 3.5X2 business cards on 12X18 stock.
We start by selecting the Mode (if not already selected). For the GW business cards, we select 3.50 X
2.00 24 up SRA3. Run test cuts to centre the stock on the slitters. Once that is complete, check the
image alignment for first cut and gutters.
Start with all parameters are set to zero. The image below shows the first cut of GW business cards with
first cut and gutter set to zero.
The above image shows the results of the first cut with parameters set to zero.
A close-up shot shows only 7 cards were cut. The 8th card ended up as waste. To fix this, we
will have to adjust the gutter.
Because we lost a row of cards as waste, we know we have to decrease the size of the gutter. We set
the gutter to -0.011 and ran another test.
This image shows the gutter variance. The first set of cards was cut with the gutter set to zero. The
second set was cut with the gutter set to -0.011 and the third shows the gutter set to -0.015. We use the
green line as the benchmark. -0.011 is near-perfect but -0.015 starts shifting the image in the opposite
direction, making the cut size too small.

Chapter 3 Set-up, operation and maintenance
1 Set-up
1-1 Set-up Guide
(1)Take the machine out of the package.
(2)Place it on a safe, solid, fixed and stable working table.
(3)Insert the business card catcher on the back of the machine, then place it
flatly.
Insert it completely and ensure contact with the magnetic switch.
(4)Make the ground-wire is grounded securely in order to eliminate the static
electricity.
electric shock may occur.
(5)Please make sure of the power switch is properly connected.
9

1-2 Set-up Guidelines
Please use this machine under the following conditions:
●Horizontally fixed
●Well ventilated place
●Leave a proper workspace around the machine.
●As this machine is made with a precise mechanism and electronic elements,
ensure the machine is clear of the following:
●Direct sunshine
●Mists
●Moisture/ wetness
●In an area with frequent temperature changes
●Areas which may be consistently vibrating.
●Please do not use any other plugs in the socket unless used specially for the
machine.
●Use a static-electricity preventing cover and a humidifier for any place in
which there may be electro-static buildup
●Do not place the machine on a table smaller than itself.
10

2 Operation
2-1 Cutting
Rate cutting test upon the flow below in the initial use.
(xx)=85,89,90,95
Have the machine placed
turn on the power switch
press [start] key to let it idly move once,
place the printing test used paper on
the paper feed desk
Paper selection: A3
Cutting mode selection
(xx)
×50
mm
(xx)
×54
mm
(xx)
×95
mm
Adjust the left-right positions of the paper feed desk
cut the test paper
End of test
Adjust the cutting size
Accurately cut without
error
(xx)
×90
mm
(xx)
×127
mm
customise
mm
Detected with
paper mark ■
Detected with
front-end of paper
(xx)
×45
mm
11

2-2 Operation panel
(1) Back of the panel
●Mode changeover key: Standby, changeover to the cutting mode, return
to standby state after setting parameters.
●Parameter setting key: used to adjust the cutting size and set the cutting
paper number
●Start (+) key: start cutting when in the standby state; increase the value in
the cutting size adjustment
●Stop(-) key: stop cutting during a job; decrease the value in the cutting
size adjustment
●LCD screen: display the cutting mode and counting
(2) LCD display
After the power is turned on, the machine starts initialization and then
goes into the standby state. The said state means the machine has finished
initializing but not entered into the cutting mode (the machine is stopped),
the LCD in the standby state will display:
LCD
screen
Mode changeover
Parameter set
Key
Start (+)key
Stop(-) key
12
Table of contents


