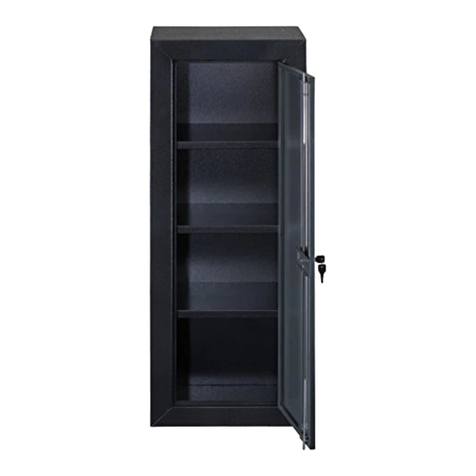
Sovereign S-22-DGP-E-S User manual

• Keep keys and combination in a secure place
away from children.
• Do not store back up key or this document in
the safe.
• NOTE: Stack-On is not responsible for any
cost incurred if the safe is replaced due to a
ood.
• Do not store electronic media, computer
disks, audio-visual media or photographic
negatives in this safe. is material will not
survive the rated internal temperature of the
safe. is material may be damaged or
destroyed.
Combination #:
Serial # :
• Warning: Keep your safe closed and locked at
all times when not in use. Children could
accidentally be locked inside the safe.
• Do not move this safe using its handle. e
handle should only be used for opening and
closing the door of the safe.
• Record the serial number from the tag on the
back of the safe or from the tag on the front
boom corner of the safe.
Instructions
WARNING
Tip Over Hazard
A child or adult can tip the safe and
be killed or seriously injured.
Failure to secure the safe as shown in
these instructions can result in death
or serious injury to children and adults.
Children should not play with or
around the safe at any time.
Screw the 5 handle spokes into the hub and hand
tighten. ese spokes are located in the front
foam packaging.
NOTE: Do not use this handle to move the safe.
HANDLE ASSEMBLY
IMPORTANT:
S-22-DGP-E-S
S-36-DGP-E-S
S-60-DGP-E-S
S-60-DGP-E-S-72
Hardware Included:
(2) M10x70 Lag screws
(2) gasketed washers
(2) plastic anchors
Tools required:
drill
3/8 drill bit
5/16 drill bit
7/16 drill bit
17mm socket wrench
Phillips screwdriver.
40664-1511 118
NOTE: You can store your Key #, Serial # and Combination on
Stack-On’s SECURE web site – www.stack-on.com under
Customer Service.
Storing your Key # or Combination will provide instant access
to this important information should you ever lose your keys or
your combination.
Only you will have access to this information.

BATTERY INSTALLATION
You must rst install the baery which is located in
the ont protective styrofoam.
NOTE: When changing the baery, always hold
the baery connecting cap while disconnecting or
aaching the baery. Do not pull on the wires.
Doing this could cause the power supply to become
disconnected from the lock.
is safe uses one 9V alkaline baery. Under normal
use the baery will last about 1 year.
When the baery is low and you press a buon on
the keypad, a red light will come on warning you
that the baery is low.
To test the baery, enter your security code. If the
baery is low the red light will come on
momentarily.
To replace the baery, remove the cover by pressing
the tab and turning the cover as shown in the
illustration. Replace the old baery and screw the
cover back in place.
IMPORTANT:
Your safe is delivered with a Safety
Interlock Screw which must be removed
in order for you to lock your safe.
Failure to do so will compromise the
safety and security of your safe.
First open the safe by turning the handle clockwise
and pulling the door open.
Locate the Safety Interlock Screw on the side of the
door; unscrew with a Phillips screwdriver, remove
and discard the screw.
Your safe can now be closed and locked. Do not
lock your instruction manual and/or keys in the
safe. You will need this manual for the instructions
on locking and unlocking the safe.
Safety Interlock Screw
TAB
40664-1511 218

ENTERING YOUR SECURITY CODE
To enter your own security code you will need to
follow the steps listed below:
1. Aer opening the electronic safe (with the preset
factory code of 1 - 5 - 9 - #) locate the small red
buon on the inside of the door near the hinge.
2. Press the red buon and then release it, you will
hear a beep. e yellow light on the faceplate will be
activated and will stay on for a period of time that
should allow you to enter your code. You can only
enter your code while the yellow light is on.
With the door open and the yellow light on, enter
your own personal security code, which can be 3-8
digits long, and conrm your new code by pressing
the " " symbol on the electronic touch pad.
Before you close the door, try the new security code
to make sure the lock releases the handle so you can
turn it and retract the live action bolts.
DO NOT SHUT THE DOOR UNTIL YOU
HAVE CONFIRMED THAT YOUR NEW
SECURITY CODE HAS BEEN ENTERED
CORRECTLY.
If the code fails, go through steps 1 and 2 again. If
the code works successfully record your
combination number on the front of this form or
store your combination on our secure website at
www.stack-on.com under Customer Service. If you
write down your combination you must keep this
information in a secure place, away from children,
not inside the safe. en you should close and lock
the safe.
When you open the safe in the future enter the
security code you have set followed by the " # "
symbol.
If the incorrect security code is entered 3 times you
will have an automatic lockout for 20 seconds before
you can try your code again.
If the incorrect security code is entered 3 additional
times there will be a 5-minute lockout before the
code can be tried again.
ELECTRONIC LOCK
Aer installing the baery, to open an electronic lock
the rst time, press the following numbers/symbols
on the electronic keypad in this order: 1 - 5 - 9 - #.
ese numbers are preset.
NOTE: You should change the entry code as soon
as possible aer opening the safe to insure proper
security.
Aer you have entered the factory code, you will
need to turn the handle clockwise to open the door.
You will have 5 seconds to turn the handle before the
locking mechanism is reactivated.
40664-1511 318
NOTE: e red reset buon located on the
inside of the door, is covered with a removable
red cap. When you use the red reset buon
while seing your own combination, remove
the cap to access the buon.
Replace the cap securely over the reset buon
aer seing your combination. Failure to do
so will compromise the safety and security of
the safe.

LOCKING THE SAFE TURNING THE KEYPAD SOUND OFF/ON
You can turn o the "Beep" sound of the keypad by
entering the code 6 3 3.
To turn the "Beep" sound on, enter the code 6 6.
To lock the safe, close the door and rotate the
handle counter clockwise until it stops. If the
handle is not turned until it stops, the locking
mechanism will not lock.
NOTE ON LOCKING THE SAFE: Because
the locking mechanism is deactivated for
approximately 3 to 6 seconds aer the
combination is entered, wait a minimum of 6
seconds from the time the combination is entered
to lock the safe.
BACK UP KEY
TAB
A "Back Up Key" has been provided in case you have
forgoen or lost your security code. To open the
safe using the back up key follow the steps below:
1. Remove the cover by pressing the tab and turning
the cover as shown in the illustration. e lock can
hang by the connecting cable while unlocking the
safe.
2. Insert the key in the key hole and turn clockwise
1/4 turn (until stopped) in order to unlock the safe.
Rotate the handle and open the door.
3. Keep the door open until you have entered a new
security code. Before entering your new code,
remove the key and screw the cover back in place.
4. Enter your new security code following the
instructions for entering your security code.
e safe should be at against the wall and oor.
Remove the baseboard if necessary.
SELECTING A LOCATION
e safe must be mounted to the oor. For
optimal safety and security, the safe should be
installed adjacent to a side wall with minimal
space on either side of the safe, in an isolated,
dry and secure area.
CHILDREN SHOULD NOT PLAY
WITH OR AROUND THE SAFE AT
ANY TIME.
40664-1511 418

Reposition the safe and secure the safe with the lag
bolts and gasket washers. Replace the hole covers.
IMPORTANT: When you drill out the re resistant
caulking om the mounting hole you must mount
the safe to the oor using the lag bolts and gasket
washers. Failure to do so will void the re rating
and waterproof rating.
Place the safe in the desired location. When your safe
is open, you will nd 2 plastic disks covering the
mounting hole locations in the oor of the safe.
Remove the plastic disks to uncover the mounting
holes. ese holes are lled with re resistant
caulking which must be drilled out before mounting
the safe to the oor. Use a 3/8" diameter drill bit to
drill out this caulking. Continue to use this drill to
mark the hole location on the oor. Move the safe
away. Drill pilot holes in the oor as follows: For a
wood oor drill 5/16" diameter x 2-1/2" deep pilot
holes. For a masonry oor drill 7/16" diameter x
2-1/2" deep pilot holes for the anchors.
You must remove the safe om the skid/legs and
place the safe on the oor. Failure to do so will void
the re and waterproof ratings.
e safe must be fastened to the oor using the lag
bolts and gasket washer provided with this safe to
insure the waterproof rating. Failure to do so will
void the waterprooof rating.
WARNING: Because this safe is
waterproof it will oat if not secured.
As the water level rises, the safe will
begin to oat and could fall over
causing personal injury.
SECURING THE SAFE
NOTE: is safe must be mounted to the oor.
Failure to do so will compromise the safety and
security of the safe.
NOTE: is safe must be secured to the oor.
Use the hardware provided.
40664-1511 518

GUN REST INSTALLATION
e gun rest and full length shelf are supported on
the outside wall brackets with 4 removable shelf clips.
You will need to permanently secure the gun rests to
avoid shiing when accessing your guns. Remove the
shelf clips and replace them with the 4 metal "L"
brackets that are enclosed.
Aach the 4 metal brackets in the same location as
the removable shelf clips using 2 screws for each
bracket as shown in gures 1 and 2 below. e gun
rest should be level aer assembly.
1
2
SHELVES
e shelves can be installed by locating the shelf clips
to the desired location and seing the shelf in place.
40664-1511 618
Image demonstrates
attachment of the gun rests.
It does not necessarily
reflect the configuration of
your safe.
Image demonstrates
placement of the shelves.
It does not necessarily
reflect the configuration of
your safe.

STACK-ON PRODUCTS CO.
P.O. BOX 489, WAUCONDA, IL 60084
IMPORTANT
Keep keys and combination number in a secure
place, away from children. Keep this record of your
key number and combination in a secure place
separate from your safe. To order a replacement key
set, follow the instructions on the aached form.
DOOR STORAGE
Your door organizer provides a variety of storage
options for your supplies.
Note: Make sure the door accessories do not
interfere with items in the safe or when closing the
safe door.
40664-1511 718

Key Request
“This is not a Registration Form”
Verification of ownership is required in order to receive replacement key for your security product.
In order to receive a replacement key to your security product:
1. Complete the following form and send to Stack-On Products.
2. Send a copy of your valid driver’s license along with the form.
3. Send a copy of the receipt showing the original purchase.
4. Security product owner must sign form.
5. Owner’s signature must be notarized.
6. Send $10.00 for replacement key. Personal Check, MasterCard, or Visa accepted.
7. Send completed information to:
Stack-On Products Company
1360 N. Old Rand Road
P.O. box 489
Wauconda, IL 60084
Serial Number______________________ Key Number (if applicable) _______
Unit Dimensions________________________________________
Unit Description___________________________________________________________
Owner’s Name ____________________________________ Date Purchased___/___/____
Owner’s Address ___________________________ Unit or Apt Number _________________
City ___________________________ State _______________ Zip Code________________
Telephone Number: (____)___________________ Fax Number: (____)___________________
Owner’s Email Address: ________________________________________________________
Owner’s Signature __________________________ Notary Signature________________
Notary Commission Expires: _____/_____/_____ Notary Stamp
SERVICE REQUESTED
Key Replacement: Yes No
$10.00 charge for this service
Credit Card Information (Please circle one) MasterCard Visa
Expiration Date: ___/___/___ Card Number:______________________________________
Credit Card Identification Number (Located on back of card, last 3 digits on signature strip)_________
9/07
NOTE: You can store your Key #, Serial # and Combination on Stack-On’s SECURE web site – www.stack-on.com under
Customer Service. Storing your Key # or Combination will provide instant access to this important information should you
ever lose your keys or your combination.
Only you will have access to this information.
40664-1511 818

STACK-ON FIRE RESISTANT/WATERPROOF SAFE
PROTECTION AFTER-FLOOD
LIMITED REIMBURSEMENT GUARANTEE
(Valid for Purchases in North America)
To the extent not already covered by valid and collectable property insurance carried by the original owner of a Stack-On Fire Resistant/Waterproof Safe, up to 5 years from
the date of purchase, Stack-On will reimburse the original owner of the safe for the fair market value of the valuables stored in the Stack-On Fire Resistant/Waterproof Safe
and lost in a flood as follows: $15,000 maximum reimbursement for valuables stored in Stack-On Fire Resistant/Waterproof Safe.
Reimbursement under this limited reimbursement guarantee is limited exclusively to direct physical loss caused by a flood in which the water level does not exceed 24
inches for a period of 72 hours; it does not include water damage that might occur in conjunction with a fire. Reimbursement will not be provided for any consequential or
incidental damages. In addition, the Stack-On Fire Resistant/Waterproof Safe is not designed for the storage of, and this limited reimbursement guarantee does not apply
to computer disks, CD’s, DVD’s, audio visual materials, photographs/negatives, or other electronic media. Finally, this limited reimbursement guarantee is null and void if
the safe is improperly installed or if the safe is left open at any point during the flood.
Please send requests for content reimbursement in writing to:
Be sure to include:
• Your name and address
• A description of the flood
• The model number and a photograph of the water damaged safe, including images of the safe’s installation.
• The serial number off the front or back of the safe
• A copy of the report from the fire department or police department if available.
• A copy of insurance claim (if requesting reimbursement for content loss)
• Proof of purchase of the safe
This limited reimbursement guarantee does not include the replacement of the safe due to a flood or water damage.
Stack-On Products Company
Attn: Customer Service Department
1360 North Old Rand Road
Wauconda, IL 60084
STACK-ON FIRE RESISTANT/WATERPROOF SAFE
LIMITED LIFETIME GUARANTEE AND LIMITED FIVE YEAR WARRANTY
(Valid Only for Purchases in North America)
If your Stack-On Fire Resistant/Waterproof Safe suffers damage due to theft, fire or flood at any time while still owned by the original owner, Stack-On will either repair or
replace (at Stack-On’s discretion) your safe free of charge. If Stack-On chooses to repair the safe, such repair work may be performed by a local technician approved by
Stack-On. Depending on the extent of the damage, Stack-On may require the safe be returned to the factory for repair. If the safe is so returned, Stack-On will pay the
freight to the factory as well as the return freight. If the safe is replaced, Stack-On will pay the freight. This guarantee does not cover labor costs for removal or installation
of the safe and its contents. Any repair, dismantling, or tampering undertaken without the prior written approval or direction of Stack-On will nullify this guarantee. Personal
property in the safe is not covered under this guarantee.
In addition, Stack-On Fire Resistant/Waterproof Safes are warranted to be free from defects in material and workmanship for a period of five (5) years from the date of
original purchase by a consumer. This warranty extends to the initial consumer only. If you believe there is a defect in material or workmanship in your Stack-On Fire
Resistant/Waterproof Safe during the 5-year warranty period, please contact our customer service department at the address and in the manner set forth below. If
Stack-On is properly notified during the 5-year warranty period and, after inspection confirms there is a defect, Stack-On will, at its sole option, provide repair parts or
exchange the product at no charge, or refund the purchase price of the product.
THIS WARRANTY DOES NOT COVER ANY PRODUCT, OR ANY PART OF ANY PRODUCT, WHICH HAS BEEN SUBJECT TO EXCESSIVE USE, ACCIDENT,
NEGLIGENCE, INCORRECT MAINTENANCE, ALTERATION OR REPAIR BY ANYONE OTHER THAN STACK-ON, ABUSE, OR MISUSE.
THIS WARRANTY IS EXCLUSIVE AND EXPRESSLY IN LIEU OF ALL OTHER WARRANTIES EXPRESSED OR IMPLIED INCLUDING THE WARRANTIES OF
MERCHANTABILITY AND FITNESS FOR A PARTICULAR PURPOSE, WHICH ARE HEREBY DISCLAIMED AND EXCLUDED. STACK-ON SHALL NOT BE SUBJECT
TO ANY OTHER OBLIGATIONS OR LIABILITIES. STACK-ON NEITHER ASSUMES NOR AUTHORIZES ANY OTHER PERSON TO ASSUME FOR IT, ANY OTHER
LIABILITY IN CONNECTION WITH THE SALE OF STACK-ON'S FIRE RESISTANT/WATERPROOF SAFES.
STACK-ON WILL NOT, UNDER ANY CIRCUMSTANCES, BE LIABLE TO THE INITIAL CONSUMER FOR ANY INCIDENTAL, CONSEQUENTIAL, SPECIAL, EXEMPLA-
RY, OR PUNITIVE DAMAGES ARISING OUT OF THE PURCHASE OR USE OF ANY STACK-ON PRODUCTS, INCLUDING THE FIRE RESISTANT/WATERPROOF
SAFES. STACK-ON'S LIABILITY FOR ANY BREACH OF THIS WARRANTY SHALL BE LIMITED EXCLUSIVELY TO REPAIR OR REPLACEMENT OF THE DEFECTIVE
PRODUCT, AS DESCRIBED ABOVE, OR A REFUND OF THE PURCHASE PRICE OF THE PRODUCT. IN NO EVENT SHALL STACK-ON'S OBLIGATION UNDER THIS
WARRANTY EXCEED THE PRICE OF THE PRODUCT.
THIS WARRANTY GIVES YOU SPECIFIC LEGAL RIGHTS. YOU MAY ALSO HAVE OTHER RIGHTS WHICH VARY FROM STATE TO STATE.
Please send your claim pursuant to the above guarantee or warranty in writing by regular mail or email to: Stack-On Products Co.
Attn.: Customer Service Department
1360 North Old Rand Road
Wauconda, IL 60084
Be sure to include:
• Your name and address
• A description of the warranty claim, fire or theft
• The model number and photographs of the safe
• The serial number off the front or back of the safe
• A copy of the report from the fire department, police or insurance company within 30 days of damage
(applies to units damaged by theft or fire)
• Proof of purchase information of the safe
This product is not designed for the storage of computer disks, CDs, DVDs, audio-visual materials, photographs/negatives or other electronic media.
1/10
40664-1511 918

• Mantenga las llaves y la combinación en un
lugar seguro lejos de los niños.
• No guarde una copia de seguridad o la clave de
este documento en la caja fuerte.
• NOTA : Stack-On no se hace responsable por
cualquier costo incurrido si el seguro es
reemplazado debido a una inundación.
• No guarde los medios electrónicos , discos
de computadora , medios audiovisuales o
negativos fotográcos en este caja fuerte. Este
material no sobrevivirá a la temperatura
interna nominal de la caja fuerte. Este
material puede ser dañado o destruido.
Combinación #:
Serie #:
• Advertencia : Mantenga su caja fuerte cerrada y
bloqueada en todo momento cuando no esté en
uso . Niños accidentalmente podrían ser
encerrados en la caja fuerte.
• No mueva esta caja fuerte utilizando el asa. El
mango sólo debe utilizarse para abrir y cerrar la
puerta de la caja fuerte.
• Anote el número de serie de la etiqueta en la
parte posterior de la caja fuerte o de la etiqueta en
la parte inferior delantera de la caja fuerte.
Instrucciones
WARNING
Peligro de Vuelco
Un niño o un adulto puede volcar la
caja fuerte y ser matado o herido
gravemente.
El fracaso para asegurar la caja fuerte,
como se muestra en estas
instrucciones puede causar la muerte o
lesiones graves a los niños y adultos.
Los niños no deben jugar con o
alrededor de la caja fuerte en
cualquier momento.
Tornillo de los 5 radios de mango en el eje y
apriete a mano . Estos radios se encuentran en el
embalaje de espuma frontal.
NOTA : No use este identicador para mover la
caja fuerte.
CONJUNTO DEL MANGO
IMPORTANTE:
S-22-DGP-E-S
S-36-DGP-E-S
S-60-DGP-E-S
S-60-DGP-E-S-72
Hardware incluido:
(2 ) tornillos Lag M10x70
(2 ) arandelas con juntas
(2 ) anclajes de plástico
Herramientas necesarias:
taladro
3/8 taladro broca
5/16 taladro broca
7/16 taladro broca
17mm llave de tubo
Destornillador Phillips
40664-1511 10 18
NOTA : Puede guardar su contraseña #, # de Serie y la
combinación en el sitio web seguro Pila -En -
www.stack-on.com bajo Servicio al Cliente .
Almacenamiento de la tecla # o combinación proporcionará
acceso instantáneo a la información importante si alguna vez
pierde sus llaves o combinación.
Sólo usted tiene acceso a esta información.

INSTALACIÓN DE LA BATERÍA
Primero debe instalar la batería que se encuentra en
la espuma de poliestireno de protección delantera.
NOTA : Al cambiar la batería , sujete siempre la
batería conectando el casquillo mientras se
desconecta o colocar la batería. No tire de los
cables. Hacer esto podría causar que la fuente de
alimentación se desconecte de la cerradura.
Este caja fuerte utiliza una batería de 9V alcalina . En
condiciones de uso normal, la batería durará
aproximadamente 1 año .
Cuando la batería está baja y se pulsa un botón en
el teclado , una luz roja se encenderá un aviso de
que la batería está baja.
Para probar la batería , introduzca su código de
seguridad . Si la batería está baja la luz roja se
encenderá momentáneamente.
Para reemplazar la batería , retire la cubierta
presionando la lengüeta y girando la cubierta como
se muestra en la ilustración. Reemplace la batería
vieja y atornille la tapa en su lugar.
IMPORTANTE:
Su caja fuerte se entrega con un tornillo
de bloqueo de seguridad que debe ser
eliminado para que te permite bloquear
su caja fuerte. De no hacerlo, pondrá en
peligro la seguridad y la seguridad de su
caja fuerte.
En primer lugar abrir la caja fuerte , girando el
mango hacia la derecha y tirando de la puerta
abierta.
Localice el tornillo de bloqueo de seguridad en el
lado de la puerta ; destornillar con un destornillador
Phillips , retire y deseche el tornillo.
Su caja fuerte se puede cerrar con llave ahora. No
bloquear el manual de instrucciones y / o llaves en
la caja fuerte. Usted necesitará este manual para
obtener las instrucciones de bloqueo y desbloqueo
de la caja fuerte.
Tornillo de bloqueo de
seguridad
Lengüeta
40664-1511 11 18

ENTRAR EN SU CÓDIGO DE SEGURIDAD
2. Pulse el botón rojo y luego soltarlo , se escuchará
un pitido. La luz amarilla en la placa frontal se
activará y permanecerá encendida durante un
período de tiempo que debe permitir que ingrese su
código. Sólo se puede introducir su código , mientras
que la luz amarilla está encendida.
Con la puerta abierta y la luz amarilla en , introduzca
su propio código de seguridad personal , que puede
ser de 3 - 8 dígitos, y conrmar su nuevo código
presionando el símbolo " " en el panel táctil
electrónica . Antes de cerrar la puerta , prueba el
nuevo código de seguridad para asegurarse de que
los comunicados de bloqueo del mango para que
pueda darle vuelta y retraer los pernos de acción en
vivo.
NO CIERRE LA PUERTA HASTA QUE HAYA
CONFIRMADO QUE EL NUEVO CODIGO DE
SEGURIDAD HA INTRODUCIDO
CORRECTAMENTE.
Si el código de falla, ir a través de los pasos 1 y 2 de
nuevo. Si el código funciona grabar con éxito el
número de su combinación en el frente de este
formulario o almacenar su combinación en nuestro
sitio web seguro en www.stack-on.com bajo Servicio
al Cliente . Si usted escribe su combinación debe
mantener esta información en un lugar seguro , lejos
de los niños , no dentro de la caja fuerte. Entonces
usted debe cerrar y bloquear la caja fuerte.
Al abrir la caja fuerte en el futuro introducir el
código de seguridad que ha establecido seguido por
el símbolo " #" .
Si se introduce el código de seguridad incorrecto 3
veces usted tendrá un bloqueo automático durante
20 segundos antes de poder probar su código de
nuevo.
Si se introduce el código de seguridad incorrecto 3
veces más habrá un 5 minutos de bloqueo antes de
que el código puede ser juzgado de nuevo.
CERRADURA ELECTRÒNICA
Después de instalar la batería , para abrir una
cerradura electrónica primera vez, presione los
siguientes números / símbolos en el teclado
electrónico en este orden : 1 - 5-9 - # . Estos números
están prejados.
NOTA : Usted debe cambiar el código de entrada tan
pronto como sea posible después de abrir la caja
fuerte para asegurar la seguridad adecuada.
Después de introducir el código de fábrica , tendrá
que girar el mango hacia la derecha para abrir la
puerta. Usted tendrá 5 segundos para encender el
mango antes de que se reactivó el mecanismo de
bloqueo.
40664-1511 12 18
NOTA : El botón rojo de reinicio situado en la
parte interior de la puerta, se cubre con una
gorra roja extraíble. Cuando se utiliza el botón
de reinicio rojo mientras el establecimiento de
su propia combinación , retire la tapa para
acceder al botón.
Vuelva a colocar la tapa de forma segura a
través del botón de reinicio después de
establecer su combinación. De no hacerlo,
pondrá en peligro la seguridad y la seguridad
de la caja fuerte.
Para introducir su propio código de seguridad que
tendrá que seguir los pasos que se indican a
continuación:
1. Después de abrir la caja de seguridad electrónica
(con el código de fábrica prejado de 1-5 - 9 - # )
localizar el botón rojo pequeño en el interior de la
puerta cerca de la bisagra .

BLOQUEAR LA CAJA FUERTE ENCENDER Y APAGAR EL TECLADO
Puede desactivar el pitido sonido del teclado
introduciendo el código 6 3 3 .
Para activar el "Beep " sonido encendido, introduzca el
código 6 6.
Para bloquear la caja fuerte, cerrar la puerta y girar
el mango hacia la izquierda hasta que se detenga.
Si el mango no se activa hasta que se detenga , el
mecanismo de bloqueo no se bloqueará.
NOTA DE BLOQUEO SEGURO: Debido a que
el mecanismo de bloqueo se desactiva
aproximadamente 3 a 6 segundos después de
introducir la combinación , espere un mínimo de
6 segundos desde el momento en que la
combinación se introduce para bloquear la caja
fuerte.
COPIA DE SEGURIDAD CLAVE
lengüeta
Un "Copia de Seguridad" se ha proporcionado en
caso de que haya olvidado o perdido su código de
seguridad . Para abrir la caja fuerte usando la tecla de
copia de seguridad , siga los pasos a continuación:
1. Retire la tapa presionando la lengüeta y girando la
cubierta como se muestra en la ilustración. El
bloqueo puede colgar por el cable de conexión ,
mientras que el desbloqueo de la caja fuerte.
2. Introduzca la llave en el ojo de la cerradura y girar
en sentido horario 1/4 de vuelta ( hasta que se
detiene ) con el n de desbloquear la caja fuerte.
Gire la manija y abrir la puerta .
3. Mantenga la puerta abierta hasta que haya
introducido un nuevo código de seguridad . Antes
de entrar en el nuevo código , retire la llave y el
tornillo de la tapa en su lugar .
4. Ingrese su nuevo código de seguridad siguiendo
las instrucciones para introducir su código de
seguridad .
La caja fuerte debe ser plana en la pared y el piso.
Retire la placa base si es necesario.
SELECCIÓN DE UNA UBICACIÓN
La caja fuerte se debe montar en el suelo. Para la
seguridad y la seguridad óptima, la caja fuerte
debe ser instalado adyacente a una pared lateral
con un espacio mínimo a cada lado de la caja
fuerte, en una zona aislada , seco y seguro.
LOS NIÑOS NO DEBEN JUGAR CON
O ALREDEDOR DEL CAJA FUERTE
EN CUALQUIER MOMENTO.
40664-1511 13 18

Vuelva a colocar la caja fuerte y asegurar la caja
fuerte con los pernos y arandelas de junta . Vuelva a
colocar las tapas de los oricios.
IMPORTANTE : Cuando profundiza la masilla
resistente al fuego desde el oricio de montaje debe
montar la caja fuerte en el suelo utilizando los
pernos y arandelas de junta . Si no lo hace , se
anulará la resistencia al fuego y la clasicación a
prueba de agua .
Colocar la caja fuerte en la ubicación deseada .
Cuando su caja fuerte está abierta , se dará cuenta de
2 discos de plástico que cubren las posiciones de los
agujeros de montaje en el piso de la caja fuerte .
Retire los discos de plástico para descubrir los
agujeros de montaje. Estos agujeros se llenan con
masilla resistente al fuego que debe ser perforado a
cabo antes de montar la caja fuerte al suelo. Use un
poco de 3/8 " de diámetro de perforación para
perforar a cabo esta calafateo Siga usando este
ejercicio para marcar la ubicación del agujero en el
suelo. Mueva la caja fuerte lejos Perforar agujeros
piloto en el suelo de la siguiente manera : Para un
taladro piso de madera 5 / 16 " de diámetro x 2-1 / 2 "
agujeros piloto profundas . para un piso de la
albañilería de taladro de 7/16 " de diámetro x 2-1 / 2 "
agujeros piloto profundas para los anclajes .
Debe quitar la caja fuerte de la corredera / piernas y
coloque la caja fuerte en el suelo. Si no lo hace , se
anulará el fuego y clasicaciones impermeables.
La caja fuerte debe jarse al suelo mediante el
pernos de jación y junta de arandela
proporcionada con este seguro para asegurar la
clasicación a prueba de agua . Si no lo hace , se
anulará la calicación waterprooof .
ADVERTENCIA : Debido a que este caja
fuerte es resistente al agua que otará si no
asegurado . A medida que el nivel del agua
sube , la caja fuerte comenzará a otar y
podría caerse y causar lesiones personales .
SEGURO LA CAJA FUERTE
NOTA : Este caja fuerte se debe montar en el
suelo. De no hacerlo, pondrá en peligro la
seguridad y la seguridad de la caja fuerte.
NOTA : Este caja fuerte debe jarse al suelo.
Utilice el hardware proporcionado.
40664-1511 14 18

INSTALAR EL RESTO ARMA
El resto del arma y de la plataforma integral son
compatibles con los soportes de pared exterior con 4
clips estantes extraíbles.
Usted tendrá que asegurar permanentemente el arma
descansa para evitar el cambio al acceder a sus armas .
Quite los ganchos correspondientes y reemplazarlos
con los 4 soportes metálicos "L" que se adjuntan .
Coloque los 4 soportes de metal en la misma
ubicación que los clips de estantes extraíbles
utilizando 2 tornillos para cada soporte como se
muestra en las guras 1 y 2 a continuación. El resto
del arma debe estar nivelado después del montaje.
ESTANTERÍA
Los estantes se pueden instalar mediante la
localización de los clips de la plataforma a la
ubicación deseada y el establecimiento de la
plataforma en su lugar.
40664-1511 15 18
Imagen demuestra el apego
del resto del arma. No
refleja necesariamente la
configuración de su caja
fuerte.
Image demuestra la colocación
de los estantes . No refleja
necesariamente la configuración
de su caja fuerte.
1
2

STACK-ON PRODUCTS CO.
P.O. BOX 489, WAUCONDA, IL 60084
IMPORTANTE
Mantenga las llaves y la combinación de número en
un lugar seguro , lejos de los niños . Mantenga este
registro de su número de clave y la combinación en
un lugar seguro separado de su caja fuerte. Para pedir
un juego de llaves de repuesto, siga las instrucciones
en el formulario adjunto.
PUERTA DE ALMACENAMIENTO
Su organizador puerta ofrece una variedad de
opciones de almacenamiento para sus suministros.
Nota : Asegúrese de que los accesorios de la puerta
no intereran con los elementos de la caja fuerte o al
cerrar la puerta de la caja fuerte.
40664-1511 16 18

Requerimos verificación del propietario para procesar esta solicitud de llave de su gabinete de
seguridad.
Para poder recibir su llave de reemplazo de su gabinete de seguridad:
1. Llene y envíe esta solicitud a Stack-On Products.
2. Envíe copia de su licencia de conducir junto con la solicitud.
3. Envíe copia del recibo mostrando la fecha original de compra.
4. El propietario del gabinete de seguridad o de la caja fuerte deberá firmar la solicitud.
5. La firma del propietario deberá estar notariada.
6. Envíe $10.00USD (dólares) para obtener una llave de reemplazo.
Aceptamos cheques personales de E.U.A., MasterCard o Visa.
7. Envíe la información completa a: Stack-On Products Company
1360 N. Old Rand Road
P.O. Box 489
Wauconda, IL 60084
Número de Serie______________________ Número de Llave (si aplica) ______________
Dimensiones de la Unidad_____________________________________________________
Descripción de la Unidad______________________________________________________
Nombre del Propietario ______________________________ Fecha de Compra___/___/____
Dirección (propietario) _____________________________ No. Interior _________________
Ciudad ________________________ Estado _______________ C.P.________________
No. Teléfono: (____)___________________ No. Fax: (____)___________________
Correo Electrónico del Propietario: ______________________________________________
Firma del Propietario __________________________ Firma del Notario________________
Fecha de Vencimiento de
la Comisión del Notario: _____/_____/_____ Sello del Notario
SERVICIO SOLICITADO
Reemplazo de Llaves Si No
- Costo de $10.00USD por este servicio
Información de su tarjeta de crédito (Favor de Indicar Una): MasterCard Visa
Fecha Vencimiento: ___/___/___ No. Tarjeta:_______________________________
Código de Seguridad (Al dorso de la tarjeta- - últimos 3 dígitos impresos en el área de firma)__________
"Este no es un Formato de Registro"
Solicitud de Llave
NOTA: Usted puede almacenar su Numero de Llave y su Nymero de Combinacion en el sitio web SEGURO de Stack-On -
www.stack-on.com bajo la opcion que dice Customer Service
Al almacenar su Numero de Llave ofrecerá acceso instantánio ha esta importante información si alguna vez pierda sus llaves.
Nadamas usted tendra acceso ha información.
40664-1511 17 18

STACK- ON FUEGO RESISTENTE / SAFE IMPERMEABLE
PROTECCIÓN PARA DESPUÉS DEL DILUVIO
GARANTÍA LIMITADA DE REEMBOLSO
( Válido para compras efectuadas en América del Norte )
En la medida aún no está cubierto por el seguro de propiedad válido y cobrable realizado por el propietario original de un / Safe impermeable Stack-On Fuego
Resistente, hasta 5 años a partir de la fecha de compra, Stack-On reembolsará al propietario original de la caja fuerte para el valor justo de mercado de los objetos de
valor almacenado en el Fuego Stack-On resistente / a prueba de agua segura y perdido en una inundación de la siguiente manera: $ 15,000 reembolso máximo para los
objetos de valor guardados en Stack-On Fuego Resistente / a prueba de agua segura.
El reembolso en virtud de este reembolso de garantía limitada se limita exclusivamente a la pérdida física directa causada por una inundación en el que el nivel del agua
no supere las 24 pulgadas para un período de 72 horas; que no incluye el daño del agua que podrían ocurrir en conjunción con un fuego. El reembolso no será
proporcionado por los daños indirectos o incidentales. Además, el Stack-On Fire Resistant / Safe impermeable no está diseñado para el almacenamiento de, y este
reembolso garantía limitada no se aplica a los discos de computadora, CD, DVD, materiales audiovisuales, fotografías / negativos u otros medios electrónicos. Por
último, este reembolso garantía limitada es nula de pleno derecho si el seguro no está bien instalado o si el seguro se deja abierta en cualquier momento durante la
inundación.
Por favor, envíe las solicitudes de reembolso de contenido por escrito a:
Asegúrese de incluir :
• Su nombre y dirección
• Una descripción de la inundación
• El número de modelo y una fotografía del agua dañado seguro, incluidas las imágenes de la instalación de la caja
fuerte.
• El número de serie de la parte delantera o trasera de la caja fuerte
• Una copia del informe del departamento de bomberos o departamento de policía si está disponible.
• Una copia de la reclamación de seguro ( si solicita el reembolso por la pérdida de contenido)
• La prueba de compra de la caja fuerte
Este reembolso garantía limitada no incluye la sustitución de la caja de seguridad debido a un daño de la inundación o el agua.
Stack-On Products Company
Attn: Customer Service Department
1360 North Old Rand Road
Wauconda, IL 60084
STACK- ON FUEGO RESISTENTE / CAJA FUERTE IMPERMEABLE
GARANTÍA LIMITADA DE POR VIDA Y GARANTÍA LIMITADA DE CINCO AÑOS
(Sólo válido para compras en América del Norte )
Si su Stack-On Fuego Resistente / impermeable Segura sufre daños por robo, incendio o inundación en cualquier momento sin dejar de propiedad del dueño original,
Stack-On se reparará o reemplazará (a discreción del Stack-On) su caja fuerte gratuita . Si Stack-On decide reparar el, como los trabajos de reparación segura puede ser
realizada por un técnico local aprobado por Stack-On. Dependiendo de la magnitud de los daños, Stack-On puede requerir la caja de seguridad será devuelto a la fábrica
para su reparación. Si el seguro se lo devuelve, Stack-On pagará el flete a la fábrica, así como la carga de vuelta. Si se sustituye la caja fuerte, Stack-On pagará el flete.
Esta garantía no cubre los costos de mano de obra para la remoción o la instalación de la caja fuerte y su contenido. Cualquier reparación, desmantelamiento, o la
manipulación realizada sin la aprobación previa por escrito o la dirección de Stack-On anulará esta garantía. La propiedad personal en la caja fuerte no está cubierto por
esta garantía.
Además, Stack-On Fire Cajas fuertes resistentes / impermeables están garantizados de estar libres de defectos en materiales y mano de obra durante un período de cinco
(5) años desde la fecha de compra por parte del consumidor. Esta garantía se extiende sólo al consumidor inicial. Si usted cree que hay un defecto en el material o mano
de obra en su Stack-On Fire Resistant / impermeable seguro durante el período de garantía de 5 años, por favor póngase en contacto con nuestro departamento de
atención al cliente en la dirección y en la forma que se indica a continuación. Si Stack-On es notificado correctamente durante el período de garantía de 5 años y, después
de la inspección confirma que existe un defecto, Stack-On, a su exclusivo criterio, proporcionar piezas de reparación o cambio del producto de forma gratuita, o el
reembolso del precio de compra del producto.
SU GARANTÍA NO CUBRE NINGÚN PRODUCTO O CUALQUIER PARTE DE CUALQUIER PRODUCTO, QUE HA SIDO OBJETO DE USO EXCESIVO, ACCIDENTE,
NEGLIGENCIA, MANTENIMIENTO INCORRECTO, ALTERACIÓN O REPARACIÓN POR CUALQUIER PERSONA QUE NO SEA STACK-ON, ABUSO, O MAL USO.
ESTA GARANTÍA ES EXCLUSIVA Y EXPRESAMENTE EN LUGAR DE CUALQUIER OTRA GARANTÍA EXPRESA O IMPLÍCITAS, INCLUYENDO LAS GARANTÍAS DE
COMERCIALIZACIÓN Y APTITUD PARA UN PROPÓSITO PARTICULAR, cual rechaza y excluidos. PILA-ON NO ESTARÁ SUJETA A LAS OTRAS OBLIGACIONES O
RESPONSABILIDADES. PILA-ON NO ASUME NIAUTORIZAA NINGUNA OTRA PERSONA A ASUMIR EN SU, CUALQUIER OTRA RESPONSABILIDAD EN RELACIÓN
CON LA VENTA DE FUEGO CAJAS FUERTES RESISTENTES / IMPERMEABLES DE PILA-ON.
Stack-On NO, BAJO NINGUNA CIRCUNSTANCIA, RESPONSABLE ANTE EL CONSUMIDOR INICIAL POR CUALQUIER INCIDENTAL, CONSECUENTE, ESPECIAL,
EJEMPLAR O PUNITIVO DERIVADO DE LA COMPRA O EL USO DE CUALQUIER PRODUCTO STACK-ON, INCLUYENDO EL FUEGO CAJAS FUERTES
RESISTENTES / IMPERMEABLES . LA RESPONSABILIDAD DE STACK-ON PARA CUALQUIER INCUMPLIMIENTO DE ESTA GARANTÍA ESTARÁ LIMITADA
EXCLUSIVAMENTE A LA REPARACIÓN O REEMPLAZO DEL PRODUCTO DEFECTUOSO, SEGÚN SE DESCRIBE ARRIBA, O EL REEMBOLSO DEL PRECIO DE
COMPRA DEL PRODUCTO. EN NINGÚN CASO Stack-On OBLIGACIÓN DE BAJO ESTA GARANTÍA EXCEDERÁ EL PRECIO DEL PRODUCTO.
ESTA GARANTÍA LE OTORGA DERECHOS LEGALES ESPECÍFICOS. TAMBIÉN PODRÍA TENER OTROS DERECHOS QUE PUEDEN VARIAR DE UN ESTADO A
OTRO.
Please send your claim pursuant to the above guarantee or warranty in writing by regular mail or email to: Stack-On Products Co.
Attn.: Customer Service Department
1360 North Old Rand Road
Wauconda, IL 60084
Asegúrese de incluir :
• Su nombre y dirección
• Una descripción de la reclamación de garantía , incendio o robo
• El número de modelo y de fotografías de la caja fuerte
• El número de serie de la parte delantera o trasera de la caja fuerte
• Una copia del informe de la compañía de bomberos , la policía o los seguros dentro de los 30 días de daños
(se aplica a las unidades dañadas por robo o incendio )
• Comprobante de información de compra de la caja fuerte
Este producto no está diseñado para el almacenamiento de los discos del ordenador , CD, DVD , material audiovisual , fotografías / negativos u otros
medios electrónicos.
1/10
40664-1511 18 18
This manual suits for next models
3
Table of contents
Languages:
Popular Safe manuals by other brands
Sanctuary
Sanctuary SA-PV2M instruction manual

BURG-WACHTER
BURG-WACHTER SecuTronic TRSE 12H operating instructions
SPORTS AFIELD
SPORTS AFIELD PRESERVE BIOMETRIC Series instruction manual
Stack-On
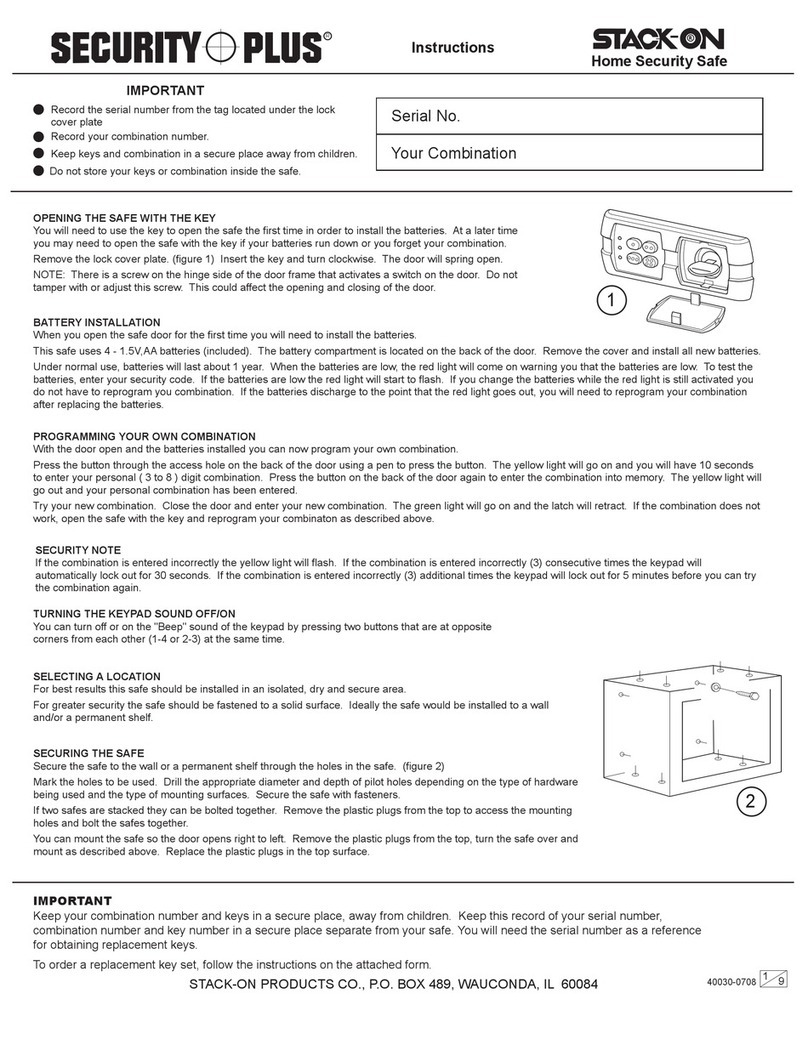
Stack-On Security Plus QAS-1310 instructions

Phoenix
Phoenix Dream Series instructions
Salvus
Salvus Torino user manual

