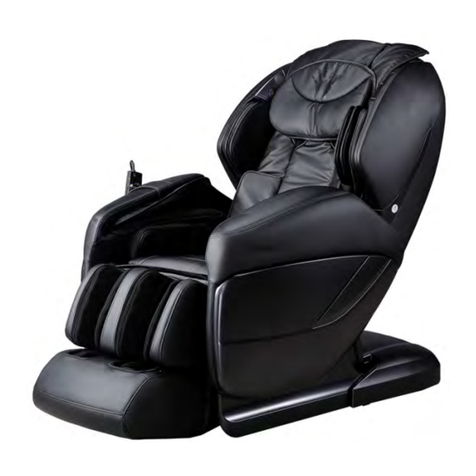
Spa Dynamix Vitala User manual

VITALA®
MASSAGE CHAIR
English
Español
Français

Important Safeguards 1
Introduction 5
Getting to Know Your Chair 6
Installation Guide 11
Operating Your Massage Chair 16
Remote Control Usage Guide 17
Using Your LCD Screen 19
Cleaning and Maintenance 20
Troubleshooting 21
Warranty and Technical
Specifications 23
TABLE OF CONTENTS

Important SafeguardsImportant Safeguards
The following individuals should not use the Spa
Dynamix® VITALA®Massage Chair
• Those with a history of blood clots or thromboembolism
• People with infectious skin diseases or lesions
• Young children under the age of 12
• Those under the inuence of alcohol or drugs
• Never use your chair while wet or operate the control panel
with wet hands
• Those with any medical concerns or issues must check with their
healthcare professional prior to using the chair.
WARNING
1
If you see this symbol, the
following language will
describe risk of death or
serious bodily injury
This denotes that something
may cause bodily injury and/
or property damage.
This represents prohibited
actions that might affect your
chair’s safe operation.
If you notice this symbol, the
language that follows will
prohibit disassembly of parts.
This indicates important
information regarding your
chair’s effective functioning.
This icon represents safe and
effective use of the chair’s
electrical components.
The chair is not waterproof,
avoid contact with any liquids
This symbol denotes any re
or environmental hazards.
Important Safeguards
Welcome to your new Spa Dynamix® VITALA® Massage Chair! Before using,
please review the following instructions for safety and the best operating
experience. Throughout this guide, we’ll use several symbols that contain
important information. To reduce risk of personal injury, re, and shock, please
review all these items carefully. Save this booklet for future use and reference.
Additionally, the following people should consult
a physician or medical provider before using this
massage chair
• Patients with implantable medical devices that might be affected
by electromagnetic activity (i.e. pacemakers)
• Pregnant women
• Patients with diabetes or any peripheral neurological damage
• Those with fractures or muscle injuries
• Anyone suffering from a serious illness or physical weakness
• Paralyzed or disabled individuals
• People who experience routine dizziness or vertigo
• Those with scarring over the massage area
Accident and Injury Warnings
• Your massage chair is intended for indoor use only.
• To prevent injury, only use your chair on a at surface.
• Do not wear loose clothing or dangling jewelry while using
this chair.
• Do not allow children or pets in proximity to the chair while
it’s in operation.
• Discourage children from playing on armrests, even while
not in use.
• Discontinue use and consult a physician if you experience vertigo
or any changes in perception during use.
• Monitor all users closely, especially if they are not independently
mobile. Children over the age of 12 may use the chair under close
adult supervision.
• Do not allow children to play with the control panel.
• Do not put hands or feet into the gaps between the cushion and
chair frame.
• Avoid massaging head or belly.
• Do not use on bare skin.
• If leather material on the chair sustains damage, discontinue
use, consult a qualied repair professional, or email support at
• Check the power switch before plugging your chair into an outlet. It
should be in the “OFF” position before unplugging or plugging in.
• Turn OFF all chair controls before unplugging your chair.
• Do not stand on the chair during operation or while in the “OFF”
position.
• Never move the chair while in operation. To move, nd help and
pick up the chair before moving it to a new location. Do not drag it,
which could cause damage to the oor and your property.
21

Important SafeguardsImportant Safeguards
3
SPECIAL NOTES
• This chair has a cord with a grounding conductor. Only use with an
appropriate outlet. Contact an electrician if you’re unsure. Do not use
plug adapters.
• Replacing your fuse: If a fuse burns out in your chair, switch to the “OFF”
position and unplug immediately. Locate the switch box and nd the
dysfunctional fuse. Only replace with a matching fuse, and contact a
professional electrician for further assistance if necessary.
Fuse Location
• Ensure the chair is fully plugged into an appropriate outlet before
turning into the “ON” position.
• To prevent skin injury, do not use the chair on bare skin or while
wearing sheer fabrics.
• Never fall asleep while using this chair, or allow a sleeping person
to use your massage chair.
Fire and Shock Warnings
• When not in use or extended periods, turn OFF AND unplug chair
from outlet.
• Only plug your chair into an appropriate outlet during use.
• Never leave a chair partially plugged in.
• Never use this chair with an electric heating blanket.
• Always use in a well-ventilated area devoid of ammable
materials.
• Keep your massage chair and remote dry at all times. In case of
• Never use a plug adapter.
• When cleaning your chair, make sure it’s unplugged and in the
“OFF” position.
• Do not plug this chair into a power strip.
• Discontinue use if you notice a poor electrical contact or broken
power cord.
• Only use in an outlet with the recommended voltage.
• Never use if a power cord is damaged, twisted, or constricted.
• To avoid overheating and injury from excessive use, do not run
for long periods of time (more than one consecutive session). If
you notice signs of overheating, such as a burning smell or the
chair becomes hot to the touch, discontinue use immediately and
contact support.
Disassembly and Maintenance
• Do not attempt repairs of a damaged power cord or plug. Contact
• Do not remove chair parts for any reason, there are no user-
serviceable parts inside.
• Contact a repair professional if you experience issues with your
chair. Don’t attempt maintenance.
Avoiding Damage to Your Chair:
• This chair is for indoor use only. Never use outdoors.
• Keep chair away from excessive heat sources.
• Avoid placing chair near stove or other heated objects.
• Never clean with corrosive chemicals.
43

Quick
relaxation
Emergency
off
Menu
OK
Auto
On/Off
Air
pressure
Zero
Intensity
Getting to Know Your ChairIntroduction
1. Remote Control
2. Right Armrest
3. Left Armrest
4. Seat Cushion
5. Leg Rest
6. Footrest
7. Head Padding
8. Back Padding
9. Shoulder Massager
10. Castor
External Structure
Getting to Know Your Chair
Take the time to review the graphics available in this section and familiarize
yourself with the individual parts of your new massage chair. Throughout this
manual, you will notice that we refer to these terms to help you install and
understand your massage chair. We have outlined the interior and exterior
components you will need to know about in order to properly use and maintain your
chair.
The installation and setup for your Spa Dynamix® VITALA® is very simple
and should take just a few minutes. We recommend having someone assist in
the assembly process. As soon as you take your chair out of the box, refer to
the components listing and ensure you have all the necessary parts for safe
questions or concerns.
Introduction
Welcome to your new Spa Dynamix® VITALA® massage chair! With simple
maintenance and care, this product will help keep you relaxed for years to come.
The VITALA® uses the calming power of traditional Shiatsu massage to provide
stress relief and rejuvenation in the comfort of your home, ofce, or anywhere
else you need to relax (NOTE: indoor use only).
Your Spa Dynamix®VITALA®has the following features
• A control panel to rotate between one of three shiatsu massage programs,
control the air pressure, heat, and seated position.
• Automatic and manual programs.
• Targeting of upper or lower body, or a whole body massage experience.
• 3 massage speeds.
As you begin to familiarize yourself with
your massage chair, keep in mind:
• The image of your chair is a guide, not an exact replica of the chair. Always
refer to your own model as you follow these instructions.
• Store this instruction manual in a convenient place for future reference.
• Please read all warnings, cautions, and prohibited actions before using this
chair.
Spa Dynamix® reserves the right to change the design specications of the
VITALA® without notice.
65

Getting to Know Your ChairGetting to Know Your Chair
1. Backrest
2. Power Case
3. Power Cord Socket
4. Fuse Socket
5. Power Switch
External Structure (Cont.) Internal Structure
1. Massage Heads (Under Cushion)
2. Shoulder Airbags
3. Lower Back Airbags
4. Armrest Airbags
5. Side Seat Airbags
6. Calf Airbags
7. Leg Airbags
8. Foot Airbags
9. Foot Rollers
87

Getting to Know Your ChairGetting to Know Your Chair
1. Right Armrest Assembly
2. Remote Control
3. Right Side Fender
4. Electric Magnetic Valve
5. Leg Rest & Footrest
6. Air Pump Case
7. Seat Frame
8. Electric Actuator
9. Left Side Fender
10. Left Armrest Assembly
11. Seat Cushion
12. Massage Machine
13. Pillow
14. Back Cushion
15. Plastic Front Cover
16. Back Frame Assembly
17. Back Cover Assembly
18. Power Case Assembly
5
1
2
3
4
6 7 8 9
10
11 12
1413 15 16 17
18
109

Installation GuideInstallation Guide
Installation Guide
You now have all the information you need to start installing and using your Spa
Dynamix® VITALA® massage chair. This section features a step-by-step guide
to unboxing and setting up your chair. Follow the instructions closely, as this
product contains several important components.
Step 1: Unpacking Your Chair
Start by laying a blanket down to protect your oor. Remove the chair frame
from the box and place on the blanket. Carefully remove armrests and set aside.
Reference your materials list to ensure you have all the parts required for assembly.
Step 2: Assemble the Backrest
Carefully unfold the backrest on the Massage Chair Main Body until you hear a
clicking sound. This means your chair back is locked and ready for use.
Step 3: Assemble the Armrests
NOTE: Before assembling your armrests, ensure the remote control is in the middle
of the seat to avoid trapped cords. Use the illustrations provided as a reference.
A. Use a Phillips head screwdriver to unscrew the M6 screws from the seat base.
B. Locate the xed bolt on the side of the seat base. This will align with the
xed hole on the armrest of your seat.
C. Align the armrest with the corresponding bolts on the seat base. Press
components together until ush. Screw components together using M6 screws.
Power Cord
Remote ControlBack Cushion
Seat Cushion
Massage Chair Main Body
Pillow
1211

Installation GuideInstallation Guide
Step 4: Assemble the Armrests Air Hoses
A. Locate the air hoses on your armrests and on the seat base, which are
color-coded. Connect each air hose on the armrest to its corresponding air
hose on the seat base.
B. Locate the LED wire on the armrest and the LED wire on the seat base.
Connect them.
NOTE: Do not squeeze the LED wire or air hoses during installation, as this could
damage the components and affect the operation of your chair.
To disassemble: Unscrew the four bolts that connect the armrest to the seat frame.
Press button on the xed hold, and lift and pull to release.
Step 5: Install the Back Cushion and Headrest
Locate the headrest and back cushion (included). Attach the two components to the
backrest frame using zippers and Velcro, respectively.
NOTE: To ensure effective operation, ensure the bottom rim of the headrest is ush
with your ears before attaching.
Step 6: Connect Seat Air Tubes
On the seat frame and seat cushions, you’ll notice color-coded air tubes. Connect
these color coded components tightly. For example, connect the gray seat frame
tube with the gray seat cushion tube. Repeat with brown air tubes. Press seat
cushion down rmly on frame to secure Velcro between the seat frame and the
cushion.
Backrest
Headrest
Velcro
Connection
Back cushion
zipper connection
Back cushion
zipper connection
Back cushion
connects to the
seat with Velcro
The Seat Area
Gray Air Tube
Dark Brown Air Tube
Seat Cushion
1413

Operating Your Massage ChairInstallation Guide
Off
On
Step 7: Before Operation
A. Plug your chair in by locating the power box and connecting one side
of the cable into Hole A (as shown).
B. Insert plug carefully into approved socket with required voltage.
C. Turn on using remote control.
D. Enjoy your new massage chair!
SPECIAL NOTES AND PRECAUTIONS
ON MAINTENANCE AND DISASSEMBLY
• When choosing a location for your chair, check the clearance by reclining and
extending your chair in all directions. Ensure there are no obstacles such as
furniture, plants, pets, or children. Allow 6 inches of space behind chair for
airow.
• Monitor your power plug carefully. Routinely clean the plug and cord to avoid
dust buildup, which could pose a re risk or affect your chair’s operation.
Ensure the cord sits neatly, without knots, kinks, or stretching. Never place
heavy objects over your power cord.
• Your chair should sit at least 4 inches from the wall starting from the backrest
and 12 inches from the leg rest front.
• Before using your chair, check for children and pets. Always check your
surroundings before using the recliner. Do not apply pressure or attempt to
get out of the chair while the leg rest is in motion, as this may cause damage,
which is not covered under warranty. Refer to the remote control guide for
more information regarding proper use and operation.
Operating Your Massage Chair
Turning On Your Chair
1. Insert the power cord into an approved socket.
2. Ensure the power switch is in the “ON” position (located at the
back of the chair).
3. Use the ON/OFF button located at the top of the remote control to
begin operation and cycle through available programs.
Starting and Ending Your Massage Session
1. To begin a massage session, use the remote control to navigate to your
desired settings, air pressure, and speed. Learn more about these options in
the Control Panel Usage Guide.
2. When a massage session ends, the chair will automatically turn off. For
best results, please wait 15–30 minutes before beginning another session.
WARNINGS CONCERNING
OPERATION
•
• If you notice damage to the synthetic leather surface, please discontinue use
• To reduce risk of injury, only use in a socket with approved voltage.
• Do not stand while using this massage chair. If you need to stand, turn the
massage program “OFF” using your remote control rst and wait for the chair
to return an upright position.
• Before using your massage chair, ensure there are no personal belongings
trapped between the gaps of the arm rests, leg rests, and seat frame.
1615

Quick
relaxation
Menu
OK
Auto
On/Off
Zero
Remote Control Usage GuideRemote Control Usage Guide
“On/Off” Button: This power button controls the basic functions of your
massage chair. Before rising from your massage chair, make sure your unit is off.
Quick Relaxation: This auto mode provides you with an eight-minute
relaxation experience once the chair is in the “ON” position. Press the button
again to stop the massage.
Air Intensity: By pressing this button, you can circulate through the four air
intensity levels, which will be reected on the remote’s LCD screen.
Menu: This button will help you change the function of your chair, which you
can navigate through the remote’s LCD screen. Press the “menu” button again to
exit. Learn more about Menu options in the “Using your LCD screen” section.
Auto: Pressing the auto buttons will allow you to choose from one of the
six auto massage options: Recovery, Pain Relief, Stretch, Health Care, Full
Body, and Rocking.
Arrow Buttons: The up, down, left, and right buttons in the center of your
remote serve as a navigator in “Menu” mode. The up and down buttons also
help you pinpoint the perfect massage position for your chair.
Leg Rest Up Button: Press and hold to move your leg rest up. Release to stop.
Leg Rest Down Button: Press and hold to move your leg rest down.
Release to stop.
OK Button: In the “Menu” mode, use this button to conrm your choices.
Back Rest Up, Leg Rest Down Button: Press and hold to simultaneously
move the back rest up and your leg rests down. Release when you nd the
desired position.
Back Rest Down, Leg Rest Up Button: Press this button to simultaneously
recline your seat while moving your leg rest up. Release to stop the movement.
Zero Gravity: Press this button to immediately go into “zero gravity” position.
Press again to return to the default position.
Remote Control Usage Guide
• To ensure effective operation, do not press two or more keys at the same time.
• Seat yourself comfortably in the chair before turning on or selecting any
massage program.
• Do not spill liquids onto the control panel. If control panel encounters liquids,
please turn “OFF” at the back of the chair and unplug immediately.
1817

Cleaning and MaintenanceUsing Your LCD Screen
Using Your LCD Screen
Your Spa Dynamix® VITALA® Massage Chair uses
an LCD screen remote for your chair’s functions. The
main interface will show the massage position, speed,
air intensity, and massage width (narrow, mid-range, or
wide). It also notes:
• Your current massage function (kneading,
tapping, knocking, pressing, or zero gravity)
• Time left in massage mode
• Heating information
Navigating the Menu
Press the “Menu” button to view the interface. Use the navigation keys to select
from the following options:
• Auto: Recovery, Pain Relief, Stretch, Health Care, Full Body, and Rocking.
• Manual: This allows you to use the manual mode in which you can set your
desired intensity, speed, position, and width adjustment. Use the arrow keys to
navigate to your selections, and the “OK” button to conrm them.
• Air: Navigate to the air selection using the arrow keys and press “OK” to
conrm. Use this function to control the air pressure intensity and positioning.
• Roller: Activate the foot roller by navigating to this menu option using the
arrow keys and pressing “OK” to conrm.
• Waist heating: This turns the heat function within the chair on and off.
Navigate to this option using the arrow keys, and press “OK” to turn the
function on or off.
• Time: The default time for massage is 20 minutes, but you can choose a 10-,
20-, or 30- minute massage using this menu selection.
• Language: Choose your desired language. You have the choice of English,
Chinese or Korean.
• Stop: Pressing this button will stop your current massage and return the chair
to its default position.
Set function by pressing Menu key
Speed
:
Width
:
Intensity
:
20 mi n
Zero
Cleaning and Maintenance
Cleaning Your Massage Chair
Your massage chair contains synthetic leather and cloth components. Routine
cleaning with a dry microber cloth will help maintain the material. Follow these
general cleaning instructions:
Synthetic Leather
Clean with a 3% to 5% neutral detergent solution. Remove all excess
moisture with a dry cloth. Let air dry–never use a hair dryer or other air-
blower.
Cloth
Use the same gentle solution and a brush or cloth to clean. Never use
harsh cleaning agents such as alcohol, gas, or diluent. Allow to dry
completely before using your chair.
Plastic
Use a weak, neutral solution to clean all plastic components. Always
wring out your cleaning cloth to remove excess water before applying.
Allow to dry completely.
Cleaning Your Remote Control
Use an electronics cleaning cloth to remove dust. Do not use alcohol, diluent, or
propellant to clean.
NOTE: Always unplug your chair before cleaning to reduce risk of electric shock.
Never submerge your chair in water or saturate with water or harsh cleaning
solution.
2019

TroubleshootingTroubleshooting
Troubleshooting
The Problem: My massage chair isn’t operating when
I select a program.
Possible solutions
• Ensure the chair is fully plugged in.
• Check to make sure the power switch is in the “ON” position on the back of
the chair.
• Choose a mode on the control panel.
• The problem lies within an inner circuit. Contact a professional electrician or
email [email protected].
The Problem: My massage chair makes a lot of noise during operation.
Possible solution: You are likely hearing the noise from the motor and other
mechanical parts. Some noise is normal.
The Problem: I notice a difference between the height of the
right and left motors. One might be higher than the other.
Possible solution: The massage rollers do not always run at the same level. This
is part of normal operation.
The Problem: The sound within the chair became much louder.
Possible solutions: You may have been using the chair continuously for too long.
Turn off the chair for at least 30 minutes, then check to see if you still notice the
difference.
With consistent use, the internal parts of your chair can wear over time. This is
normal. Contact an authorized maintenance professional for repairs.
The Problem: My massage stopped unexpectedly during a session.
Possible solutions:
• The massage cycle may have ended.
• You may have been using your chair for too long. Wait 30 minutes before
selecting another cycle.
further assistance.
The Problem: I cannot use the backrest or leg rest as intended.
Possible solutions: Check the surrounding area for clearance and other
obstacles.
The Problem: I cannot get my chair to return to a default position.
Possible solutions: This may occur when you use the chair continuously for too
long or when the massage period ends. Wait 30 minutes and try again. If the
problem persists, contact an authorized maintenance professional for repairs.
The Problem: The electrical wire is hot to the touch.
This may occur from overuse. Allow your chair to rest for 30 minutes and try
again.
Caution
If you notice any signs of overheating, turn off your unit and unplug immediately.
Contact an authorized maintenance professional for more information.
This troubleshooting guide provides examples of common issues but is not
a comprehensive resource. Should you experience issues with your chair,
discontinue use and contact Spa Dynamix® at 888-243-5772 or
NOTE:
• For repairs, please contact the distributor or after sales service. For more
information, refer to your enclosed warranty card.
• Any questions directed to customer service may be recorded for training
purposes.
• The instructions of specications of this product may change without notice.
• Should your chair need repair, customer service can help you nd a qualied
repair center.
2221

Warranty and Technical SpecificationsWarranty and Technical Specifications
Warranty and Technical
Specifications
TWO (2) YEAR LIMITED WARRANTY
Spa Dynamix® warrants this Spa Dynamix® VITALA® Massage Chair against
defects in materials and/or workmanship under normal use for a period of
TWO (2) YEARS from the date of purchase by the original purchaser (“Warranty
Period”). Normal use is dened as use by an end-user in a residential location.
If a defect arises and a valid claim is received within the Warranty Period, at its
option, Spa Dynamix® will either 1) repair the defect at no charge, using new or
refurbished replacement parts, or 2) replace the Spa Dynamix® Massage Chair
with a new or refurbished Spa Dynamix® Massage Chair OR 3) provide a credit in
the amount of the purchase price of the original product. A replacement product
or part, including a user-installable part installed in accordance with instructions
provided by Spa Dynamix®, will be covered for the remaining warranty period of
the original product. When a product or part is exchanged, any replacement item
becomes your property and the replaced item becomes Spa Dynamix® property.
When a credit is given, the original product must be returned to Spa Dynamix®
and becomes Spa Dynamix® property.
Obtaining Service: To obtain warranty service, call the Spa Dynamix®
Warranty Service at 888-243-5772 or contact the company via email at
Massage Chair model that needs service and the nature of the problem. Proof
of purchase is required. All repairs and replacements must be authorized in
advance. Service options, parts availability and response times will vary.
Limits and Exclusions: Coverage under this Warranty is limited to the United
States of America, excluding the U.S. Territories of Guam, Puerto Rico, and the
U.S. Virgin Islands and including Canada. This Warranty applies only to products
manufactured by Spa Dynamix® that can be identied by the “Spa Dynamix®”
trademark, trade name, or logo afxed to them or their packaging. The Warranty
does not apply to any non-Spa Dynamix® products. Spa Dynamix®, in so far
as permitted by law, provides these products “as is.” This warranty does not
apply to: a) damage caused by failure to follow instructions relating to product’s
use or the installation of components; b) damage caused by accident, abuse,
misuse, re, oods, earthquake or other external causes; c) damage caused by
service performed by anyone who is not a representative of Spa Dynamix®; d)
accessories used in conjunction with a covered product; e) a product or part
that has been modied to alter functionality or capability; f) items intended to
be periodically replaced by the purchaser during the normal life of the product
including, without limitation, batteries or light bulbs; g) any product sold “as is”
including, without limitation, oor demonstration models and refurbished items;
or h) a product that is used commercially or for a commercial purpose.
SPA DYNAMIX® SHALL NOT BE LIABLE FOR INCIDENTAL OR CONSEQUENTIAL
DAMAGES RESULTING FROM THE USE OF THIS PRODUCT, OR ARISING OUT
OF ANY BREACH OF THIS WARRANTY. TO THE EXTENT PERMITTED BY
APPLICABLE LAW, SPA DYNAMIX® DISCLAIMS ANY AND ALL STATUTORY OR
IMPLIED WARRANTIES, INCLUDING, WITHOUT LIMITATION, WARRANTIES OF
MERCHANTABILITY, FITNESS FOR A PARTICULAR PURPOSE AND WARRANTIES
AGAINST HIDDEN OR LATENT DEFECTS. IF SPA DYNAMIX® CANNOT LAWFULLY
DISCLAIM STATUTORY OR IMPLIED WARRANTIES, THEN TO THE EXTENT
PERMITTED BY LAW, ALL SUCH WARRANTIES SHALL BE LIMITED IN DURATION
TO THE DURATION OF THIS EXPRESS WARRANTY. Some states disallow the
exclusion or limitation of incidental or consequential damages or how long an
implied warranty lasts, so the above exclusions or limitations may not apply to
you. This warranty gives you specic legal rights and you may also have other
rights, which vary from state to state.
Technical Specifications
Name: Spa Dynamix® VITALA® Massage Chair
Model: VITALA®
Input Voltage: AC 120 V, 60 Hz
AC 220 V, 50/60Hz
AC 240 V, 50 Hz
Safety Design: Class I
Power: 200 W
NW/GW: Body: 180/210 lb
Arm rest: 42/60 lb
Packing Size (LxWxH): Main Body 55 x 30 x 33.75 in
Arm rest: 48.5 x 16.5 x 34.5 in
2423

VITALA®
SILLA DE MASAJE
Español
SPA DYNAMIX®
DIRECCION 410 South 16th St. Easton, PA 18045
TEL (888) 243-5772
E-MAIL [email protected]
WEBSITE www.SpaDynamix.com

Salvaguardias Importantes 1
Introducción 5
Conozca su Silla 6
Guía de Instalación 11
Operando su Silla de Masaje 16
Guía de Uso del Control Remoto 17
Usando su Pantalla LCD 19
Limpieza y Mantenimiento 20
Solución de Problemas 21
Garantía y Espicificaciones
Técnicas 23
TABLA DE CONTENIDO

Las siguientes personas no deben usar la silla de
masaje Spa Dynamix®VITALA®
• Personas con un historial de coágulos de sangre o tromboembolismo
• Personas con enfermedades o lesiones infecciosas de la piel
• Niños pequeños menores de 12 años
• Personas bajo la inuencia de alcohol o drogas
• Nunca use su silla mientras está mojado ni opere el panel de
control con las manos mojadas
• Aquellos que tengan inquietudes o problemas médicos deben
consultar con su profesional de la salud antes de usar la silla
Si ve este símbolo, el lenguaje
que lo acompaña describirá
una advertencia de graves
lesiones corporales o la muerte.
Esto denota que algo puede
causar lesiones corporales
y/o daños a la propiedad.
Esto representa acciones
prohibidas que pueden
afectar el funcionamiento
seguro de su silla.
Si observa este símbolo, el
idioma que sigue prohibirá el
desmontaje de las piezas.
Esto indica información
importante con respecto al
funcionamiento efectivo de
su silla.
Este ícono representa el
uso seguro y efectivo de los
componentes eléctricos de
la silla.
La silla no es impermeable,
evita el contacto con líquidos.
Este símbolo indica cualquier
incendio o peligro ambiental.
Salvaguardias Importantes
¡Bienvenido a tu nueva silla de masaje Spa Dynamix ® VITALA ®! Antes de
usar, revise las siguientes instrucciones de seguridad y la mejor experiencia de
operación. En esta guía usaremos varios símbolos que contienen información
importante. Para reducir el riesgo de lesiones personales, incendios y golpes,
revise cuidadosamente todos estos elementos. Guarde este folleto para uso
futuro y referencia.
Además, las siguientes personas deben consultar a
un médico o proveedor médico antes de usar esta silla
de masaje
• Pacientes con implantes de dispositivos médicos que podrían verse
afectados por la actividad electromagnética (por ejemplo, marcapasos)
• Mujeres embarazadas
• Pacientes con diabetes o cualquier daño neurológico periférico
• Aquellos con fracturas o lesiones musculares
• Cualquier persona que padezca una enfermedad grave o debilidad física
• Individuos paralizados o discapacitados
• Las personas que experimentan mareos o vértigo de rutina
• Aquellos con cicatrices en el área de masajes
Advertencias de Accidentes y Lesiones
• Su sillón de masaje está diseñado solo para uso en interiores.
• Para evitar lesiones, solo use su silla sobre una supercie plana.
• No use ropa suelta ni joyas colgantes mientras usa esta silla.
• No permita que niños o mascotas estén cerca de la silla mientras
está en funcionamiento.
• Evite que los niños jueguen en los apoyabrazos, incluso cuando no
estén en uso.
• Interrumpa el uso y consulte a un médico si experimenta vértigo o
cualquier cambio en la percepción durante el uso.
• Monitorear de cerca a todos los usuarios, especialmente si no se
pueden mover de forma independiente. Los niños mayores de 12
años pueden usar la silla bajo la supervisión de un adulto cercano.
• No permita que los niños jueguen con el panel de control.
• No ponga las manos o los pies dentro de los espacios entre el cojín
y el marco de la silla.
• Evite masajear la cabeza o el estomago.
• No lo use sobre la piel desnuda.
• Si el material de cuero en la silla sufre daños, interrumpa el uso,
consulte a un profesional de reparación calicado o envíe un correo
electrónico al servicio técnico en support@ SpaDynamix.com.
• Verique el interruptor de encendido antes de enchufar su silla a
una toma de corriente. Debe estar en la posición “OFF” antes de
desenchufar o enchufar.
• APAGUE todos los controles de la silla antes de desconectar su silla.
• No se pare en la silla durante el funcionamiento o en la posición “OFF”.
• Nunca mueva la silla mientras está en funcionamiento. Para
moverse, busque ayuda y levante la silla antes de moverla a una
nueva ubicación. No lo arrastre, ya que podría dañar el piso y su
propiedad.
Salvaguardias ImportantesSalvaguardias Importantes
ADVERTENCIA
21

• Asegúrese de que la silla esté completamente enchufada a un
tomacorriente apropiado antes de pasar a la posición “ON”.
• Para evitar lesiones en la piel, no use la silla sobre la piel desnuda o
usando telas transparentes.
• Nunca se quede dormido mientras usa esta silla, ni permita que
una persona que duerme use su silla de masaje.
Advertencias de Fuego y Descarga Eléctrica
• Cuando no esté en uso o durante periodos prolongados, apáguelo y
desenchúfelo de la toma de corriente.
• Solo enchufe su silla a un tomacorriente apropiado durante el uso.
• Nunca deje una silla parcialmente enchufada.
• Nunca use esta silla con una manta de calefacción eléctrica.
• Siempre use en un área bien ventilada y sin materiales inamables.
• Mantenga su silla de masaje y el control remoto secos en todo
momento. En caso de daños por agua, comuníquese con support@
SpaDynamix.com.
• Nunca use un adaptador de enchufe.
• Cuando limpie su silla, asegúrese de que esté desenchufada y en la
posición “OFF”.
• No conecte esta silla a una regleta de enchufes.
• Interrumpa el uso si nota un contacto eléctrico deciente o un
cable de alimentación roto.
• Solo use en una toma de corriente con la tensión recomendada.
• Nunca lo use si un cable de alimentación está dañado, torcido o
estrechado.
• Para evitar el sobrecalentamiento y las lesiones debidas al uso
excesivo, no la use durante largos periodos de tiempo (más de una
sesión consecutiva). Si nota signos de sobrecalentamiento, como un
olor a quemado o si la silla se calienta al tacto, descontinúe el uso de
inmediato y póngase en contacto con soporte.
Desmontaje y Mantenimiento
• No intente reparar un cable de alimentación o un enchufe dañado.
• No quite las partes de la silla por ningún motivo, no hay piezas que
sean reparables por el usuario.
• Si tiene problemas con su silla, póngase en contacto con
un profesional de reparación. No intente arreglarlo o darle
mantenimiento.
NOTAS ESPECIALES
• Esta silla tiene un cable con un conductor de conexión a tierra. Solo use con
un enchufe apropiado. Contacte a un electricista si no está seguro. No use
adaptadores de enchufe.
• Reemplazar su fusible: si un fusible se quema en su silla, cambie a
la posición “OFF” y desenchúfelo inmediatamente. Ubique la caja de
interruptores y encuentre el fusible dañado. Sustitúyalo únicamente por un
fusible igual y de ser necesario contacte a un electricista profesional para
obtener más ayuda.
Fusible
Evite Daños a su Silla:
• Esta silla es solo para uso en interiores. Nunca use al aire libre.
• Mantenga la silla lejos de fuentes de calor excesivas.
• Evite colocar la silla cerca de la estufa u otros objetos calientes.
• Nunca limpie con productos químicos corrosivos.
Salvaguardias Importantes Salvaguardias Importantes 43

Quick
relaxation
Emergency
off
Menu
OK
Auto
On/Off
Air
pressure
Zero
Intensity
Introducción
¡Bienvenido a tu nueva silla de masaje Spa Dynamix ® VITALA ®! Con un
mantenimiento y cuidado sencillos, este producto lo mantendrá relajado durante
muchos años por venir. La VITALA ® utiliza el poder calmante del masaje
Shiatsu tradicional para proporcionar alivio de la tensión y rejuvenecimiento en la
comodidad de su hogar, ocina o en cualquier otro lugar donde necesite relajarse
(NOTA: solo para uso en interiores).
Su Spa Dynamix®VITALA®tiene las siguientes características
• Un panel de control para rotar entre uno de los tres programas de masaje
shiatsu, controlar la presión del aire, el calor y la posición sentada.
• Programas automáticos y manuales.
• Puede enfocarse en la parte superior o inferior del cuerpo, o una experiencia
de masaje de todo el cuerpo
• 3 velocidades de masaje.
A medida que empiece a familiarizarse
con su silla de masaje, tenga en cuenta:
• La imagen de su silla es una guía, no una réplica exacta de la silla. Siempre
consulte su propio modelo mientras sigue estas instrucciones.
• Guarde este manual de instrucciones en un lugar conveniente para futuras
referencias.
• Lea todas las advertencias, precauciones y acciones prohibidas antes de usar
esta silla.
Spa Dynamix® se reserva el derecho de cambiar las especicaciones de diseño
de VITALA® sin previo aviso.
1. Control Remoto
2. Apoyabrazos Derecho
3. Apoyabrazos Izquierdo
4. Cojín del Asiento
5. Descanso de Piernas
6. Descanso de Pies
7. Almohada de la Cabecera
8. Cojín del Espaldar
9. Masajeador de Hombros
10. Montacarga
Estructura Externa
Conozca su Silla
Tómese el tiempo para revisar los grácos disponibles en esta sección y
familiarícese con las partes individuales de su nueva silla de masaje. A lo largo de
este manual, notará que nos referimos a estos términos para ayudarlo a instalar
y comprender su silla de masaje. Hemos delineado los componentes interiores y
exteriores que deberá conocer para usar y mantener su silla correctamente.
La instalación y conguración de su Spa Dynamix® VITALA® es muy simple
y solo le tomará unos minutos. Recomendamos que alguien ayude en el
proceso de montaje. Tan pronto como saque la silla de la caja, consulte la
lista de componentes y asegúrese de tener todas las piezas necesarias para
una operación segura. Póngase en contacto con Spa Dynamix® en support@
SpaDynamix.com si tiene alguna pregunta o inquietud.
Introducción Conozca su Silla 65

1. Respaldo
2. Caja de Poder
3. Enchufe Hembra del
Cable de Poder
4. Caja de Fusibles
5. Interruptor de Encendido
Estructura Externa (Cont.) Estructura Interna
1. Cabezales de masaje (Cojín Inferior)
2. Bolsas de Aire de Hombro
3. Bolsas de Aire de la Espalda Baja
4. Bolsas de Aire del Apoyabrazos
5. Bolsas de Aire del Asiento Lateral
6. Bolsas de Aire para la Pantorrilla
7. Bolsas de Aire de Piernas
8. Bolsas de Aire de Pies
9. Rodillos de Pie
Conozca su Silla Conozca su Silla 87
Table of contents
Languages:
Other Spa Dynamix Massager manuals
